
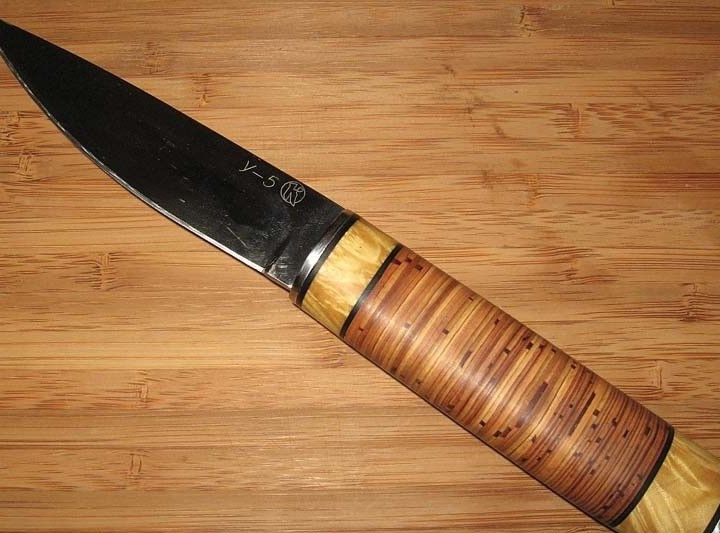
Hello to all lovers homemade and just those who like to visit the site in search of interesting and useful. Sometimes it happens that it’s not always what the manufacturer offers us that can be used in everyday use, so you often have to turn on your imagination and make everything yourself, and by doing do it yourself You will be confident in your manufacture. This article also makes sense of remaking the finished one, so we smoothly proceed to the assembly.
As usual, any homemade product requires material and what we want to change, in this case it will be a knife. In order to assemble a knife handle, the author explains that is necessary, this is:
* Birch bark.
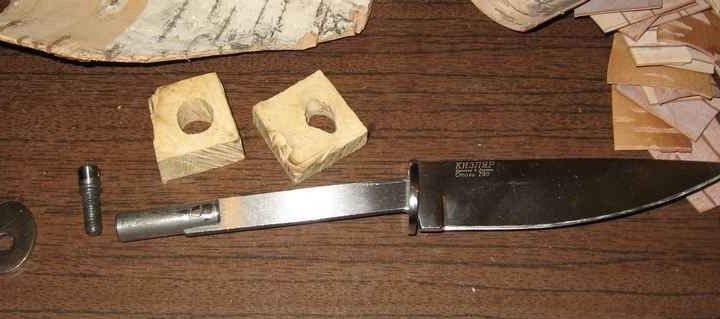
* The knife itself without a handle.
* Clamping vise with stilettos with lamb.
* A grinder with a grinding wheel of medium grain.
*Glue.
When all the assembly materials are ready, you can start assembling.
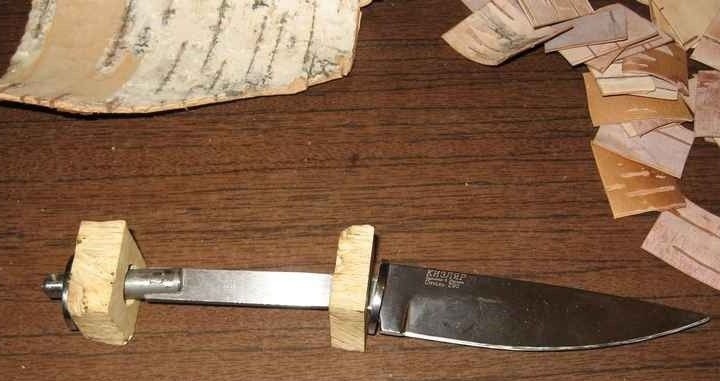
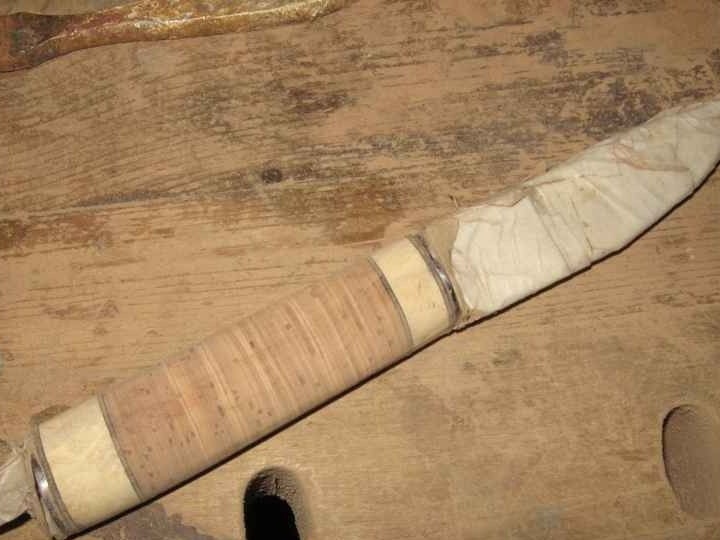
First of all, the author took pieces of wood 5-6 mm thick on both sides and made holes in them that fit into the steel handle of a knife.
Then, according to the size of these pieces of wood, it is necessary to cut out a sufficient number of squares of birch bark and roughly measure whether they are enough for the length of the handle.
When the required amount is cut out, we proceed to another step.
We make a hole in each square of birch bark, it is up to you to make it; for a better hole, you can use a wood drill, which is slightly larger in diameter of the sleeve on the knife. We repeat this process with all the other elements of our future pen.
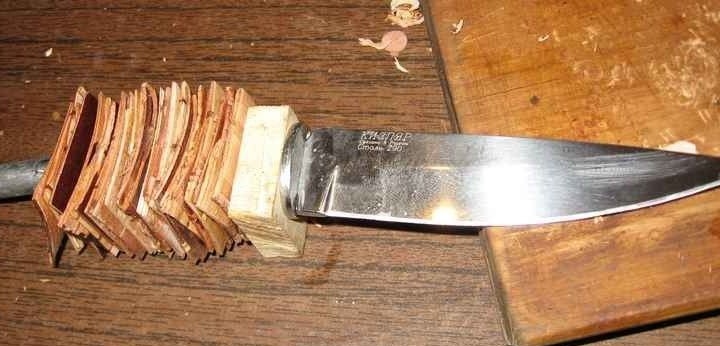
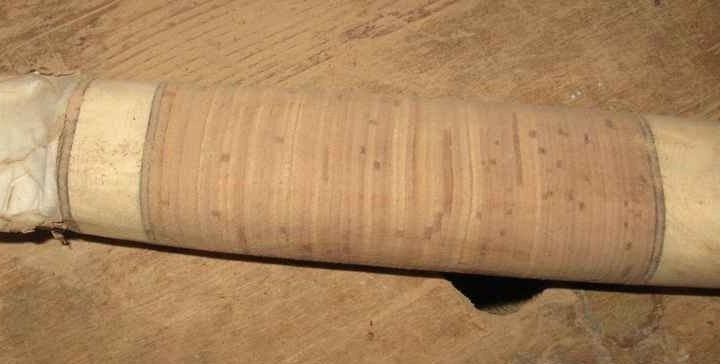
When the whole birch bark is planted on the handle, we press them lightly against each other, and then we soak between each glue and hold for a couple of tens of minutes.
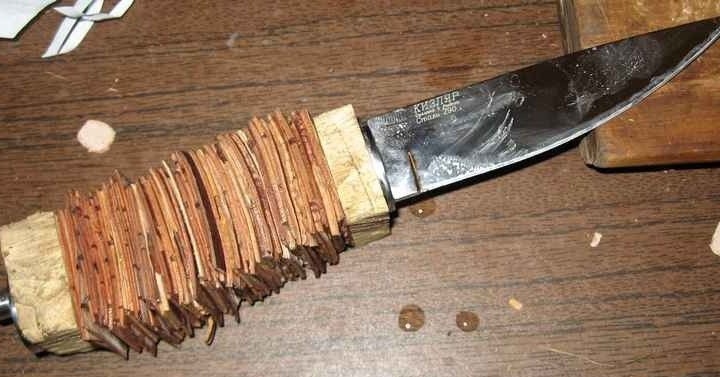
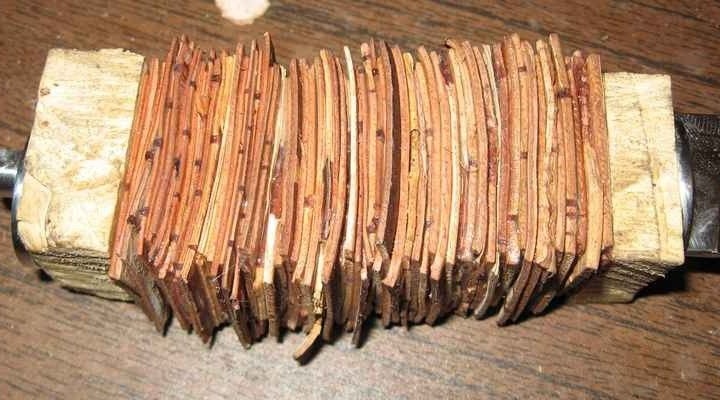
When the glue is slightly grasped, you can press the entire structure with a vise on the heels, having previously removed it from the knife.
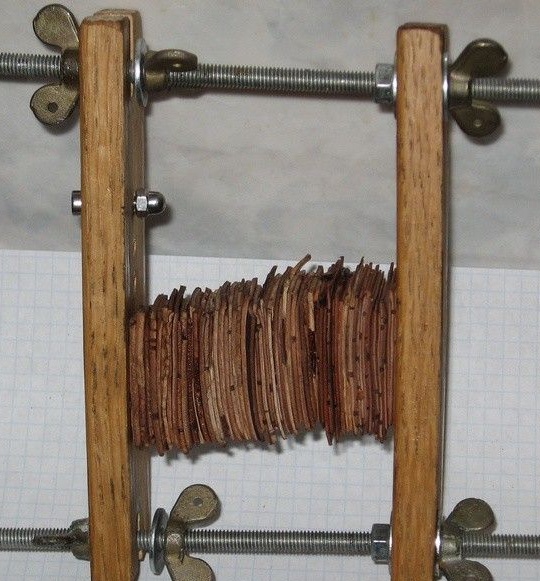
For further processing, it is necessary to allow the glue to dry completely and when you are already sure that the glue has dried, proceed to grinding and shaping. To make grinding more convenient, you need to put our pressed birch bark back on the knife handle and equipping the grinder with the grinding wheel to proceed with processing.
Attention! All work with the grinder must be carried out with utmost care and observe safety measures. To begin with, we use a grinder to square the handle.

Then we grind it to an oval, comfortable to fit in the hand.
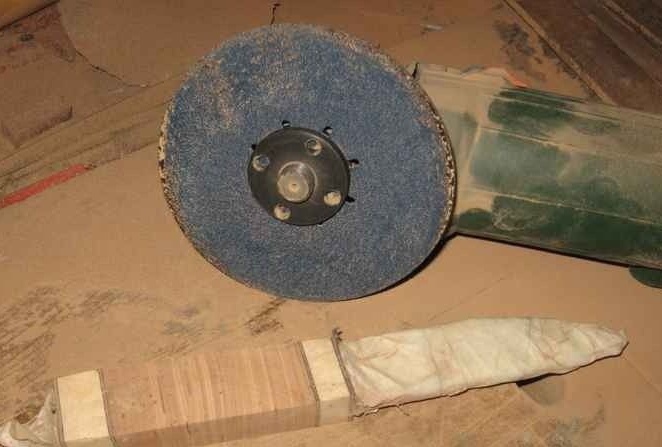
Ultimately, the author gives a shiny look to the handle by polishing.
On this, the homemade knife handle is ready, you can repeat it without much effort, and also its manufacture does not require high skills. Thank you all for reading this article, and also a special thanks to the inw author.