
It is generally accepted that a cat is a nocturnal animal. In fact, "night" for a cat is a loose concept. Another, for example, can sleep sweetly up to twenty hours a day, and only four can play, fool around, eat and rush around the house. And only with this daily routine will the animal remain healthy and satisfied.
The average cat at an honorable age of 10 years, more than 6 of them spent in a dream. From this it is clear that sleep for a cat is much more important than games, hunting and even food. Of course, taking care of her good rest is the breeder's task, i.e. - yours. And in this master class we will tell in detail and show how do it yourself make a bed for a cat so that she has her own secluded corner for sleeping.
Making such an accessory is not such a long and complicated process as it might seem. Having some skills, you can make a couch in the evening. And it will cost much less than if you bought something like that at a pet store. Moreover, such a couch will serve your pet for more than one year.
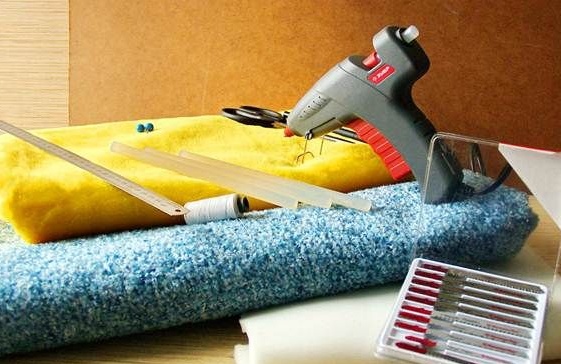
For the manufacture of stove benches you will need:
1. Materials:
- two sheets of fiberboard or OSB (36x48 cm.);
- thin foam rubber 10 mm. (two details: 10 x 135 cm. and 35 x 46 cm.);
- faux fur (14 x 136 cm.);
- furniture fabric or any other durable fabric for the base (43 x 50 cm.);
- glue for a thermogun.
2. Tools:
- thermal gun;
- scissors;
- pencil or marker;
- ruler;
- jigsaw;
- a thread and a pair of push pins or pins to draw a circle for the pattern.
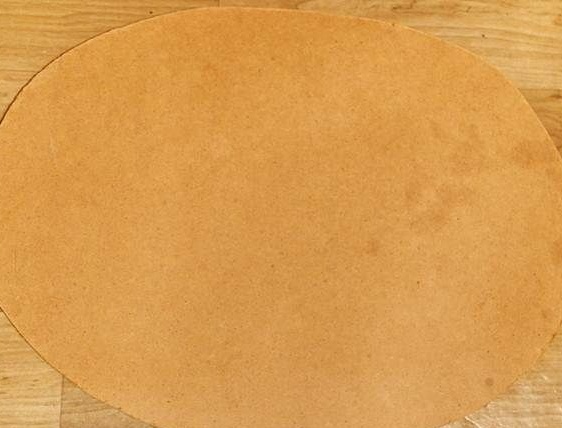
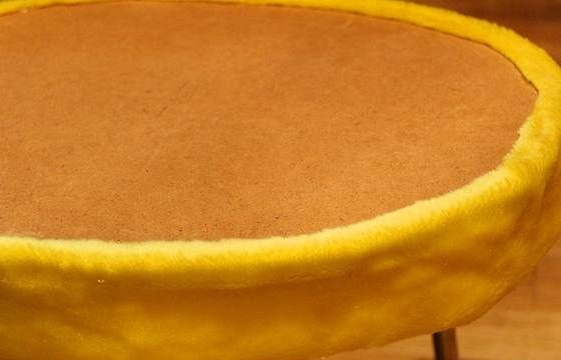
Our oval bed is 36 x 48 cm. You should consider the size of your pet. Perhaps the dimensions of the bed should be increased. It is believed that the diameter of 40-50 cm. - The standard size of the bed for a cat of medium size. If it is difficult for you to determine the size, wait until the cat falls asleep and measure it to be sure of the final result.
1. Preparatory phase
The oval shape of the couch was not without reason chosen by us, since it is more difficult to manufacture than round or square. The form mainly depends on personal preferences, as well as where the accessory is planned to be placed. If this is the corner of the room, it is the square or rectangular shape that will be the more acceptable option, if this is any other place, the bed can be round or oval - like ours.
Choose a place where your cat will not be able to disturb anyone, a place where no one will disturb her peace.It is better if it is impassable, without drafts, with good visibility.
Before we get to work, let us take a few more words about choosing fabrics. Furniture fabrics that are usually used for upholstering sofas and not only are the most suitable option for the manufacture of stove benches. Of course, far from every house a piece of furniture fabric was littered. Therefore, we only note that it should be soft, pleasant to the touch, and also convenient to care for.
Loops should not be drawn from matter. This type of fabric includes cut pile fabrics. A good compromise is faux fur. It has all of the above features, in addition, it is decorative and will fit perfectly into almost any interior. Such material is quite expensive, but it is much easier to find it than narrowly profile furniture fabric. In extreme cases, faux fur will always be found in the nearest second-hand.
2. Base fabrication
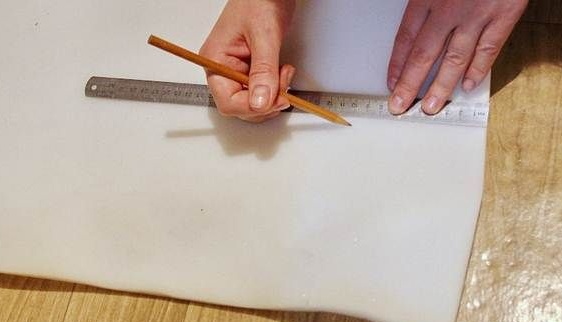
It's time to mark the fiberboard. Draw the shape of the desired shape. In our case, it will be an oval and how to correctly depict it on a plane will be discussed below.
Consider two options:
Method one
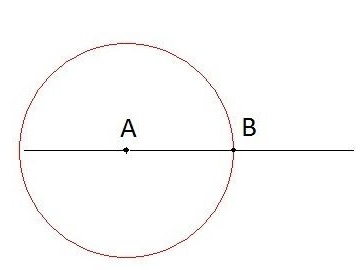
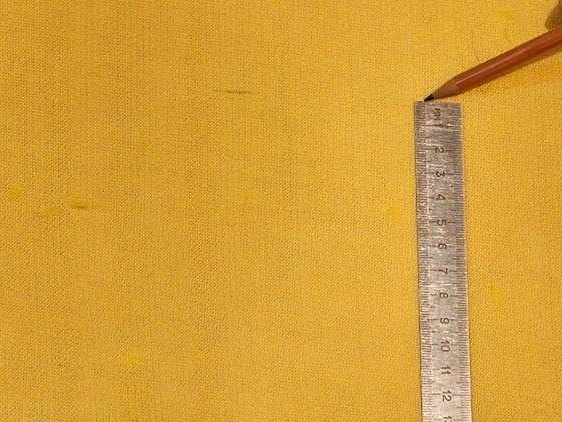
Draw a straight line on the working surface and mentally divide it into three equal parts as shown in the photo below. For convenience, you can use the ruler. Get two points - A and B.
Place the compasses alternately at each of the points and draw one circle of the same diameter. Thus, get two more working points - C and D.

From the obtained points, draw two arcs. The radius of each arc is equal to the diameter of the circle.

Circle the resulting ellipse.

Second way
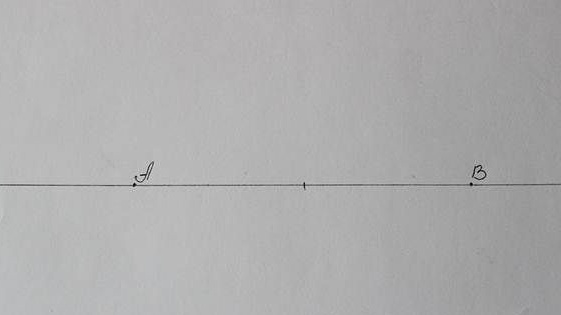
This time we don’t need a compass. Arbitrarily draw a horizontal line on a piece of paper or directly on the fiberboard. We find the middle and lay the same distance on both sides. We get two points - A and B.
We attach to the received points one pushpin or a tailor pin and put a thread on them in such a way as to make a loop (see photo below).
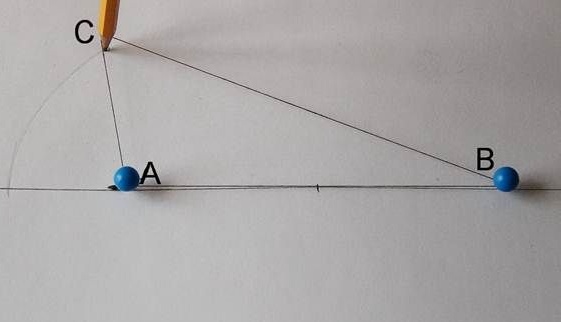
Pass a pencil or marker into the loop and, without loosening the tension, draw an oval on the surface.
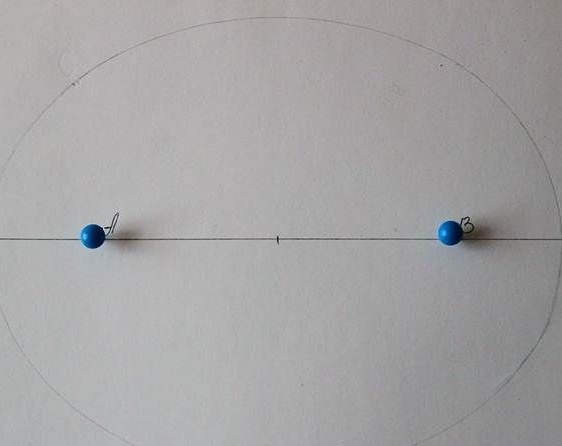
Cut the resulting oval using an electric jigsaw. Now place the first part on the fiberboard (we only need two of these) and circle around the contour. Cut the second part with a jigsaw.
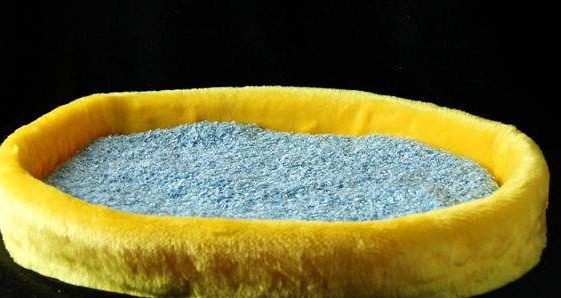
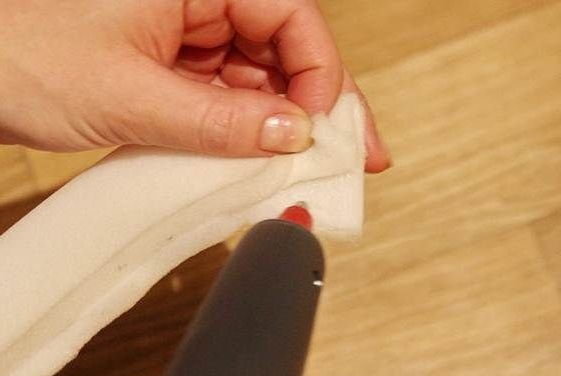
3. The manufacture of bumpers.
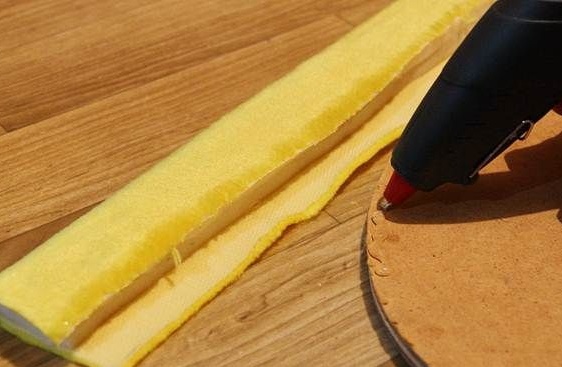
In order to make a side, you will need thin foam rubber. In our case, this is a piece of 10 x 135 cm, and in your case, all subsequent sizes depend on the chosen shape and specific sizes.
Simply attach a strip of foam to the circumference of the base and determine how much you need.
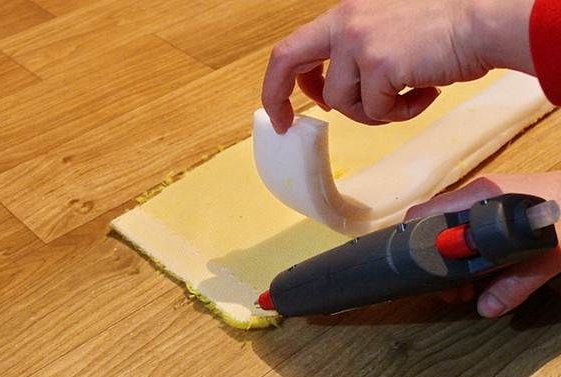
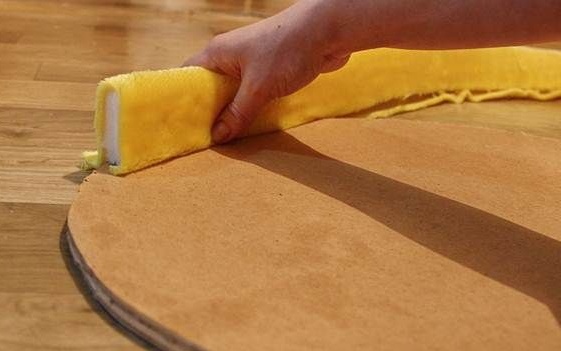
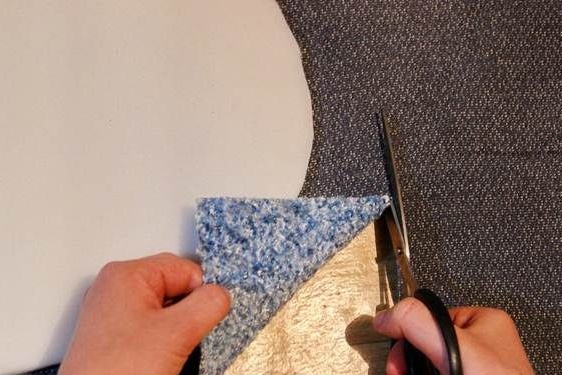
Cut the foam, fold in half and glue, fix with glue or a simple thread in the ring and put on the side of the base. If the part came in size, proceed to tighten the side of the cloth.
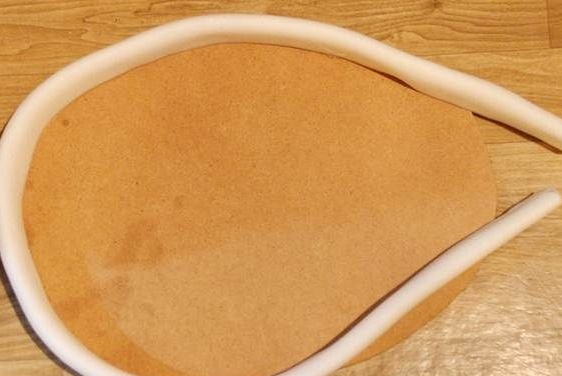
To do this, mark on a piece of fabric and cut a part of the same length as the foam rubber, and add 4 cm to the width for the allowance. In our case, the width was 14 cm.
From the inside, let the fabric flush with the foam base. The outer side remains 4 cm wider and is designed to secure the material to the bottom of the base. Therefore, first apply glue along the edge of the base on its inside and firmly fix the edge.
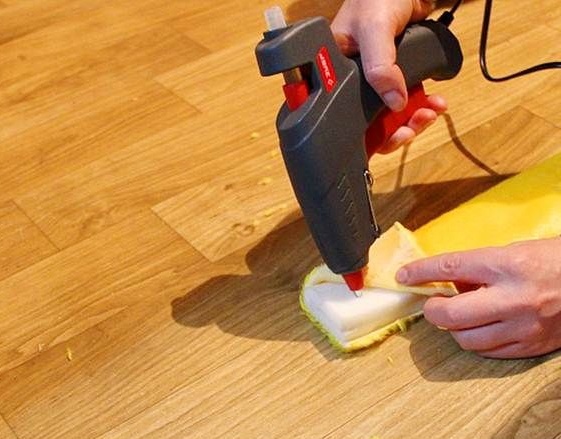
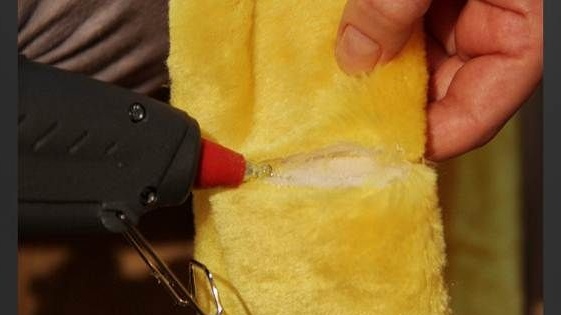
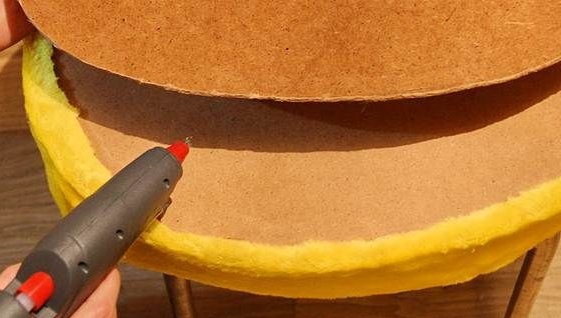
Fasten the ends of the rim with a thermal gun, and glue the rim from the outside to the bottom of the base.
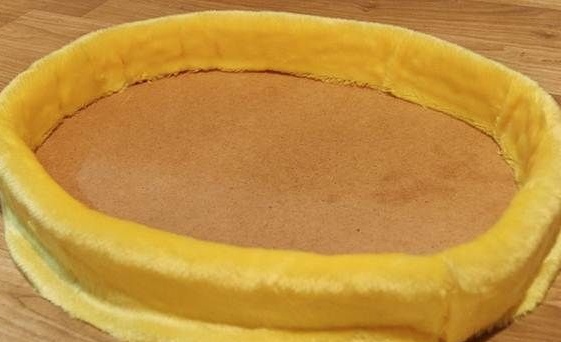
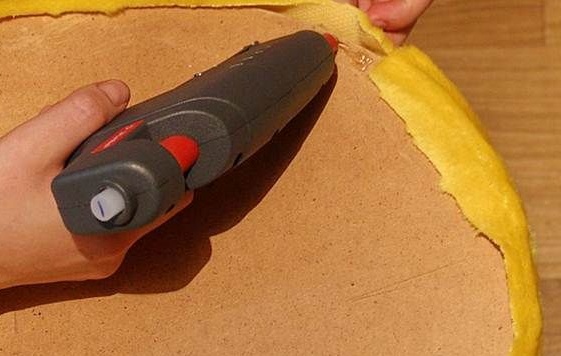
It remains to close the bottom with the remaining oval from the fiberboard. To do this, glue it in place, covering all the seams and raw edges of the fabric.
4. Make the base soft
Attach a piece of foam in the center of the bed and determine the size of the substrate. Draw the part with a marker or pencil and cut along the contour.
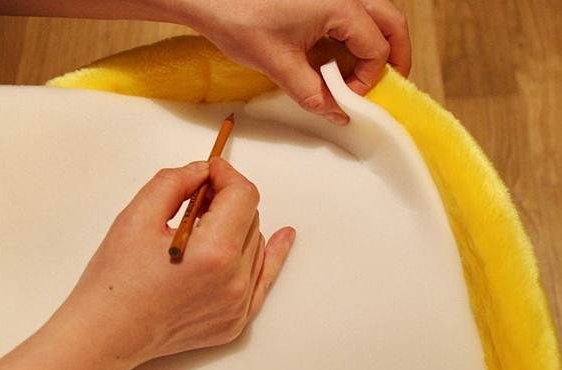
Put it on the fabric and mark it up, adding a little to the allowances for gluing.
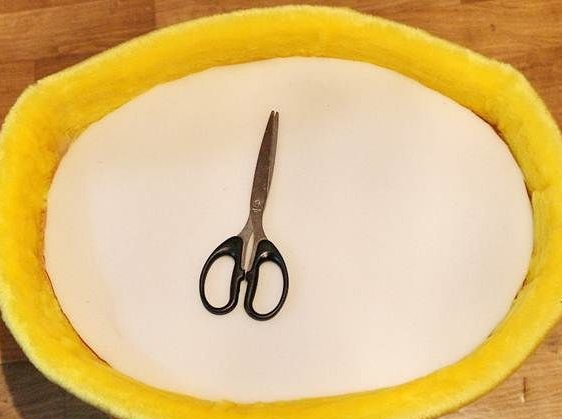
Cut the fabric and stick to the foam to get a soft backing.
Using a heat gun, glue it to the base of the bed.

In fact, it is better to make such a pillow removable in order to make it convenient to clean. Therefore, just cover the foam on the back with a cloth using glue and place the pillow in the center of the bed.
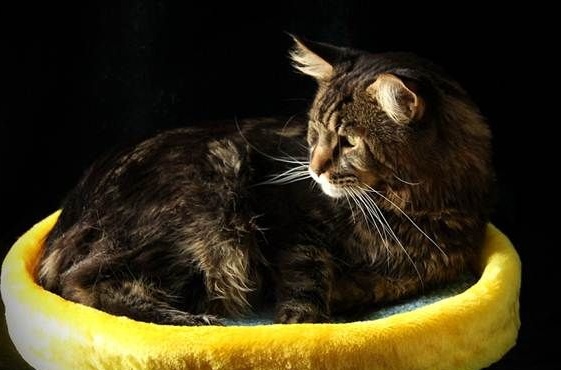
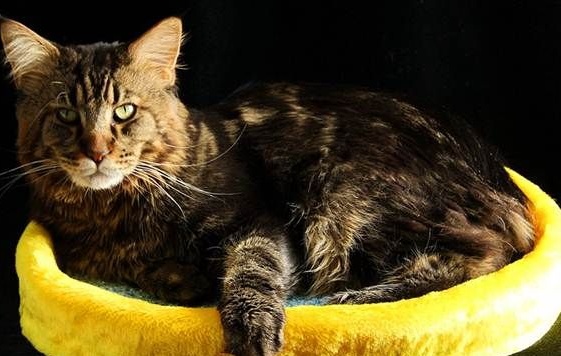
That's all - ours accessory can be considered complete. Put it in a designated place and be patient, because any new item naturally causes distrust in a cat. It will take time before she realizes that the bed does not pose a danger to her, but rather is a wonderful place to sleep and rest. To speed up the process, put your favorite toy with the smell already familiar to it.
It should be added that a couch is simply an irreplaceable thing for a small kitten, to whom she will resemble a warm mother cat. And it will be much easier to teach a cat to her as a kid.