

This article will consider an example of creating a simple slooper model (flying wing). Model called ALULA. The author used ceiling tiles as the main material for assembly, it is lightweight, comfortable to work with, and has sufficient strength for such homemade.
The flight weight of the vessel does not exceed 200 grams with a span of 840 mm.
The author made the model drawings himself, it did not take much time. It should be noted that the dimensions and design of the fuselage were selected individually based on the dimensions of the equipment used, that is, the turnigy receiver and the battery. The author also left a little space in the bow and tail, centering weights are installed here. A 25-35 mm model is centered on the root chord, this information was obtained from another branch to create a similar model.
Model drawing:
Materials and tools for homemade:
- ceiling tiles;
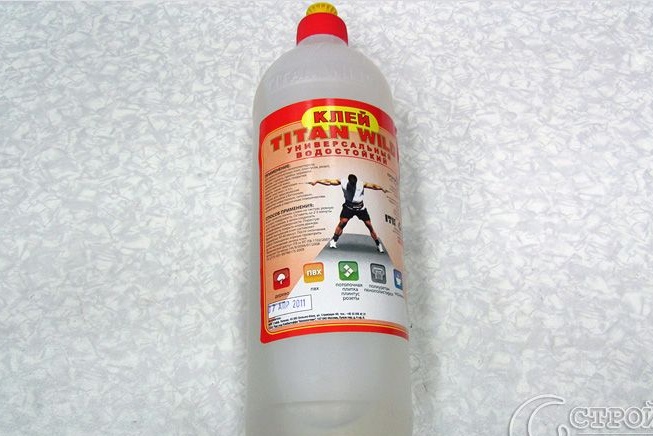
- glue for the ceiling (Titanium or the like);
- adhesive tape;
- receiver;
- micro-servo motors HXT900 9g;
- NiMH 300 mAh 4.8 V battery;
- soldering iron;
- stationery knife, scissors and more.
Model manufacturing process:
Step one. We draw and cut the wing
First, a sheet of the ceiling is taken and a drawing of the wing is applied to it. The author also draws lines for gluing the side members. Only one layer will be used for the wing, in shape it will be asymmetric with a plane-convex shape profile.
As for other elements, such as elevons, spars, fuselage and tail, their author makes two-layer, the tile is glued using glue Titanium.
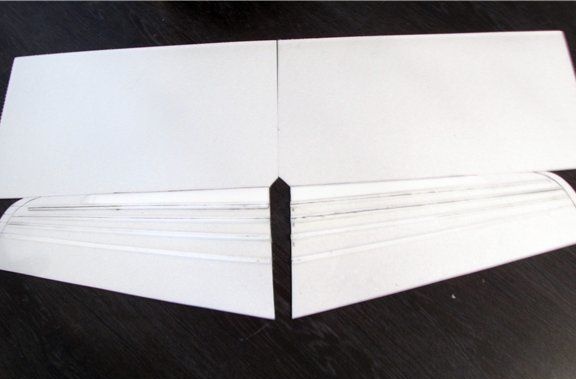
Step Two Spar installation and wing assembly
When the spars are dry, they need to be glued along the lines into the wing. To strengthen the leading edge, it is necessary to glue a 10 mm ceiling strip in front of the first spar, as well as two pins with which the wings will be connected.
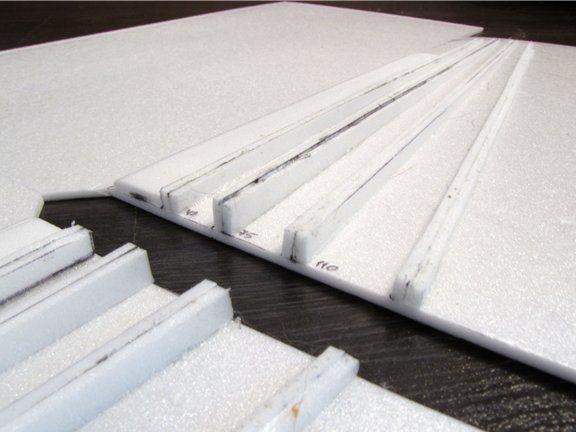
While the glue will dry, you need to make a loop of double-sided tape. When installing them in their places, the protective layer of adhesive tape will need to be left outside the wing, then elevons are installed here.
When the glue dries, the wing can be turned over, two strips of adhesive tape are glued to the deflection point. Then, from the inside, it will be necessary to push through with a non-sharp object (the end part of the brush for drawing is suitable) the inflection line and then bend the skin.
To further strengthen the wings, the author pasted a piece of a wooden ruler with epoxy glue between the second and third side members along the entire length. It took a third of the width of the ruler. When the wings stick together, the other end of this rail will need to be remembered to be coated with epoxy glue. Further, the skin can be sealed.
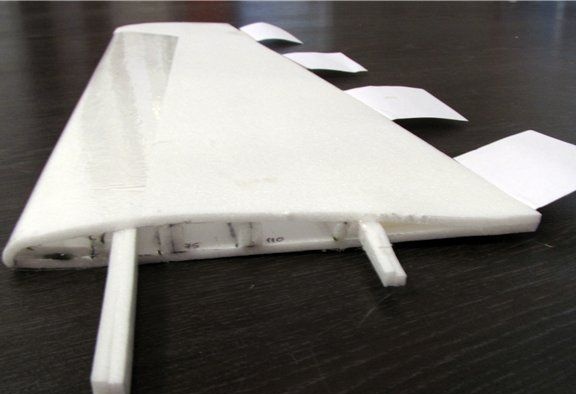
While the wings will dry, you can do the elevons. The front edges of the workpieces will need to grind at an angle of 45 degrees. You do not need to glue them together yet.
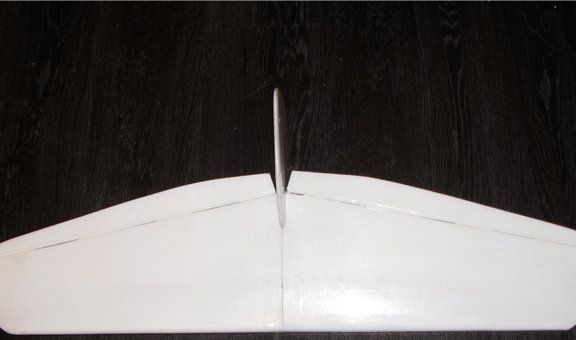
After the wings have dried, they can be combined together. Here you will need glue Titanium and epoxy to stick the rail. When gluing the wing, it is desirable to give a V-shape, but this is not necessary.
Now that the entire structure has dried out, the joints must be reinforced with reinforced tape. The author used a transparent reinforced tape for such purposes, such can be found in departments with painting and other adhesive tapes. In conclusion, the wing will need to be covered with colored tape in accordance with the design. An iron or a hairdryer will be needed here, the author used a hairdryer and a plastic card to smooth the tape.
Step Three Elevons
When the wing is ready, you can start hanging the elevons. The author made boars for rods himself, for this a plastic corner was needed. They are glued to the bottom of the elevons with double-sided tape. The second part is glued with glue Titanium. Now you only need to exactly align the two halves, for these purposes two rulers and 3-4 clothes pegs will be needed. To increase the strength of the elevons, the trailing edge was not sharpened.
When everything is dry, the elevons are covered with tape. This enhances the loop.
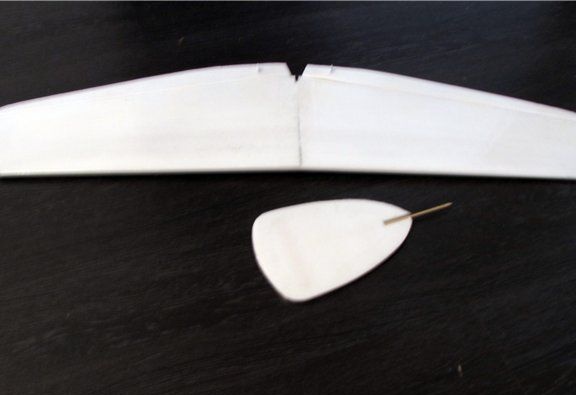
Step Four Tail model
The tail is made of ceiling tiles, and then covered with tape. For fastening bamboo was used. How this element of the model looks can be seen in the photo.
Step Five The final stage. Fuselage making and model assembly
First you need to transfer the drawings of the fuselage elements to the ceiling and cut. Then they stick together, all the bumps, bulges, it will be necessary to cut and grind after the glue hardens. Ultimately, the fuselage is fitted with tape.


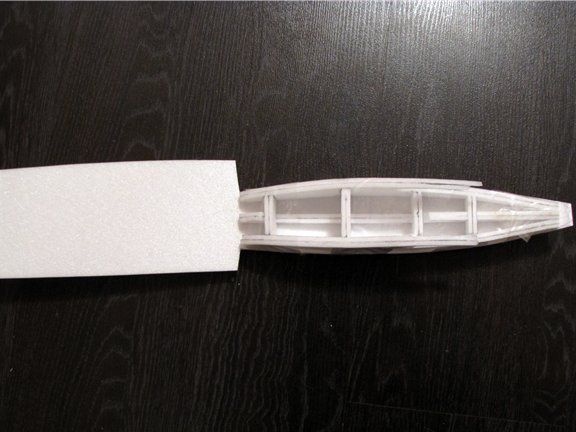
To increase the strength of the bow, a double ceiling was used in the fuselage design, as well as a stringer in the center. Then the head will need to be brought using sandpaper to the state as shown in the photo.
Now you can try on the wing to the fuselage, if everything is correct, then set electronics and servomotors. They are attached using a five-minute epoxy. Then you just need to glue the adhesive tape in some places and decorate.
Also in the bow you will need to make a hatch for access to electronic elements and, of course, to center.
The final mass of the assembled model was 16-170 grams. The model is being assembled, according to the author, in 4-5 hours. The model is controlled through Turnigy 9x mode 2. Power to the receiver passes directly. The left servomotor is connected to the first channel, and the right to the second.