
Good day to lovers of homemade appliances. When there is no vise at hand or if they simply are not available, the easiest solution is to assemble something similar to yourself, since special skills and hard-to-reach materials for assembling the clamp are not required. In this article I will tell you how to make a wooden clamp.
In order to assemble your clamp, you need to find a strong tree species so that it can withstand heavy loads. In this case, an oak board is well suited.
In order to proceed to the manufacturing step necessary:
* Bolt, the size of which is better to take in the region of 12-14mm.
* Nut under the bolt.
* Oak wood bars.
* Part of a profile from a tree with a section of 15 mm.
* Joiner glue or parquet.
* Epoxy.
* Varnish, can be replaced with stain.
* Metal rod 3 mm.
* Small diameter drill.
* Chisel or chisel.
* Hacksaw for wood.
*Hammer.
*Electric drill.
* Medium sandpaper.
* Vise and clamp.
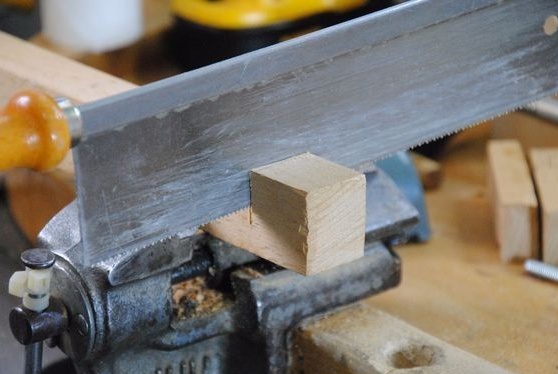
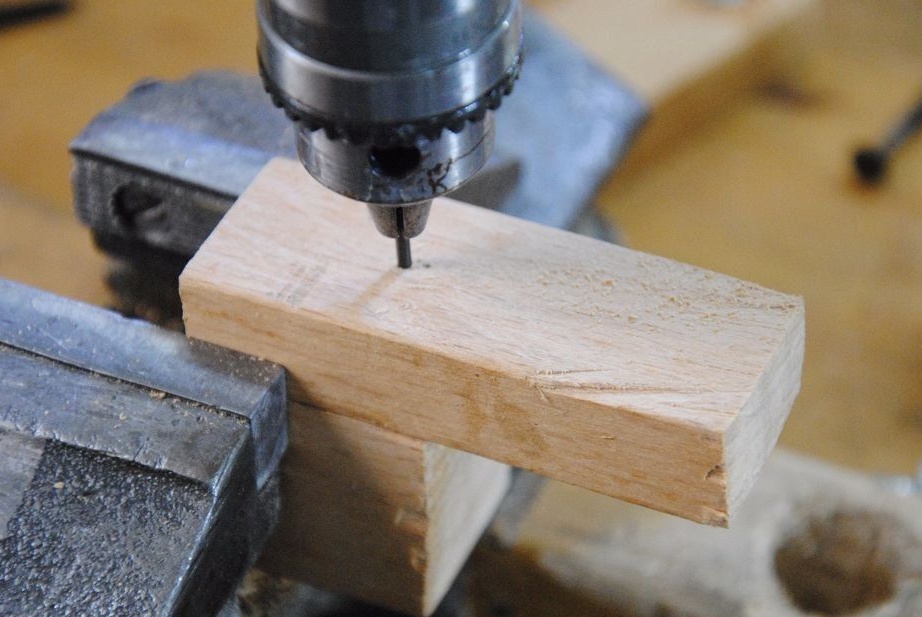
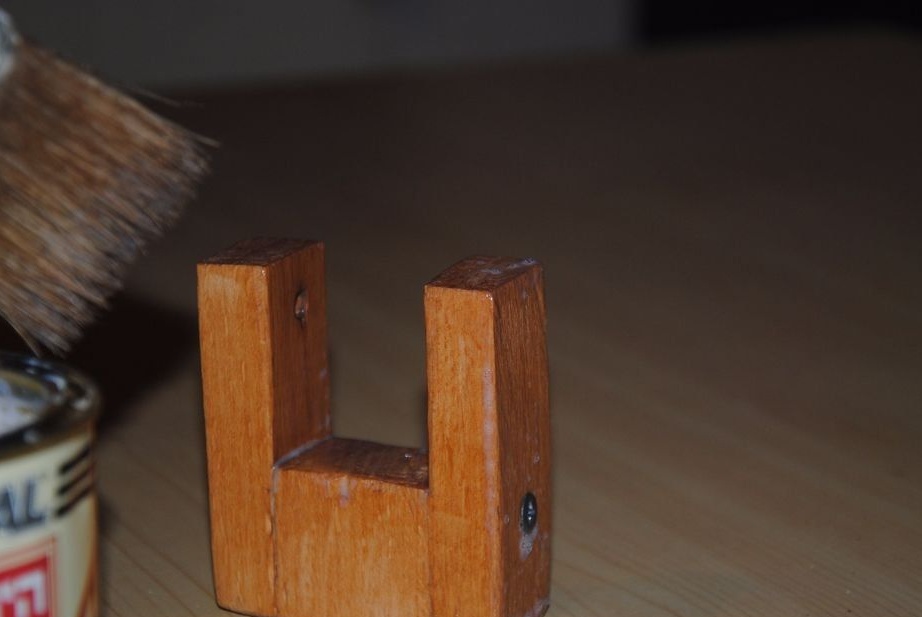
First step. Depending on your requests, the clamp size can be made different, in this case, the author cuts blocks of 3.5 x 3 x 3.5 cm in size - one piece and 1.8 x 3 x 7.5 cm - two pieces.
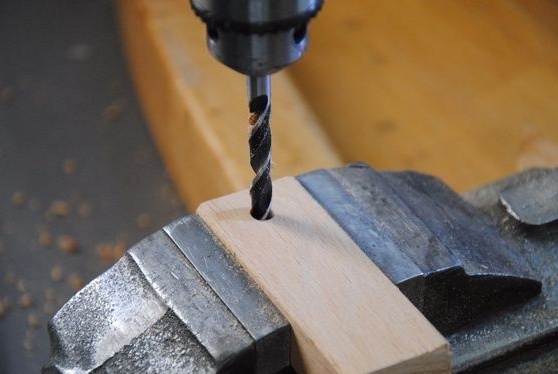
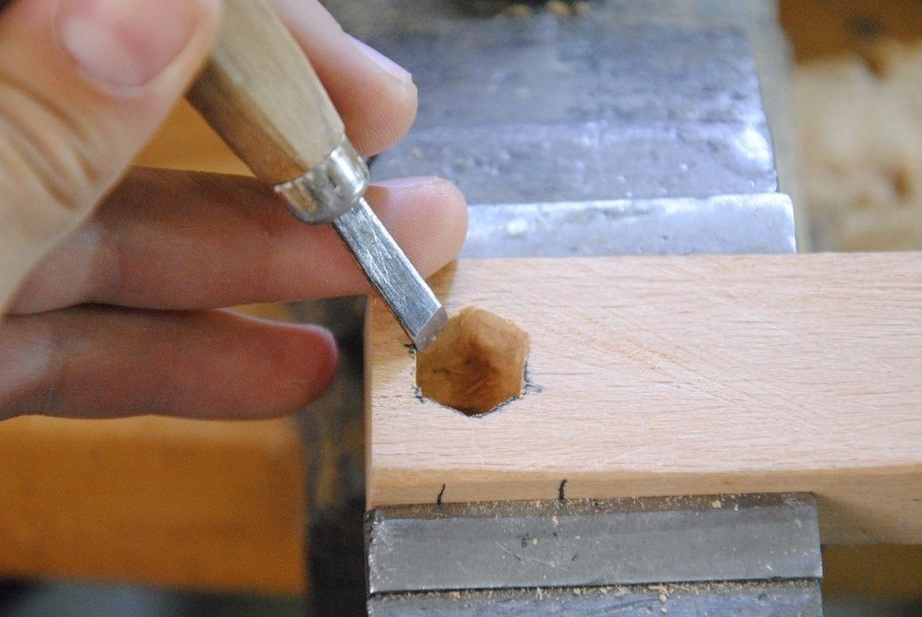
After that, we clamp a bar 75 mm long in a vise and drill a hole with a drill, stepping back from the edge 1-2cm.
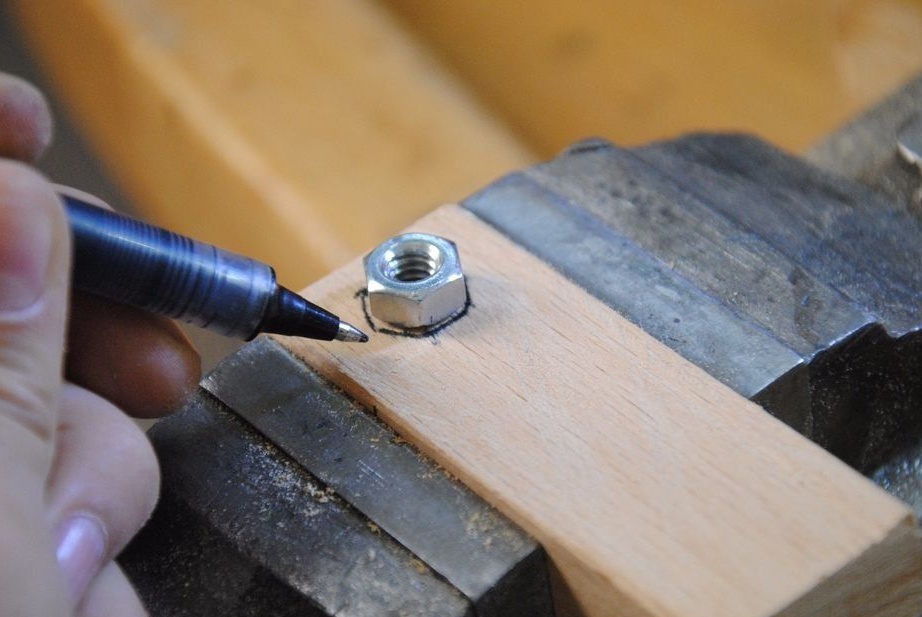
Next, compare the hole just made with the hole in the nut and circle the outline with a pencil. After marking, armed with a chisel and a hammer, cut the hexagonal flange for the nut.
Second step. To fix the nut in the bar, it is necessary to lubricate the groove in the groove with epoxy resin inside and immerse the same nut there, drowning it in the bar a little.
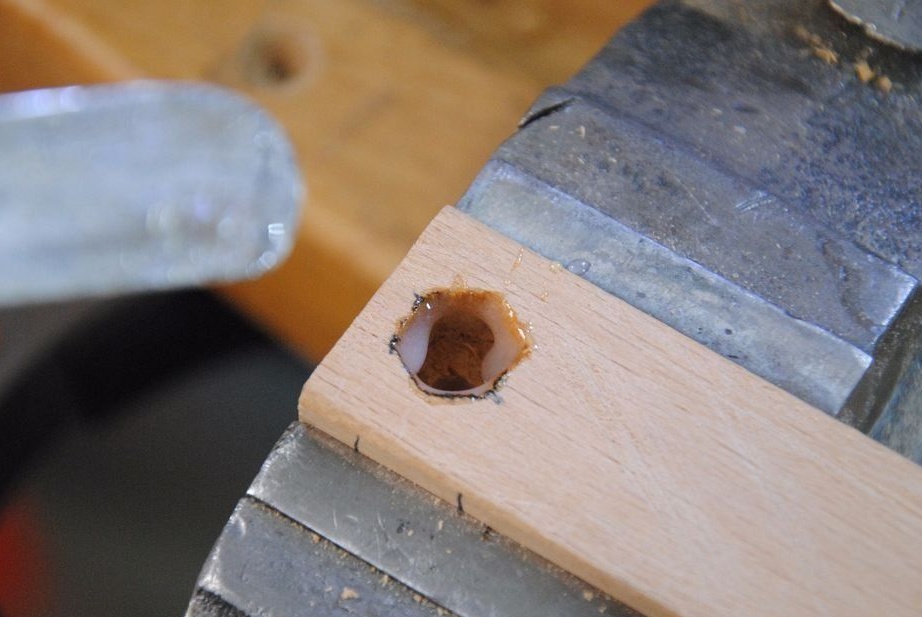
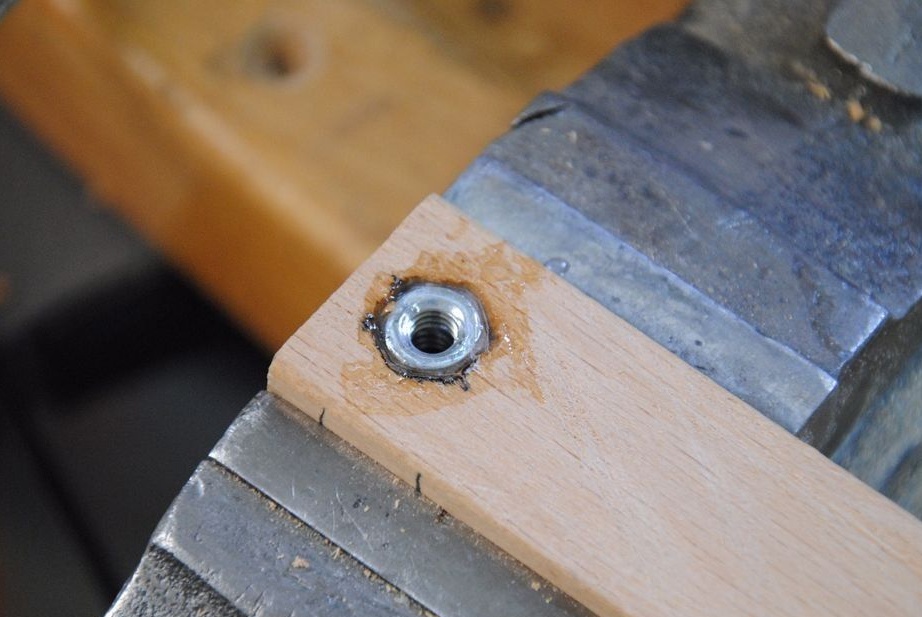
As a rule, complete drying of the epoxy is achieved after 24 hours, after which you can proceed to the next stage of assembly.
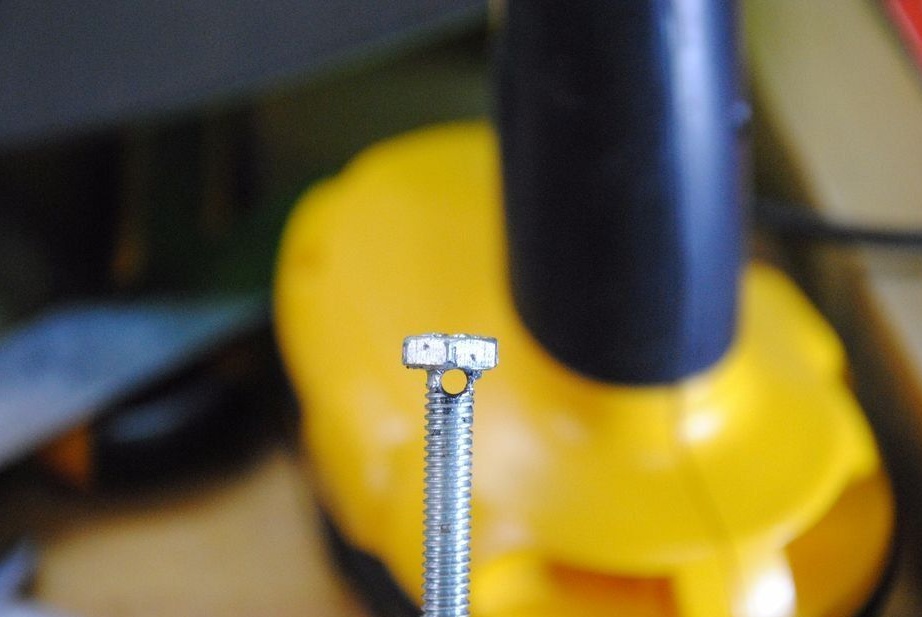
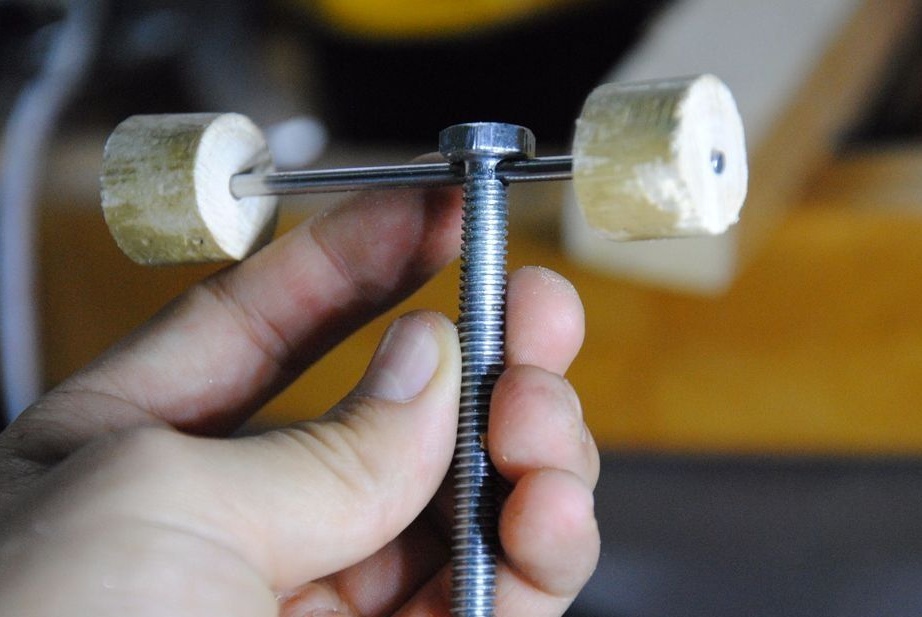
Third step. The bolt that fits perfectly with our fixed nut in the beam needs to be modified, for this we take a drill and drill a hole right next to its hexagonal head.
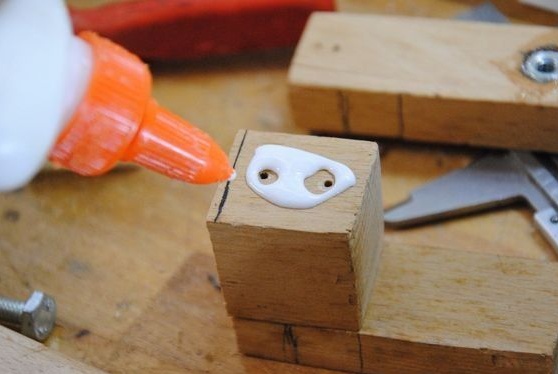
After that, we move on to the bars, they must be combined together so that the bars are more authentic on the sides, and the bar is shorter between them.Before the three beams are clamped together, you need to drill holes in the fastener with a thin drill so that the workpiece does not crack, because this alignment does not suit us.
Using a screwdriver, we screw the screws into the finished drilling places, after having previously coated the joints between themselves with glue.
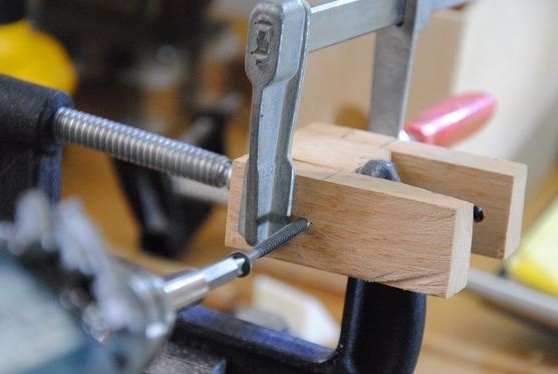
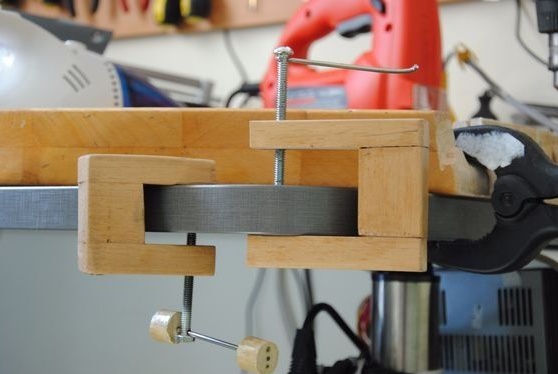
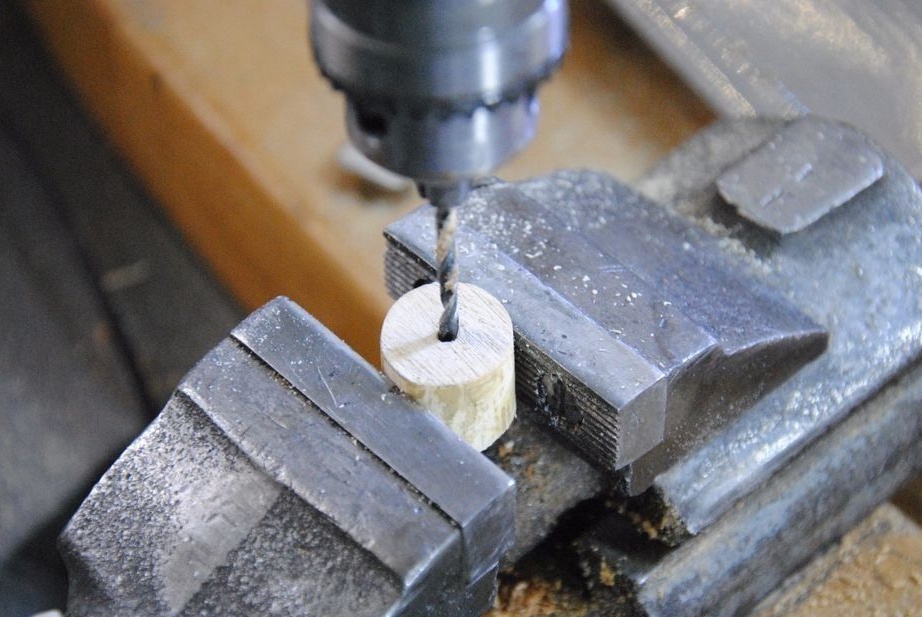
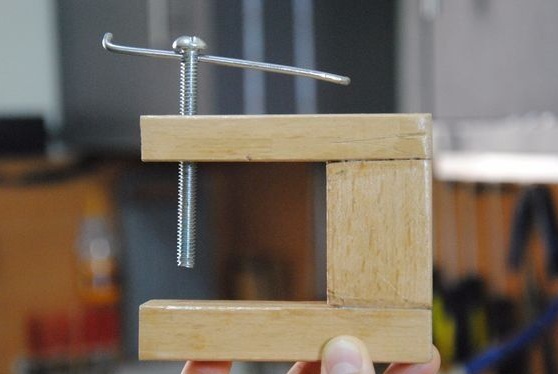
We fix with the clamp an almost ready clamping mechanism and wait for the glue to dry. For convenient use of the clamp, you need a lever with which you can clamp your workpieces, they will just serve as a metal rod and a circular-shaped piece of wood cut into two sections with a cross section of 15 mm, in both you need to drill a hole for the rod and put it all on glue.
The final stage. To complete the assembly, you need varnish or stain, grind our home-made clamp, and then varnish in several layers.
This is the manufacture of the clamp do it yourself it will be ready and in working condition when the varnish dries completely, after that it is possible to work with this device with full confidence.
Thank you all, I wish you successful articles and homemade undertakings.