
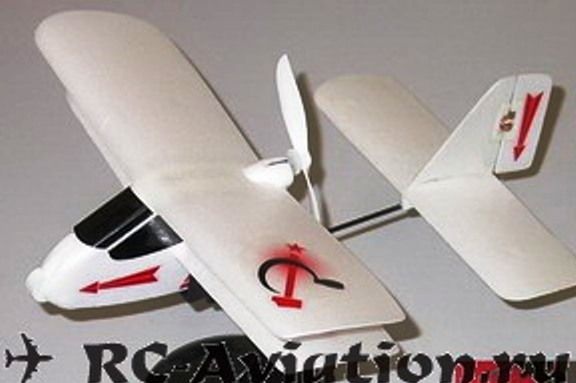
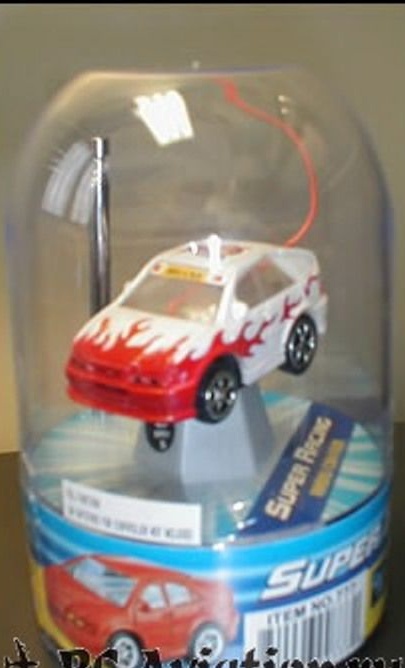
At this time, on sale you can find miniature models of aircraft on the radio, here you can include Ofice Flyer, which is produced by Pilotage. On such models, you can make flights in small rooms or halls with the number of visitors up to 10-15 people. But due to the crisis, the cost of such aircraft models is in the range of 1000 rubles, in addition, they break very quickly due to a very weak design, they last only for a few hits. Then the toy can be thrown away, or it can be made from it using the engine, receiver and battery homemade.
Similar models are controlled using an infrared transmitter. In this regard, flying on a street in sunny weather on such an aircraft model will not work. You need to wait for cloudy weather or evening. Total model It has two channels for control, with one engine speed is controlled, and the second channel is reserved for steering.
In this article we will look at how you can assemble such a mini-model of a flying airplane yourself using as a basis a miniature radio-controlled typewriter for office racing. Such machines cost about 250-300 rubles, which is 2/3 less than the cost of Ofice Flyer.
Materials and tools for homemade:
- a miniature radio-controlled machine;
- soldering iron;
- ceiling tiles;
- glue for ceiling tiles;
- ruler;
- scissors, clerical knife;
- wires and other little things.
The process of manufacturing an aircraft model:
Step one. We disassemble the machine
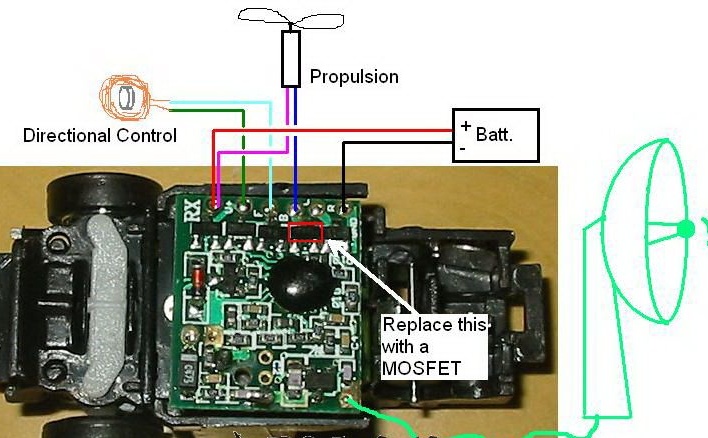
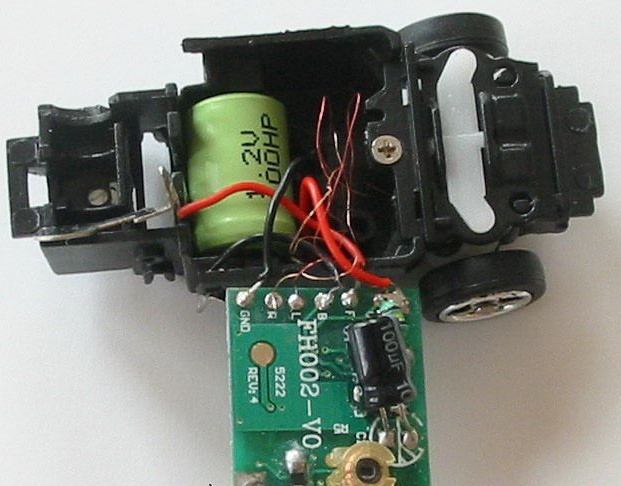
First you need to disassemble the machine from which the aircraft model will be made. This should be done carefully, the engine and steering wires should be tried to be kept in place.
Step Two Create an airplane model
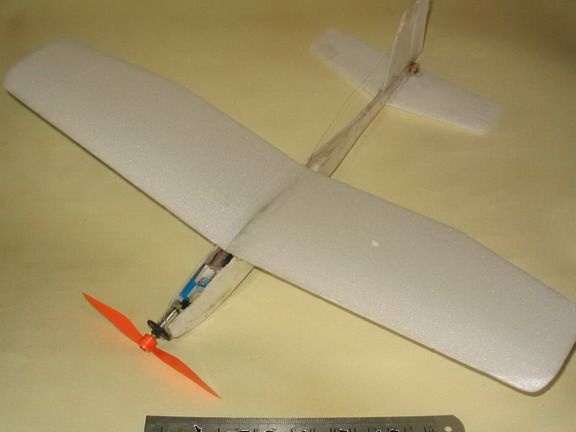
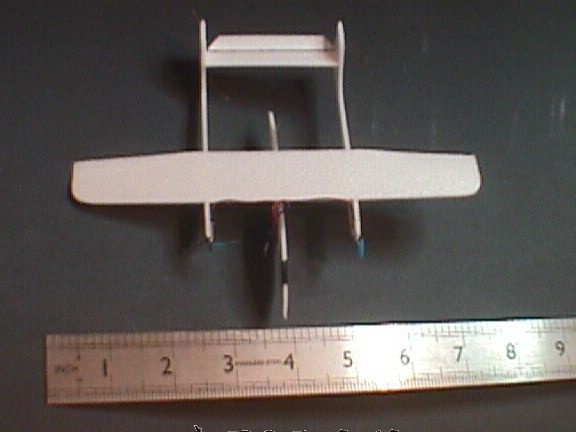
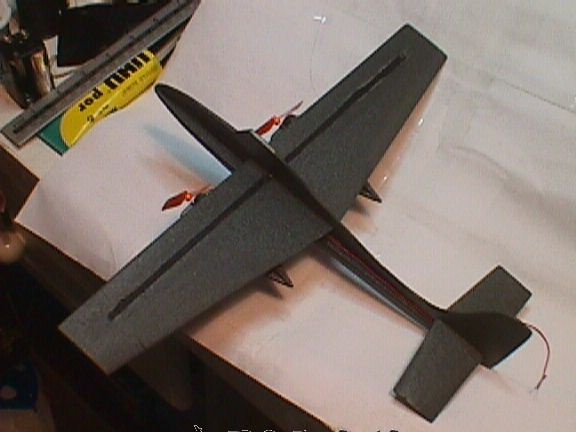
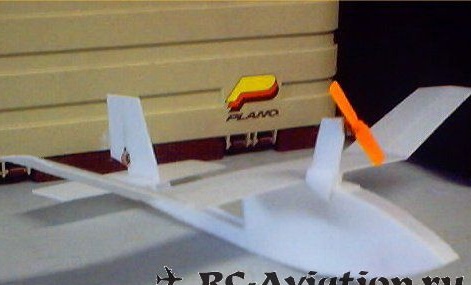
The model of the aircraft is made of ceiling tiles, for this you will need to download the drawing and print. You can download the desired model drawing from. The fuselage of the model is flat, its outline is made of ceiling tiles with a thickness of 3.5-4 mm.
For the manufacture of the wing and the tail unit, you will need a ceiling tile, dissolved in half. You can dissolve the ceiling in half using a piece of nichrome wire that connects to a power source. To do this, drill bits of the desired diameter or other suitable objects are placed under the ceiling tile. On top of the ceiling is pressed by plywood or MDF sheet, a weight is placed on top.Now the sheet needs only to be evenly dragged through the hot nichrome. The result is two sheets of ceiling tiles of the same width.
Still, as an option, you can first glue the workpiece, and then use the sandpaper glued to the bar to grind off the excess, but this is a rather lengthy and painstaking procedure.
The wings of the model should be located in the form of the letter V. This is done so that the aircraft model itself stabilizes during flight.
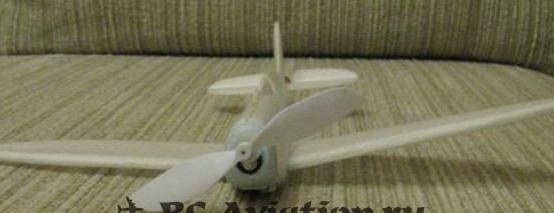
According to the author, the easiest way to make a twin-engine model. As an example, you can build a bomb model
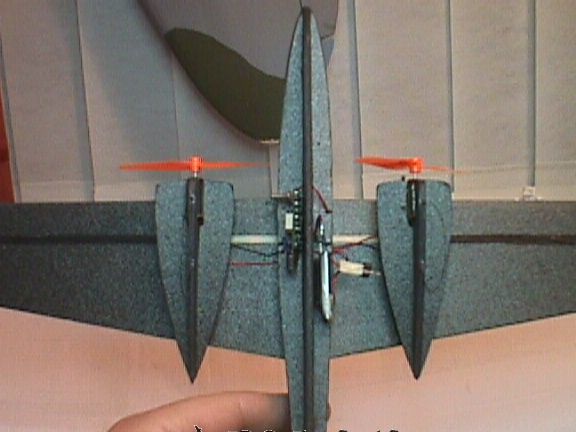
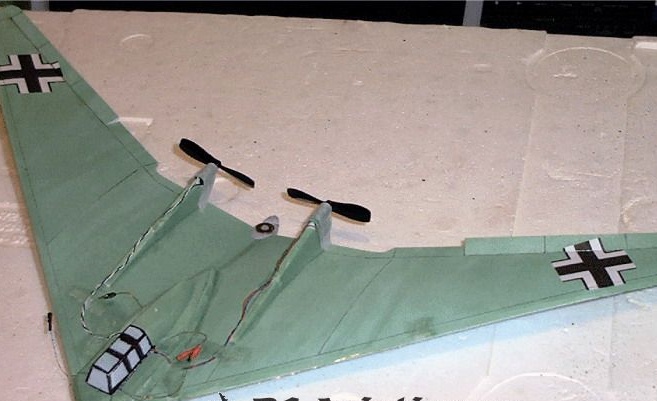
Another option is to assemble a flying wing, as an example, the Stealth model. But for such a homemade product you will need a controller that controls two motors, it will be difficult to find one in radio-controlled cars. But more often than not electronics found in tanks on the radio.
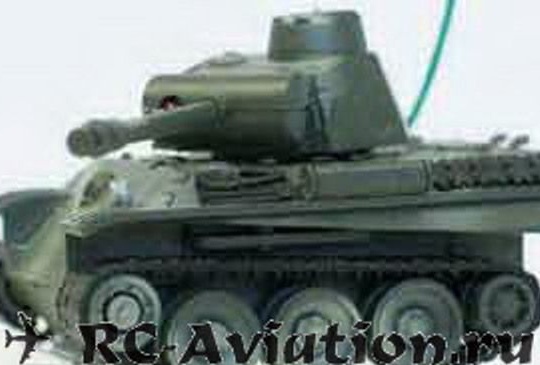
The peculiarity of this model is that it does not require steering wheels for turns. The model will rotate due to the fact that there will be a difference in traction between the left and right screws. It is on this principle that electronics work in a tank.
Still in such tanks there is a channel through which the tower is controlled. It can be used in order to control the elevator or turns.
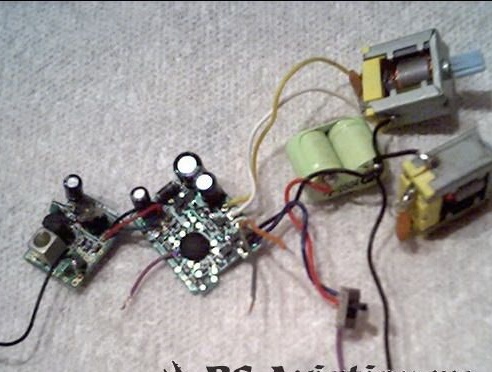
If the model has control of only one engine, then an actuator is used for turns. The same device is used to rotate the front axle of the minimachine. It must also be carefully removed from the toy, leaving the whole winding. If the winding was damaged, then you can do it yourself, you just need to wind a thin wire on a paper tube.
Step Three The final stage. Engine
When installing the engine, it is put a little upward bias, in other words, the axis of the engine should look slightly upward relative to the axis of the model. The screw in the model needs to be used large, for its work you will need to make a gearbox. Such a gearbox can be made of gears that are in the watch, other Chinese toys, an old printer, and so on.
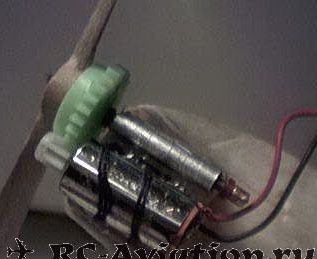
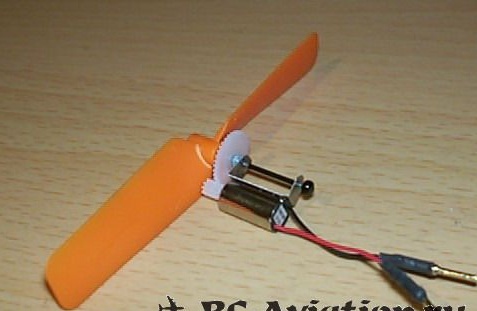
And the gearbox can be made belt


If a model with two motors is going to be assembled, then in addition to mowing up, the axes of the engines should be turned slightly towards the center. The fact is that at full throttle, the screws will pull the model up, and it will take off. And on average gas, the aircraft model will fly straight.
As for the control, if it is discrete (push-button), then the model will fly in a parabola. That is, when you press the button, the maximum engine speed will go, and the model will take off, and when you release the button, the plane will plan. There may also be a reverse button on the remote control (backward movement), it is better to turn it off, because if you press it when the engine is running, it can burn out, it will rotate by inertia.
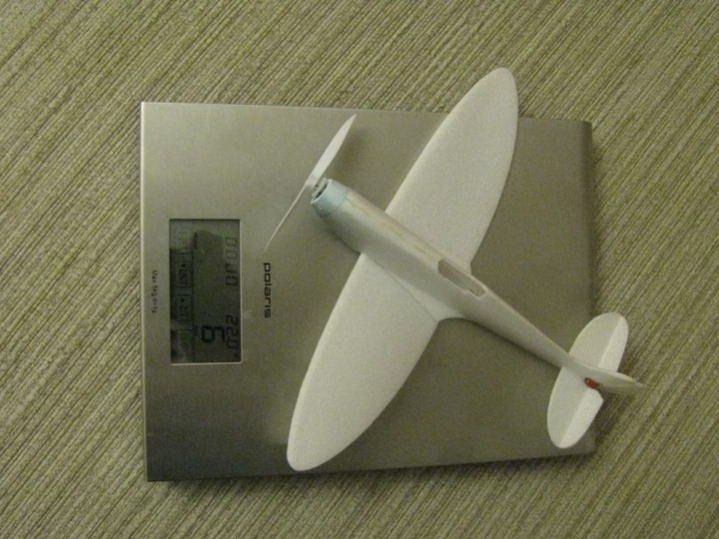
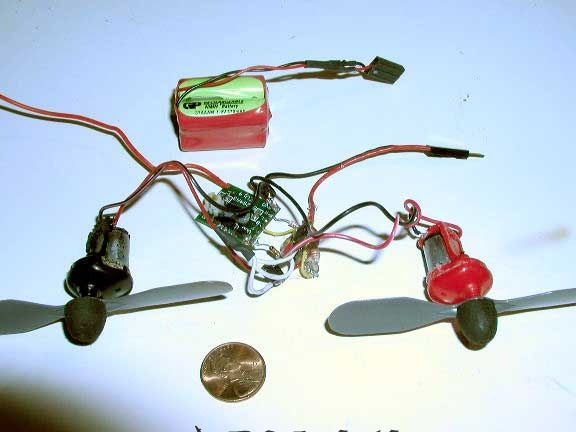
The micromodel is powered by a powerful capacitor or ionistor. The first flights can be done on such a power source, and in the future you can put a small LiPo battery. A single battery with a capacity of 150 mA / h is enough to fly on the model at full throttle for about half an hour.
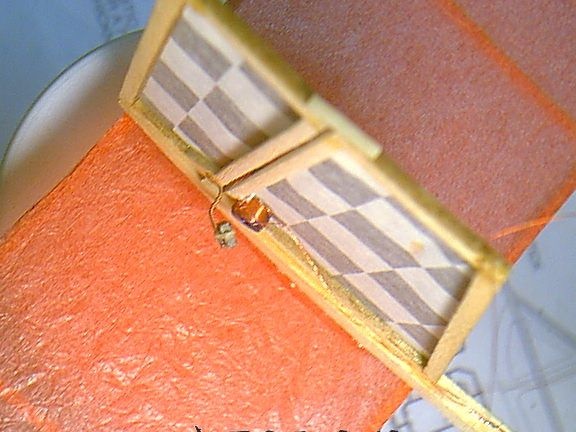
If an infrared channel is used to control the model, then the sensor must be positioned so that it can always be seen during flight. If radio control is used, then the antenna is located below the wing in the form of the letter P.
As for additional options, such as a siren, headlights, etc., it is not necessary to connect them, for flights they are not needed.
Before starting the model, you need to center. To do this, the model is launched by hand with the engine off on something soft, for example, on a bed. The launch should go at an angle of about 10 degrees. The model should plan smoothly. If the plane flies in steps, that is, it lowers, then raises its nose, the center of gravity must be shifted to the bow. For example, you can move the battery.
Now you can do the first flights, it is best to test the model in a large room and preferably without witnesses so that no one interferes or distracts. Another model can be finalized by making it possible to land on water. Then in calm weather you can go to the lake and fly there.