
The Internet is full of articles about how to use a building pallet, turning it into a sofa, now into a bed, or into a flower pot.
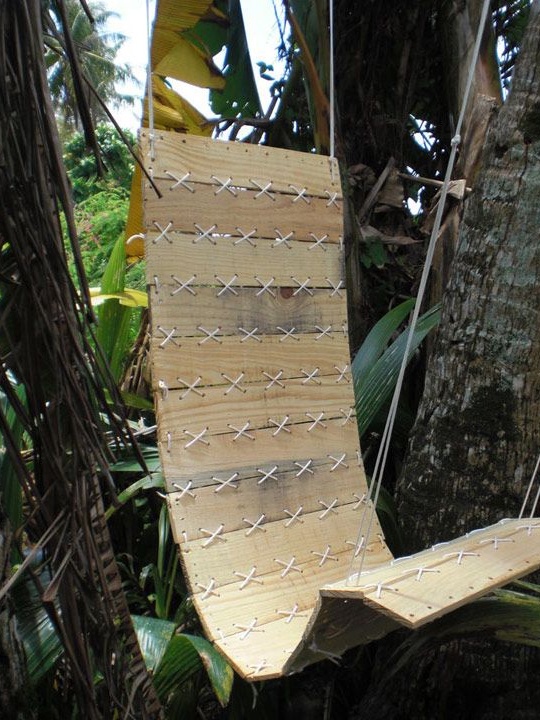
We are true connoisseurs of comfort, so when it came to the disposal of the next pallet lying around idle, we decided to create from it nothing more than a hammock chair. It seems that experiences of this kind have not yet been written. And if you wrote, then we are happy to join the initiative and share a master class in which we will describe in detail the process of creating a hammock hanging chair do it yourself.
You, of course, can use ordinary boards, even new ones. However, you must admit, sometimes it’s so nice to turn old used materials into amazing things with your own hands. Therefore, we advise you how to carefully look at your own household and find a few boards for work that have already been in use and have served, it would seem, their age.
For, to make a hammock chair with our own hands, we need:
1. Materials:
- one building pallet or old boards with a thickness of 20 mm.
- synthetic braided cord for connecting the planks and a thicker cord for hanging the chair;
- metal hooks for fastening - 4 pcs .;
- metal rings for fastening - 4 pcs .;
- paint, toner or varnish on wood for wood processing.
2. Tools:
- electric drill;
- a manual hacksaw for wood;
- grinder;
- Reciprocating saw or hammer and pliers (nail puller) to remove old nails.

Step 1: preparing the materials
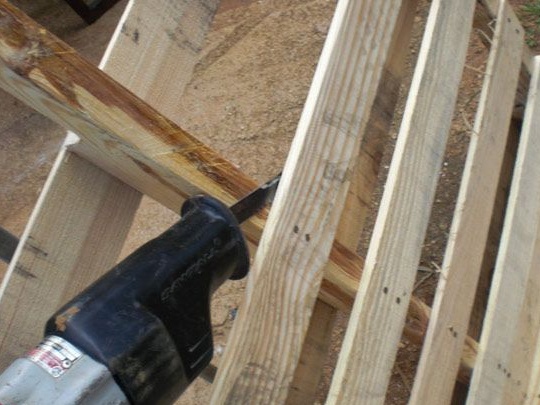
Often pallets are assembled using threaded nails, which greatly complicates their disassembly. Without proper patience and accuracy, the boards can crack during the work process, so you must act with extreme caution. Use a reciprocating saw or a hacksaw for metal to cut nails. In extreme cases, pieces of boards can be cut with a hacksaw without contacting the mounts.
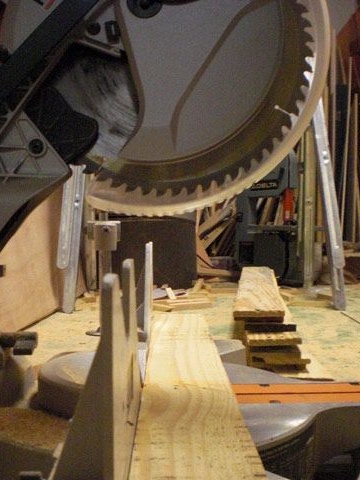
Considering the thickness of the material, we will not plan the boards, but simply treat them this time with a grinder until a clean and smooth surface is obtained.
Mark and cut the boards into pieces of the required length and grind the end edges.
Clean the workpieces from dust and start surface treatment. You have several options:
- painting with ordinary paint on wood. Choose persistent paint from well-known brands for outdoor woodwork.Remember that the chair will be in the open air and will be exposed to atmospheric influences, and the wrong choice of paint material will cause the painted surface to crack and the product will be easier to throw out than to correct the situation;
- Toner coating. A great option if you still have toner leftovers, which are often used for outdoor applications when they want to tint wood, but at the same time preserve its natural texture. This material perfectly protects the tree from harmful effects and the coating can be updated at any time, previously only by slightly treating the surface of the wood with a grinder or sandpaper;
- varnish painting on wood. Another great option for processing wood products for lovers of natural materials. In this case, you will be able to preserve and emphasize the natural color and texture of the wood.
We left the tree uncoated for now. The photo shows that in some places it even turned slightly blue with old age. However, it has not yet lost strength.
So, process the planks-blanks in one of the methods described above and proceed to the next step.
Step 2: assembly of the structure
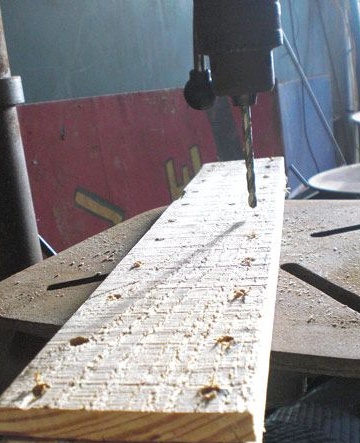
Step back 1.5 cm from the edge and mark the cord attachment points on each workpiece. The optimal distance between future holes is 5 cm.
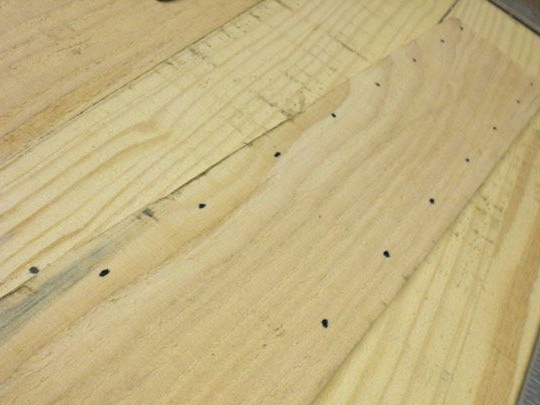
Armed with an electric drill and drill, slightly larger in diameter than the cord, make holes at the designated points.
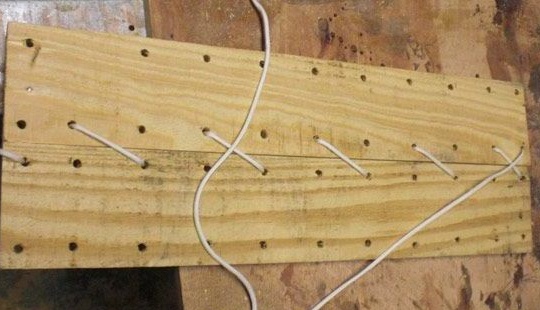
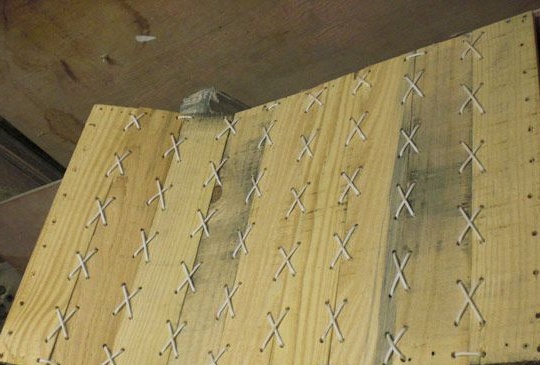
Weave the planks together as shown in the photo using a cord. Knots on the seamy side of the cord should be knotted. Do not make the weave too dense - for ease of use, the design should be as flexible as possible.
Weave until the length of the chair blade reaches 120 - 140 cm. Keep in mind that the size of the chair depends on your own height.
Step 3: permanent installation
On the first upper and second to last lower plank, make two holes on each side to hang the chair in a permanent place. Use a larger diameter cord for this. Install one metal ring at the top.
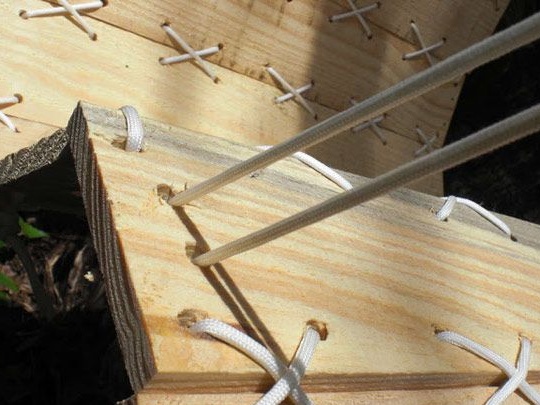
Hooks are best made on their own, taking into account the peculiarities of fastening in place.
Hang or otherwise install the hooks in a fixed place. Hang the chair on the hooks by the metal rings.
The miracle chair is ready for active use and you can finally fully enjoy your outdoor vacation!

Place a chair in the garden in the shade of the trees to listen to the birds singing or on the terrace, where you can hide from the sultry sun and think about how you can still use the construction pallet for your own benefit.