
If you are a happy owner of a large yard and often use power tools for economic purposes, then you know how difficult it is sometimes to cope with electric carrying, a couple of tens of meters. The wire gets confused, intertwined and you can untangle it for hours.
And you can use the organizer in the form of a coil with a wire. Its price in construction stores is often frightening, and it is not possible to tear the necessary amount from the heart. There are, of course, economical options are simpler, less durable and, as a rule, low-power, designed for a simple household electric tool and for the inexperience of the buyer. However, the latter very quickly become unusable.
Therefore, it is most rational to make a coil with an extension cord do it yourself, considering own needs. In this case, you can choose any wire that is suitable in length and cross-section, as well as high-quality sockets and plugs.
To make an organizer in the form of a coil for an electric wire you will need:
1. Materials:
- plug;
- socket;
- electrical cable;
- sheet material, such as plywood or OSB (any other suitable) - 60 x 30 cm .;
- a piece of plastic pipe 110 mm. in diameter - 9 cm .;
- a piece of sewer pipe for the base of the coil;
- M6 or M8 bolts (120 mm. long) and nuts - 3 pcs.;
- paint for coils;
- metal bar 10 mm. thickness for coil frame;
- element of the handle (can be used or homemade);
- paint or primer for the carcass and sidewalls.
2. Tools:
- jigsaw;
- electric drill;
- welding machine;
- screwdriver (optional, use a screwdriver);
- pliers;
- screwdriver;
- hammer;
- spanners;
- a vise.
Let's get to work.
Step 1: manufacturing side parts of the coil
We invented our own method of sawing round elements from sheet material using a jigsaw. However, surely this method was invented before - and more than once.
In order to cut the blanks of the side parts of the coil, take an unnecessary piece of plywood and, having previously made a hole for the saw, screw the base of the jigsaw to the plywood using self-tapping screws. Turn the improvised “machine tool” upside down and attach it to the work surface as shown in the photo.
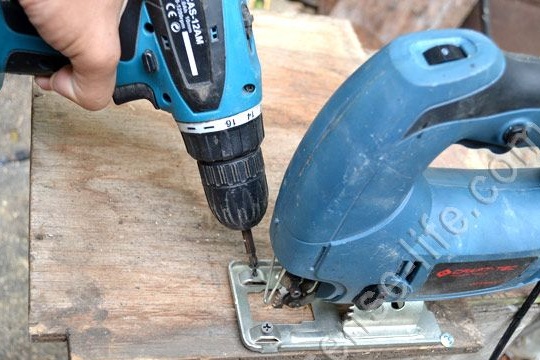
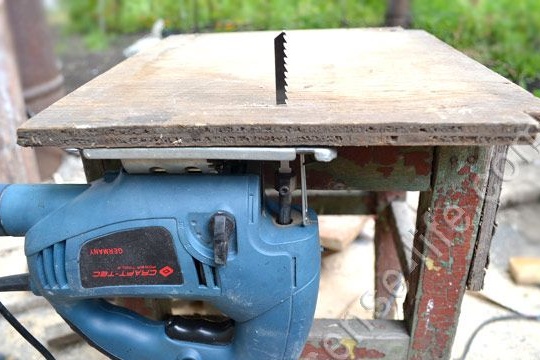
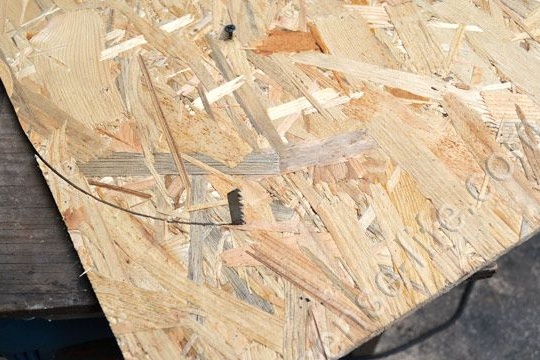
Having noted the required radius of 15 cm, determine the center of the workpiece and drill a hole for the screw in it.Install the workpiece with the cut line to the cutting blade of the jigsaw and secure it with a self-tapping screw, without screwing it to the end so that the workpiece can rotate around its own axis.
Start the jigsaw and hold down the lock button. Be careful - be careful not to injure your hands! Saw the circle of the desired diameter by turning the workpiece. In total, we need two of these.
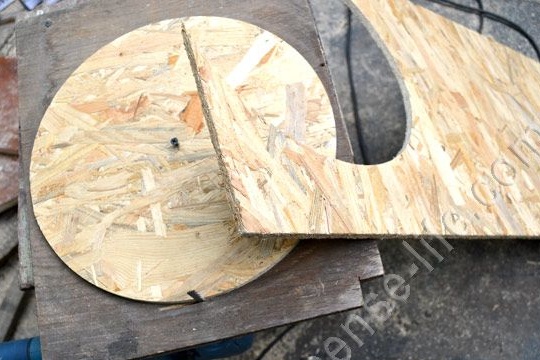
In each sidewall, make a hole for the axis of rotation with a drill, and also drill three holes for fastening.
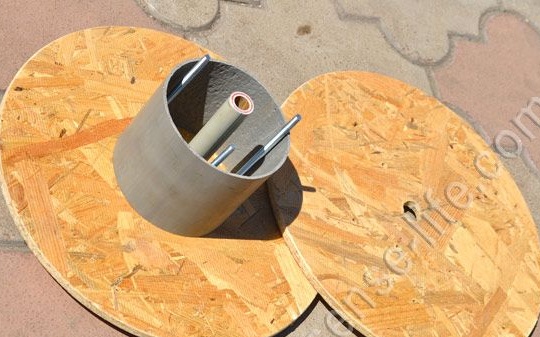
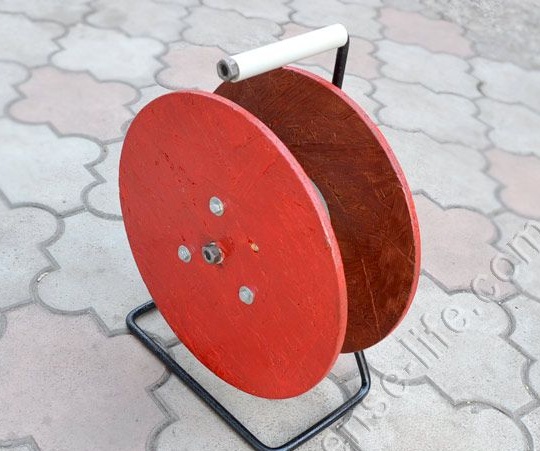
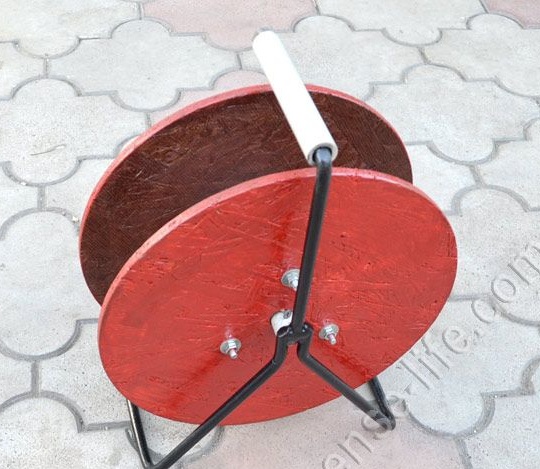
Taking into account the peculiarities of the operation of plywood, so that the organizer lasts longer, we came up with the idea of installing a sleeve made of ordinary plastic PP or PVC pipe (1/2 inch) in the center of each sidewall. On the reverse side, it protrudes somewhat by 1.5 - 2 cm, so that the mounting bolts on the sidewalls do not cling to the coil frame (see photo).
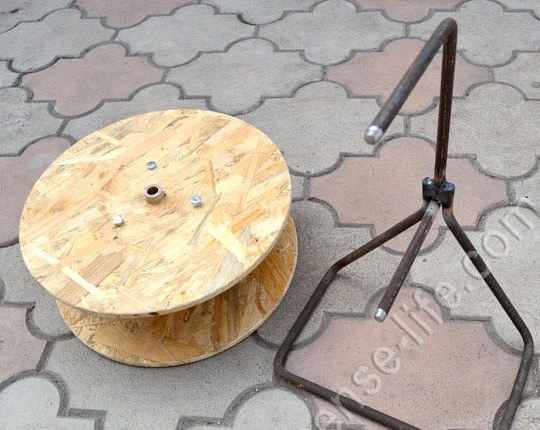
Step 2: making the coil frame
In the manufacture of the frame, we used a 10 mm metal rod. thick. Its design is extremely simple and consists of only two parts - the handle and the supporting part, welded together.
Having calculated the required length, saw off two rods of the required size and bend as shown in the photo. Use a vise to simplify the task.
On the handle at the top and bottom, cut the threads to fix the handle element and the coil itself with the cable. Weld the handle to the base.
Paint the frame with any suitable paint or simply primer.
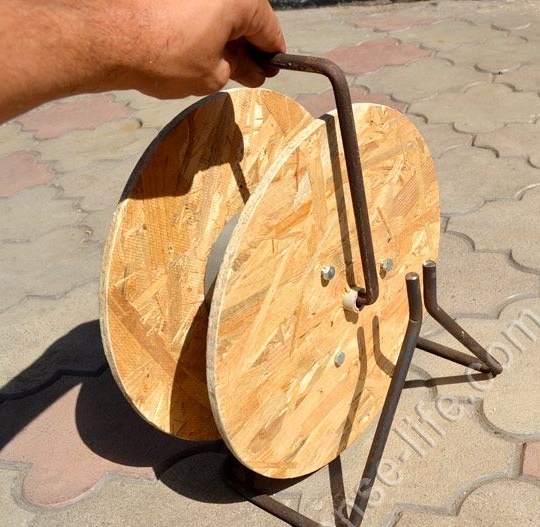
Step 3: final build
Slide the sidewalls onto the axle, placing a piece of sewer pipe between them, and secure with bolts and nuts. Do not forget to mount the sleeve from a piece of plastic pipe.
Put on the handle element and also fix it with the nut.
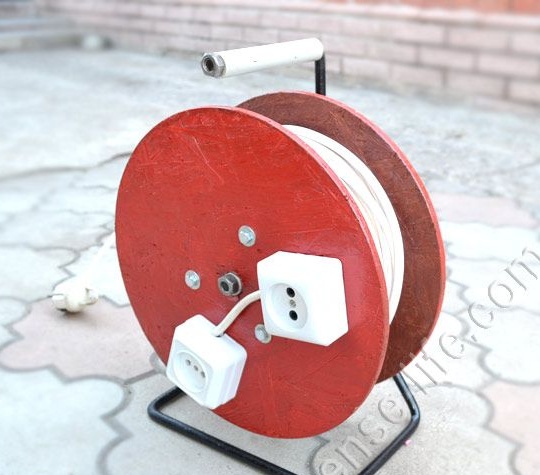
Install the plug and socket on the cable. For convenience, you can use a double or even a triple outlet, but we did not find one at hand, so we installed two single ones in parallel.
Fix the socket on one of the sidewalls and wind the cable around the reel.
Organizer is ready to use! To the above, we add only that we collected such a coil twice. And the first sample served us faithfully for a length of 7 years.