
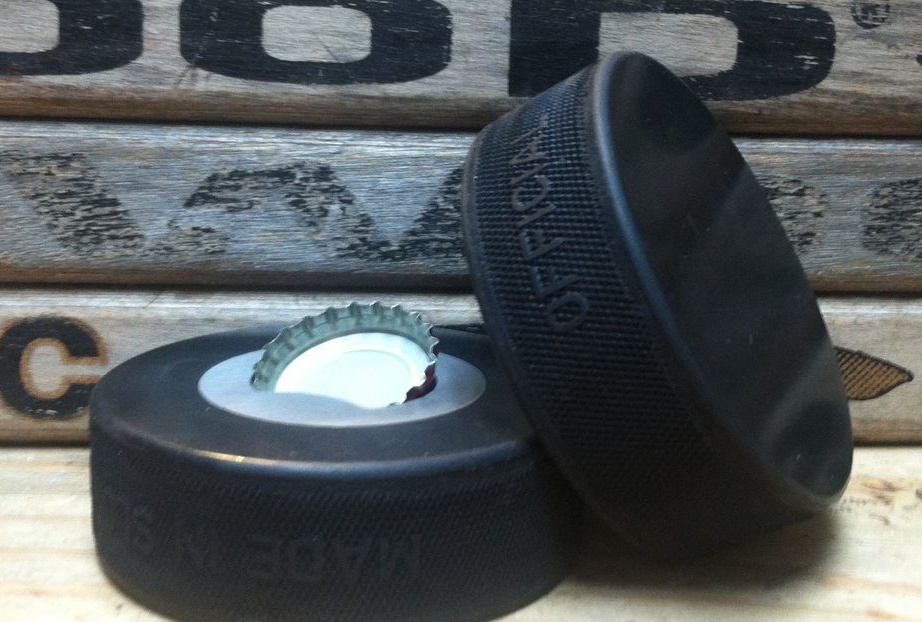
Hello to all lovers homemade, for sure there are fans of hockey here, which is why the author came up with the idea of creating openers from a hockey puck, since at one time the choice of openers on the market was very extensive and diverse in the style of various sports.
In order to assemble such an opener do it yourself, we will need:
* Part of a wooden plank, with dimensions larger than the dimensions of the washer.
* Medical syringe.
*Glue.
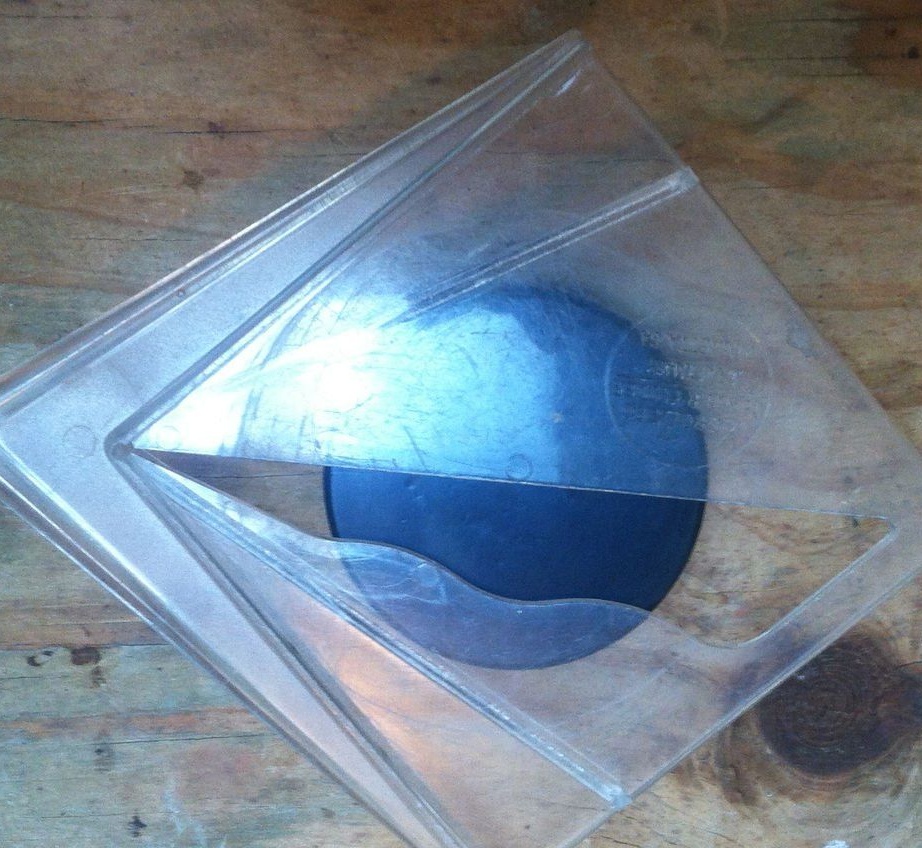
* Normal opener with a diameter of 3 inches.
* Ring drills of various diameters, 3; 3.4 and 1.8 inches.
* Drills for wood.
*Drilling machine.
* Hex bolt.
* Hexagon.
* Hacksaw for metal.
* Drawing tools: pencil, ruler.
When you are convinced that all materials are ready, you can proceed to the step-by-step assembly stage.
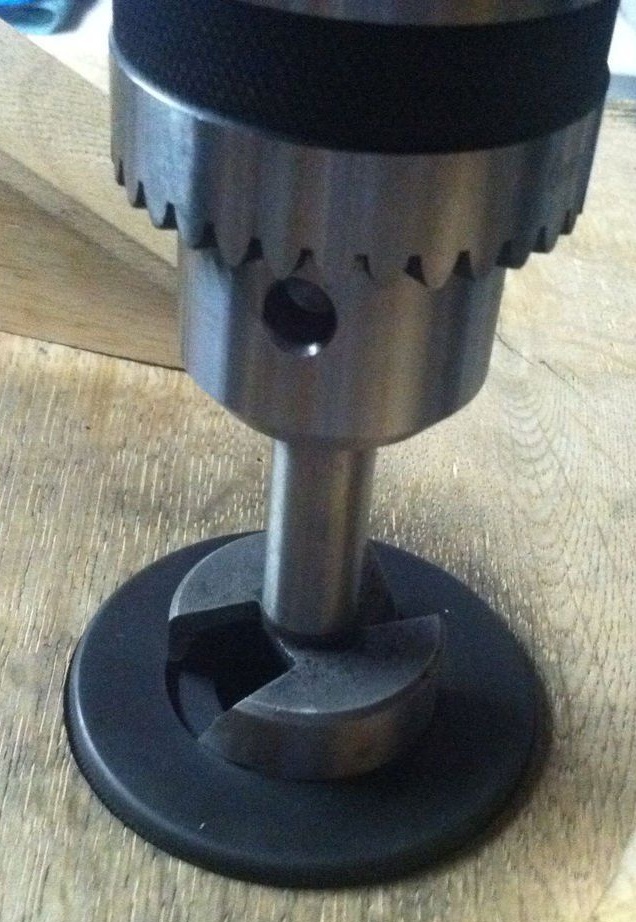
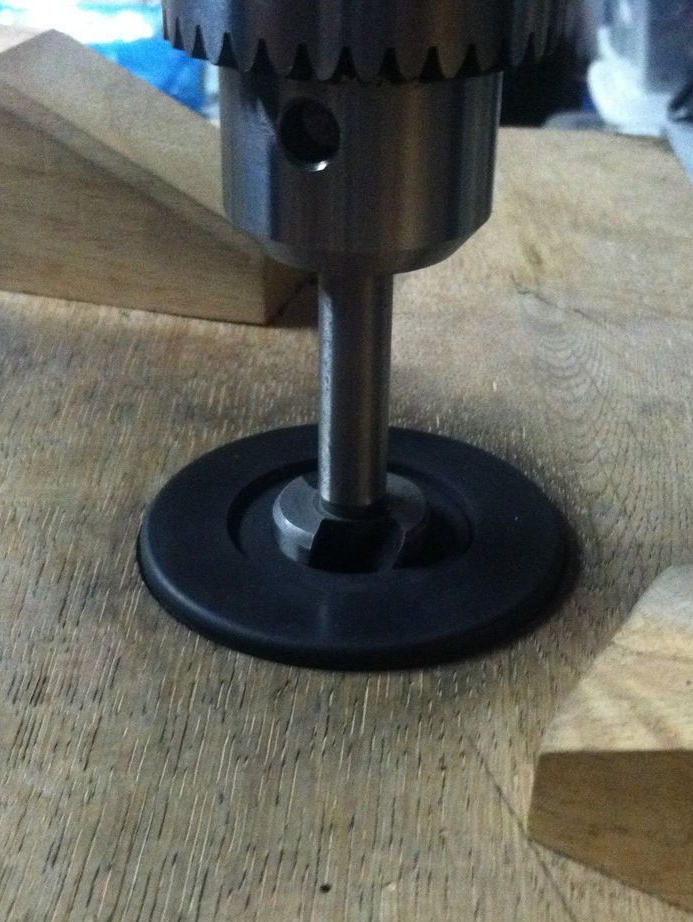
Step one. Obviously, the opener will sit inside the washer, so we need to achieve high accuracy in the manufacture of holes on a professional drilling machine.
In this case, the washer will be fixed using a special makeshift holder, since the hands do not hold the washer while drilling, and also to comply with safety measures. To prepare our universal holder for the washer, we need a solid piece of wood using a 3.4-inch ring drill, or, as it is also called a crown, drill a hole whose depth should be the same as the height of the washer.
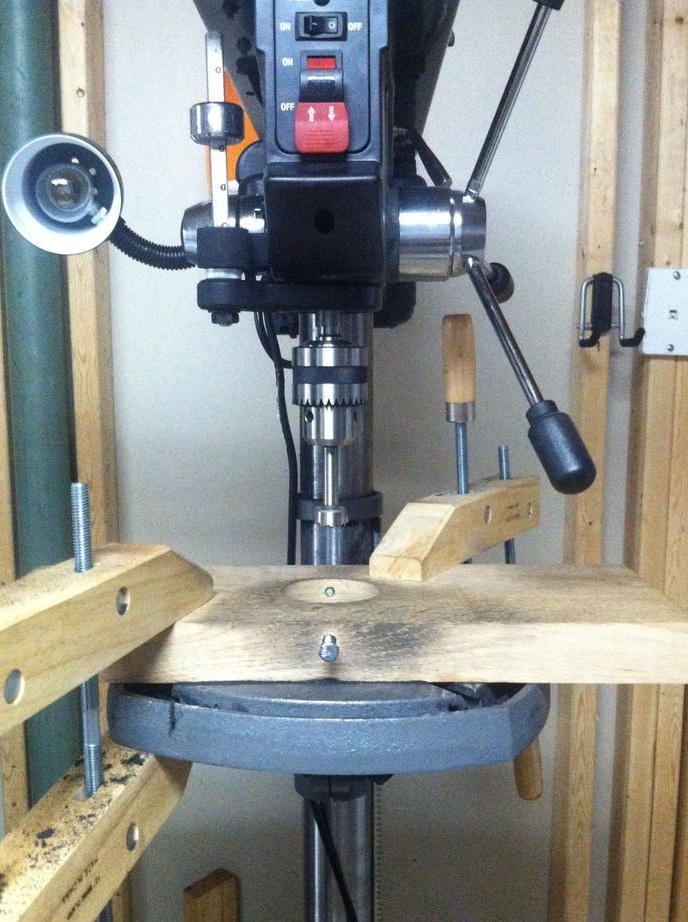
Drill two holes on the sides of the wooden holder and insert the bolts under the hexagon.
With their help, you can easily and firmly fix the puck, preventing it from turning and flying.
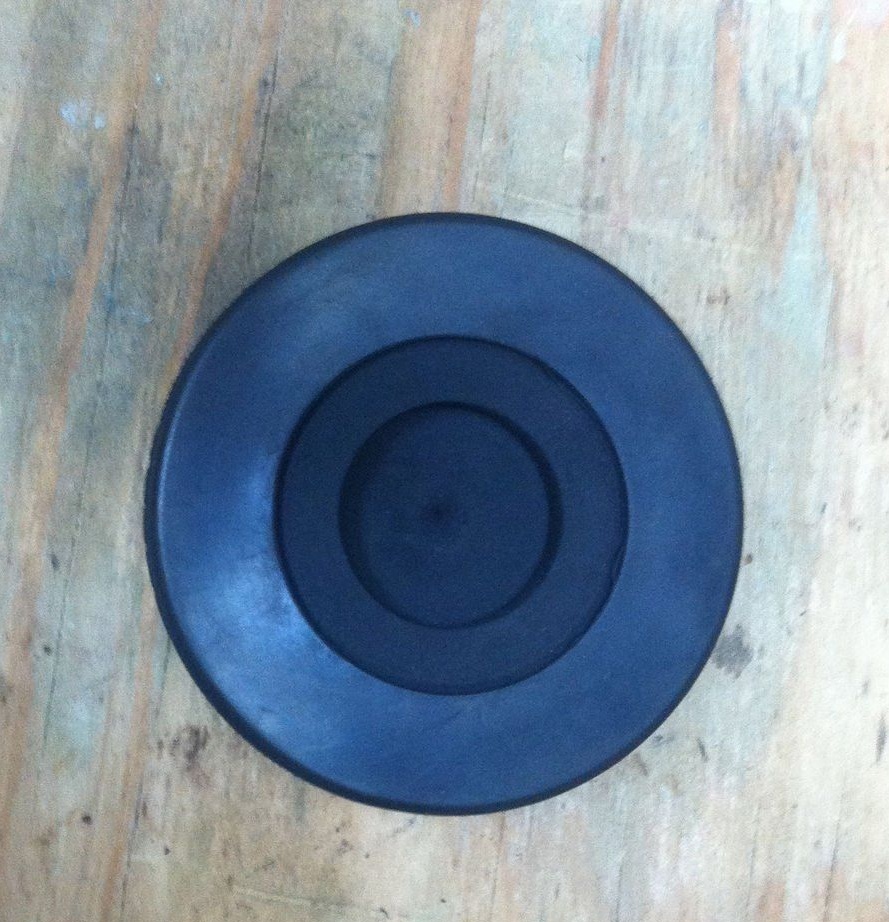
Step Two At this stage, we will need drawing tools, such as a ruler and pencil. With their help, we draw the center on our puck, we can’t do a simple cross here, we draw three lines, thereby achieving the exact center.
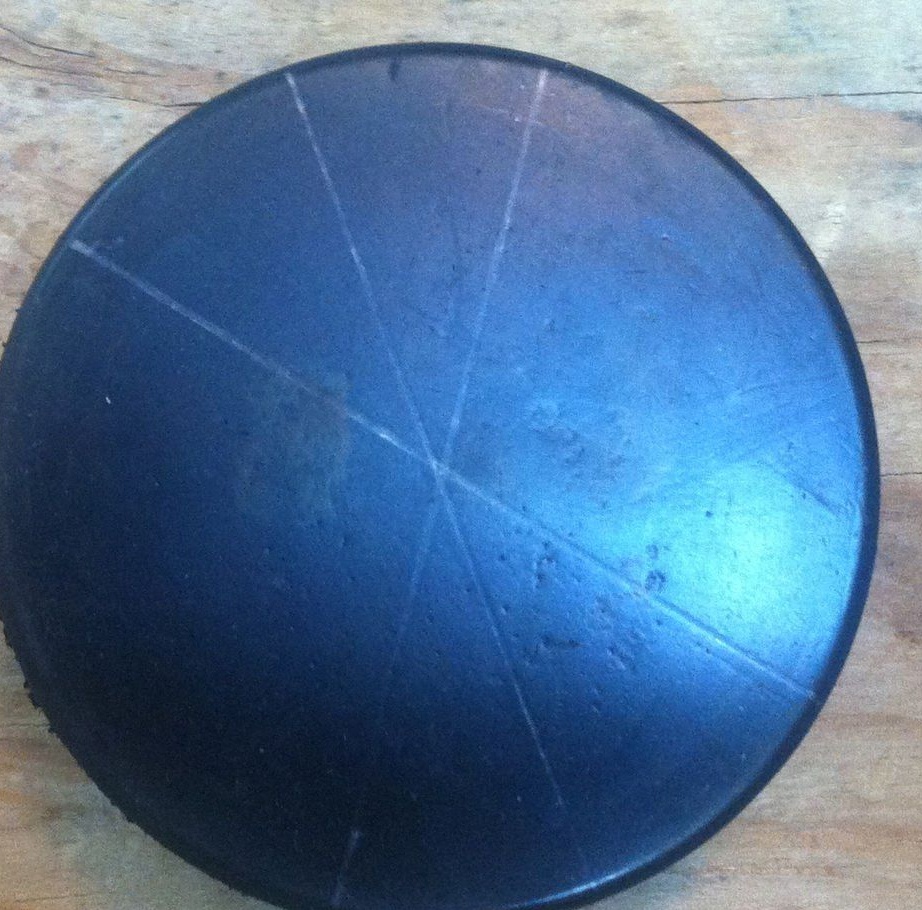
In the future, it is starting from the center that we will process the puck.
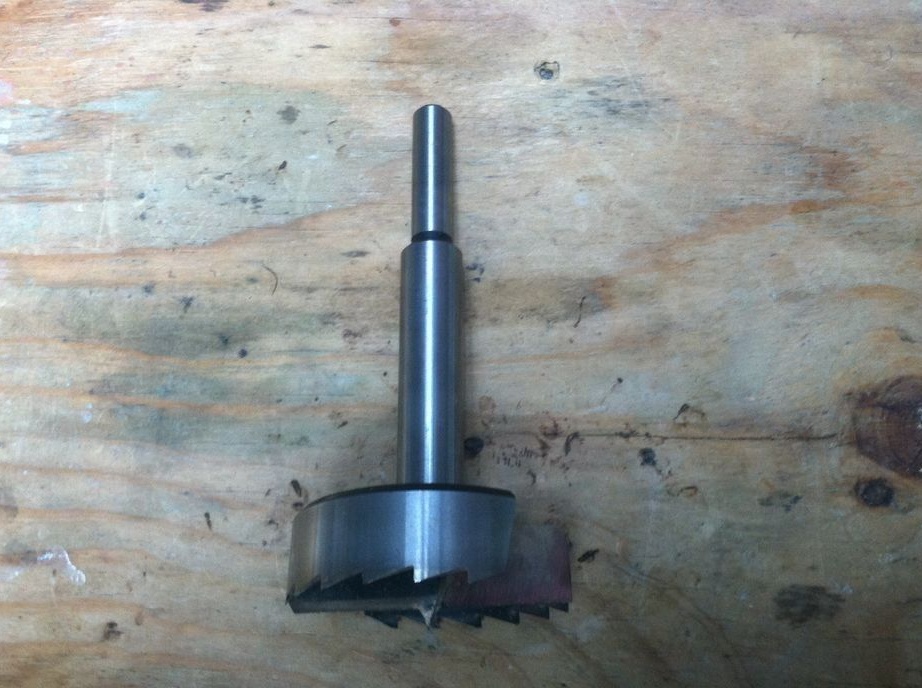
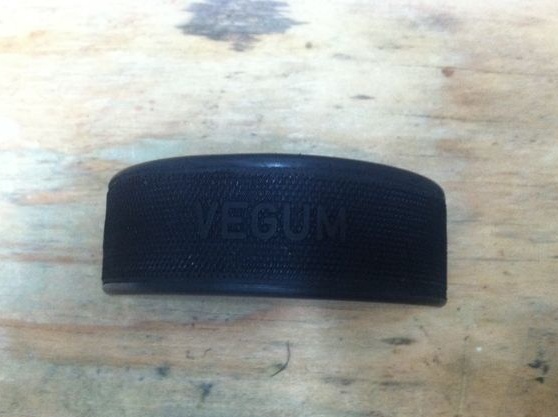
Step Three Armed with a hacksaw for metal, we proceed to sawing off the excess part on the opener, namely the handle, since the handle will serve as the handle.


After the handle is sawed off, take a file and equalize those irregularities that formed in the previous manufacturing step.
The working part of the opener is ready, we move on.
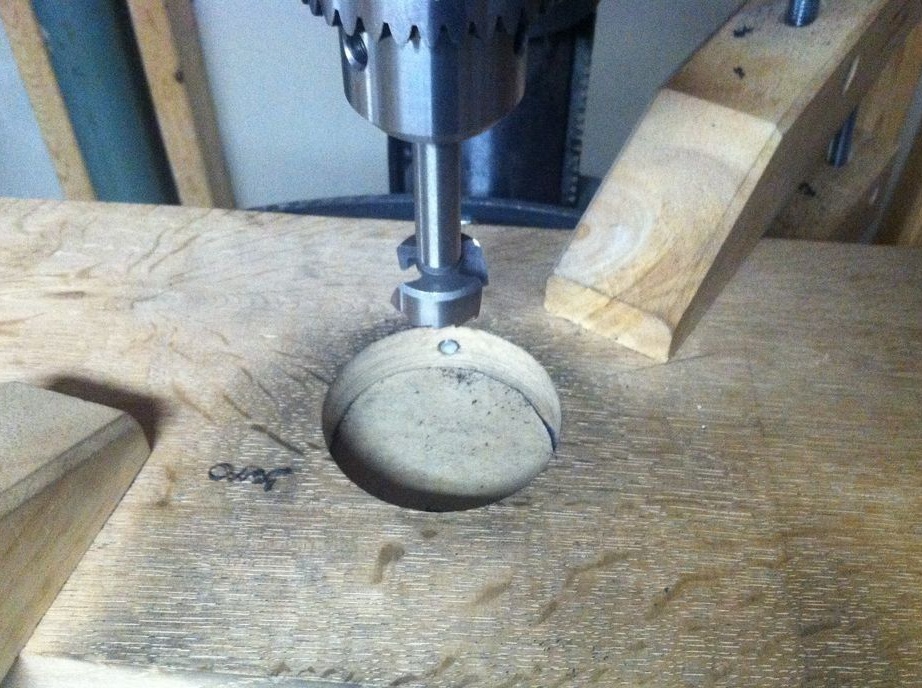
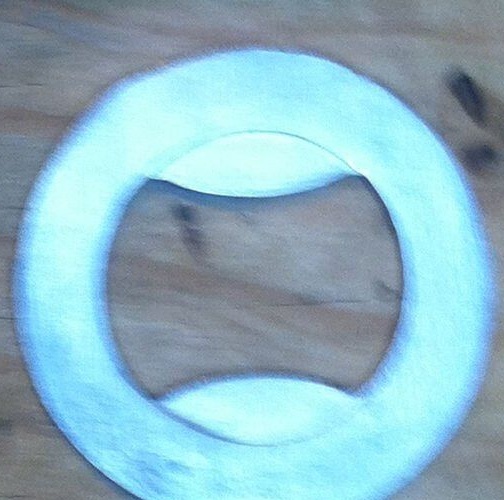
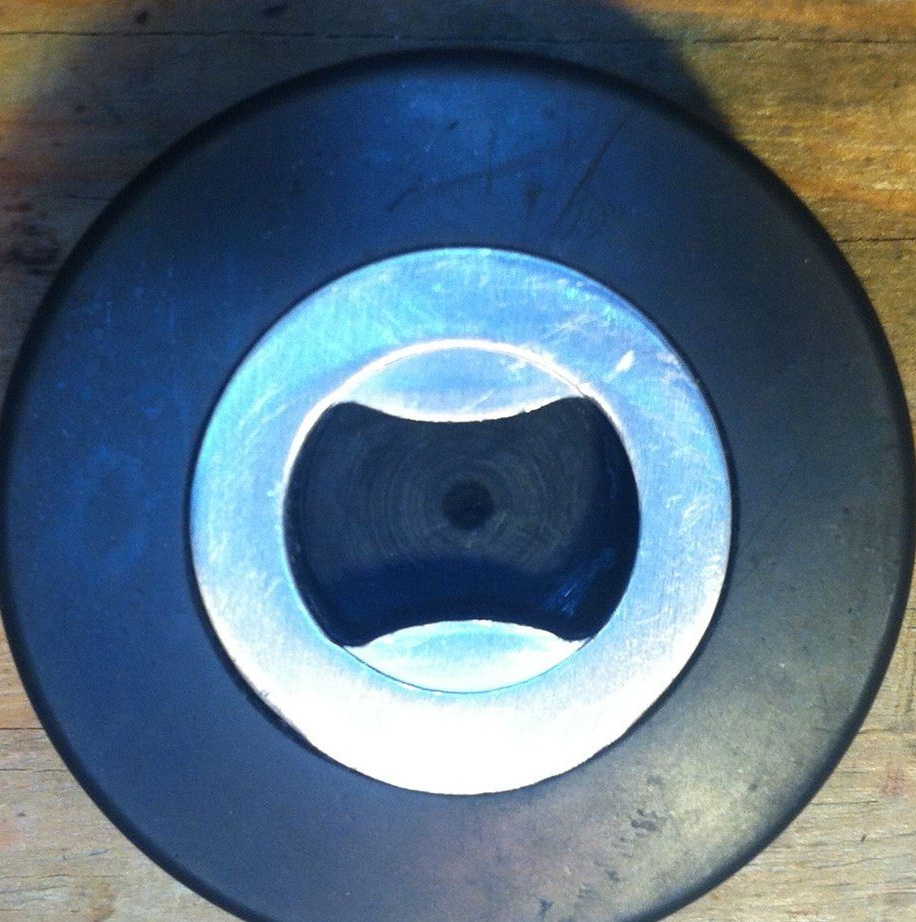
Step Four Fix a core drill with a diameter of 3 inches in the drilling machine, when working with the machine, be careful and wear glasses as a precaution. Then, immersing the puck in our improvised hole, which we nicknamed the holder, we clamp with bolts along the edges, thereby preventing it from scrolling. We drill the first hole exactly the same depth as the height of our openers, in order to subsequently set it flush.
With the first hole ready, throw the drill a little smaller and drill a little deeper than the first. In finished form, it looks something like this.
Step Five After drilling, go to fixing. Using glue intended for gluing metal parts, having previously degreased the surface of the elements to be glued, we glue our opener with a syringe.
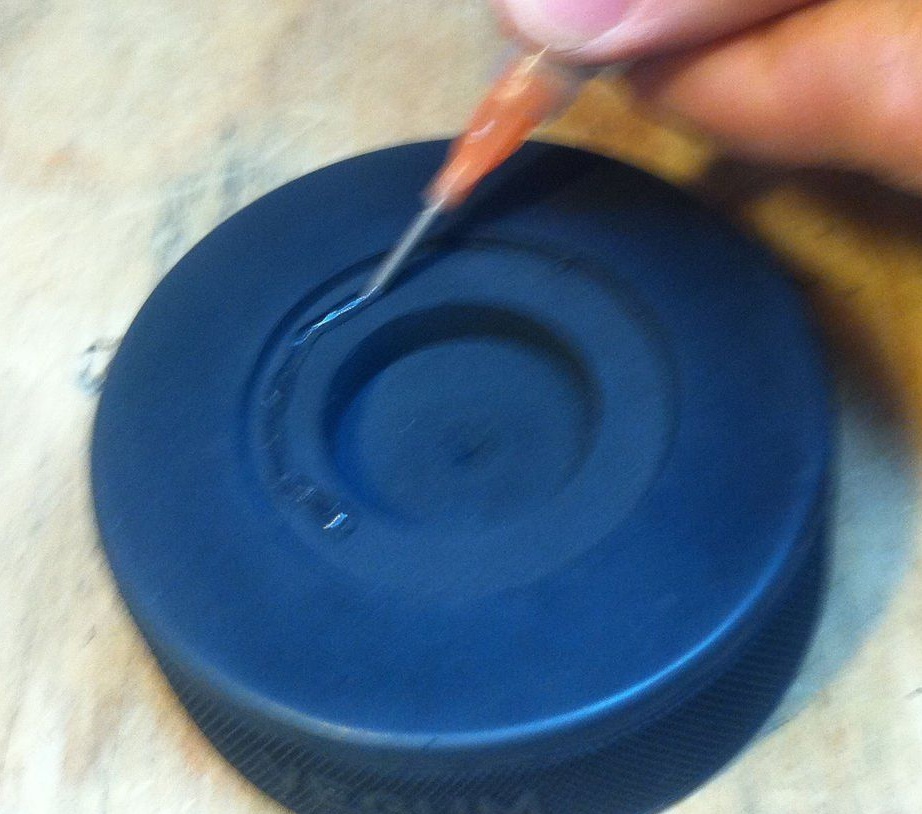
Then press everything with a press and leave for half an hour to set.
If part of the glue comes out, remove excess. Upon reaching the final drying of the glue, the opener can faithfully serve you, opening you a bottle of your favorite drink.
Good luck to everyone in the new homemade products.