
Each tree embodies the greatness of nature, and sometimes it’s sad that the next one comes time to turn into fuel for a stove or fireplace, without leaving a trace. Do you know such experiences?
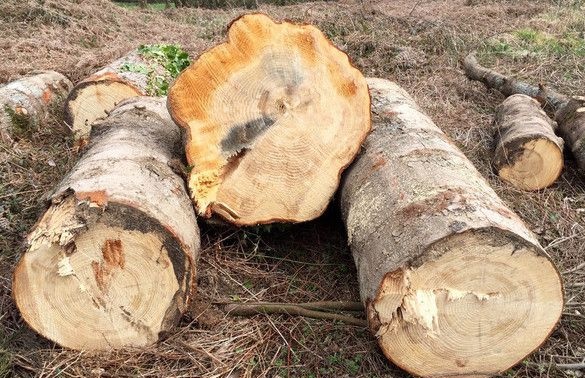
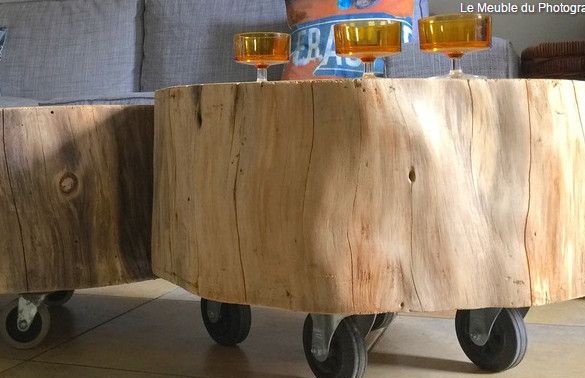
Surely in your farm or in the forest nearby lies a couple of logs from trees that fell in a storm or just had to be cut. They will always have time to go to the oven, but to do good service in the manufacture of a mobile coffee table for the living room is quite suitable.
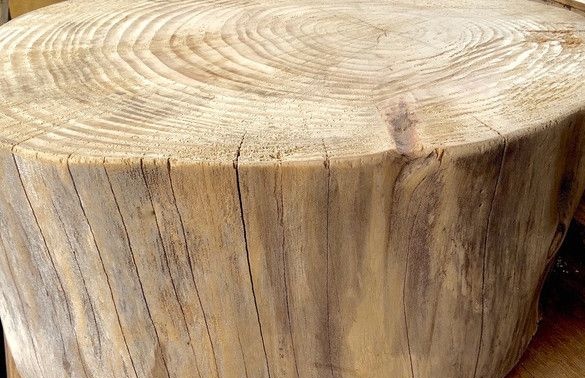
Only at first glance, a table from a stump might seem too extravagant to someone, but in fact it will easily fit into almost any interior and bring a bit of nature to your home.
Making it is easy, and the time spent will pay off with interest when you finish the job. The whole work process is reduced mainly to the processing of wood and the transformation of an ordinary stump into a complete blank for the base of a coffee table.
Please note that the log used to make the table must be thoroughly dried in the bark to prevent cracking of the wood during the operation of the finished of furniture. It takes at least a year to dry a tree of this diameter in the open air. Shelf life can be shortened by placing the workpiece in a warm and dry room with normal ventilation for the entire drying time.
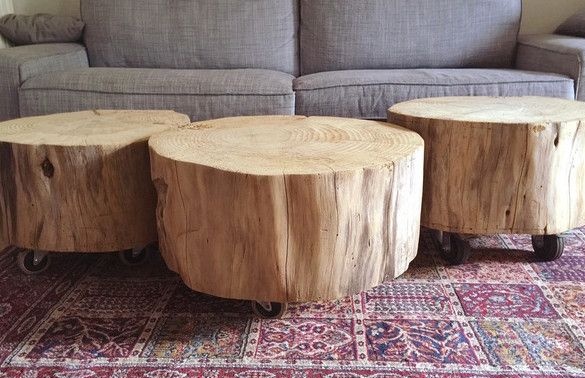
We will make three copies of the table at once, since this is now a very fashionable trend. All of them will be simultaneously similar, but at the same time different and so unique! In a word, we are full of enthusiasm and impatience and are ready to start work. If you managed to get a piece of pine or tree trunk of any other breed, do not hesitate and join us.
So, in order to make a mobile table on wheels from a pretty stump, you will need:
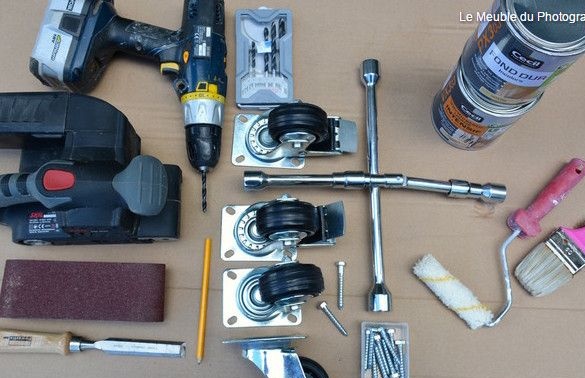
1. Materials:
- a piece of log with a diameter of about 60 cm and a length of about 30 cm (we prepared three blanks at once);
- wrench screws;
- four furniture wheels (two of them are equipped with a brake);
- primer on wood;
- varnish for wood, used for processing parquet.
2. Tools:
- tesla (chisel or joiner's knife);
- hammer;
- Sander;
- a wrench suitable in size to the hats of the screws;
- sandpaper of varying degrees of graininess;
- electric drill and drill for drilling holes for screws;
- pencil or marker;
- paint brushes.
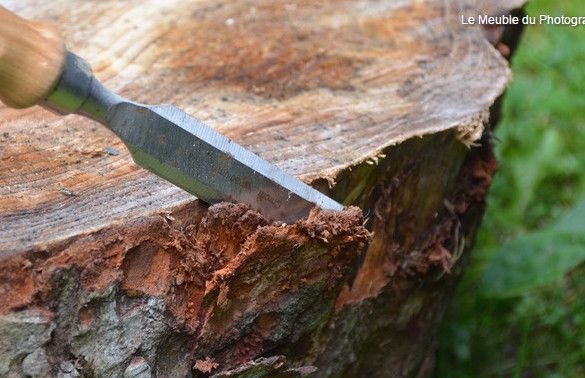
Step 1: removing bark from workpieces
Normally, after drying, the bark from the pre-harvested log is removed without problems. Of course, it all depends on the type of tree you have chosen. Sanding an oak or maple will be more difficult, but with a pine, for example, there should be no problems.
To get the workpiece, cut a part of the log 30 cm long from the middle, slightly departing from the edge. Carefully remove the bark from it, using one of the three tools that will be most suitable for your chosen tree species. We worked with pine, so the chisel and carpentry knife turned out to be quite enough.
Start sanding from the outer zone, within which the coarse primary layer of bark is located. Use a chisel and hammer to do this. Then grab a knife and move on to a more elastic and softer secondary layer.
Step 2: grinding
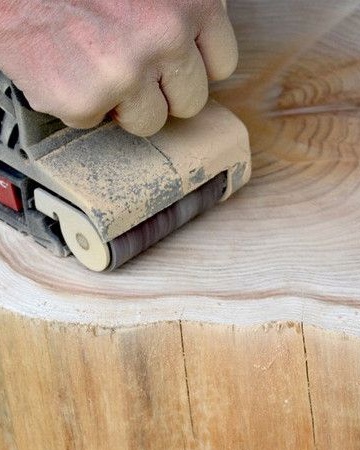
After sanding, the workpiece is still very far from ideal. On its surface there are many irregularities that should be removed during the grinding process.
In fact, you could have polished the tree manually, but it will take a lot of time. Therefore, it will be better to use a grinder.
Start by using large sandpaper to remove the most significant flaws, then move on to a smaller sandpaper. Finish sanding with fine emery paper until you get a smooth surface that feels good to the touch.
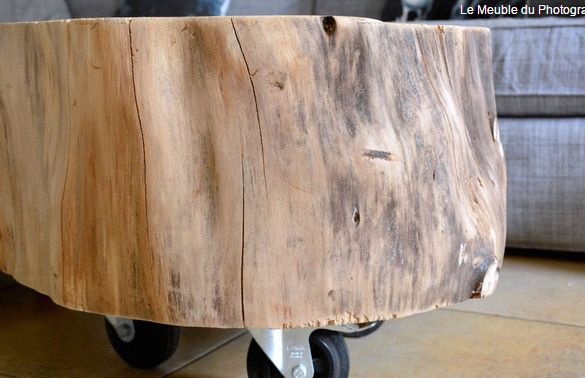
For the top of the countertop, select the side of the workpiece that is most interesting in texture and color and pay special attention to it during processing.
Clean the workpiece from dust and sawdust, wash with water and leave to dry for a while.
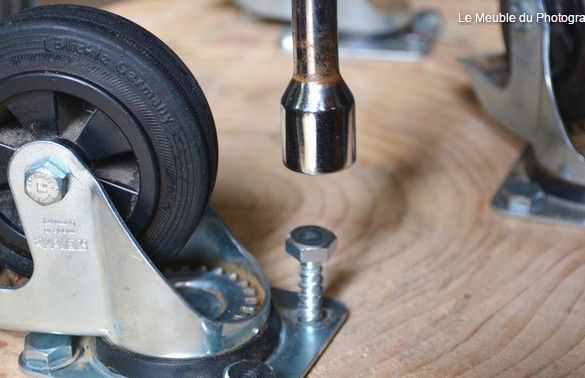
Step 3: marking and drilling holes for screws
We will mark out the places of attachment of furniture wheels to the countertop. Turn it upside down, attach the wheels alternately so that they do not extend beyond the boundaries of the countertop, and use a marker or pencil to mark the places for drilling holes for screws. Keep in mind that the wheel rotates around its own axis and can somewhat change its location in the process of moving from place to place.
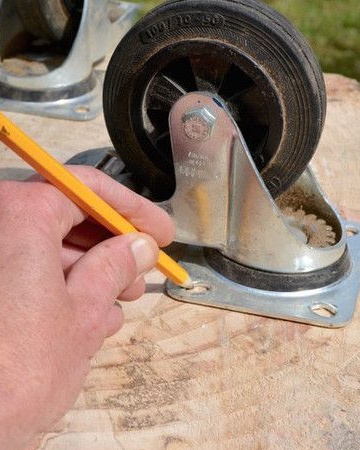
Use an electric drill to drill holes for the screws.

Step 4: fasteners for furniture wheels
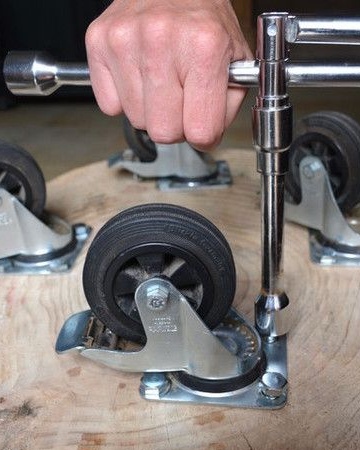
The holes are ready and you can proceed to screw the wheels. Use a suitable wrench for this. Screw in all the screws at the same time and gradually so that the mount does not move.
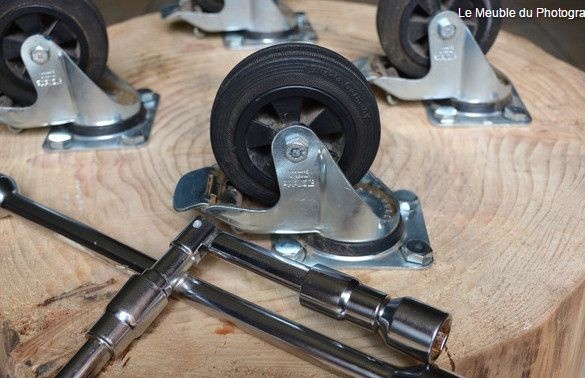
Choose wheels with rubberized elements, as they properly take care of the safety of your floor.
Please note that the shape of the workpiece is incorrect and after mounting the wheels it may turn out that the whole structure is unstable. In this case, you will have to unwind the mounts and change the location of the wheels until you find the optimal one. In fact, if you're out of luck, it can take quite a while.
To avoid such inconvenience, you can use another method. Pre-attach the wheels in the desired position on the screws. Test the design for stability and if everything is in order, unscrew the screws and only then drill holes for the screws.
Please note that the weight of the table is quite solid, and the fasteners using screws are not as reliable as we would like. Therefore, during testing, handle the table carefully.
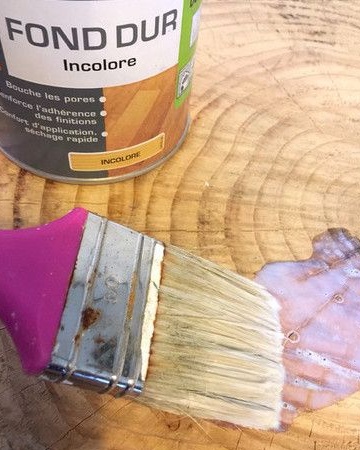
Step 5: Primer
The table is almost ready and the finishing touches remain.
Since we will use parquet varnish, the surface must be prepared. Primer it with a regular paint brush to fill all the bumps and pores of the wood. Thus, you will slightly reduce the consumption of expensive material and increase the adhesion of the surface of the tree with varnish.
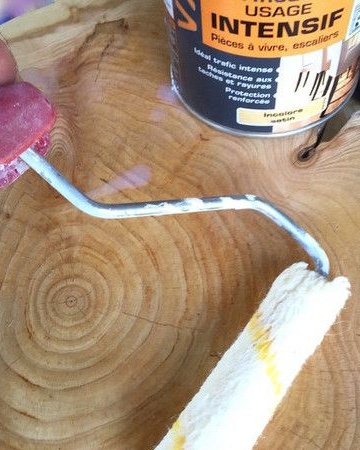
Step 6: varnishing
We will varnish the surface of the table in several stages. First, apply the varnish with a brush, picking it up a little so that there are no smudges. Allow the coating to dry and sand with fine-grained emery paper to form micro-scratches on the wood surface.
Apply a second coat and leave to dry again. Thus process the table three times. It is not necessary to grind the last coat of varnish.
For processing the upper flat part, you can use a small roller. So you will achieve the most uniform application of varnish.
We recommend using matte varnish to achieve an exquisite, but as natural look as possible, however, choosing the type of varnish is a matter of personal preference.
Step 7: Dry
Leave the table for a while for final drying. It is best carried out in a warm and dry room with good ventilation. But if this is not the case, you can dry the table right on the street, choosing for this a dry and clean place, sheltered from strong gusts of wind that can bring dust particles with it.
In order to make a table of this type fit into the separate interior as much as possible, it is sometimes partially painted: the side parts are painted or vice versa - the countertop, leaving the sides intact. We did not experiment yet and left everything as it is.
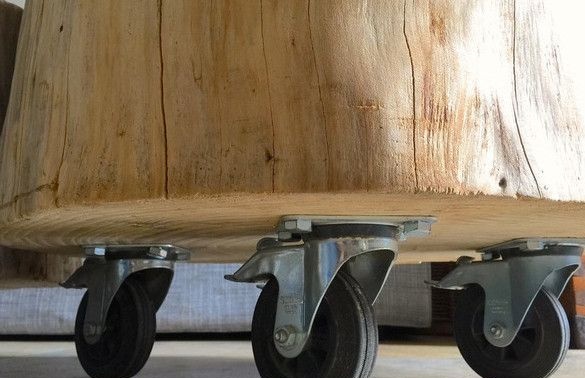
The mobile table from the stump is ready!