
Elena Savchenko, a practicing interior designer, shared a workshop with us, where she explained in detail and clearly how to decorate a wall do it yourselfwithout resorting to buying expensive mixtures for textured plaster, as well as profile tools that are usually used.
Looking ahead of impatience, we can only say that the described technique of decorating walls will be mastered by every more or less creative person, who would catch up on a similar idea and was inspired by the work of Elena.
The very same Elena Savchenko told us a secret that often her experiments in the field of interior design of premises provoke comments from professionals like "they don’t do this." However, this does not bother her at all and, as usual, she enthusiastically takes up a new risky project. Elena claims that when the next of them succeeds, the intractable builders are much more supportive, and from them you can often hear words of approval and admiration for the deeds.
The process of decorating the wall, which we will talk about today, suffered the same fate and all the same, upon its completion, everyone was extremely pleased with the result.
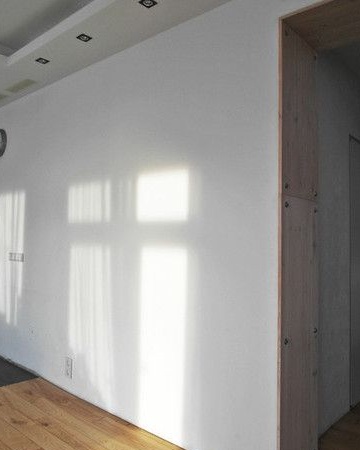
But the whole story began a little earlier, in the house of Elena herself, who every time turns out to be an excellent testing ground for a practicing designer. The white wall in the middle of the apartment seemed an unwritten canvas, and many ideas arose about how to decorate it better ...
The solution came to fit the general interior - soft, smooth and calm: to perform a volumetric pattern on the wall, like those that are usually done using expensive compositions of decorative plasters, but use simple and easily accessible materials. You can find them in any, even very provincial hardware store.
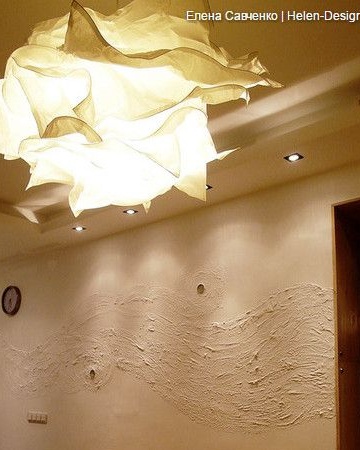
Before we begin, it should be added that the sculptural pattern will be appropriate mainly in plain interiors, where the emphasis in design is not on colors, but rather on the shapes of the elements and their texture. At the same time, the contour lighting on the ceiling, as well as the upper spot lighting favorably emphasizes the volume of the sculptural pattern due to the formation of shadows from the lamps.
If the picture on the wall has a continuation in the elements of decor, as in our case with a chandelier, it’s wonderful.There is nothing to dream about the best conditions! Feel free to proceed with the implementation of your plan - do DIY wall decorwithout the involvement of specialists!
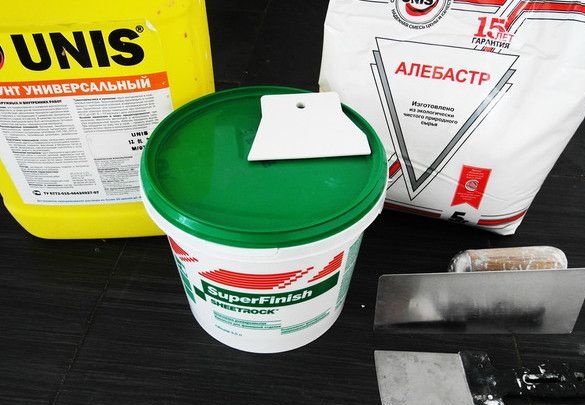
For work you will need:
1. Materials:
- primer for walls (deep penetration);
- Alabaster (gypsum without additives of white color);
- finishing putty Sheetrock;
- white color acrylic paint;
- a pair of decorative glass pebbles from a flower shop;
2. Tools:
- trowel (trowel for plaster);
- spatulas of suitable size;
- paint roller and brushes;
- a pencil;
- working protective gloves.
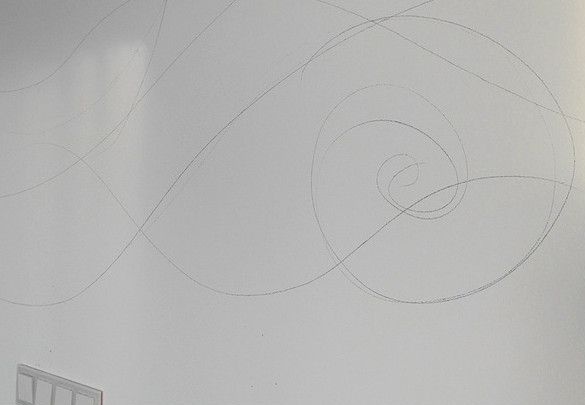
Step 1: draw a picture on the wall
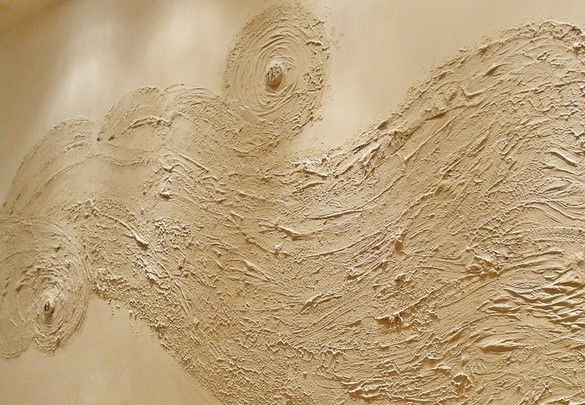
It all started with an idea: Elena sought to portray a gust of wind on the wall. As elusive as the final drawing itself - ghostly, devoid of color and clear outlines. The spirit of the wind was conceived to convey using volume, the use of different materials and giving them the necessary texture.
Of course, the drawing was made in any form without preliminary sketches.
Find your own idea and draw it on the wall with a pencil. Do not use a marker for this. Although plaster should ultimately hide your sketch completely, in the case of a marker this will be somewhat more complicated.
Step 2: prime the wall
Use deep penetration primer. It glues dust particles on the surface of the wall and promotes better adhesion of gypsum. If the walls are clean and have not previously been subjected to any decoration, priming them is not necessary.
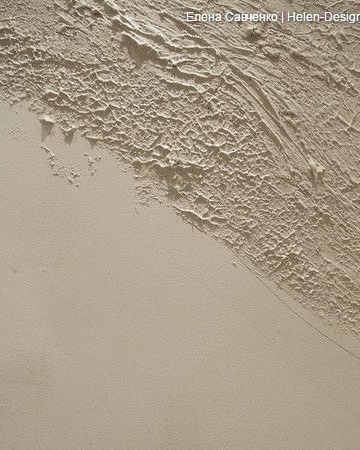
Step 3: apply the plaster and give it the original shape
Prepare a mass of alabaster of such a consistency that it is dense enough, but at the same time plastic. The plaster should be easy to apply, firmly adhere to the surface of the wall, but it is also easy to correct so that you can give the drawing the desired shape.
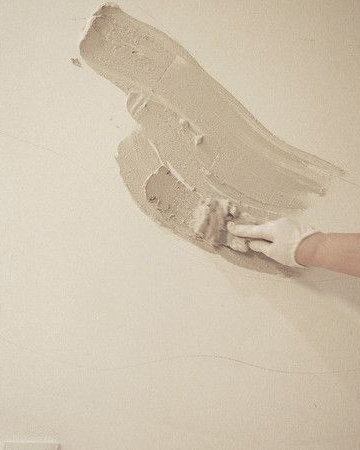
The thickness of the layer does not exceed 1 - 1.5 cm.
At this stage, your task is to apply the required amount of material, add a picture of the volume and select it on the wall surface properly. Plaster must be applied on the lines that you have previously determined.
While working on the main details of the drawing, work not only with a spatula, but also with your hands.
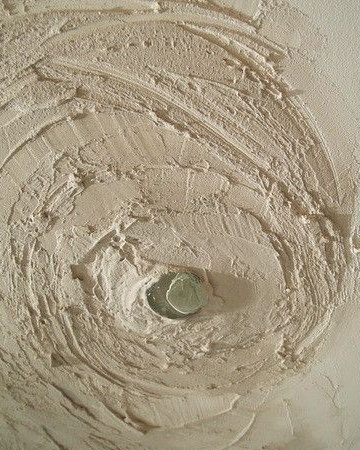
In each of the twists, place one decorative stone and secure it with plaster.
If you feel that the foundation is ready, proceed to the next step.
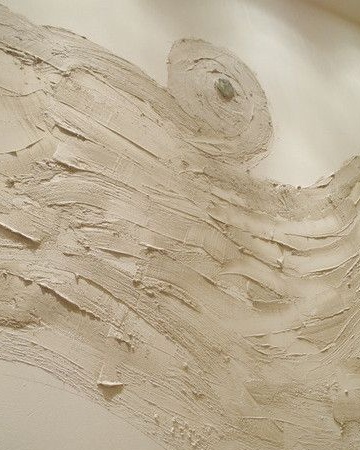
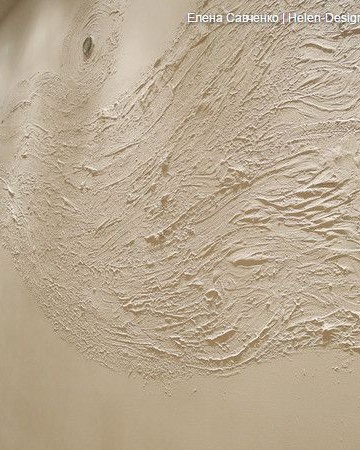
Step 4: working out small details
To create a finishing, more textured layer, use putty. We took Sheetrock putty, but any other mixture is suitable for decorative plastering, just to achieve the volume you intended.
Do not forget about texture. Separate zones should differ from each other primarily by texture, since we have abandoned the use of bright colors.
When creating voluminous decorative drawings using stucco mixtures, the masters use the most incredible tools and each of them has a couple of secret tricks on this subject.
The meaning of the decoration at this stage is to arrange fancy prints that will bring a hint of completeness to our picture and combine all its elements into a single composition.
Elena told us that she made a small net, which is clearly visible in the photo, a trowel, pressing it to the gypsum mass and sharply tearing it off the wall.
You can use a crumpled plastic bag or cardboard, a kitchen sponge and a host of other tools that seem appropriate to you.
If you are afraid to spoil the drawing, prepare a small amount of putty, put it on a sheet of drywall or any other suitable material and try here all the tools available to you, comparing the result.
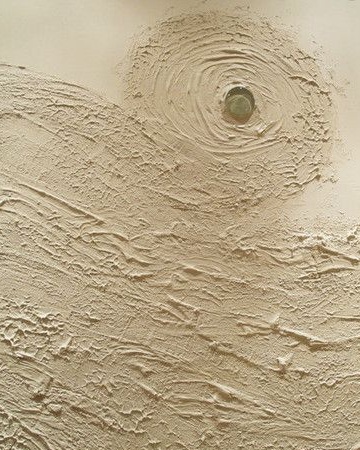
Step 5: color the drawing
Paint your drawing with acrylic paint.First, work through the brush with all the textured elements, then once again go through the decor, but this time with a paint roller.
3D drawing on the wall is ready and you just have to wipe the glass pebbles and clean them of the remnants of gypsum.
Despite the fact that the author used one color in her work, you can achieve additional volume by using two shades of the same color at once: light and darker. However, the second color should only be a little darker - one, a maximum of two tones.
In this case, it could be snow-white white and warm white of a milky hue or any other light tone that would be in harmony with your interior.
The meaning of the reception with two shades is that first you brush with a darker tone immediately on the whole picture. And after the first layer has dried, apply a light tone, but already with a roller, trying to ensure that its surface is stained only with three-dimensional elements.
Sometimes, in order to achieve the desired effect, two tones are interchanged.