
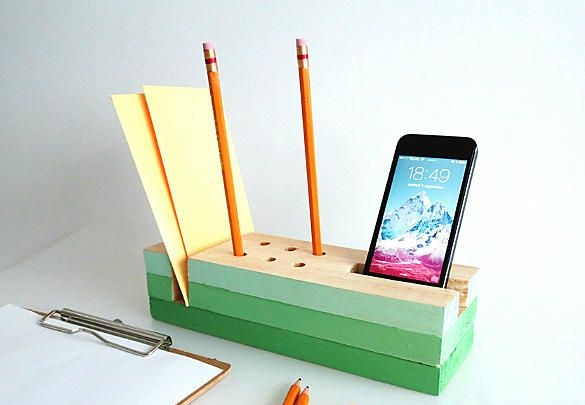
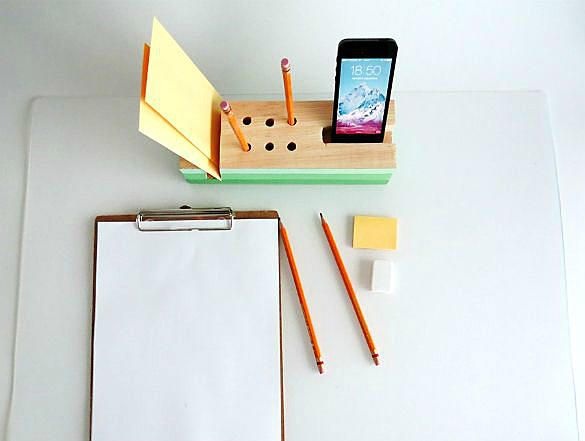
Hello to all lovers homemade, sit comfortably, as it will be interesting. As everyone knows, the order on the desktop is the key to a successful business, and also shows the person’s attitude to accustomed systematic care. In order to maintain their workplace clean and tidy, organizers will help here, able to accommodate all the small things while maintaining convenience. At the moment, the goods market is ready to offer a large number of different varieties both in appearance and functionality, but is there any point in acquiring them if you have some initial skills in working with wood, and if you did not miss labor lessons at school, then all It will be easy and simple. Often, purchased caskets contain a large number of unnecessary sections that no one ever uses, and you will not often find an organizer that provides a compartment for the phone. And now let's get down to business.
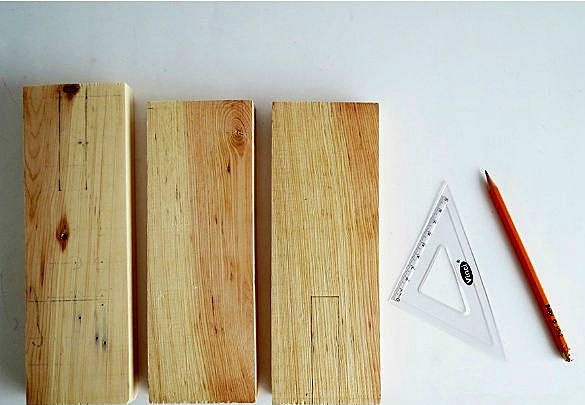
In order to start the assembly, the author indicates the necessary materials:
* Three square-shaped beams with a thickness of at least two cm. Try to find such beams so that two of them are the same in length, and the third is 1 cm longer than them.
* Paint for wooden surfaces in three different colors.
* Sandpaper.
* Paint brush.
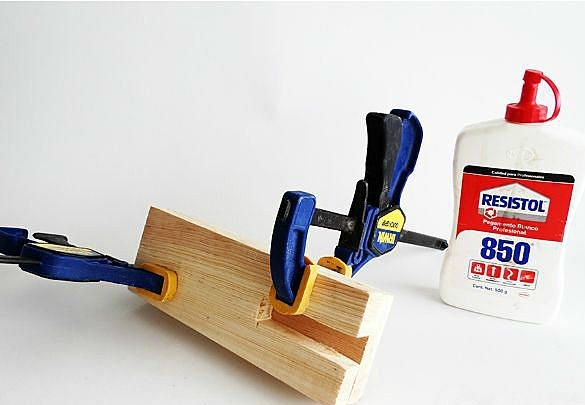
* Tools: chisel, hammer, wood saw, electric drill, vise, wood glue or parquet.
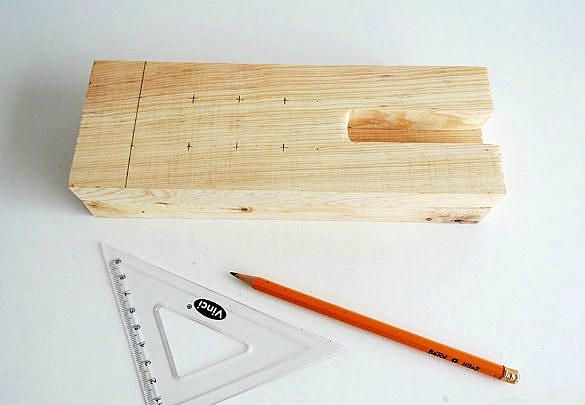
* Drawing accessories: pencil, ruler.
All the materials that are needed for assembly are now directly transferred to the manufacturing process.
Step one.
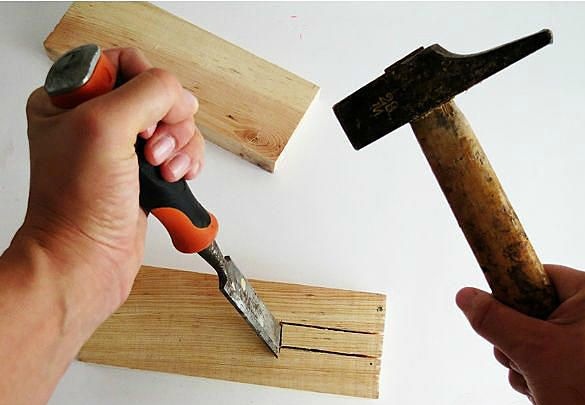
First you need to decide on the appearance, I think that each of you has a sense of taste and design ideas, and this will help in finding certainty what exactly you want to store in your organizer, as well as in what sequence and arrangement. At this stage, you need to make a recess for the phone, paper and pen holes. To do this, draw a slot for your phone on one of two identical bars, if the phone is 7mm thick, make at least a slot of 9-10mm, and use a ruler and a pencil for rough marking. The hole can be cut with a hammer, while wielding with a chisel so as to remove along a thin layer of a wooden block. What is it for? So as not to remove a large amount of excess material, in which case a curved frame with bevels may appear or the remaining part will be too thin, which will reduce the strength properties of the workpiece. Therefore, with the greatest accuracy, cut a hole, use a small weight of the hammer, so achieving accuracy will be easier.
Step Two
The finished place made in the previous step must be sanded, in order to reduce surface roughness, do not miss this item if you do not want to sacrifice your phone, since this was previously the goal of protecting the phone from scratches on the case, because, often the materials of the cases are not hard enough and easily undergo deformation.
Step Three
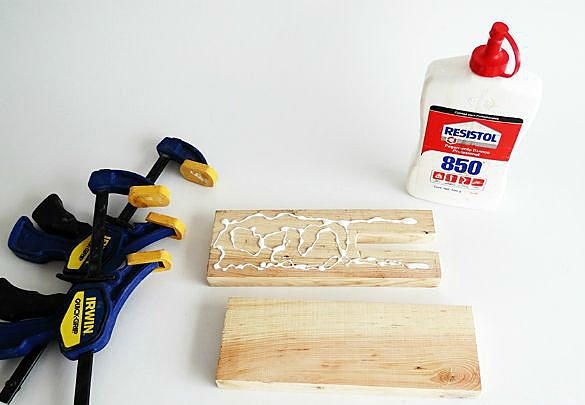
With the help of wood glue, you need to glue two identical boards, if their ends are not quite even, then we align them with sandpaper, fixed on a flat beam. After that, the two boards missed on both sides need to be fixed in a vice, clamps will also work, which in principle will be even more convenient. For complete drying, leave the parts to be glued for a long time, you can wait an hour, which will be enough for the next treatment.
Step Four
At the end of the drying of the glue joint of the workpiece, using a simple pencil, we mark the locations of future holes, where then it will be possible to place pencils, pens, and also draw the dimensions of the paper recess.
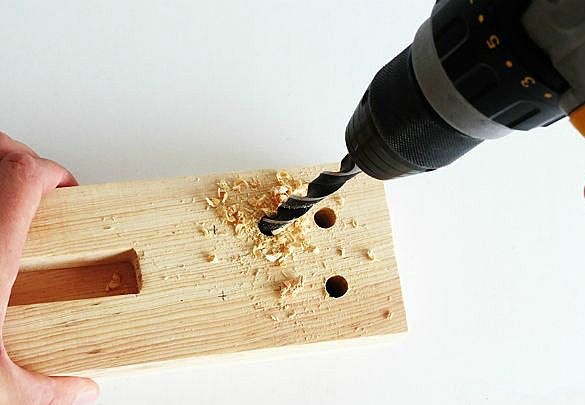
Armed with an electric drill, we drill through holes in those places that we had previously outlined. When working with a drill, observe safety precautions, and also be careful that you need to work with this tool in safety glasses that save particles of material from getting in.
After drilling, we saw off a piece of the bar along the intended line using a wood hacksaw.
Step Five
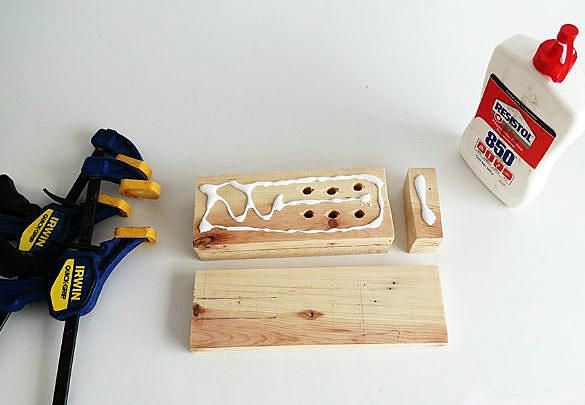
We pick up the third block, which is 1 cm longer than the previous ones, and glue the newly made part to it all the same wood glue. Before completely fixing the workpieces, be sure to attach the parts evenly, their edges should coincide on one side. Glue the sawed-off part from the other edge, and as a result we will be a ready-made hole for placing paper. After making sure that the sides are in full compliance, fix the product with a vice as well as the last time until it completely dries, which is about the full extent of daylight hours.
Step Six
What kind of organizer will it be if it is not painted? It is true, unpresentable and nondescript, to solve this problem is easy enough if you have at least some idea of beauty. Therefore, we use the simplest, most convenient, as well as the budget way - to paint it with gouache paint. In this case, the author considered that a gradient transition would look beautiful.
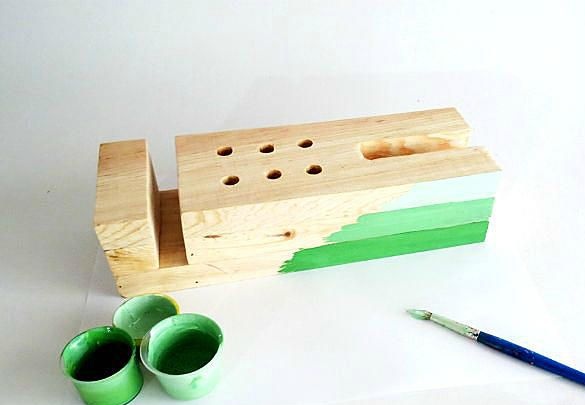
As a result of such painting, a smooth transition from green to light green is obtained. If the idea does not fit your preferences, then turn on the imagination and come up with a variety of images, playing colors of colors. After that, let the product dry, after which you can use it with your homemade organizer, admiring the result of your efforts.
Thanks to all.