A new life of old things is still a direction that does not lose its relevance in all areas that, one way or another, affect the process of housing construction. Starting out needlework and ending with a thorough construction work. It is not alien to the interior design of the premises, in the framework of which we often face the need to restore the old furniture.
All things sooner or later turn out to be unclaimed and live out their lives in the attic or in the garage. It’s a pity to throw them away, because everything is intact and done firmly, but the appearance often leaves much to be desired and, well, does not fit into the surrounding space.
The direction of fashion in the world of interior designers is changing with the advent of each new season. Agree that it would be at least strange and wasteful to send furniture to a landfill just to stay on the wave of fashion trends.
Against this background, it will not be amiss to acquire knowledge and skills in the restoration and updating of furniture elements, using inexpensive, readily available materials and techniques to breathe new life into old things.
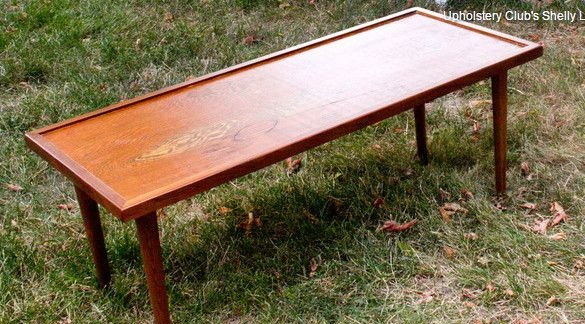
Shelley Lear, the author of the master class, used an old coffee table, as well as fabric and a piece of foam rubber left over from previous works to create a soft bench. And in general, she is deeply convinced that it is from old things that the most interesting and truly original household items can be made, where furniture is not an exception, but rather a key object for experiments.
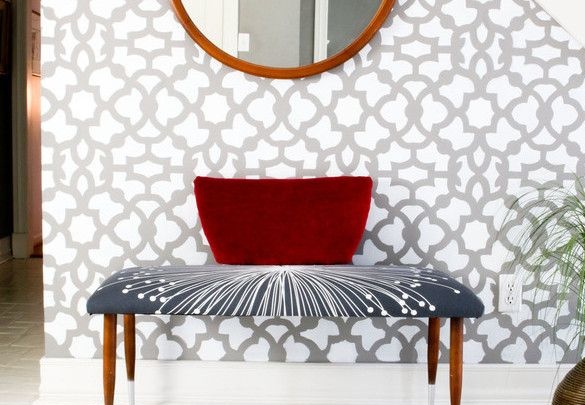
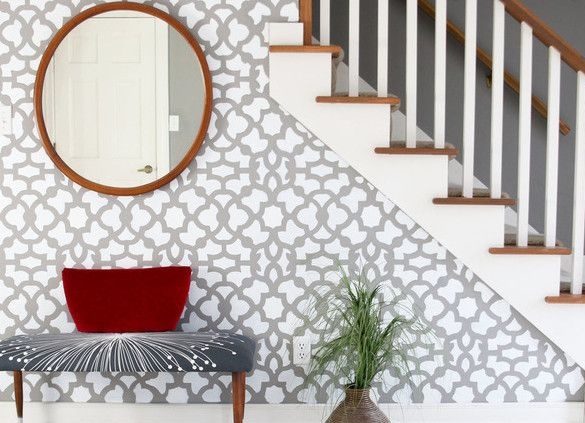
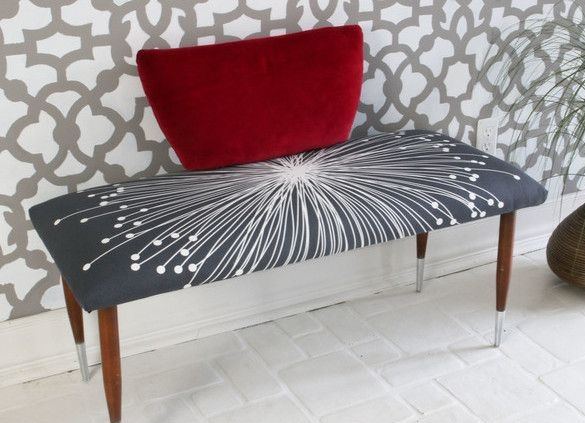
For Shelley, the bench cost a ridiculous amount, but she coped with her task with a bang and fit perfectly into the interior of the hallway. The composition was complemented by a bright and contrasting velor pillow.
For, to convert a coffee table into a soft bench for the hallway, you will need:
1. Materials:
- a sturdy table made of plywood or any similar material that can support the weight of an adult;
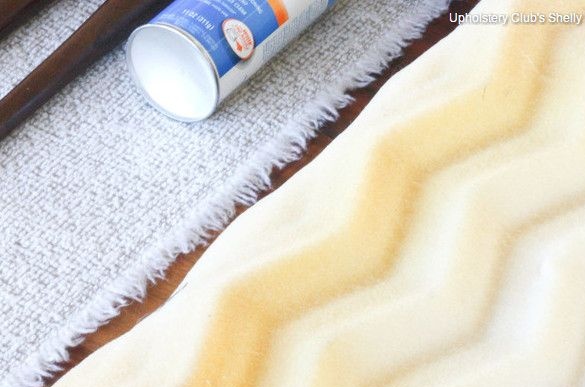
- furniture foam 40 - 50 mm. thick;
- thin foam rubber or batting as the top layer of the filler;
- glue in the form of an aerosol (preferably glue for the production of upholstered furniture, which is used for gluing foam rubber and textile materials);
- Upholstery fabric (furniture or just dense and durable fabric);
- fabric for the back of the bench;
- white paint for decorating wooden legs.
2. Tools:
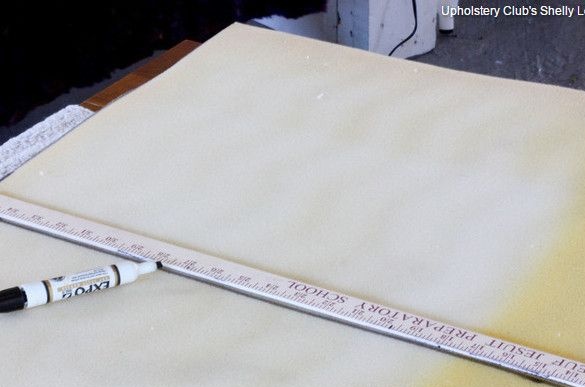
- ruler, construction tape measure or tailor meter;
- a marker or pencil for marking parts;
- scissors;
- furniture stapler;
- a screwdriver and pliers to remove the brackets during operation;
- paint brush;
- sandpaper of different grain size.
Step 1: preparing the foundation
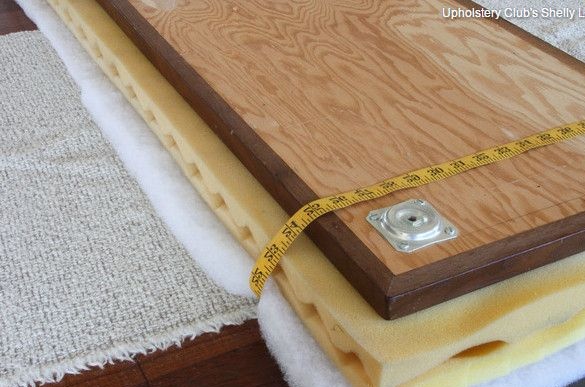
It all starts with choosing the base for the bench. In this case, the choice fell on the old coffee table, which received its second chance in life.
In principle, he carries out the supporting structure and only his knives will be visible in the finished product. You can grind them and paint them in any suitable color, you can leave them untouched - it all depends on personal preferences.
Shelley left the legs unprocessed at the base, thereby emphasizing the age of the material, and at the bottom painted them in snow-white white to add elegance to the product and fit it into the surrounding space in an advantageous way.
In any case, first you need to carefully inspect the table for damage and breakdowns. We are not interested in cosmetic defects today, but defects that affect the strength of the structure will have to be eliminated. If necessary, change the legs attachment or fix the countertop with screws. In a word, add a little table of strength if you feel that time has taken its toll.
If the legs are removable, disconnect them from the countertop and grind the paint area - first with large sandpaper to remove a layer of old paint or varnish, and then fine to prepare the surface for applying a fresh coat of paint.
Let the legs dry.
The base is ready and you can begin reincarnation.
Step 2: Upholstery
According to the dimensions of the base of the future bench, mark and cut a piece of foam rubber of a suitable shape, adding a couple of centimeters on each side. Shelley used scissors for this, and if necessary you can use a sharp knife and a ruler.

If you could not find a foam rubber of suitable thickness, use two layers at once, gluing them together with furniture glue.
The foam base must be glued to the surface of the bench so that it does not move and is less deformed during operation.
To do this, apply the adhesive spray in an even layer, making sure that it does not fall on the legs, and attach a piece of foam. It usually takes a few minutes to set the glue, and soon you can continue to work.

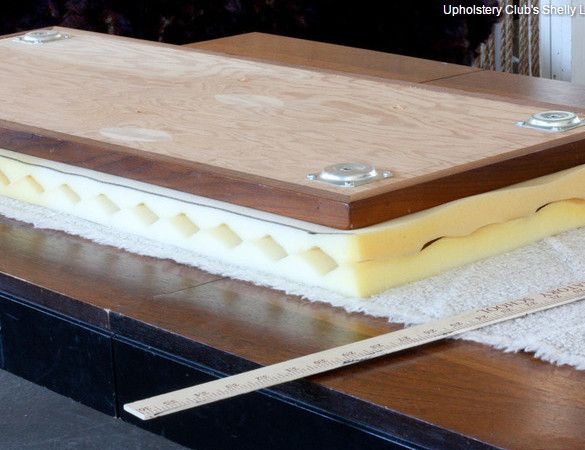
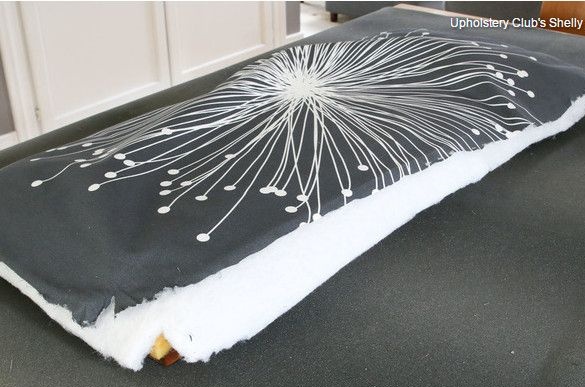
Start preparing the second layer. Mark and cut from thin foam or batting a part with allowances on the sides of a soft base. Apply a layer of glue to the foam and stick the resulting part in the same way as in the first case. Leave it to dry for half an hour, and in the meantime prepare the textiles.
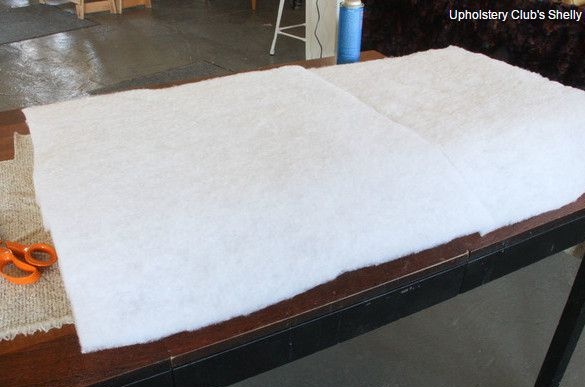
Attach the fabric to the base of the future bench and figure out how much you need. Do not forget to add a little to the allowances for fixing the material on the back of the seat. At Shelley, they turned out to be minimally acceptable, since she used the already existing piece of fabric. You can leave a little more so that it is convenient to attach the material with brackets.
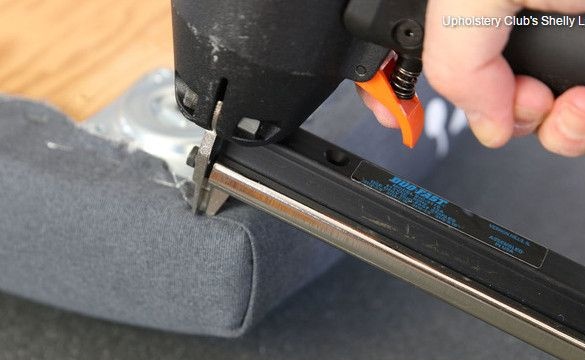
Spread the fabric evenly from the center to the edges and start fastening from the back as shown in the photo. A professional pneumatic furniture stapler in this case is not necessary at all, since its benefits will not be reflected in the final result. It is usually used by professionals in the furniture industry to facilitate work and in order to speed up the process.

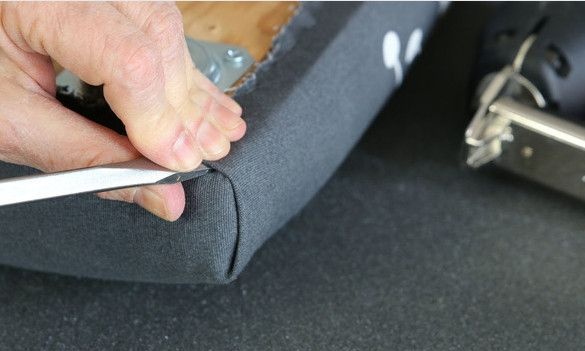
If you notice that the fabric is lying unevenly, remove several staples with pliers, gently prying them with a screwdriver, and make any necessary corrections.
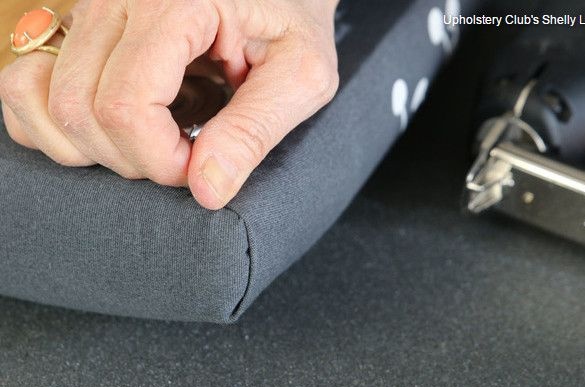
When you are satisfied with the result, fasten the fabric with a continuous row of staples, leaving the corners untreated 10 cm on each side.
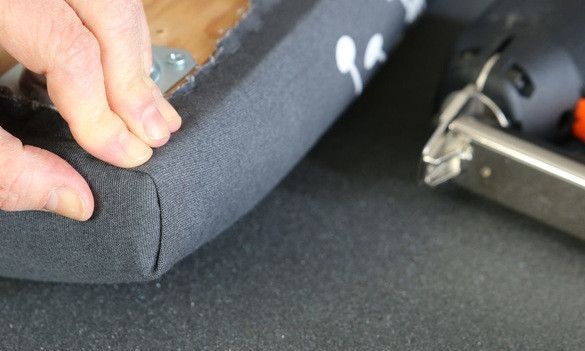
Lay the corners as shown in the photo using a flat-blade screwdriver or any other suitable tool to smooth the fabric. This is the most critical area, since poorly crafted corners can ruin all the work. Therefore, be patient and do not rush until you get neat, tight corners, similar to one another. Lock the fabric on the back and proceed to the final step.
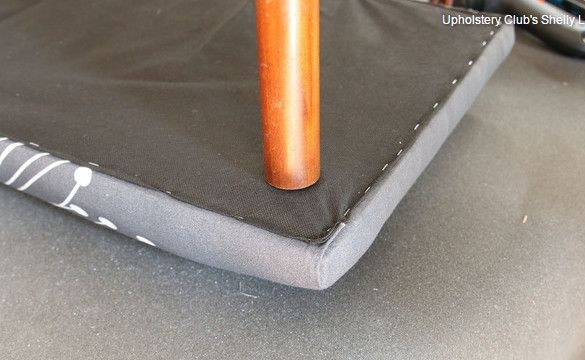
Step 3: processing the opposite side of the seat
Now it’s the turn of the opposite side of the bench, where you need to hide all the technical nuances under a neat layer of fabric in store for this occasion.
Measure how much you need it and, as in previous cases, add a little to the allowances. Mark and cut the part with scissors.
Turn the edges so that this technical element, after you fix it in place, is not visible from the front of the product. For convenience, you can iron the allowances using an iron. So they will keep their shape and you will not have to measure each time by eye how much fabric you need to bend before fixing it with a stapler.
Attach the fabric to the back of the seat also with staples.
Make small holes for the legs and screw them into place.
Padded bench ready, and now is the time to test it for strength and stability.
Needless to say, the work was done brilliantly. Notice how well Shelley picked up the materials and how organically her bench fit into the hallway space! We wish you a similarly successful outcome to you, our dear readers and regular subscribers, and we have no doubt for a second that you will succeed.