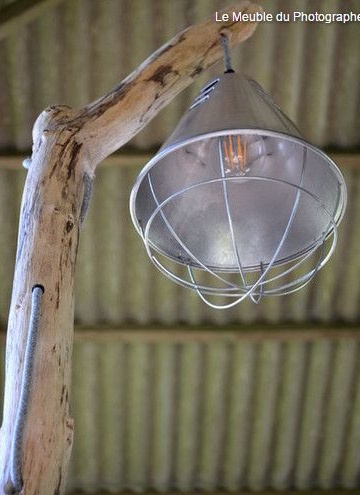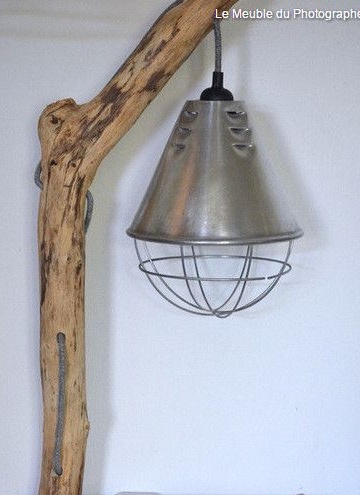
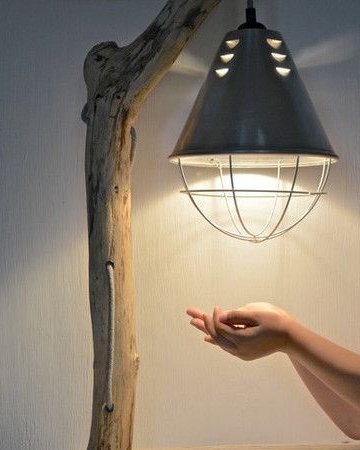
The interior design of the house where the author of this master class Anna-Laura lives with her family is made in an industrial style. But the lamp turned out to be a little fusion, with elements of industrial and country styles, since it is never superfluous to add such a strict style with straight lines and laconic color schemes a little natural simplicity.
The process of creating a lamp is extremely easy and does not take much time, partly because Anna Laura took a ready-made lampshade from an old infrared lamp. These are used by farmers to heat small piglets and birds. But since in Western countries the fashion for them has practically passed and was supplanted by the widespread use of more advanced technologies for heating household premises where animals are kept, the lamps are no longer in use. However, finding them lying around idle still will not be difficult.
In domestic countries, such plafonds can be bought at pet stores or on the market with utility ranks. But in the second case, the lampshade will be slightly smaller, since the shades of precisely such dimensions are used in the manufacture of a portable extension cord with an incandescent lamp. This time they have nothing to do with farmers or animals.
The lamp turned out with a suspended ceiling due to the successful shape of a stained stick, which was found on the beach. And, in my opinion, this is how the lamp looks much more attractive and interesting. We must give it its due, because nature itself prompted us the idea of a future product. And in general, led to the thought of its creation.
So read about how to make an industrial style table lamp from an old infrared lamp and a pair of stained sticks.
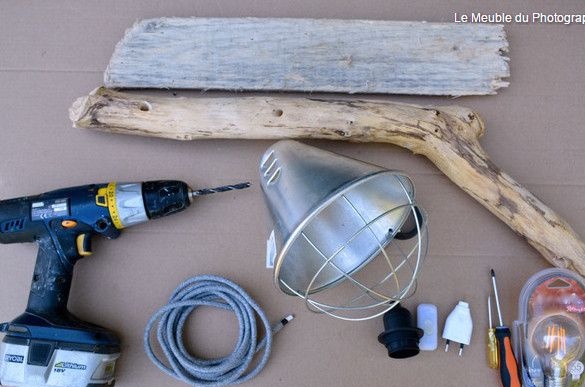
For work you will need:
1. Materials:
- a metal lampshade from an old infrared lamp;
- stained stick of suitable diameter, better curved or with a knot;
- stained plank-base of the future lamp;
- An electric wire in a textile braid of neutral shades, preferably plain without a pattern (with two or three wires) - from 2 meters or more;
- cartridge;
- plug;
- switch.
2. Tools:
- screwdriver;
- electric drill;
- nippers or pliers;
- a knife to free the wire from insulation when connecting accessories;
- a screwdriver.
If all materials and tools are collected, feel free to get started.
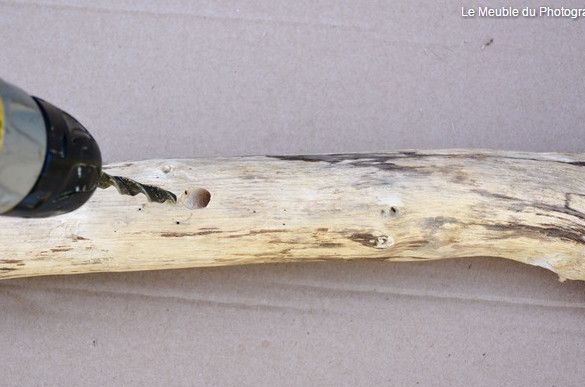
Step 1: drill holes for the electric wire
To do this, use an electric drill and drill, which slightly exceeds the diameter of the wire. Anna-Laura used a 6 mm thick wire in the process. This means that in order for the cord to pass freely through the holes in the stick, you need an 8 mm wood drill.
Drill through the holes every 8 to 12 cm.
About a meter of wire will go to the base of the lamp and only half of it will make up the part by which it can reach the outlet. Therefore, make the necessary calculations and plan to purchase a longer length of wire if you do not have a working cable a meter long.
Thread the wire through the holes.
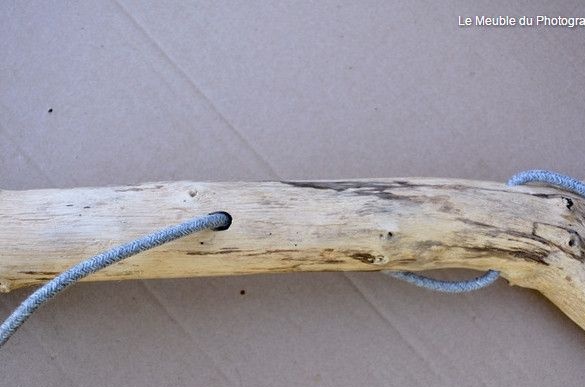
For our purposes, select a two-wire or three-wire cable for outlets in which grounding is provided. In this master class, a plain wire in a textile braid very successfully fit into the overall composition, so you can safely take it as a sample when buying.
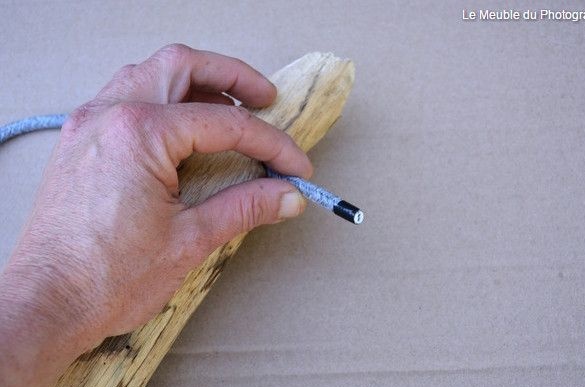
Since the ceiling will hang freely on the branch, you need to leave 8 - 10 cm of wire at its upper end with a margin for connecting a cartridge to it. An increase of 2 cm will be quite enough if you have already attached the cartridge earlier and are sure that you will not have to redo the work. If you do not have such an experience, and you doubt your skills a bit, leave a larger supply of wire.
Step 2: connecting the hardware
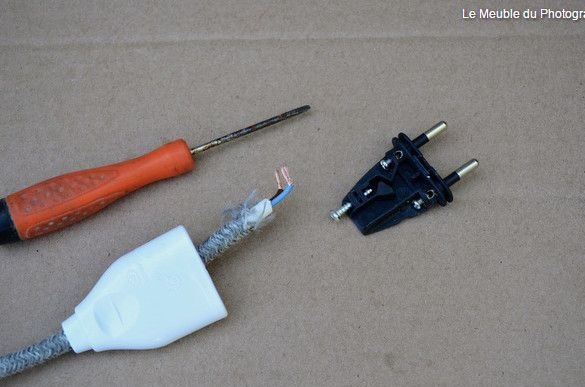
To expose the wires for connecting the cartridge, remove all insulation from the cable for a length of 2-3 cm. Use a knife for this, as pliers or wire cutters can damage the wires without having the appropriate skill.
Disassemble the cartridge and attach the wires to the contacts, carefully locking them with screws. Assemble the cartridge in the same order.
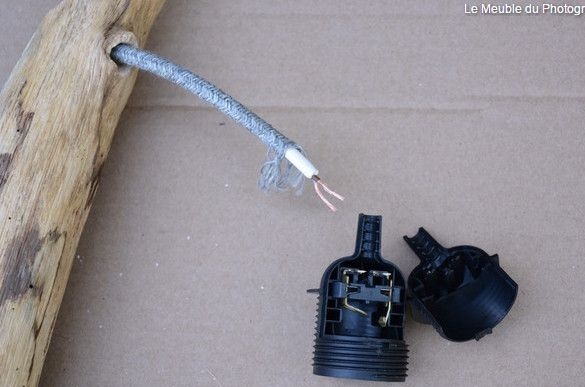
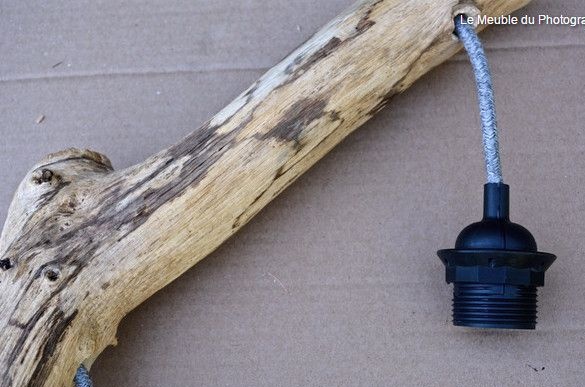
Before connecting the wires, do not forget to put a lampshade on them, otherwise everything will have to be redone. Twist everything together by placing the cartridge inside the lampshade.
In a familiar scenario, release the wires from the insulation on the back of the cable.
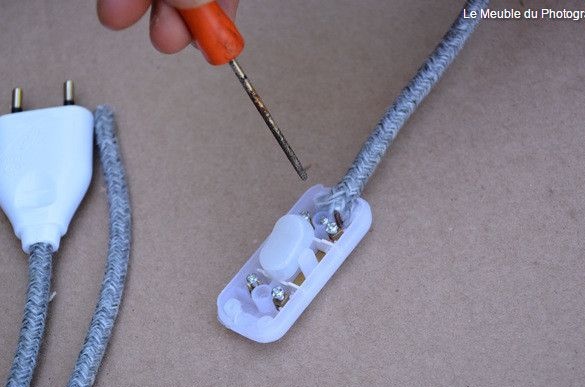
Disassemble the plug and, as in the case of the cartridge, connect the wires to the contacts. Connect both parts of the plug and securely fasten with a screw.
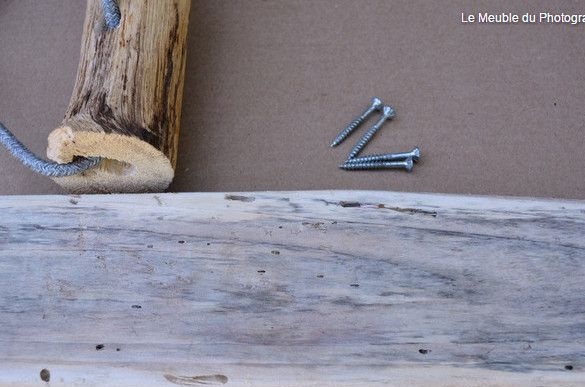
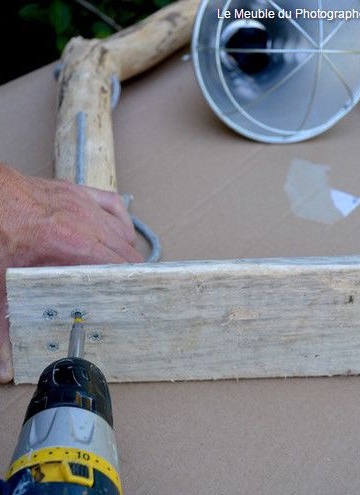
Step 3: making the base
The material for the base on which the lamp will stand, choose a flat and stable. For these purposes, Anna Laura took a tablet thrown to the sea by the waves during the surf. It is slightly different in color, but if it bothers you, you can choose a more suitable material if you wish.
At the base of the stick, where it is attached to the plank, you need to make two adjacent holes with a drill: through the first wire you will go out to connect the lamp to the outlet, and through the second you will pass it through the branch into the first hole.
Place the wire at the base in the working position and holding the branch with one hand so that it does not move to the side, with the other, grab it with a self-tapping screw, fixing it in the correct position. Screw a few more screws from the back of the base.
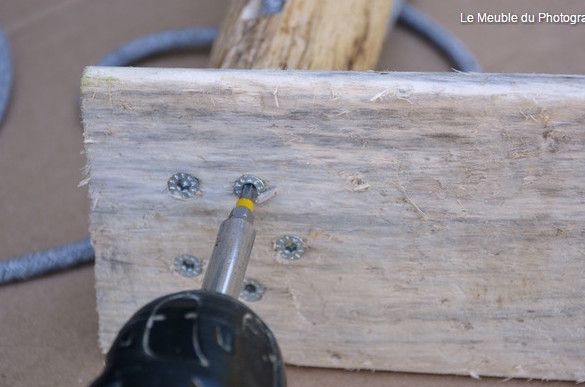
In the work we used soft, slightly rotten wood. And only for this reason it did not split after screwing five screws into the same zone. If you are not sure about the strength of the selected material, pre-drill small holes for self-tapping screws, thereby protecting the wood from cracking.
Step 4: installing the switch
One plug to turn the lamp on and off will not be enough. For convenience, you need to install a switch on the wire.
To do this, cut it into two parts in the place where the location of the switch seems to you the most convenient.
Then do the same as in previous cases. Disassemble the switch, connect the wires and reassemble everything.
The lamp is almost ready. It remains only to screw in the bulb, plug the plug into a power outlet and check whether you have connected everything correctly.
However, we recommend doing such things with the help of a device for measuring voltage in the network - a voltmeter. Ask Google how to use it correctly.
Anyway, preliminary check of connections with a multimeter It will protect your creation from damage, and you - from excessive stress.
Anna-Laura used Edison's lamp to emphasize the industrial style of the product, but when choosing a metal shade, it is almost invisible from the side. If you choose an Edison lamp, try using a smaller lampshade.