
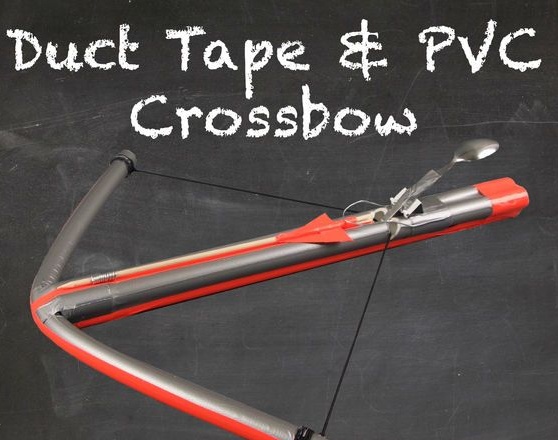
This article will discuss how to make a small crossbow and arrows for it. Materials that the author homemade used, is in almost every house.
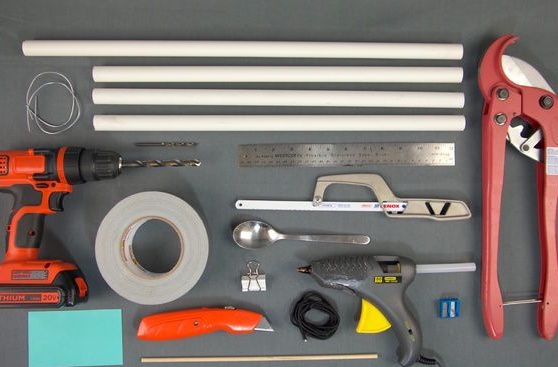
Tools and materials:
-Metal ruler;
- Scissors for PVC pipes;
- Half inch PVC pipe;
- adhesive tape;
-Paracord (parachute sling);
-Drill;
-Glue gun;
-Knife;
-Hacksaw;
-Office clip;
- a metal spoon;
-Wire;
- Round stick;
-Sharpener for pencil;
-Protective glasses;
Step 1: Making a Crossbow Bed
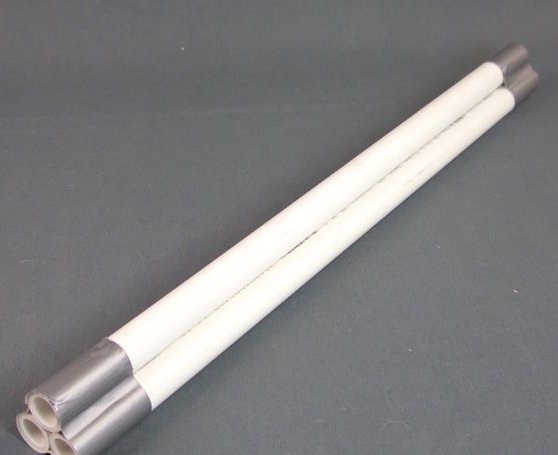
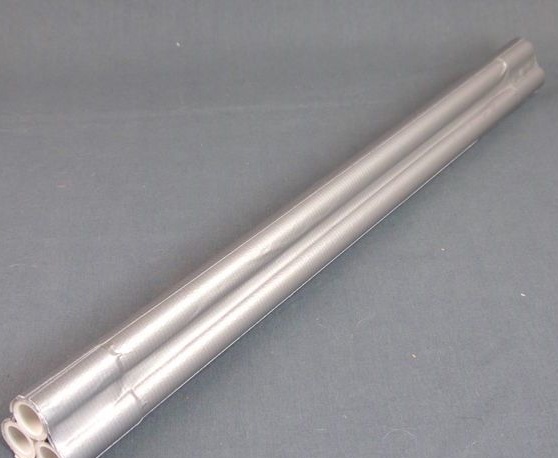
To make the bed, the author cut three pieces of pipe of 50 cm each. Then he folded them together and wrapped them with duct tape. He pressed the tape at the seam, making a recess. I glued the adhesive tape along the seam along the entire length, also pressing the tape into the recess. The groove will serve as a guide for the boom.
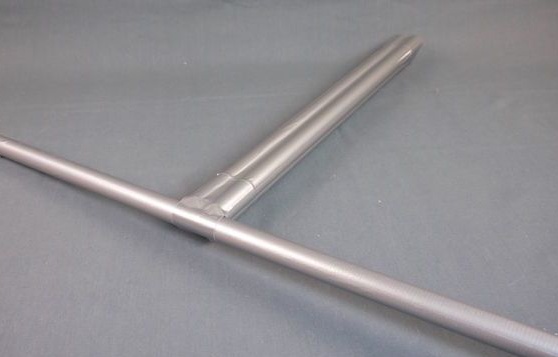
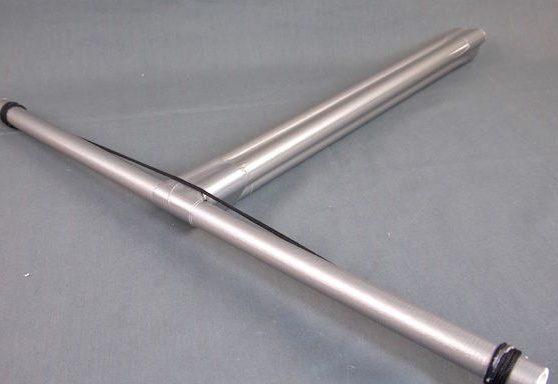
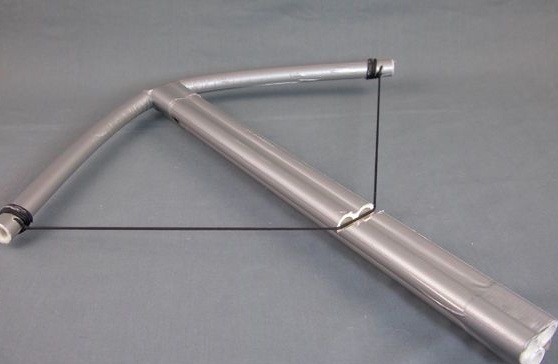
Step 2: making the arc
For the arc, the author cut off 60 centimeters of PVC pipe. Tape her with duct tape. Measured the middle of the arc. Tightly fastened the arc to the bed, not forgetting to form a guide. The upper plane of the arc should be below the guide.

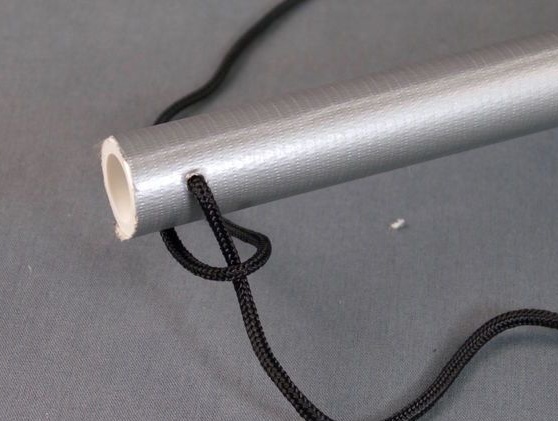
Step 3: Bowstring
For a bowstring, the author used 90 cm of paracord. I drilled a hole at both ends of the arc slightly larger than the diameter of the paracord. He pulled the bowstring through the hole and made a loop as in the photo.
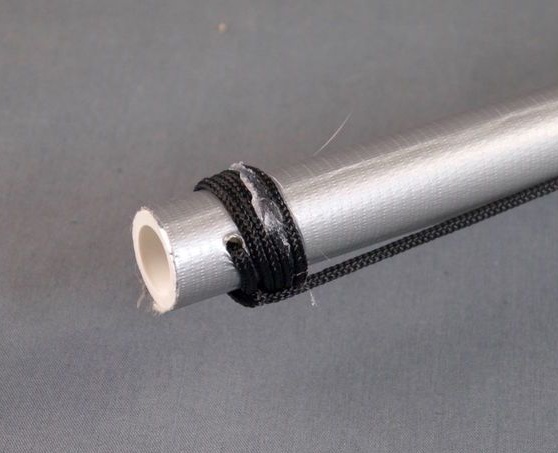
He wrapped, several times, a bowstring around the end of the arc and fixed it with hot-melt adhesive. I repeated the same actions on the other hand.
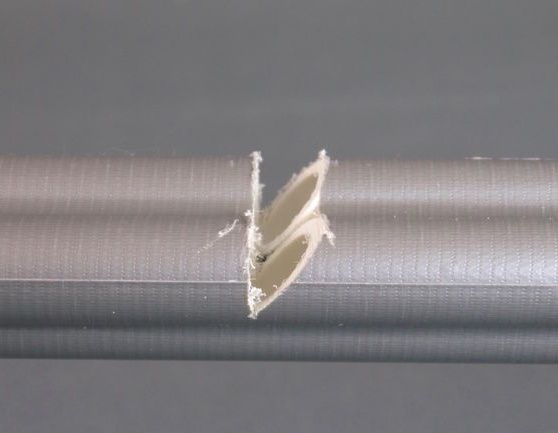
Step 4: making a groove
To hold the bowstring in a taut position, it is necessary to make a groove. Measured 36 centimeters from the front of the crossbow. I cut the adhesive tape on top of the bed (between 36 and 37.5 cm). I made a cutout as in the photo. I cleaned the edges of the groove.
For testing, wear safety glasses.
Resting the back of the crossbow on the floor, he pulled the bowstring and hooked it on the neckline. He left the bowstring in a tense position for five minutes. During this time, the shoulders of the crossbow will take the desired shape, and the strength of all parts will also be checked.
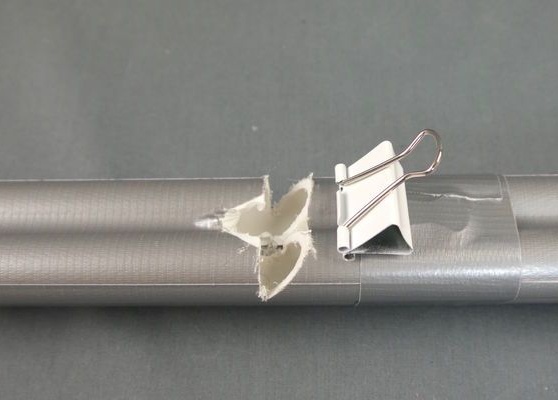
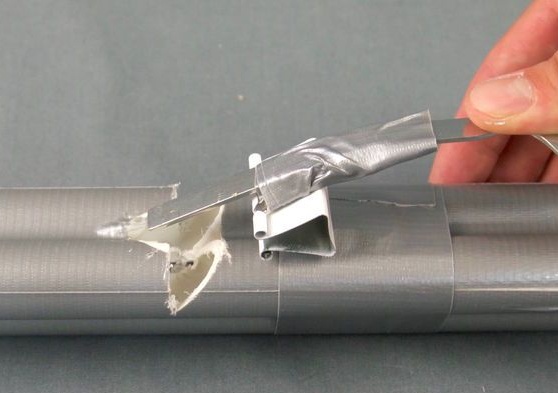
Step 5: Making the Trigger
Makes a cut as shown in the photo.
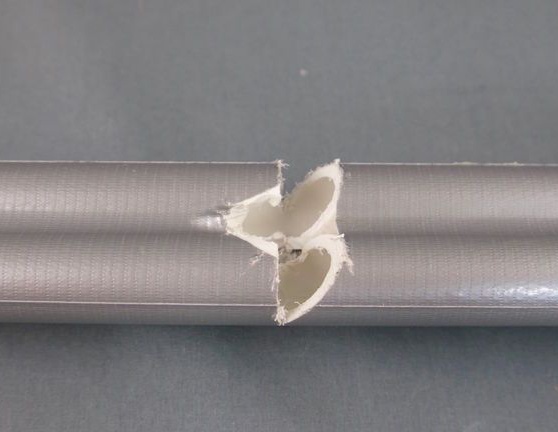
I fixed the clerical clip with duct tape.
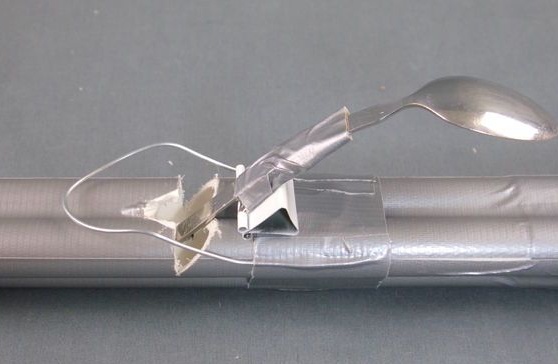
I attached a metal spoon to the clamp in such a way that when I pressed the upper part of the spoon, the lower part would come out of the cut.

He bent and secured the wire as shown in the photo. The wire will press the arrows and prevent them from falling out.
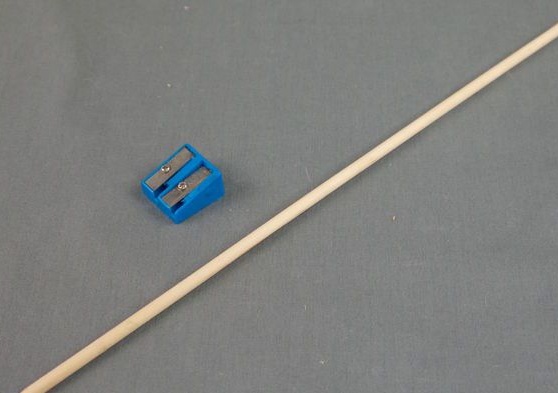
Step 6: Making Arrows
For arrows, the author used round wooden sticks with a diameter of about 5 mm and a length of 33 cm.
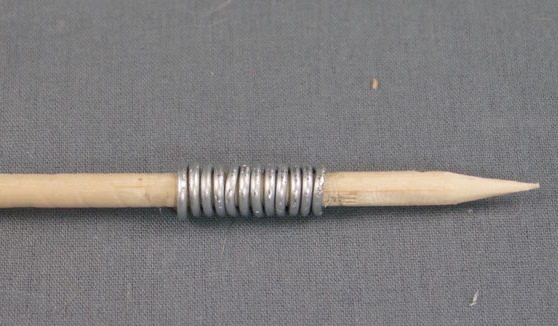
A pencil sharpener, sharpened one end.
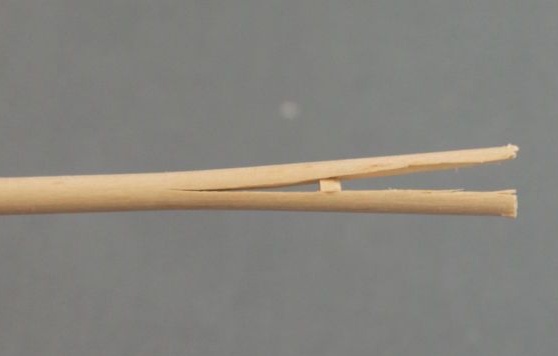
He gently sliced the second end of the arrow with a knife and inserted a piece of stick there.
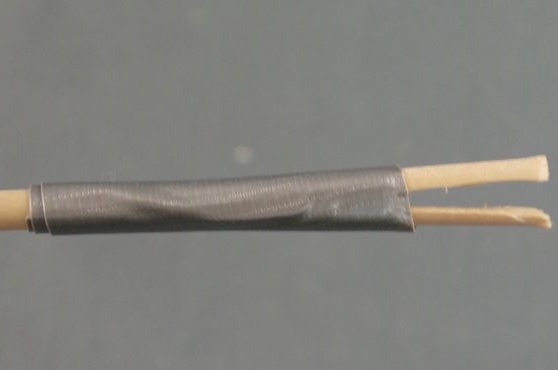
Fixed with duct tape.
Added plumage.
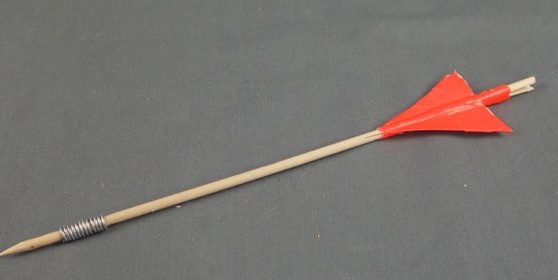
I wrapped several turns of wire on the front of the boom.
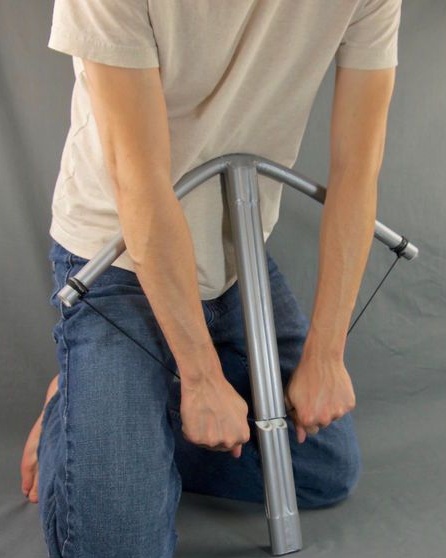
The author made a crossbow and arrows, now you can start shooting at the target. Pulls the bowstring and sets the arrow in the guide, pressing the back of it with a wire clip. Now it is necessary to press the trigger (spoon) and a shot will occur.
You can see how the crossbow works in the video.