

As you know - during the day when riding car it is necessary to include low beam headlights or daytime running lights. The standard headlights of most cars mainly contain incandescent lamps, plus the rear lights of the dimensions - as a result, we get energy consumption from the battery and generator of about 150-300W. But nothing happens for free - this leads to an excessive consumption of gasoline, to premature failure of incandescent lamps of the car, that is, to additional costs and loss of time for repairs.
Daytime running lights give a good car on the road and are a good addition to any vehicle. However, the price of branded DRL in our stores is usually quite rather big. Let's try to make them yourself, especially since the prices of materials will be minimal.
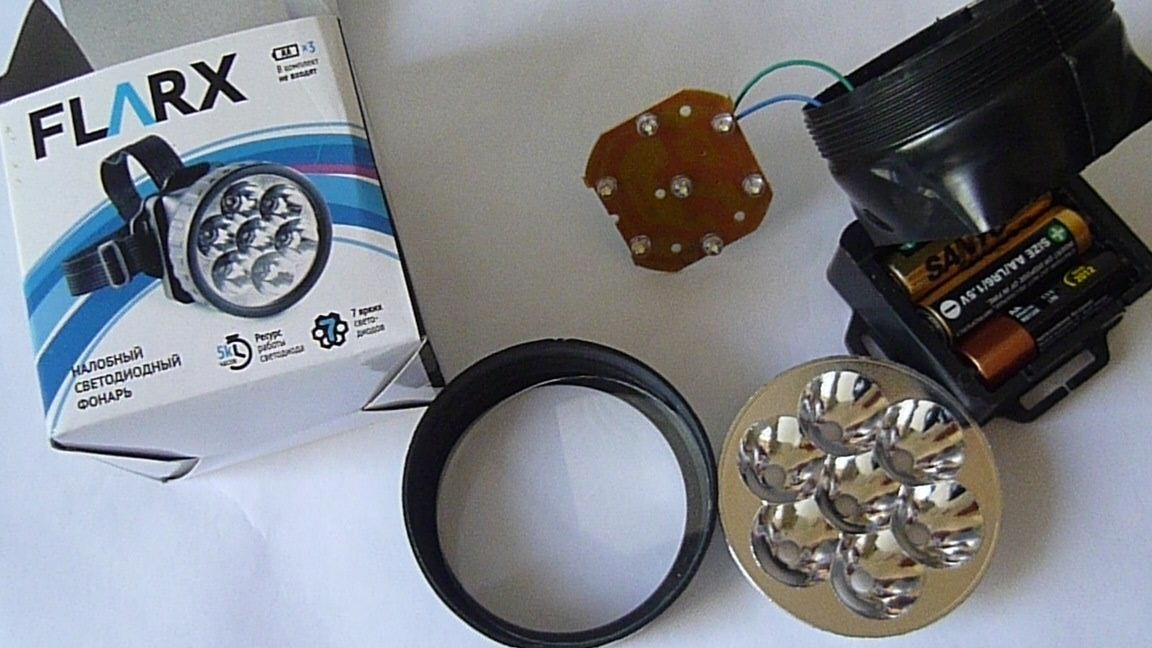
I tried different options for DRL. But always something didn’t suit, LEDs often burned out, then light-diffusing fixtures quickly lost transparency from dirt and sand, etc. But he turned up on his hands headlamp from the store Fix Price for a ridiculous price of 50 rubles. He turned out to have a good mirror reflector and small dimensions. For the sake of the experiment, it was decided to upgrade it. The converted flashlight can be used both in DRL mode and as a powerful flashlight in the garage, camping, etc.
You can see the manufacturing process homemade in the video:
The list of tools and materials
- headlight ;
-screwdriver;
soldering iron;
-tester;
-12V power supply;
White LED 1W-7 pieces;
rectifier diodes 1A-4pcs;
-folded double-sided textolite;
thermal paste;
silicone sealant;
- sheet brass or copper metal 0.3 mm thick.
Step one. Dismantling the lamp.
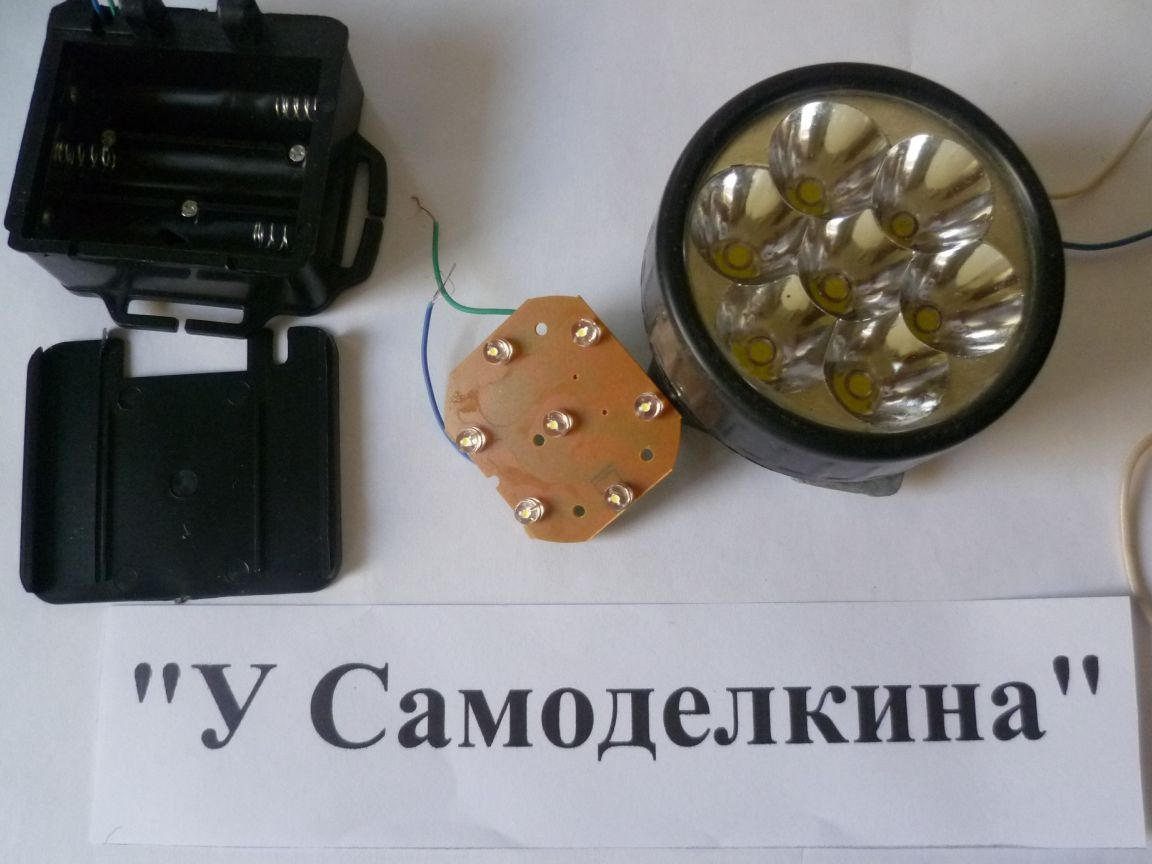
We disassemble the lamp into its component parts. We disconnect the board with LEDs from the battery case. By the way, you can make a bank out of this battery compartment by adding a battery charging board. But now we only need the lantern body with a reflector and glass.
Step Two Production of printed circuit boards, heat sinks, assembly of the lamp.
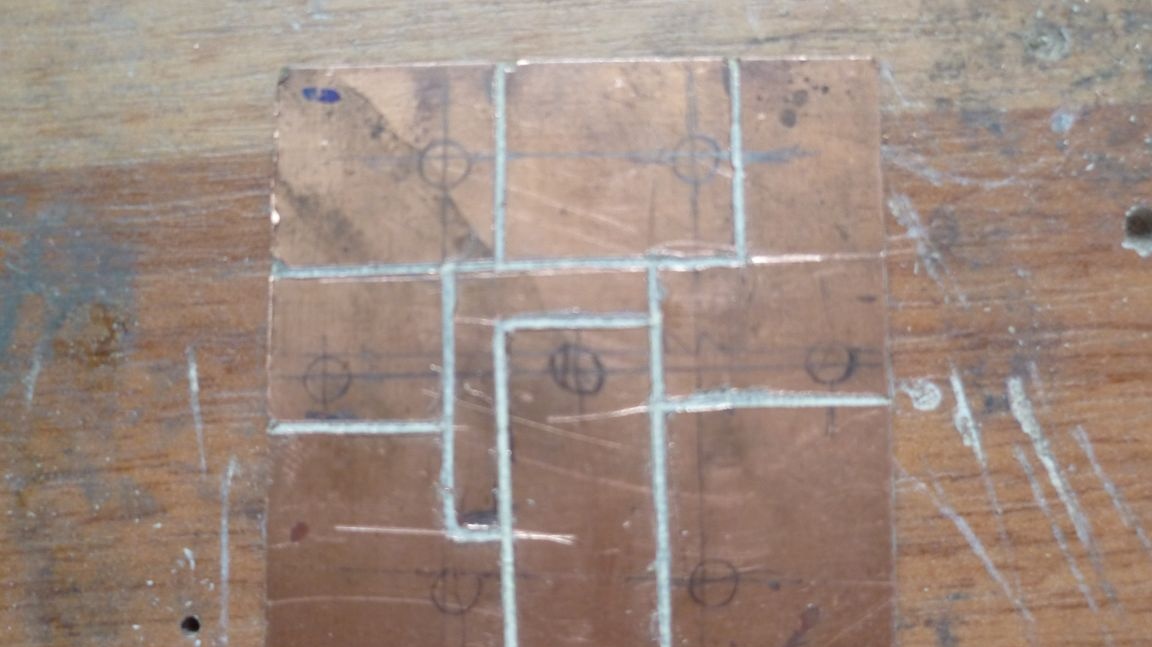
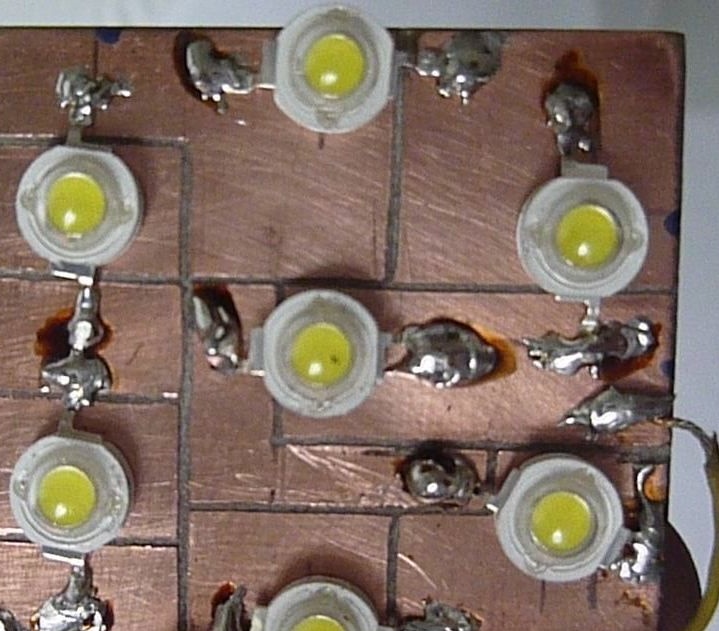
From a foil-coated double-sided PCB with a size of 45x45mm, we make a printed circuit board. Cutter make tracks for two groups of LEDs. The first group is four LEDs, the second three.
Then we install the LEDs on the printed circuit board using thermal paste and solder them according to the diagram below.
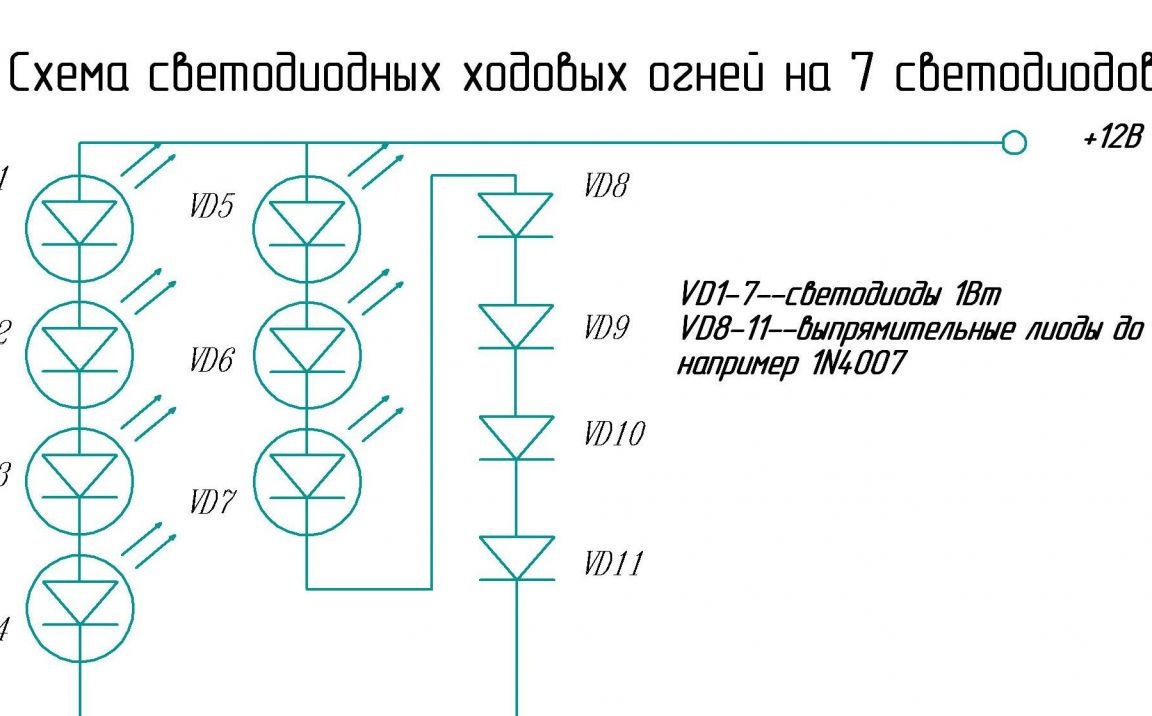
Additional diodes serve to equalize the voltage in a group of three LEDs. They are soldered to the board protected by heat shrink. I dubbed these diodes from a faulty electronic board of an energy-saving lamp.
On the reverse side of the printed circuit board we solder the brass strips, which are designed to remove the heat generated by the LEDs. We put a glass of a lamp on silicone sealant. We fasten the reflector to the printed circuit board and assemble the flashlight. Brass strips are removed from the lamp housing through the slots and folded into an accordion on the outside. The threaded connection is also treated with sealant. The power wires are led into the hole in the lamp housing through a rubber sealing tube. We fasten a home-made metal bracket to the rotary clamp for attaching to the car.
Step Three Testing a converted flashlight.
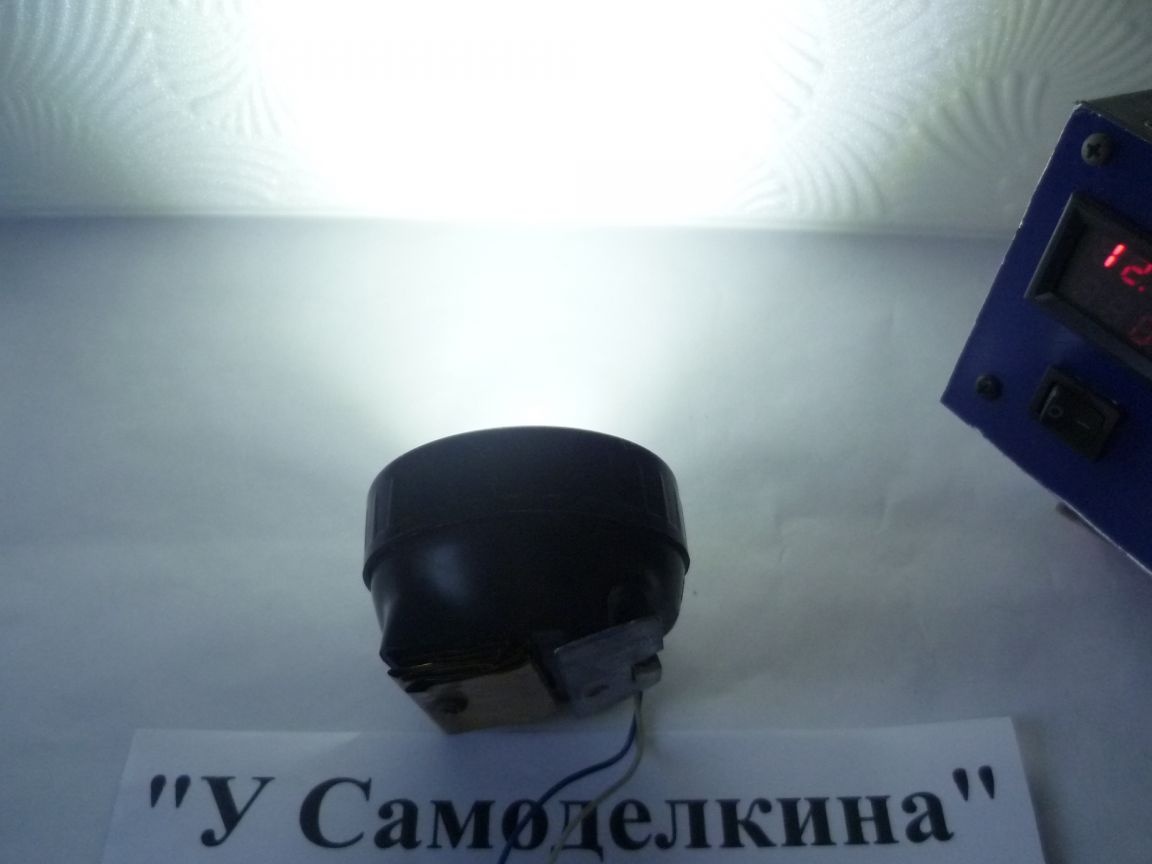
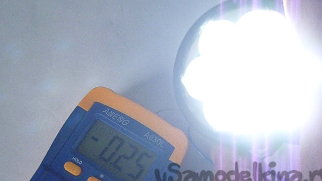
We connect the converted lamp to a power source.
Comparative photo before the alteration.
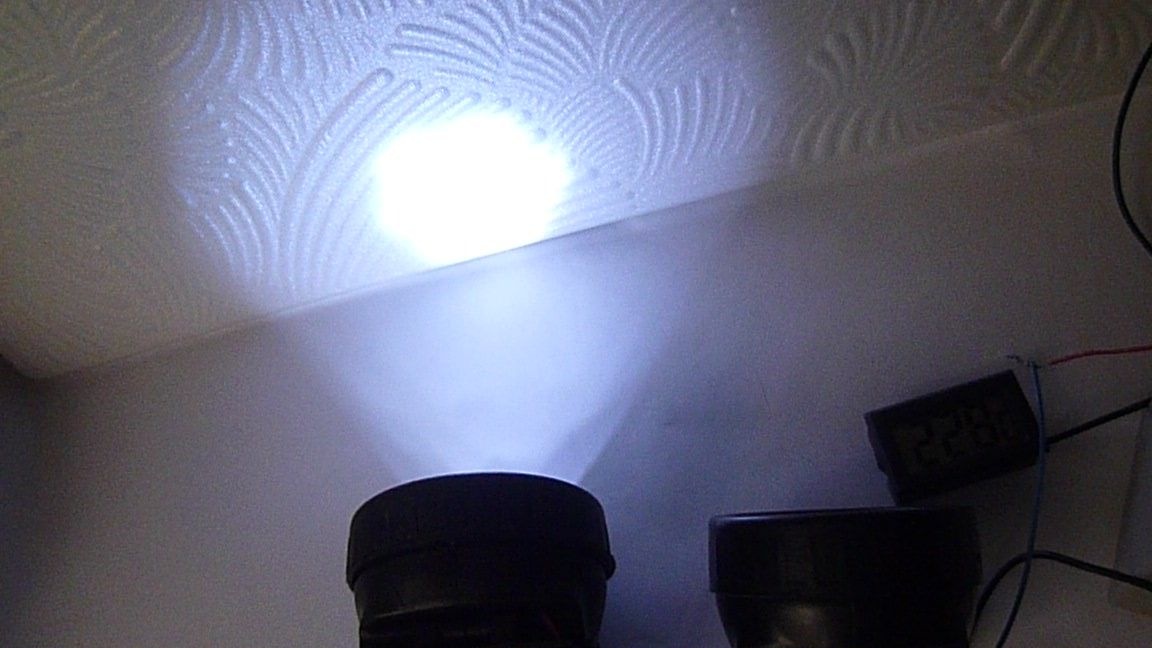
As you can see in the photos, the result was not bad. When the supply voltage changes, the current through the LEDs changes dramatically. At 12 volts-0.25 amps, 13 volts-0.48 amperes, 13.4 volts-0.62 amperes. The maximum current for these 1-watt LEDs is 0.3 amperes. There are two groups of LEDs in the lamp, so I decided to increase the resource of the LEDs, the total current should be within 0.5 amperes. In the car’s electrical network, the voltage can range from 12 volts to 15 volts, so when connecting in DRL mode, it is advisable to add a current stabilizer on the LM317 chip.
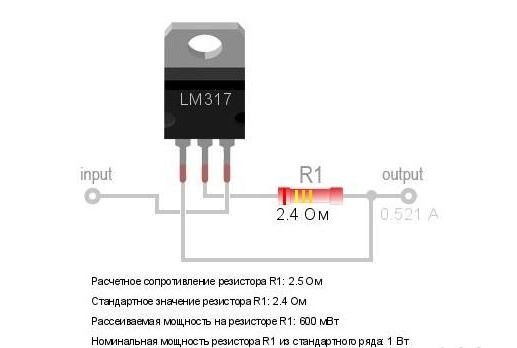
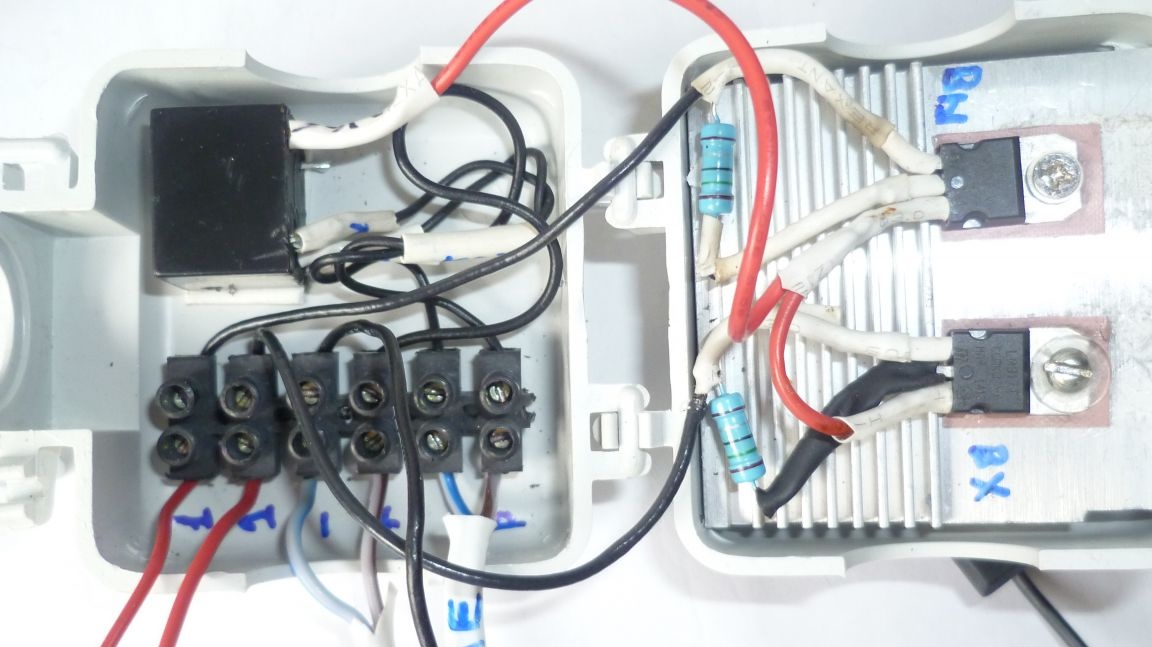
The current stabilizer is assembled on an aluminum radiator and installed in a junction box along with a terminal block and an intermediate relay. I installed the power distribution box next to the car battery. The relay supplies voltage when the engine starts. The relay coil is connected to the filament of the marker lamp and the fuel pump power circuit. Thus, the relay is activated only when the engine is running and the dimensions and the main headlights are off.
This alteration did not entail tangible costs. The cost of flashlights is -2x50 = 100 rubles, LEDs 1W-14x3 = 42 rubles, LM317-2x7 chips = 14 rubles (I took the LEDs and the microcircuit on Aliexpress). The remaining materials are from garage trash. It has been operating in the DRL mode for several months — there were no failures. A converted flashlight with success I use on fishing and in the garage.