

Hello to all lovers homemade, today I will tell you how to make a stand for a jigsaw, it is easy to manufacture and convenient to use, it can be used both when working with a jigsaw and for storing it. friends who often work with a jigsaw know that it is very inconvenient to lay this tool on a workbench or on a table, as well as take it for further work due to a nail file protruding from the base, which may break if you put the jigsaw in the wrong way, as well as experiencing inconvenience when the brush has to be twisted to take or put the tool. However, such an idea of the stand is not always necessary, since not everyone works with a jigsaw for a large amount of time, and periodically, for this reason, you can suffer all the inconveniences. But if the amount of work is large or the jigsaw is quite powerful and heavy, then using it is also not always convenient and easy, and this leads to increased hand tearing, which significantly reduces the quality of work.
To solve this problem, the author decided to make a special stand, which is quite simple and easy to manufacture.
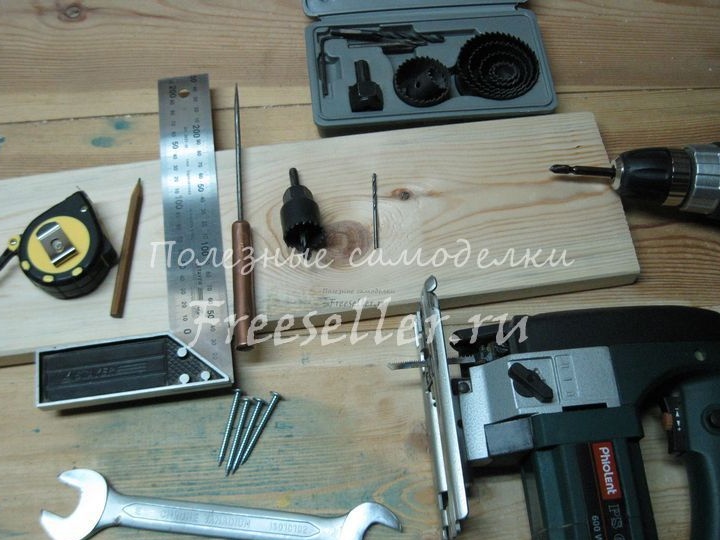
In order to make a homemade comfortable stand, we need:
* A section of a board 2 cm thick, 14 cm wide, and 35-40 cm long.
* Four screws with a 4x50 mm press washer.
* Pencil, tape measure and square.
* Awl.
* Electric fretsaw with a file for a figured cut.
* Screwdriver and drill bit for metal with a diameter of 2.5 - 3 mm.
* Wood crown with a diameter of 28 mm.
* Figured bit PH2 for tightening screws.
* A 20 mm wrench that will help to wrap and unscrew the nuts of the hole saw in wood.
* Sandpaper.
Preliminary calculations and consideration of the convenience of the product.
To begin with, it is necessary to build a drawing of the future part, we do it in the compass 3D program, one not unimportant moment is visible from the drawing, that here the idea is applied to make a wedge-shaped slot in the stand, although it would be possible to do just a straight narrow slot. And the bottom line is that it is much more convenient and faster to run the file into the wedge-shaped slot while installing the jigsaw on the stand, which also does not require any aiming for this. The dependence is straightforward, the wider the wedge of the slot at the base, the more convenient it is to put a jigsaw. Also, if you make an excessively wide wedge at the base, which will be wider than the slide of the jigsaw, then the stability of the jigsaw will be much lower, which can cause it to tip over.In this regard, it is more profitable to choose the best option, that is, to make the width of the base of the slot so that the jigsaw is comfortable enough to put on a stand without losing the reliability of its stability.
The author chose the width of the base of the slot at his discretion, which became equal to about 78 mm. In realities, this is enough to conveniently put the jigsaw on a stand, not being afraid that it will fall back. If you get this idea, then select the indicated size in the drawings, comparing with the width of the slide of your jigsaw.
The next important point is the front and back of the stand, made in a semicircle. The purpose of just such a shape is to provide the best aesthetic appearance, so if you want to focus on this, you can easily make the shape of the stand rectangular.

Well, we figured out the basic nuances, now we are starting the assembly process.
Step one.
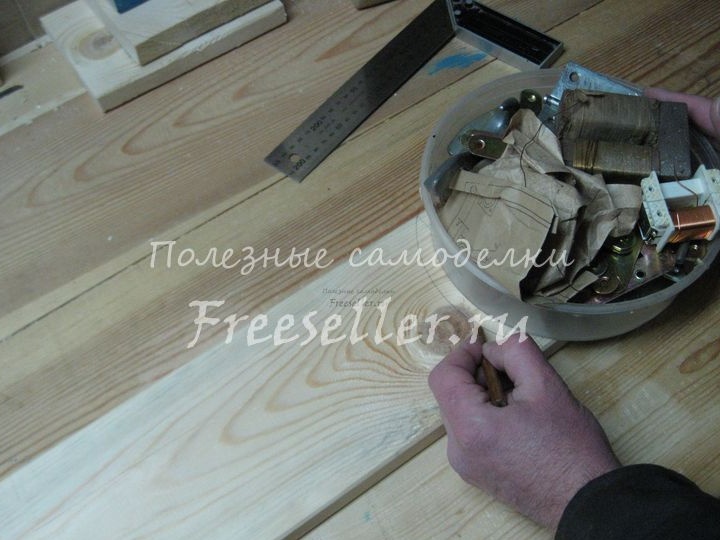
Before picking up the tool, we need to draw the layout of the workpiece according to the drawing. Given that the length of our future stand will be only 20 cm, then for its cutting it is necessary to take a little more (by 15-20 cm), and this is done in order to ensure that the workpiece can be stably fixed for further processing.
To show curved surfaces with a pencil on a blank, we take any round object of large diameter. In this case, it is a plastic jar for storing small things.
Step Two
We fix the workpiece in the clamps and saw out the hole in it with a circular saw or, as it is called, a crown clamped in a screwdriver's chuck.

Step Three
This stand will have special legs to be at the maximum height, which will not allow the jigsaw file to break on the surface, we drill blind holes for these legs.

Step Four
Using a jigsaw, we cut out the drawn wedge along the contour and then saw out the excess parts of the stand. Working with the jigsaw is quite dangerous, so be careful and take precautionary measures, such as protective gloves, as well as glasses.

Step Five
We arm ourselves with sandpaper and grind the surface to a smooth state, which should not have scuffs and indentations, after which we screw the screws into a flat surface of the workpiece, in this case they serve as legs.

On this, the homemade stand is ready, we put an electric jigsaw on it, and in order to stand stable, we adjust the screws, which are also legs.
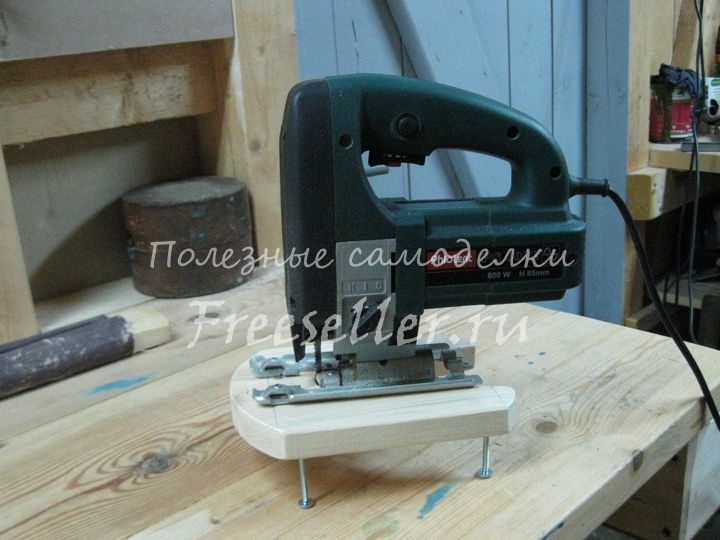
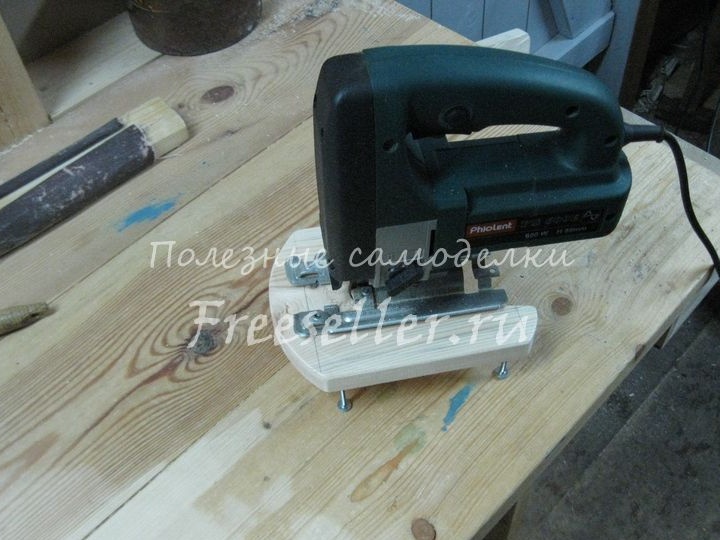
One small trick in the manufacture that cannot be missed, the fact is that the height of the stand should be slightly larger than the length of the working part, it is precisely such a file that it is 50 mm, and its maximum deviation downward is about 50 mm. Therefore, a height of 60 mm in the case of 50 mm the distance of the saw’s stroke will be enough, because if the jigsaw is accidentally turned on, when it is installed on the stand, the saw will not break, because it will not be able to reach the surface on which the legs rest, which will protect the workplace from random incidents.
Thanks to all.