Here is an article that talks about making an unusual bottle chandelier. Making a chandelier is quite simple and does not require special skills, while the chandelier itself has an attractive aesthetic appearance.
Materials that were required to create the chandelier:
aluminum sheets to create a frame
acrylic for fixtures
durable steel chain
- multiple padlocks for chain
- a large number of glass bottles and caps from them
RGB LED strip approx. 180 cm long
Three RGB plugs
- one more LED strip, but only with white LEDs and a length of 120 cm
- also three plugs for this tape
wireless controller
touch dimmer
power wires
60 watt power supply
connector for plug
After all the materials for creating an unusual chandelier from bottles were collected, the author proceeded to its creation. Below is a description of the phased assembly of the chandelier:
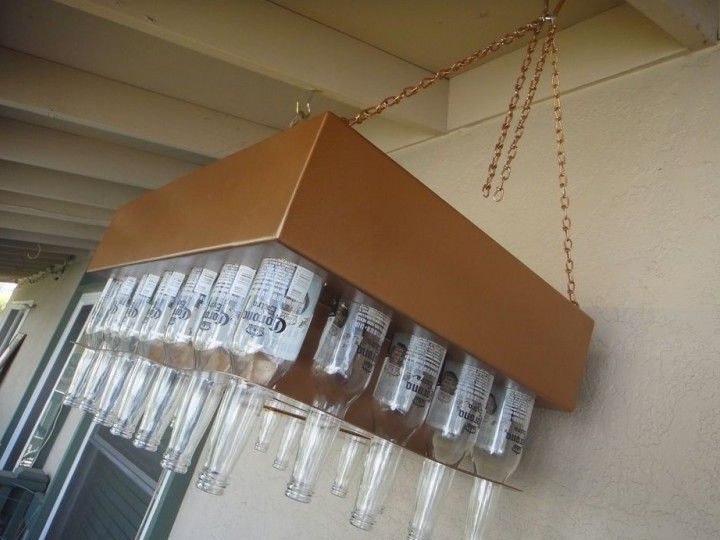
Step One: Designing and Creating a Chandelier Frame
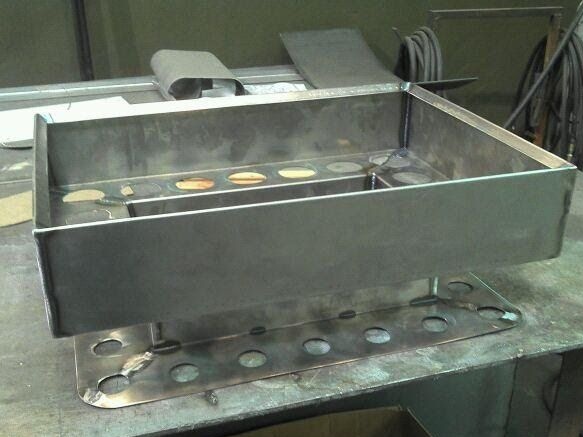
The author decided to create the frame as the first step. Several sketches of the schemes of the future chandelier were made, a scheme was chosen from their concept to create the frame of this chandelier.

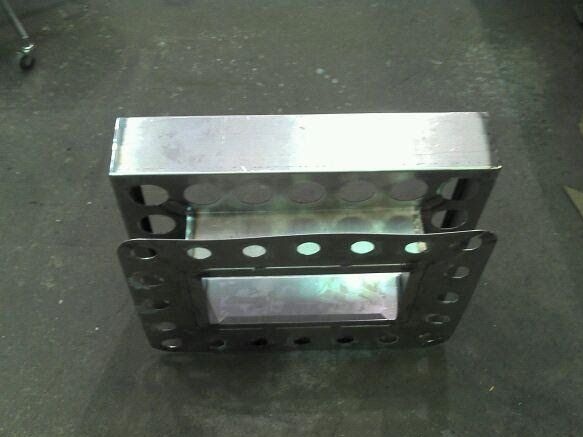
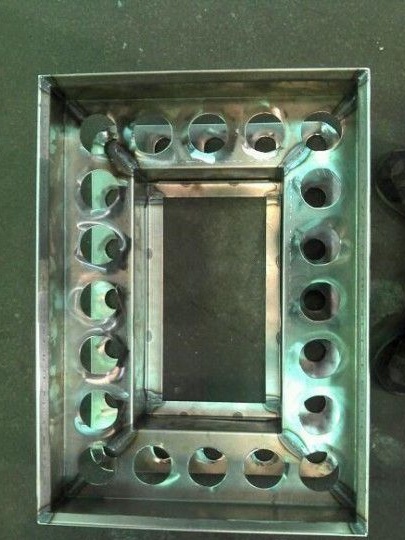
Aluminum was used as the main material for creating the frame, since it is strong enough and at the same time very light. These qualities of the material for the manufacture of the frame are very important, since a large number of glass bottles will be used in the chandelier, which by themselves already weigh a lot.
Having cut out the necessary elements from aluminum sheets, the author assembled a frame from them, using welding as a connection of parts.
Step Two: Creating a Chandelier Fixing System
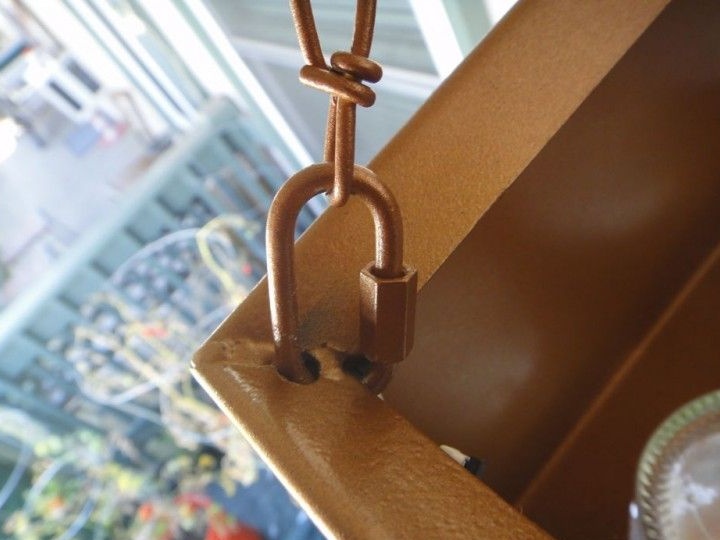
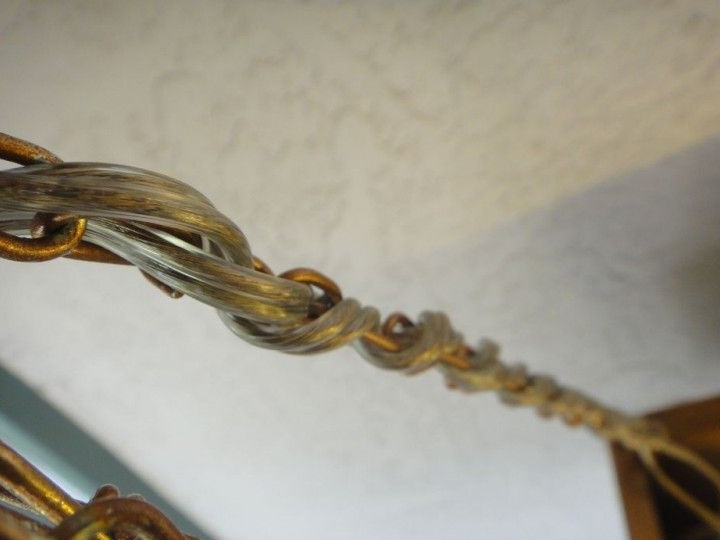
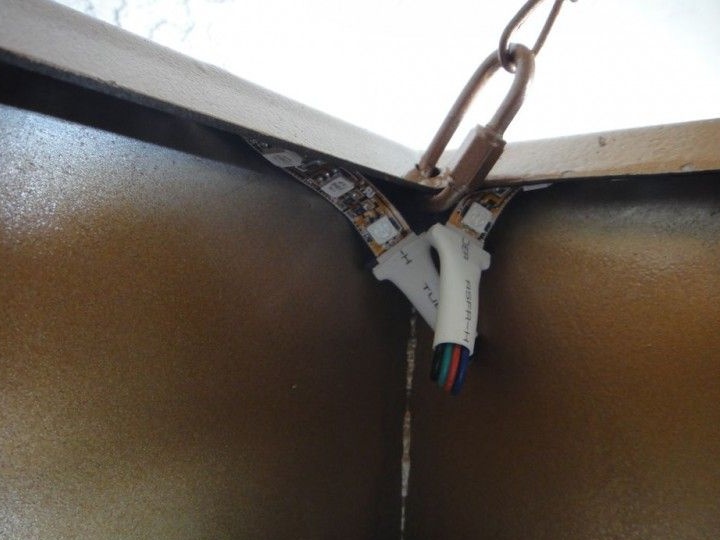
Holes were made in each of the four upper corners of the resulting rectangular frame. Locks are inserted into these holes, which serve to connect the frame with the suspension chain. Locks should be wide enough to provide some mobility of the frame, and not transfer too high loads to individual sections of the chain.
After doing all the fastening and checking the reliability, the author proceeded to painting the frame and chains.
Step Three: Install Power Wiring
This is how the wiring diagram for a bottle chandelier looks like.
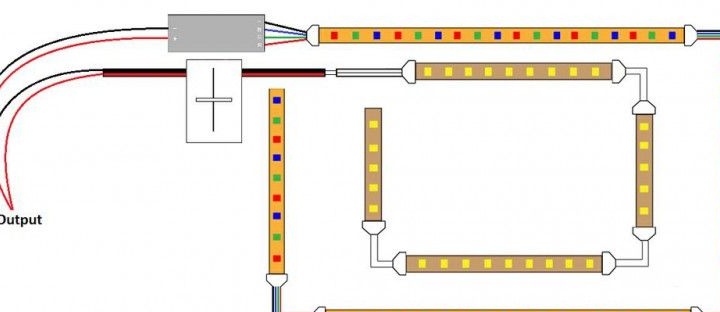
The terminals from the main power cable were connected to the off chandelier power supply.
Then the other end of the power cable was pulled through the chain links of the holding chandelier. It is necessary to stretch the cable up to 30-60 cm of free wire, which will subsequently be used to power the lighting controller and backlight acrylic.
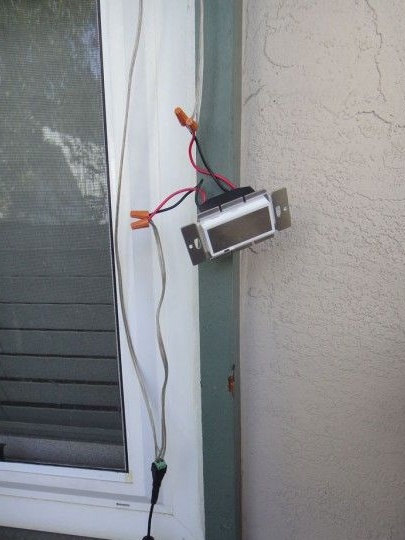
A touch dimmer mounted inside the chandelier frame is also connected.
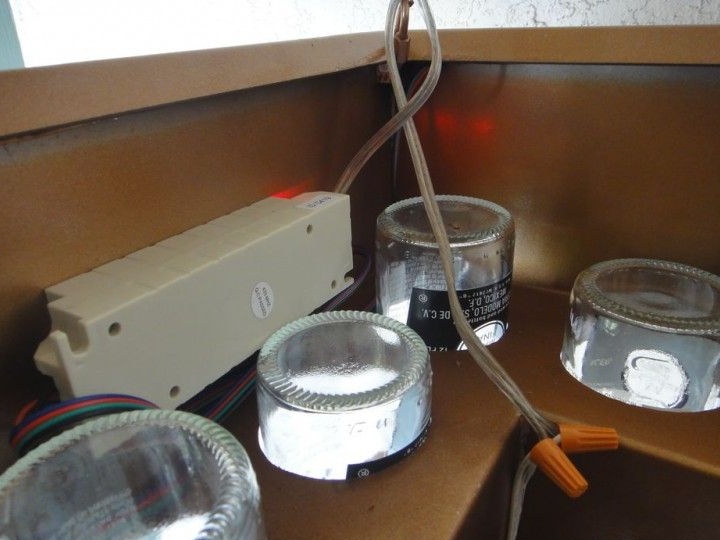
Fourth step: Installing LED strip.
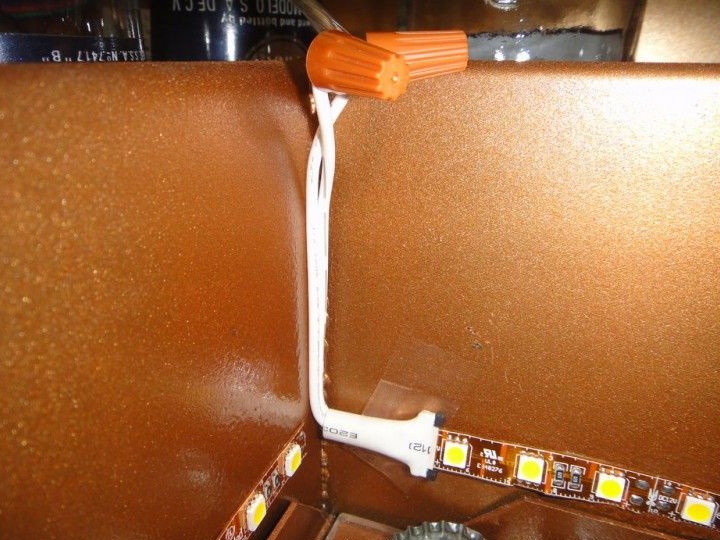
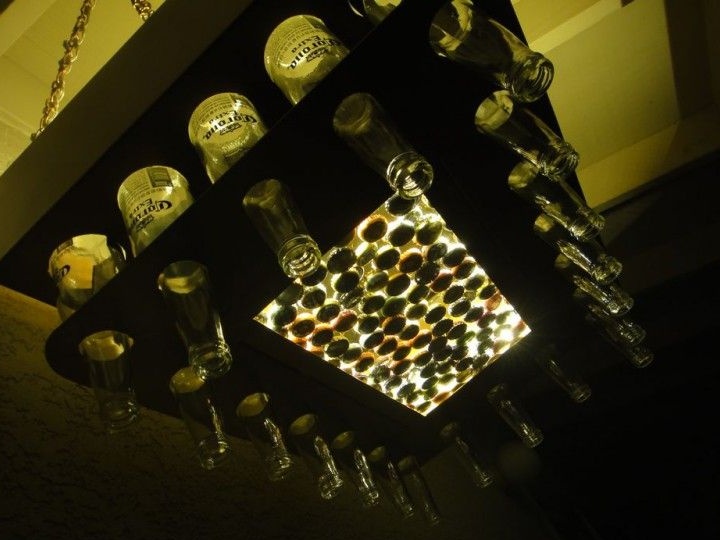
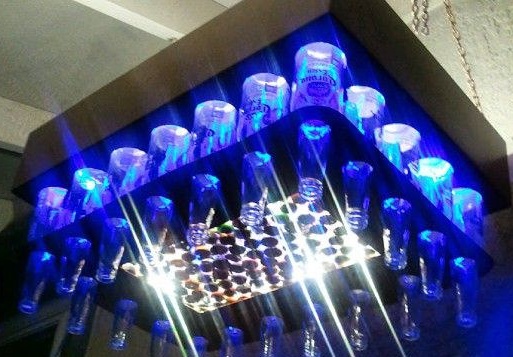
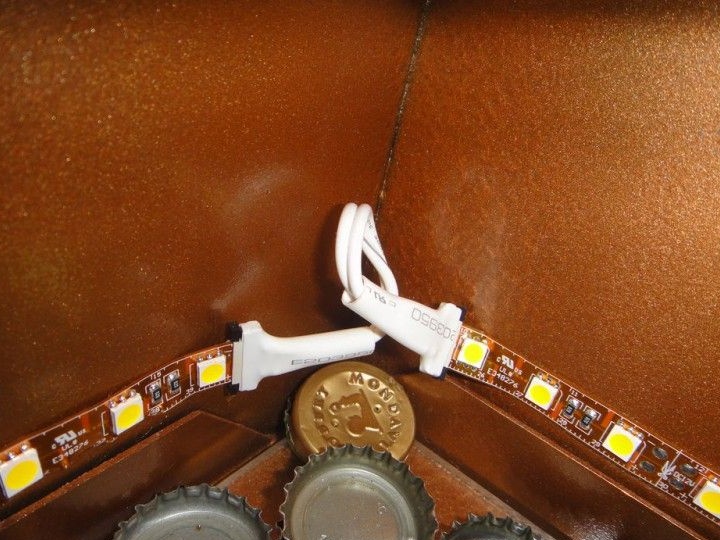
Then the author proceeded to install LED strips. An ordinary LED strip was installed along the side perimeter of the chandelier. To do this, it was first connected to the power wires through the existing connectors, and then, removing the protective film protecting the adhesive layer applied to the back of the tape, the author glued it around the entire perimeter of the side wall of the chandelier frame. The second RGB tape, which will be responsible for the color of the lighting, is installed in the same way, but mounted on top of the installation site of the bottles. Thus, when turned on, it will highlight glass bottles in the desired color. White LEDs were also installed at the bottom of the acrylic plate.
Further, all wires were connected to the lighting controller. The second part of the wireless controller is installed in any convenient place.
Then the author proceeded to install decorative elements of the chandelier.
Step Five: Installing the decorative elements of the chandelier
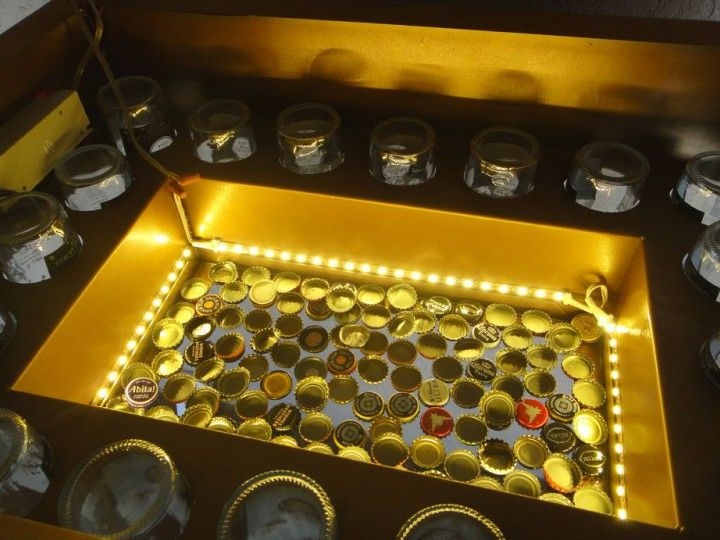
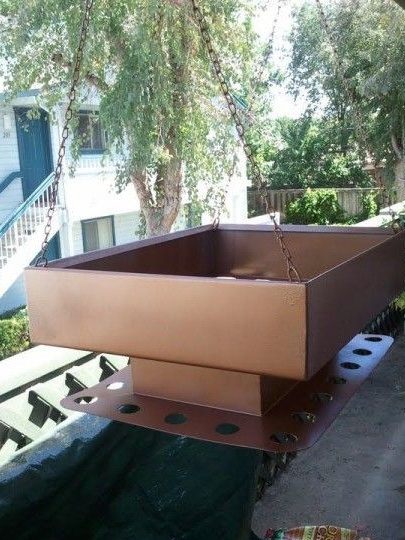
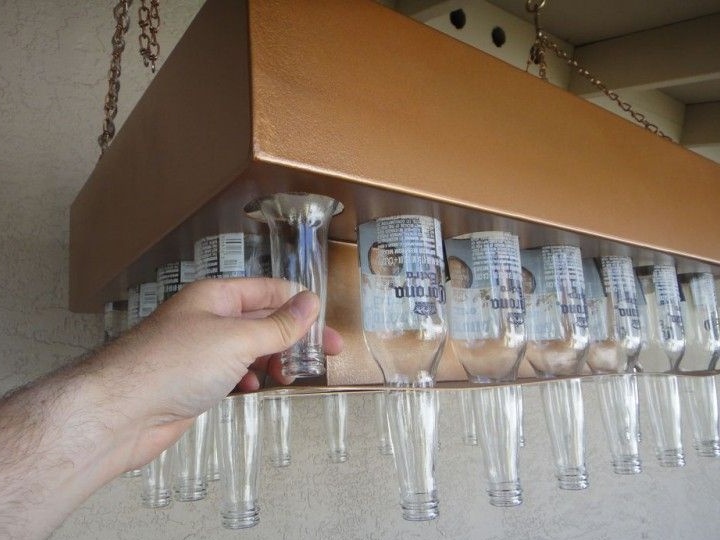
An acrylic sheet was attached to the flanges of the bottom of the frame in which the bottle holder is located.
Bottle caps were placed on top of this acrylic sheet.
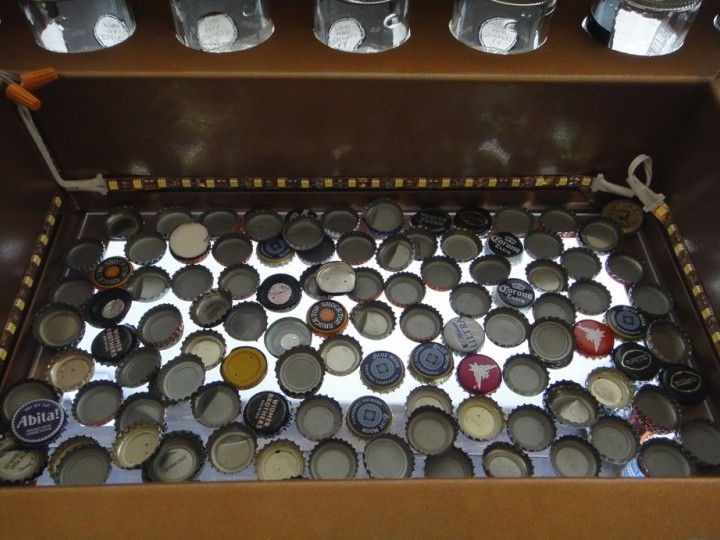

The bottles themselves are thoroughly cleaned and installed in the round nests of the holder.
Step Six: Installing the chandelier and testing its operation.
After that, the chandelier is installed in a place of permanent mounting.
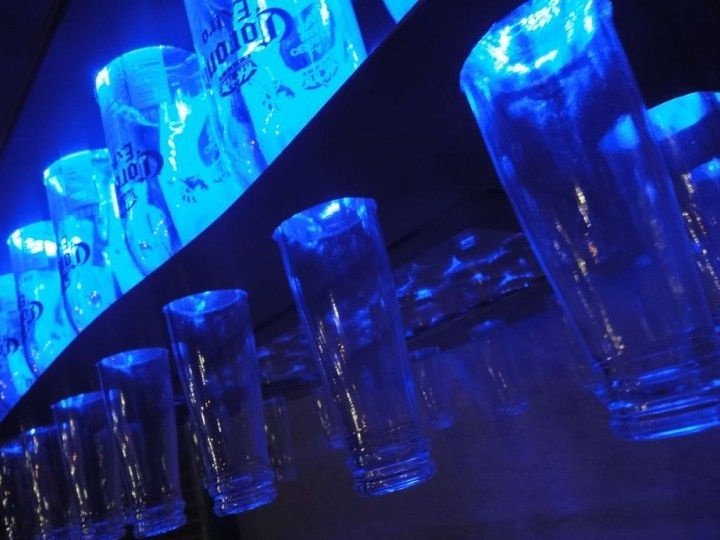
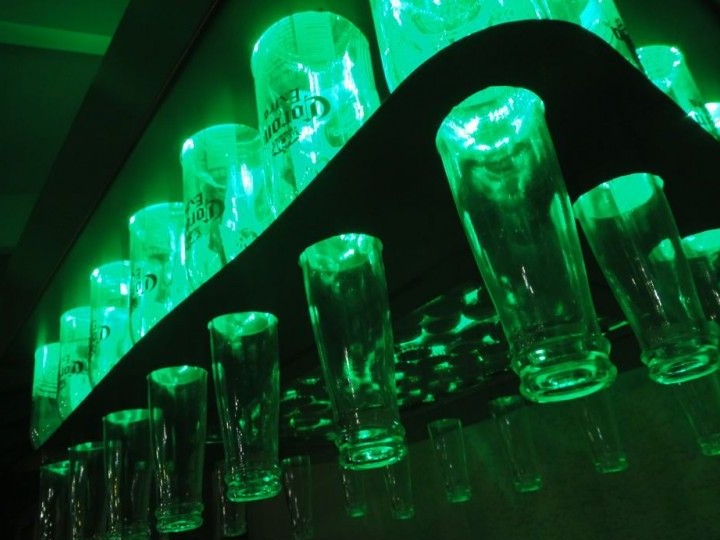
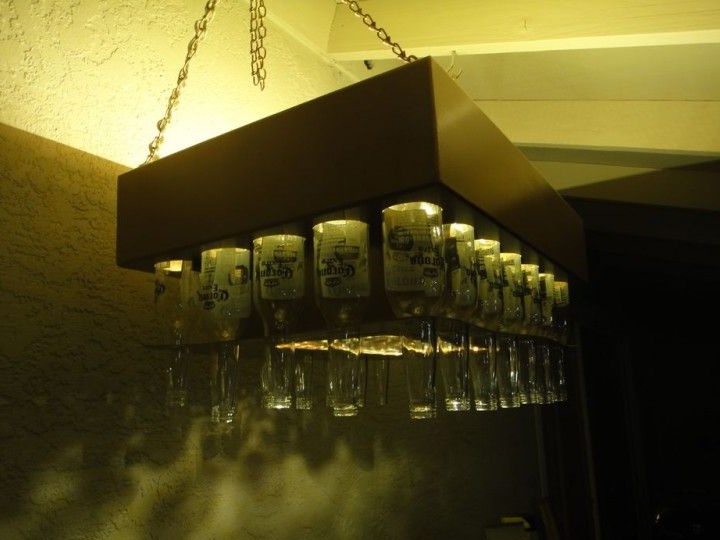
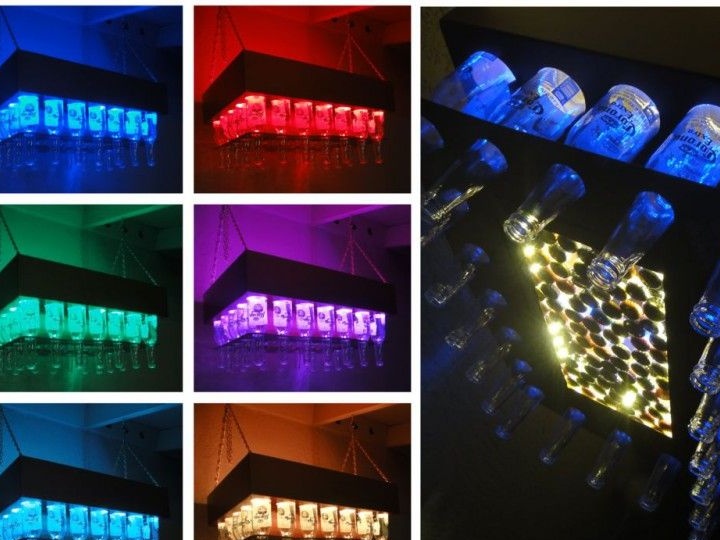
Then the power is connected and a final check of all backlight operation modes is performed. In the photographs presented, you can see how the lighting of the room looks when you turn on the various lighting modes.