The author of this homemade travels frequently. Moving from one housing to another, naturally he is faced with the need for constant assembly and disassembly of furniture. Besides the fact that it is quite tiring, it also harms the furniture itself. With frequent disassembly and assembly, screws, mounting brackets are lost, the furniture itself after several becomes unusable. Therefore, after some time, the idea of creating furniture with our own hands appeared, which would be more convenient for use in conditions of frequent moving.
It was decided to start with the simplest thing - with the assembly of a shelf on which things could be conveniently stored, but which would be free from the drawbacks of store furniture.
The planned shelf will be easy to assemble and disassemble, take up as little space as possible in an unassembled form, and also a minimum of fasteners should be used in its design.
Used materials:
-5 x 30 cm boards 360 cm long
-tung oil 100%
-Mahogany stain
-Polyurethane
-brushes with a bristle width of 25 mm
Tools required:
- Sawing
- Corner and protractor
-Drill
Shaping and Milling Machine
Belt Sander
A detailed description of the manufacture of shelves for relocations:
Step One: Design Shelf Design
As the main material for creating the shelf, the author decided to use pine boards 5x30x360 cm.
For this project, I decided to use pine boards with a size of 50.8 x305 mm. In the program for modeling CAD the following was created model: the lowest shelf will be 120 cm long, vertical guides are attached to it from two sides at an angle of 8 degrees. Thus, the shelf will have a trapezoidal shape, due to which it will have increased stability. Therefore, the total height of the structure will be about 180 cm.
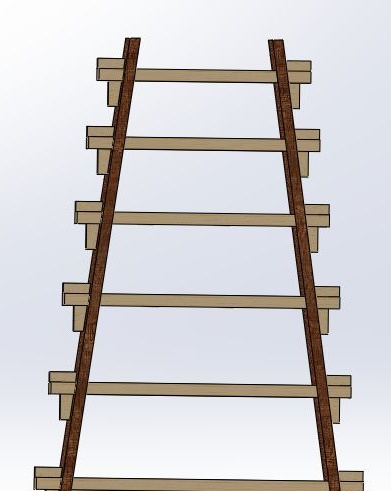
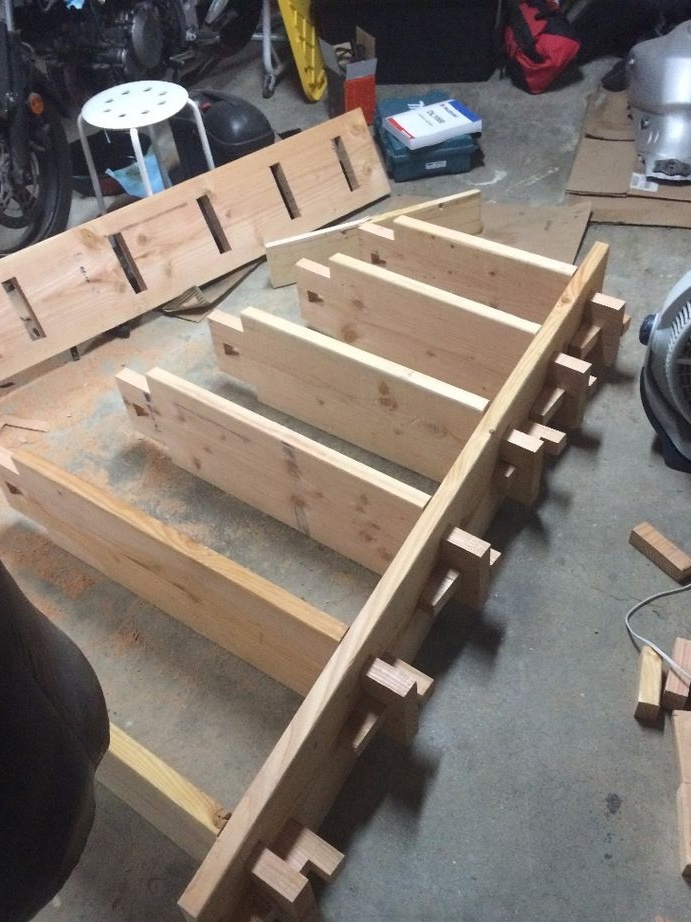
It was decided to use a spike connection as a shelf mounting unit. Such a connection is very simple to use, easy to disassemble and does not require additional tools, and also does not spoil the appearance of the furniture. To make a joint from wood, a thorn is cut, and holes are made along the edges of the shelves. A peg installed in the hole fixes the structure and provides structural rigidity.
Step Two: Vertical Guides
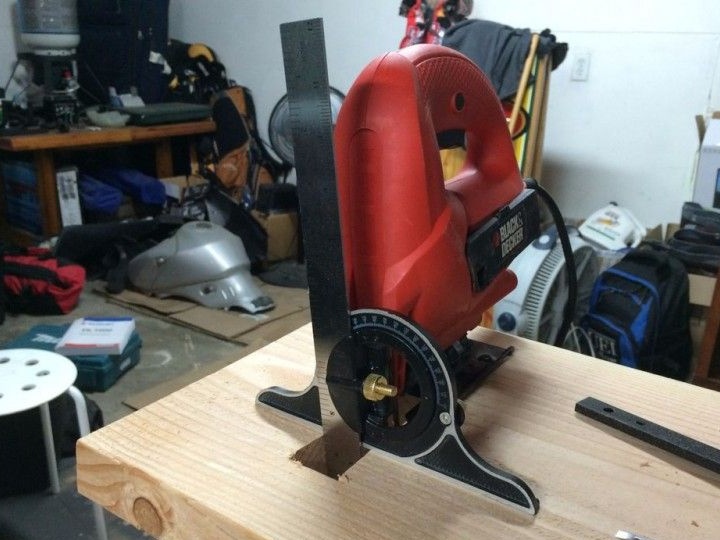
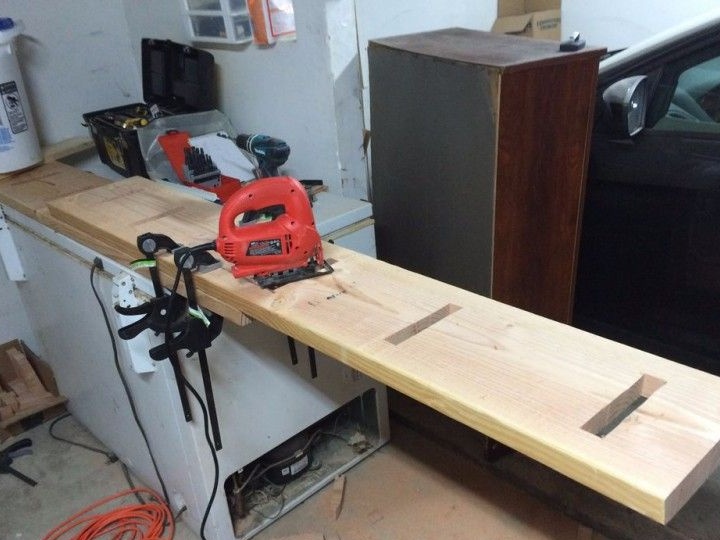
Transferring the dimensions from the modeling program to the boards, the author proceeded to the manufacture of the vertical supports of the future shelf.In the guides, it was necessary to cut openings for fastening the shelves, here the author encountered a difficulty: since the guides go at an angle of 8 degrees, each fastening hole must also be cut at this angle. To perform this task, 11 mm holes were drilled at each end of the groove, after which the grooves were cut with a hacksaw. Using a corner and a protractor, the desired angle of 8 degrees was fixed.
Step Three: Shelves
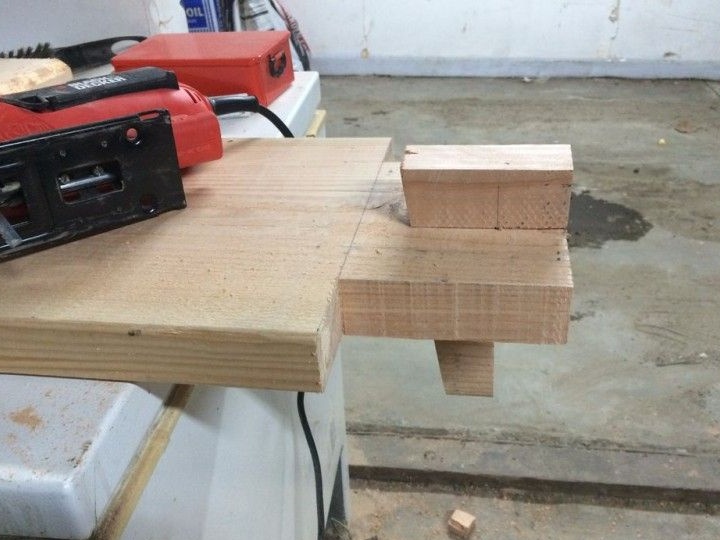
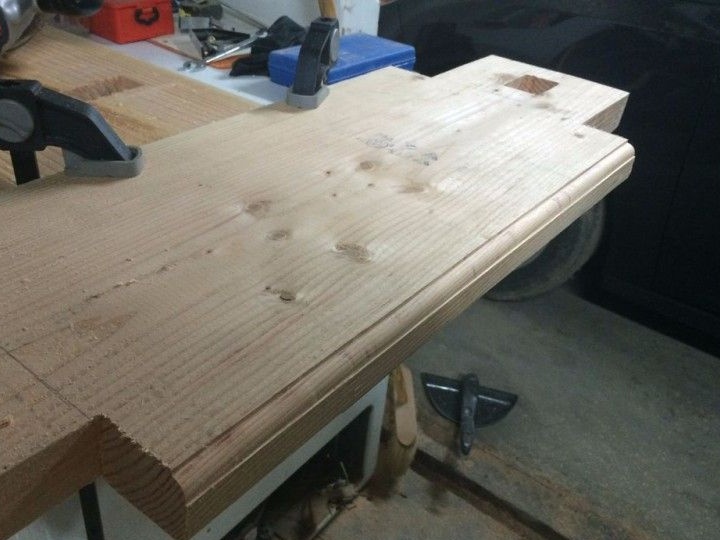
Next, the author began to manufacture horizontal boards that will serve as shelves. The first step was to cut the spikes for mounting. Then, holes were made in each board for attaching this spike. Then the edges of the shelves were cut to the size of the holes of the guide supports. Thus, a spike connection was made. Everything was done according to the dimensions of the CAD model. To prevent further confusion with the installation of shelves, they were marked by size.
Step Four: Checking the assembled shelf
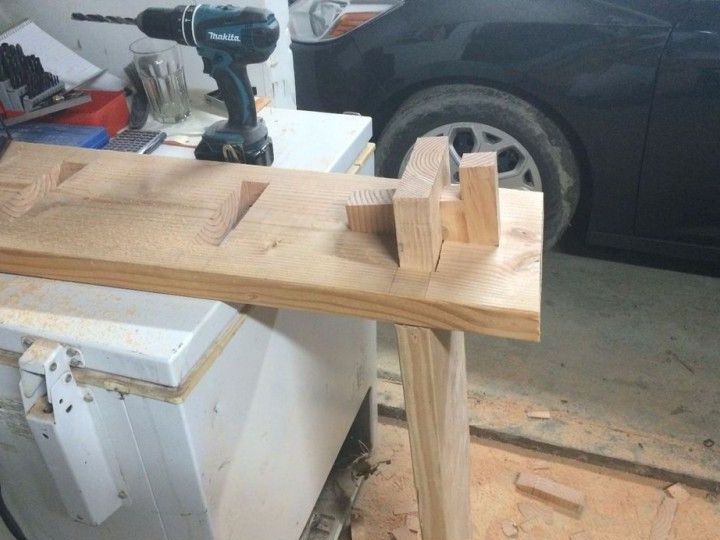
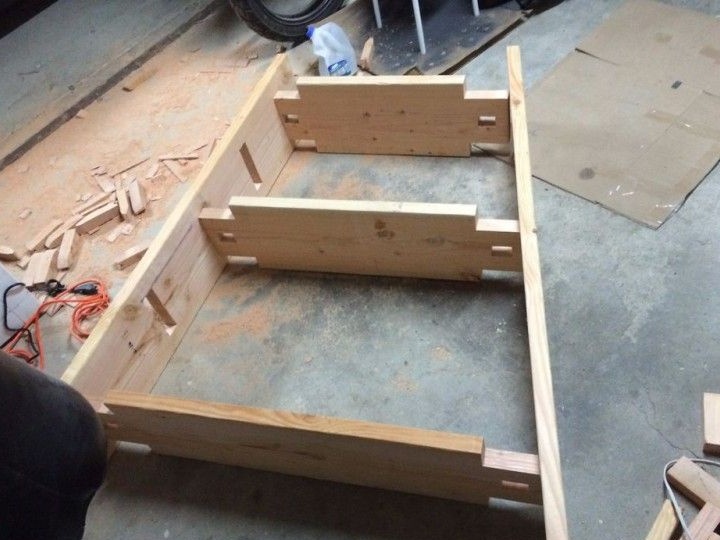
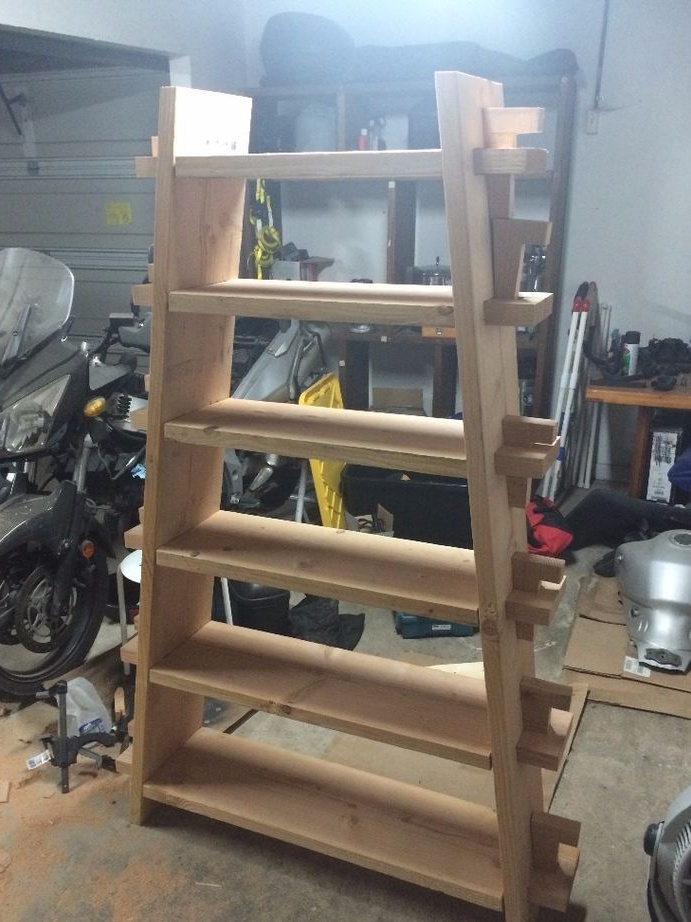
When the main parts were ready, the author proceeded to check the compatibility of the holes made. For this, the shelf structure was assembled. To completely assemble the entire shelf, I had to align part of the holes, as well as cut the workpieces. When everything was fitted perfectly and easily assembled and disassembled, the author proceeded to the final work on creating a shelf for relocations.
Step Five: Final Production
Using sandpaper with grit 80, 120, as well as a belt grinding machine, all the details of the shelf were sanded. Considering that stronger grinding for a pine product is not required, the author proceeded to apply layers of stain and tung oil on the horizontal parts of the shelf. For the vertical guide supports of the shelf, the author used 2 layers of stain and a layer of polyurethane.
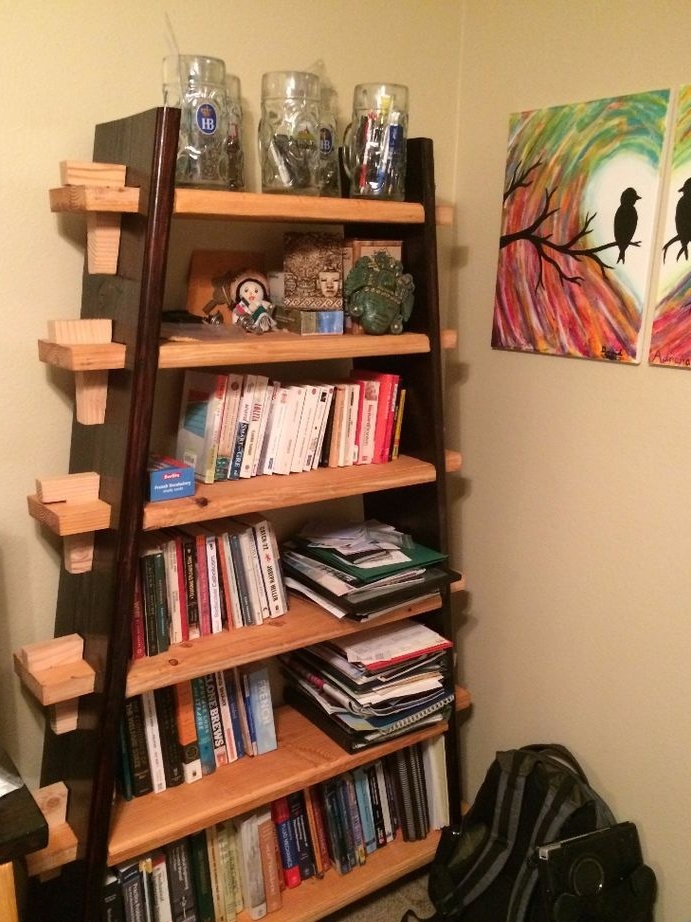
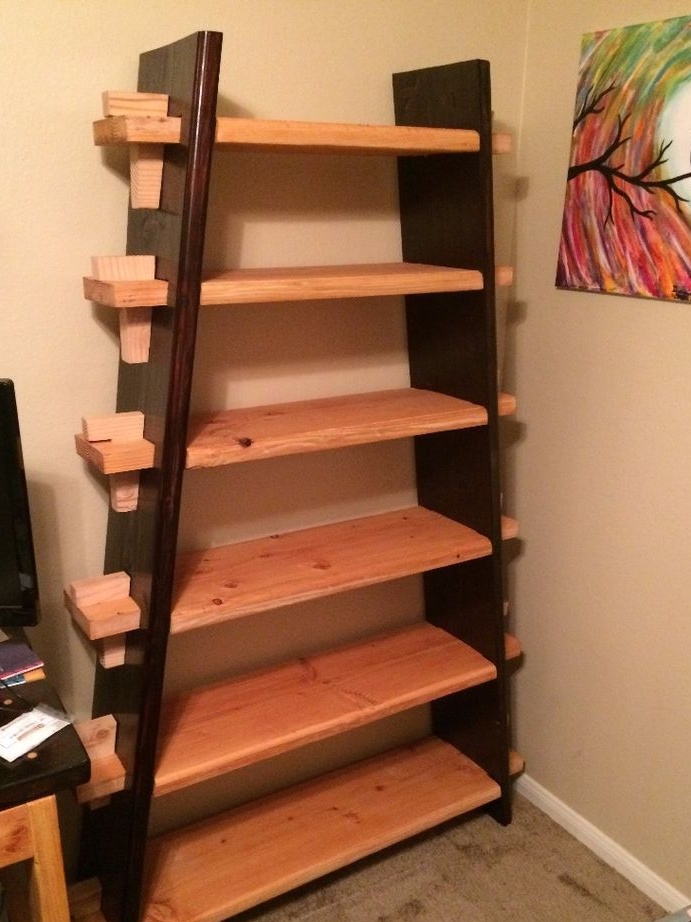
As a result, we got here such a shelf, the design of which will significantly facilitate moving.