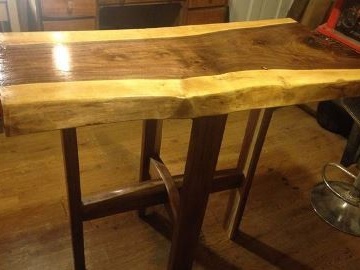
The interior design in the eco style, as before, does not lose its relevance. Mankind is striving for technocratic progress, but the true reality of nature is such that each individual is still drawn to nature. After all, human life beyond its limits is unthinkable.
In the pursuit of happiness, each of us experiences a shortage of free time, and not everyone succeeds in escaping to rest in the lap of nature. But the ways to achieve harmony are inexhaustible. In everyday life, you can surround yourself with household items, clothes and even unusual hobbies that are at least a little bit, but still bring you closer to the natural way of life.
Furniturethat we use every day is no exception. Natural materials, natural and laid-back shapes, natural shades - all this gives us inexhaustible opportunities for creativity in the field of interior design.
Making eco-style furniture is not an overwhelming task. On the contrary, projects sometimes turn out to be so simple that a person with modest initial skills could easily cope with them without significant experience in this field.
If you are on our site for a reason and want to learn how to make furniture do it yourself, this detailed workshop is just for you.
Today we will tell and show how to make a table made of wood cut. Its design is extremely simple and perfect for a beginner with some experience. At the end of the work, you will gain useful wood processing skills and in the future will be able to move on to much more complex products.
The table is universal and fits into almost any interior, so do not hesitate and, even worse, do not try to doubt your own abilities, but instead, boldly get to work.
In order to make a table out of do-it-yourself saw,you will need:
1. Materials:
- sawed a natural tree of 30 - 50 millimeters thick (select individual sizes);
- board for the manufacture of legs;
- furniture screws with caps for a wrench or ordinary - with a Phillips screwdriver;
- transparent decorative coating for wood;
- glue for wood.
2. Tools:
- a circular saw;
- a grinder or sandpaper of different degrees of granularity (coarse-grained and fine-grained);
- jigsaw;
- drill with a drill on wood;
- a screwdriver or wrench (a simple Phillips screwdriver for tightening screws);
- paint brush (+ roller);
- metal brush;
- a flat screwdriver or chisel to remove the bark;
- work gloves.
Prepare all the necessary materials and tools, as well as the place where you are going to work. Lay any unnecessary material on the floor so as not to stain it. It can be oilcloth, wrapping paper and even old wallpaper.
If you use a potentially unsafe substance for processing, choose a non-residential building with good ventilation for work. In summer, you can completely do without a room and carry out all the manipulations on the street under a canopy.
Step 1: material selection
You probably picked up a rare decorative wood with an interesting pattern. Please note that knots should not be placed on the workpiece, otherwise they may break off during processing and the product will be damaged. Therefore, the absence of knots is the first thing you should pay attention to when choosing a material.
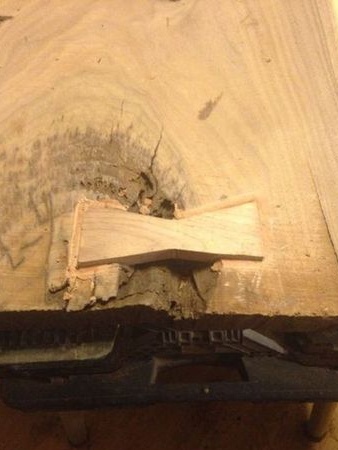
On our board, such a drawback is still present, but even after drying at the location of the knot, it did not lose strength. Thus, the knot turns into a kind of decorative element, and a flaw becomes a virtue. Nevertheless, we strengthened this place with a wooden insert, put on glue - just in case.
Secondly, the saw cut should be made from a well-dried tree. Otherwise, in the course of further drying, its fibers will dry out and decrease in size. In human language, your workpiece is simply cracked and will no longer be suitable for the manufacture of countertops.
Thirdly, determine the thickness of the saw. Too thin a piece in inexperienced hands can crack, and in general it will turn out to be fragile with further use. Too thick - it will look rough and will make the table noticeably heavy. The optimum thickness of the countertop is 30 - 50 mm, depending on the type of wood: wood, which is easily pricked, will require a greater thickness of the finished part, and strong and fibrous wood - less.
Step 2: preliminary preparation of the wooden workpiece for the countertop
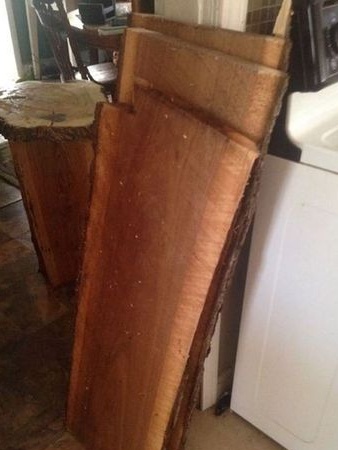
So, you have a saw cut of a tree and it’s completely nothing to yourself, but in fact there is a gap between the workpiece and a full-fledged piece of furniture, and now you can see for yourself. Your task is to add a practicality cut. This is what we will do.
First, remove the entire bark from the ends. Use a flat screwdriver or chisel. Work with gloves so as not to injure your hands and do not forget that newcomers tend to have minor injuries if they do not take proper care of protection.
You can easily remove the rest of the bark with a metal brush.
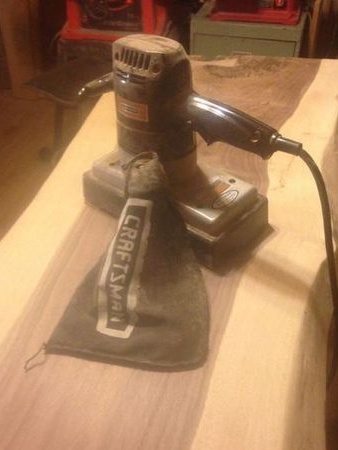
Now proceed to grinding. Use a grinder or sandpaper for this. The second option for a beginner is preferable. Working with your hands, you can feel the wood, understand its properties. In addition, when working with a grinder without the proper skill, the workpiece is easy to spoil, because the grinding process at this moment is very intense. Finally, when working with such a small part, it simply makes no sense to involve a grinder.
Sand both horizontal surfaces as well as the end edges with coarse sandpaper to remove any pronounced blemishes.
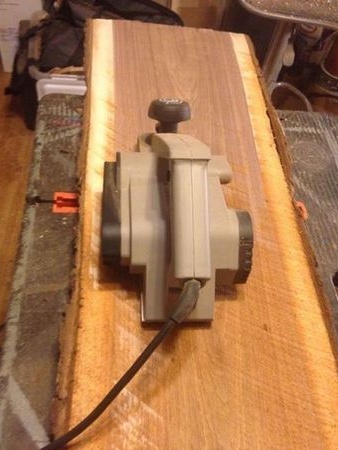
We shaved the boards before grinding.
Step 3: making the base
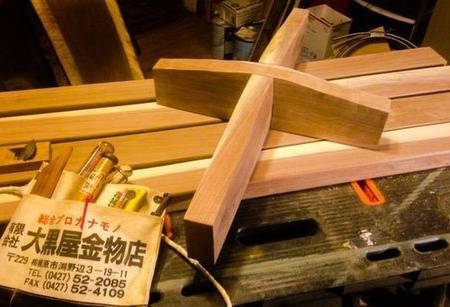
The base of our table consists of several parts: four legs and two short pieces, connected cross to cross.
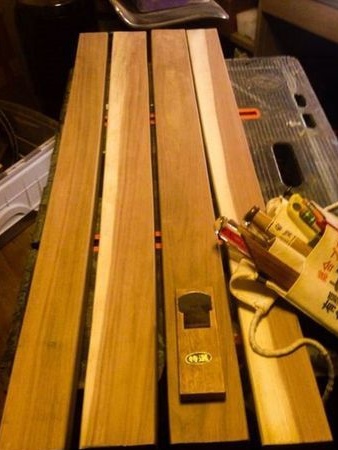
In order to make these elements, dissolve a couple of saw cuts into pieces of the required thickness. The circular saw will do the job perfectly.
Round off the legs for the crosswise connection of the legs with a jigsaw and join the groove into the groove using wood glue.
Step 4: Finishing Parts
It's time for fine processing. At this stage, you have to prepare the tree for painting. Sand it with fine-grained emery paper until the surface becomes smooth and pleasant to the touch.
Clean the workpieces from dust. This is a responsible task and should not be ignored. If you feel the need, additionally wipe the wood with a piece of clean, damp cloth.
Now start painting. To do this, you can use any transparent coating - colorless or with a suitable light shade. If you choose the second option, keep in mind that the result of painting may be unpredictable. Therefore, it will be better if you test the coating on pieces of wood of the same species.
The most affordable materials for protective and decorative processing in our case are:
- natural linseed oil - gives some hydrophobic properties and emphasizes the natural color of the tree, but does not protect it from mechanical damage;
- natural drying oil (often based on the same linseed oil) - acts the same as linseed oil;
- decorative oil (oil stain) - reliably protects wood from any influences, including light mechanical ones. It can be used to tint wood, but colorless oil can also be used;
- varnish on wood - equally reliably protects wood from all types of exposure. Choose a matte varnish to achieve the most natural effect.
Decide on the coating and paint the countertop. To do this, use the brush to apply the first layer and wait until it has completely dried to evaluate the result. For painting solid horizontal surfaces (as is the case with the working side of the countertop), you can use a small roller. Evenly applying the material with it is much easier than with a brush.
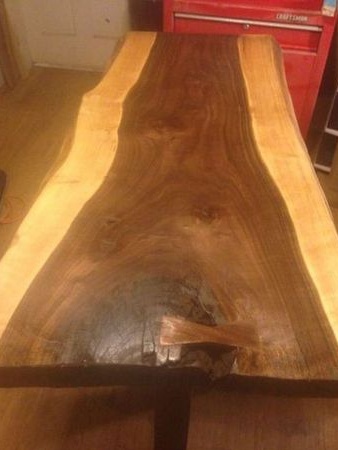
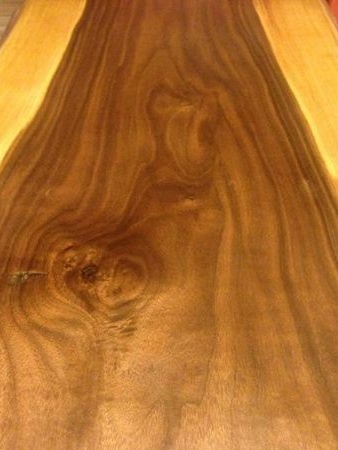
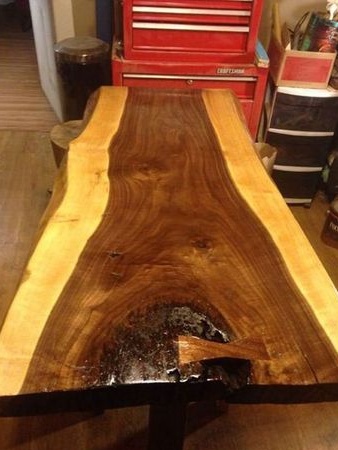
If after painting the tone seemed to you not deep enough or if the shade is lighter than expected, apply a second coat.
If you use varnish, we recommend sanding each new coat lightly with fine sandpaper. After a similar procedure, micro-scratches form on its surface and a new layer penetrates the previous one, forming a more resistant and reliable coating. Experienced craftsmen do this in the furniture manufacturing process, sometimes up to 5-7 layers of varnish.
Step 5: Build
Assemble the base and fix the countertop on it. Use furniture screws as fasteners. But first, be sure to drill holes for fasteners, otherwise the workpieces in the process run the risk of cracking.
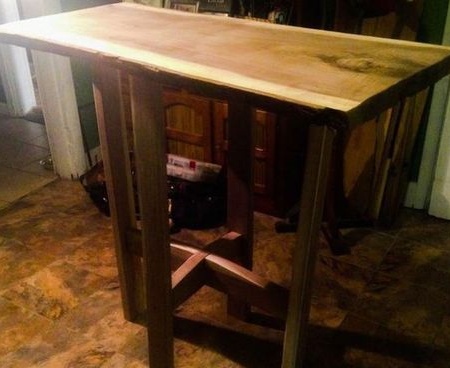
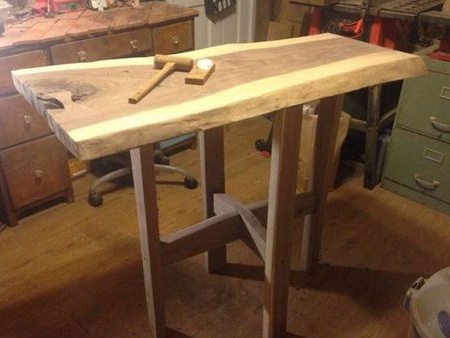
Congratulations! Surely you did the job perfectly, and the coffee table from the saw cut is ready. Now you are a beginner, but you are already a true master and you can proceed to the manufacture of more complex furniture elements.
