
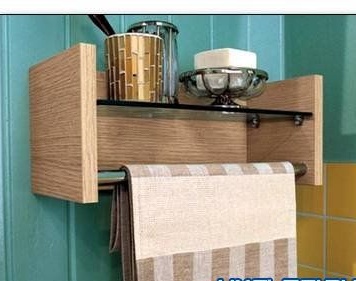
Hello to all the residents of our sites, the bathtub in each house should be with a convenient shelf so that you can easily get the right towel, soap and other accessories. It is in this article that I will tell how the author made a convenient shelf for accessories in the bath. A lot of materials do not need to be assembled; all the details can be made from the remnants of most people’s wooden boards or chipboard sheets.
In order to make this shelf, we need:
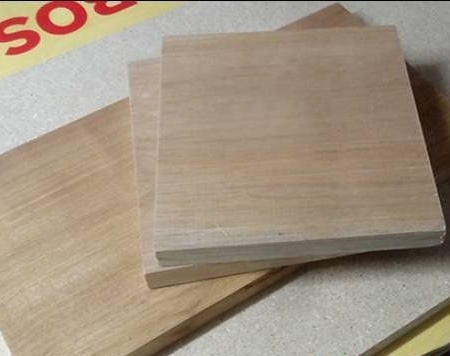
* 2 boards 200 x 200 mm in size, the material can be either chipboard or wood, in this case there will be sides.
* 1 board with a size of 200 x 400mm, which will serve as the back side.
* Chrome pipe with a diameter of 19 mm and a length of 410 mm.
* Strong glass 5 mm thick, 180 x 400 mm.
* Dowels.
* Glue for gluing wooden products.
* Sandpaper of different grain sizes.
* 2 key brackets and 20 mm screws.
You will also need tools, without them in any way:
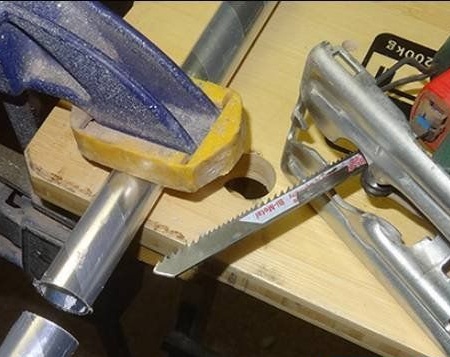
* An electric jigsaw for cutting steel, in this case, you just need a metal file for the jigsaw instead of the one for wood.
* Electric drill
* Quick clamps, or rather clamps, you can use a vise.
* Drawing tools such as tape measure and pencil.
That's all the details with the tools are ready, for a start we put on a dressing gown to protect, and we will also protect ourselves with goggles against accidental ingress of chips or other possible particles. Well, now you can definitely proceed to the gradual production homemade.
Step one.
First you need to cut a sheet of chipboard or wood, we do it using an electric jigsaw, for greater evenness it is most convenient to use a special emphasis that rests on the even side of the board, which ultimately guarantees an even cut. You need to saw off the details according to previously measured data, which need to be estimated according to the size of the wall so that it does not look bulky and not enough. On the ends you need to glue the edge, which will close the saw cut and hide from the eyes the very glued shavings of chipboard plates.
Step Two
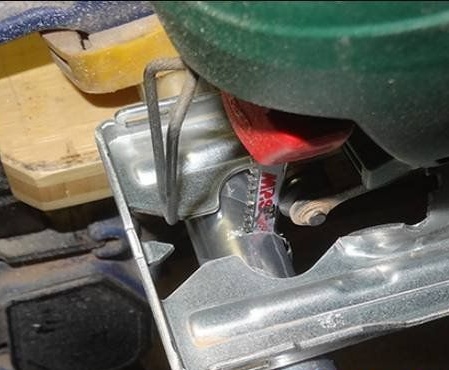
Now we turn to the measurement of details, it will be better to measure in this case with a tape measure, since the length of the next workpiece from a chrome pipe is 410 mm, it is at this point that we put a dash with a pencil, and then, installing a metal saw in the jigsaw, (this is done in two ways , using the hex key in the base of the tool) we saw off the future part, which in turn is firmly clamped to the workbench using large clamps.If there are no clamps, then a vice will fit, only before clamping the part, it is necessary to wrap it with some soft material, for example, a rag, in order to leave the workpiece without noticeable dents and similar defects. Working with a jigsaw is very unsafe, so wear safety glasses, as well as hand protection, whether gloves or special hands.
Step Three
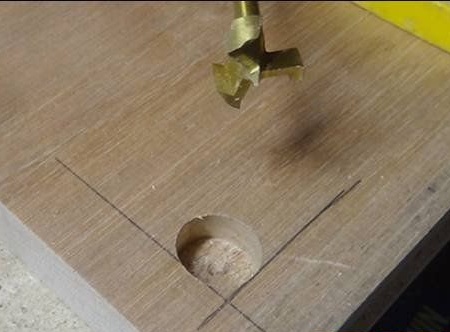
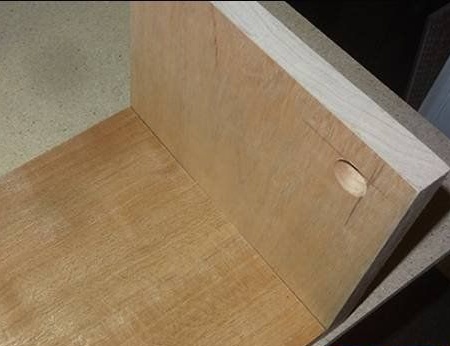
Armed with a tape measure, we measure 20 mm from the edge on both sides, and then holding the drill into a screwdriver, drill a hole, where we will install a chrome pipe in the future, but not drill through, but leaving a small wall thickness.
Step Four
Making grooves is not an easy job, but the edge grooving tool, which makes smooth grooves with good accuracy, will help us with this, they must be done in the side and rear sections.
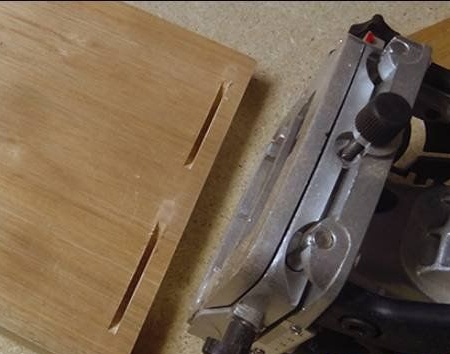
In the absence of this tool, you can use the more common method, namely, attaching to the spikes, they are made easier, and in small quantities they will not require much time. Before the next step, check if the sections coincide with each other, if everything is fine, then move on.
Step Five
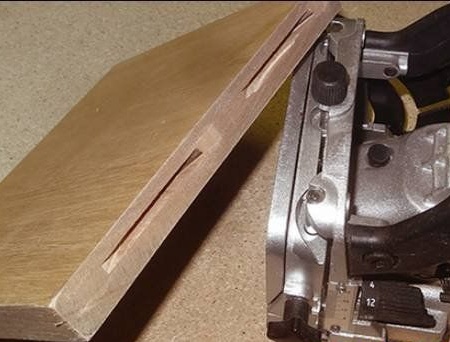
Now you need to set the cutting depth to the size of the dowels, then apply glue to glue the tree into the cut out slots.
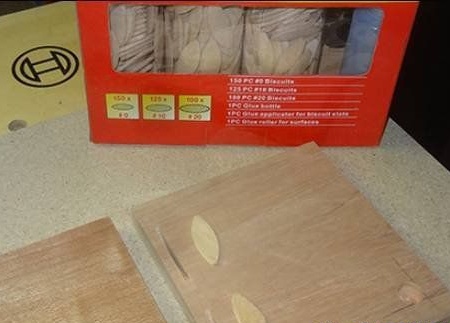
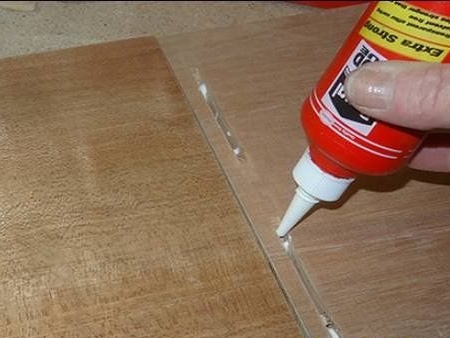
Step Six
We insert the finished dowels in one direction, and then collect the parts together, installing them in the grooves smeared with glue.
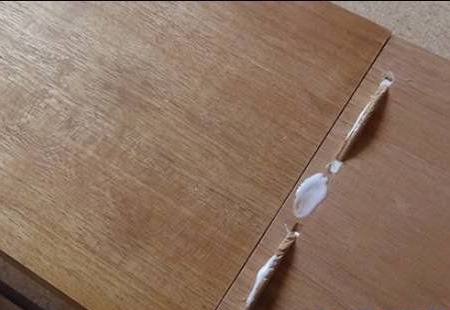
Excess glue will likely come out, but this is not a problem, because in this case it will even be better, because there will be a part in this place.
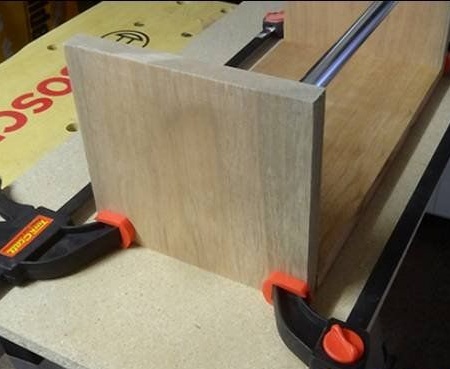
Seventh step.
On the other hand, make inserts for the chrome tube before installing the side section, after installing the sides, you can finally clamp the entire structure until it completely dries, which usually takes 24 hours.
Step Eight.
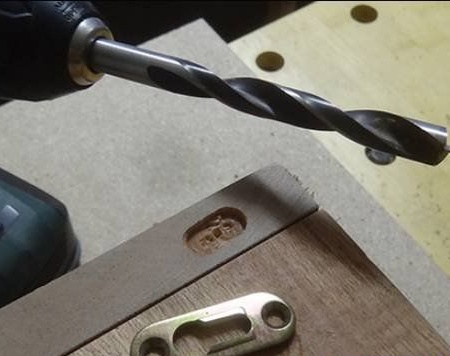
Since the shelf will not stand on any surface, but hang on the wall, you need to think about how it will be kept on the wall, you don’t need to think about it for a long time, this method is called mounting on brackets, which you need to do in our homemade product . To install the bracket, we mark with a pencil the future location of the brackets on the back wall.
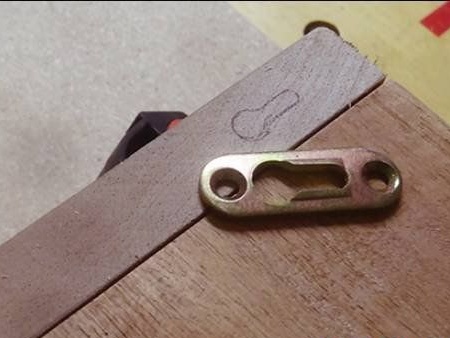
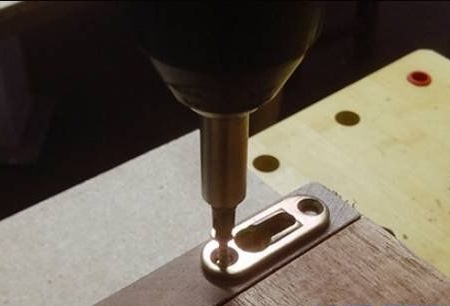
Next, using a drill with a diameter of 10 mm, drill a hole with a depth of 5 mm and use the 20 mm screws to fix the brackets.
And finally, you need to install a glass shelf.
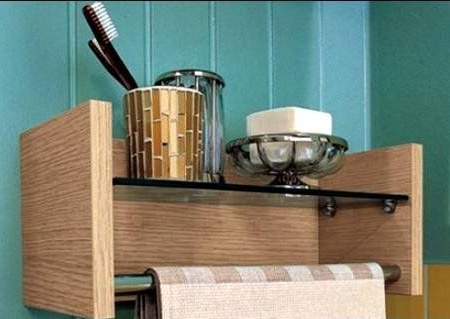
On this is a bath shelf do it yourself I’m ready, thank you all and good homemade goods to you.