
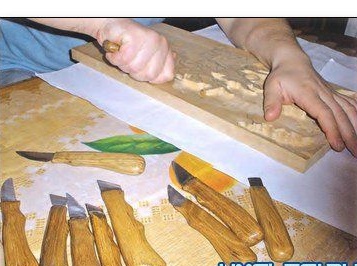
Hello to all lovers homemade, every specialist knows well that the tool has a large role in the work, namely its reliability and build quality. Thinking about this topic, thoughts arise to make an ideal convenient tool do it yourself, in this case, it’s wood cutters, and cutting patterns with their help is quite an exciting experience, which is good news. The main thing in creating cutters is to be more careful, since you will have to work with sharp objects, namely with the cutting part. The author’s idea to make woodcarvings with his own hands was accompanied by the fact that there weren’t any nearby tools, and they weren’t in local stores either.
The properties that a good wood carving knife should have are:
• High-quality steel, increasing the resource of knives and long-term sharpness.
• Ergonomic (comfortable) handles.
• Relative ease of manufacture.
• Reliability.
To create this home-made product you don’t need any hard-to-reach materials, they shouldn’t be here, since it was planned in advance that all the details should be easily accessible by most joiners and woodworkers.
Necessary materials and tools:
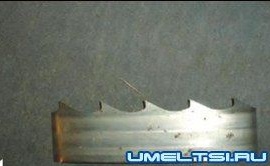
* Pieces of a band saw made of durable steel, which from experience confirms their long retention of sharpening.
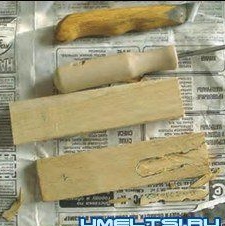
* Remains of oak planks left over from past works, since oak itself is strong, beautiful and technologically advanced in its own way.
From the tools you will need:
* Electric sharpener.
* Belt sander with a grain size of about 40, as well as a sandpaper (grain size 80, and for finishing - 240, 800 and 1000).
* Hacksaw.
* Respiratory protection - respirator (gauze mask).
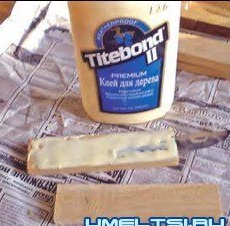
* Joiner's glue.
That's all the parts with the right tools are ready, now let's proceed to the phased assembly.
Step one.
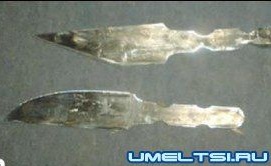
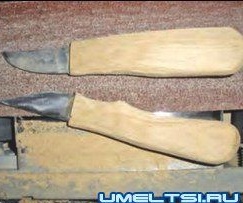
The first step is to make a blade. From the pieces of the saw blade about 8 cm long, the author machined the metal blanks of the blades of the desired shape, and put the shanks on the blanks, their length is about 4.5-5 cm, these sizes guarantee sufficient strength of the blade in the handle.
For greater reliability of fixation (protection from loosening and falling of the knife from the handle), semicircular cuts were made on the sides of the shank.
The cross section of the blade of the knife has a wedge narrowing, the angle of which varies from 10 to 15 degrees from the butt to the cutting edge, which is the descent of the blade.Well, the cutting edge is attached to this shape with a small chamfer, that is, a large narrowing, and therefore an angle already at 25-30 degrees close to the blade edge.
A large chamfer on the knives must be done before the moment when the shank is not glued to the handle. The shape of the chamfer must be given on both sides, while observing a certain angle, the grinding of the metal should occur symmetrically. It is known from material science that with intensive grinding, the metal heats up, which causes its tempering, and this leads to the fact that the metal becomes softer and loses its ability to maintain sharpening. To prevent this from happening, the workpiece to be machined periodically needs to be cooled in water, thereby avoiding overheating. It is most convenient when the container with cold water is near and lowering the billet is not difficult. In order to finally form the blade, as well as to sharpen and polish it, you need to install the handle, which will actually happen next.
Step Two
After long work with metal, we proceed to the manufacture of the handle; for this, oak bars were well suited, the dimensions of which were 12 by 22 mm in cross section, and the length was slightly more than 120 mm. These bars were selected so that the glued surfaces were smooth. To simplify the work, we make a sample of the socket for the shank in one of the halves of the future handle.
First, the shank is processed using a grinder at the edges, in order to get rid of burrs. Then, applying the shank to the prepared bar, circle it with a pencil. Using the chisels, we select the nest to a depth that is equal to the thickness of the workpiece, periodically collecting dry the assembly of the structure to check the fit of the bars to each other. In the case of insufficient depth of the nest, the handle either does not stick together or if it is poorly connected, it will simply crack when used. Too deep a nest will cause the blade to walk from side to side, which leads to undesirable consequences, namely cracking of the handle or deformation of the shank. Therefore, to the selection of nests for the shank, show maximum accuracy.
After you were convinced during the control assembly “dry” that all the parts fit tightly, in this case the shank, as well as in the absence of gaps between the handle bars and halves, you can proceed to gluing. We apply carpentry lei to the surface of the bar and into the nest under the shank, since it is impossible to achieve accuracy in depth with manual selection of the nest, just in case it is better to fill it with glue, after drying of which the shank will hold due to its hardness, in case of inaccuracy. On the adjacent part of the handle, you also need to apply glue, but in a smaller layer.
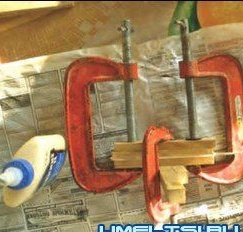
Step Three
Then we combine the details (it is necessary to connect the ends of the blocks located closer to the blade as accurately as possible), and tighten them with clamps. Excess glue is removed with a damp cloth and left for 12 hours until completely dry.
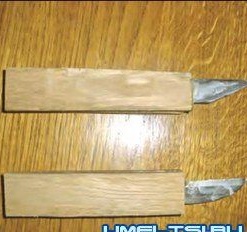
Step Four
Now we will adjust the handle to the appropriate shape for the cutting tool, usually a slight bend in the back to rest the thumb.

But you can not do without the features of these pens, they differ in that
their back is wider and rounder than the one closer to the blade, because of this, all the workpieces for the handles in the first stage of processing are more like a truncated elongated pyramid, and there is also a recess for the index finger.

After gluing the workpiece, the back is sawed off with a hacksaw, to a size of 12 cm.
Then, with a belt sander, we grind the ends of the handles, Do not forget to use personal protective equipment - safety glasses and a respirator, since oak dust can cause allergies.
Grinding takes place first with a grain size of 40, and then in increasing order until the workpiece is smooth.
We cover with nitrol varnish.
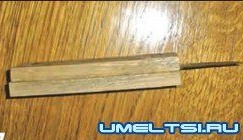
Step Four
We bring the cutting part, we need a small chamfer, the sharpening angle of which for these knives is about 25-30 °. To form a small chamfer, the author uses a sandpaper of different grain sizes, gradually increasing grain size, starting from 240, going to 800, and then to 1000, eventually everything is polished on a leather belt clamped on a bar. If the sharpening is successful, then the wood should be cut both along and across the fibers without any special effort, while the cut surface should be smooth and shiny, the so-called “oil” cut.
Using this manufacturing template, several knives were made, in general, they are quite reliable and easy to use, which is very decent for the layman.
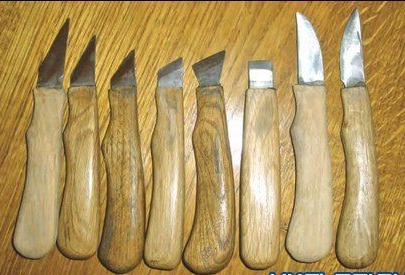
On this homemade knives for woodcarving are ready, thank you all and good luck to you.