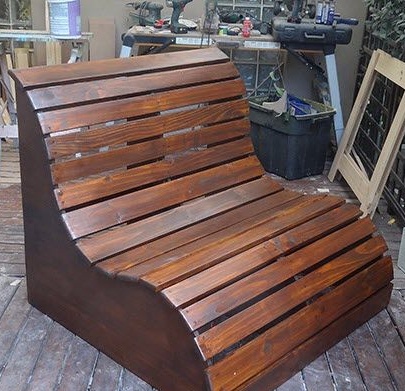
There are so many craftsmen in this world - there are so many bench designs: from strict classical forms to stylish elegant little things. Sometimes you wonder how a simple bench can decorate a garden or add a twist to a terrace. And it happened exactly with our shop. The streamlined design and luxurious sheen of wood exceeded all expectations.
This design is quite simple, but, nevertheless, will suit the master with the existing skills of such work. For solid curly details, we used plywood, and sewed up a bench with pine battens.
So, if you were inspired by the photos of our detailed workshop, prepare everything you need and get started soon.
In order to make a garden bench do it yourself you will need today:
1. Materials:
- plywood for the manufacture of the supporting structure (we used sheets of 900 x 900 mm, 16 mm thick);
- pine slats, 140-150 cm long;
- a couple of scraps of pine boards to connect the middle bearing part (in our case, it turned out to be composite, because on the whole - there was not enough material);
- glue for wood;
- wood screws;
- putty for wood;
- decorative coating for wood;
2. Tools:
- jigsaw;
- electric drill;
- screwdriver;
- Sander;
- building tape measure
- ruler;
- paint brush;
- putty knife;
- a pencil.
Gather all materials, prepare tools and a workplace. In the summer season, you can work outdoors under a canopy.
Step 1: manufacture of base parts
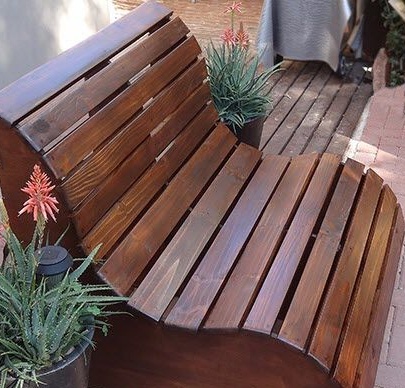
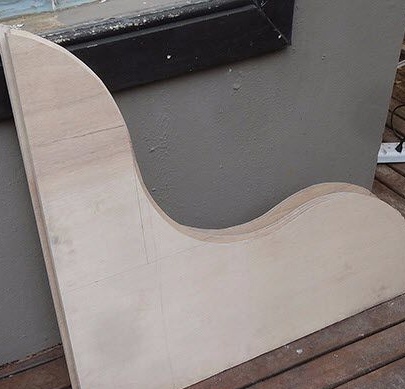
Start by making the elements of the base of the bench. It will consist of 3 figured details and three pine slats that connect them together.
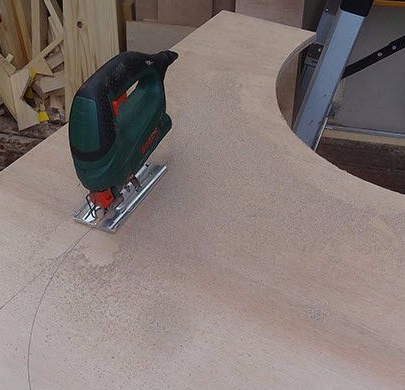
For curly elements we used plywood. After processing with a protective decorative coating and accurate operation, it will last quite a long time. If we decided to use wooden boards for these purposes, we would first have to make a shield by gluing them together and fixing the groove in the groove. This is a difficult and long work and that is why the choice fell on the finished sheet material.
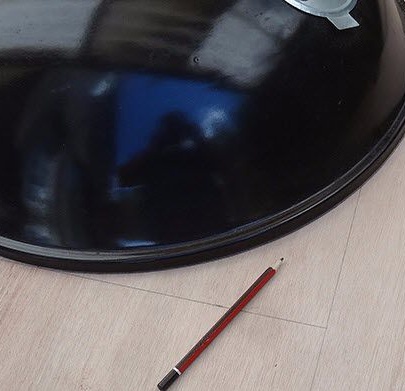
To draw the figures of the necessary form, we used the tabletop of the coffee table. If you want, you can build patterns on cardboard or wallpaper, cut them out and only then transfer the drawing to the material. The height and width of the elements should be at least 90 cm. Their thickness was 16 mm.
The design for reliability provides for three curly parts, but we did not have enough material for the third integral part. In order not to buy another sheet of plywood, we made it a composite of two parts, which are connected by scraps of wooden battens.
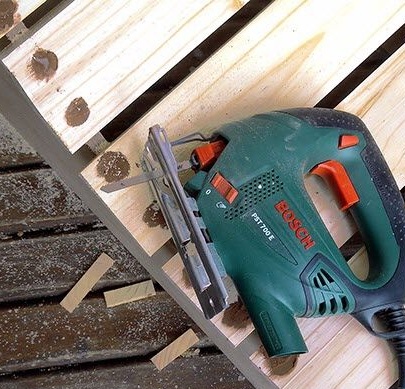
Cut out the parts using a jigsaw. Mark three grooves under the wooden blocks on each workpiece and saw them out.
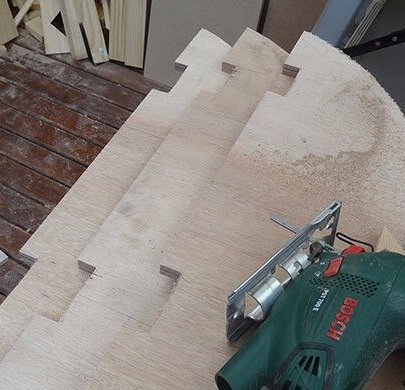
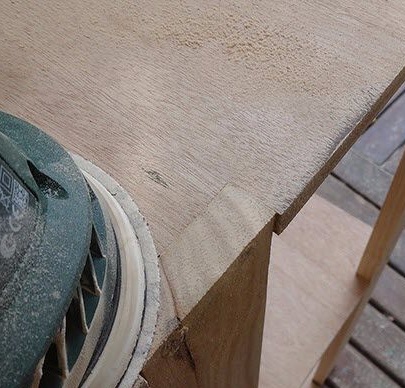
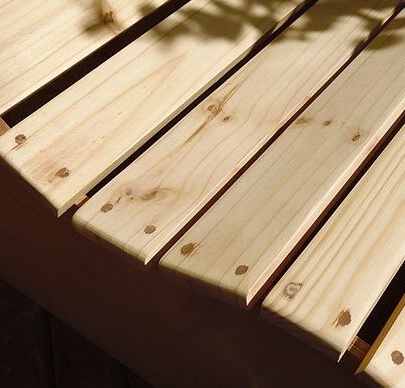
Prepare the bars for the supporting structure. To do this, cut a pre-prepared narrow board into segments of 140 cm. You should get such parts 3. Grind them with a grinding machine before connecting all the elements together. Sand the edges of the plywood blanks as well.
Step 2: preparing the rails
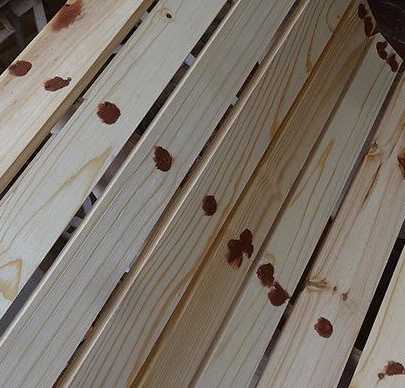
Prepare slats 150 cm long - this is 10 cm longer than the supporting structure. Grind them with a grinder to prepare the wood surface for painting.
Step 3: assembly of the structure
Connect 3 curly blanks with bars using self-tapping screws and coat the joints with wood glue. To prevent the bars from cracking when screwing in the screws, use an electric drill and pre-drill holes for fasteners in them.
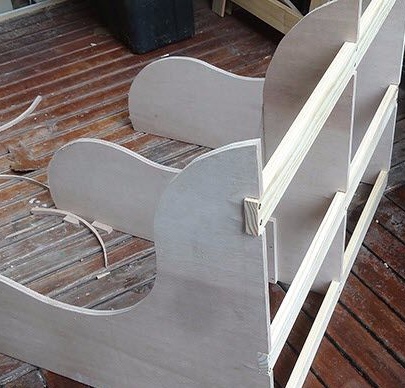
Proceed to screw the rails. In each of them also drill holes for self-tapping screws.
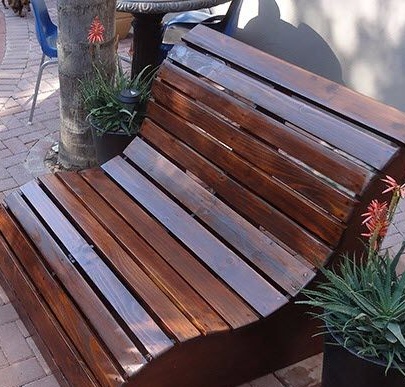
The design is basically ready. Therefore, you can sit down and test it for convenience and reliability.
Step 4: Finishing
Stack wood hats with wood putty. We will paint the bench in a darker tone, so boldly used dark brown. Wait for it to dry completely.
Start finishing sanding. Take particular care of the mounts. Gently round the transverse edges of the rails at the edges.
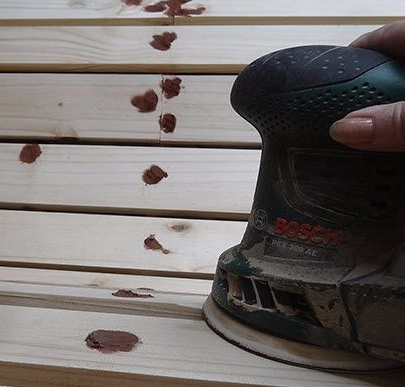
Clean the bench of chips and wood dust. If necessary, wipe it with a damp, clean cloth and proceed to painting.
We used oil-based wood varnish with a beautiful dark brown undertone. You can do the same, or you can choose any paint and varnish material of your choice: paint with a dense coating, decorative oil, natural linseed oil or drying oil, stain. Or use several coatings at once. For example, stain and varnish or paint and varnish and so on.
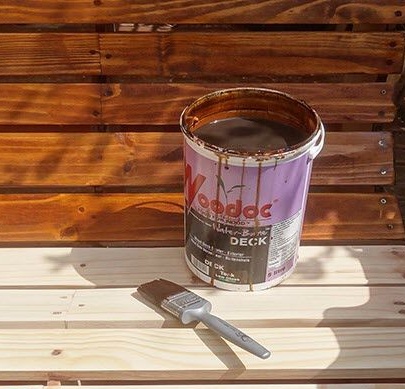
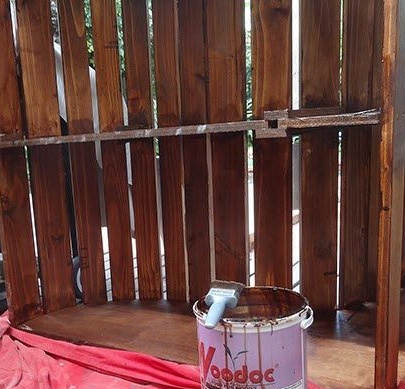
Please note that when using varnish or paint, it is better to apply the coating in several layers at once, lightly sanded with fine-grained sanding paper so that each new layer penetrates deep into the previous one. Thus, you will receive a coating resistant to atmospheric phenomena and mechanical damage, and the bench will serve you for several years without repair.
The garden bench is ready and our workshop has come to an end. We really hope that he will inspire you to new beginnings and the creation of wonderful homemade!