

This article will examine the creation of a self-balancing vehicle or simply a Segway. Almost all materials for creating this device are easily accessible.
The device itself is a platform on which the driver stands. By tilting the body, two electric motors are controlled through a chain of circuits and microcontrollers responsible for balancing.
Materials:
- Wireless XBee control module.
microcontroller Arduino
-batteries
InvenSense MPU-6050 sensor on the “GY-521” module,
-wooden bars
-button
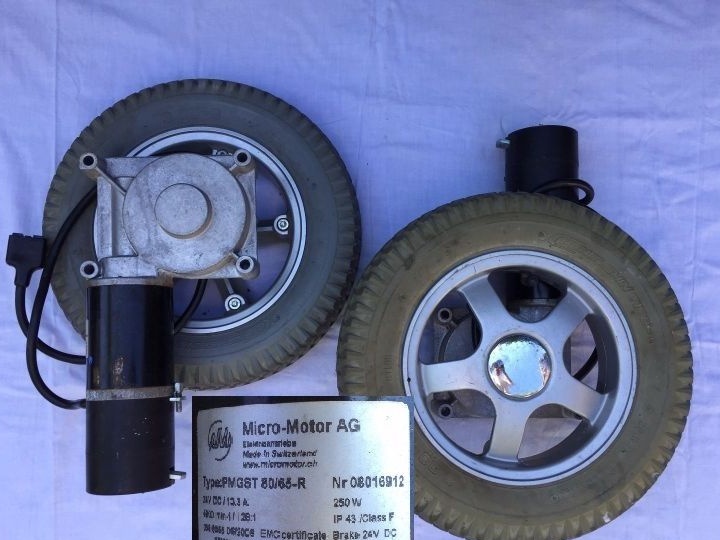
-two wheels
and so on, indicated in the article and in the photographs.
Step One: Determine the required characteristics and design the system.
When creating this device, the author tried to fit into such parameters as:
-passability and power necessary for free movement even on gravel
- batteries with sufficient capacity to provide at least one hour of continuous operation of the device
-to provide the possibility of wireless control, as well as recording data on the operation of the device on an SD card to identify and troubleshoot.
In addition, it is desirable that the cost of creating such a device be less than ordering an original off-road hoverboard.
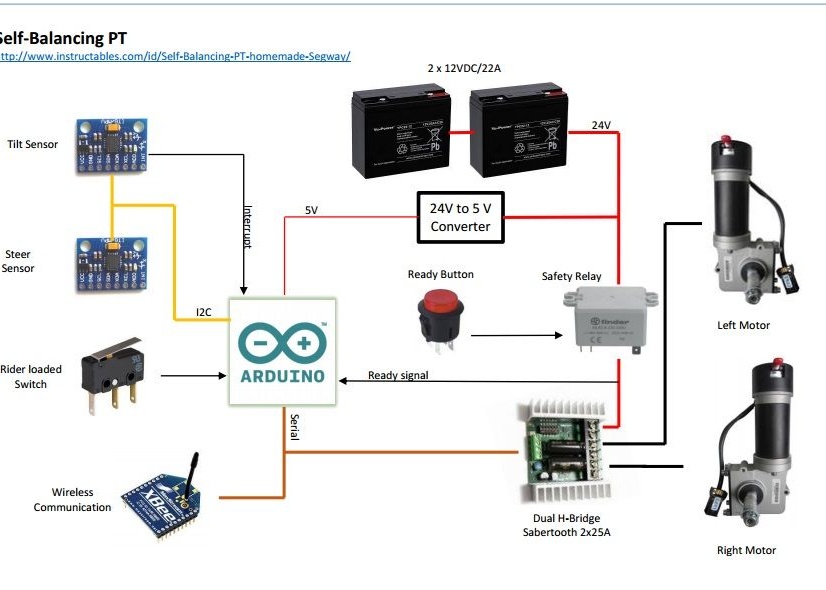
According to the diagram below, you can see the circuit diagram of the self-balancing vehicle.
The following image shows the operation system of the gyroscope drive.

The choice of a microcontroller for controlling Segway systems is diverse, the author of the Arduino system is most preferred because of its price categories. Such controllers as Arduino Uno, Arduino Nano will do, or you can take the ATmega 328 to use as a separate chip.
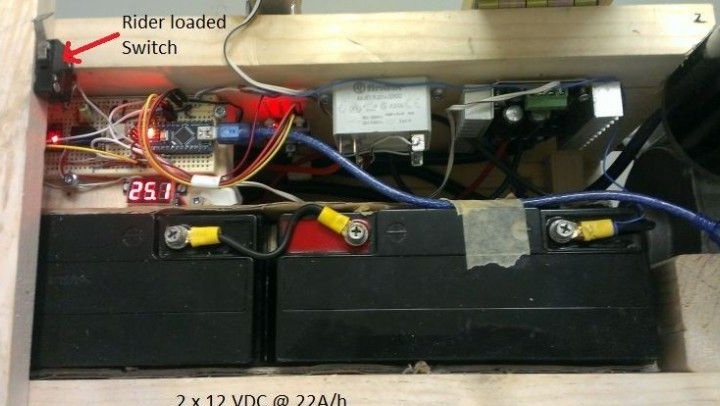
To power a dual bridge motor control circuit, a 24 V supply voltage is needed, this voltage is easily achieved by connecting 12 V car batteries in series.
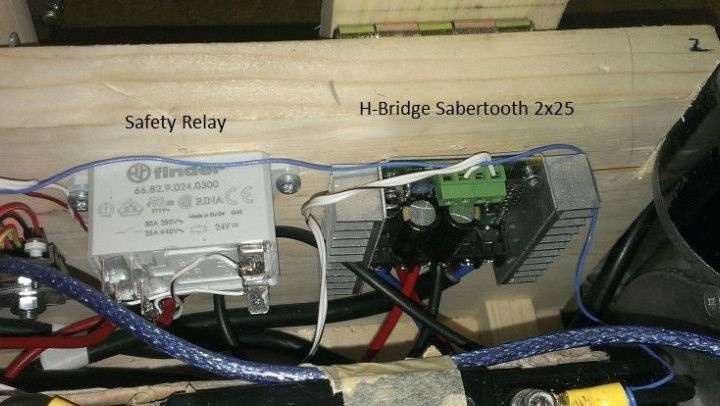
The system is designed so that power is supplied to the engines only while the start button is pressed, so for a quick stop, just release it. At the same time, the Arduino platform must support serial communication with both the bridge control circuit of the engines and the wireless control module.
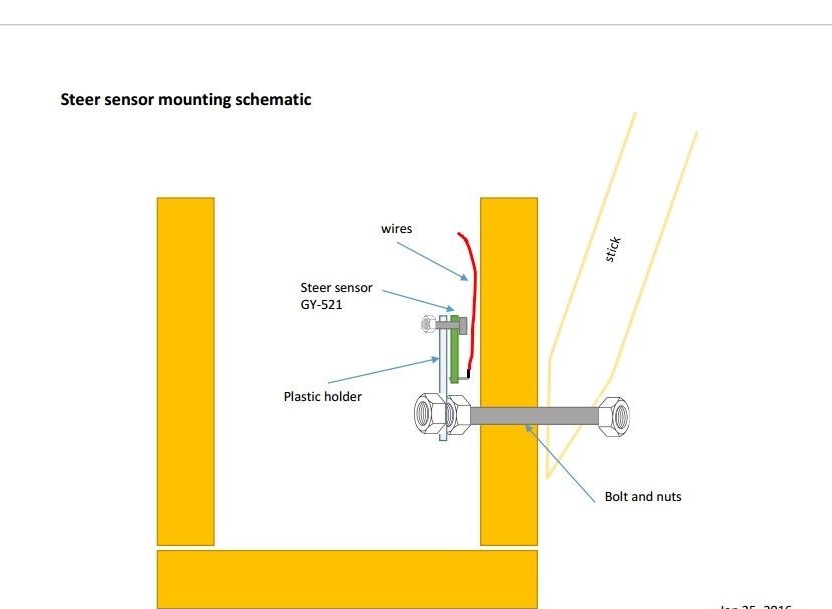
Due to the InvenSense MPU-6050 sensor on the “GY-521” module, which processes acceleration and carries the functions of a gyroscope, the tilt parameters are measured.The sensor was located on two separate expansion cards. The l2c bus communicates with the Arduino microcontroller. Moreover, the tilt sensor with the address 0x68 was programmed in such a way as to poll every 20 ms and provide interruption to the Arduino microcontroller. Another sensor has the address 0x69 and it is pulled directly to the Arduino.
When the user enters the platform of the scooter, the load limit switch is activated, which activates the algorithm mode for balancing Segway.
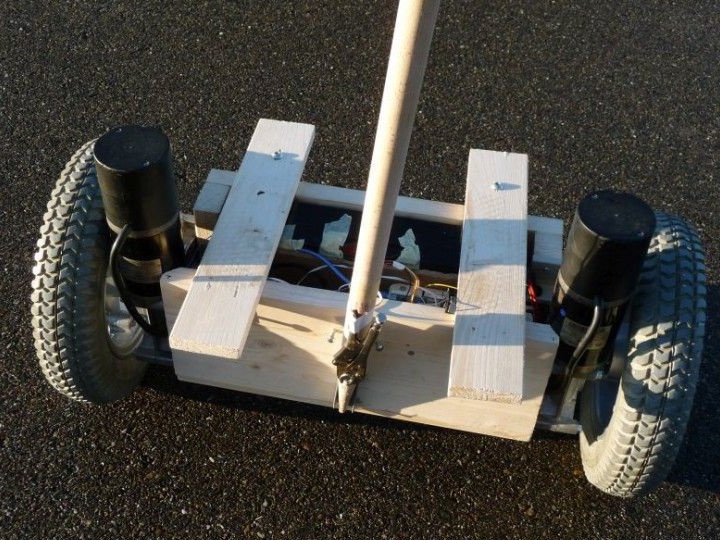
Step Two: Create a hull of the hoverboard and install the basic elements.
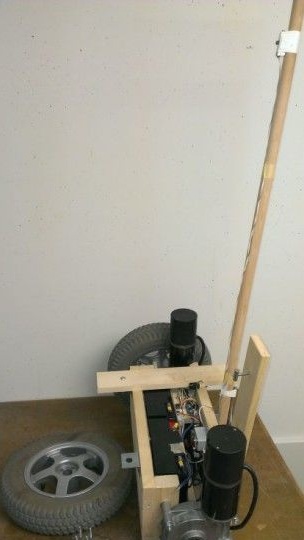

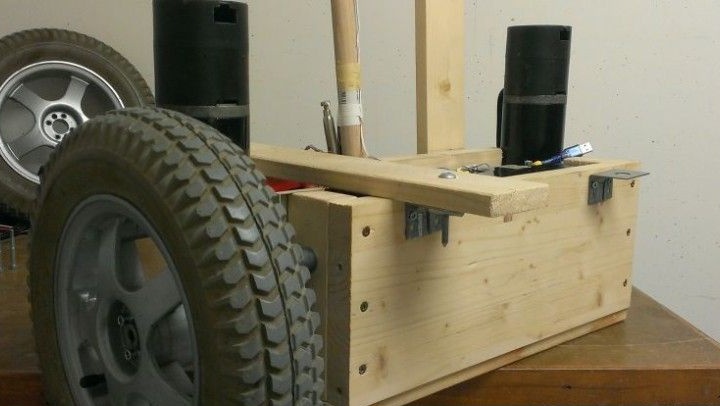


After determining the basic concept of the gyro scooter operation scheme, the author proceeded to the direct assembly of its body and installation of the main parts. The main material was wooden boards and bars. The tree weighs little, which will positively affect the duration of the battery charge, in addition, the wood is easily processed and is an insulator. From these boards, a box was made in which batteries, engines and microcircuits will be installed. Thus, a U-shaped wooden part was obtained, on which wheels and engines are mounted using bolts.
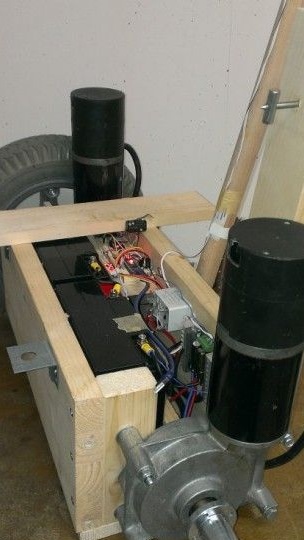
The transmission of engine power to the wheels will go through gear transmission. When laying the main components in the Segway housing, it is very important to ensure that the weight is distributed evenly when the Segway is brought into a working vertical position. Therefore, if you do not take into account the distribution of weight from heavy batteries, then the work of balancing the device will be difficult.
In this case, the author placed the batteries at the back, so that to compensate for the weight of the engine, which is located in the center of the device. Electronic component devices were placed between the engine and the batteries. For subsequent testing, a temporary start button on the Segway handle was also attached.
Step Three: The electrical circuit.

According to the above diagram, all the wires in the Segway housing were implemented. Also, in accordance with the table below, all the outputs of the Arduino microcontroller were connected to the engine control bridge circuit, as well as to the balancing sensors.

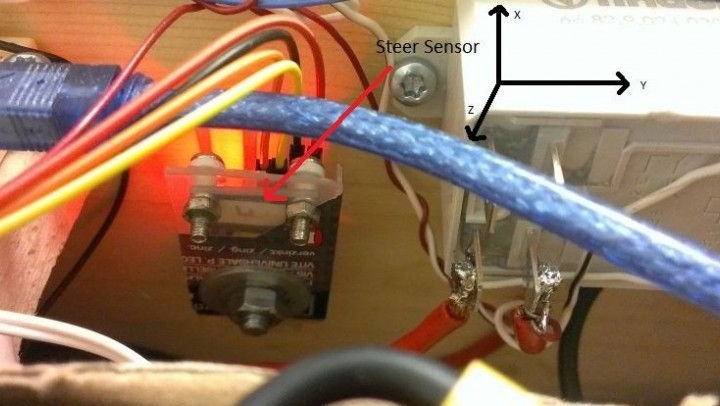
The following diagram shows a tilt sensor installed horizontally, while the control sensor was installed vertically along the Y axis.
Step Four: Test and configure the device.

After the previous steps, the author received model Segway for testing.
When conducting testing, it is important to take into account factors such as the safety of the test area, as well as protective equipment in the form of protective shields and a helmet for the driver.
The author decided to start testing Segway by downloading the code to the microcontroller and checking its connection with control circuits and sensors.
Software:
Arduino Terminal is great for checking the functionality of the code, as well as the possible search for problems for their subsequent debugging. It is important to correctly adjust the gain of the PID controller, which will depend on the parameters of the used motor.
After adjusting the regulator, power is supplied to the controller, and the sensors enter the standby state. Then the start button is pressed, and the engines turn on. By tilting Segway, the driver controls the movement due to the work of the balancing algorithm.
The video below shows the operation of the assembled hovercraft device: