» Electronics » LEDs DIY rechargeable LED lamp

DIY rechargeable LED lamp

Greetings to lovers homemade !
I decided to share with you my little homemade product, which is quite simple to manufacture, and if desired, everyone can repeat it.

How? what? And why ? - Now I will try to tell in detail and show!

So, let's begin:
It all started with the fact that I got a broken LED lamp in my hands, which I initially tried to restore, but alas, nothing came of it. It was a pity to throw out, as always, with the words: - “come in handy”, put aside. Over time, I accidentally stumbled upon it, and it was decided to do something useful, namely, a rechargeable LED lamp.

I needed:

- Broken LED lamp;
- 5 LEDs of 1 w each;
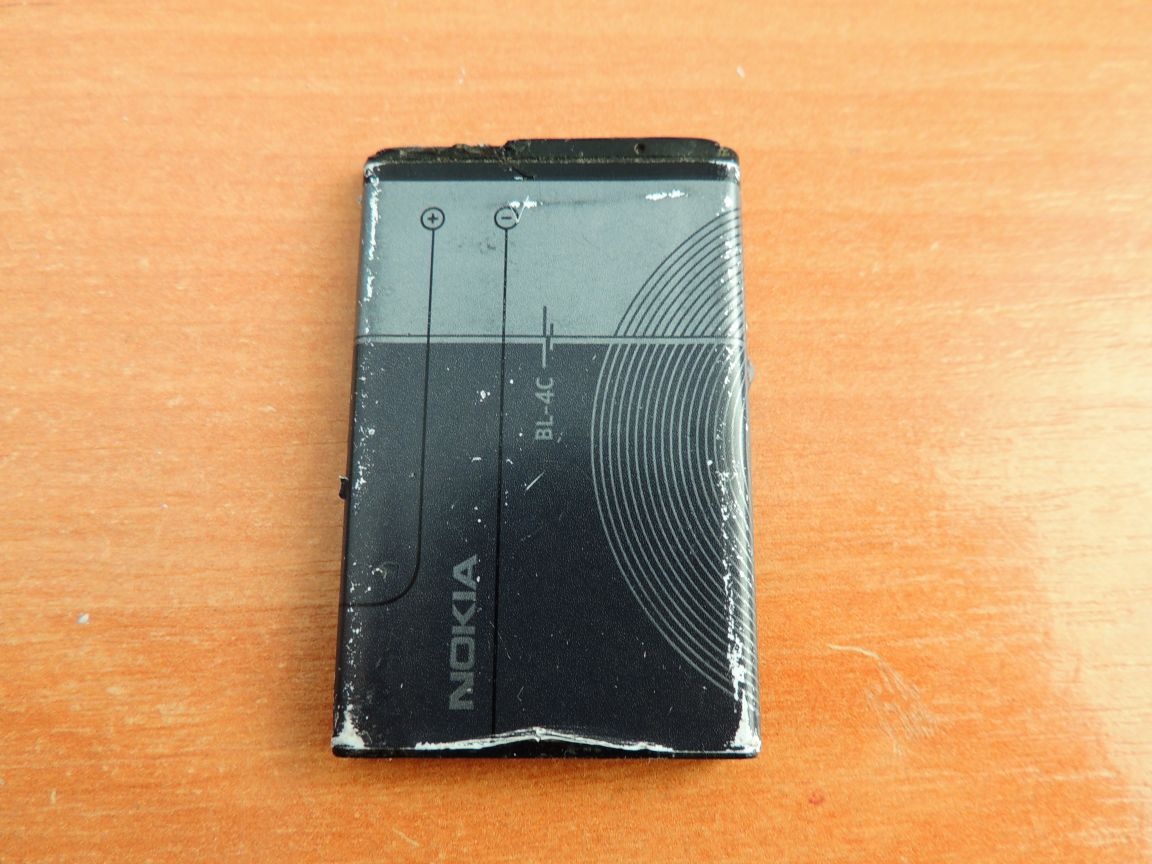
- 1 battery 3.7 V (from the phone);
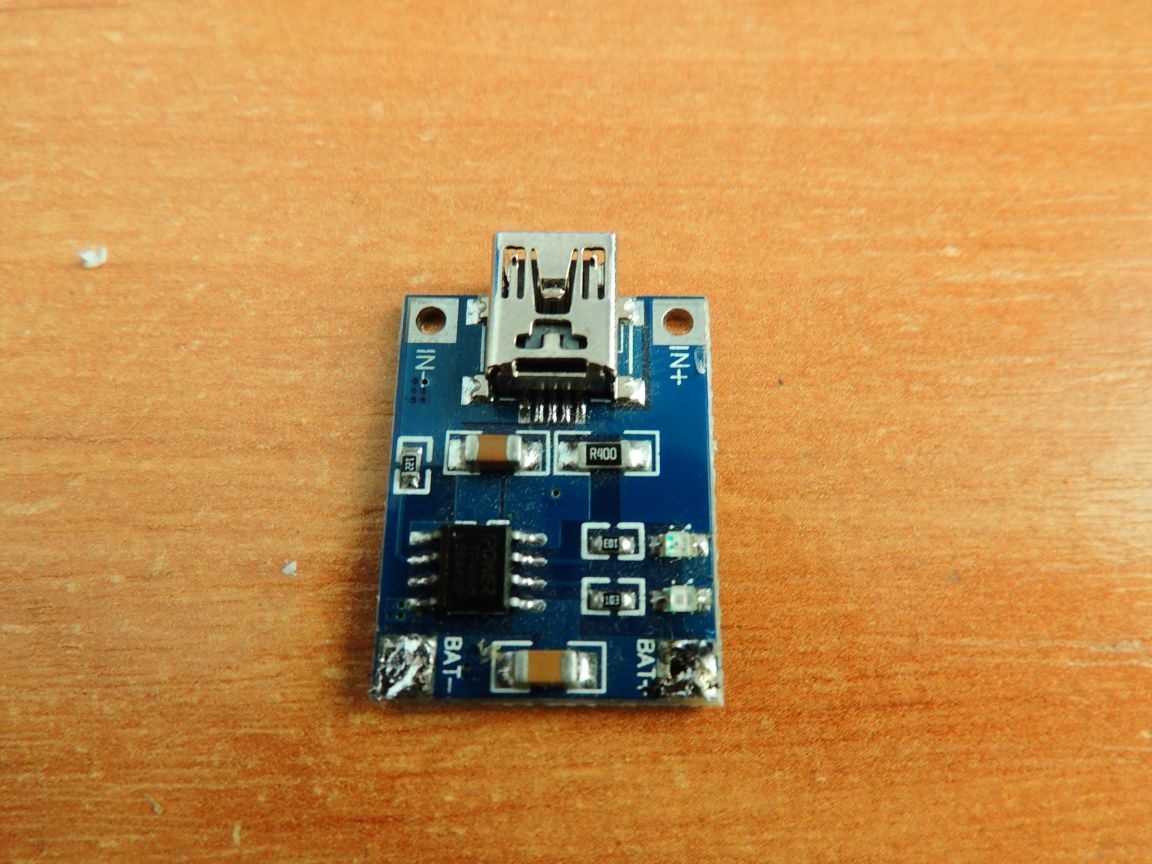
- 1 li-ion battery charge module:
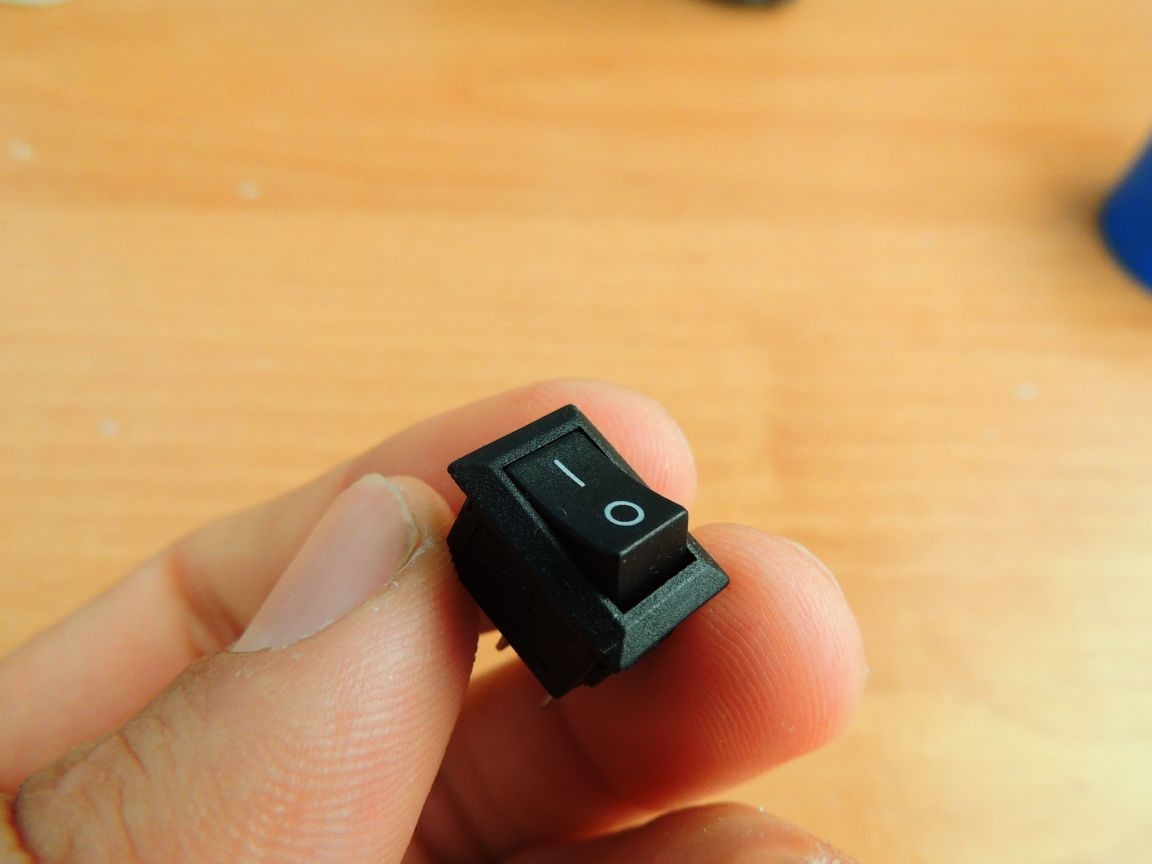
- 1 switch;
- 1 resistor 50 ohms;

Tool:
- stationery knife;
- glue gun;
- soldering iron;

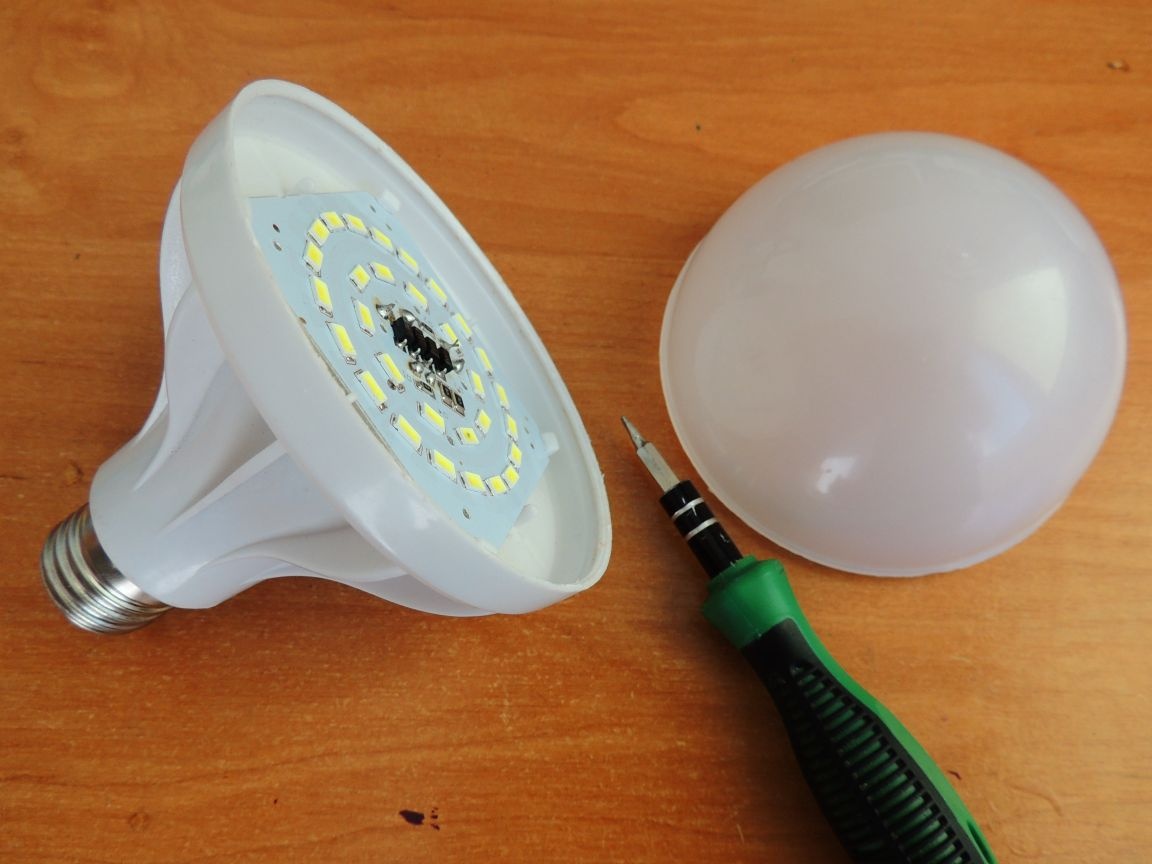
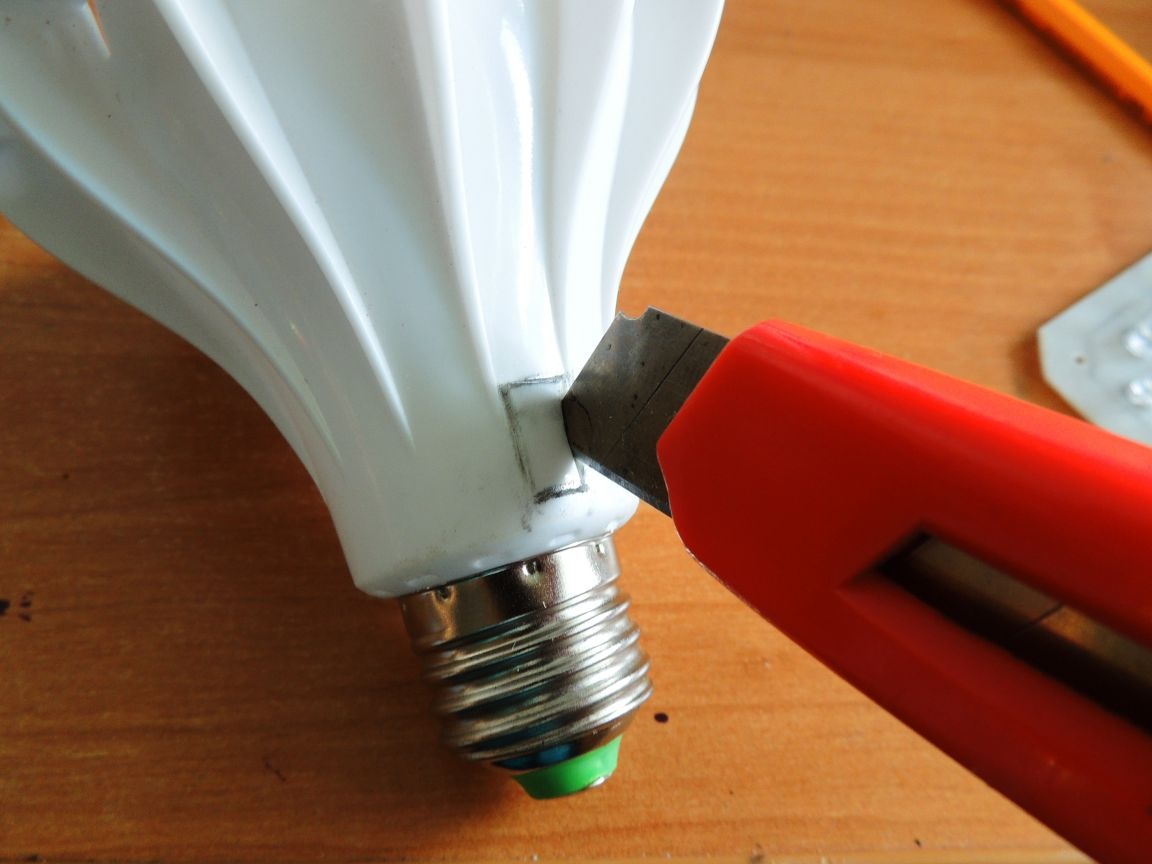
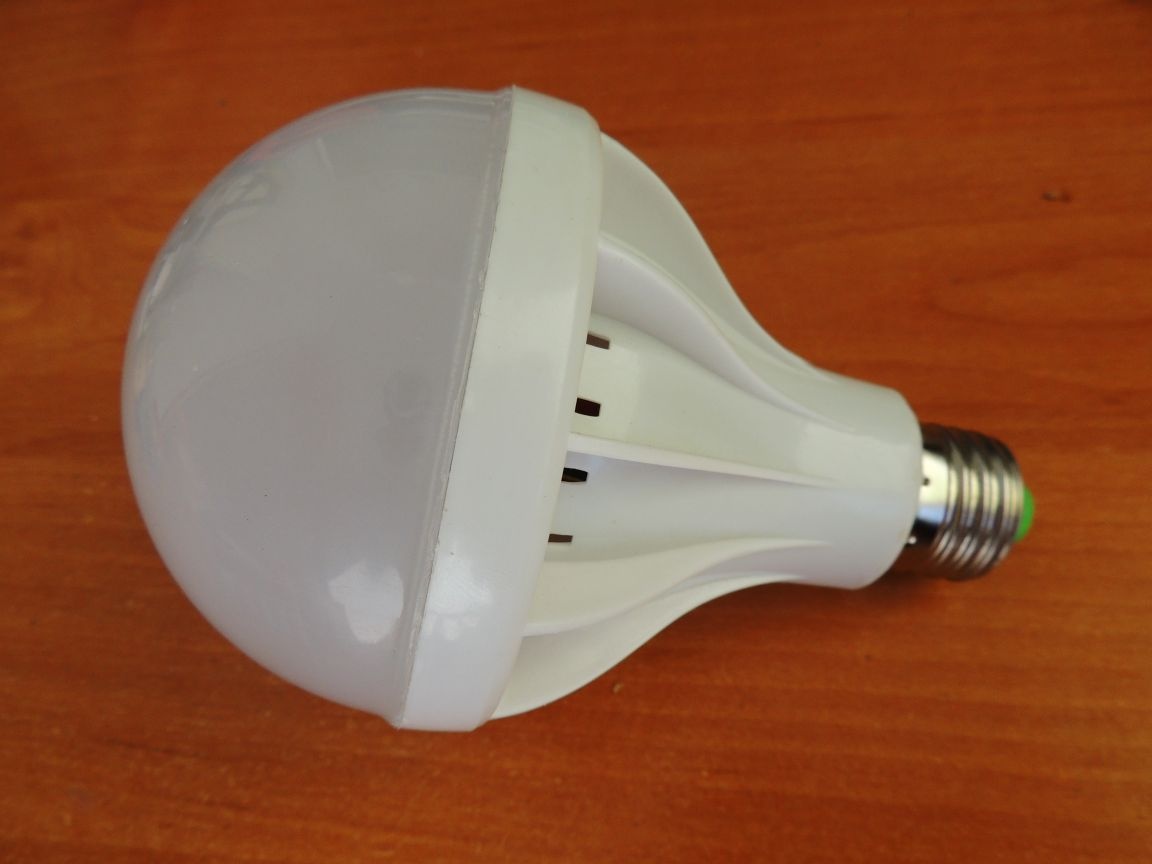
Here was taken this very ordinary LED lamp.

[/ center] Next, disassembled using a flat screwdriver
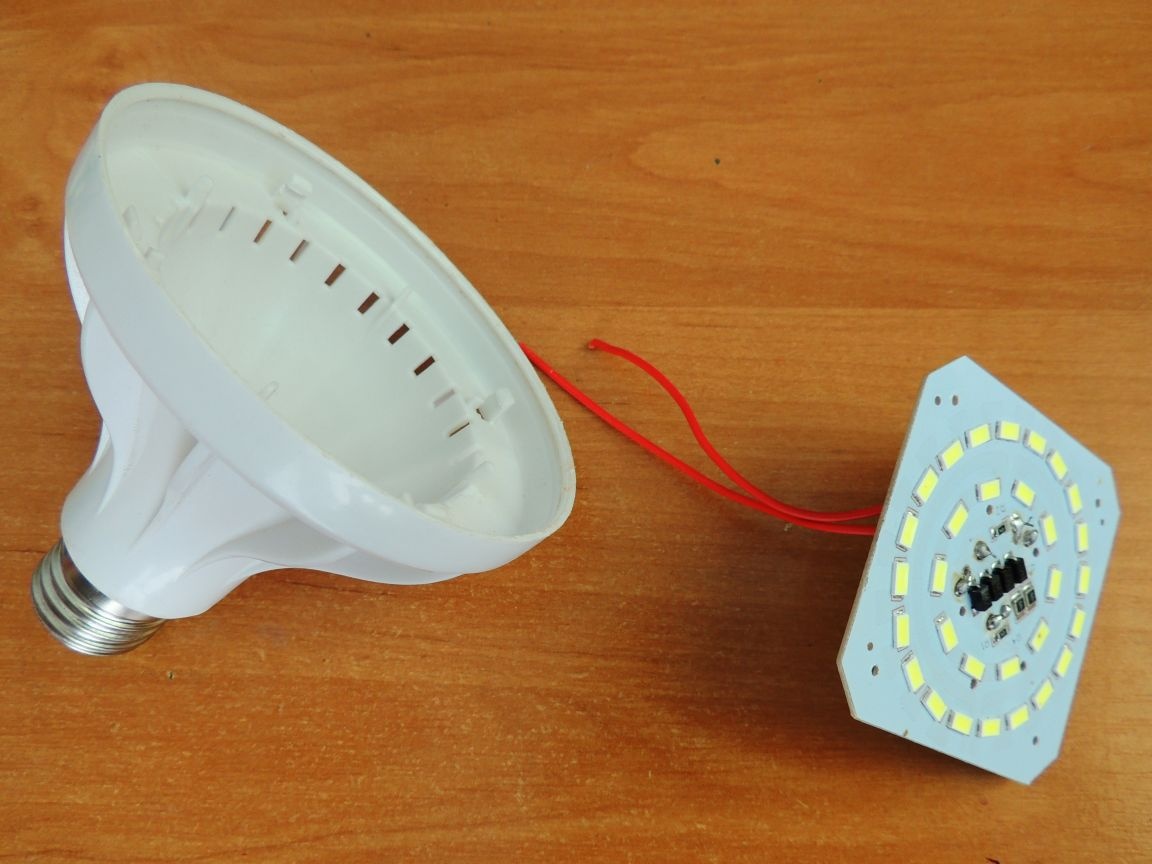
The main board with LED filling is removed, wires are cut
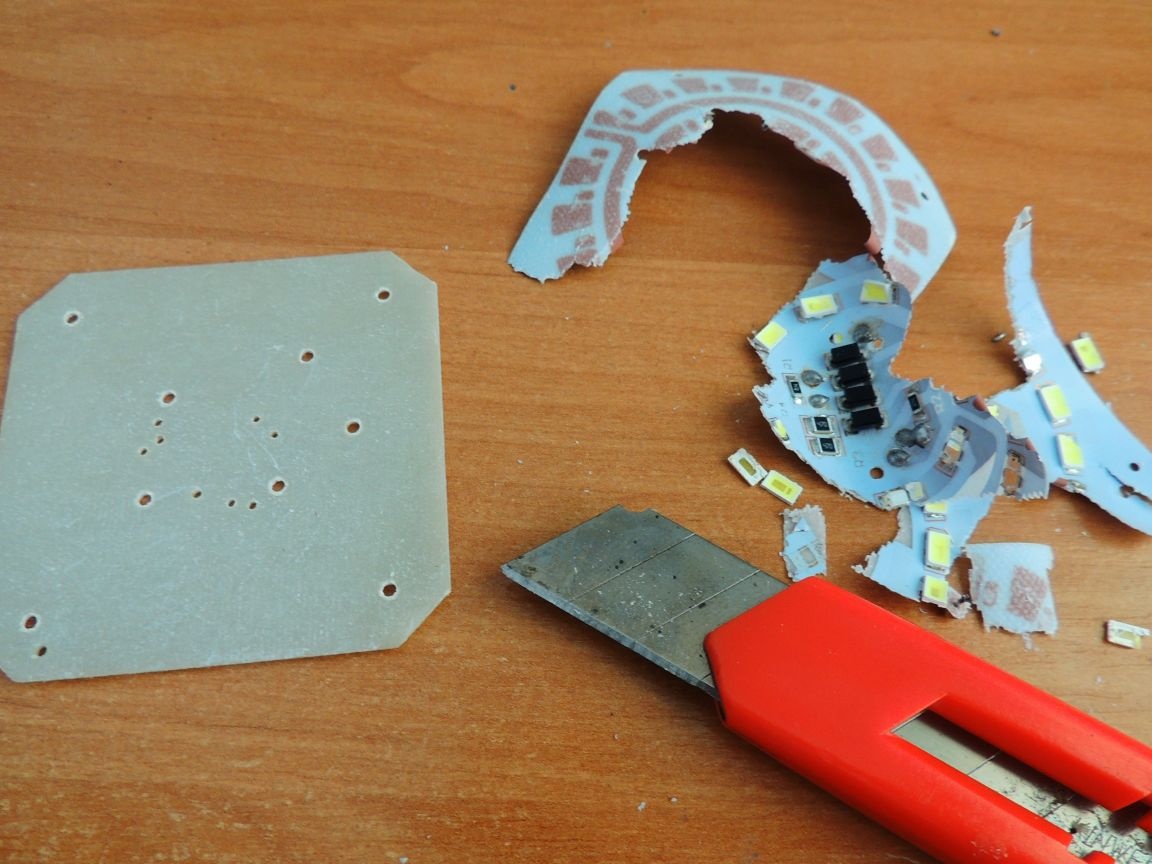
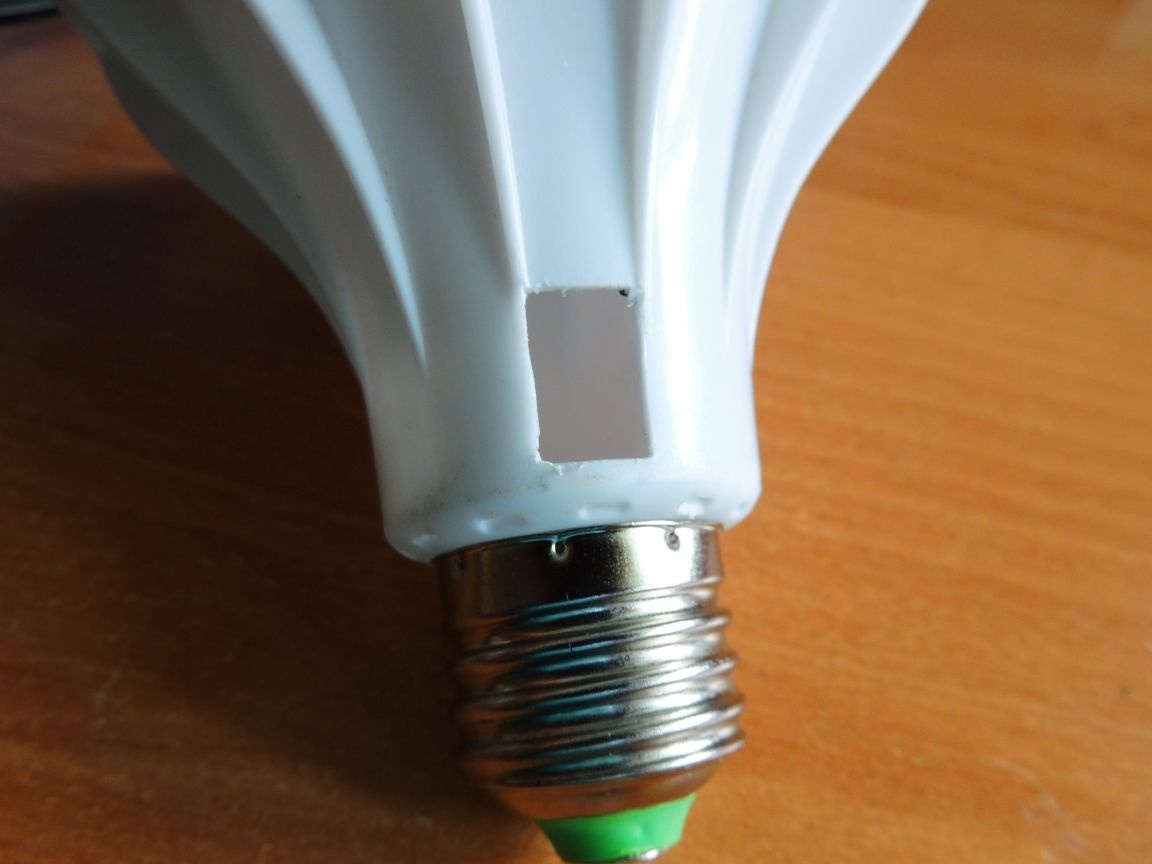
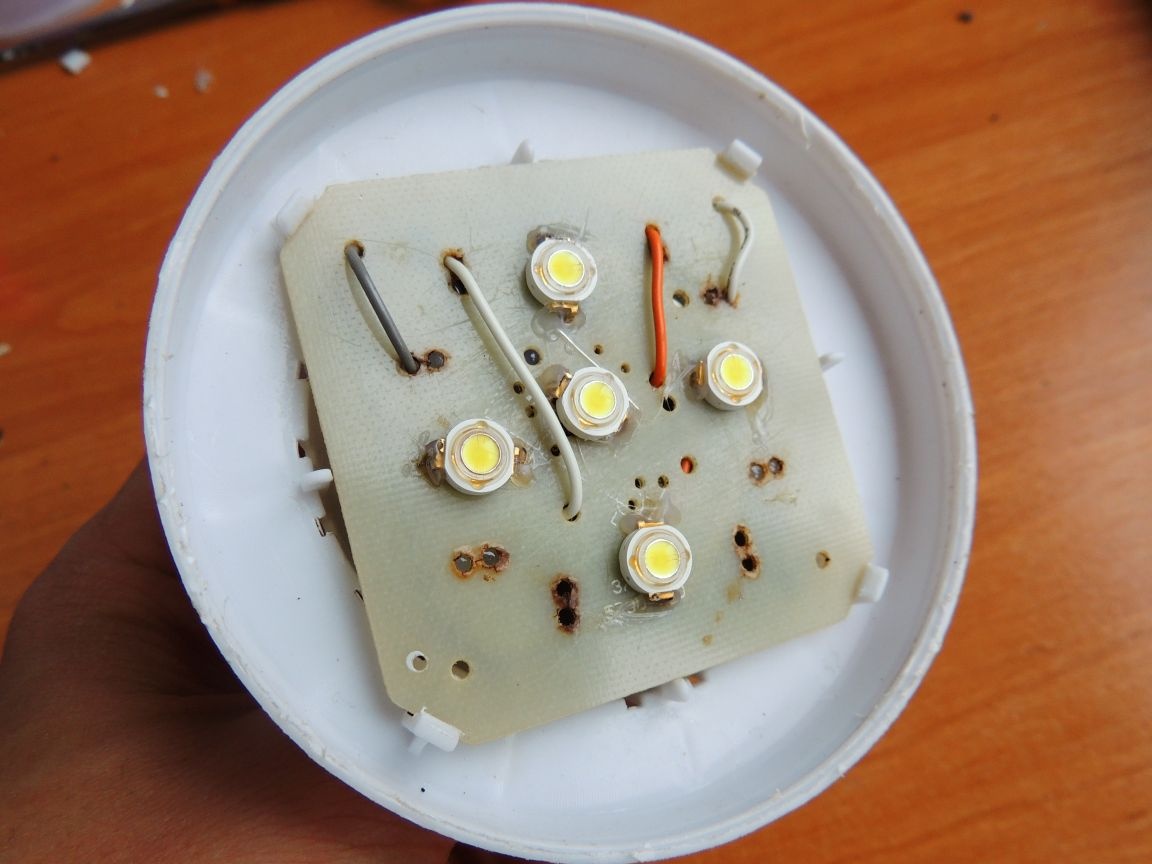
It was decided to remove the burnt LEDs by cutting one of the layers with a clerical knife.
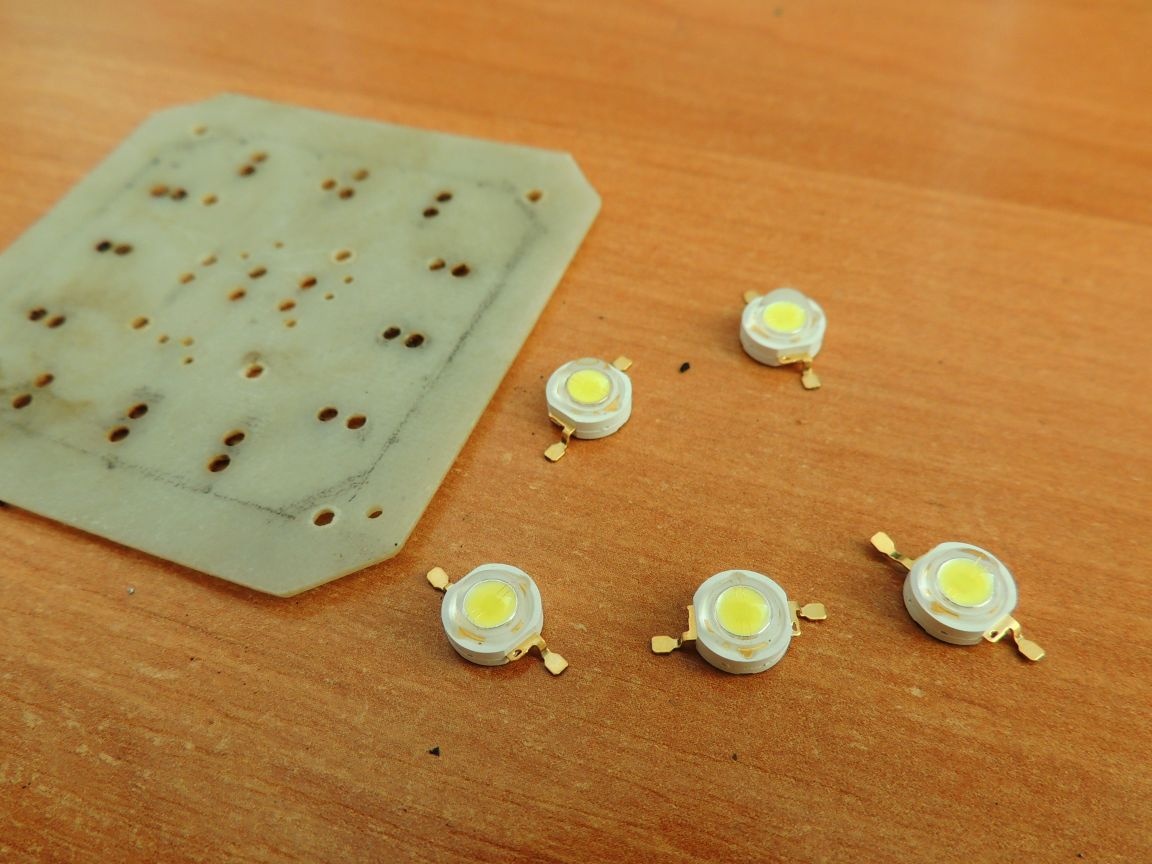
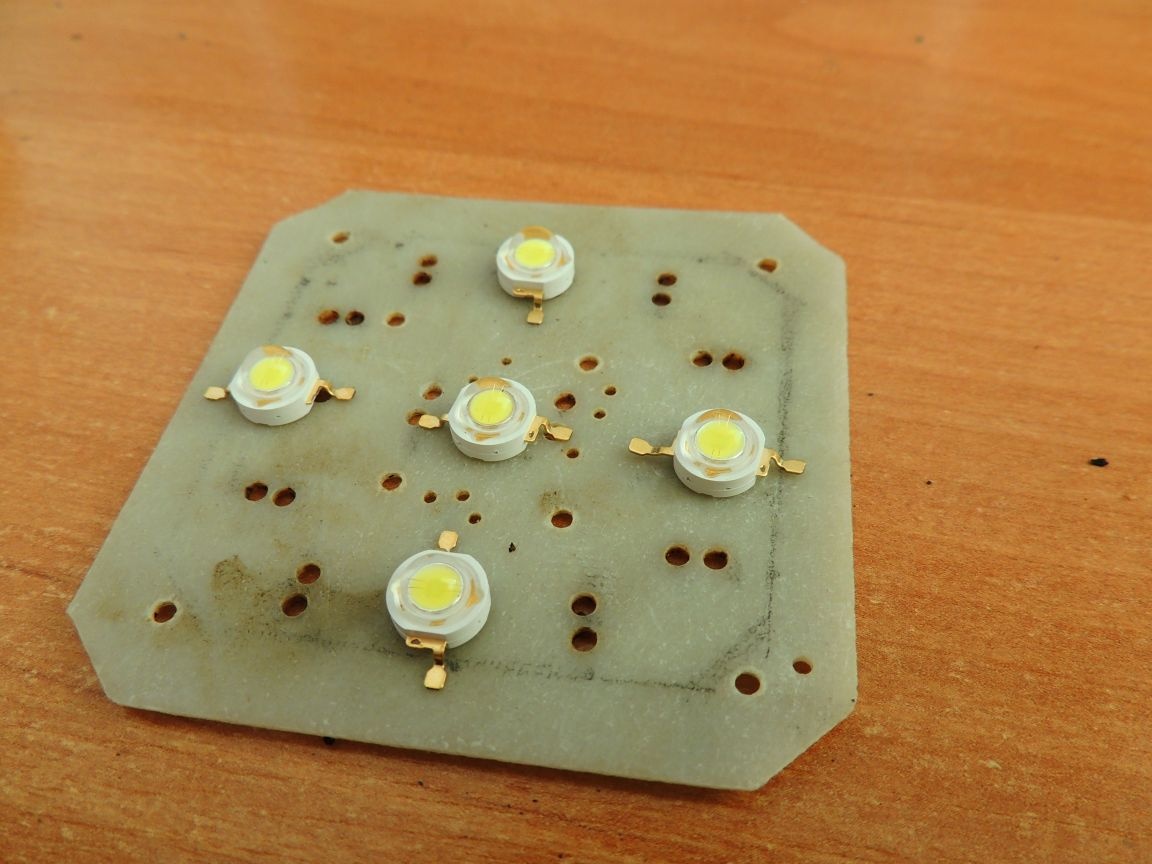
At the end there was a clean area
Next, holes were made where the LEDs will be mounted, namely 5 pcs. with a power of 1 w each
The contacts are threaded into the holes and fixed with hot-melt adhesive.
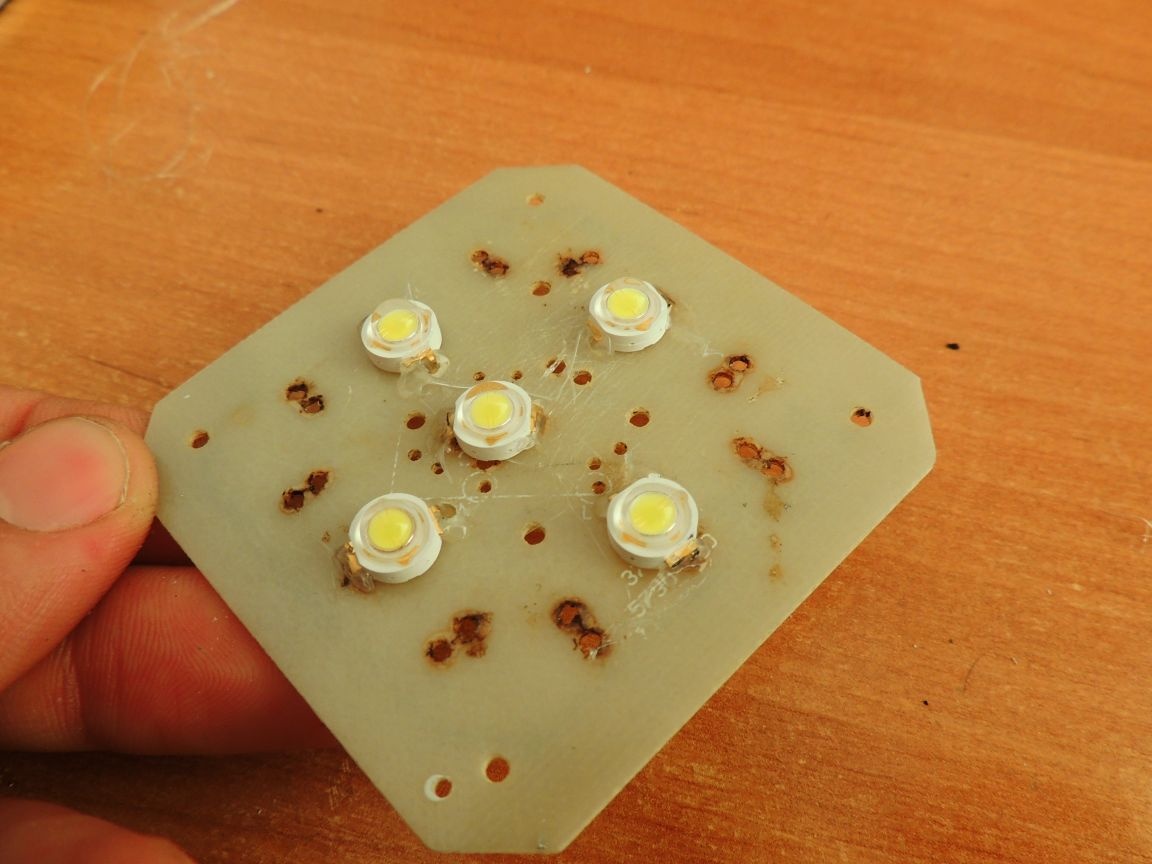
Further, all the LEDs are soldered in parallel with each other
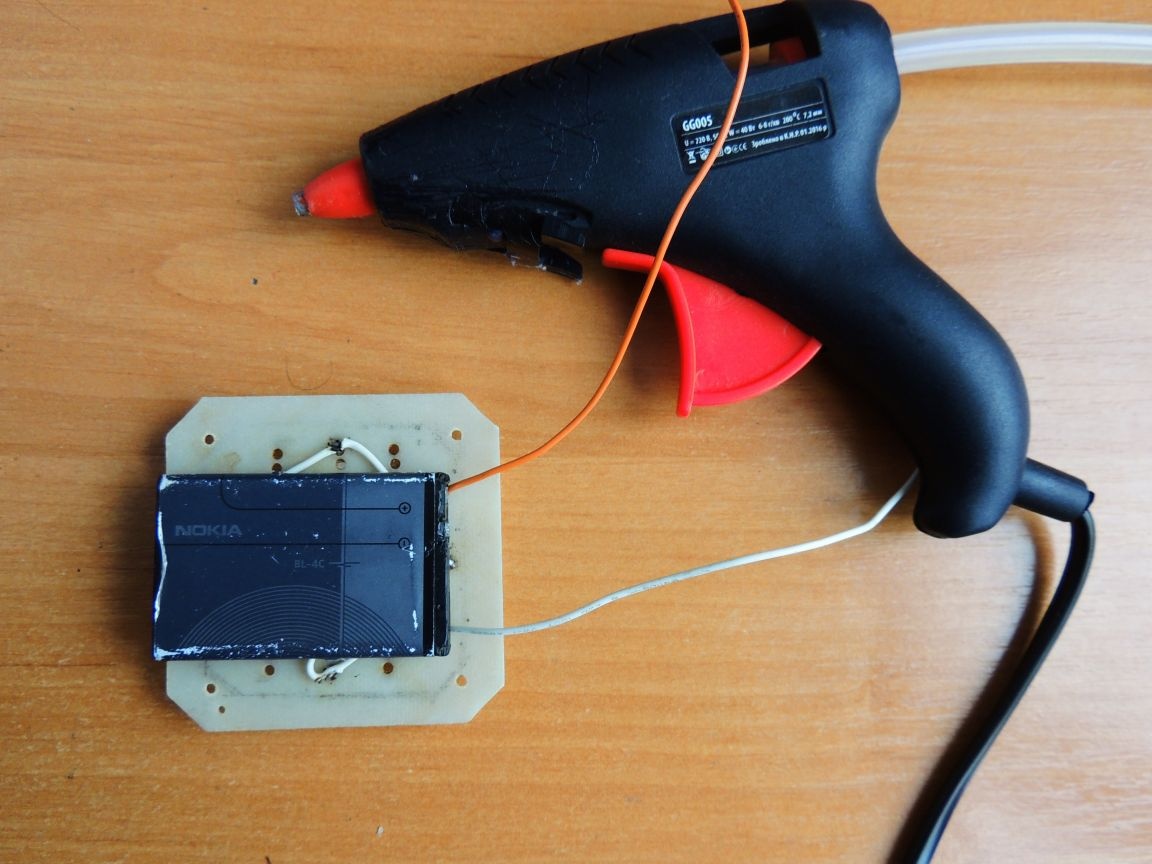
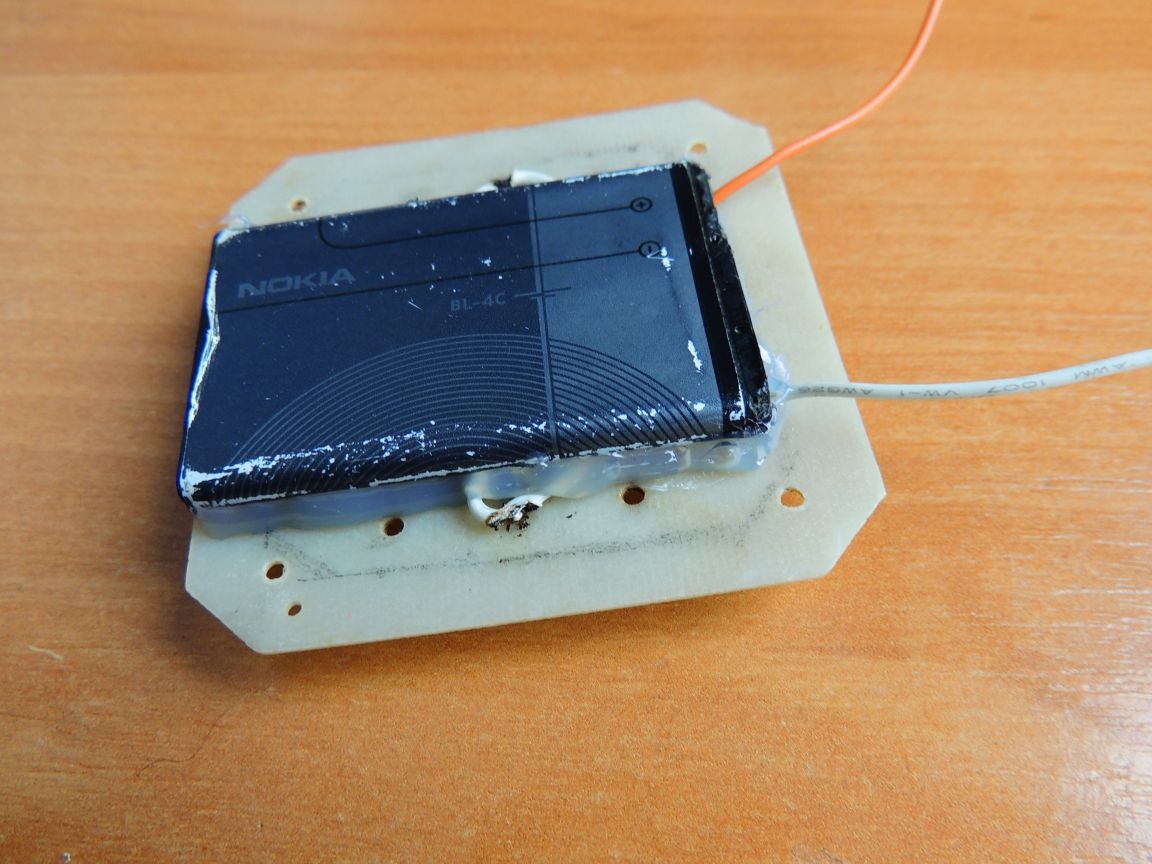
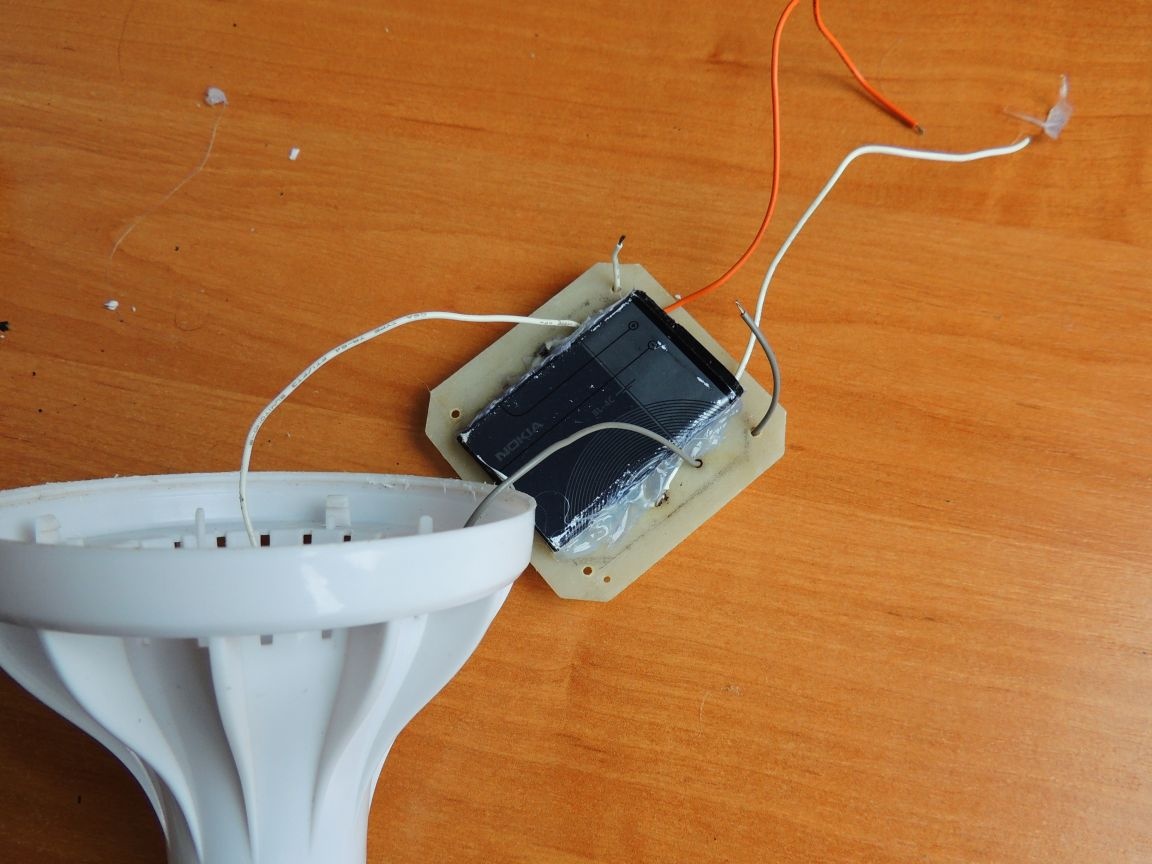
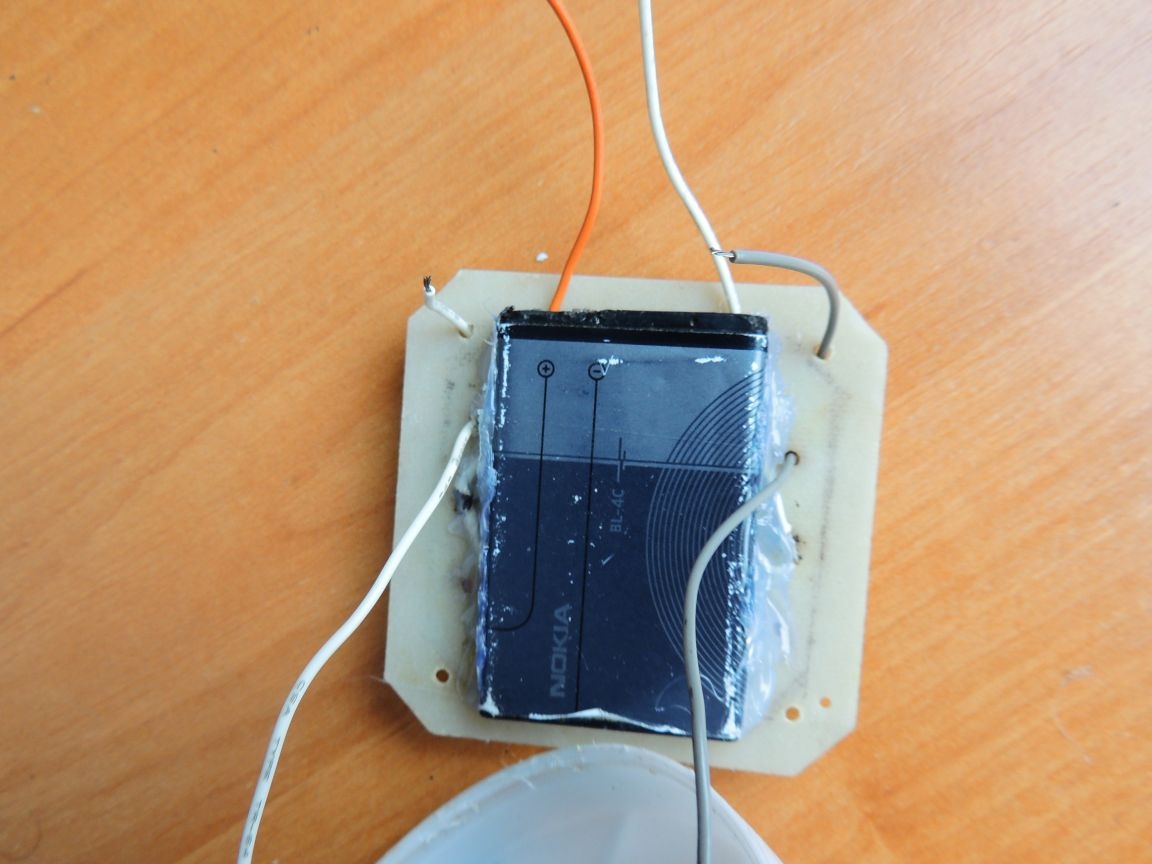
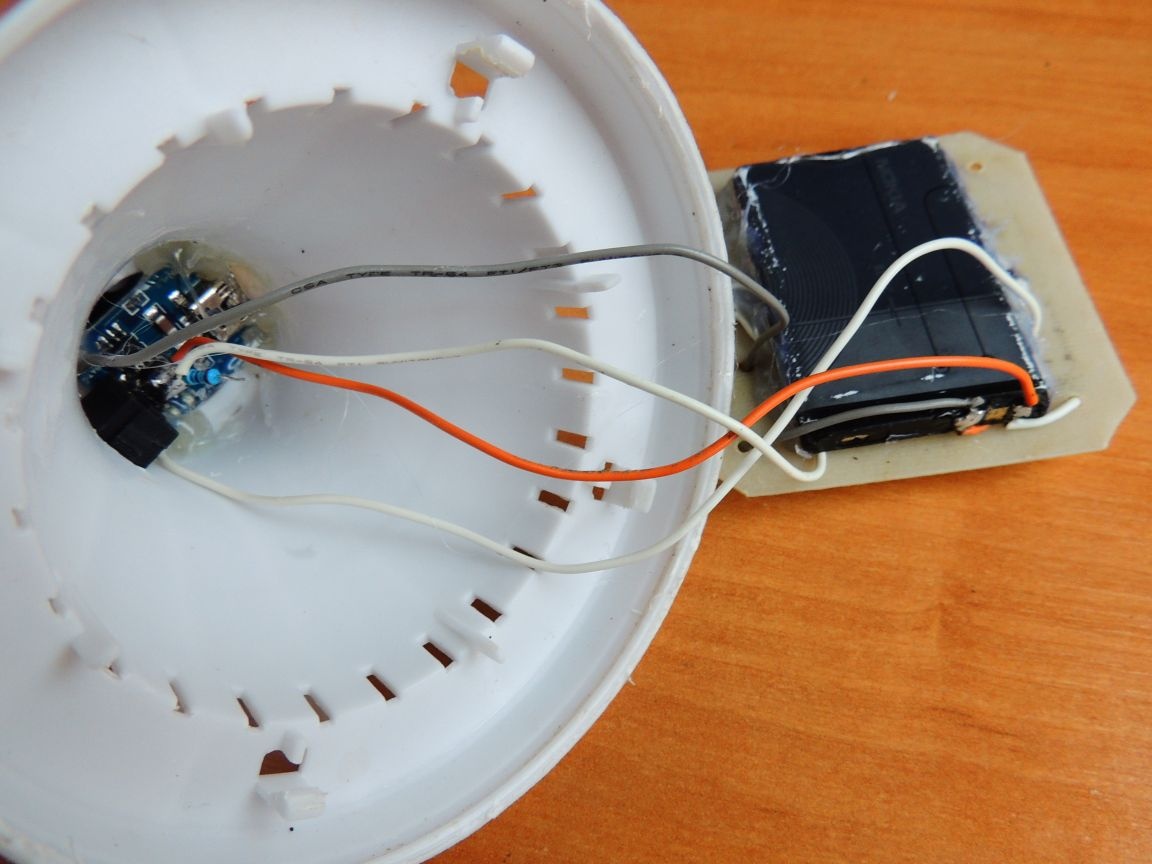
Here is a 3.7 v battery
Which we fix in the lower part of the plate with hot-melt adhesive, thus bringing the two contacts out
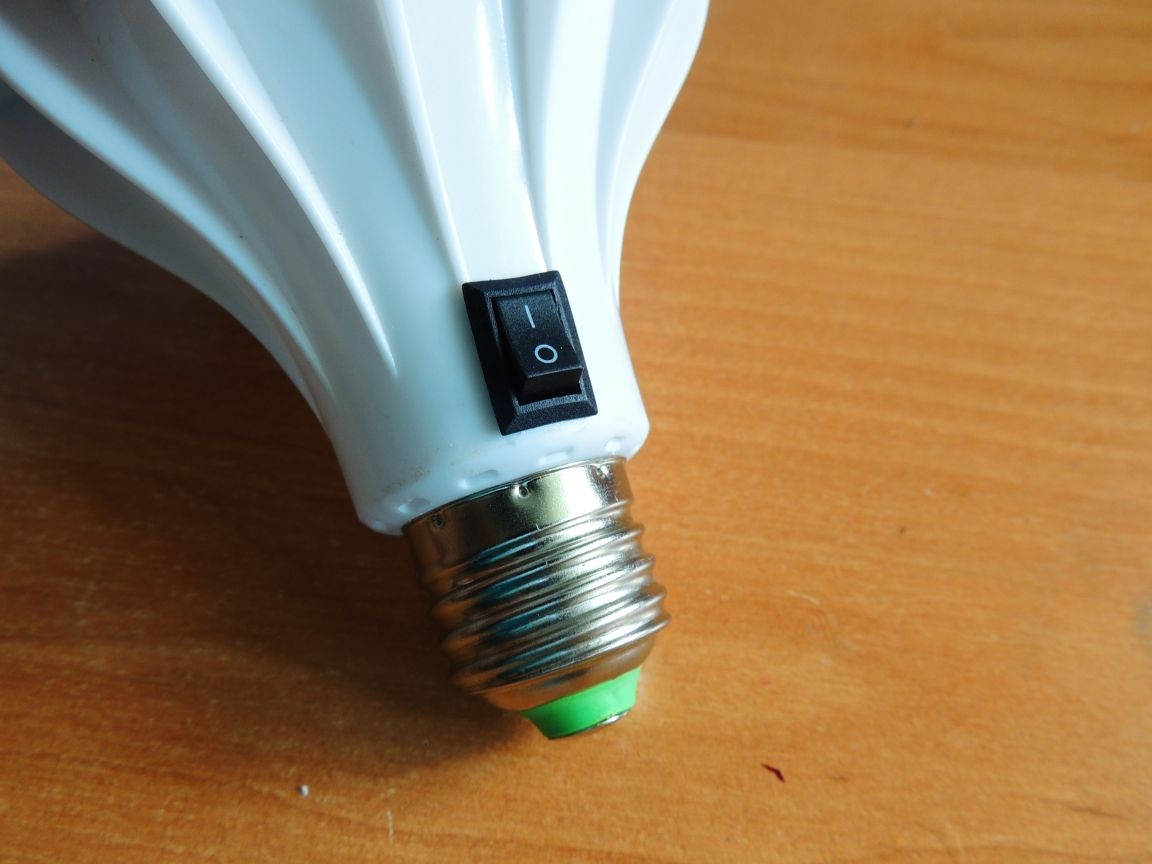
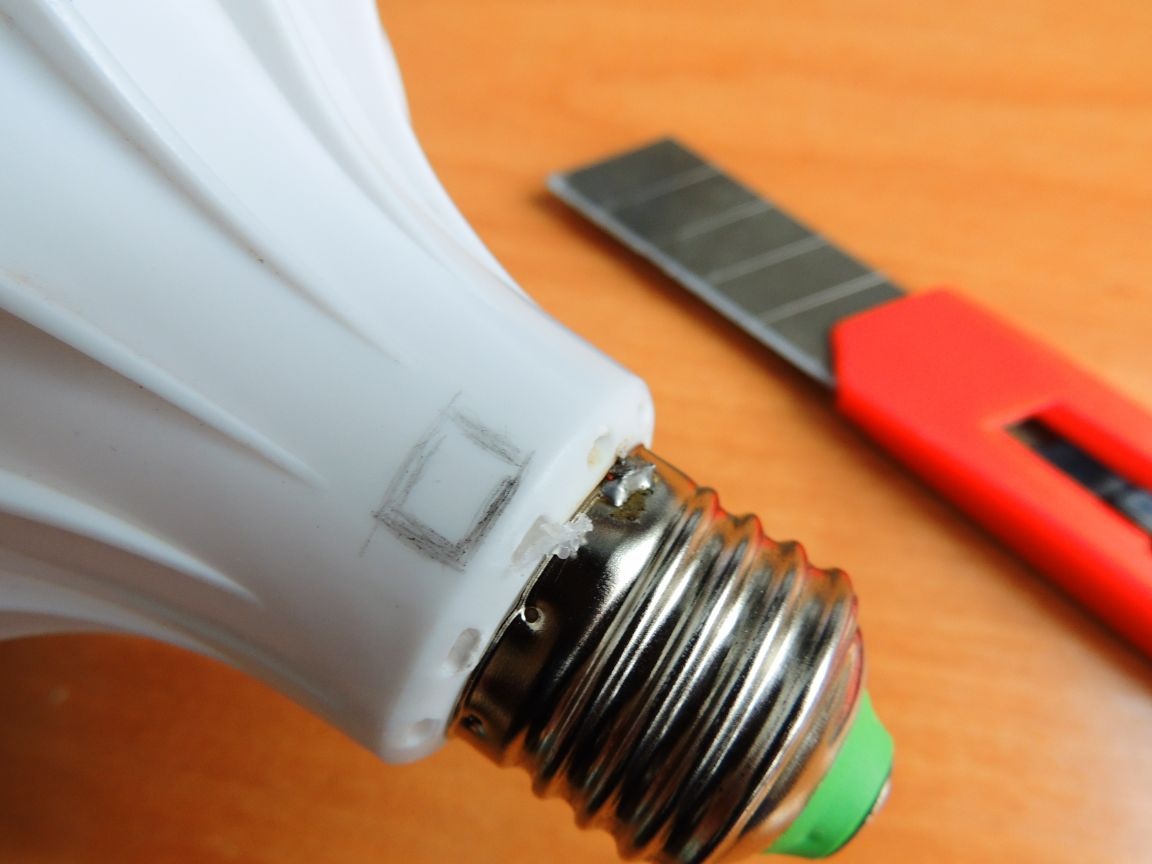
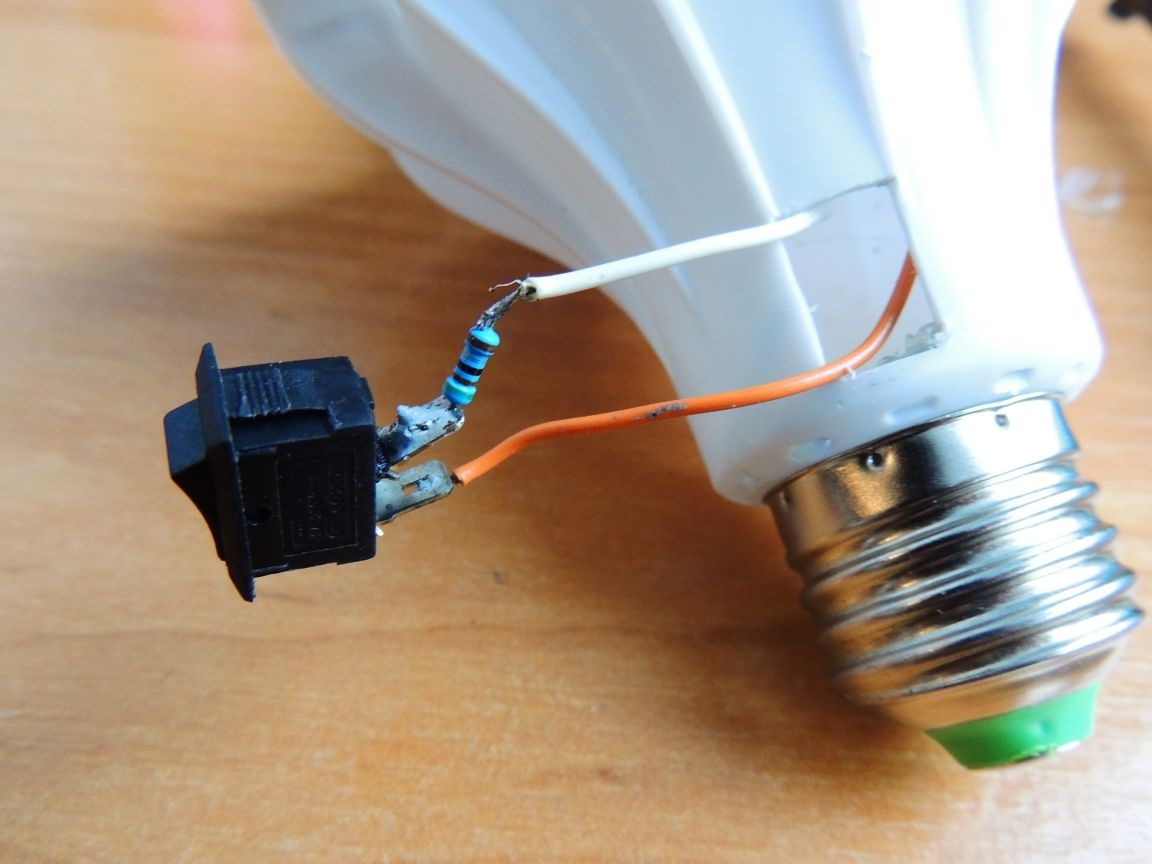
Now you need to work a little with the lamp housing, namely, install the switch, which will be located at the bottom.
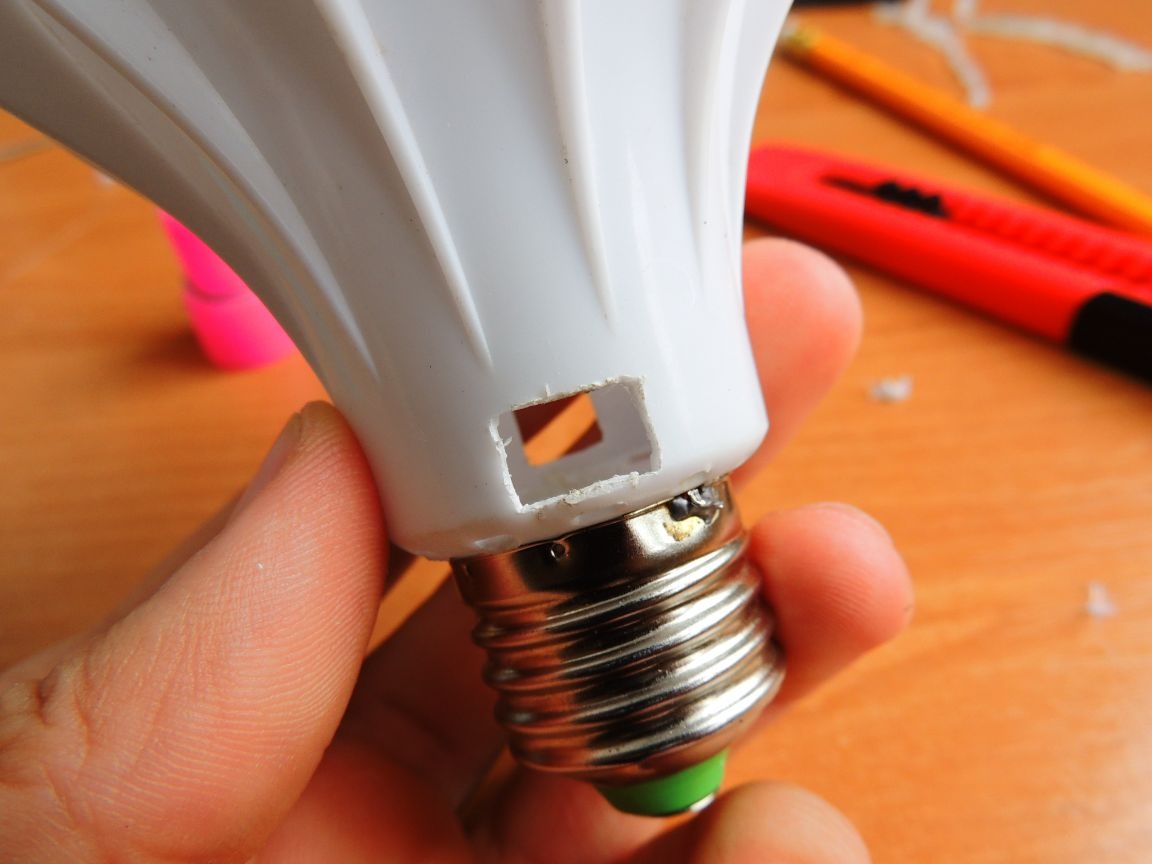
To do this, take the switch, take measurements, draw a contour, and cut a hole with a clerical knife
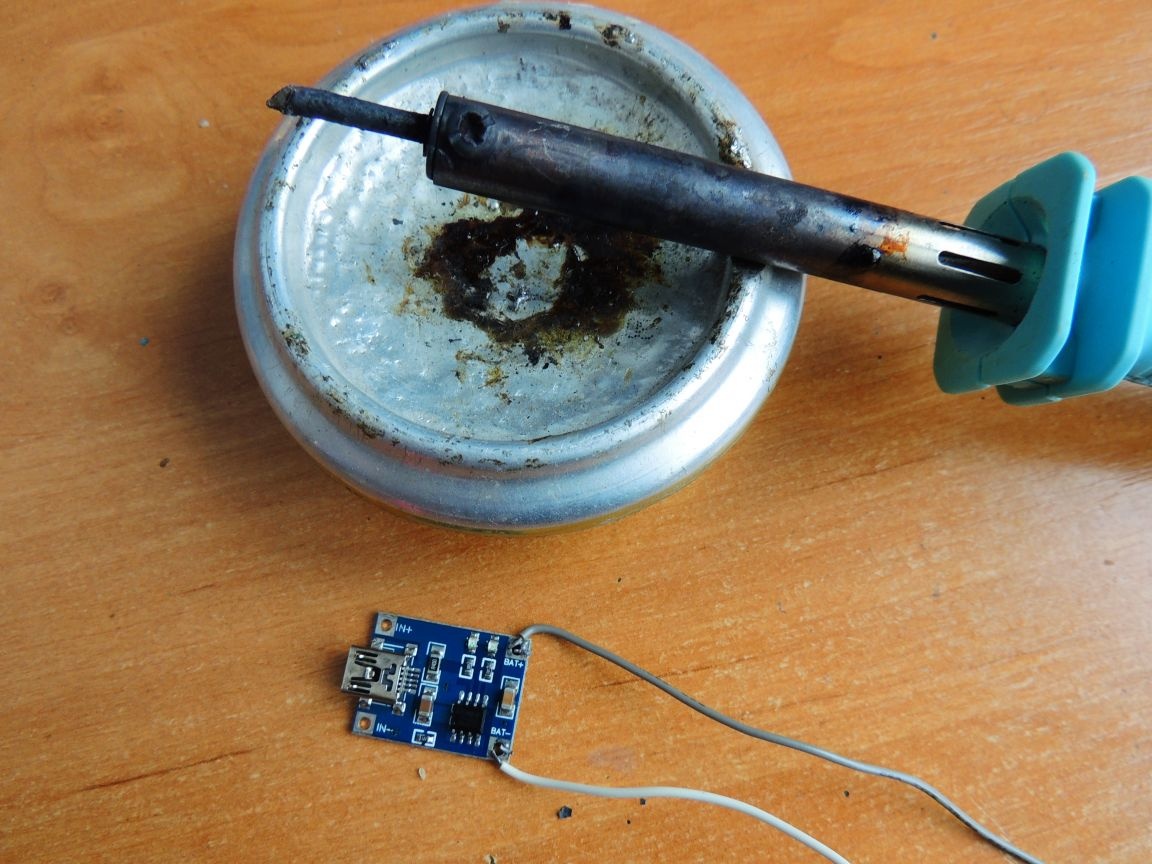
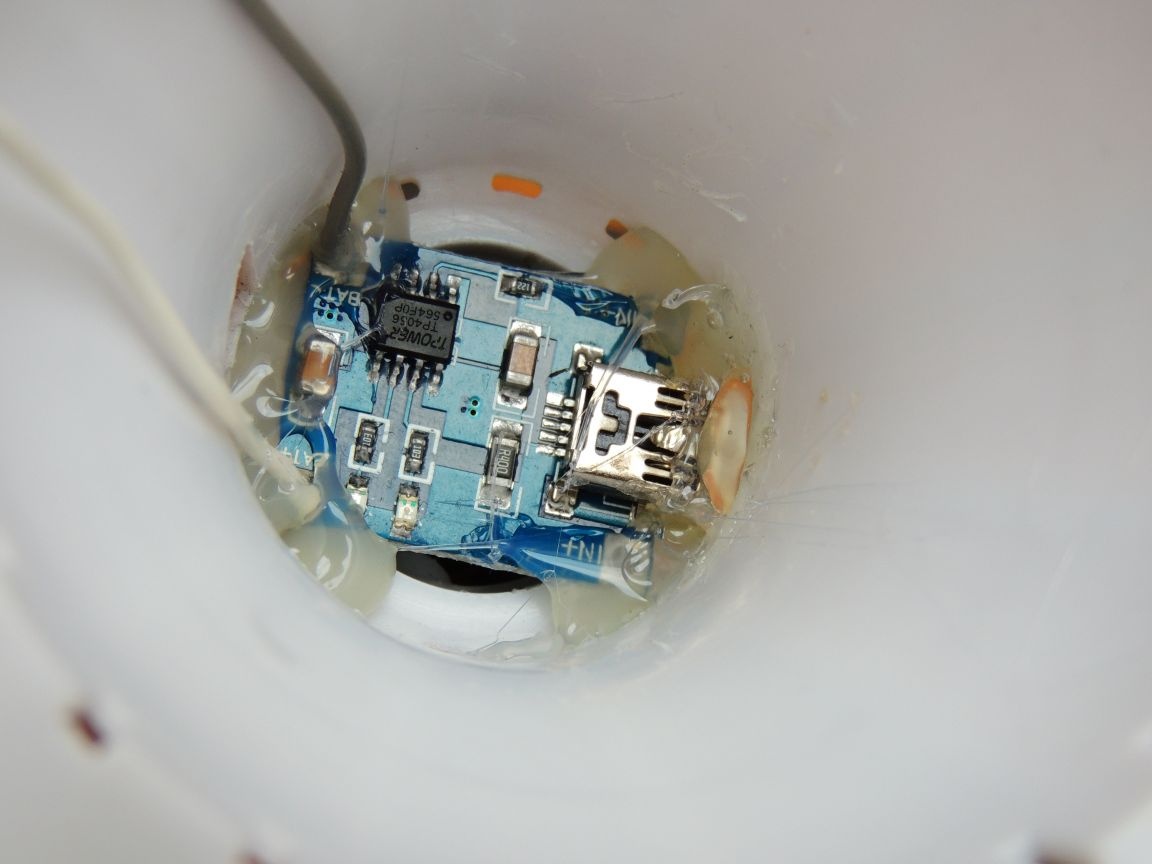
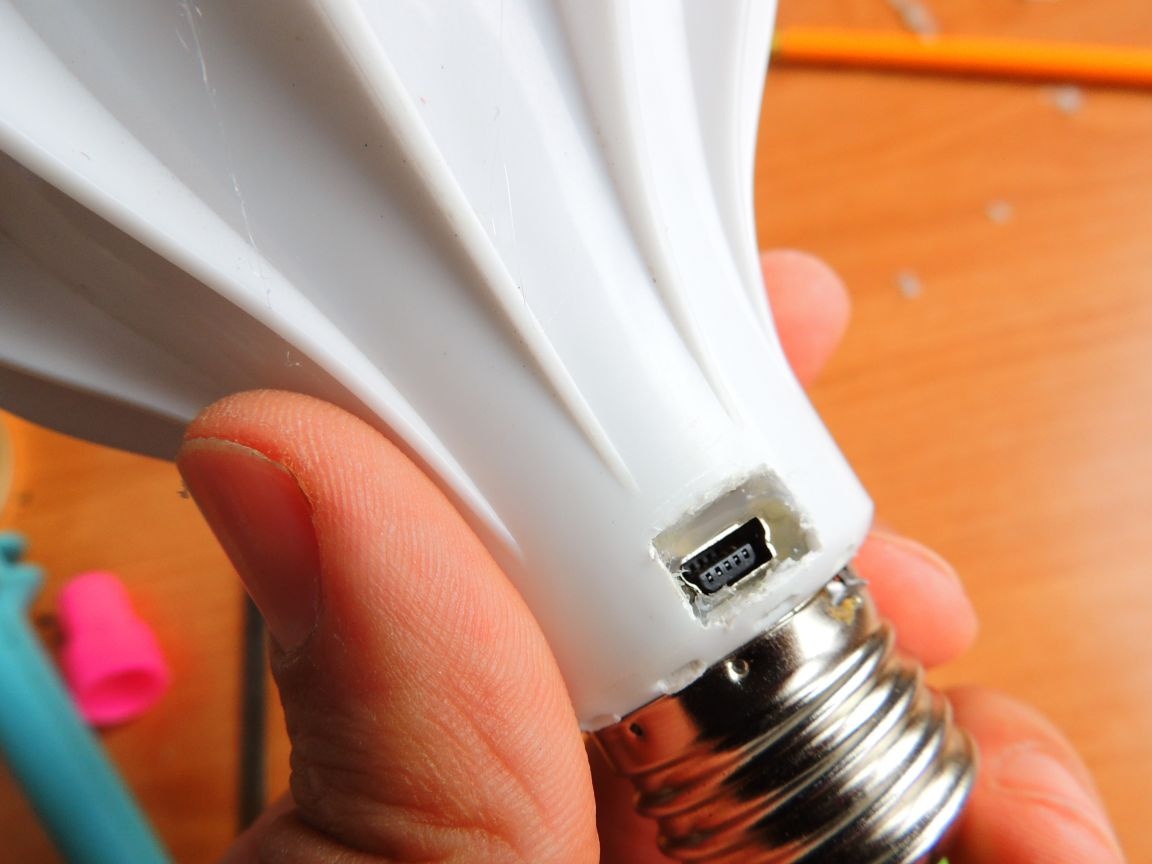
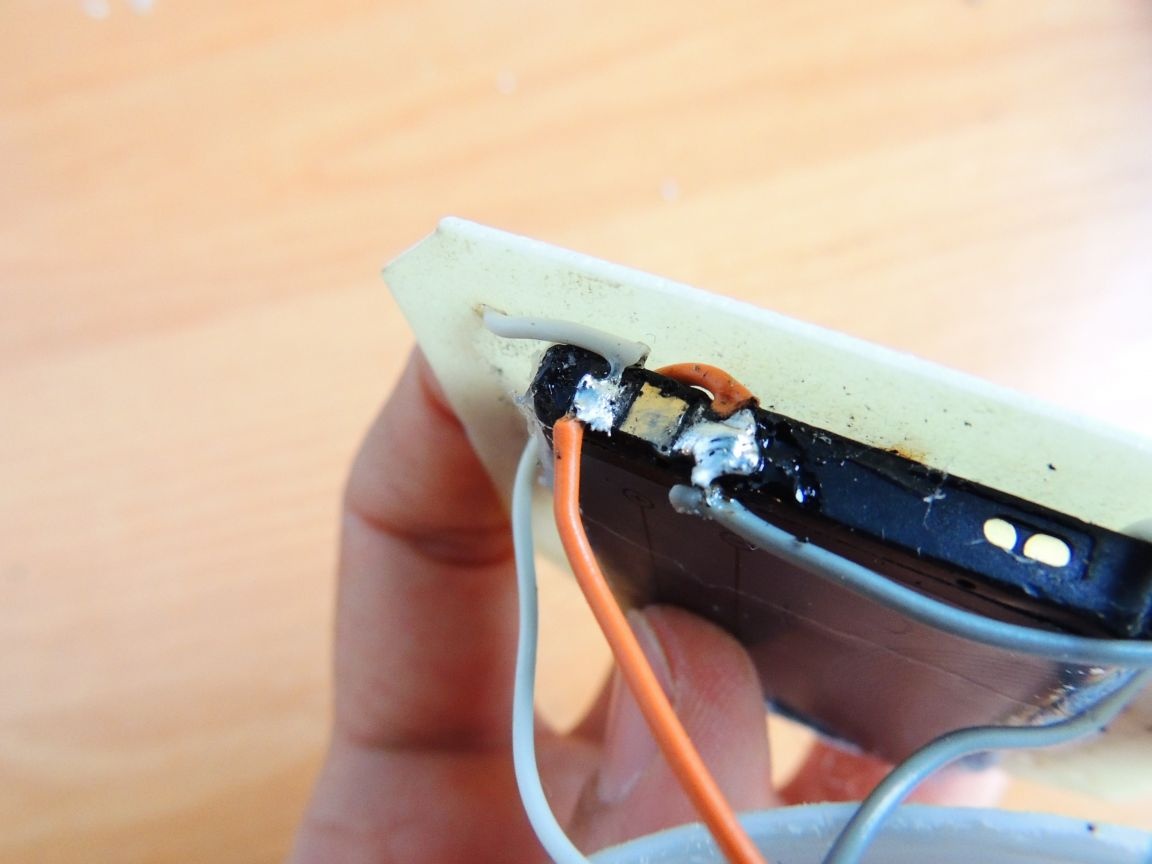
Next, take the li-ion battery charge module, solder 2 + + wires to it, and also install it in the lower part. We make a cutout for charging, fix it with hot glue
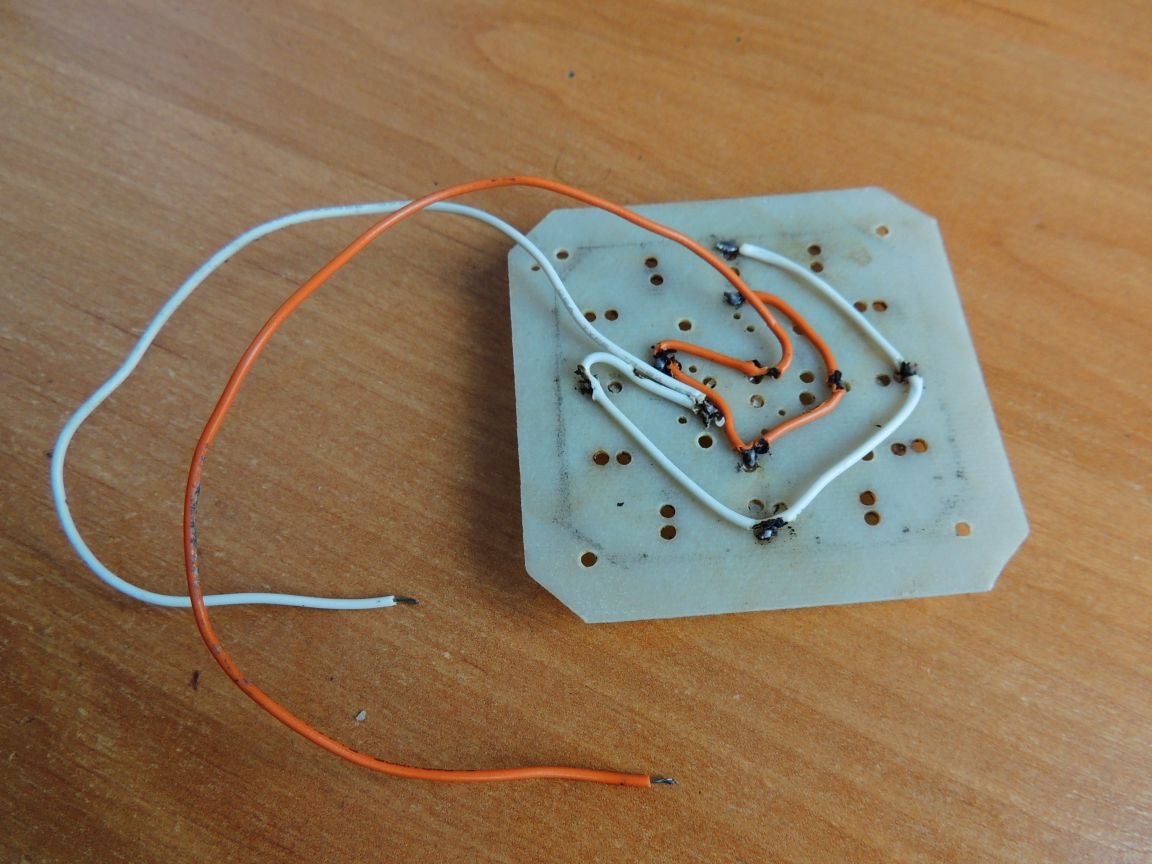
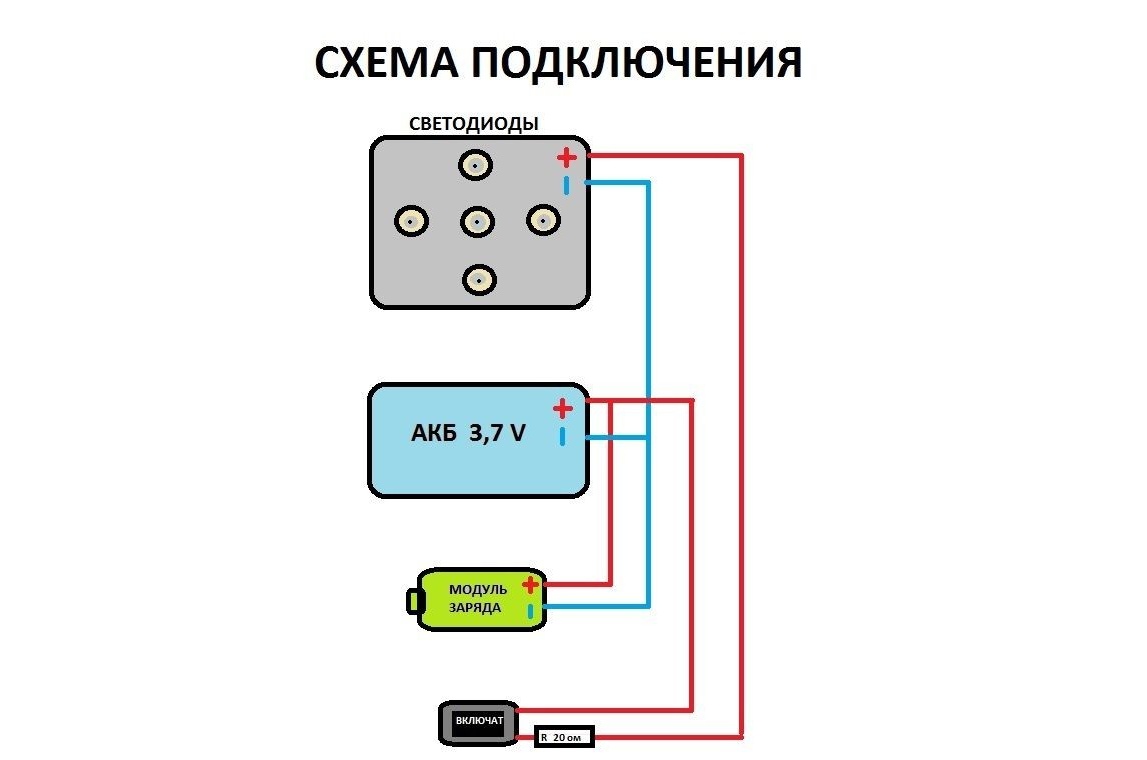
Now it remains only to solder everything together.I will not describe literally what is where, and how. To do this, I sketched such a diagram, everything is described in detail and clearly, + I attach a couple of photos

We solder a current-limiting resistor with a resistance of 50 ohms to the switch
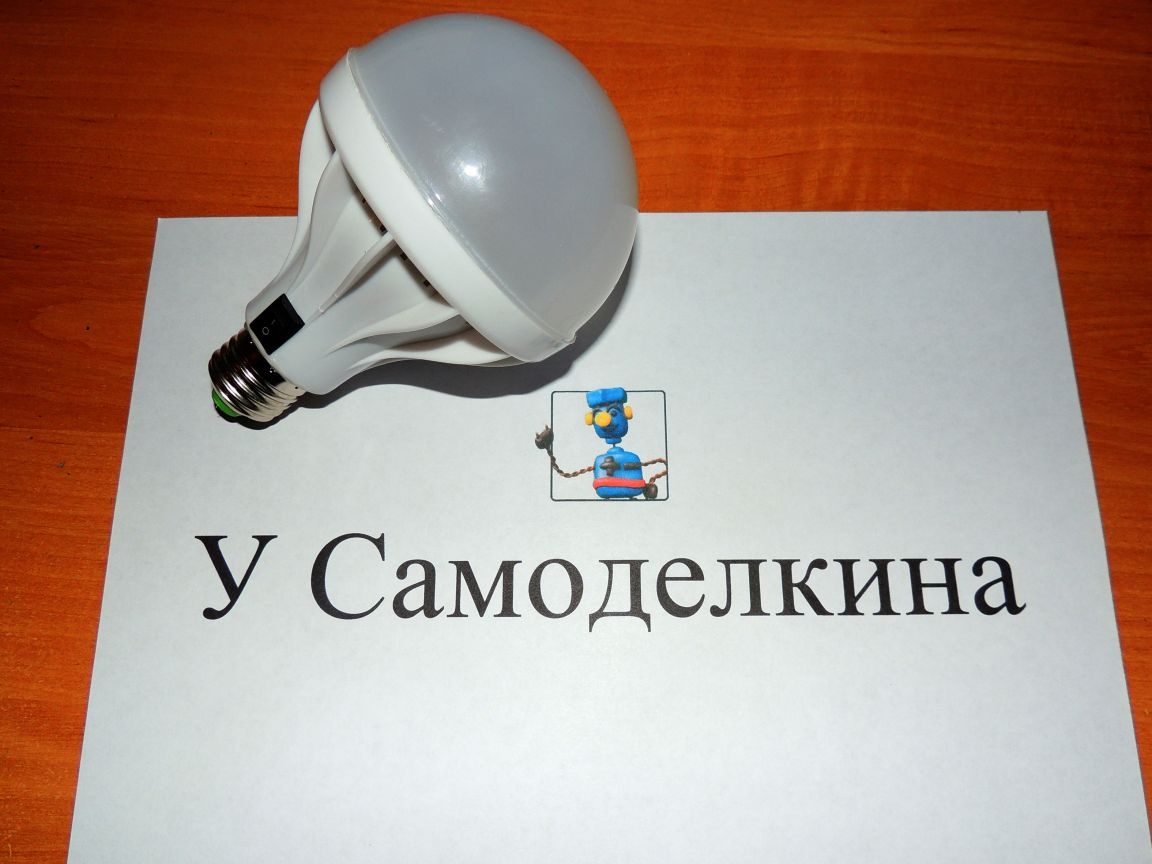
That's basically it. We put everything in its place. Electronic hide part inside, close the flask
As a result of all our actions, such a homemade product came out
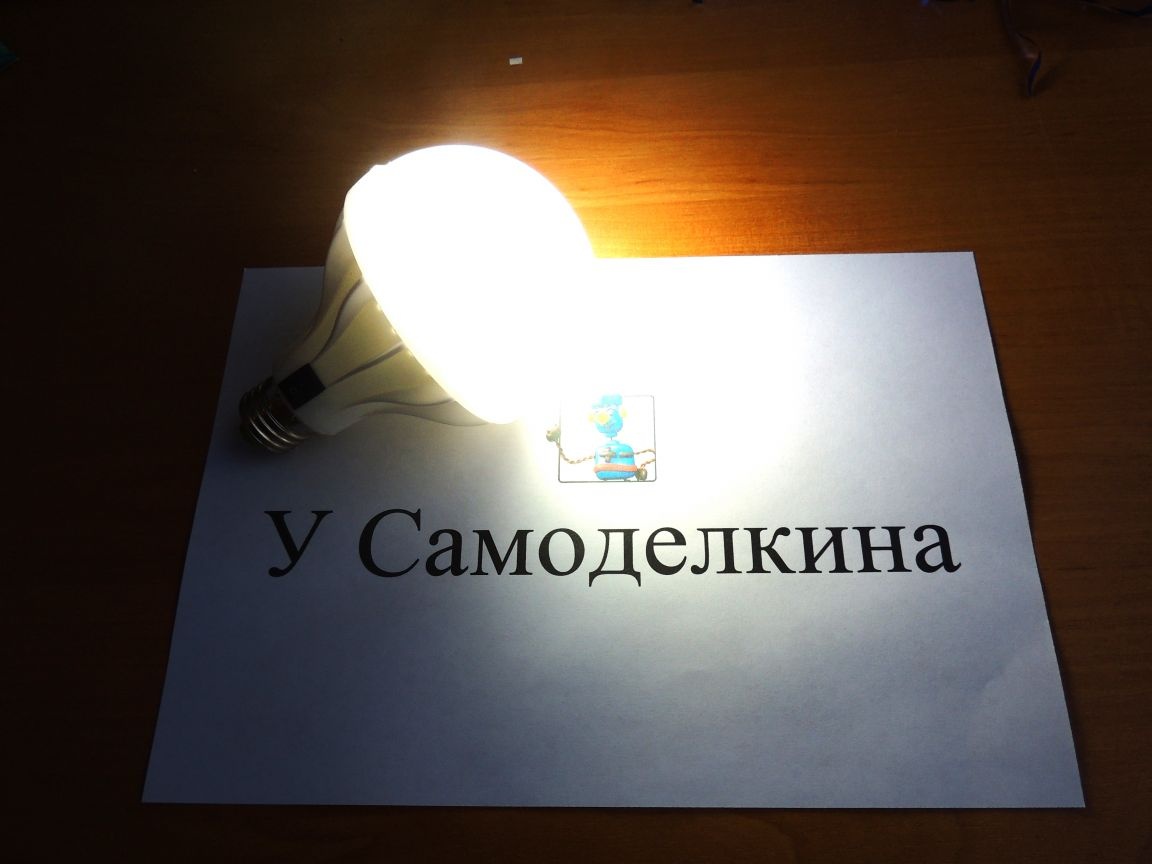
Now we will test our LED lamp a little, see how it will show itself in operation
An example of the glow we got is
After 30 minutes of operation, the LEDs heat up slightly. He did not install heat sinks such as radiators. Heating is within normal limits. Since the LEDs do not shine at full power, they are limited by a current-limiting resistor. Brightness is enough. Such a lamp illuminates a small room not bad, but I do not need more.


As an option, in the future I want to add a small carabiner in the lower part, or a small hook, so that if necessary the lamp can be hung anywhere.


That’s probably all. What we ask incomprehensibly, I will try to answer all questions!
Thank you all for your attention!
Have a good mood!

6.7
7.3
7.7

Add a comment

    • smilesmilesxaxaokdontknowyahoonea
      bossscratchfoolyesyes-yesaggressivesecret
      sorrydancedance2dance3pardonhelpdrinks
      stopfriendsgoodgoodgoodwhistleswoontongue
      smokeclappingcraydeclarederisivedon-t_mentiondownload
      heatirefullaugh1mdameetingmoskingnegative
      not_ipopcornpunishreadscarescaressearch
      tauntthank_youthisto_clueumnikacuteagree
      badbeeeblack_eyeblum3blushboastboredom
      censoredpleasantrysecret2threatenvictoryyusun_bespectacled
      shokrespektlolprevedwelcomekrutoyya_za
      ya_dobryihelperne_huliganne_othodifludbanclose
18 comments
Here is a very decent site. A lot of useful information, including - very chewed in detail.
Thanks! What I wanted to find out. This is bad for your battery: the capacity of BL-4C e from different manufacturers is from 800 to 860 mAh, that is, you charge it with a current of more than 1C. ((
It is necessary to limit the current somewhere, the most correct way is to replace 1.2 kOhm with 1.5 kOhm in the 4056 module.
Author
Sorry, stupid a bit, that's right max. current strength is 1A
Author
I use regular mobile charging 5.0 V - 1.0 A
Stanislavsky, reformulate again more strictly: what is the maximum current of the source connected at the entrance Your lamp, beforemodule 4056? I know the characteristics of this module, therefore, I want to clarify what you use outside, to the module.
Stanislavsky,
The current is measured in amperes, what did you start bu-bu ... And in this case it is equal to a maximum of 1A. And what you say is voltage and it is measured in volts.
Author
4.25V is the maximum current of the charge module that is supplied to the battery.
Or did you mean the maximum current from the battery to the LEDs?
Quote: Ivan_Pokhmelev
And about the "maximum current 4.25v" - did not understand. ((

... about "maximum current at a voltage of 4.25v ...
Can it be like that?
blush

 
P4056 is standing inside you, but what's outside, what current?
And about the "maximum current 4.25v" - did not understand. ((
Author
Hi, there’s not enough time to sit down and answer. (
To charge the battery, I use the Chinese module for li-ion batteries P4056, the maximum current is 4.25v.
Its characteristics:
And about the connection, thanks for the advice, I will stick to the serial connection. I do not often work with LEDs, I did not know this.
As I understand it, the author is not interested in commenting on her homework. ((
Or doesn’t want to answer the question: what is the maximum current of the used charging current source?
Although he stated that
What we ask incomprehensibly, I will try to answer all questions!
The thought itself is interesting; today it will surprise someone hard. But why not, let him live. Children will be especially interested. Comments have already been written, I can only add that the switches are white.Which will make it less noticeable on the white case.
Good old nokia served here too! :)
An interesting craft, in my opinion, is more suitable for the beauty / surprise of friends. You can play a trick on a person who is not knowledgeable in electricity: take a light bulb in one hand, and touch the socket with the other and turn it on :) I would do that :)

Recently, I also began to adhere to consistently turning on the LEDs (plus a current-limiting resistor (cutter :) if necessary). When disassembling and repairing floodlights with many LEDs, I always wondered why the 28-38 volt power supply and LEDs are connected in series, not all of course, but only a certain amount, and then in parallel. Here is such a consistent "stack" of about 10 pieces in a loop, in principle, can be called a load. Now everything is finally cleared up, thanks to the homemade fathers (I'm not ironic).
For example, you can read about LEDs.
Quote: Valery
"the shortest" will take on a larger current ... Well, then - "where it is thin, it breaks and warms." Guessed? )))) Or, nevertheless, the fact is that the diode itself is "not a load, but a conductor"? and is it better to add voltage drops than to raise current?
Both of them are true. More important is the first: this is to ensure reliability, indeed, the LED with the lowest direct drop will begin to take on babouttake the current, bask, take another baboutless current and, as a result, will fail. And so on down the chain - with the rest. You may ask, what about the Chinese with their crafts? They have a little trick: they can pick up (not manually, of course))) LEDs with the same direct drops and put them in one lamp. In addition, the Chinese are not interested in the continued operation of their products.
The second is secondary, but also true, only from an economic point of view: when connected in series, the current is less, therefore there is less loss on the rectifier diodes.
Quote: Ivan_Pokhmelev

Well, and again, I repeat that connecting LEDs in parallel - badly!

And why? (I really don’t know). Based on your categorical statements, taking them as an axiom, I was looking for an answer ...))))
Only one thing came to mind - there can be absolutely identical diodes in terms of characteristics, therefore, the "shortest" will take on more current ... Well, then - "where it is thin, there basking torn. "
Guessed? ))))
Or, nevertheless, the fact is that the diode itself is "not a load, but a conductor"? and better to add voltage drops than to raise current?
I concretize the question: what is the maximum current of the used charging current source?
I would like to know what the author uses to charge the battery?
Well, and again, I repeat that connecting LEDs in parallel - badly!

We advise you to read:

Hand it for the smartphone ...