
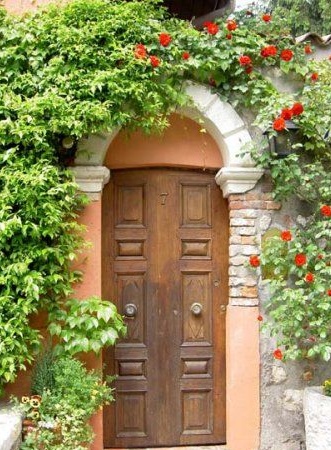
Do you need to hang the door so that it fits snugly on the jamb? Then read our recommendations - they will help you do the thing "without a hitch."

For work, we need: a hand drill, a drill (its diameter depends on the diameter of the screw and blade), a single-blade or Phillips screwdriver, a square, a chisel, a hammer, an ax, a plane and, of course, hinges with a length of at least 120 mm for 8 screws in each hinge (hinges right or left, depending on which side the door will open).
First, we insert the door leaf into the box and, if something interferes with this operation, mark the “extra” places with a pencil. We remove them with a chisel or a plane.
By the height of the hinges on the canvas and the rack of the box we mark the position of the hinges (Fig. 1). It should be remembered that the marking should not fall into the size of the keys. We take out the canvas from the opening, transfer the risks to its edge along the square. We attach one half of the hinge so that the axis of rotation is at the top, and the transition boundary of the flat part of the hinge, rounded under the axis, coincides with the edge of the side of the canvas (Fig. 2), and draw a pencil around the flat part. We will do the same with the lower hinge and its half.
Chisel will choose a bed depth in the thickness of the loop. We install the door on the edge of the sidewall and lay the half of the hinge. She should lie down tightly, without moving. Having drilled the extreme hole to a depth somewhat shorter than the length of the screw, screw it. We drill a second fastener through the extreme hole of the loop and fix it with a screw. We will do the same with the middle holes of the loop. In the same way we attach the lower part of the connection of the canvas with the box.
If you work with a partner, you can simply attach the hinge halves to the box and then hang the canvas. If you work alone, we suggest using the following method. In the corner of the hinge for a quarter of the threshold, put a sliver 2-3 mm thick. The door leaf, having previously laid out the support for the hinge angle, we will put perpendicularly to the opening so that its lower end rests at a depth of 3-5 mm at a quarter of the threshold, and the upper corner at the quarter of the box jumper.
If this does not work out, you can deepen the quarter below. We tilt the canvas onto ourselves, put on the lower half of the upper hinge and insert it together with the canvas in the hinge bed. If the canvas does not hold, it can be wedged from the bottom. Let's drill the top hole and screw in a screw. Pull the lower part of the door towards you to connect the lower hinge, and slide the door into place.The loop record should go into its box. We fix this hinge (Fig. 3).
We remove the temporary support and close the door. It will not completely close, since the hinges form a small gap on the hinge side. Therefore, we will put the door back in its original position and screw the hinges onto the other screws. We remove the sliver placed in the corner of the hinges and close the door. On the front porch, we mark with a pencil a line copying the edge of the canvas. We’ll finish this quarter with an ax and a chisel and close the door. With proper fitting and installation, the web should not "spring", although this often happens if the axis of the loops do not lie on one straight line or this straight line is not parallel to the quarter side plane. Compliance with the geometry of the box, its quarters and door leaf is the main condition for the quality of the hinge.
After hitching the canvas, they insert an internal lock, put handles to open and close the door, and on the inside - a hook with a loop.
To perform this work, you will need a drill with a diameter of the thickness of the lock and a drill, a chisel, a hammer, a drill for screws, a screwdriver, a square.
We outline the height of the castle position that is most convenient for you. Open the door and on the sidewall note the height of the lock without a mounting plate. We outline its thickness in the middle of the thickness of the door. Then we apply the lock to the plane of the door leaf so that the plate is on the side of the door, and outline the top and bottom of the lock. We drill two holes on the side of the door along the edges of the markings, trying to put the drill perpendicularly and parallel to the plane of the blade, to the depth of the castle. Chisel choose a blind rectangular hole and insert the lock box. We outline the contour of the mounting plate and prepare a bed deep in the thickness of the plate. We take out the lock, measure the distance of the key entry from the plate and the box wall and transfer these dimensions to the door. We drill a door with a slightly larger diameter of the key rod through the door at the intersection of the transferred dimensions.
The lock can be with another, the so-called English key, for which there is a special opening mechanism in such a lock. Under the English castle, we make the same markup and fit as in an ordinary castle, only oversized. Next, we outline the dimensions of the passage of the beard of the key down from the hole and use a chisel to select a through rectangular hole, insert the lock and try to close it with the key.
Sometimes a lock box is clamped and cannot be closed or opened. The malfunction is eliminated with a chisel.
If the lock operates normally, fix the plate with screws. When installing the English lock, wrap the screw of the key mechanism in the hole in the plate. We’ll close the lock and on the porch counter we mark the position of the tongue of the lock and the latch spring (if the lock has one). We will transfer these risks along the square to the quarter side, close the door and measure the distance from the plane of the door to the wall of the quarter of the rack. If there is a gap in this place, we transfer its size to the quarter side with the door open.
We outline the entrance of the tongue and the latch, make a chisel with the corresponding rectangular recess to the height of the tongue and the latch, and attach a plate with a bent rib and two holes to the quarter wall with the rib facing out. Let's combine the holes and circle the outline with a pencil, with a chisel we make a bed with a depth of the thickness of the plate and screw it. We will close the door and check whether the lock is locked.