
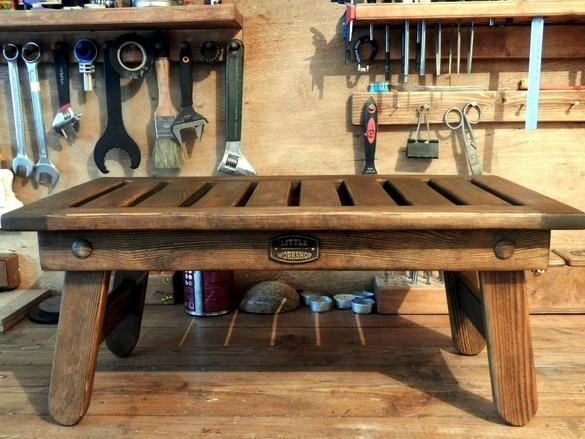
Hello to all lovers homemade. Nowadays, almost everyone uses a laptop or a computer, in this case the article will be useful to those who own the laptop. Sometimes a regular table is not convenient for working on a laptop, so the author decided to make his own homemade table, which will satisfy all conditions at work. Parts for this homemade product are not difficult to access.
In order to make a table for a laptop, we need:
* Wooden planks.
* Round choppies.
* Clamps.
* Joiner's glue.
* Bolts.
* Varnish for wood.
* Sandpaper.
That's all the parts that we need to build, now you can start assembling everything.
Step one.
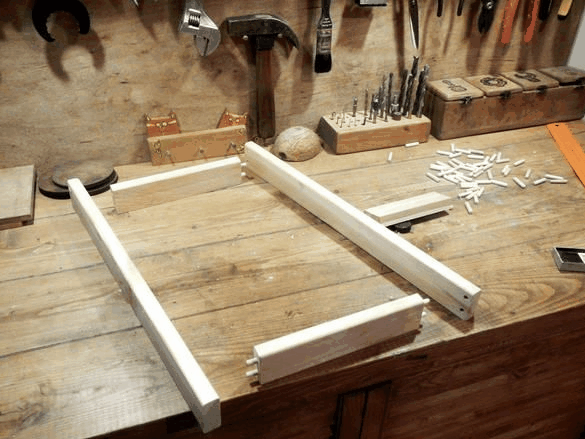
First of all, boards are needed, and a table will be made of them. We adjust to fit all the parts of the future table so that their sizes do not differ from each other, since the final result will depend on this.
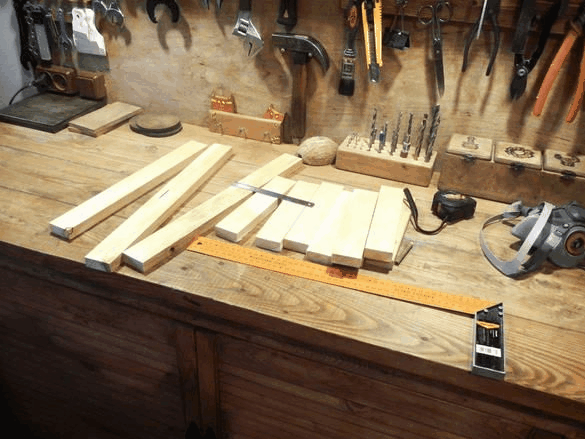
They will be interconnected by means of choppers, which can be bought in a store or made from a round stick.
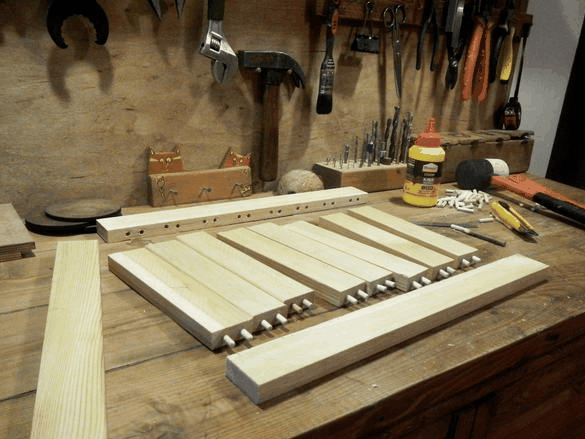
Step Two
We insert choppers into each plank, prematurely drilling holes for this. For a better connection, install two chopiks on the board.
We prepare the surface with sandpaper, you need to sand the skin gradually, moving from a grain size of 60, then 120, 200 and so on, until you reach 800, which will be enough.
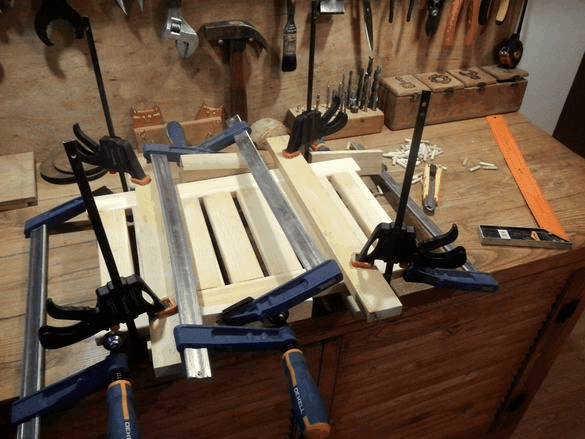
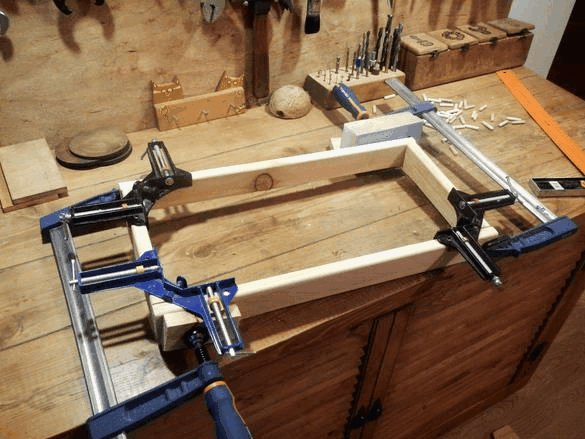
Step Three
When the grinding stage is completed, we proceed to gluing the elements. First glue the countertop. Lubricate joints and choppers with wood glue and with the help of clamps we tighten the structure into a durable frame, which will be the table top of the future table.
Step Four
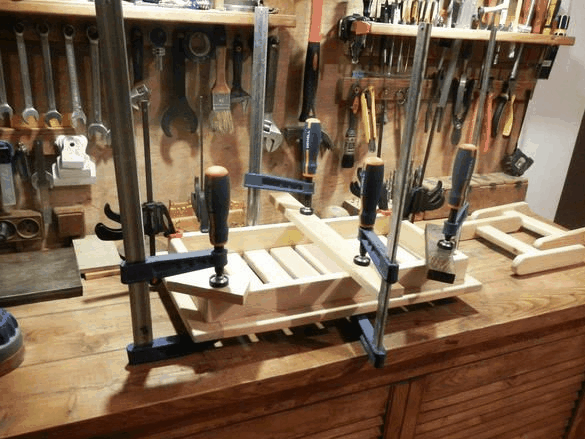
Now let's move on to the base, make it out of four boards folded in the form of a rectangle, after which we fasten them to the glue to each other, pressing them with the same clamps and wait until the glue dries.
It's time to connect the countertop and base together, grease the joints and press with clamps, at the same time, note that the clamp legs do not leave marks on the countertop, and to avoid them, place a small rag folded in half under the leg.
Step Five
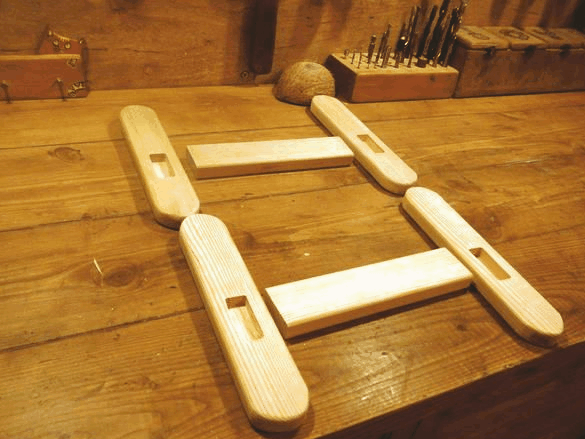
The table is almost ready, but you still cannot call it that, because it is without legs. We will take care of this and make the legs of our table, the material is the same as the table itself, we glue the parts with carpentry glue, the connection place here will be a plate installed in a slot made in the middle of both legs.
Step Six
And now we fix the legs on the base of the table with the help of bolts, clamp tightly, but so that the bolt does not push the tree. We embellish the bolt a little, making shelter for his hat. We grind hats out of wood and glue them on a bolt, these are decorative plugs, so to speak, so as not to violate all the beauty.
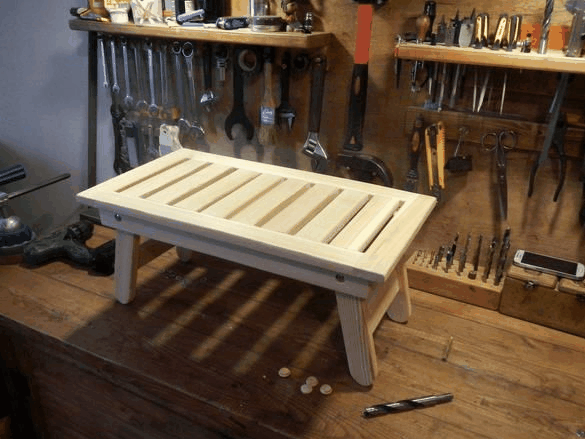
And at the end we cover the tabletop and the base with legs with varnish for wood, which will express its texture and give the table a natural beauty.

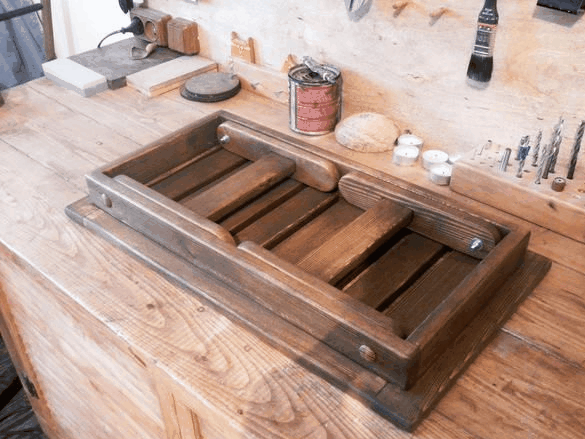
So the table looks when folded, which will save your space.
On this homemade ready, thank you all for your attention and good luck in new endeavors.