A video card is a very important part of a computer device, since it is it that is responsible for processing and displaying the image on the screen of your monitor. It is no secret that when a computer is running, its parts heat up, and the video card is no exception. In this article, you will learn how to make cooling for your video card using the simplest tools.
Materials and tools that were needed to create a cooling system for a video card of a stationary computer:
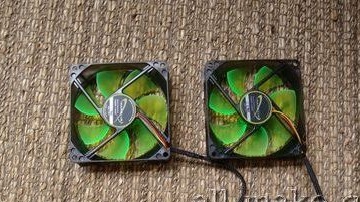
- two fans
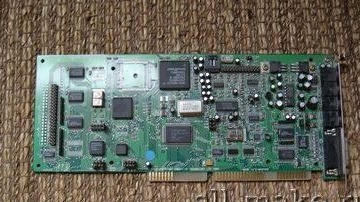
- old sound card
-drill
jigsaw
-sandpaper
-bolts and cylinder nuts
Let us consider in more detail the stages of the author's work on creating cooling for a video card.
Step One: System Design
First you need to understand why the cooling of a video card plays such an important role, and what exactly pushed the author to improve this system. The fact is that overheating of the video card negatively affects its service life, and can even disable it, but this is not noticeable to the average user. Many applications, in particular games, are very demanding on graphics and give an increased load on the video card board, and if the cooling system fails, the image starts to slow down, which already noticeably interferes. This is what prompted the author to improve the cooling system of his video card.
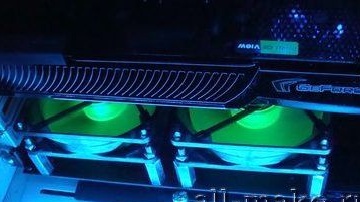
Initially, the video card cooling system consisted of one radiator attached to it, which naturally was not enough. Therefore, without thinking twice, the author decided to use a pair of fans to more quickly cool this radiator and, accordingly, the video card itself.
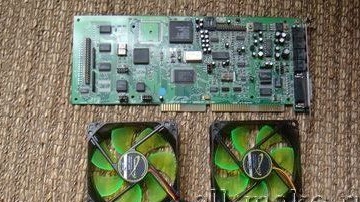
Placing two fans on the video card itself is not an easy task, which requires accuracy and calculation. Therefore, the author decided to go the simpler way. In the computer motherboard, under the video card mounting connector, there are several more connectors into which other devices, for example, a sound card board, can be fixed.Just such a burned out and unnecessary board was available. It was she who was chosen as a platform for fixing the fans, thus significantly simplifying the task.
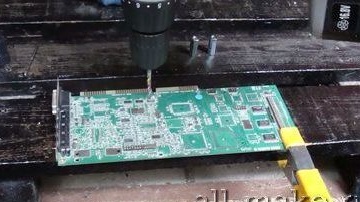
Step Two: Prepare a burnt sound card as a cooling system platform.
Having tried on the best way to install coolers on the board, the author found a suitable place and marked out eight necessary mounting points. Then through these holes through holes were drilled. To leave more room for air circulation inside the system unit, it was decided to get rid of the unnecessary part of the sound card. Using a jigsaw, the excess part of the board was sawn off.
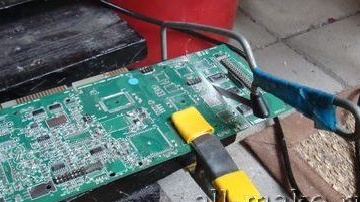
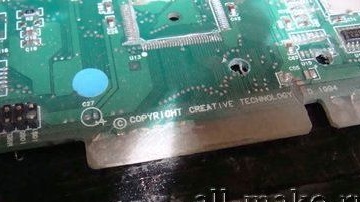
Next, the author deleted all the contacts from the sound card connection connector, which should be installed on the computer motherboard bus. This is a very important point, because otherwise a burned-out sound card can harm the computer system, namely, disable the motherboard.
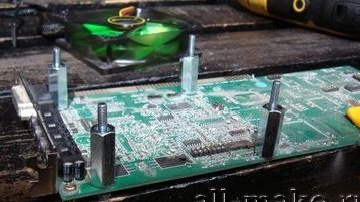
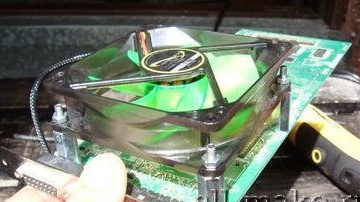
Step Three: Installing Fans on the Sound Card Platform
After the platform for the home-made cooling system was prepared, the author proceeded to install the mounts. As fasteners, bolts and cylindrical nuts were used, from which peculiar fasteners were assembled. After that, fans were installed on these mounts, and it is important to do this in such a way that the air flow that they create is directed from the sound card. In this position, the fans were fixed with nuts.
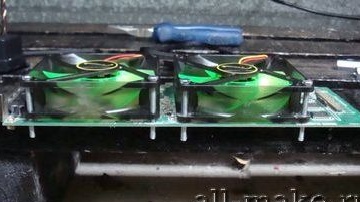
Fourth step: completion and connection of the system.
To make it easier for fans to draw in airflow and direct it to the graphics card, small holes were cut out under the fans. After that, the platform with coolers was installed on the motherboard bus and securely fixed in a special mount for additional devices. Then the power was connected to the coolers from the wires that come from the computer's power supply.
Then the cooling system was ready. Now the fans will automatically turn on when the system unit is turned on and additionally cool the computer’s video adapter board. Thus, having spent a couple of hours of free time, the author significantly improved the cooling system and solved the problem of image freezing due to overheating of the video card under heavy loads.