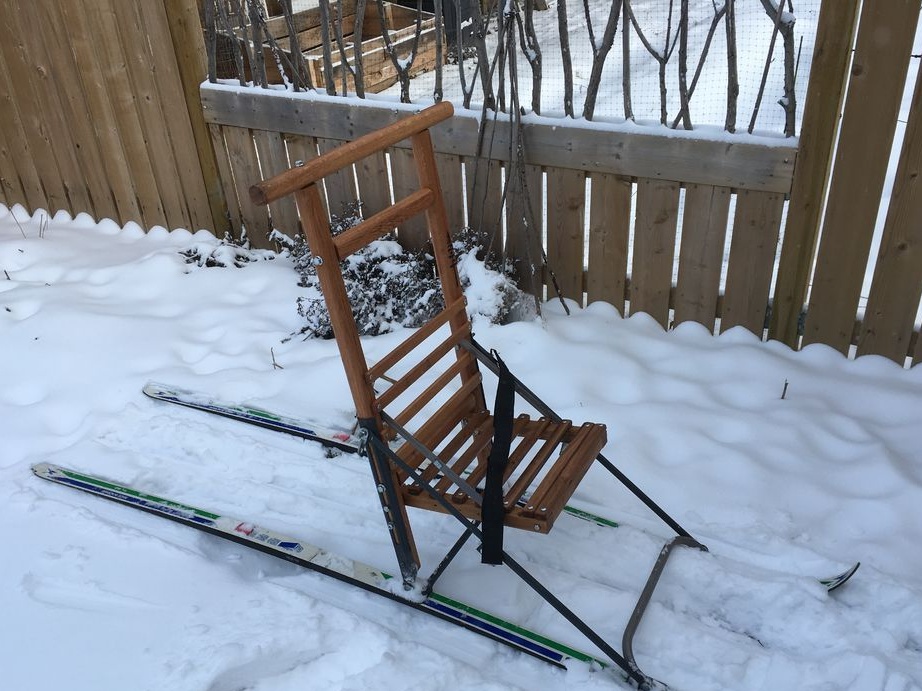
These wonderful sleds made do it yourself a master from Canada for his grandchildren. He himself and his wife prefer cross-country skiing, which children cannot yet master.
Meanwhile, winter in Saskatchewan (Canada) lasts no less than five months, so winter sports and recreation remain in demand.
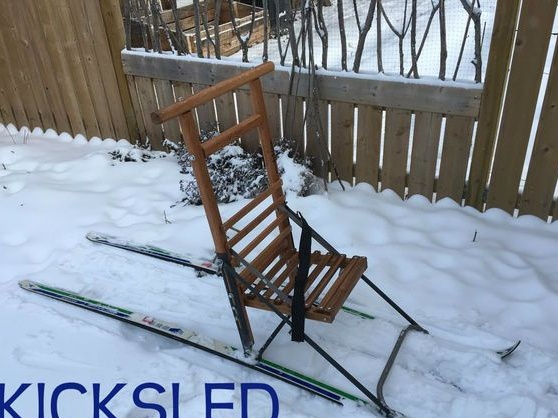
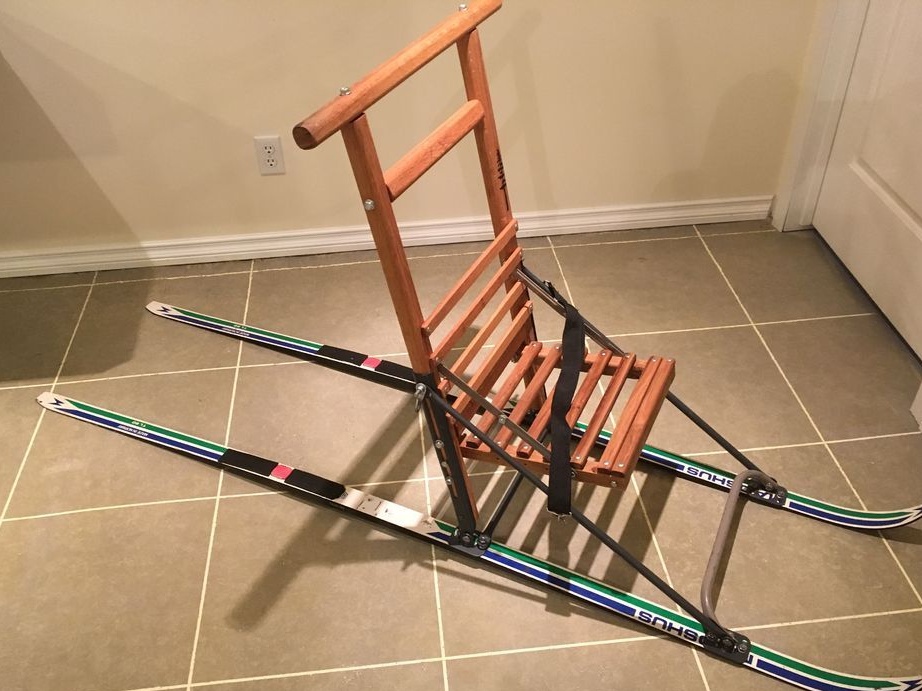
It is worth noting that this design is not new, it is very popular in the Scandinavian countries, but the author showed a great deal of imagination in the search for materials, so the sled came out very original.

So, to make sledges from old skis, we need:
1. Materials:
- board;
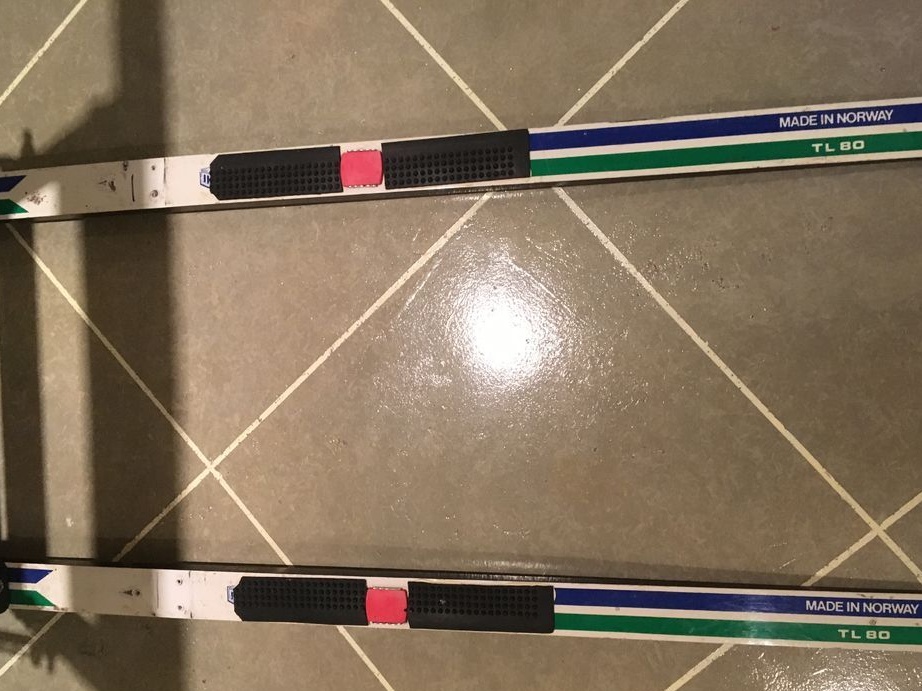
- old skis (preferably wide mountain ones);
- bolts, washers, nuts for fixing elements;
- wood screws;
- a sheeting for a tree at will;
- all kinds of metal plates and tubes.
2. Tools:
- drill with a set of drills;
- miter saw or hand saw for wood;
- milling machine or manual milling cutter (you can do without them);
- a circular saw;
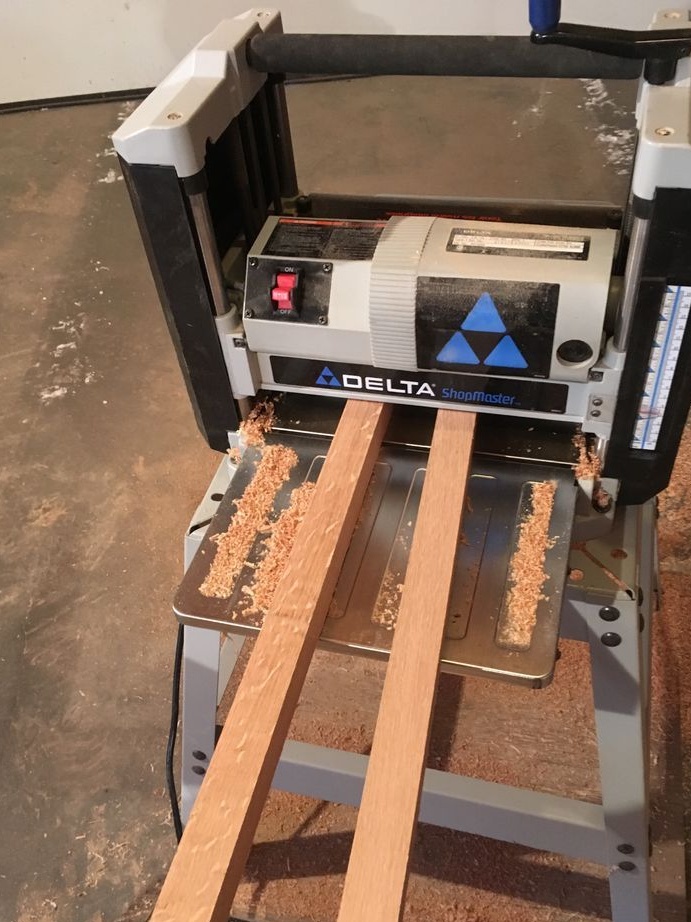
- Thicknesser or a hand tool for planing a board like a jointer;
- Bulgarian with a cutting disc for metal;
- a set of socket wrenches and an adjustable wrench.
Step 1: search for materials
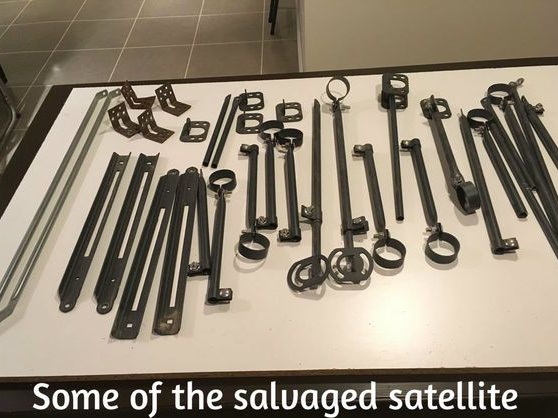
The selection of metal parts and tubes turned out to be a purely creative process. The author used only those materials that were available to him. For example, metal fittings remained from satellite dishes, the installation of which he had once been involved in. Customers sometimes refused services, and the satellite company did not want the material back, so over the years it has accumulated a certain amount.
The source of all kinds of metal pipes was an old folding garden chair-chaise lounge, which had long been out of use.
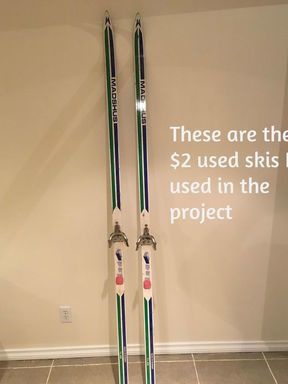
Skis were bought at a sale for two dollars, and this is perhaps the only waste on the creation of sleds, not counting drying oils.
Oak plank - non-standard - was freely available at a local farm.
Thus, the author saved all this wealth from the prospect of going to the landfill and got all the materials necessary for work.
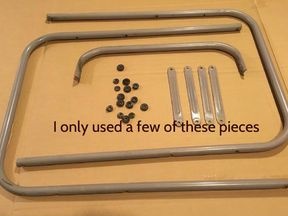
Step 2: dismantling the frame of the garden chaise lounge chair
First of all, it was necessary to disassemble a deck chair. For this, the author used a grinder with a cutting disc for metal. He cut the rivets that held the chair together.
All kinds of pipes turned out to be a whole sea, but in the end he used only a few pieces.
Step 3: Attaching the Metal Bracket to the Skis and Installing the Triangular Base
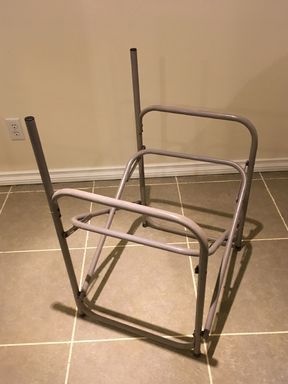
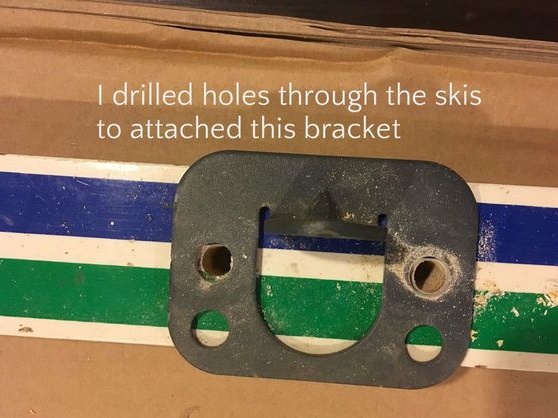
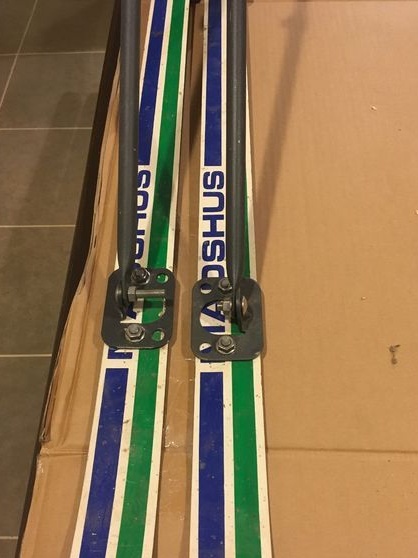
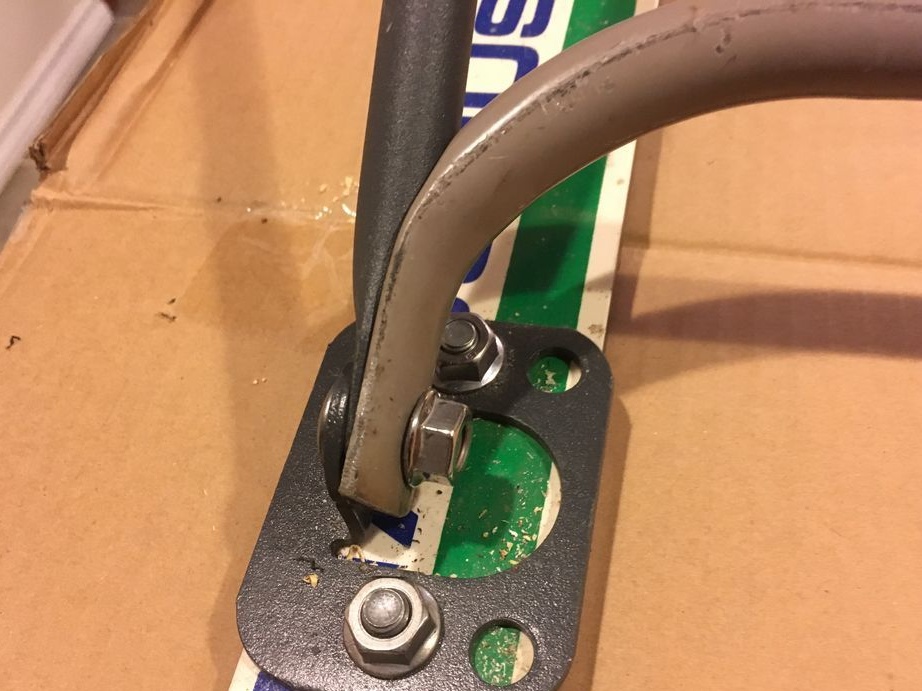
Work began by installing metal brackets on the base of the skis, on which the prefabricated triangular frame was to be mounted.
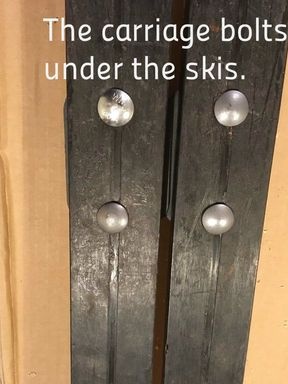
To fix the braces, the author made two holes in each ski with a drill and screwed the brackets with flat head bolts as shown in the figure. Perfect hats should not interfere with the sliding of skis in the snow.
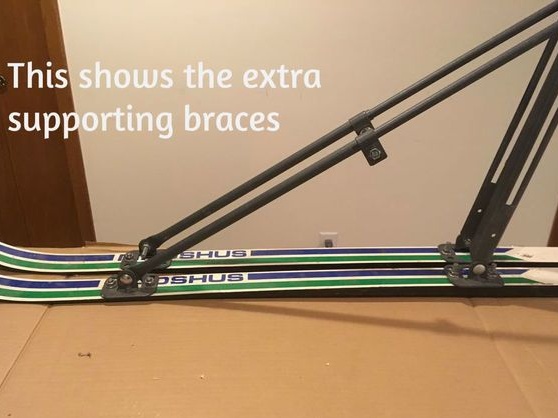
Further, accessories from satellite dishes went into the matter, from which the author conceived a triangular base for an oak seat. It also turned out to be very comfortable, with suitable openings - as if specially designed for such a job. I didn’t have to invent anything.
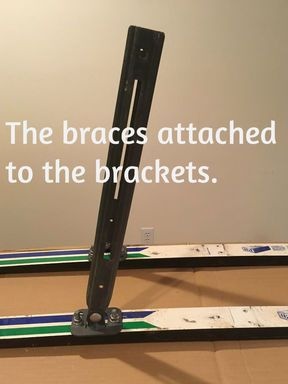
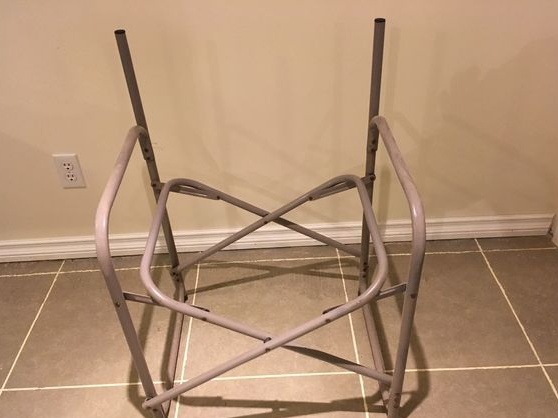
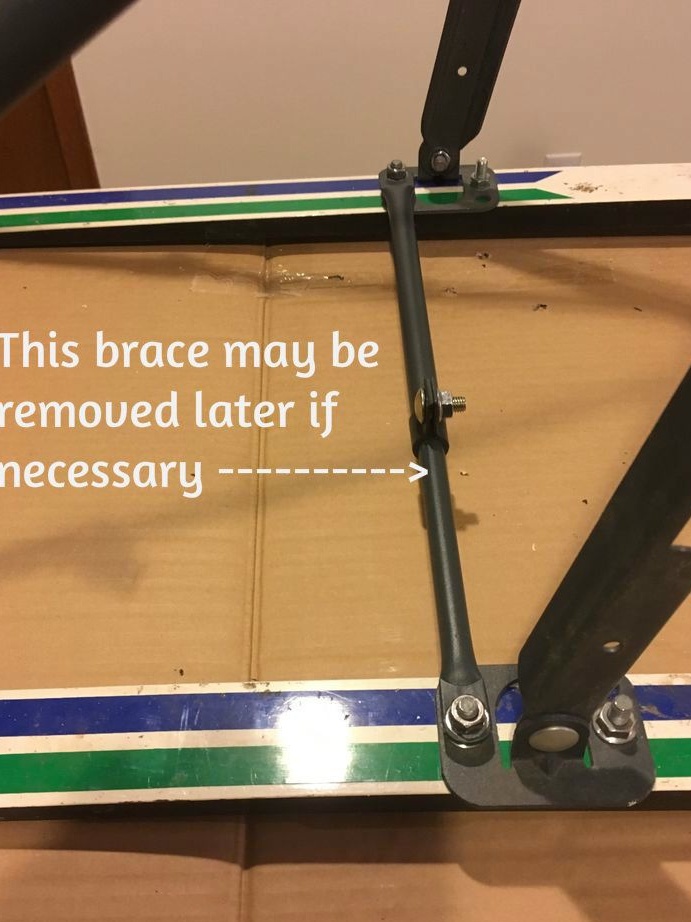
The uprights were intentionally angled for weight distribution. Between them and the front of the skis, the author installed metal struts, bolting them.
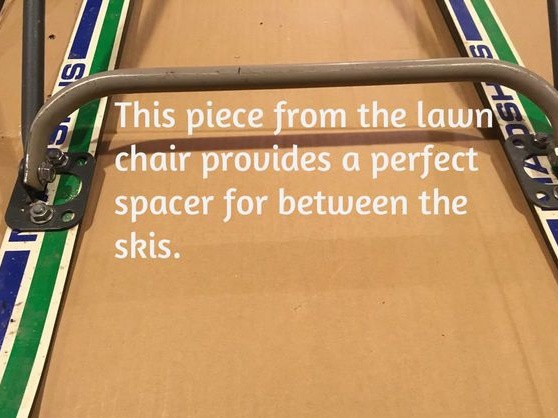
In order to reliably fix the skids of future sledges at a certain distance, the author used a curved U-shaped tube from a deck chair. This detail turned out to be very useful, since its bending will not prevent the structure from sliding in the snow.
He also temporarily installed a piece of small diameter tubing at the bottom for structural rigidity. It can, and indeed, needs to be removed after all other parts are firmly connected to each other.
Step 4: preparation and processing of wood
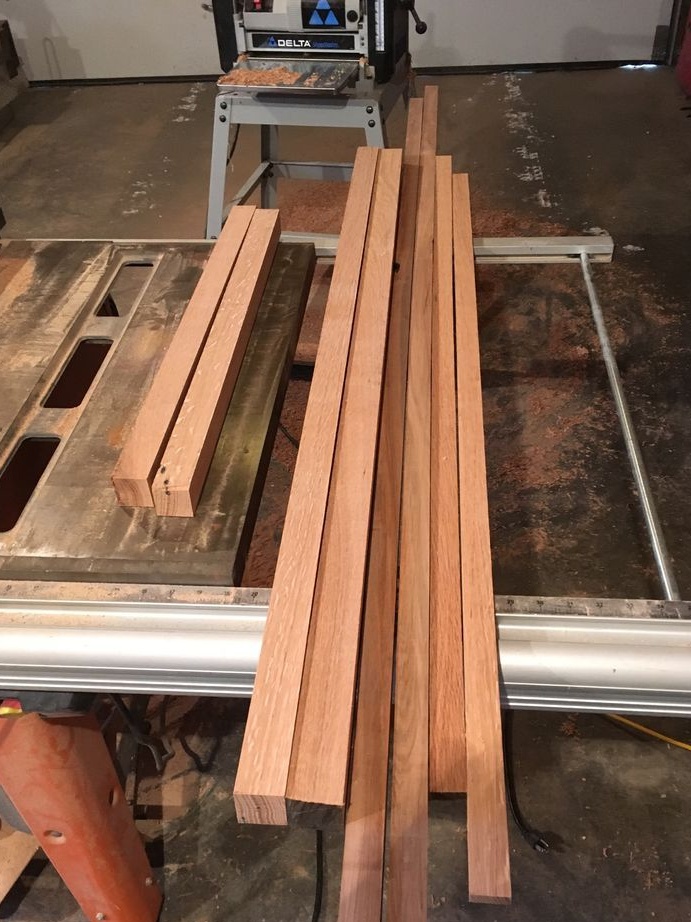
The author got boards that were in use from a neighboring farm. Fortunately, they turned out to be oak and strong, but they were of different thicknesses.
He dismissed some of them along, but all of them had to be passed through a surface gage. IN home In the absence of machines, you can use the jointer and planer to adjust the boards to a thickness. Oak cutting by hand is not easy, but treating any other breed of wood in this way is within the power of everyone.
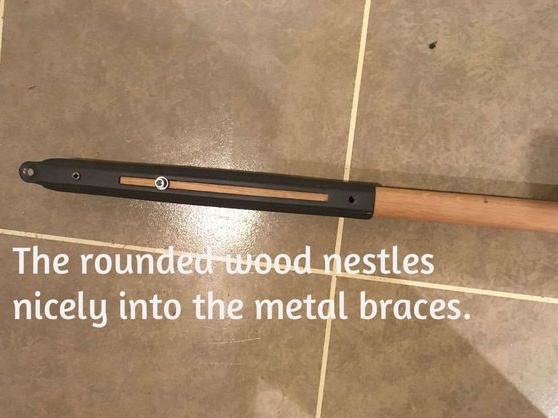
To achieve a better aesthetic appearance, the author rounded the edges of the bars on the milling machine. For these purposes, a hand milling machine is suitable.
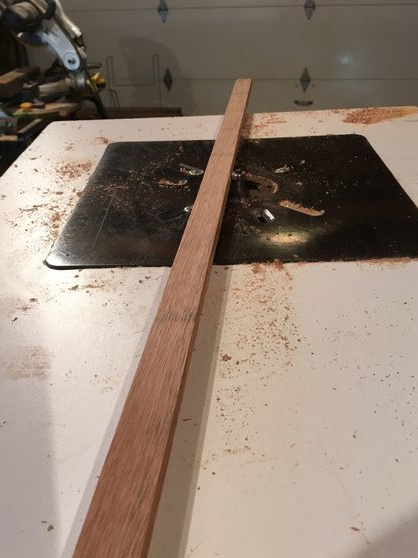

Also, a small chamfer can be removed during the grinding process, especially since you can not do without grinding here.
The author polished oak billets on the machine. But a manual grinder will also work.
It is worth noting that oak does not require painting or impregnation and is one of the most wear-resistant types of wood. However, if desired, you can tint the workpiece with decorative oil, varnish, stain or just paint.
Step 5: Creating and Installing a Wooden Base
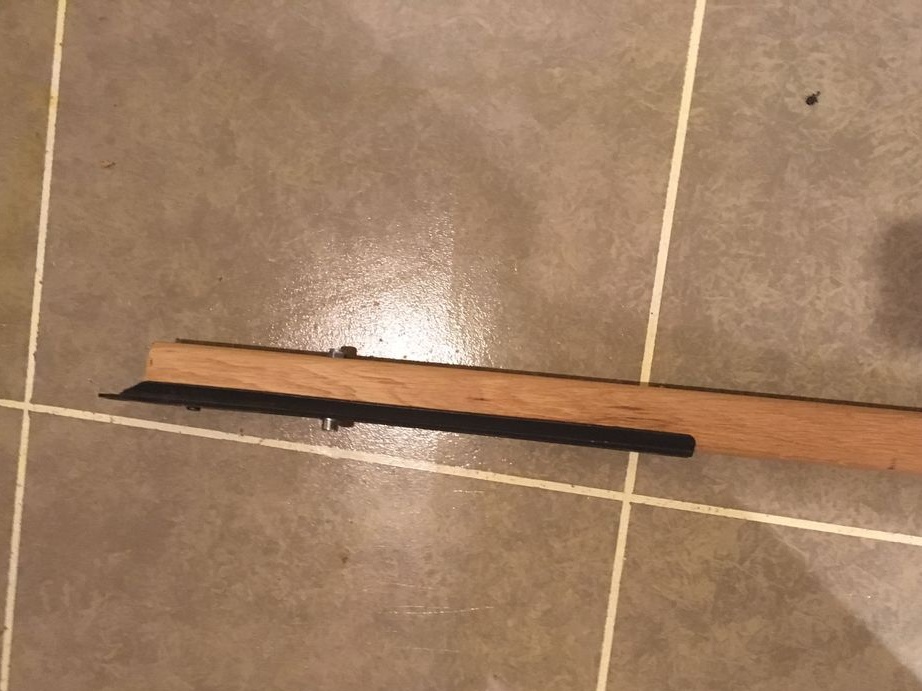
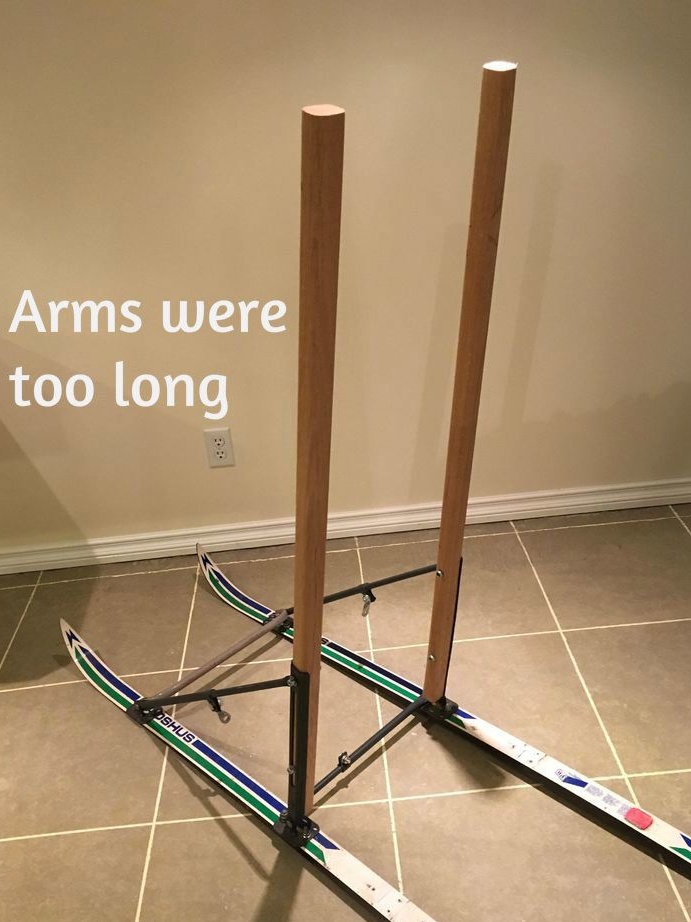
Fitted wooden workpieces, designed as vertical racks, perfectly matched metal fittings. The author secured them with bolts.
Later it turned out that the racks were too long. Therefore, they had to be dismantled and shortened a little under the author’s growth.
In the upper part, he installed a wooden jumper of the same cross section as the racks.
The same jumper was installed just above the base to prevent bending and twisting of the sled in case of unexpected loads. This will also remove the metal spacer, which is visible in the photo and mentioned above, so that it does not interfere with the sliding of the sled.
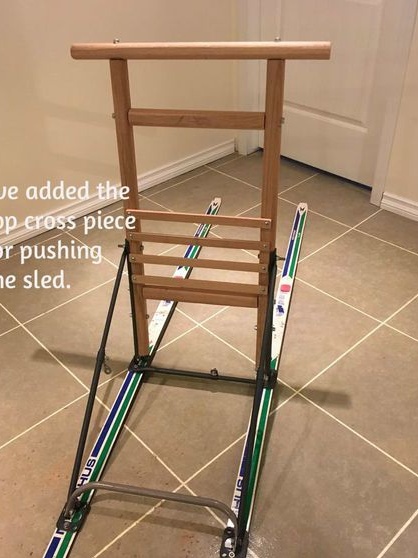
Finally, a longer rung was installed at the top, passed through the milling cutter so that it was comfortable to hold on to it. To avoid splitting the wood of the vertical guides, the author drilled holes before screwing in the screws.
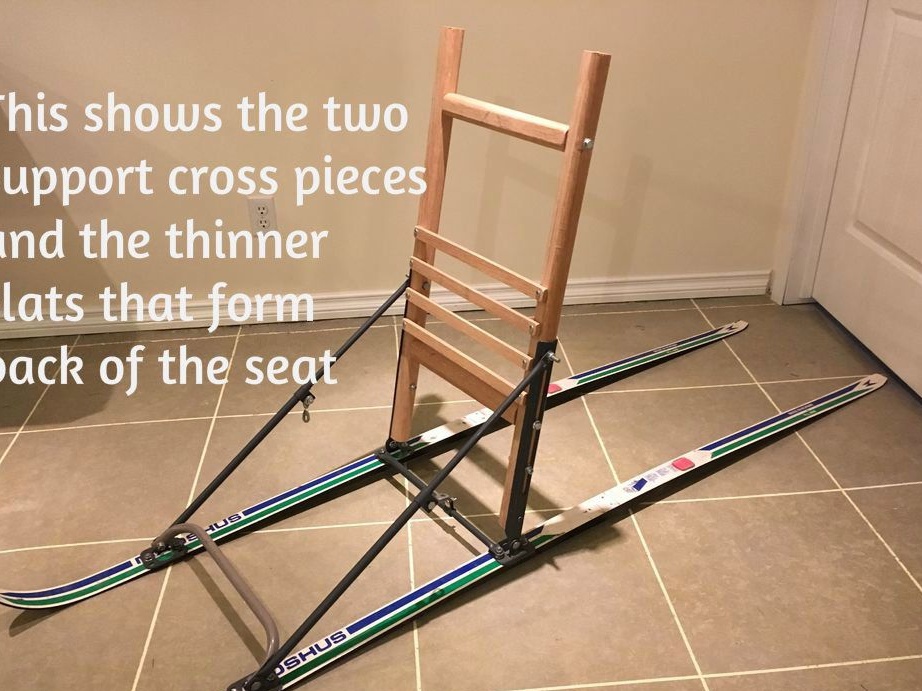
From thinner boards, the author arranged a back for sitting. This was to add design stability when riding.
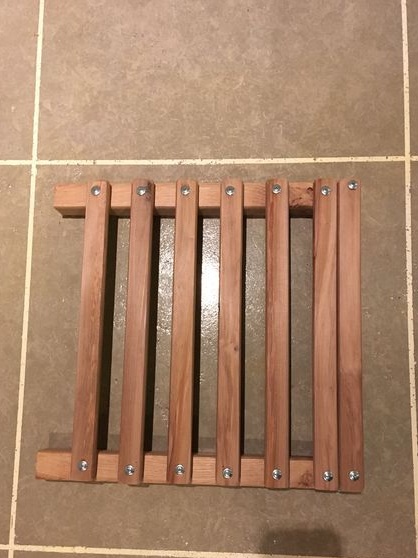
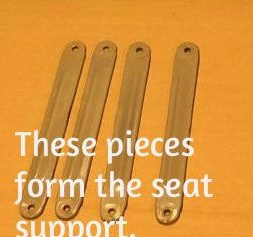
In order to get the seat itself, the author made a U-shaped base from bars of a small cross section and screwed seven narrow boards with screws. And so that the tree does not crack, he previously drilled holes in the mounting points.
Step 6: installing the seat
After the seat was made, the author secured it with bolts, drilling a hole under them in wooden racks so that the ends of the bolts fell into the slot of metal fittings.
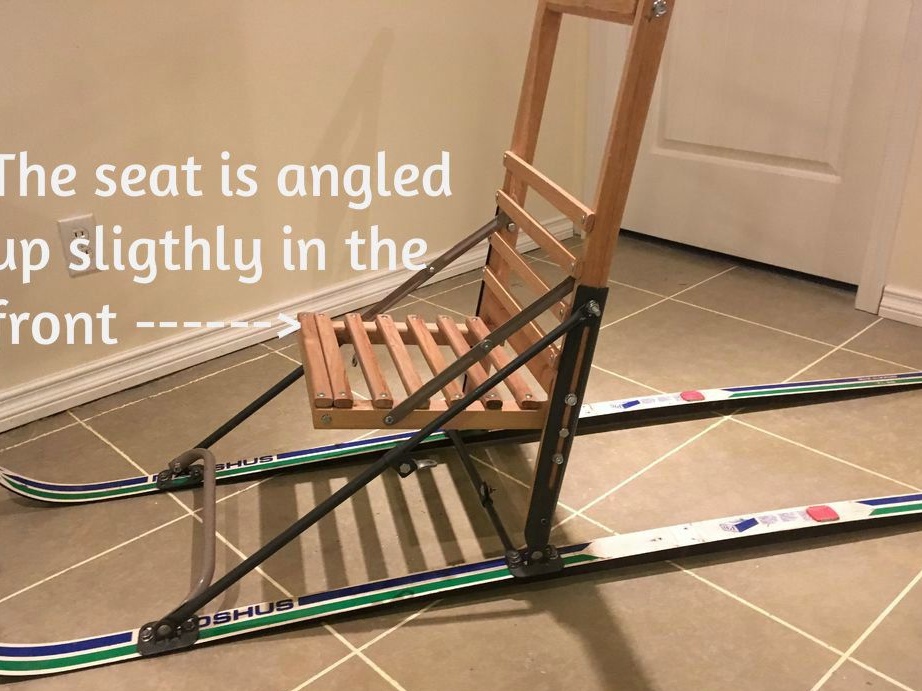
The seat is not too high and is at an angle so that it is comfortable to sit on and does not have to crawl forward while sledding.
After joining both sides, it remained to establish diagonal metal extensions to strengthen the structure. They turned out to be composite, each of a pair of metal plates that remained after disassembling a deck chair. The author connected the plates to each other with bolts and fixed them on the back and seat as shown in the photo.
Step 7: add seat belts
Since the sled was intended for children, the author homemade was a little worried about the safety of its passengers in the event of an unexpected fall.
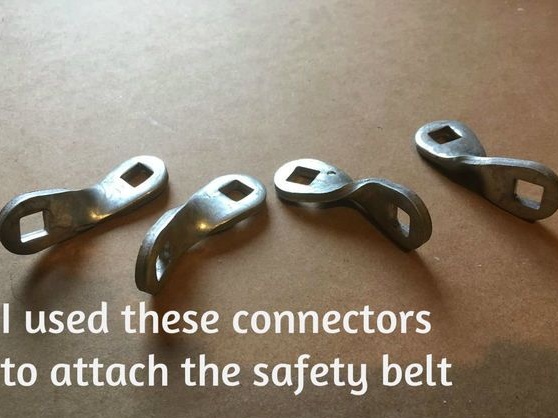
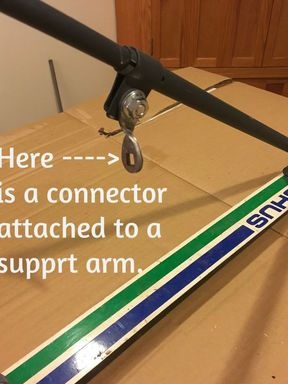
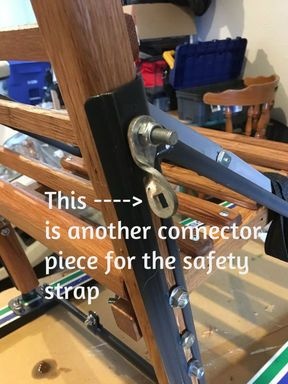
He added to the design curly connectors from satellite dishes, securing them to vertical racks so that the belt runs diagonally.
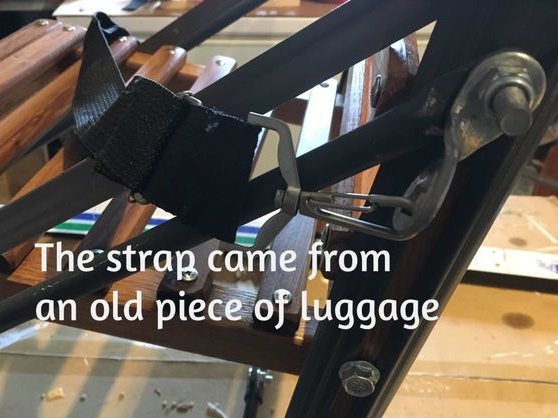
And the old handle from the suitcase was very useful as a seat belt. There was all the necessary accessories for attaching to the connectors, moreover, the handle was easily adjustable. In a word, you can’t imagine any better.

In addition, the “seat belt” can serve as protection for luggage from falling if placed on the seat.
Step 8: the final touches
The construction was completed on the whole, it only remained to add ski pads on the base of the runners so that the feet would not slide on the tree during the skiing. Their author glued with rubber glue.
Step 9: testing and adjusting
In the process of testing the sled, it turned out that they did not slip as expected. The author suggested that the problem was the grip ski paste that covered the base of the skis. He removed it and applied a water-repellent paste to slip. Only after that did the sled really slide in the snow.
And finally, to preserve the wood, the author nevertheless used drying oil, which he applied in two layers with a difference of a couple of hours. After some time, he removed the excess drying oil with a napkin. He recommends repeating this operation every season to extend the sleigh's lifespan.
The author also shared his doubts about the skis he used. In the future, he plans to replace cross-country skiing with mountain skiing, which have a wider base.