
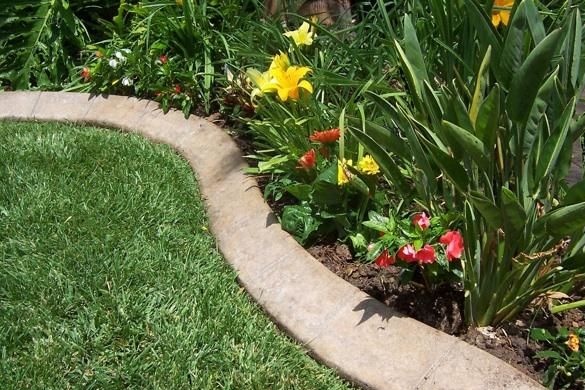
Sometimes it is difficult to do without borders when laying a new flower garden or garden path. Whatever you say, but in addition to its aesthetic function, it also greatly facilitates the process of caring for decorative plantings.
There are a huge number of recommendations on how to make borders from improvised materials. There are also enough options for ready-made border elements that anyone can purchase in a garden store or a construction supermarket.
The author decided to dwell on an intermediate option - to make a border with his own hands similar to those that can be bought in a store.
Subject to the technological process, as well as in the presence of certain conditions, which will be discussed below, such a border will last a considerable number of years and, like any other creation of its own hands, will delight its creator for a long time.
The technology described in this master class allows you to erect curbs of arbitrary shapes and any length, and thereby relieve you of trouble for a long time.
So, today we will talk about how to arrange a border around a flower garden or garden path without the help of specialists.
For work it will be necessary:
1. Materials:
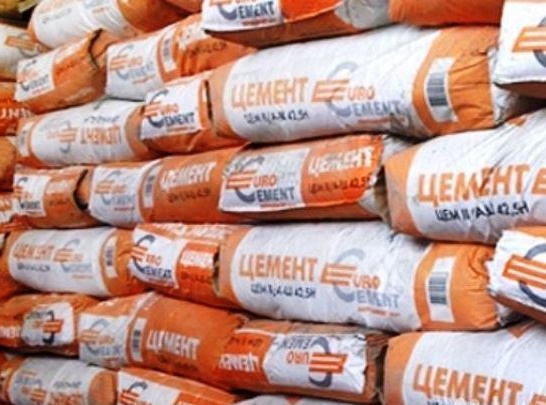
- cement;
- river or quarry sand (do not use sea sand!);
- crushed stone;
- wire for reinforcement (you can do without it);
- pigment for coloring concrete (optional);
- liquid for washing dishes (used to give the solution elasticity);
- any flexible sheet material such as plywood or thin fiberboard for formwork;
- wooden slats for formwork;
- metal screws or staples for the construction of formwork;
- wooden pegs (for formwork);
- liquid for sealing a concrete border;
- sand for backfilling in case of work in clay soil.
2. Tools:
- a bucket;
- car;
- shovel;
- wooden trowel for leveling concrete surface;
- Master OK;
- a screwdriver or furniture stapler;
- hammer;
- hacksaw for wood or jigsaw;
- container for concrete;
- concrete mixer (you can knead the solution manually in concrete tanks);
- a hose or cord for marking the curb line.
Step 1: Consider Local Conditions
The easiest way to carry out such work is the happy owners of sandy soil. The only prerequisite for this is the wetting of the finished concrete curb throughout the entire time that it dries and hardens. And this is almost a month.The fact is that sand has excellent drainage properties and the moisture that is in the concrete mix will pass through the sand. Concrete, however, acquires the necessary strength only when wet. In the summer it will dry out very much.
If you want your border, built on sandy soil, to last a long time, consider this feature.
In second place is loose forest soil. It is the least pretentious in the construction of concrete structures, albeit such minor ones.
The third place is occupied by black soil. In its properties, it approaches loamy and clay soils.
And, finally, loam and clay - the most moody soil. But it is quite simple to tame it, resorting to one simple method.
The fact is that clay is unusually hygroscopic. This means that it literally draws moisture to itself - like a sponge. In frost, all the moisture contained in the clay freezes, and the clay soil expands, as it were. If there is a curb in it, he will be subjected to real torture. As a rule, concrete structures in clay soil quickly deform, cracks form in them and they begin to collapse.
To do this, a long time ago came up with a sand pillow. Before laying the curb solution in the groove, a layer of sand should be poured. It will prevent the deformation of concrete and protect it from destruction.
You can also pour concrete mortar without deepening it into the ground. This is an economically more rational option, since you do not have to bear the cost of sand for a sand cushion.
However, pay attention to the amount of rainfall that occurs during the rainy seasons. If it rains continuously in the fall and you have clay in the garden and impassable dirt forms, keep in mind that over time the border will go deeper into the soil until it is completely visible above the surface. In this case, it is better to abandon the construction of concrete borders and opt for other options. Or strengthen the ground before undertaking a similar job.
Step 2: preparation of the base and construction of the formwork
So, with the local geological conditions, we figured out a bit and you can get to work.
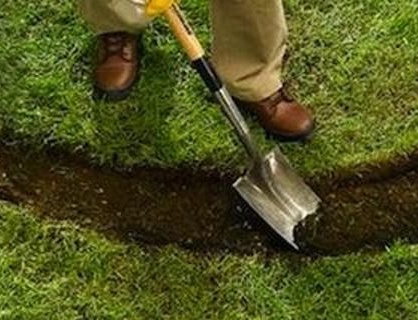
If you have planned a curly curb line, use the garden hose for marking. This will greatly facilitate the process. In extreme cases, you can take the cord. But the markup is recommended not to be neglected, but to give it special significance.

Mark a strip under the border at least 10 cm wide, remove grass and remove the vegetative layer of soil. If you want to securely fix the curb, as is usually the case with industrial elements (their height is at least 30 cm and sometimes reaches half a meter), deepen the trench to the desired level. Do not forget about the sand cushion.
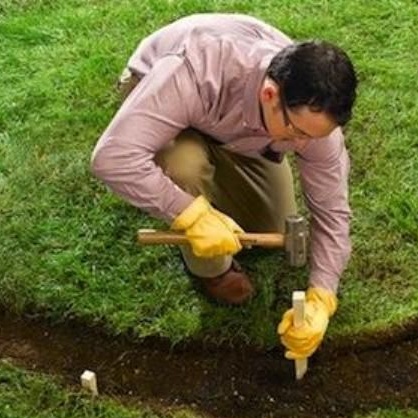
Drive pre-prepared wooden pegs on both sides at a distance of about 50 cm. This is the outline of the future formwork.
In order to build the walls of the formwork, flexible plywood was used, because the curb was conceived curly. In areas where there are no bends, you can use stiff material, including boards. But working with boards is not so convenient. In addition, the texture of the tree will be transferred to the walls of the curb in places where it is inappropriate.
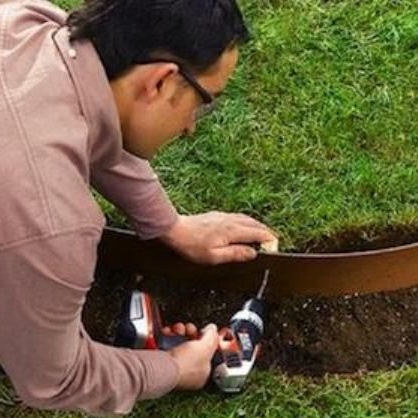
In order to fix plywood on stakes, use a choice of a furniture stapler and staples, or a screwdriver and self-tapping screws. You can use nails, but such a formwork will be much more difficult to disassemble at the end of all work.
In order for the border width to be the same, prepare and install spacers from pieces of unnecessary wood. Spacers, of course, should be located above the planned height of the curb itself.
Step 3: preparing the solution
In the process of preparing a concrete mortar, you can use a concrete mixer or do without it - decide for yourself.However, mixing the solution manually is not an easy task.
Prepare the necessary tool so that there are no delays during operation (the prepared solution has a limited life), as well as materials: cement, sand, gravel, water, dishwashing detergent and pigment, if you are going to use it.
Also prepare straight sections of wire if you want to reinforce the curb. This measure is optional and somewhat costly, but you will be sure that over time deep cracks do not form in it due to seasonal movement of the soil.
Mix the ingredients in order: first cement and sand, then water with detergent and only then crushed stone.
Carefully read the instructions for the pigment and prepare it, if necessary. Introduce the pigment into the solution as indicated in the instructions.
The solution should turn out to be thick enough, but not so much as to smooth it like it was with a wooden trowel.
Step 4: forming a border
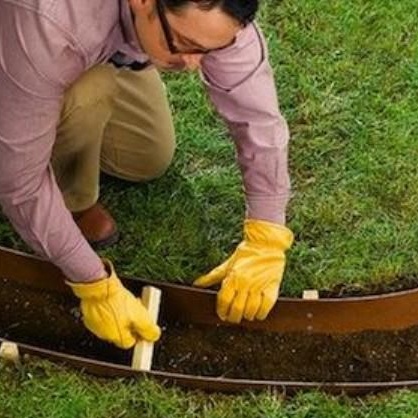
Spread the solution into the formwork using a trowel, compacting it and filling all the voids.
Align the surface of the curb with a trowel and wait until the mortar is slightly set.
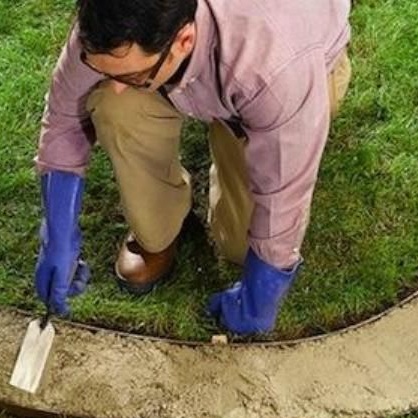
Now is the time to work with a wooden trowel. It is very effective if you need to make the surface of concrete smooth and dense.
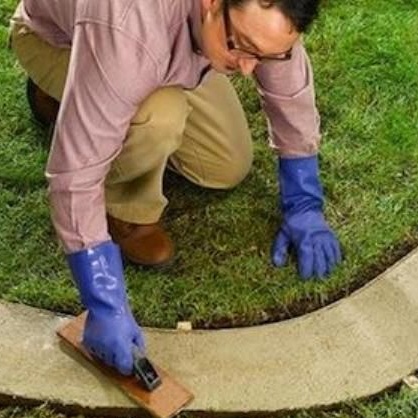
When the mortar is set so that the formwork can be dismantled, but still retain plasticity, you can optionally smooth the edges of the curb as the author did.
You can also arrange the layout by simulating the industrial sections of the border.
Concrete mortar is grabbed quickly, but the fortress gains a long time - up to one month. All this time you need to make sure that it does not dry out in the sun and sometimes water the border with water.
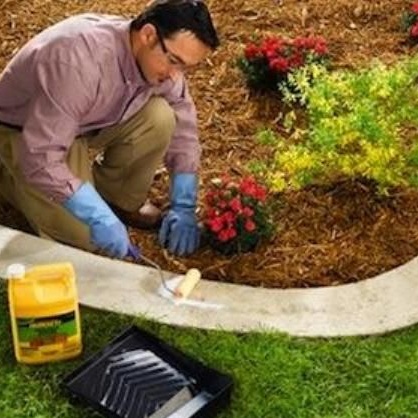
After a month, apply a solution to the surface of the curb to seal it. You can try to use it immediately, as soon as the solution sets, so that the border does not dry out. You can also use a primer.
If voids remain on the sides of the curb, tamp the ground.