
Many of us like to go outdoors, while we take a lot of home equipment with us - pots, plates, forks and much more, as well as stocking up on food. By tradition, we start to cook, or just start to get ready-made food from bags and other appliances, and the question immediately arises, where is this to be put? Some will prefer the option with a regular tablecloth laid on the ground, which is not very convenient for me, and are unforgettable about local insects, which will even try to taste the brought goodies.
The author of this article suggests that you and me make a convenient folding table that will clearly be better than the written method. The work ahead is not difficult, everyone can cope with it. And, probably, the main advantage of this work will be that the table will not take up much space while transporting it to the resting place, as it will be folding.
For a homemade table you will need the following.
Tool:
- hacksaw for wood;
- roulette;
- ruler;
- a pencil;
- sandpaper;
- construction stapler;
- hammer;
- drill.
Materials:
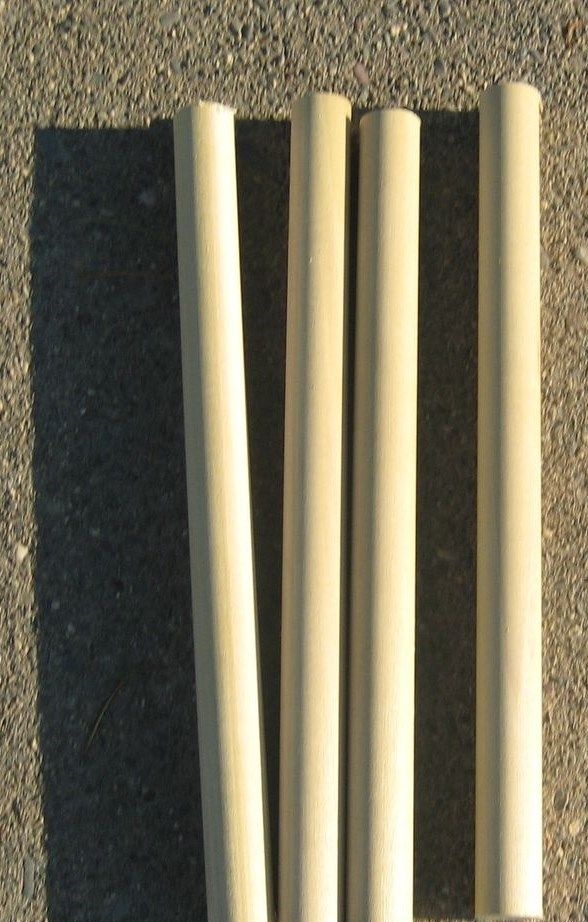
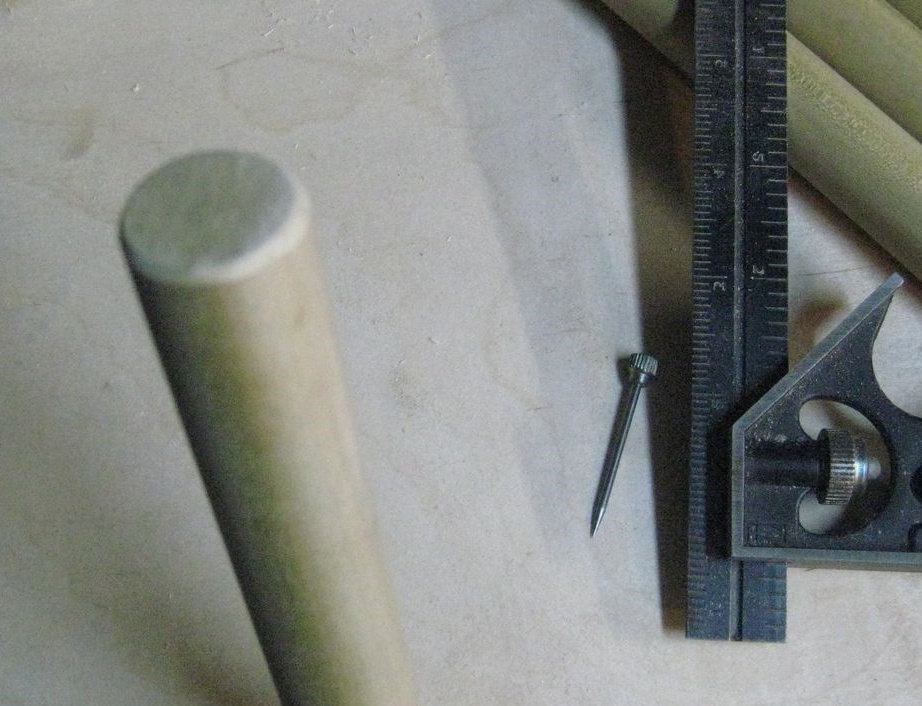
- a round wooden handle, 2 cm in diameter, 120 cm long (you can take it thicker, but this is at your discretion);
- 3 pcs. boards (for a table and a fixing element) 2.5 m long, with a section of 1 x 5 cm;
- 4 things. shipping bolts;
- 4 things. brass threaded nuts - inserts;
- nylon flat cord 120 cm long;
- construction brackets 6 mm.
To begin with, we cut the legs for the table, you should get four equal parts, each 40 cm.
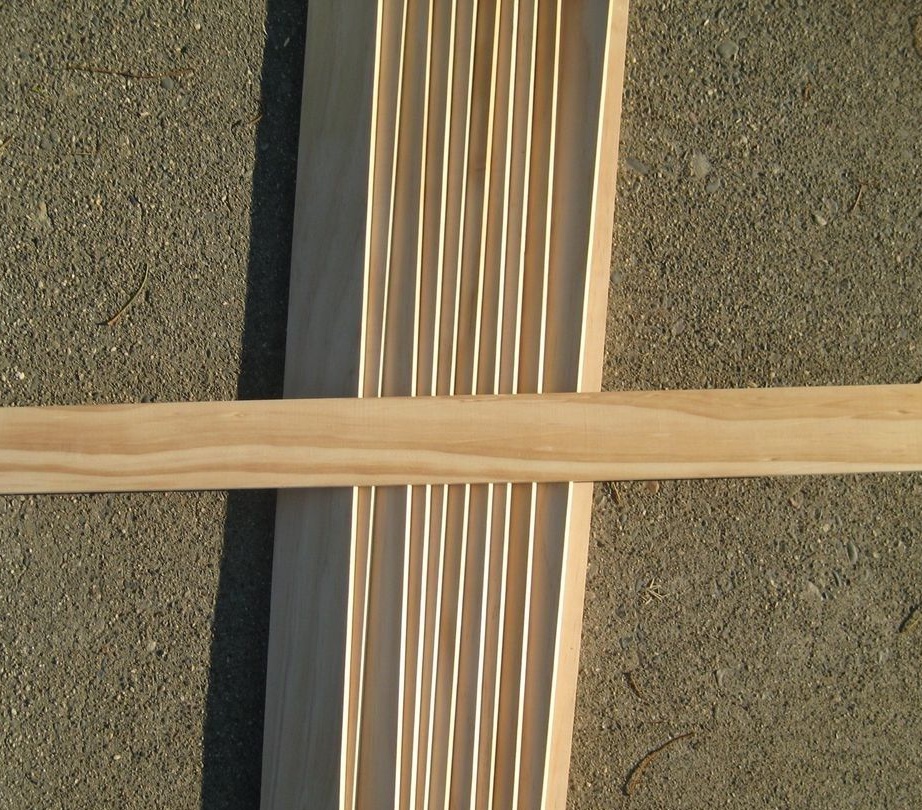
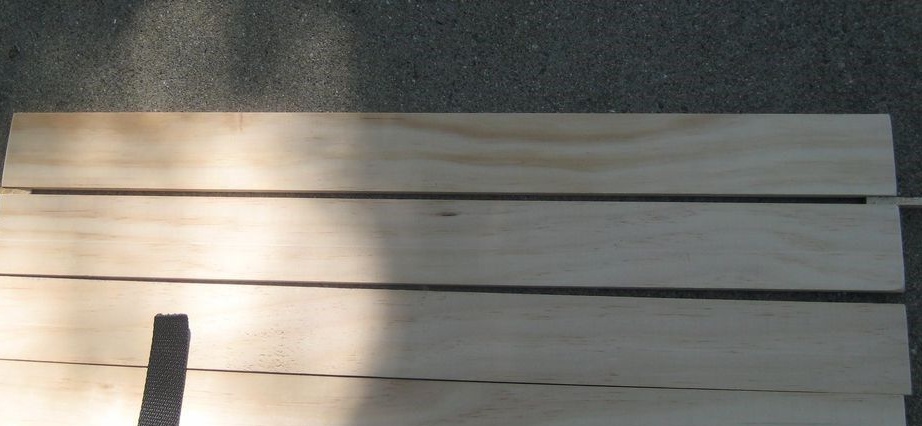
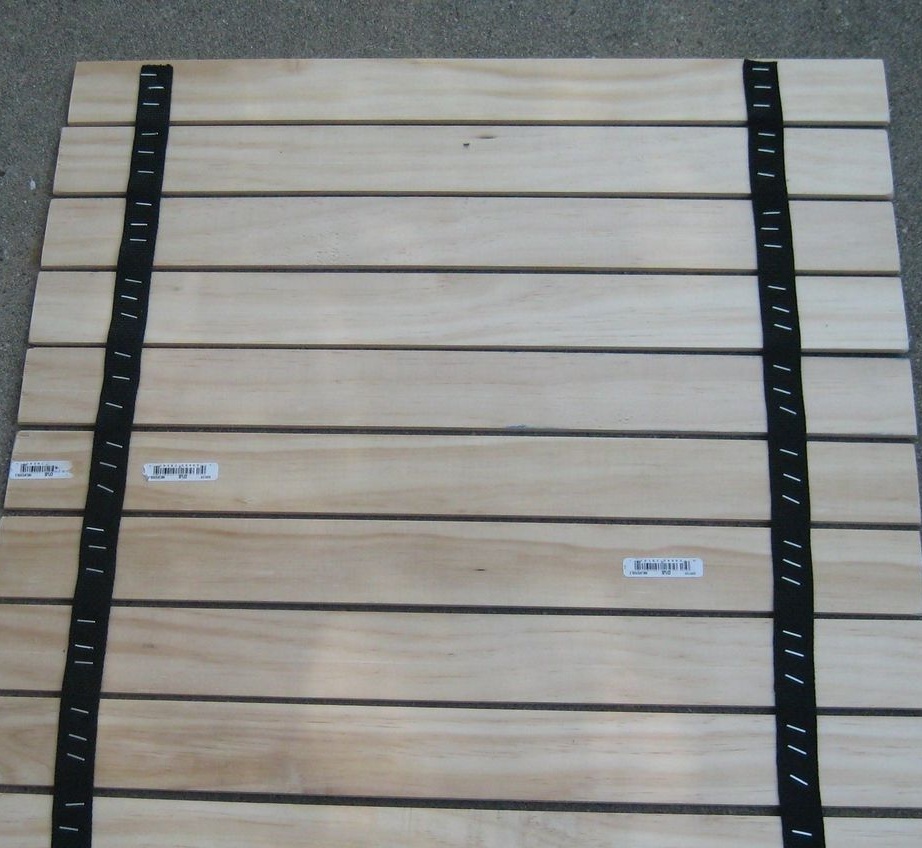
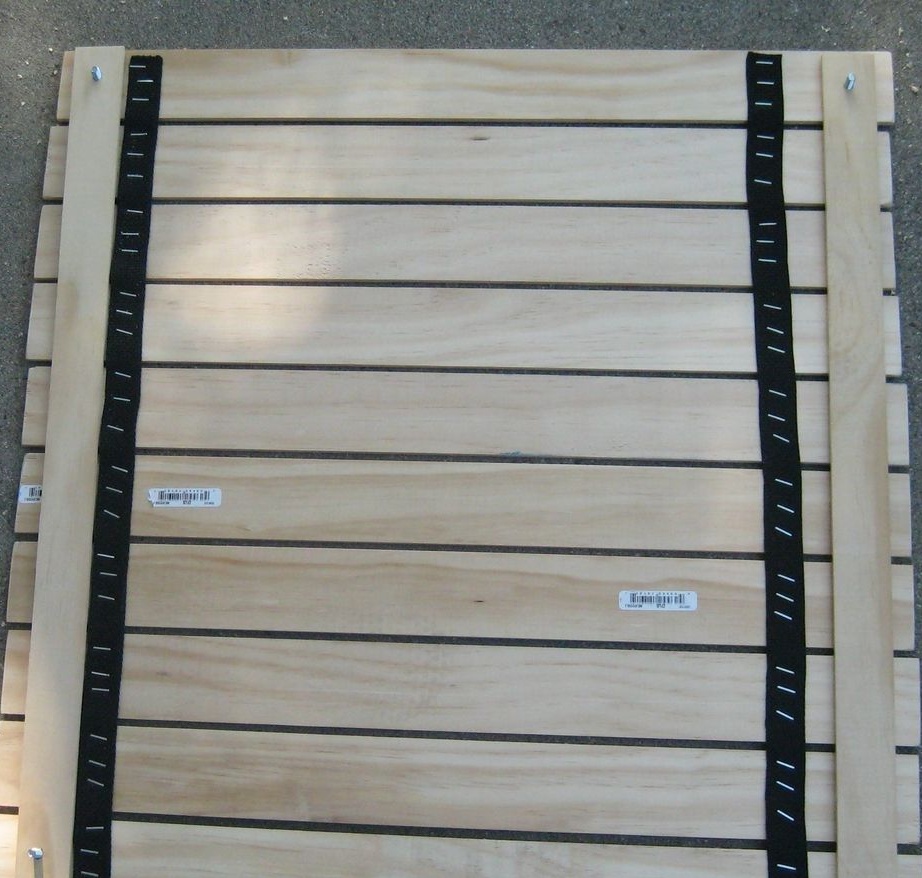
Next, we take the planks that we will use for the countertops, cut them in the amount of 10 pieces, each length is 60 cm, for this we use your cutting tool. Then you need to saw off two more workpieces with the same size of 60 cm, they will be further used as a fixing element for the countertops.
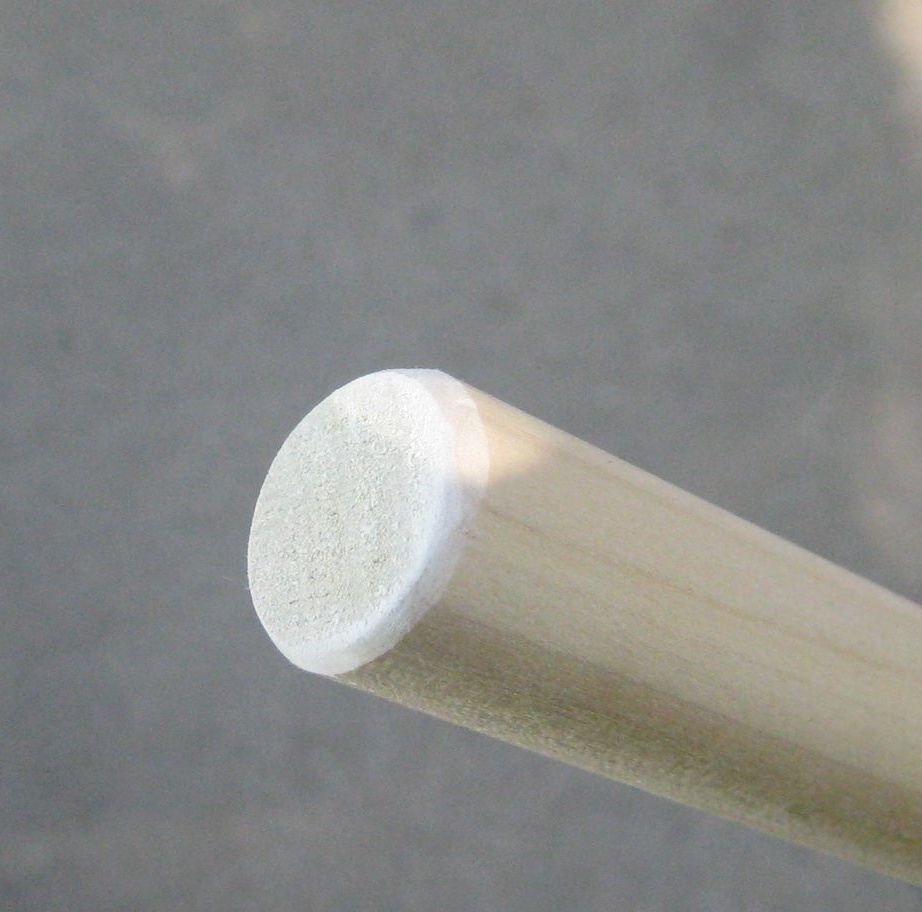
When all the parts are sawn to the parts we need, we grind, remove and round off sharp edges, use sandpaper.

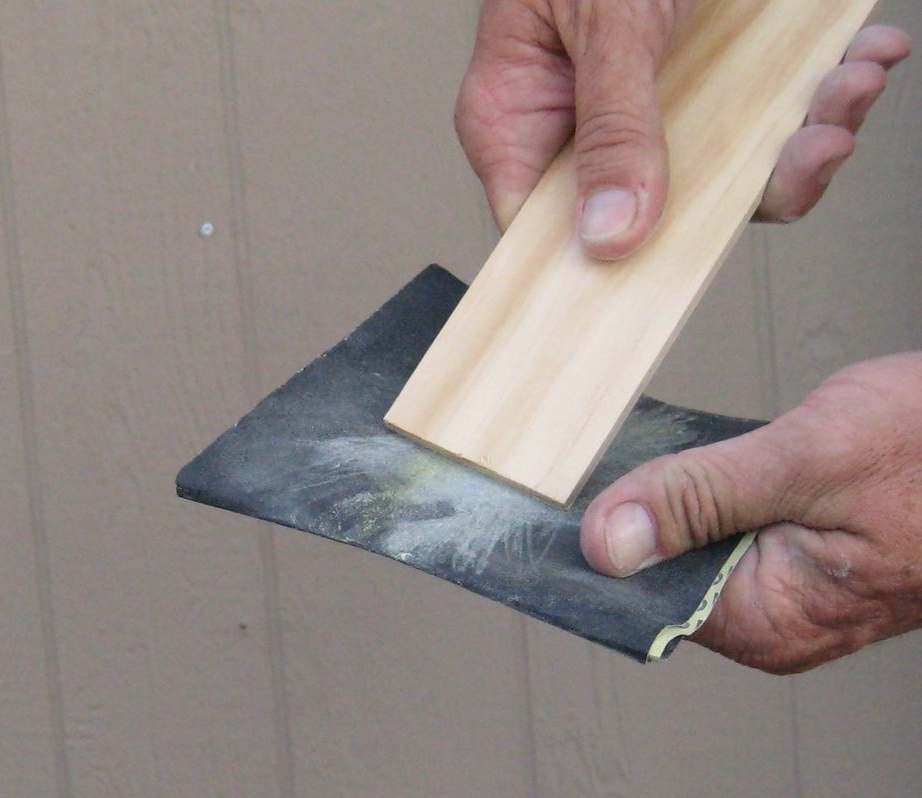
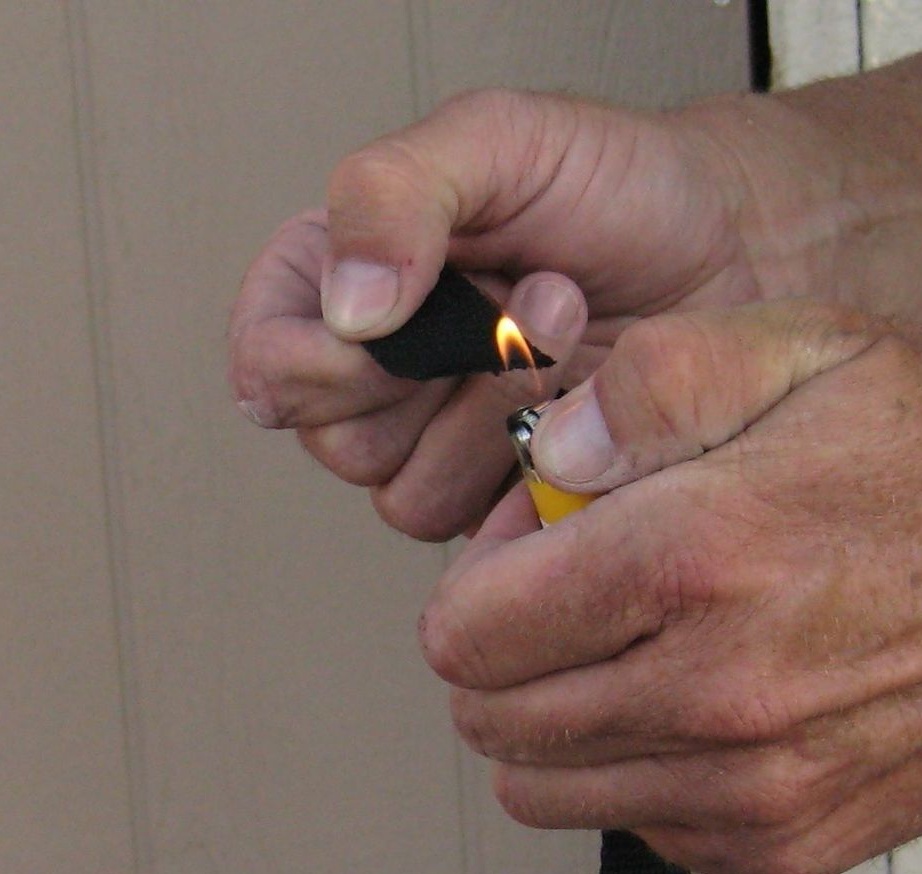
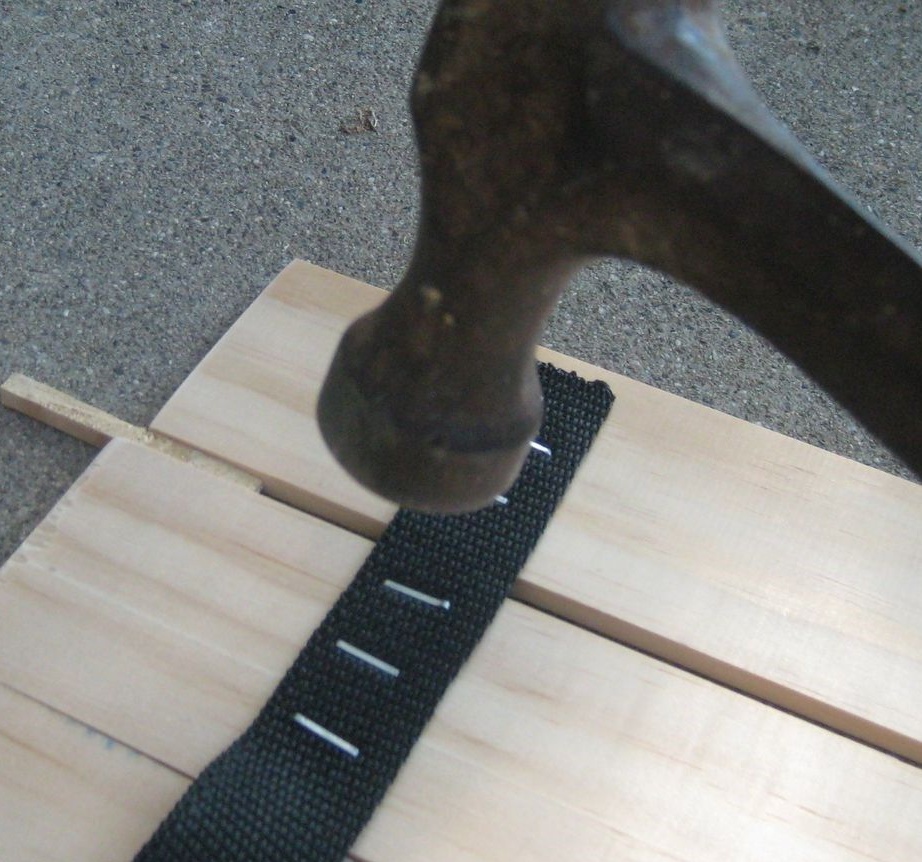
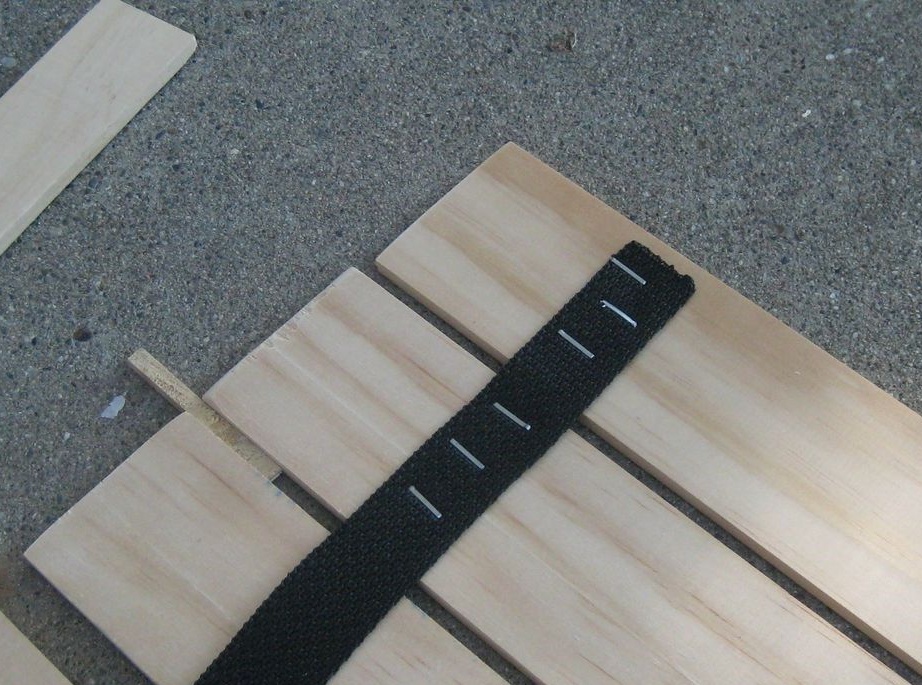
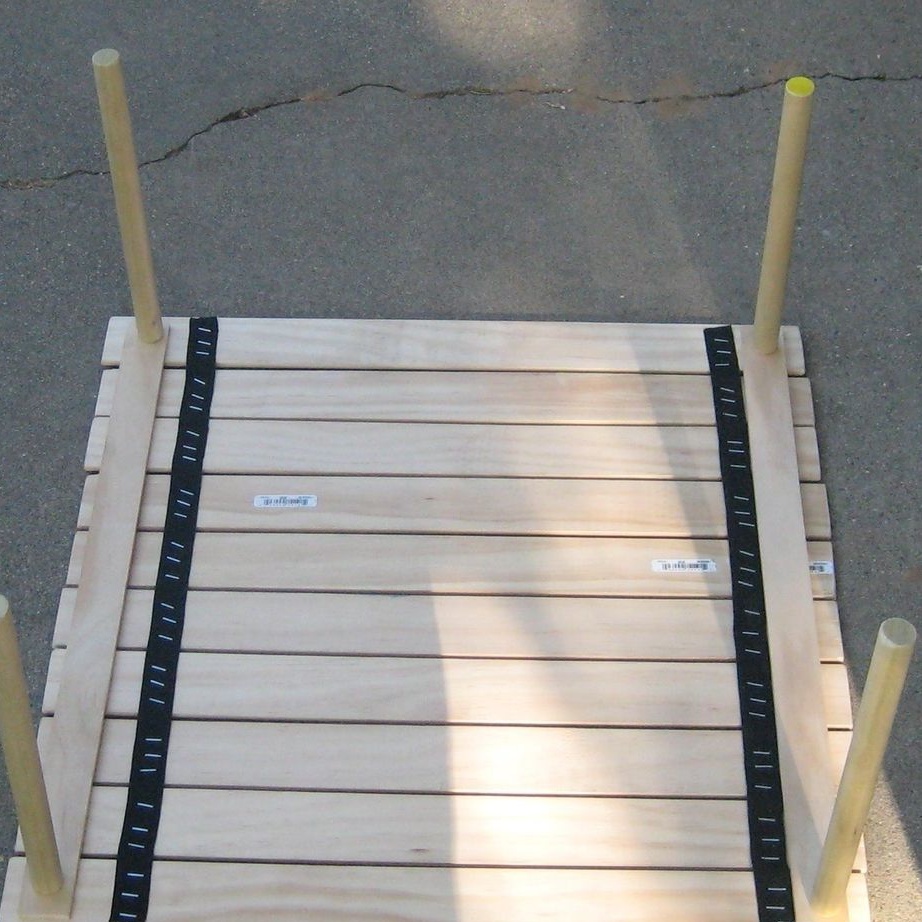
Next, you need to prepare a flat nylon braid, for this we cut two pieces of 60 cm each, then with the help of a lighter you need to cauterize the edges - this is so that the edges do not come apart over time.
Now we take all the slats that we left for the countertops, we are unlikely to lay them out. Between them you need to leave a small gap, it should be uniform along the entire length.To do this, we use a small wooden block, which we substitute into the slot from two sides.
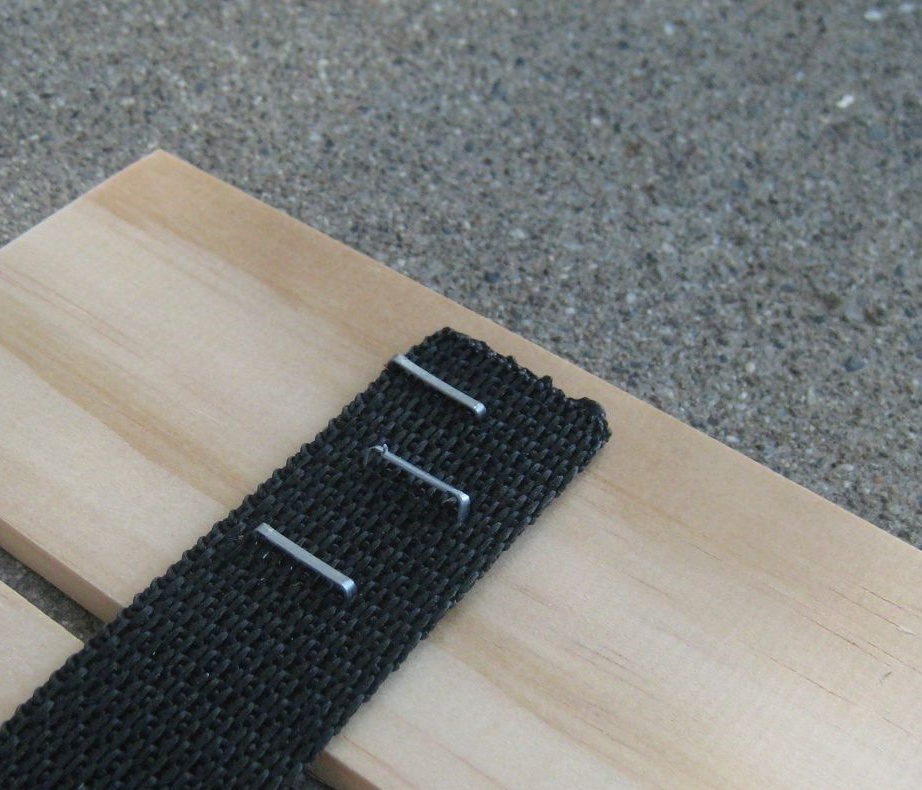
Then we take the prepared nylon braid and lay it out along the entire length, then with the help of a construction stapler we begin to fix it to the planks, if the stapler breaks the rail poorly, you can use a hammer as an additional impact force. After that, we carry out the same operation on the second side of the table.
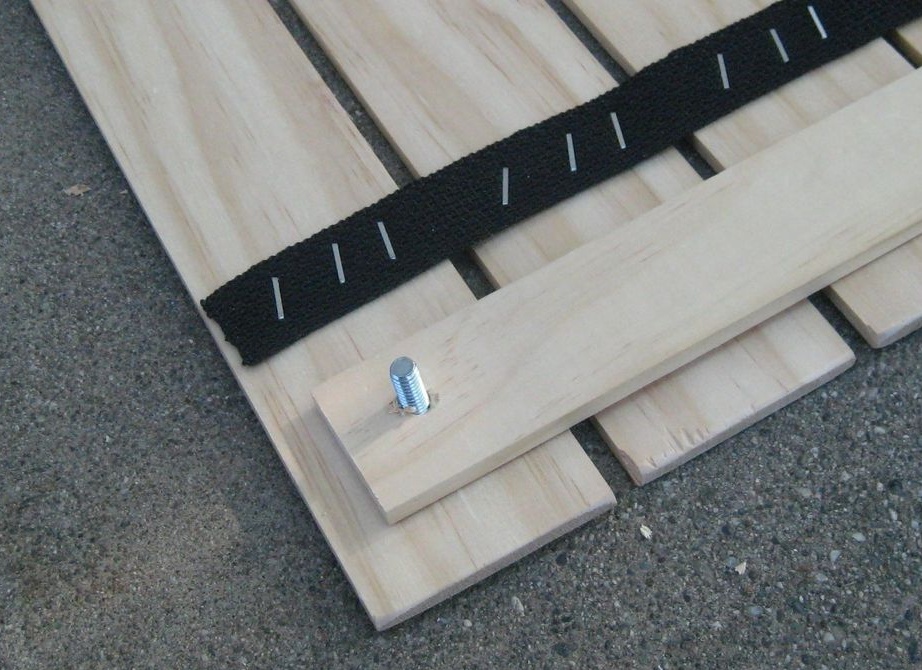
Next, we take a drill and make a hole in the four corners, as shown in the photo, insert the transportation bolt into this hole.
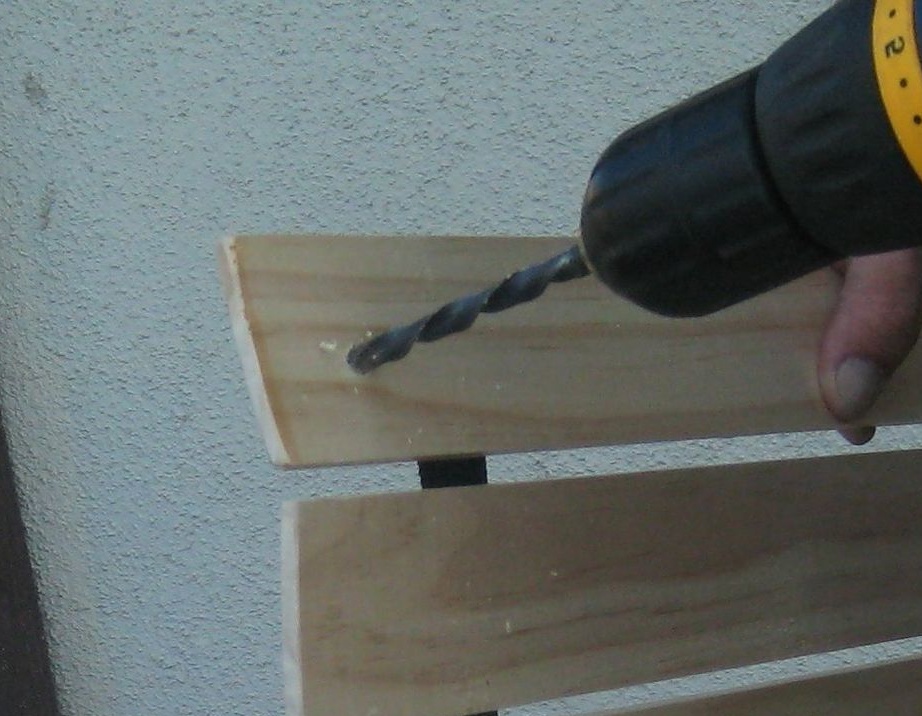
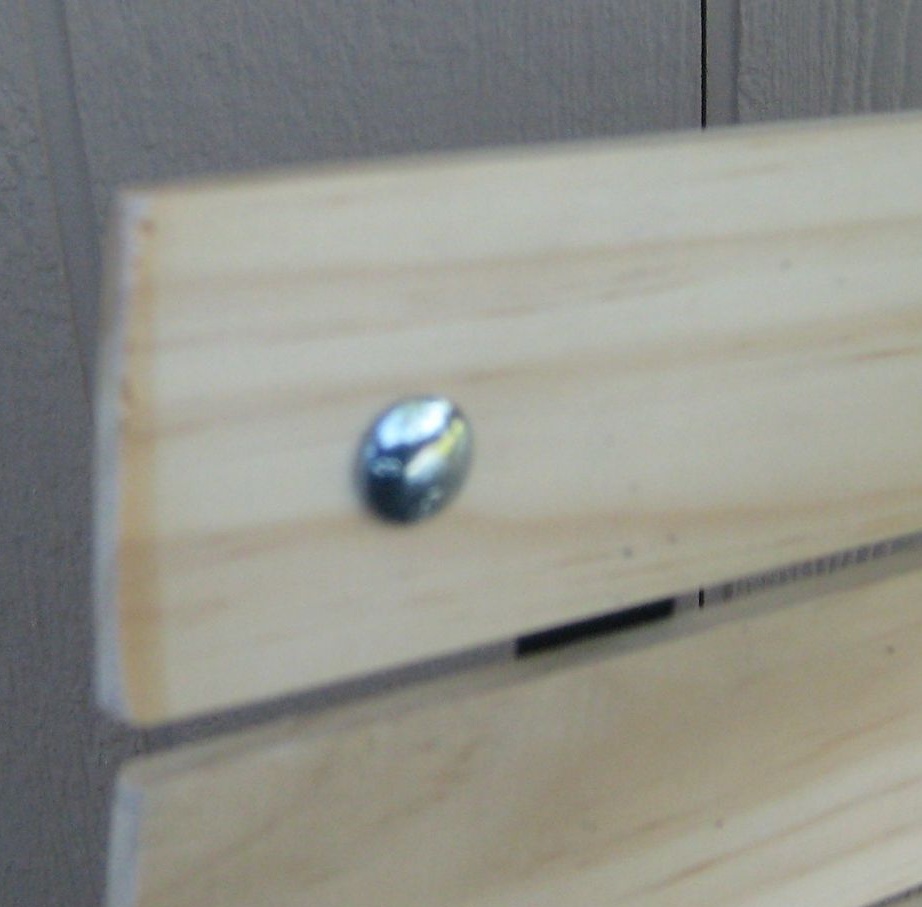
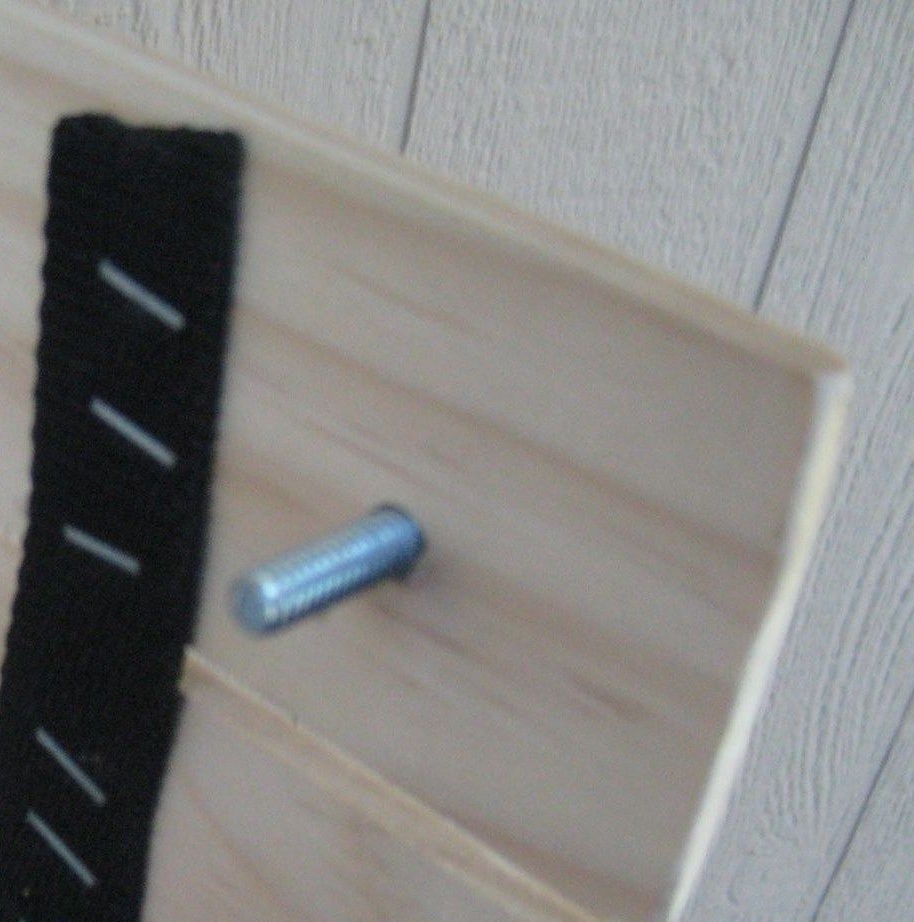
After that, we take two fixing strips and put them across the countertops, mark and drill through holes, insert a bolt.

We turn to the manufacture of legs.
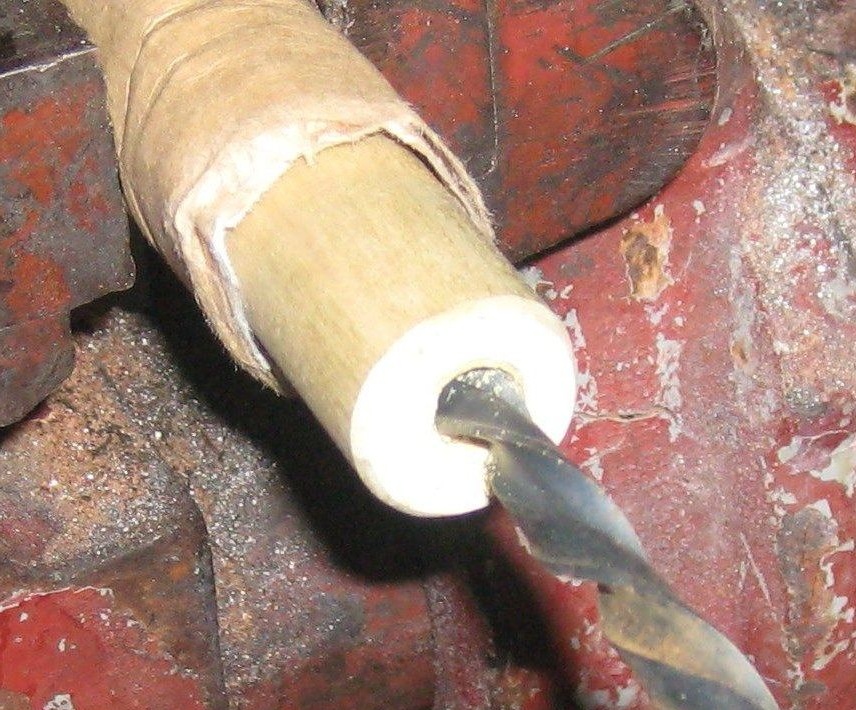
We take the legs, and in each of them we find and mark the middle, then using a drill we make a hole, use a drill with a diameter of 7 mm, the depth of such holes should be 25 mm. In order to make it more convenient to drill - we clamp the legs in a vice, wrapping them with a soft cloth, this is so as not to damage the wood.
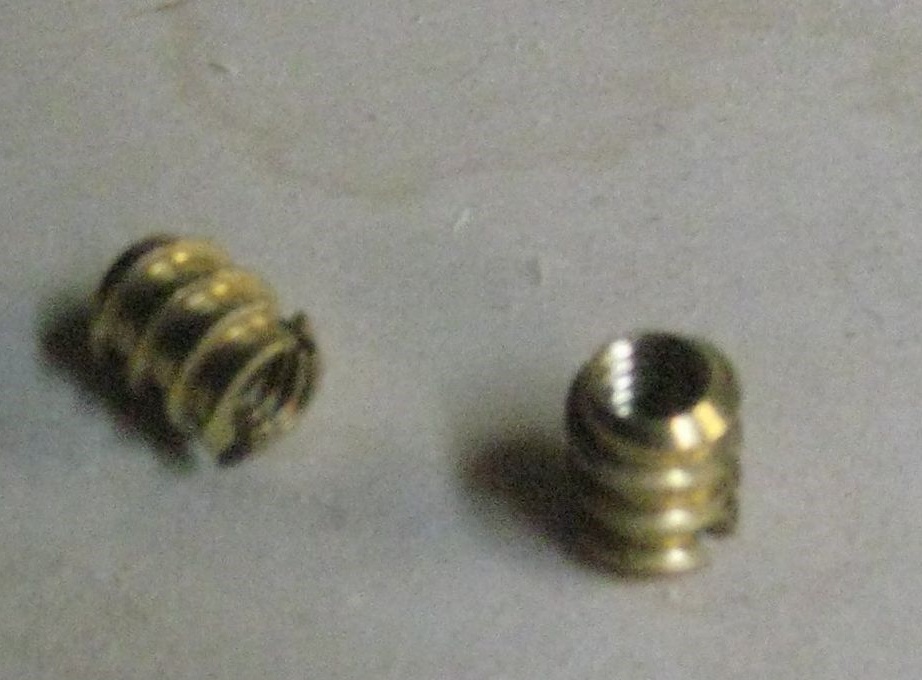
When all the holes are ready, put inside the sleeve with a female thread.
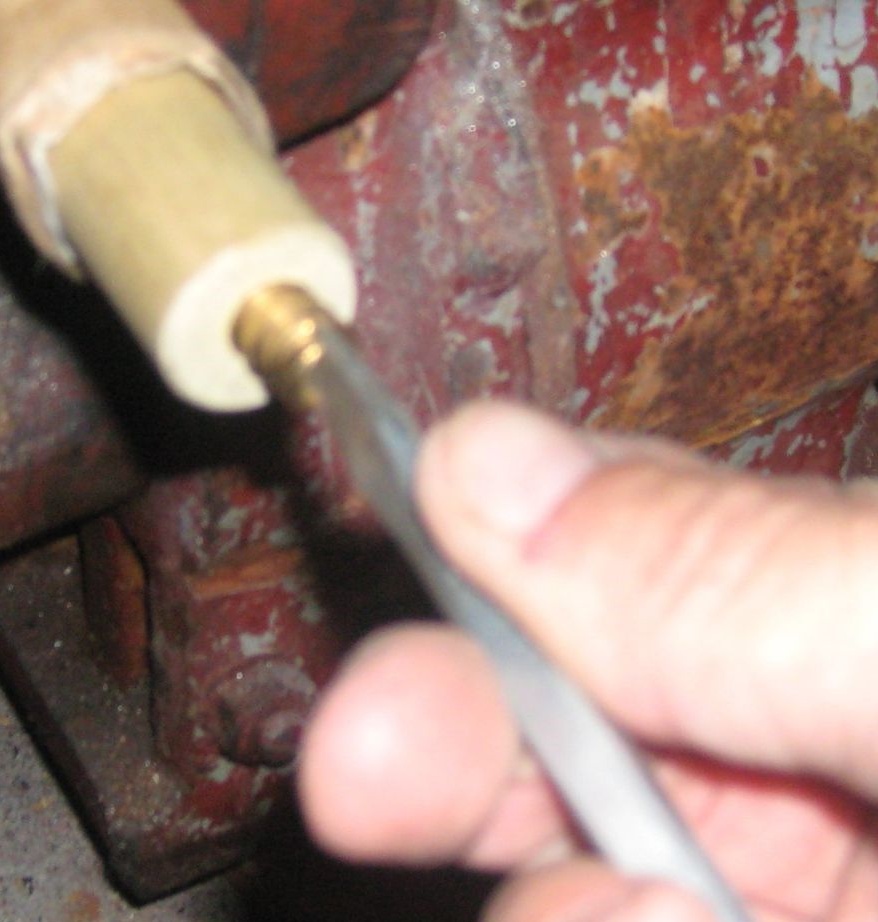
Then you can screw the legs, you should get the following.
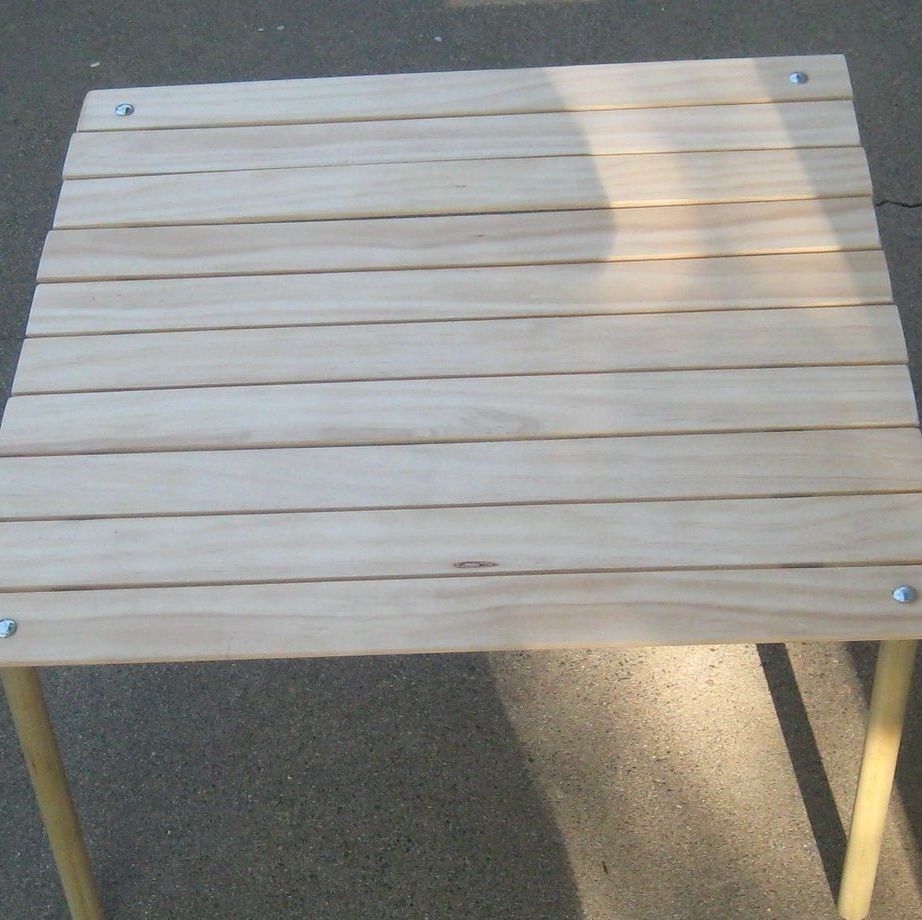
If desired, give the table a brighter color using a stain, varnish, paint or other type of coating.
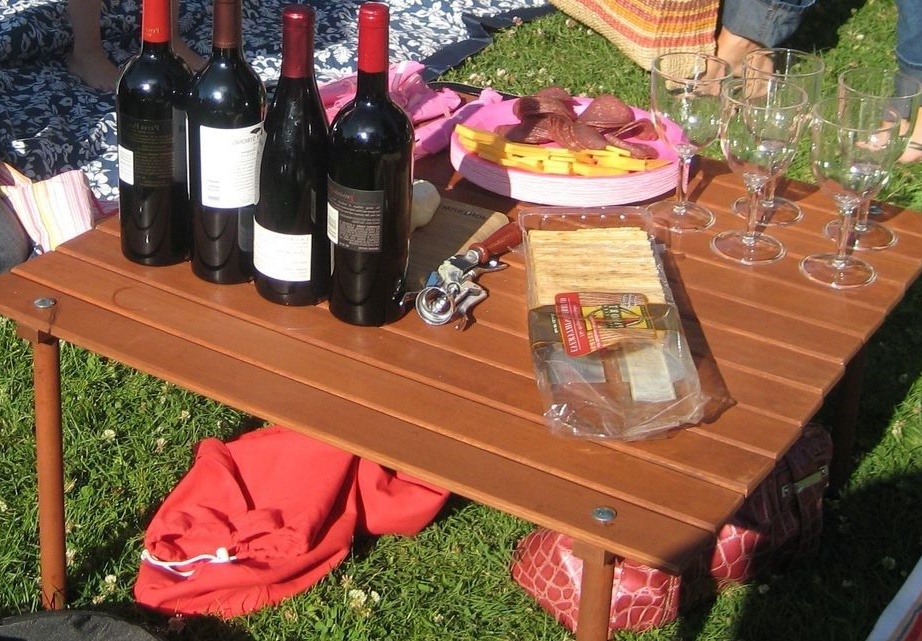
As a result of all the actions, we get just such a picnic table that is easy to make, which is easy to assemble and disassemble. For such a table, you can sew a special cover in which it will be more convenient to carry it.
It is worth writing that if you use all the sizes specified in the article, the table will not turn out to be very large, but the author does not force you to adhere to these parameters. You can do everything at your discretion. The main thing is that the whole manufacturing process is understandable to you.
This article is over, thank you all for your attention.