
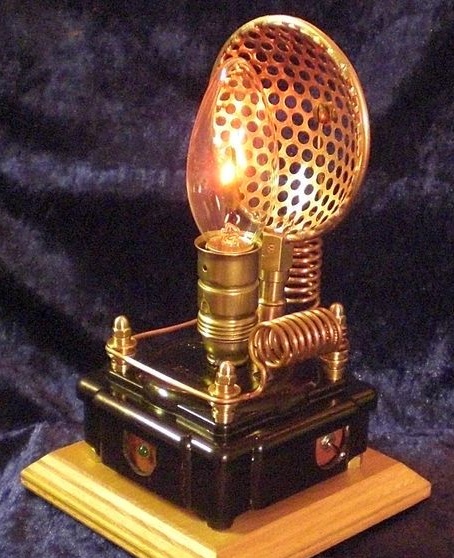
This article will consider an example of creating a simple lamp in the style of steampunk. The author used a flash from the camera as a power source for a flickering lamp.
Materials and tools for homemade:
- base in the form of a small box of black bakelite
- a ready-made light bulb with a small base (sold as sets in stores)
- wooden stand
- hammer
- cheap flash camera
- pliers
- nippers
- copper wire
- perforated copper plate
- glue
- epoxy resin
The process of making a flickering steampunk lamp
Step one. We prepare materials. We create the basis for subsequent decoration
To begin with, the author prepared a flashlight. We disassemble the camera, get the flash, which will be used in the lamp.
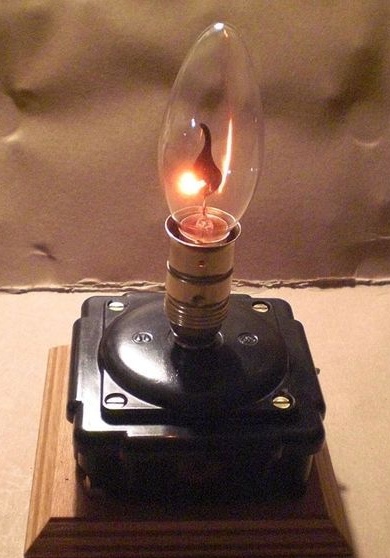
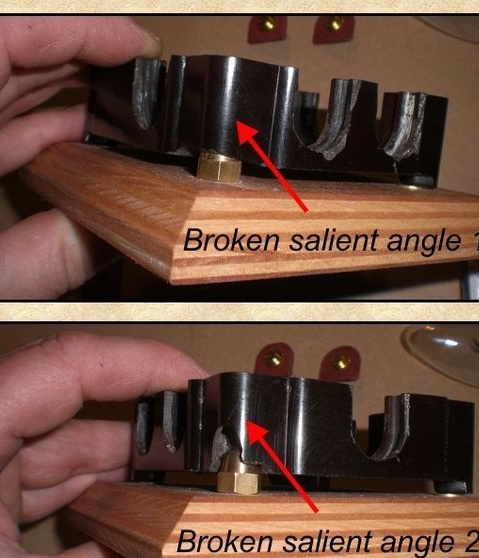
We install a box of bakelite on a wooden stand. The author had a box with broken corners, so he decorated the broken edges with epoxy. Next, we mount an LED in the circuit (the author chose green) and a switch. The author adapted the LED to show problems with the lamp: if it is not connected or broken, then the power goes to the diode, and it lights up, signaling problems.
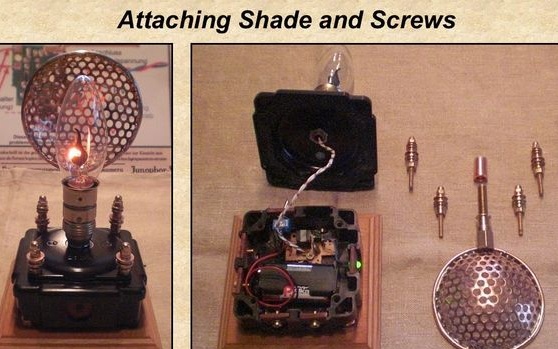
After fixing the box on the stand, insert the lamp in the housing into the box. We drill holes for the fixing screws and carefully lay all the wiring inside the box. This is the basic version of the Lamp. Now the author adds elements in the steampunk style: reflector and screws, he calls them multifunctional.
Step Two Add steampunk elements: a reflector to create shadows
First, the author adds a frame to the cartridge: puts a copper pipe on it. Then creates a reflector to cast shadows.
To create a reflector, the author needed: a copper perforated plate, a hammer and a ladle (he asked his wife not to tell about this ). We bend the copper plate in the ladle with a hammer, the output is a bent convex plate. It is she who will be our reflector.Next, with a thick copper wire, we make the edging of the reflector, we bring the ends down, they should last about 3-5 centimeters. We fill them with epoxy resin and put them into a copper tube. The reflector is ready - you can continue decorating our lamp.
Step Three Add decor elements and multifunction screws
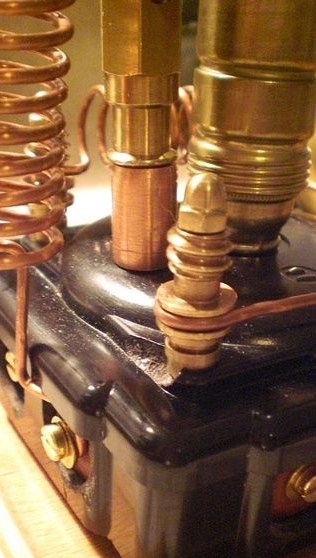
To enhance expressiveness, the author adds specially crafted screws. To create them, either the caps of ordinary screws are cut, or a special rod with a thread is taken and a blank for screws is cut from it to the desired length. Various nuts are put on, copper, either etched or painted under copper, a valve nut is put on top. In addition to decor, these screws carry the function of fasteners.
Step Four We add additional elements from a copper wire
From a wire with a cross section of 5 mm, the author makes small elements with curved edges, which are fastened under bolts. These elements carry a purely decorative load.
Conclusion
So, in four small steps, the author makes a flickering lamp with a steampunk reflector. However, you will need some ready-made elements, as well as a flash from the camera. Of course, the design can be simplified by installing LEDs or another light source in the lamp.