
Good day to all !
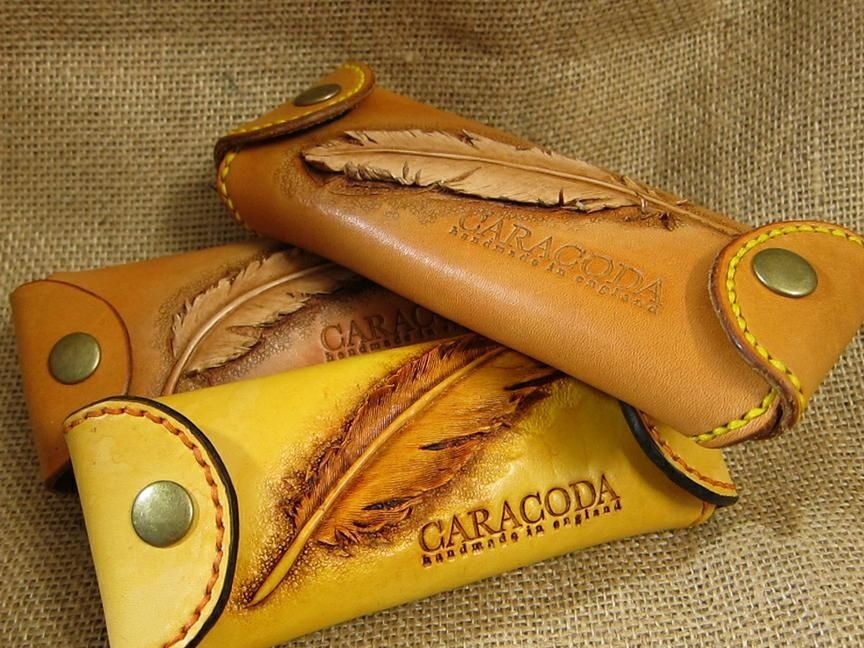
Today, the author of this article wants to share his master class on making a case for glasses, which can also be used as a pencil case for pens. The whole process is described in detail and will be accompanied by a photo report.
To make the case we need:
Material:
- leather 2.5 - 3.0mm.
- thin leather for lining;
- glue;
- adhesive tape;
- foam sponge;
- paint "antique";
- finish for the skin;
- buttons - 3pcs.;
- waxed threads;
- a piece of wax;
- paint.
Tool
- awl;
- two needles with a blunt end;
- scissors or knife;
- rotary knife;
- hammer;
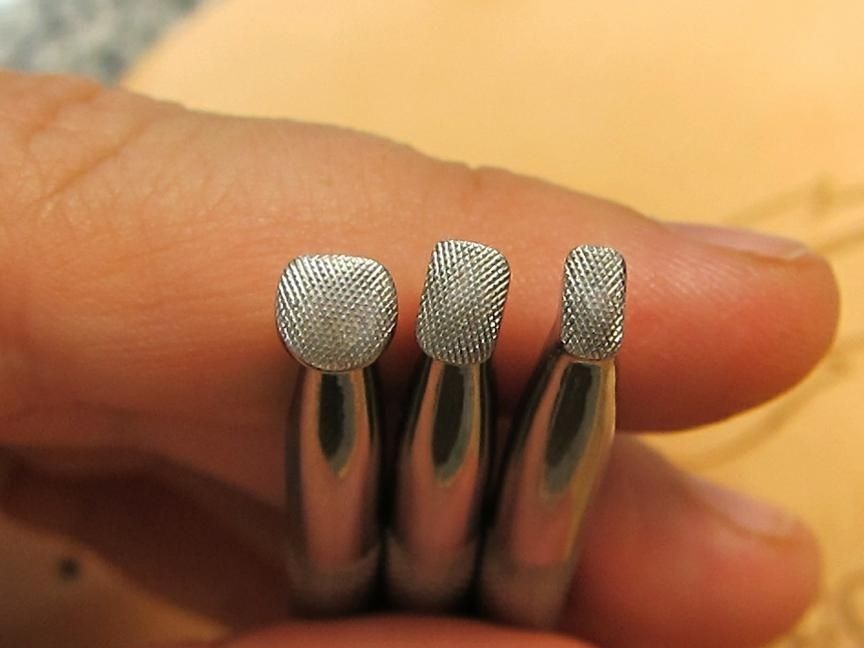
- Bevellers of different sizes;
- a spoon for modeling ;;
- stamps for the background;
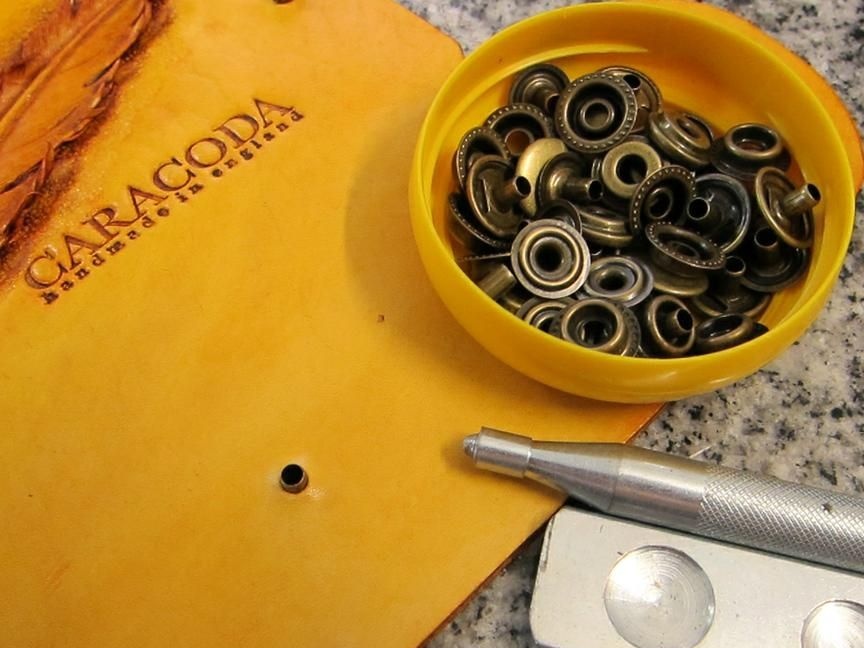
- punch for buttons;
- punches for holes;
- edge cutter;
- sandpaper;
- a wooden peg for polishing slices.
Let's get started.
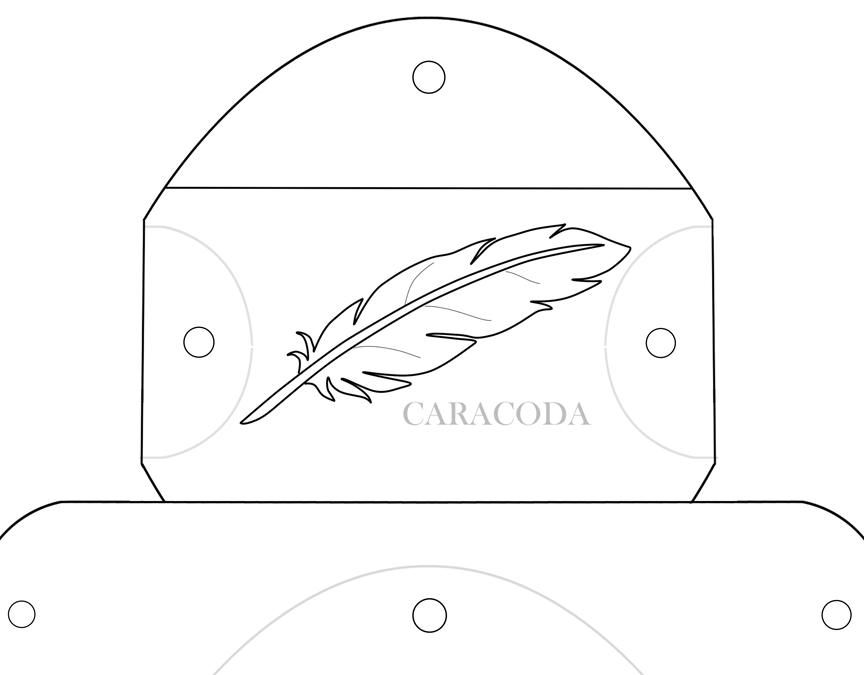
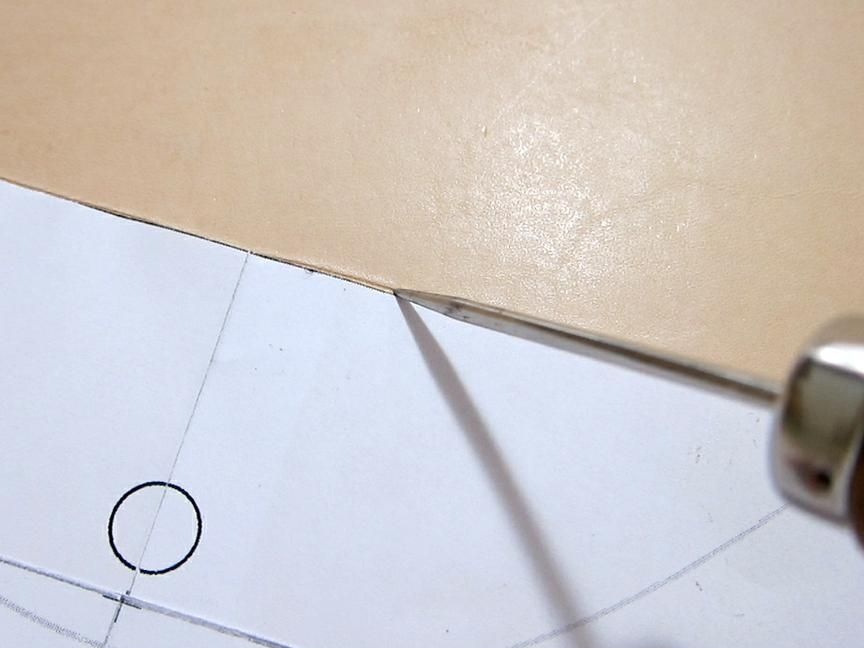
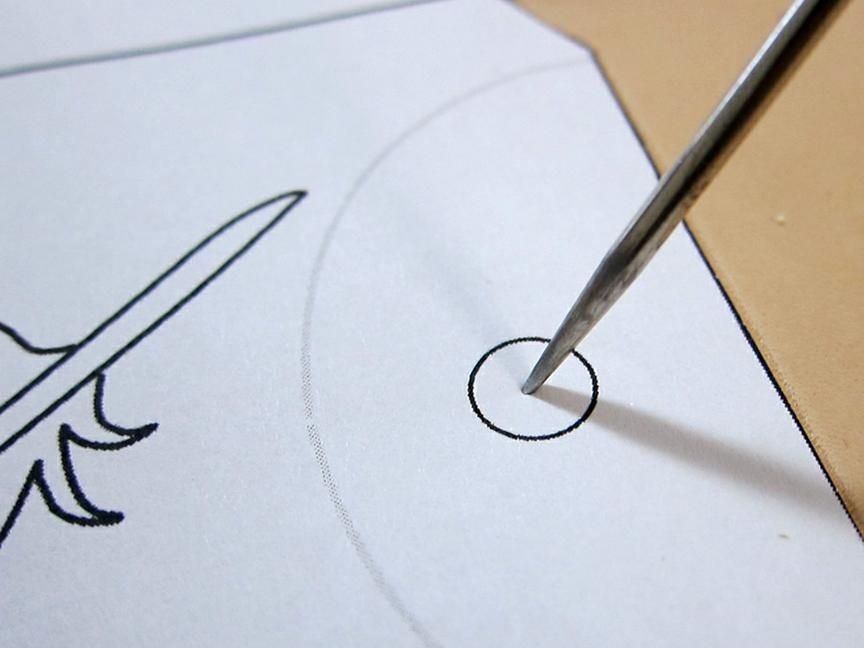
The author provides us with a special pattern for the case, it must be saved, and then printed using a printer. Then cut with scissors. When everything is ready, we take the template and lay it on an existing piece of vegetable tanned leather, then with the help of a sharp awl we draw a contour, slightly scratching the skin, you do not need to press hard.
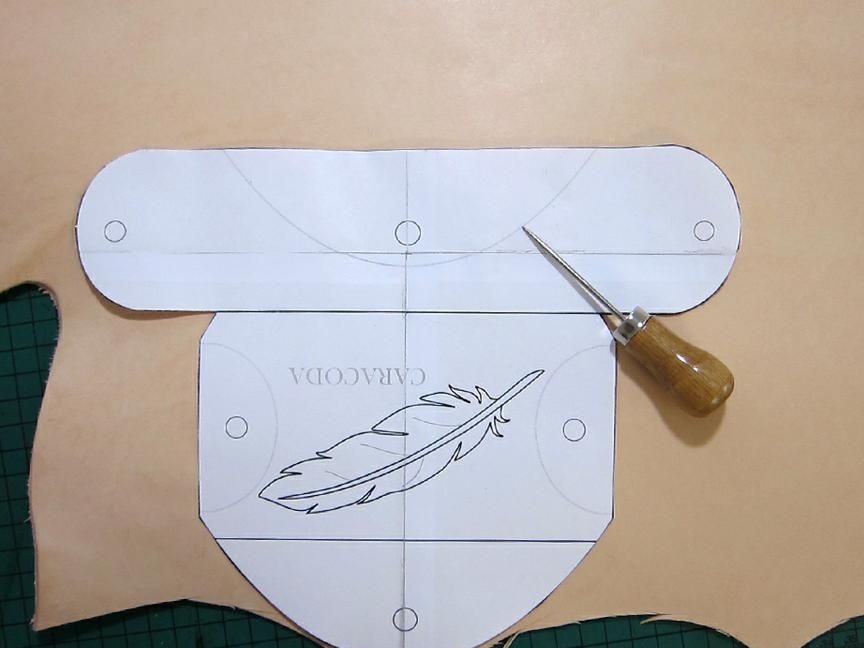
Then with an awl we make marks in those places where the buttons will be located.

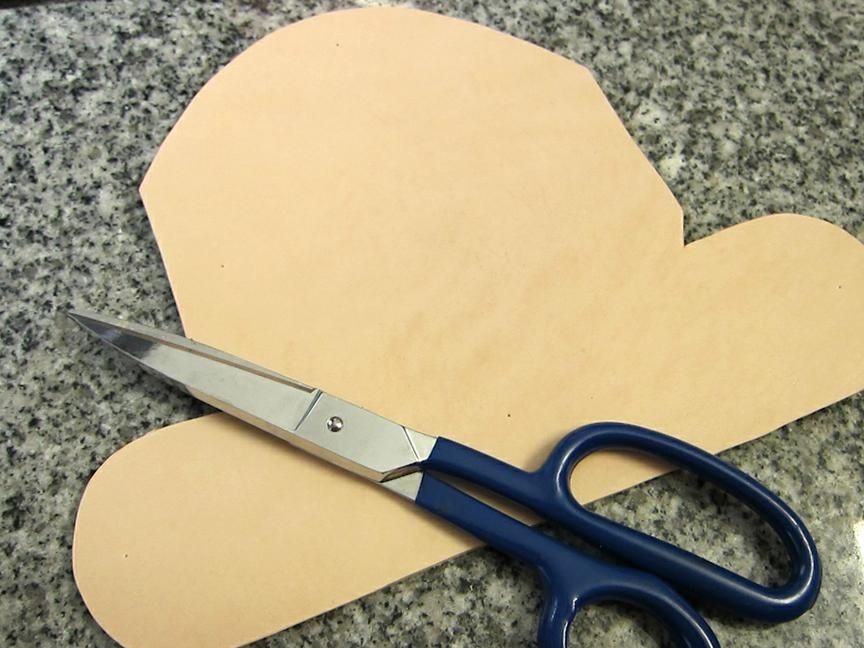
Then we take scissors and cut it out.
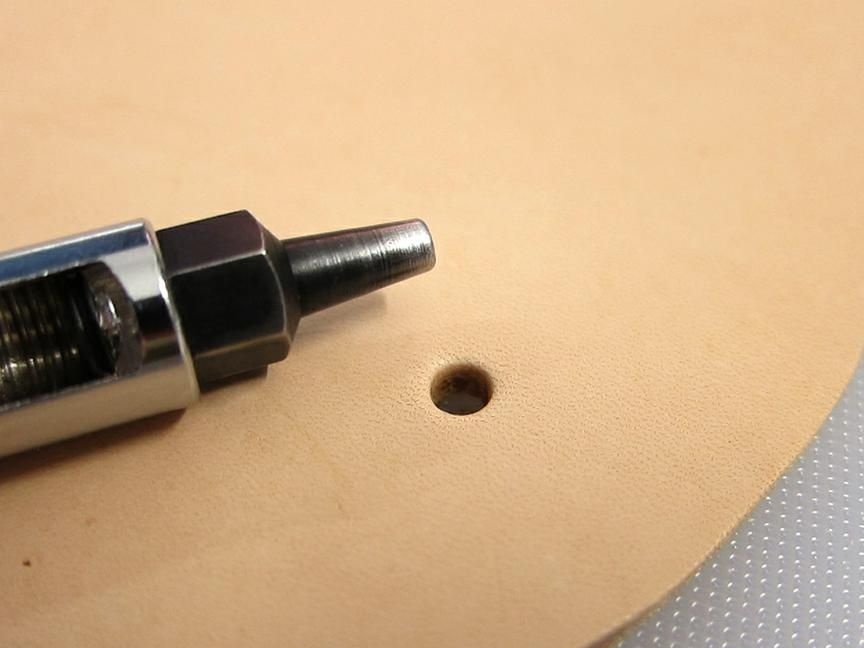
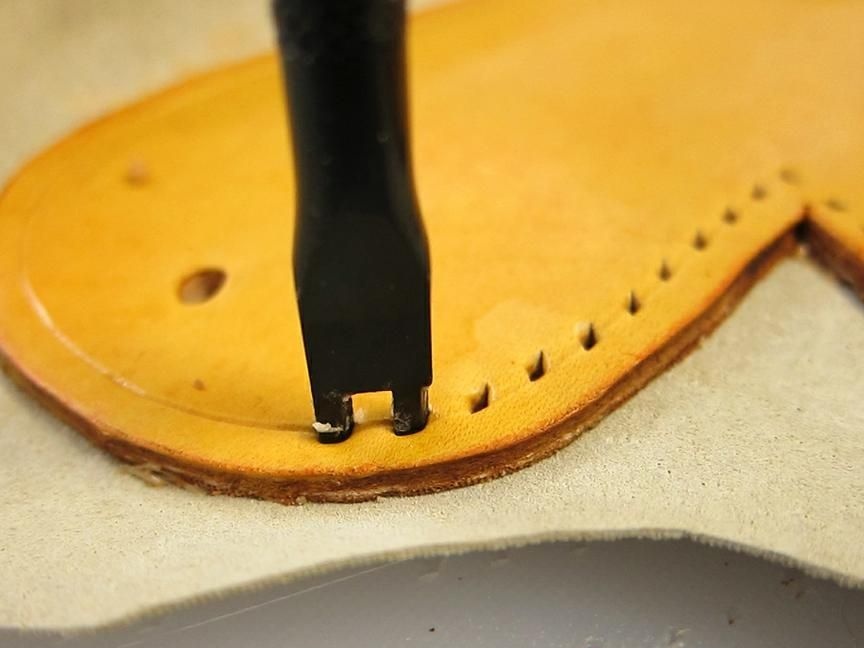
Next, take a punch and make six holes, as shown in the pattern.
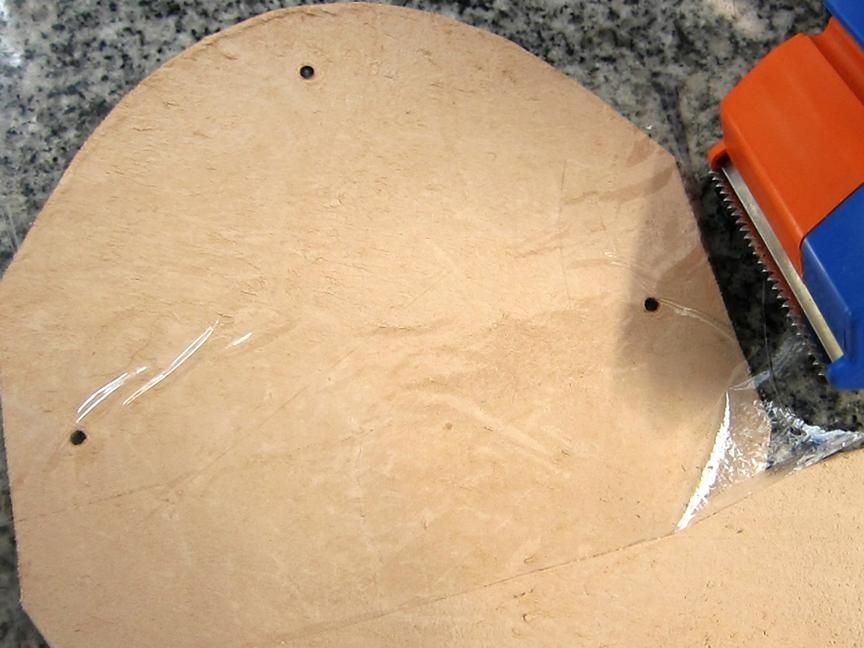
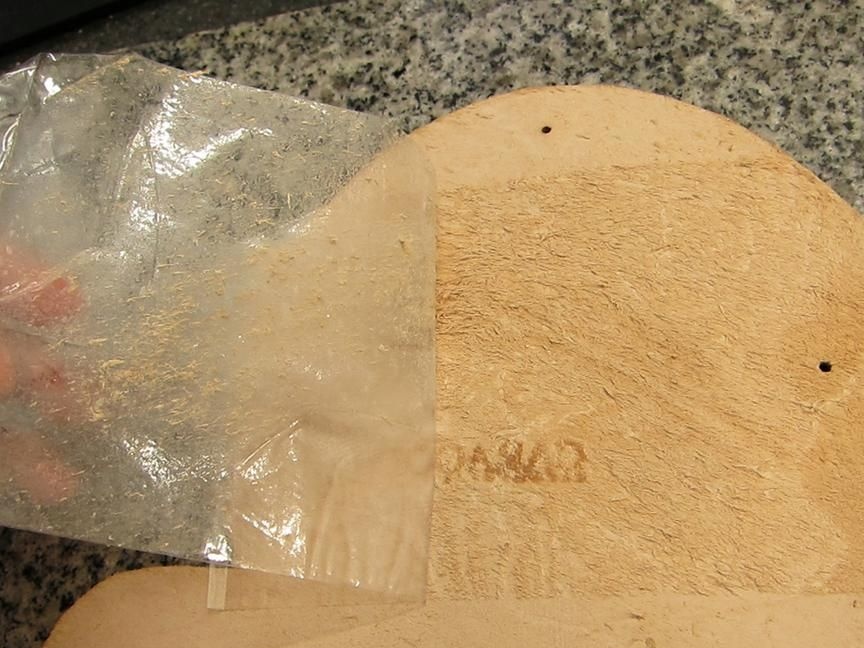
Before making holes, you need to stick tape on the back side, at the places of the holes - this is so that when embossing the skin does not begin to deform and stretch.
Next, take a wet sponge and moisturize the skin, because the skin quickly absorbs moisture, repeat the procedure. The skin should not get wet through, but only its upper layer. As soon as the water begins to soak up not so fast - this is a sign that it is time to stop.
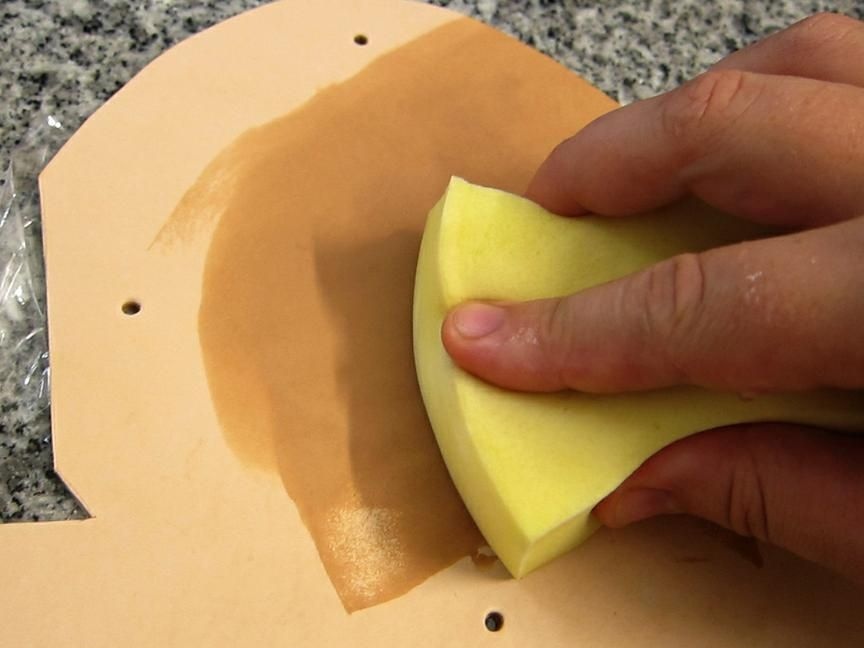
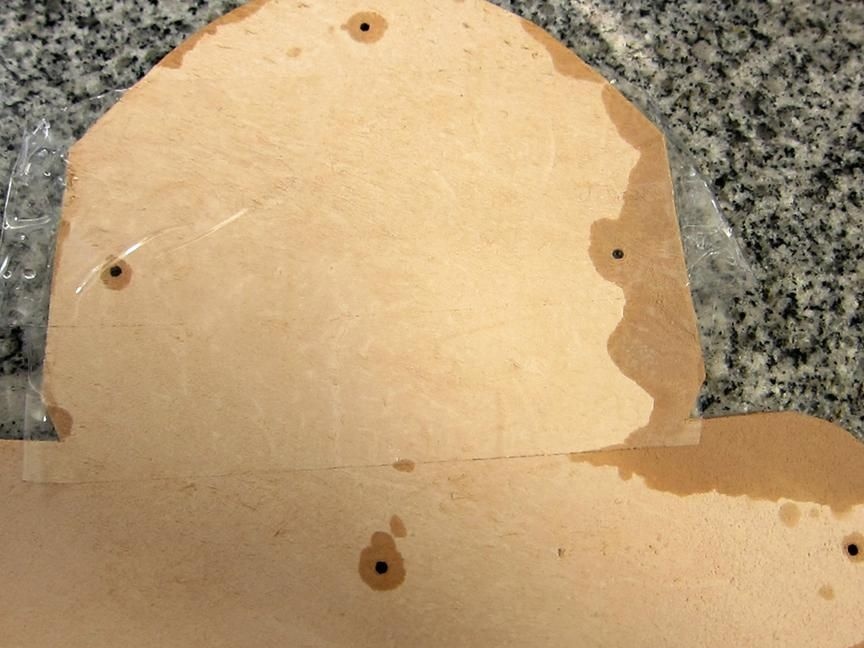
Set aside the part for about 10-15 minutes, this is to give the water to soak completely, just let the skin dry.
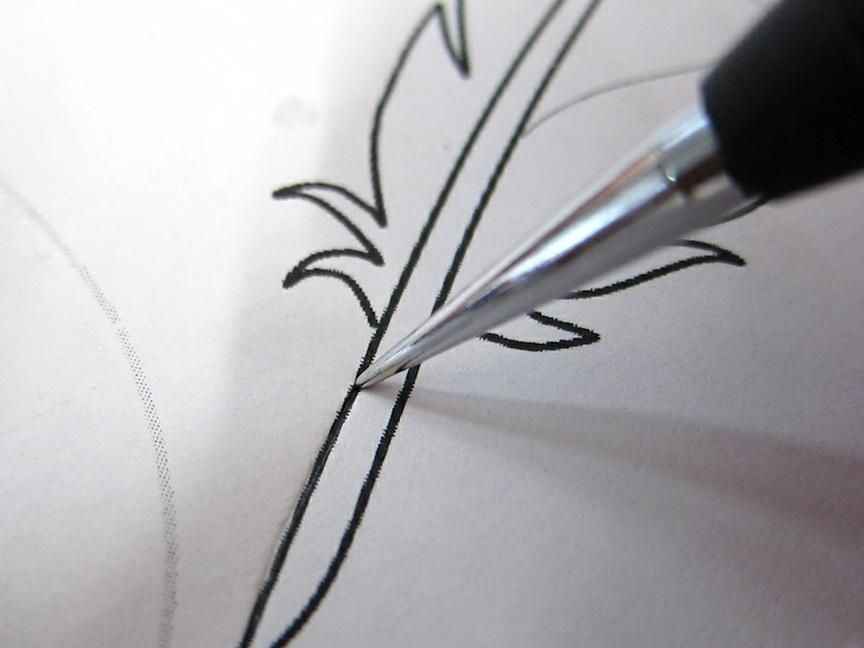
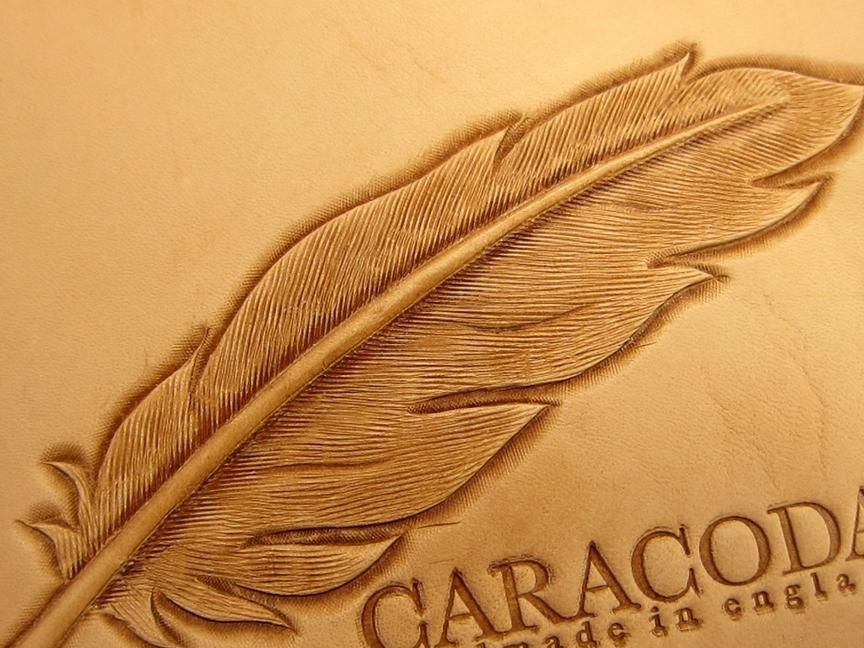
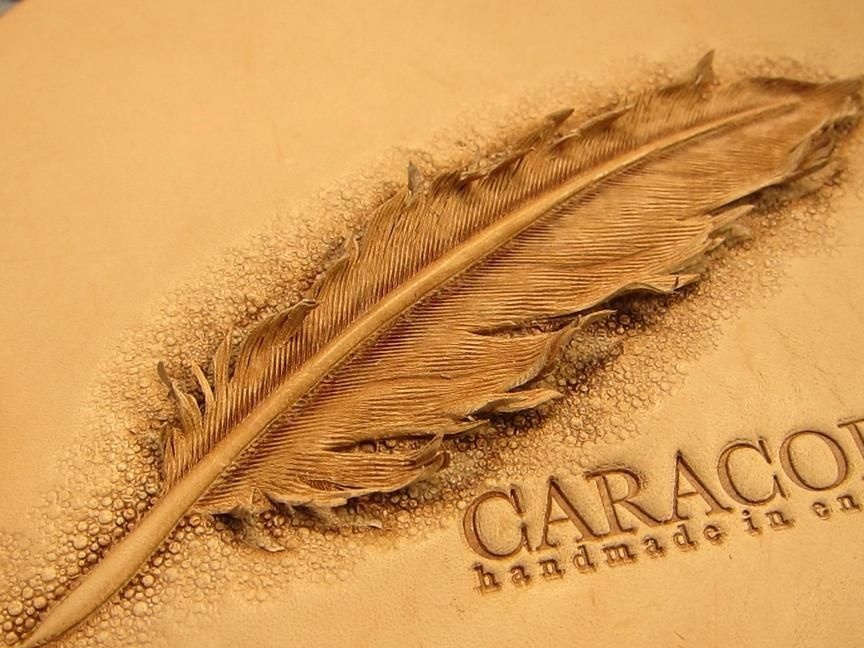
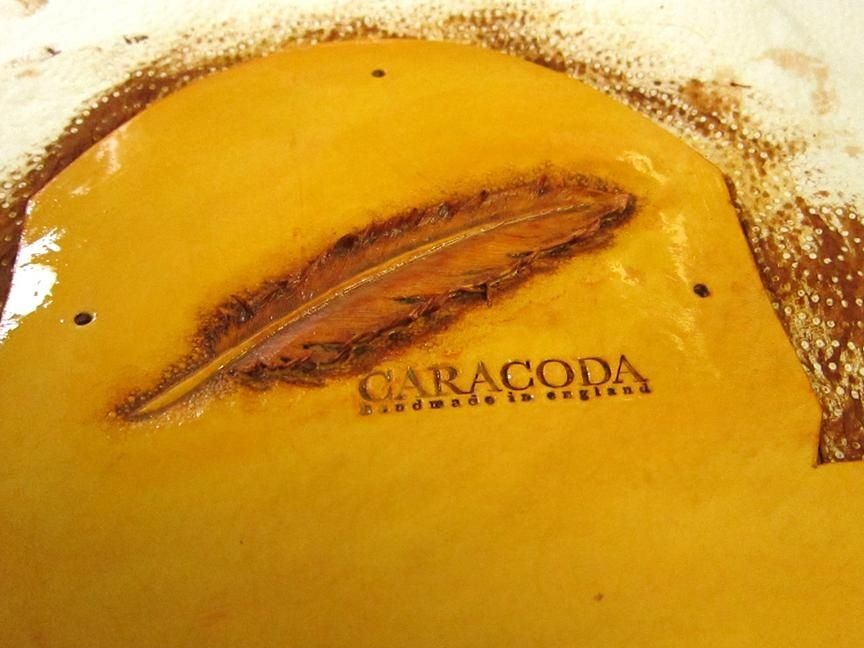
When the skin gets its original color, take a feather pattern and put it on the surface of the skin and use a pencil to draw the outline of the pen, do not press too hard, press lightly, the final result should be a printed image of the pen.
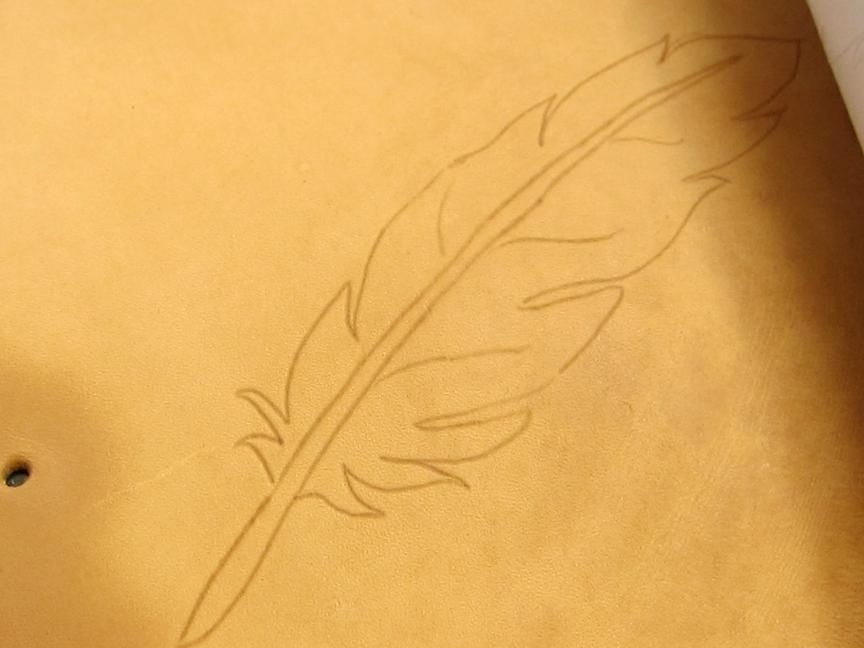
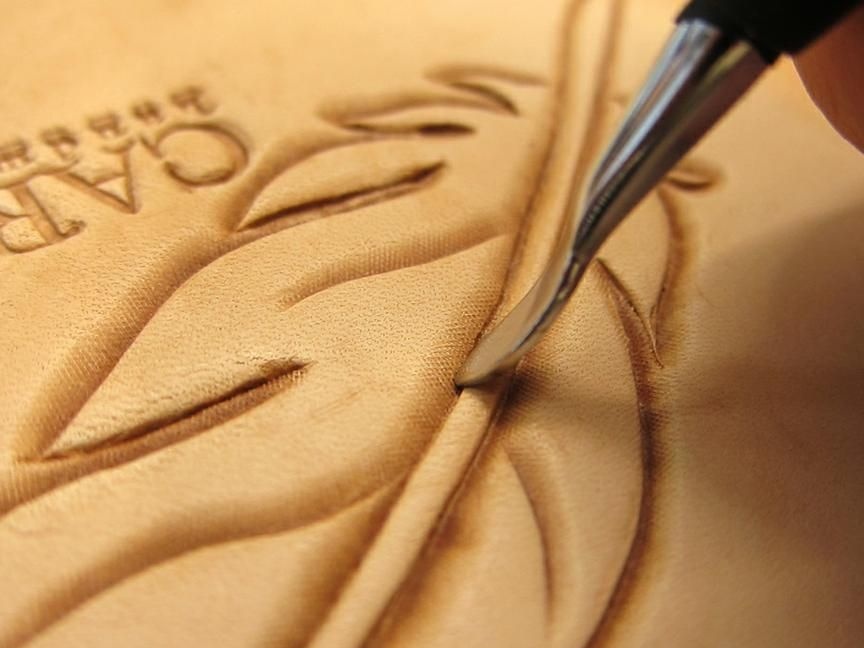
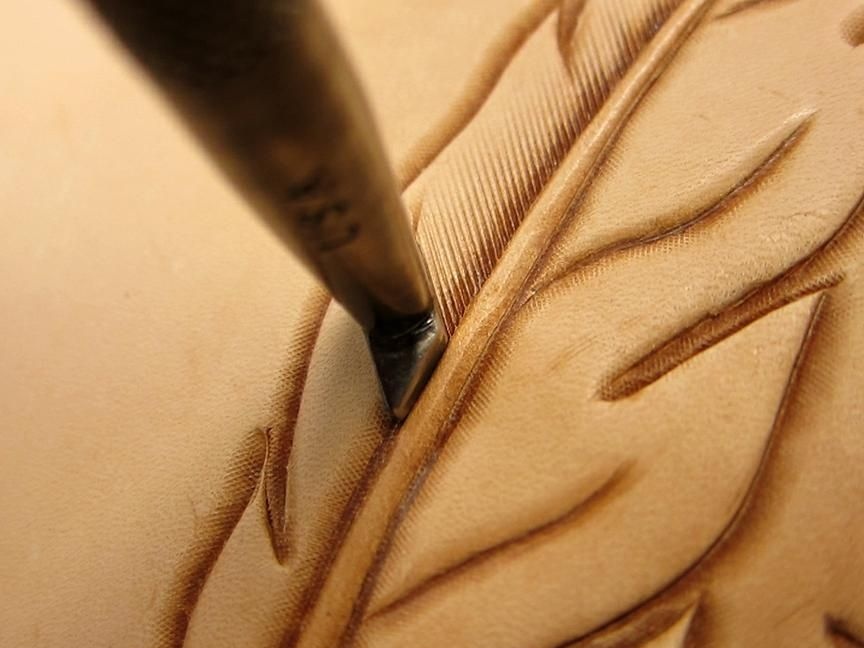
Next, we take a special rotary knife and with it we slightly cut the entire contour of the drawing, you need to cut it by about half the thickness of the skin.
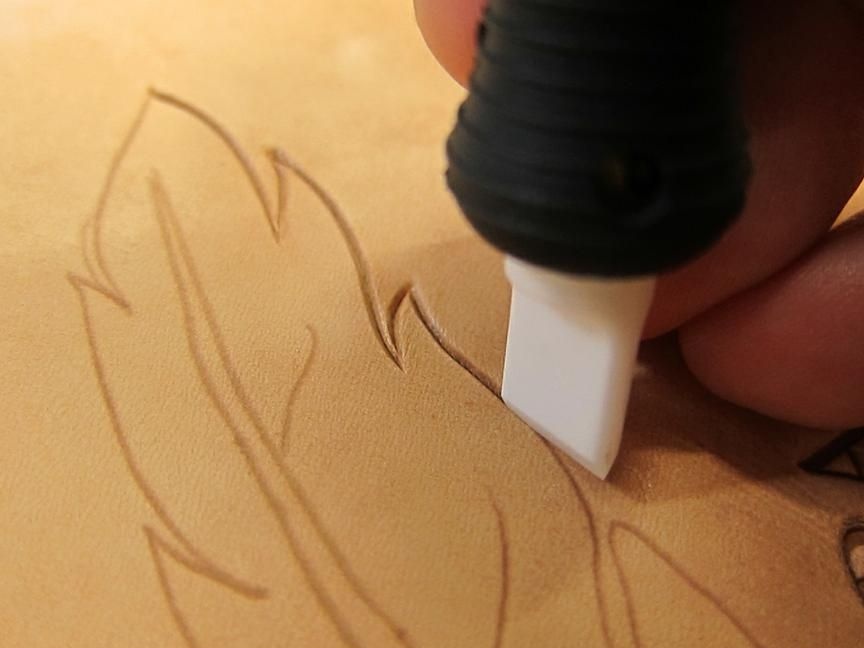
Then you need to take the bevellers of different diameters and using them we create the effect of volume embossing. We put one of the selected bevellers on the line from the outside of the picture, it should be slightly sloping, and then with the help of a hammer you need to slightly hit it, after which a bump on the skin should appear. We follow the same principle along the entire contour, try to go exactly along the line.
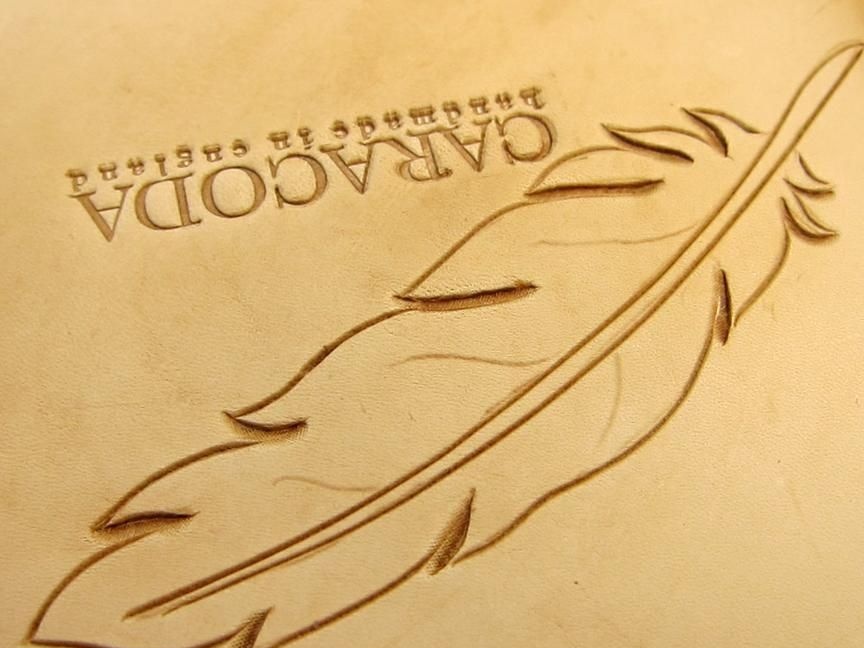
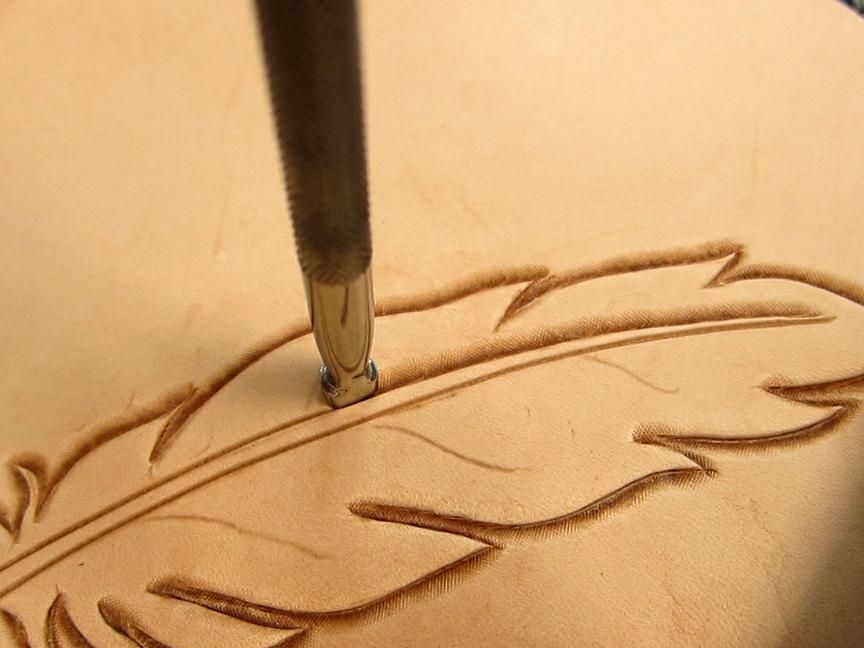
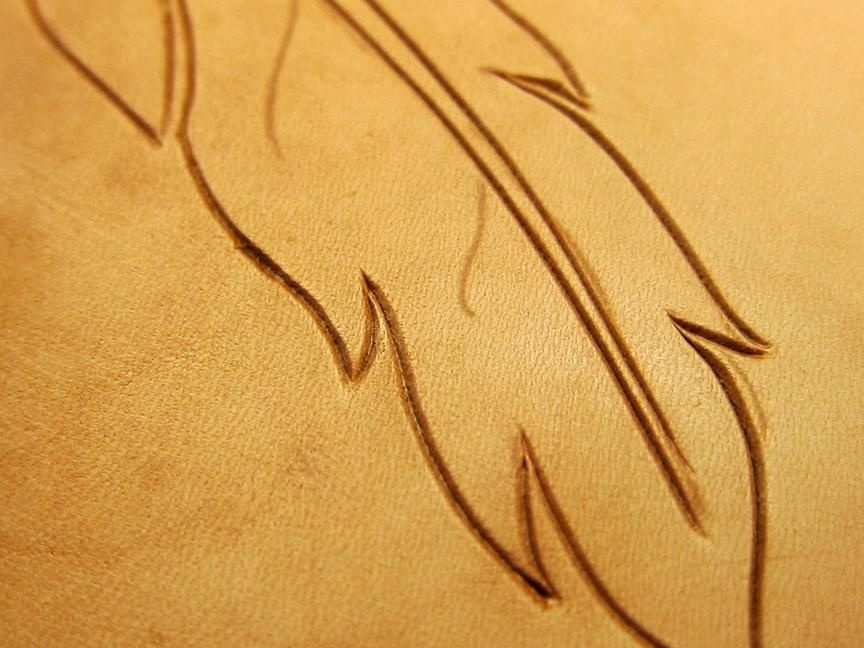
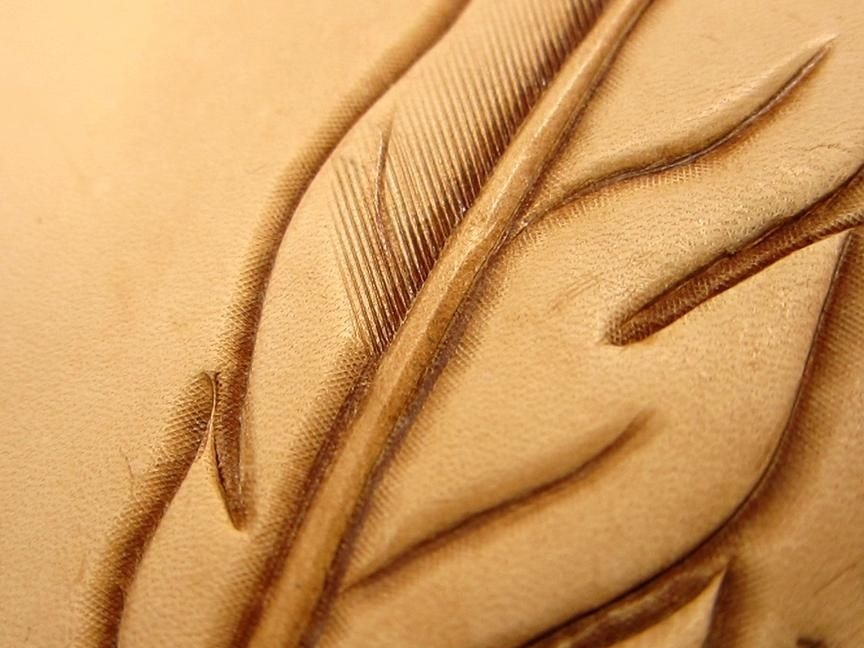
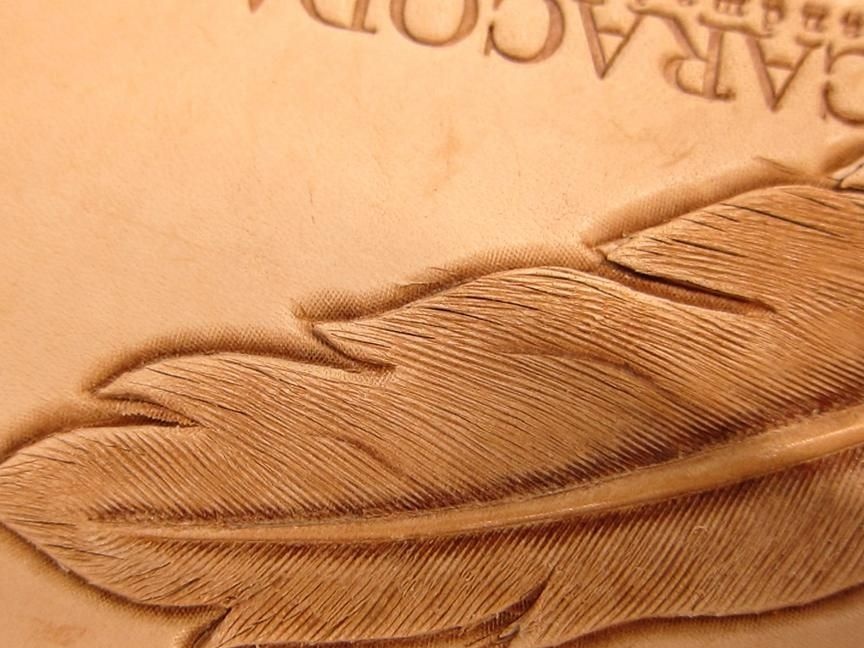
Next, using a special spoon, which is used for modeling, you need to smooth the central part of the pen.
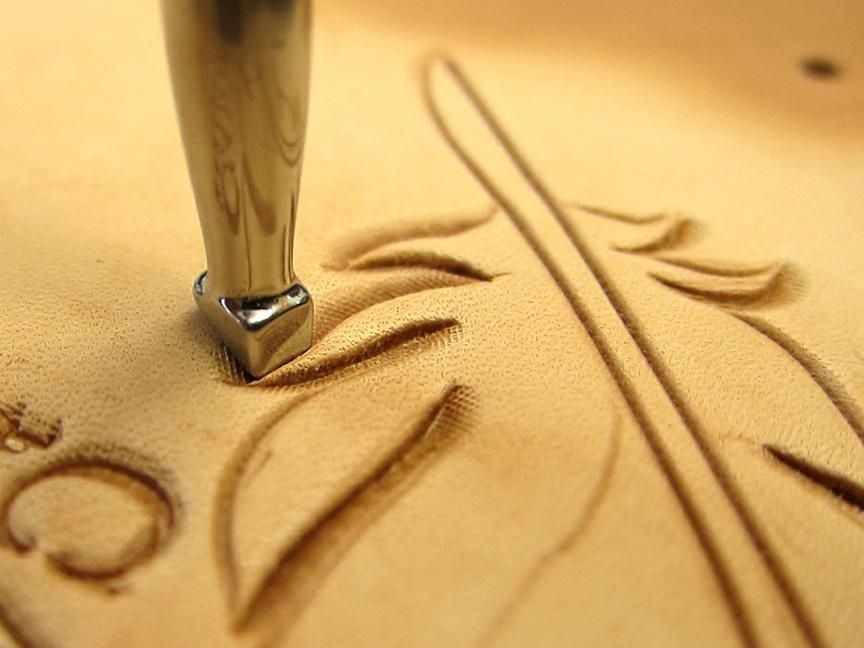
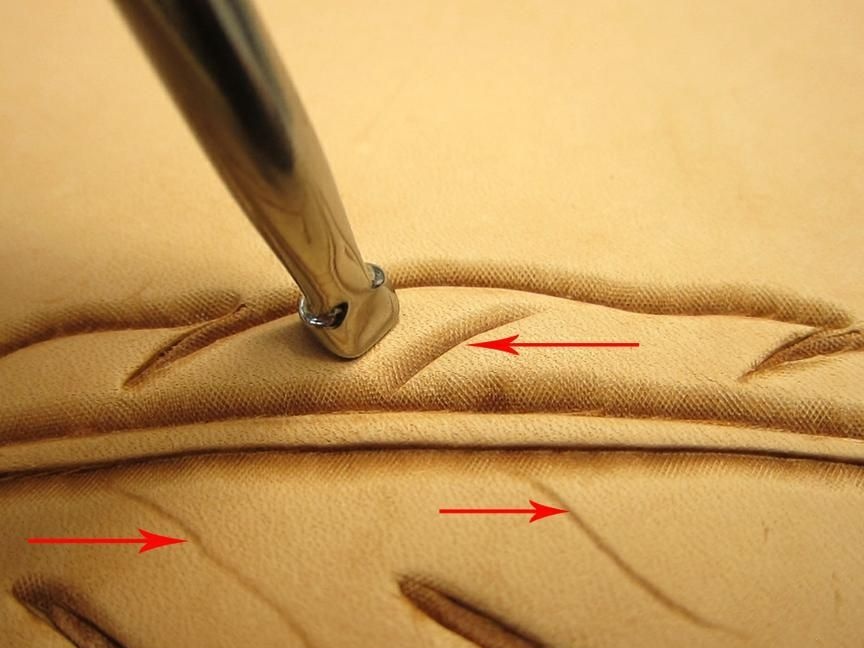
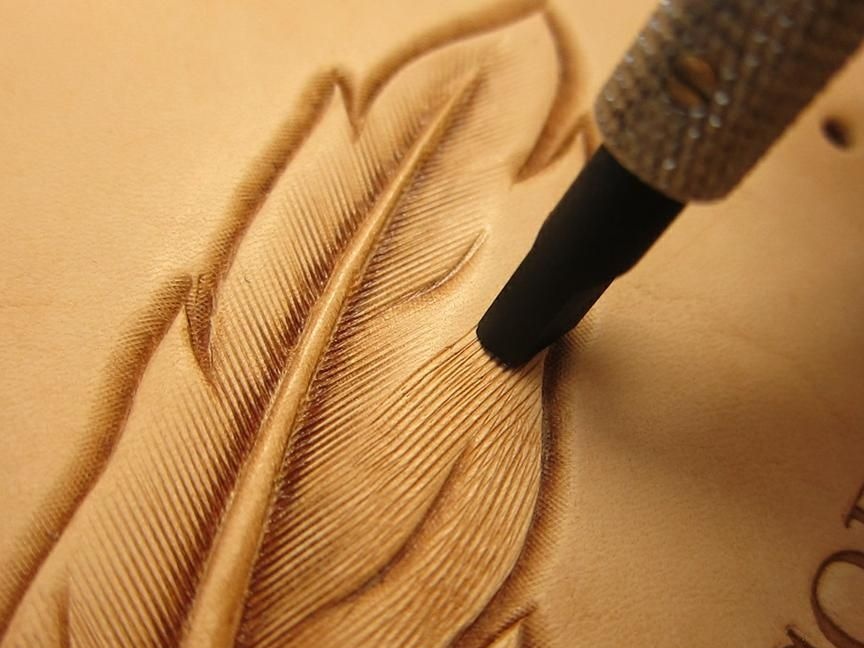
Now you need to take a stamp, with which you need to make diagonal lines. We walk along the central part of the pen, go along the outer line, paying attention to the direction in which the lines on the stamp are directed.
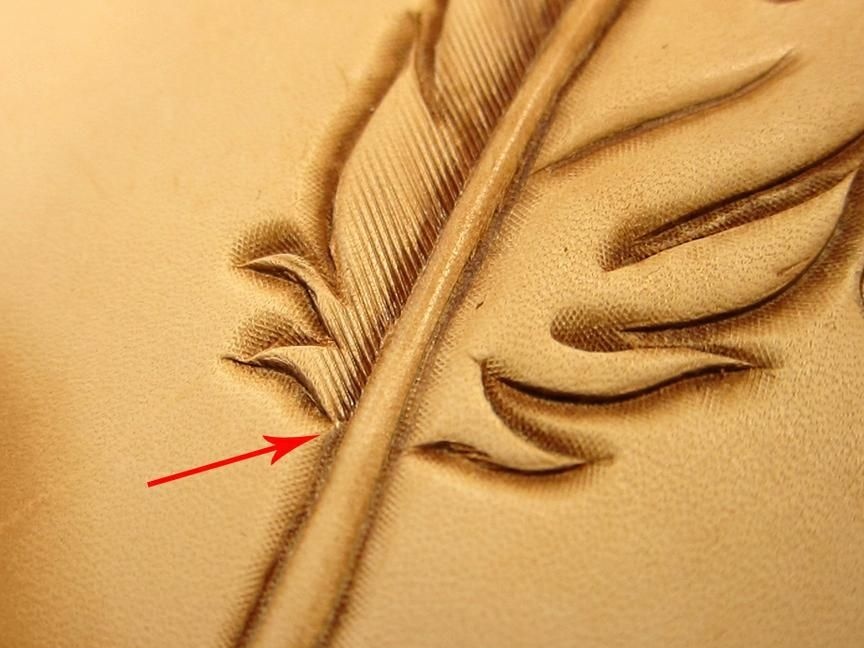
An example of how to correctly stamp.
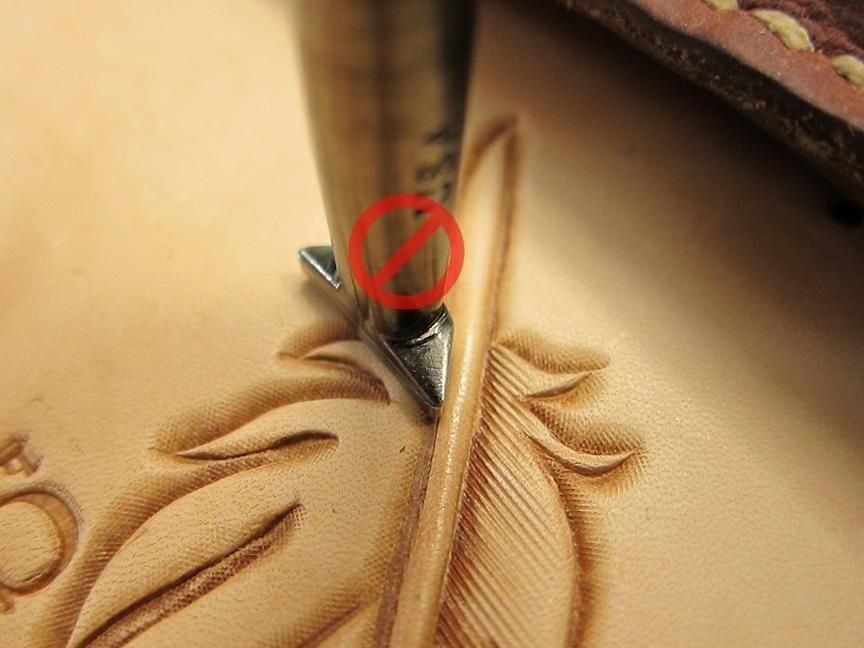

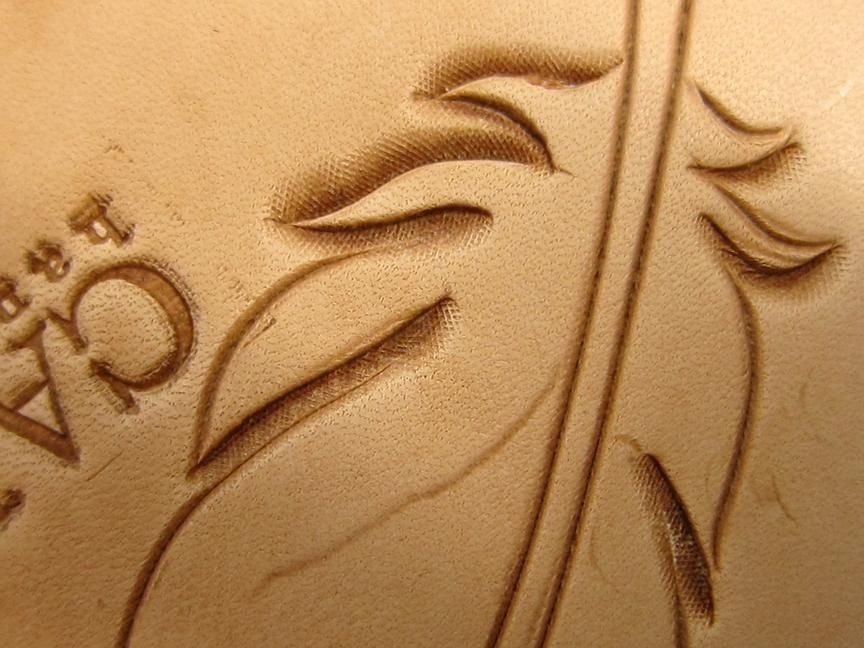
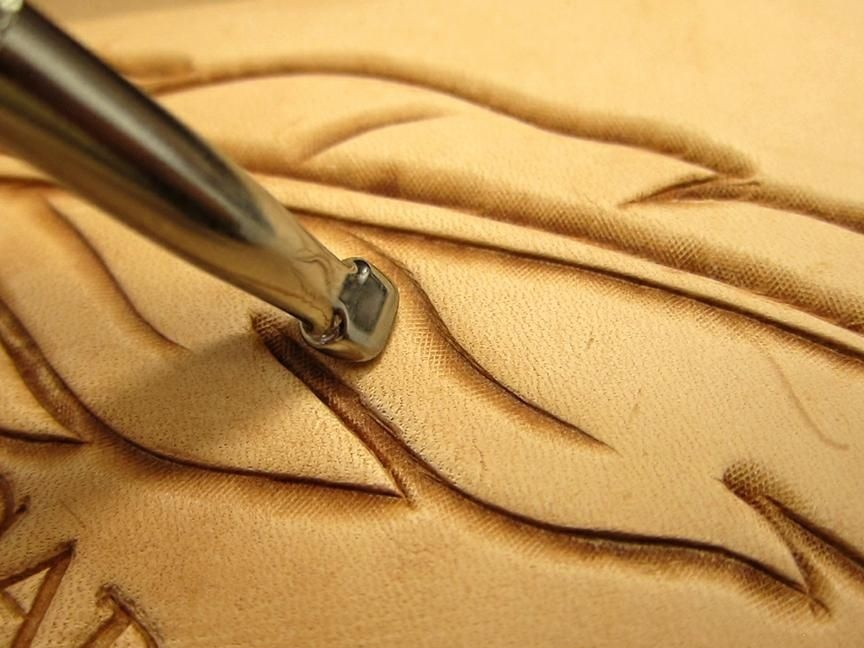
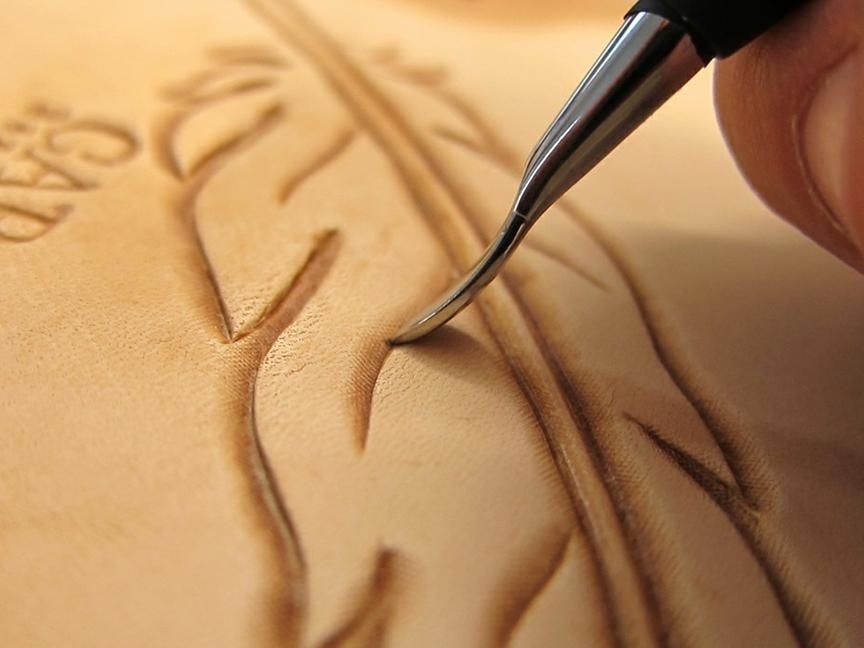
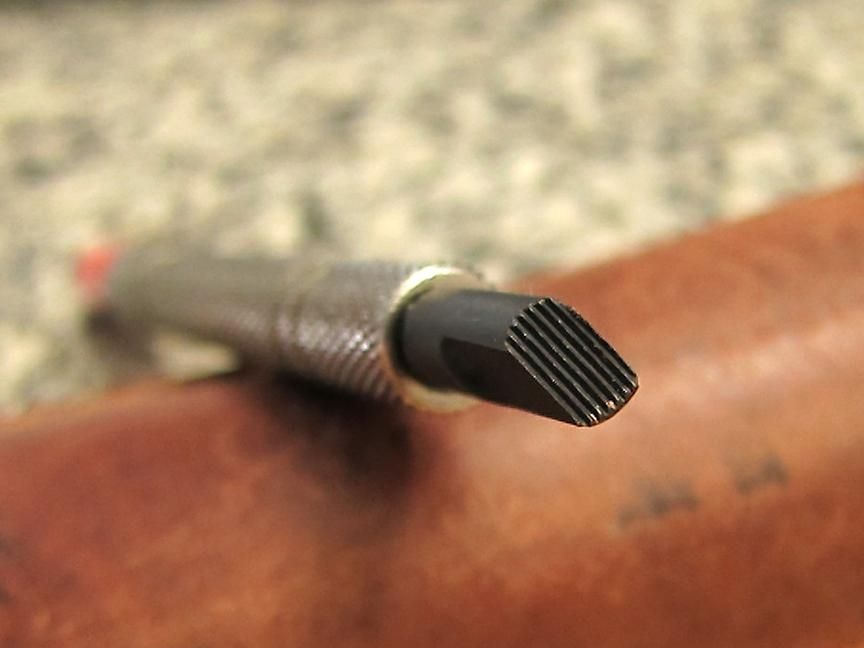
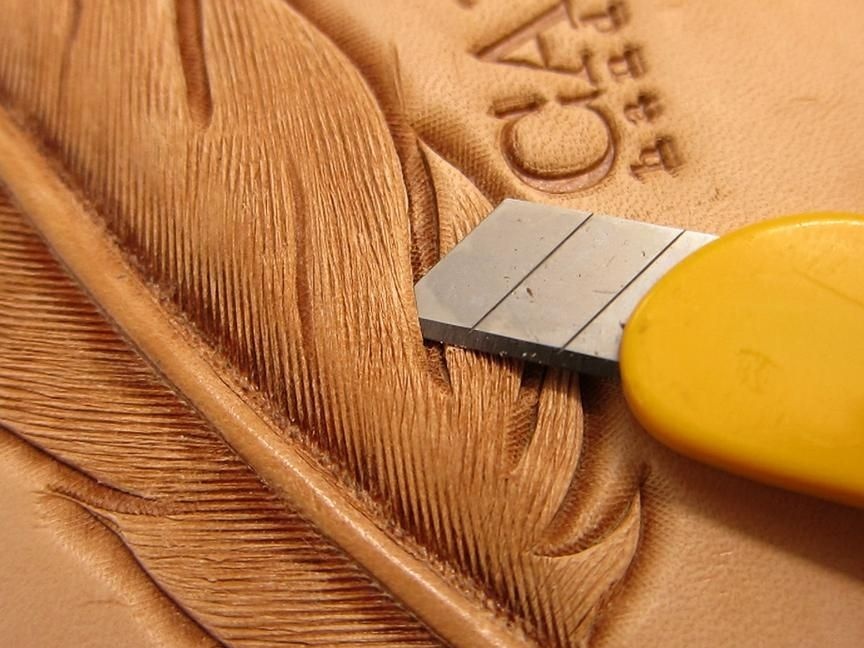
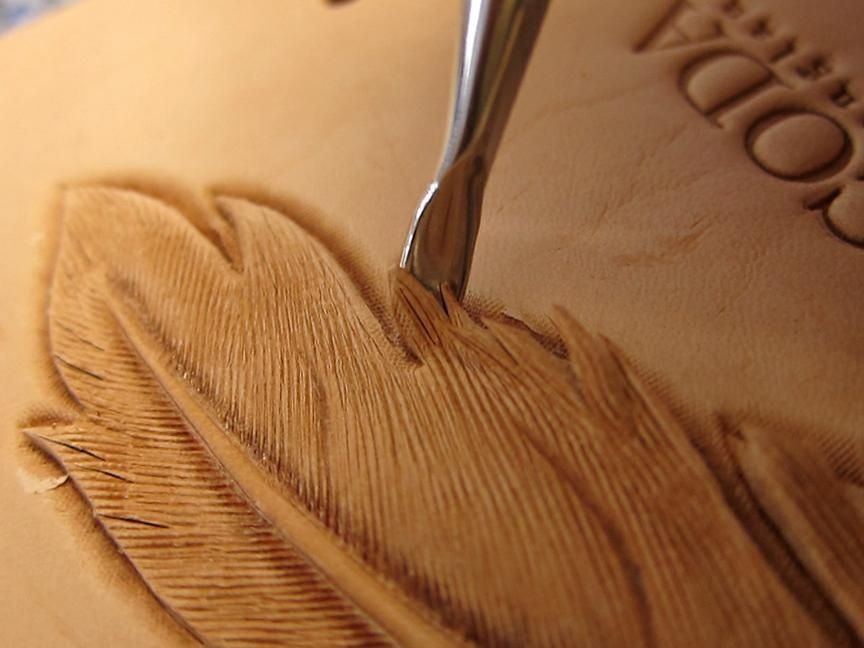
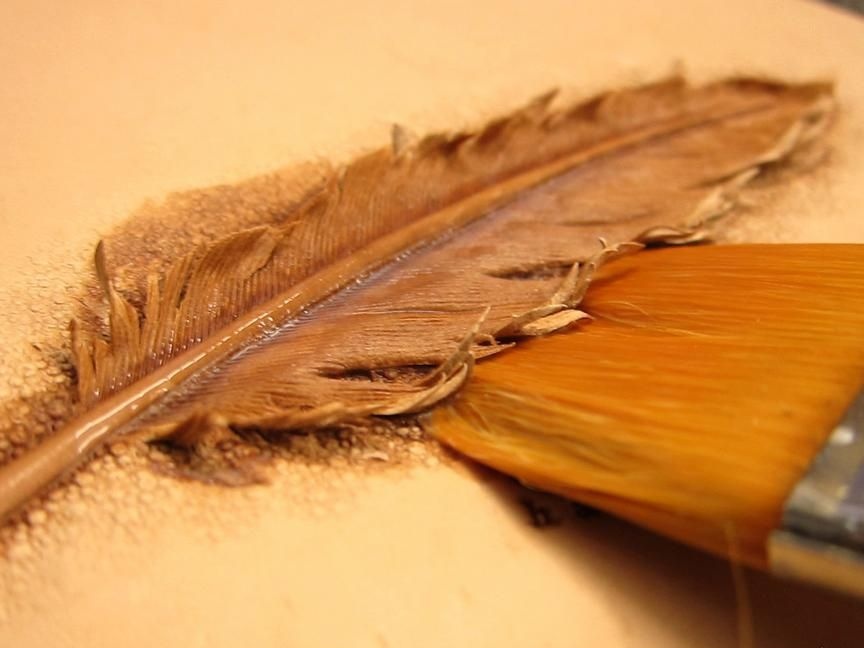
Next, you need to take a special tool, which is needed for a more detailed drawing of feathers, using it we go through all the lines.
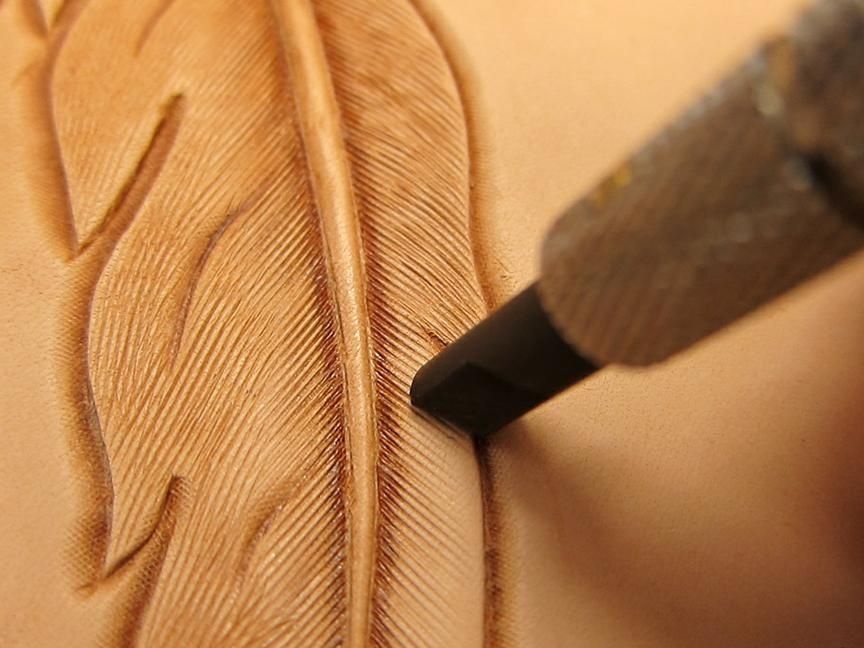
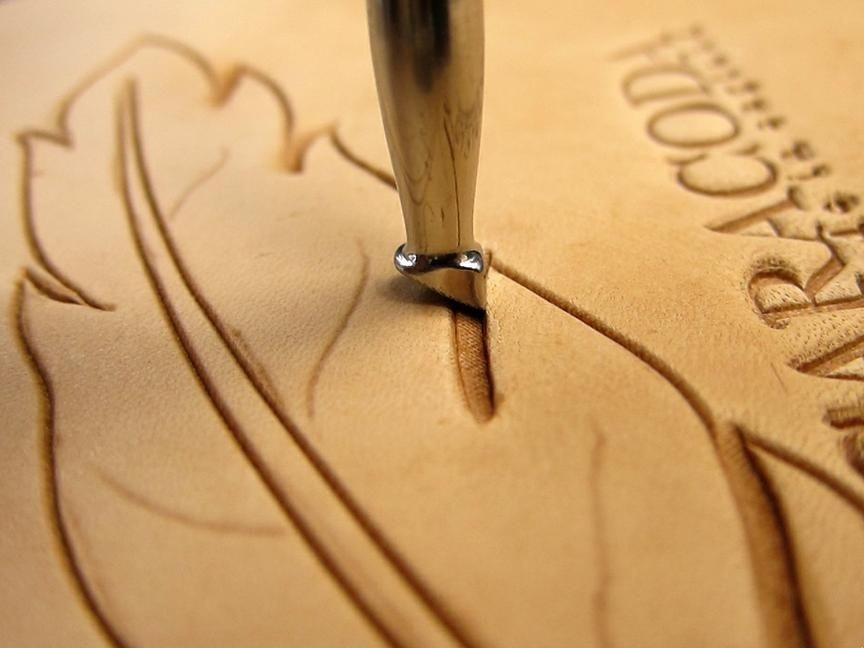
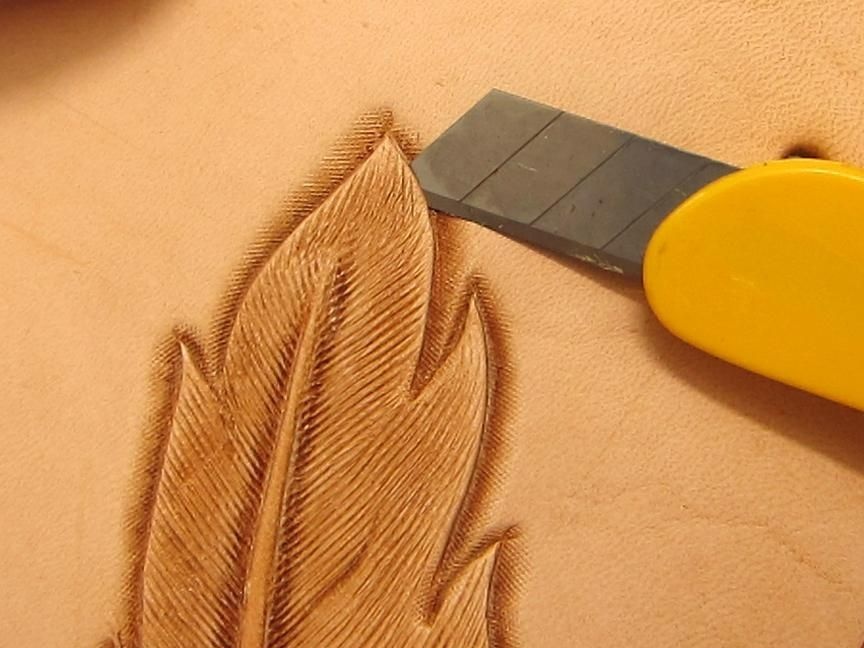
Then we take a clerical knife or a scalpel and with the help of one of them we need to trim the feathers around the edges, we try to do everything carefully.
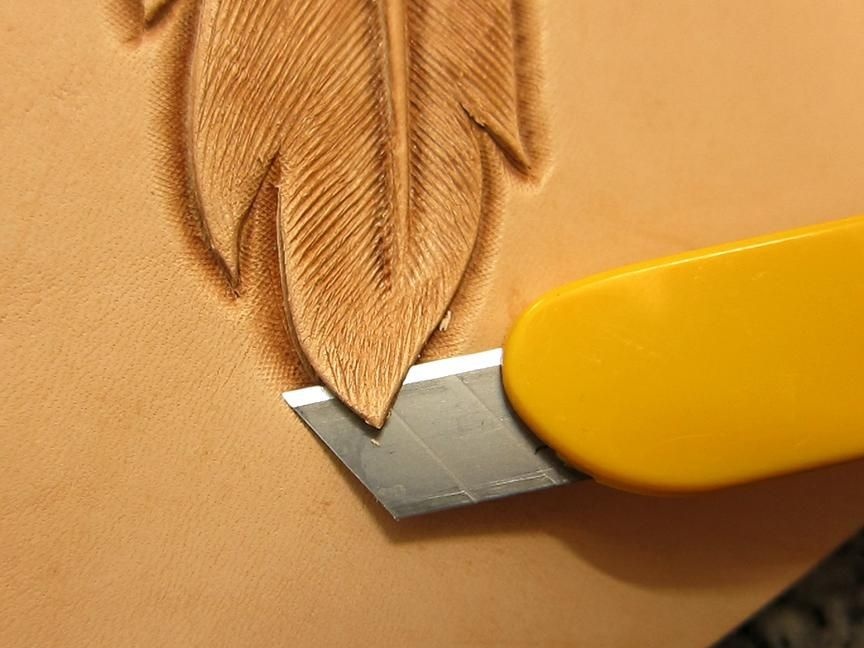
Next, make cuts along the contour of the pen.

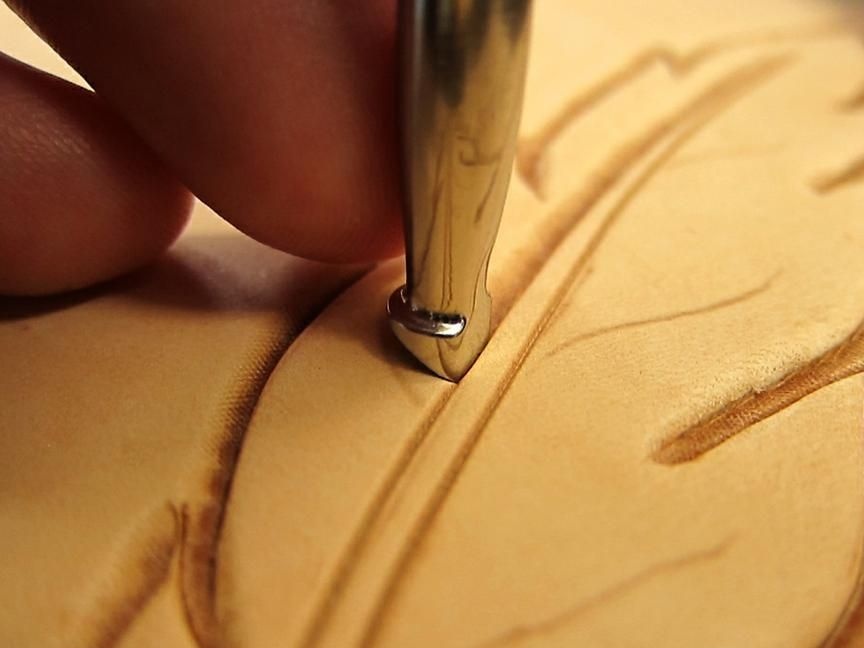
When everything is ready, all the parts that we cut must be slightly raised.
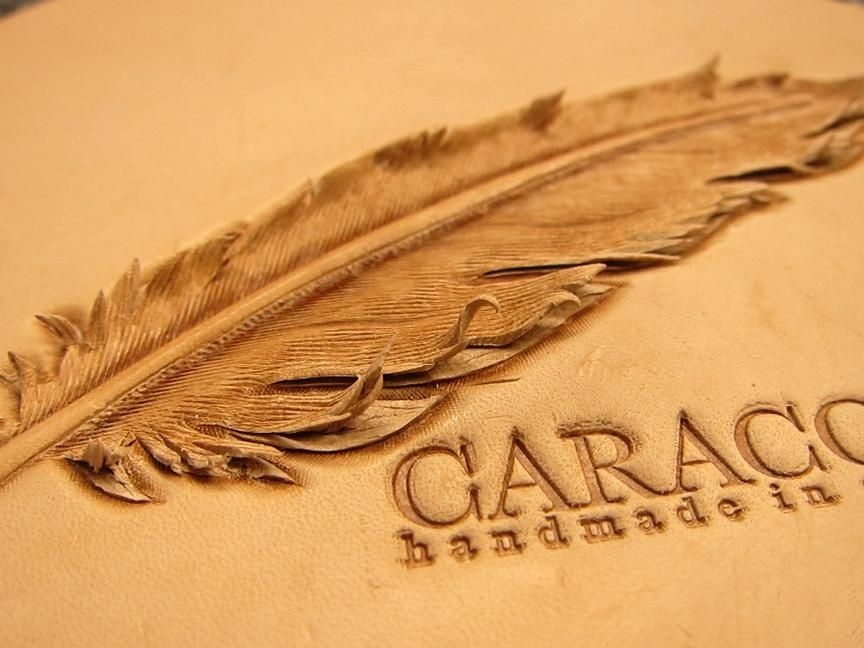
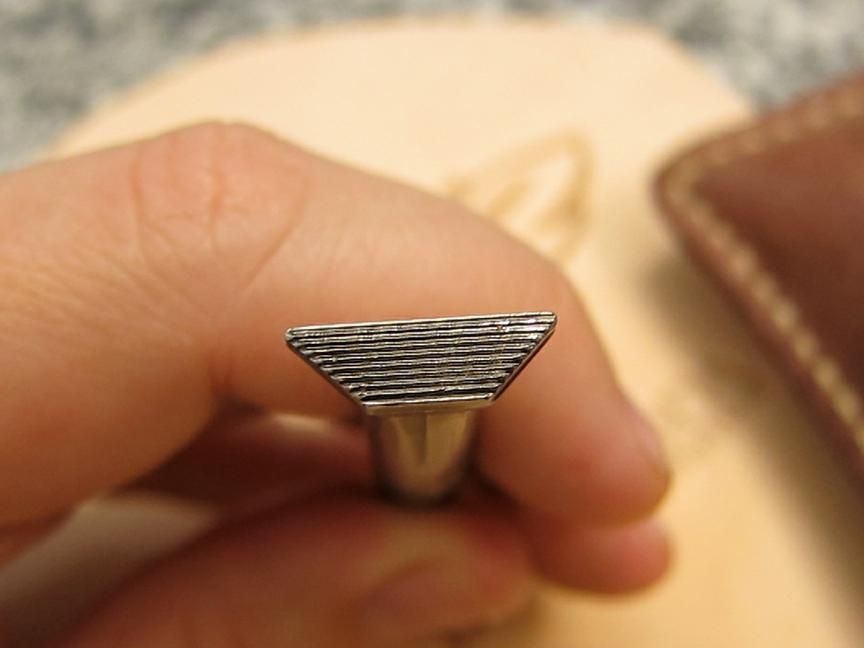
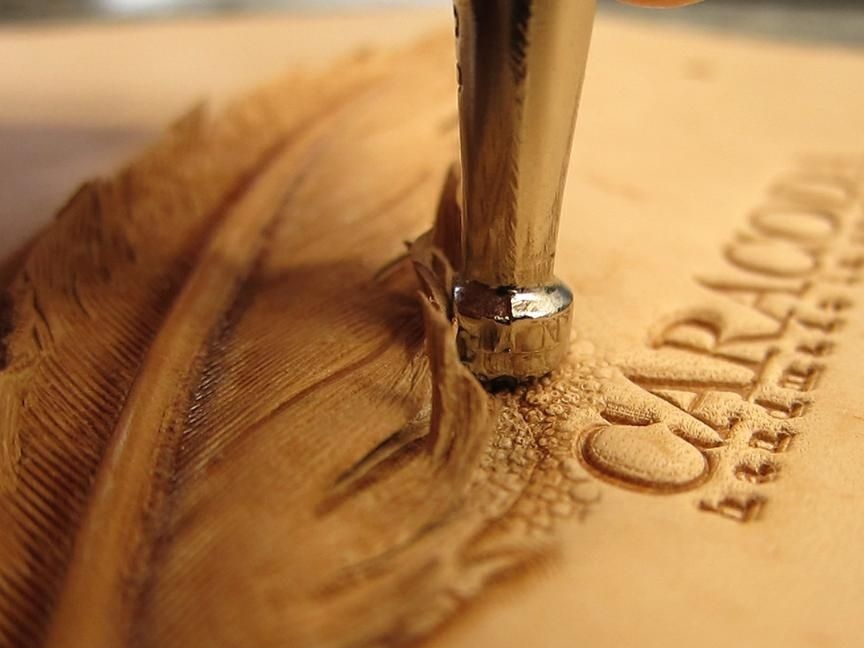
Then you need to take special stamps, we need them for the background. We lift the incised parts of the pen and go through the stamp.

Let the skin dry completely, and then remove the tape.
Next will be described the method of priming, painting and the final process of assembly of the case.
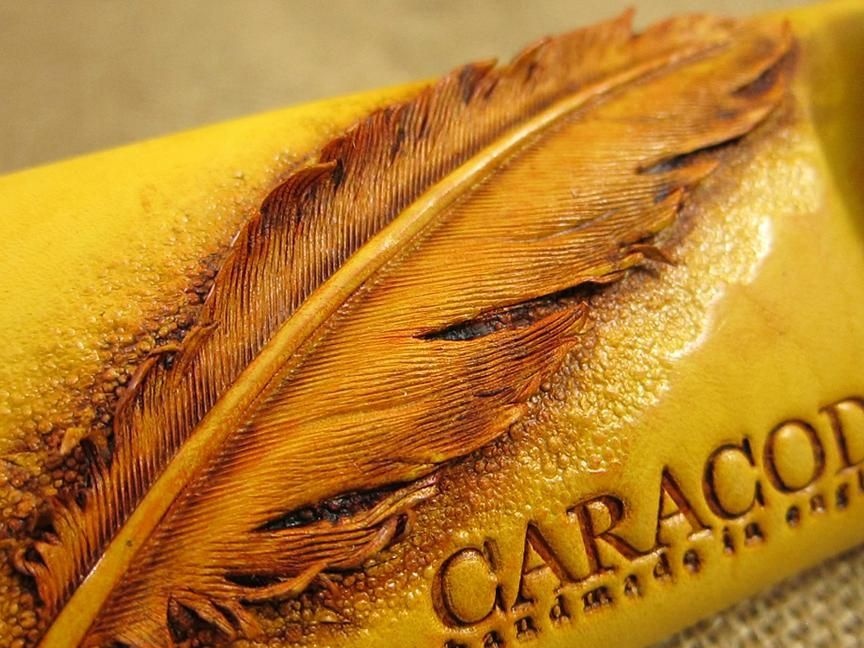
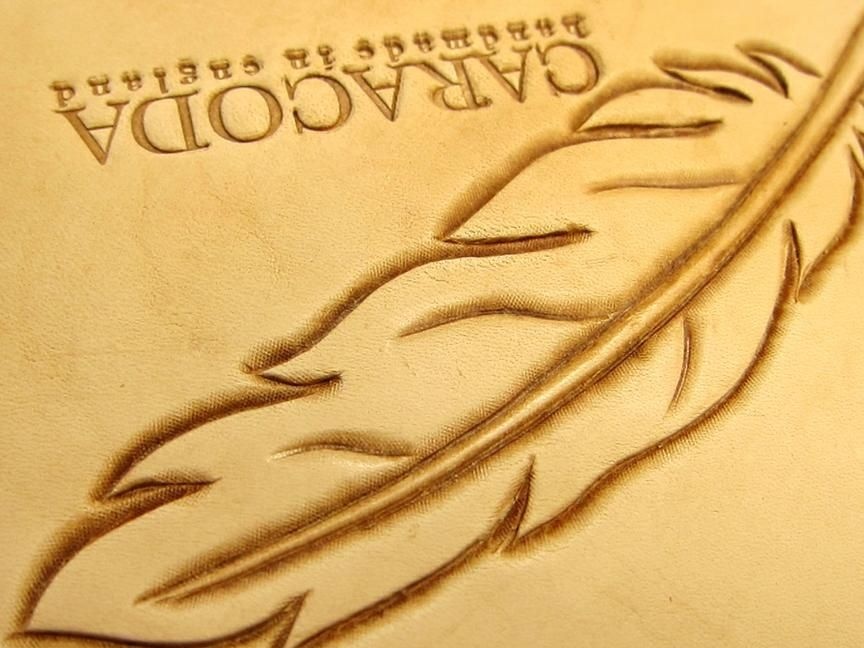
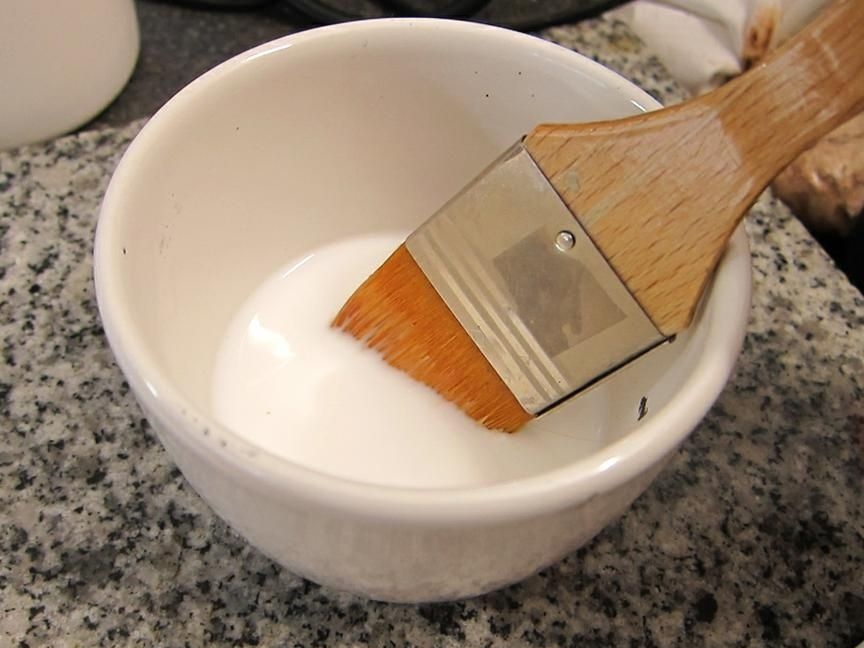
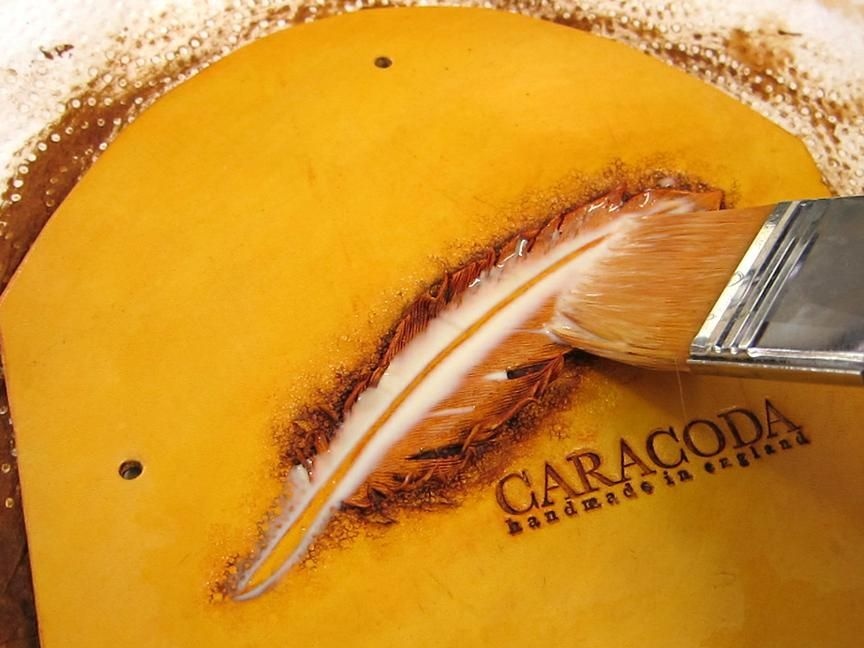
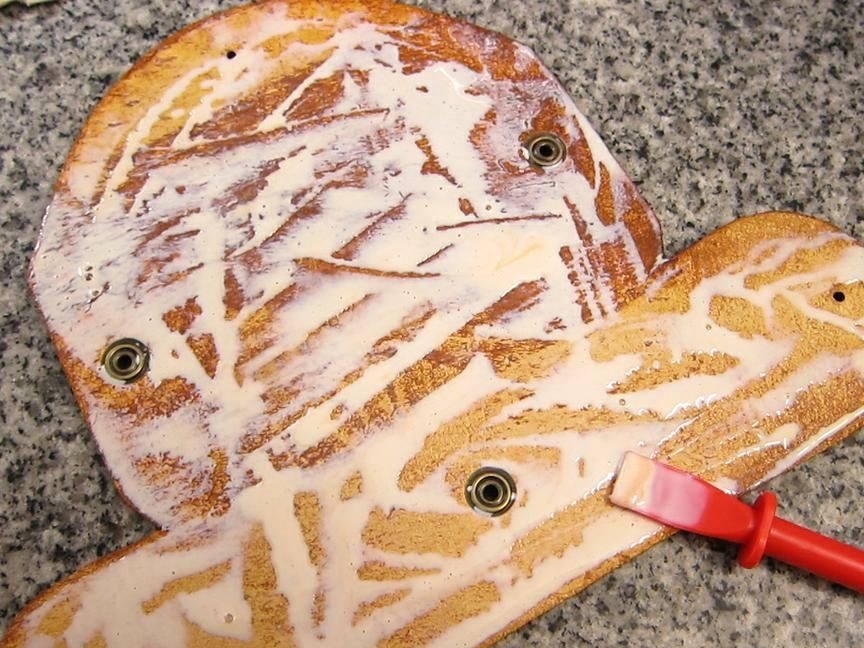
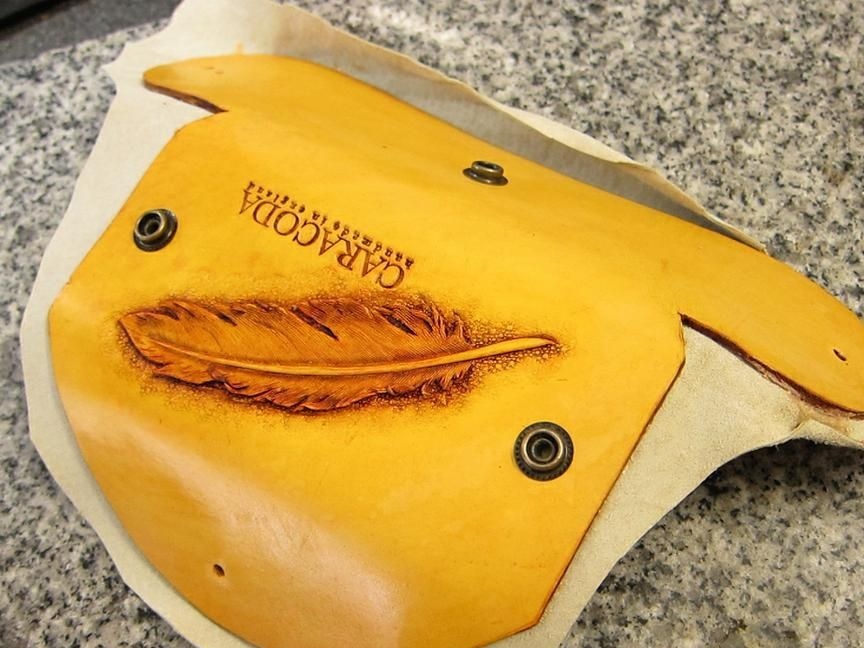
We begin to apply the topcoat, (we use a special varnish for the skin, or any other water-repellent). We walk along the feather and under it. The first layer is needed in order to smooth out all the bumps, fill in all the recesses, etc., this coating will be a kind of primer, when painting, the paint will lay down in an even layer.
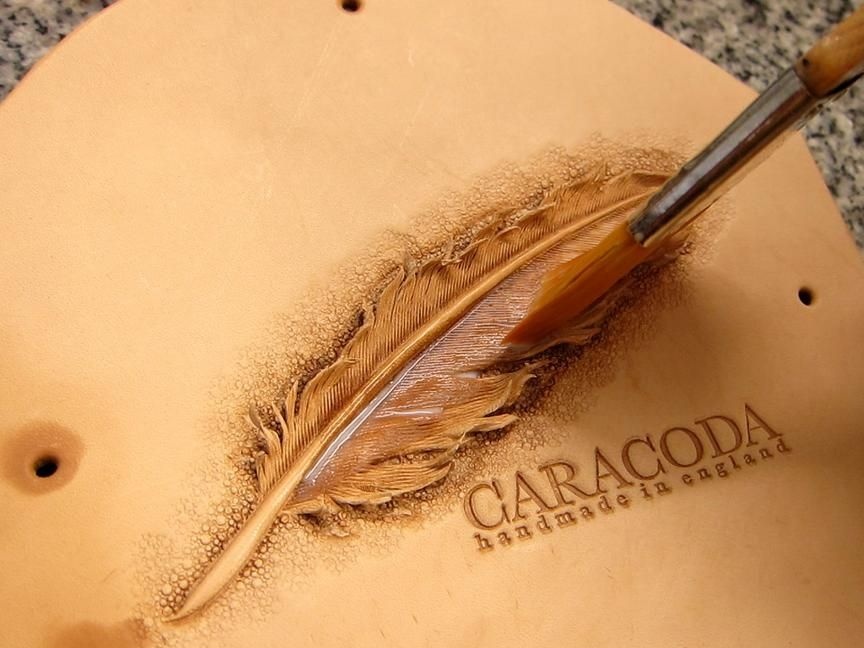
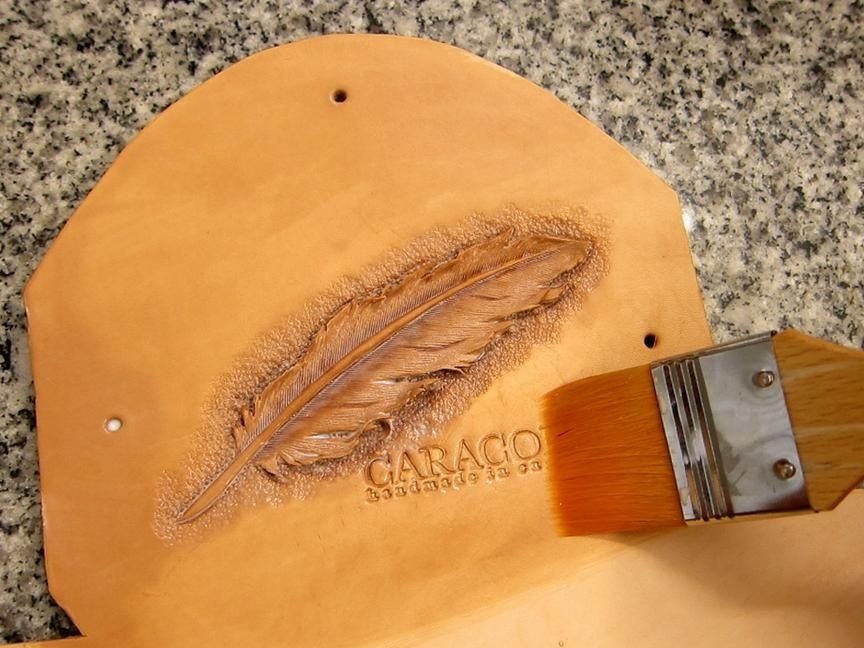
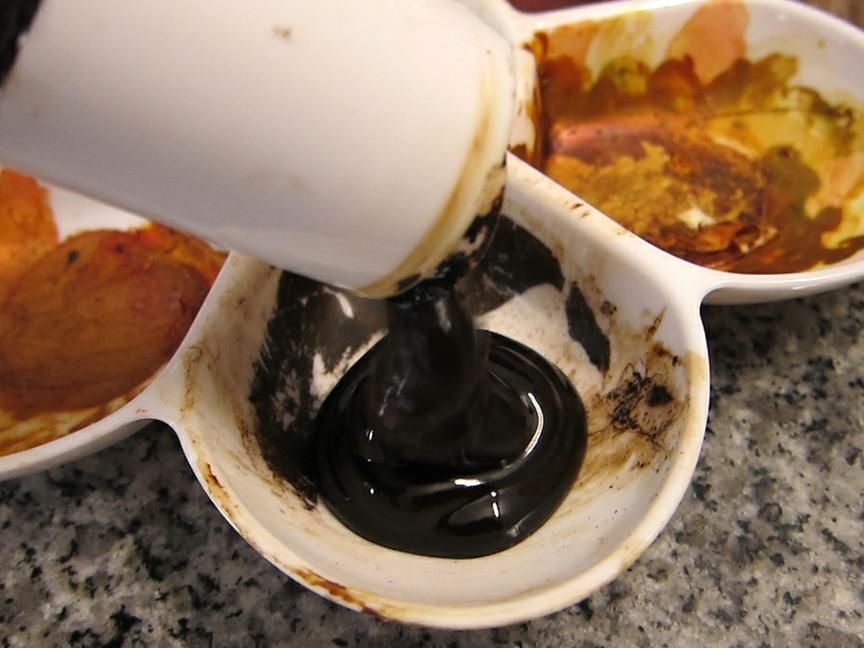
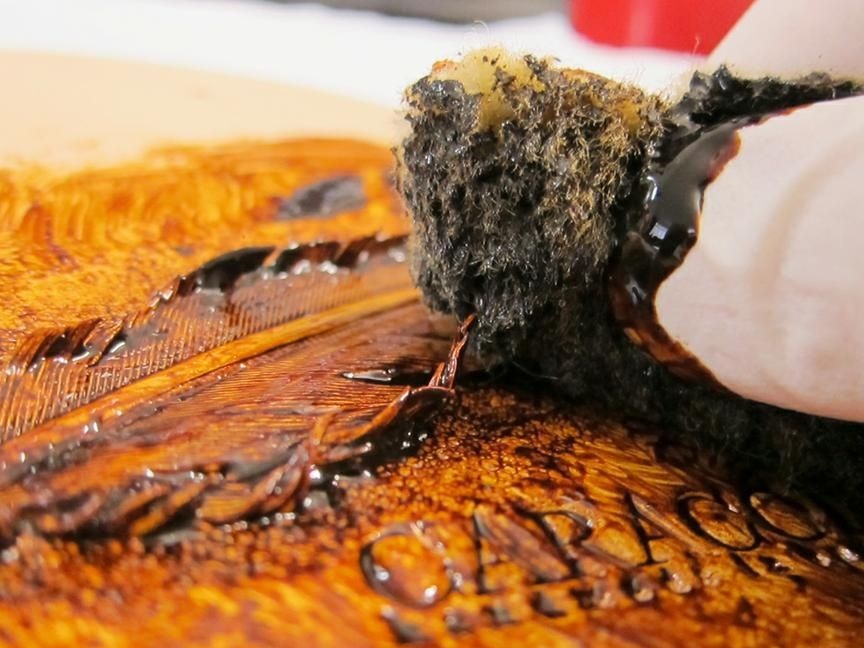
In order to highlight the pen from the general background, paint, use the paint “Antique”. We take the paint, and with the help of a sponge we carefully go along the contour of the pen, and under it, and then in a circular motion we paint everything else.
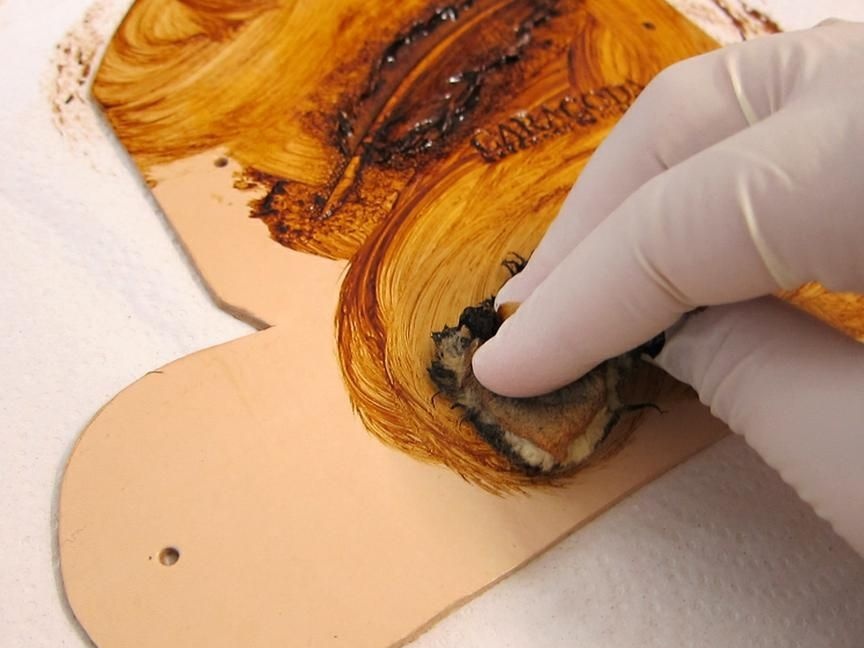
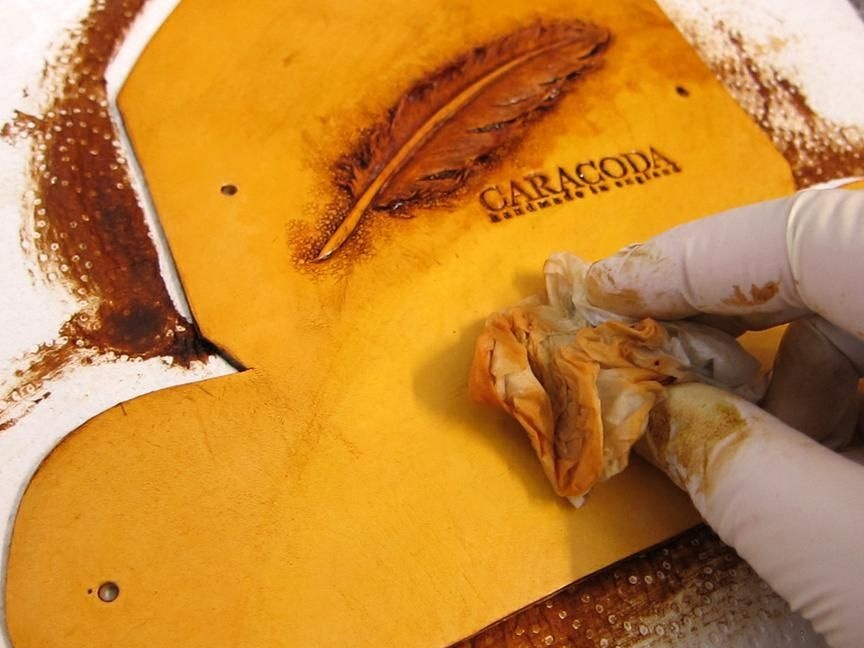
When everything is ready, take a paper towel and erase unnecessary paint residues.
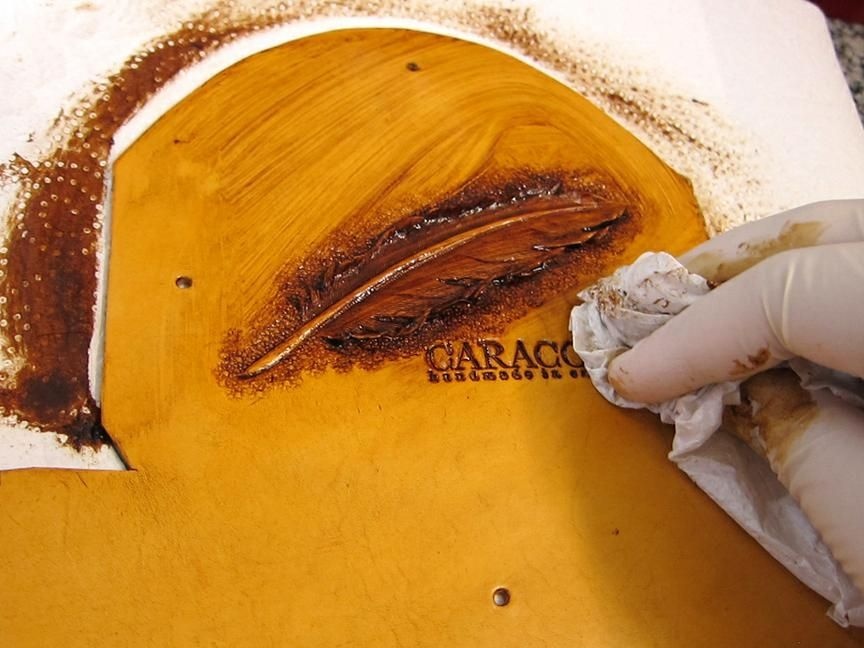
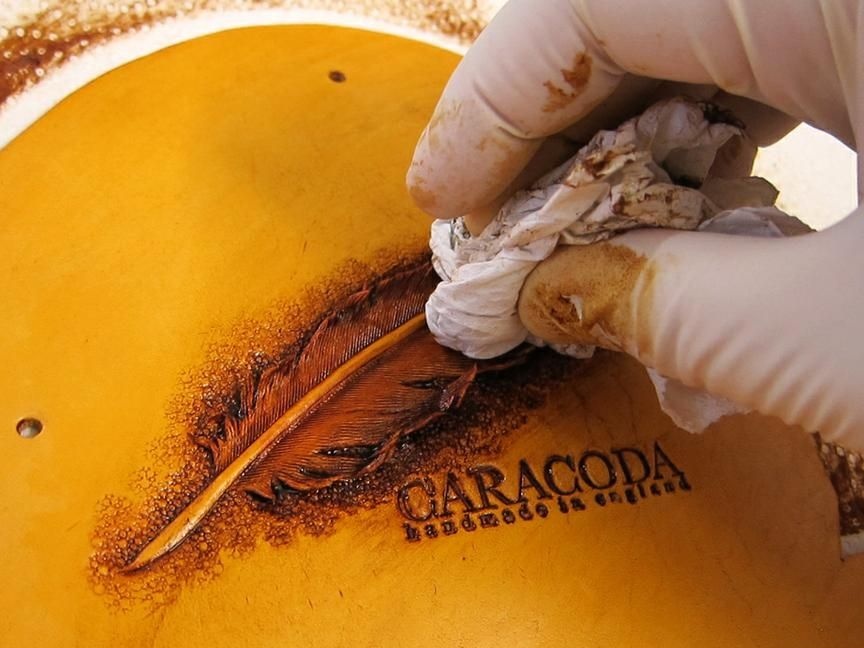
Then we wet a clean towel in water and finally wash off the remaining paint.

Leave the skin to dry for a day. When the skin dries, you need to apply a layer of top coat, we pass again along the entire contour of the pen, and then along the entire surface.
We leave the skin to dry for half an hour, after this time we apply another layer, but the last one, after which it is recommended to leave the skin to dry at night.
Next, using a piece of sheepskin, or a linen cloth, you need to polish the dried surface of the skin, you need to bring it to shine.
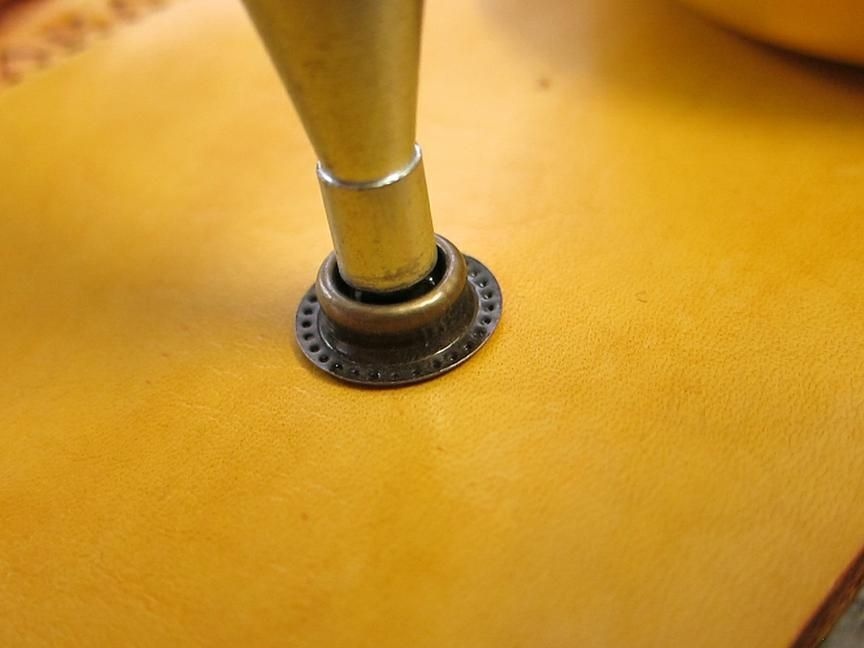
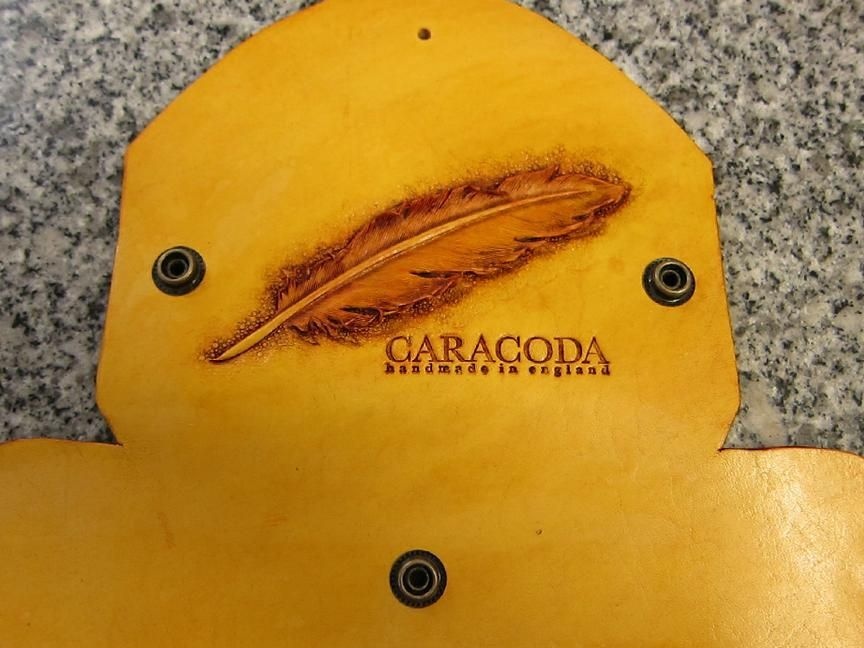
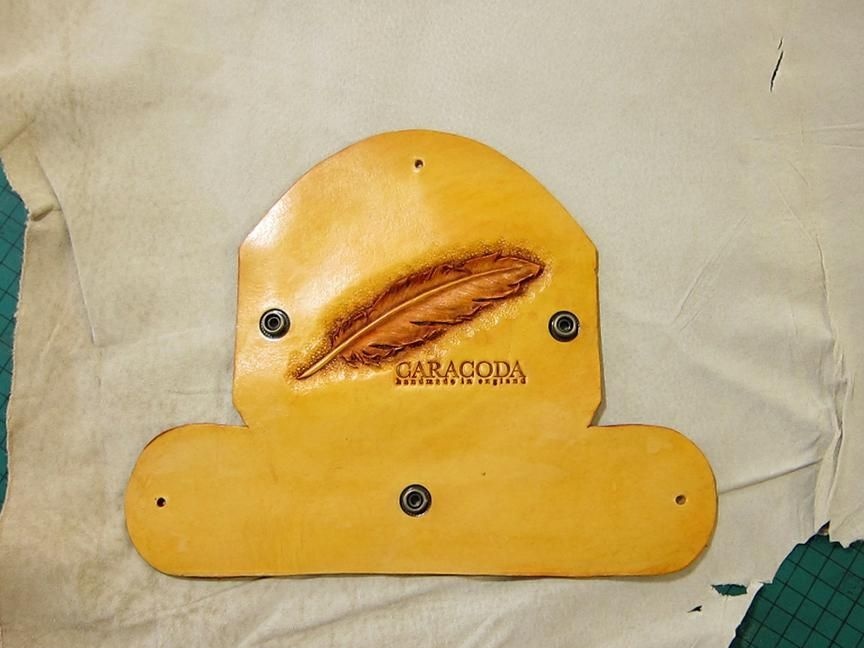
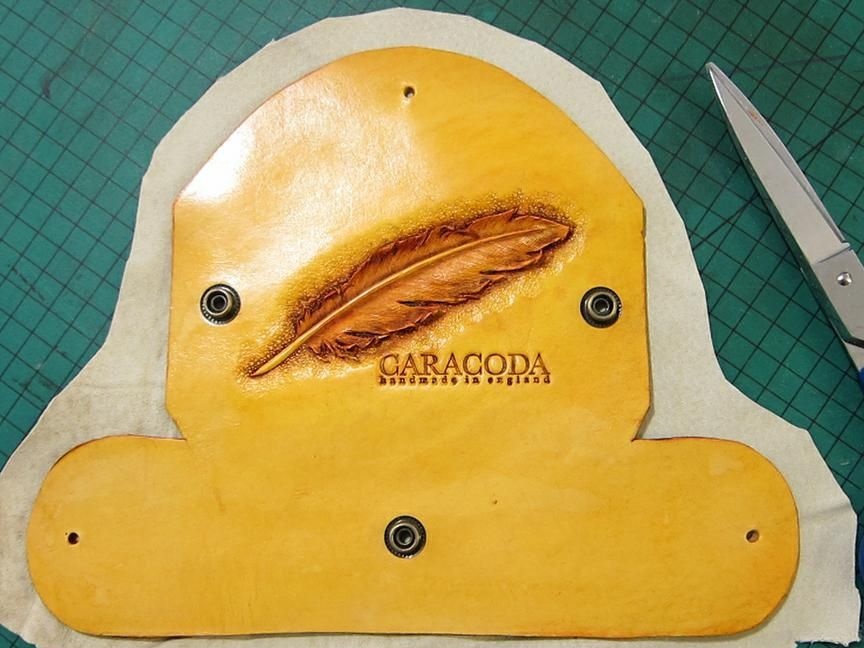
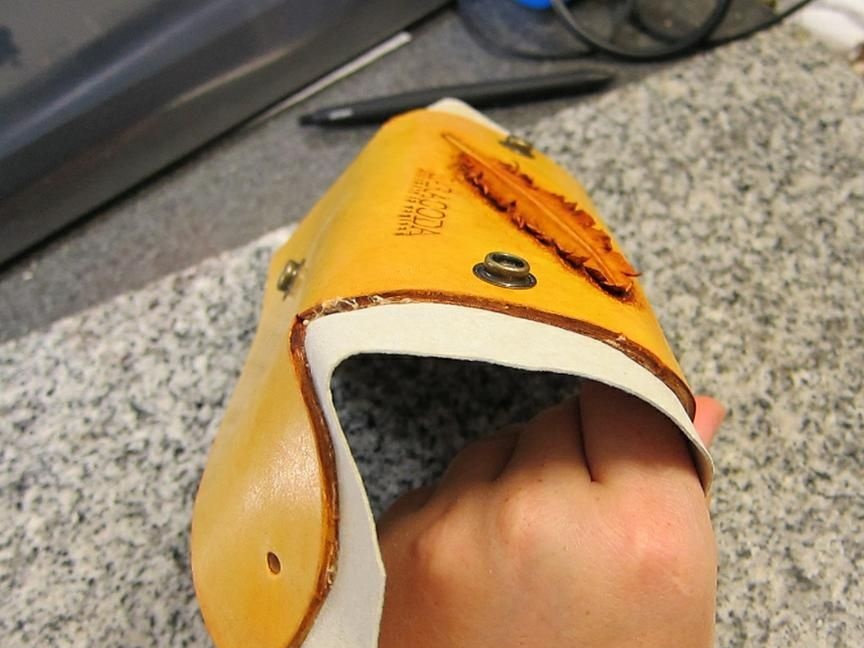
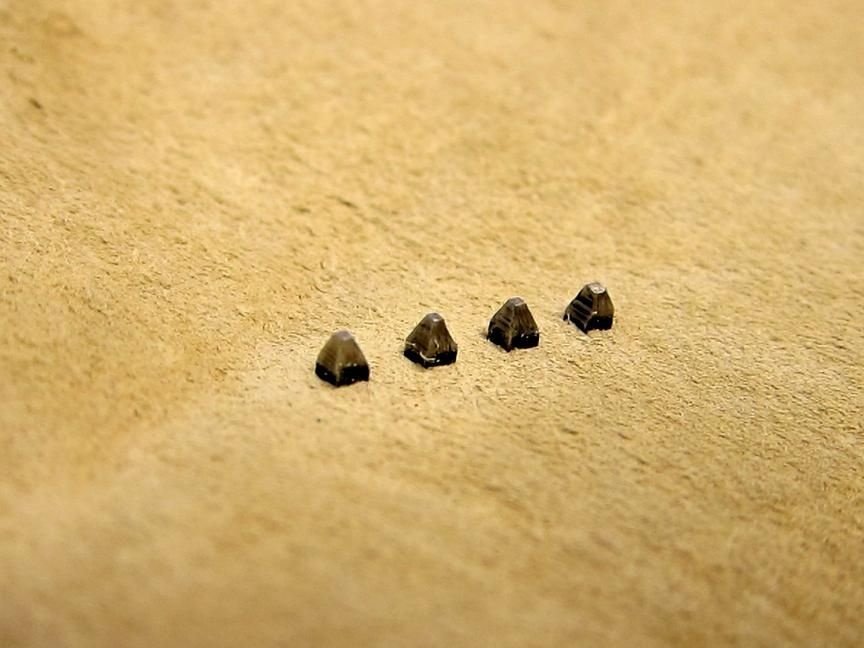
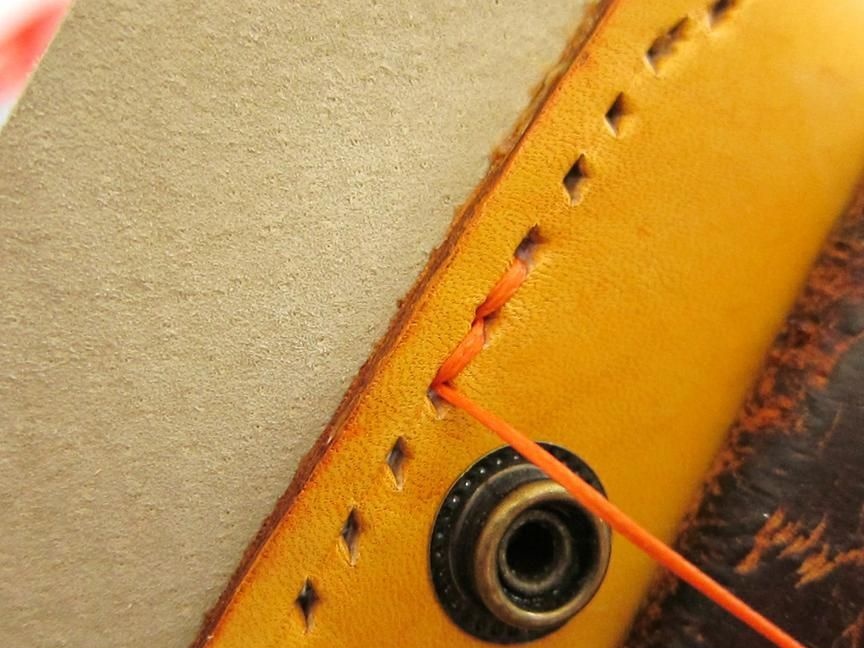
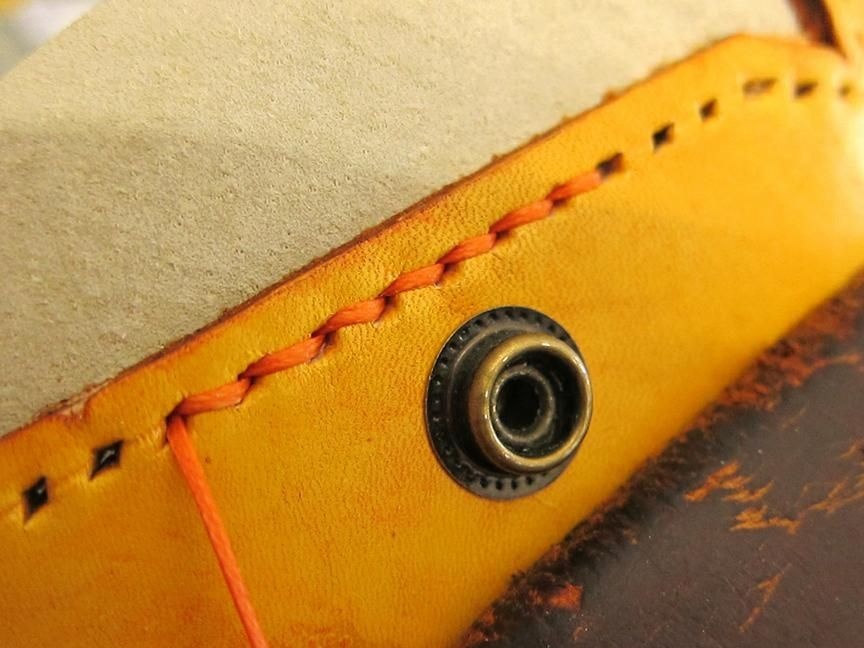
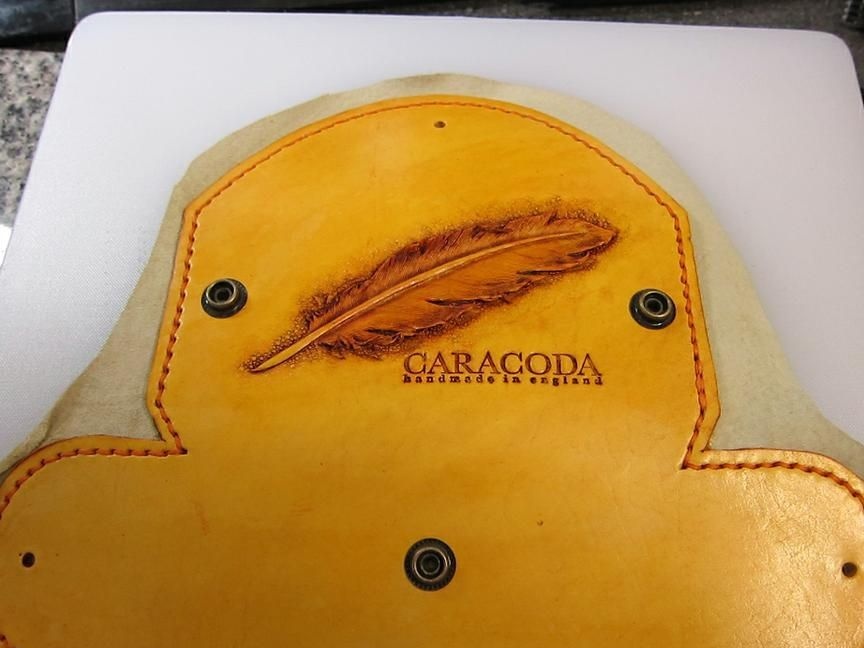
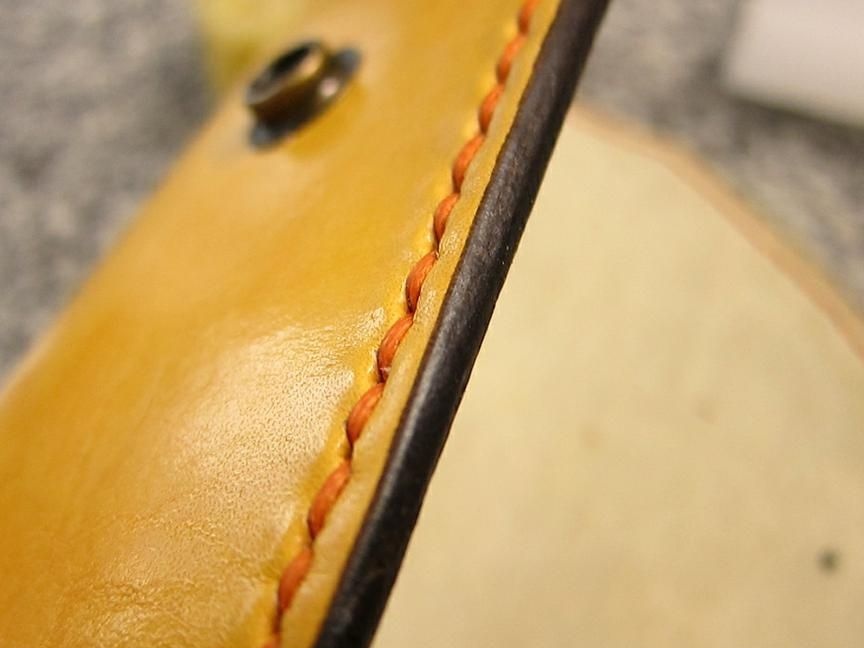
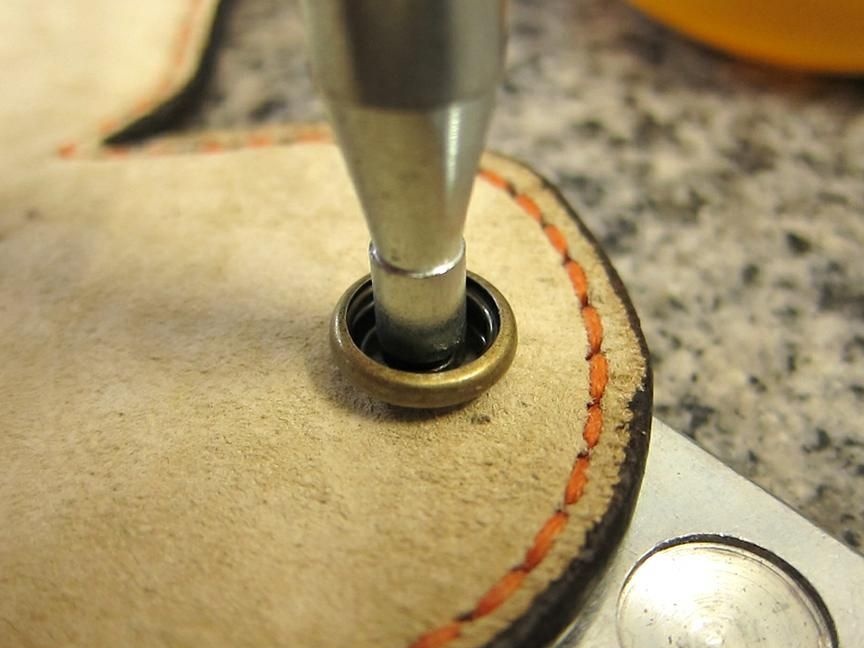
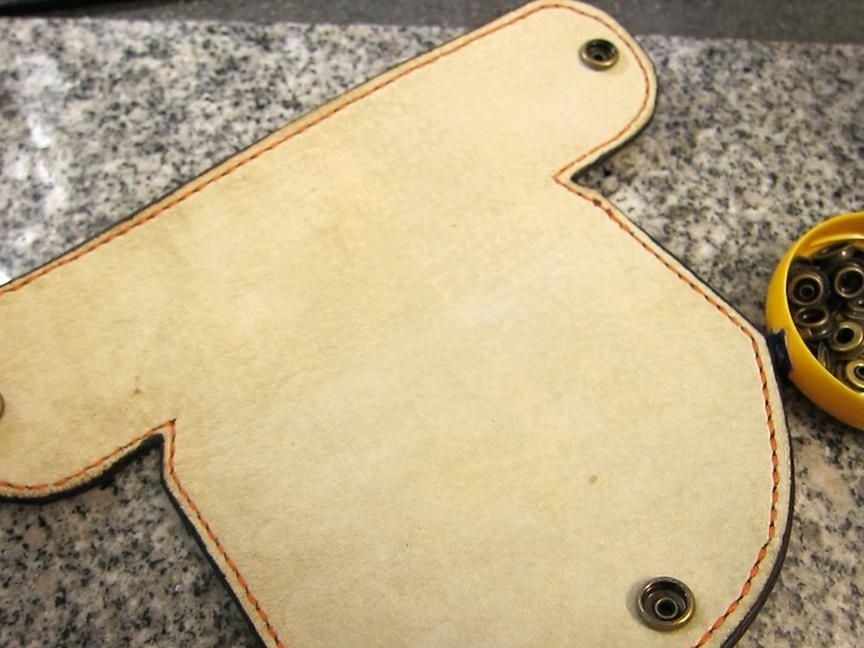
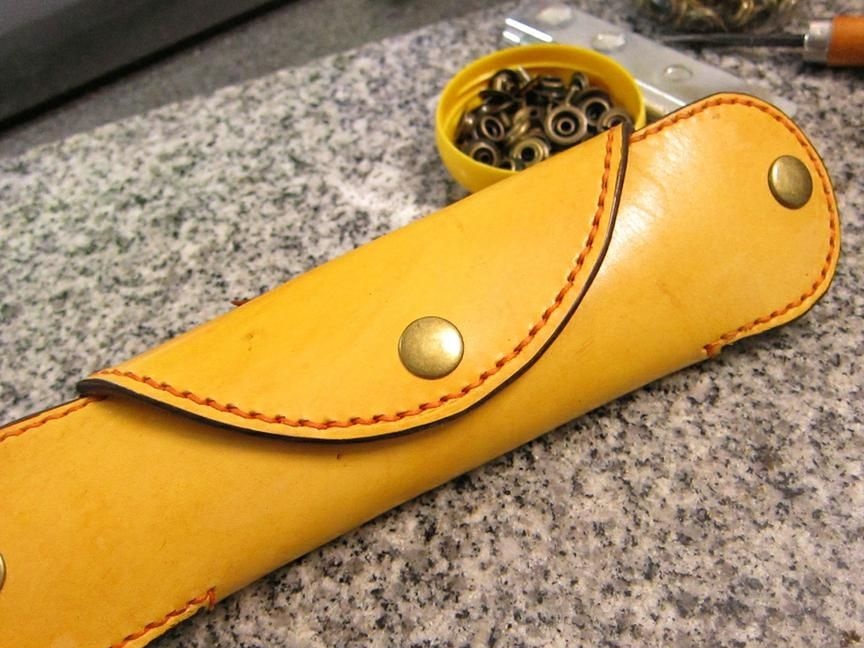
Then we fix the buttons using a special punch, according to the example in the photo.
Now cut out the lining
Then we apply glue, and glue the lining, while you need to bend the skin a little in those places where there will be a bend.
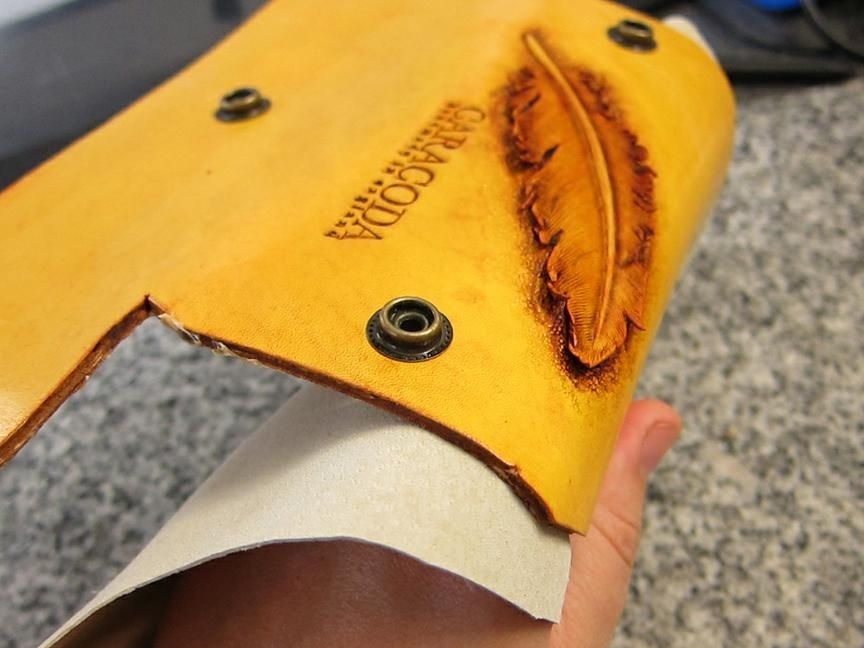
We remove all the bubbles, smoothing the surface.
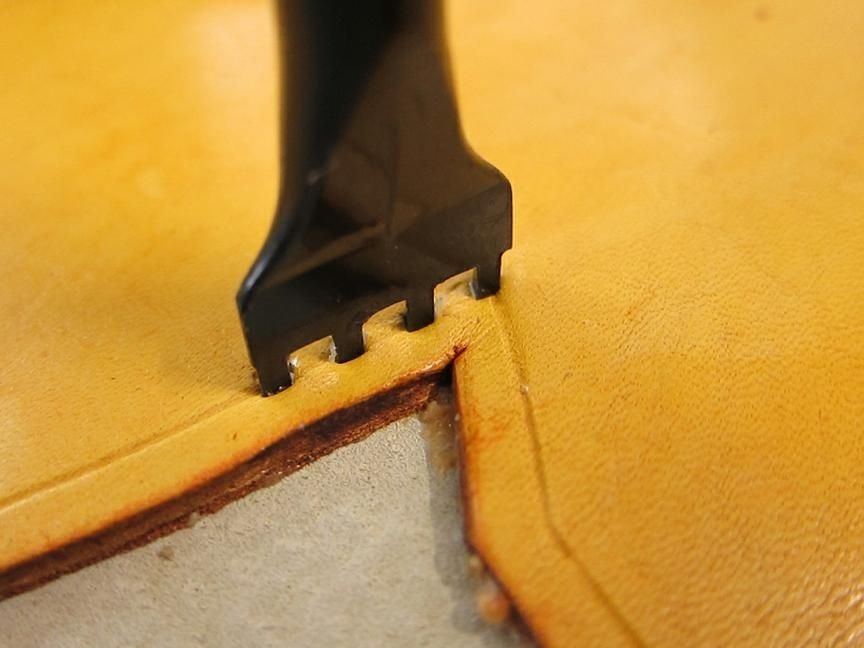
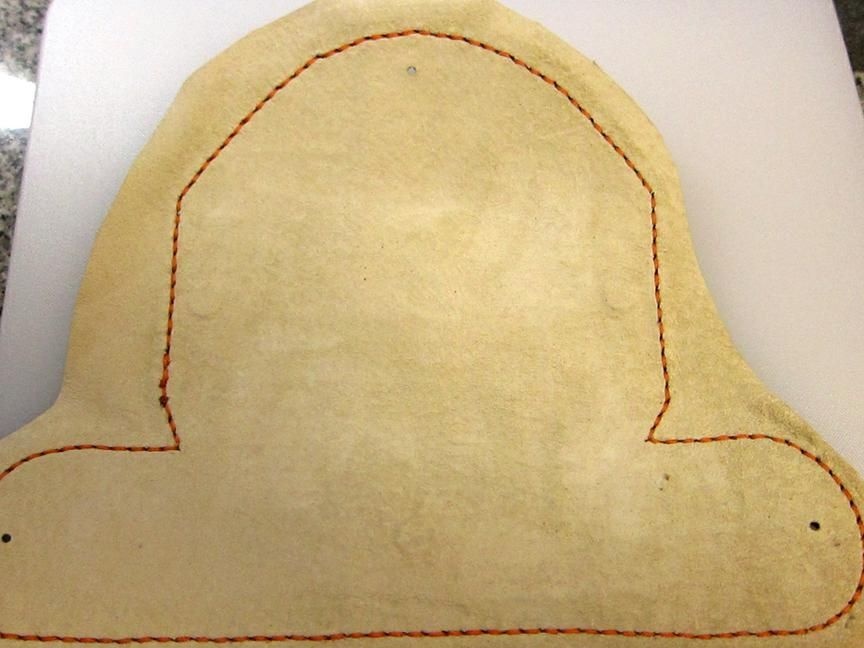
Now we need to break through three holes again, since we covered them with a lining.
Next, take a special compass and draw a seam line.
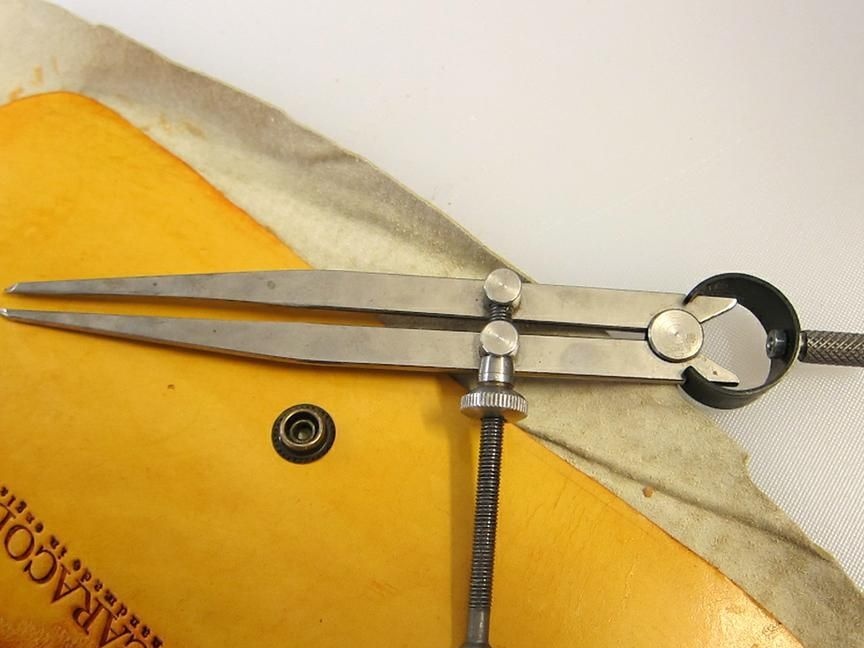
Punch holes
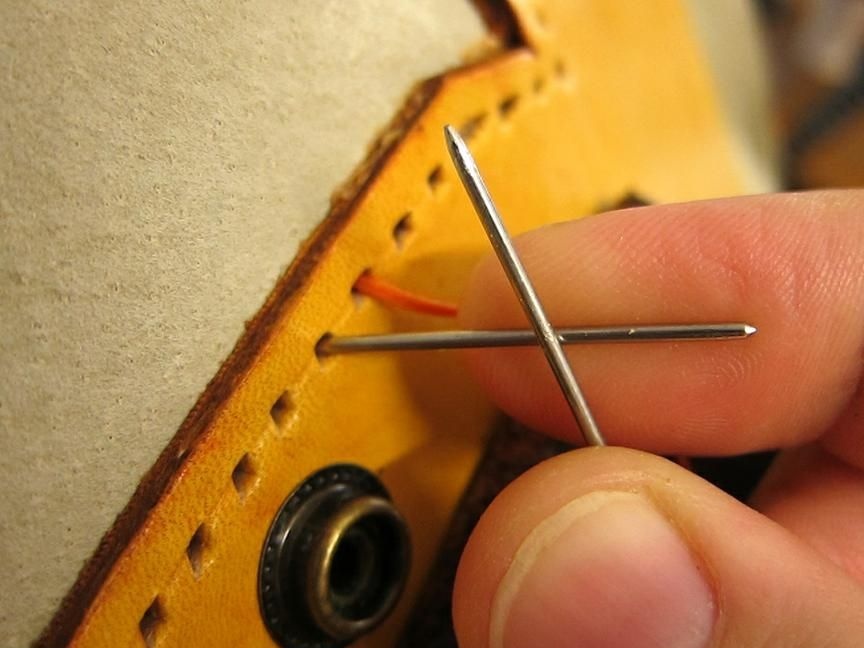
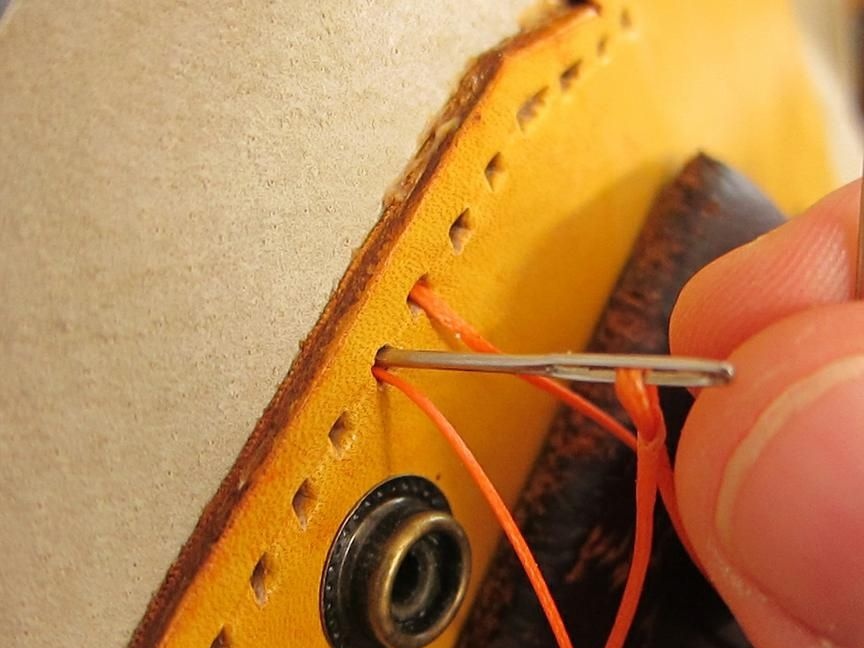
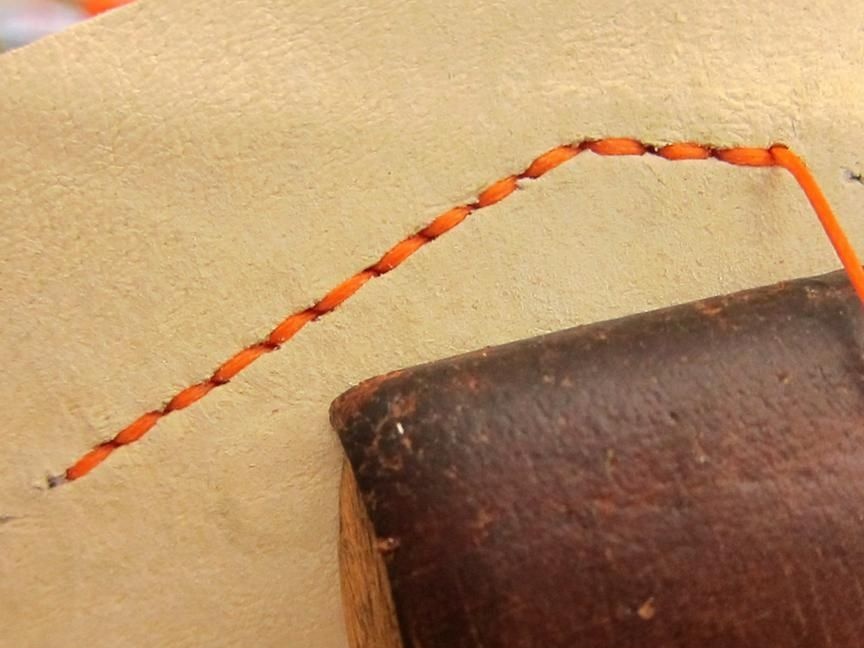
Stitch with a saddle seam.
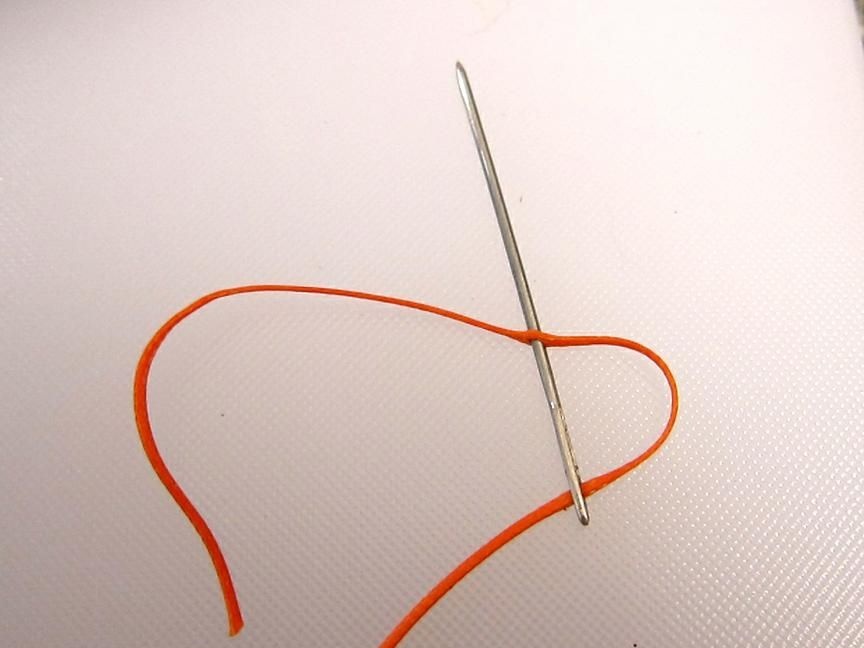
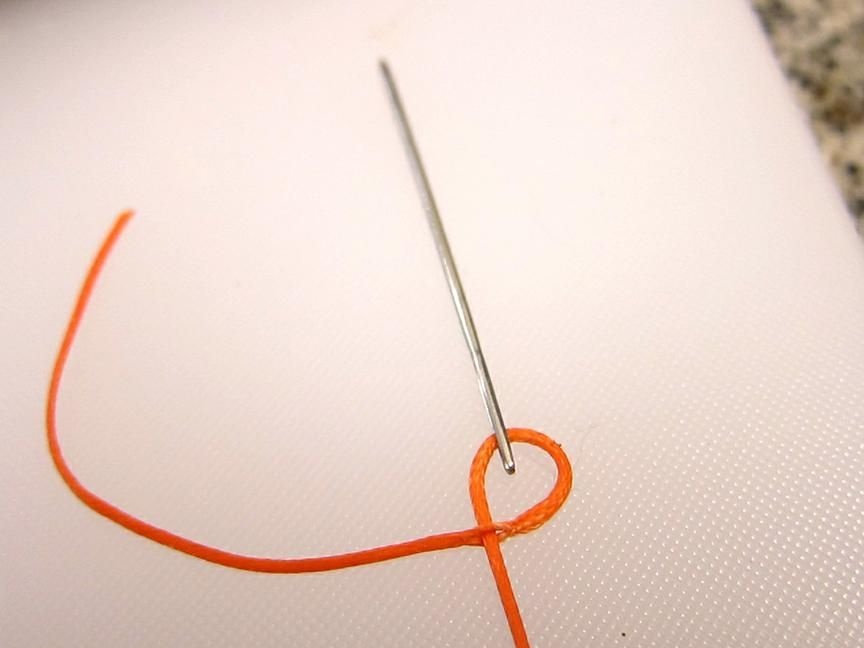
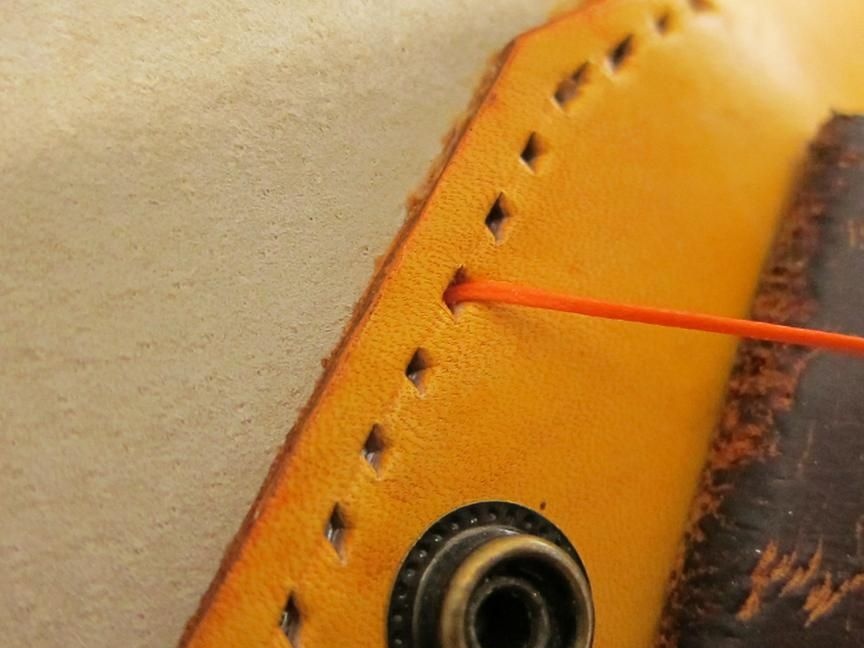
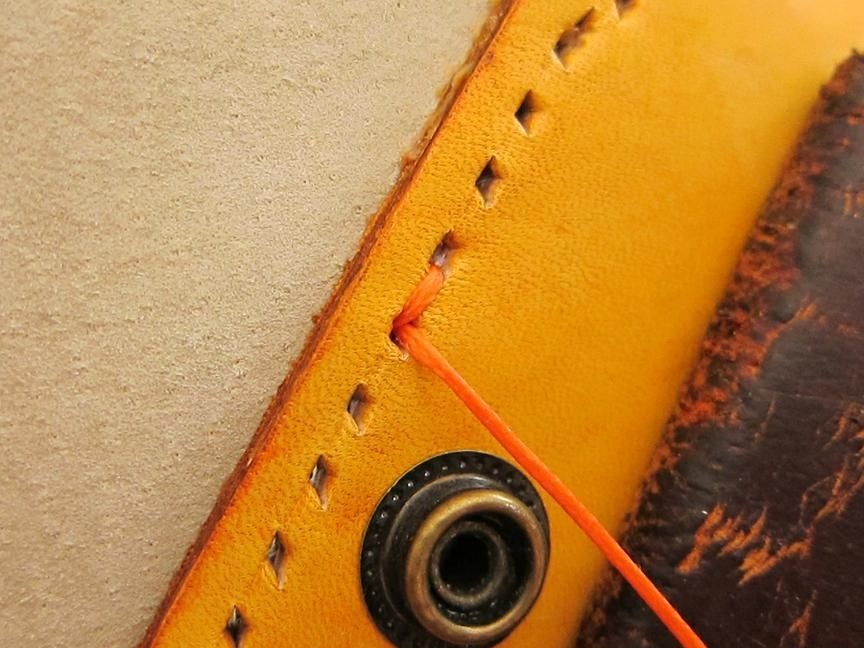
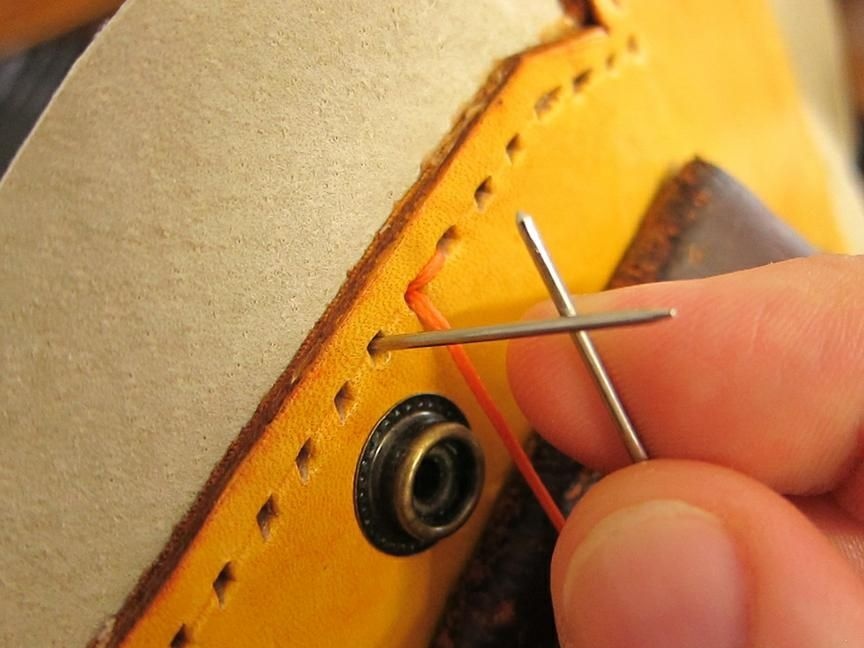
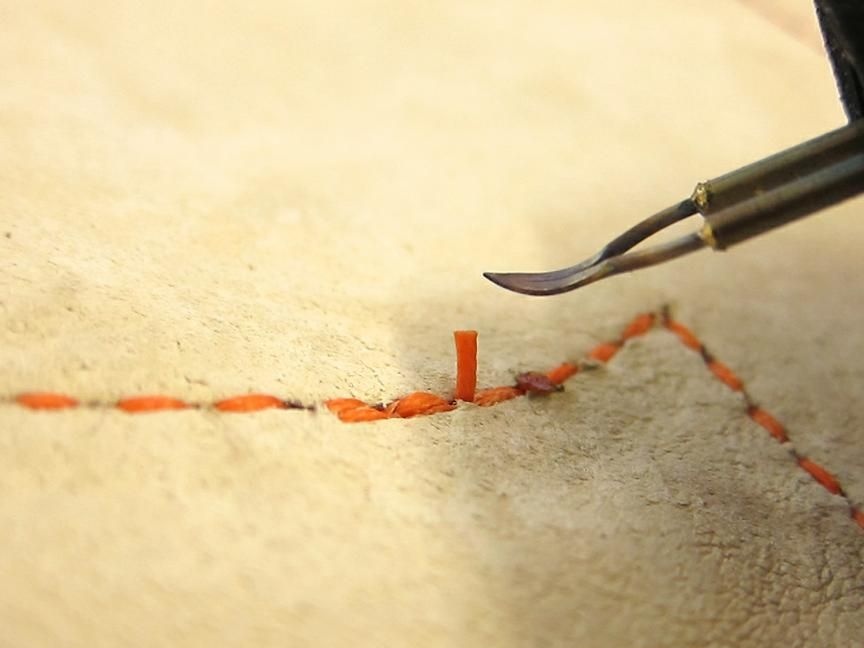
When we get to the place where the seam ends, we do an additional 3-4 stitches in the opposite direction, this is to fix the edges more firmly, we put the end of the thread into the inner part (wrong side).
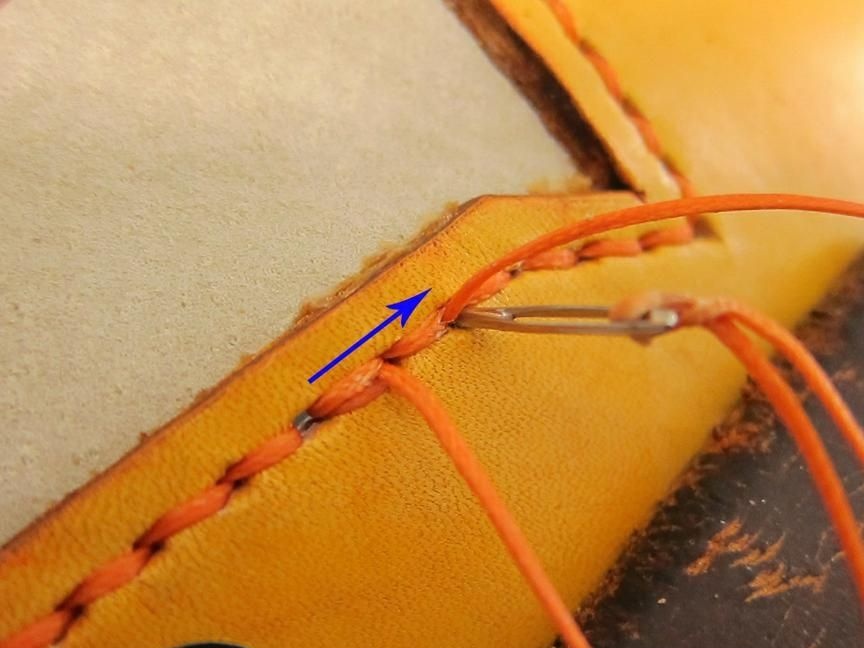
Then we cut the thread, we burn the tip with a lighter.
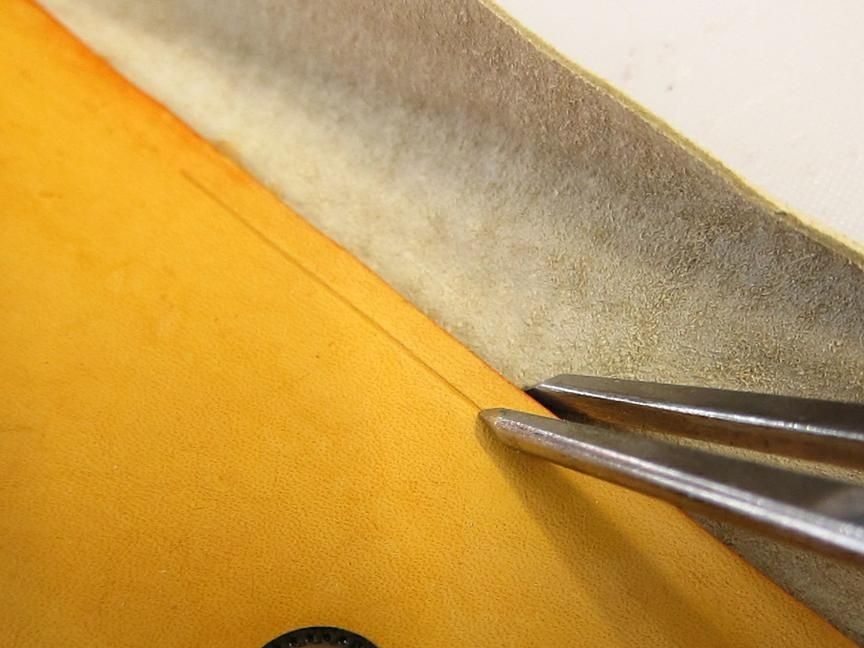
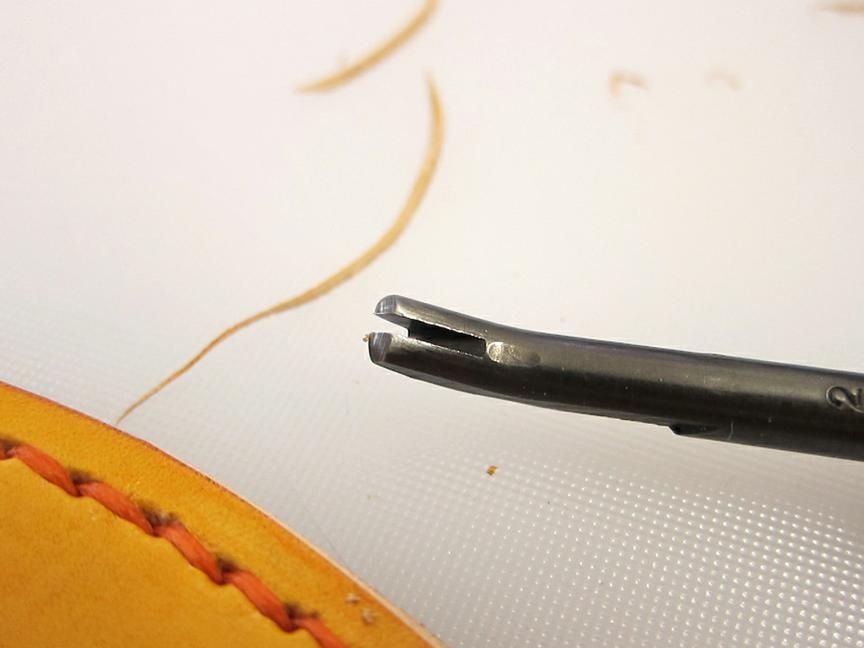
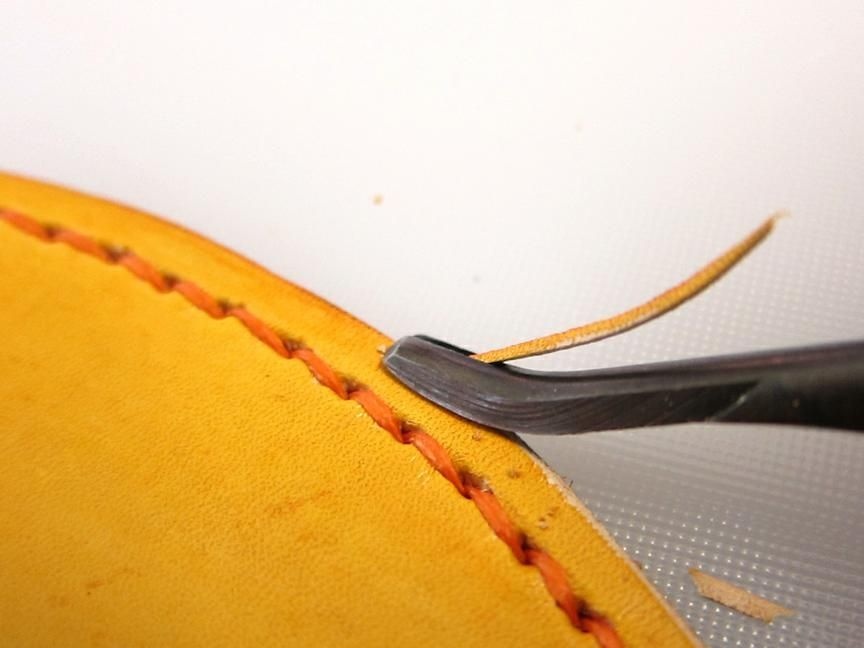
Next, cut off the excess parts of the lining, use a knife or scissors.
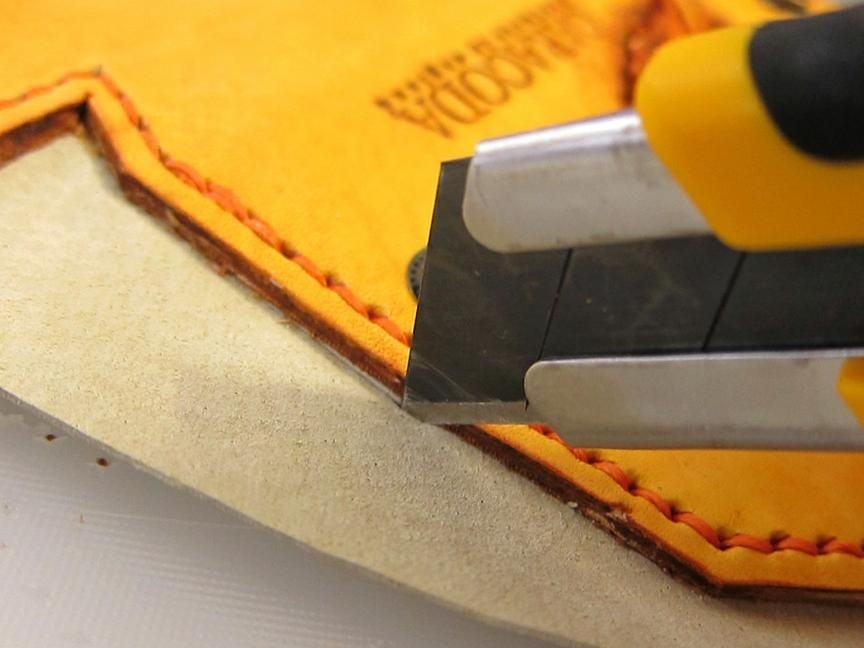
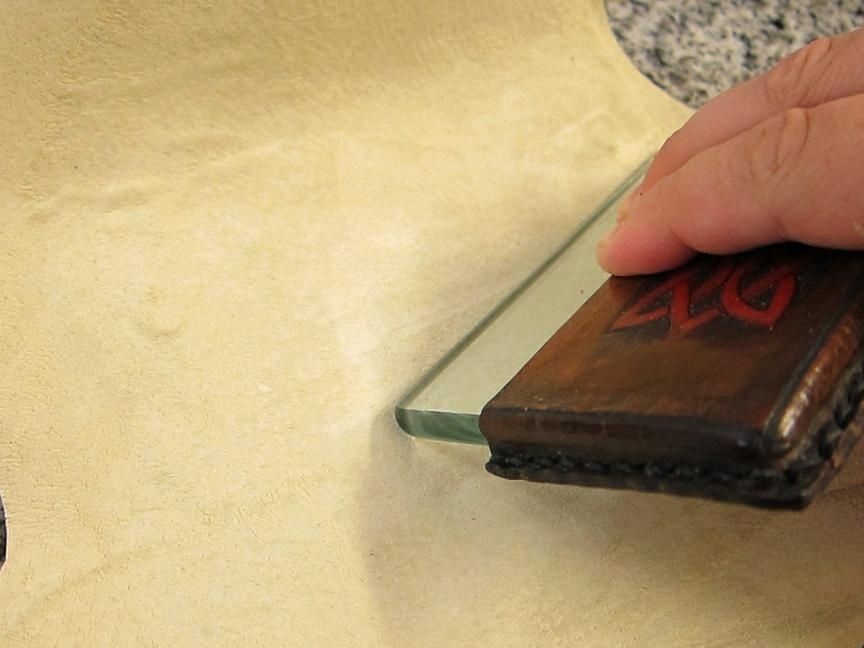
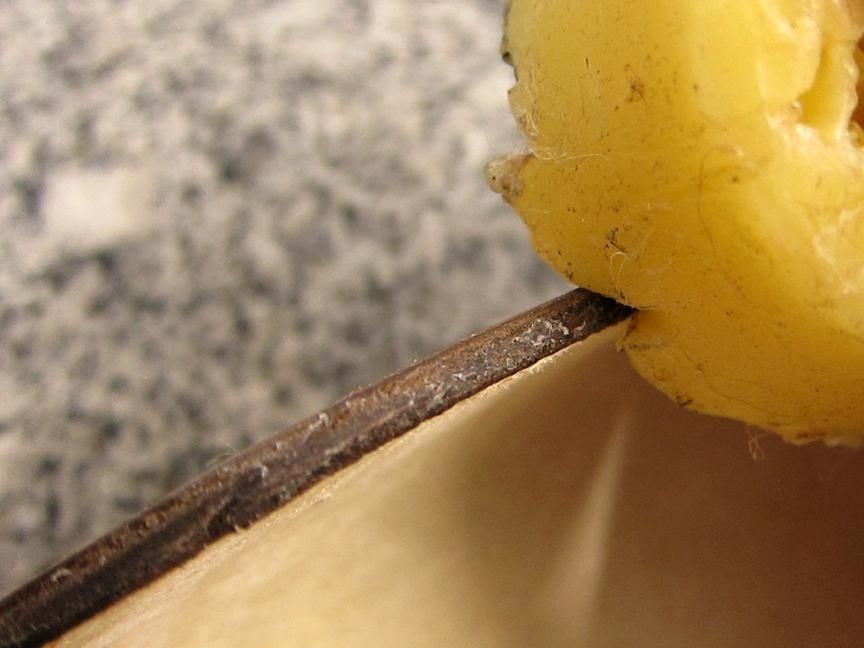
Use a round cutter to round off all slices.
Now, using sandpaper, we clean the edge, go from coarse to fine-grained, smooth sections should be obtained.
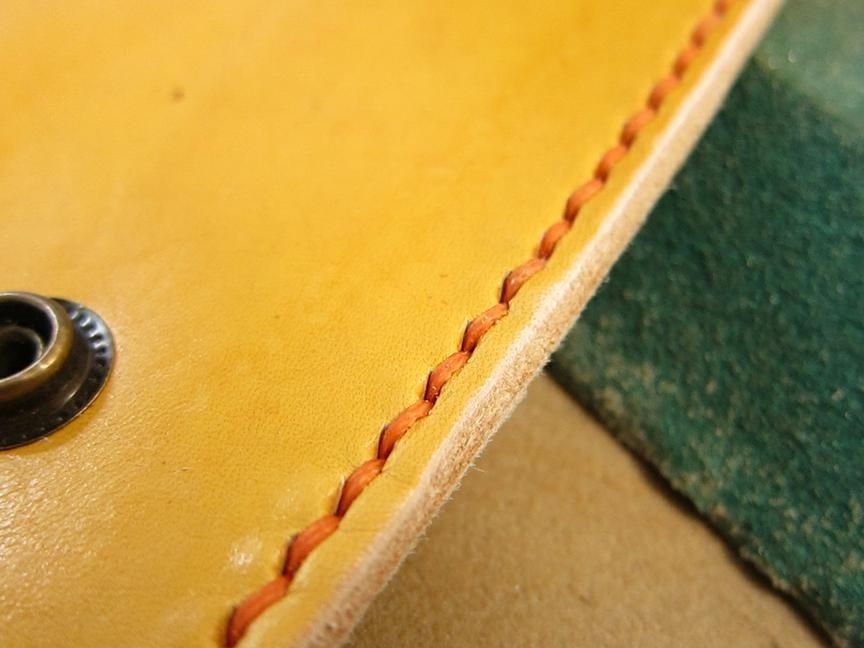
Next, paint the edges.
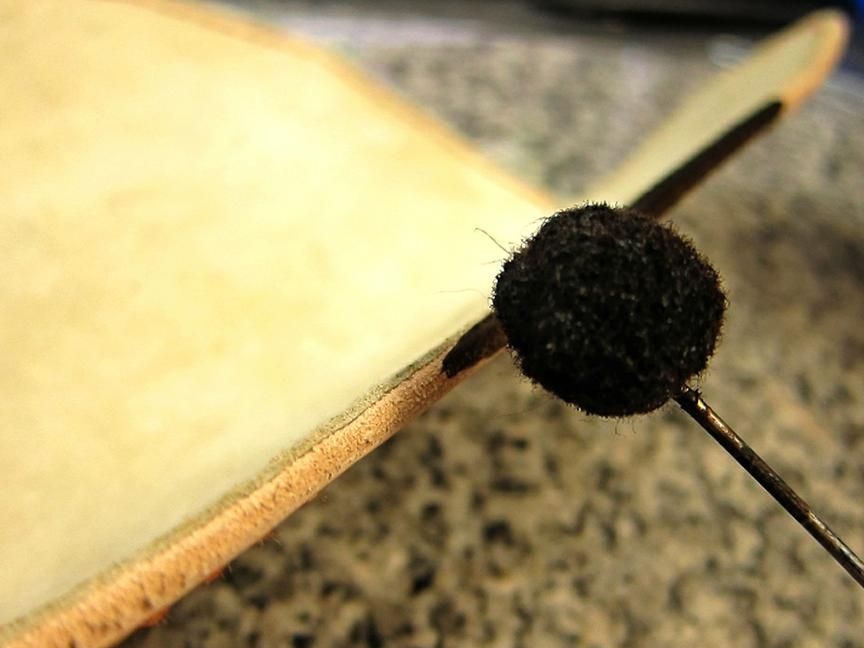
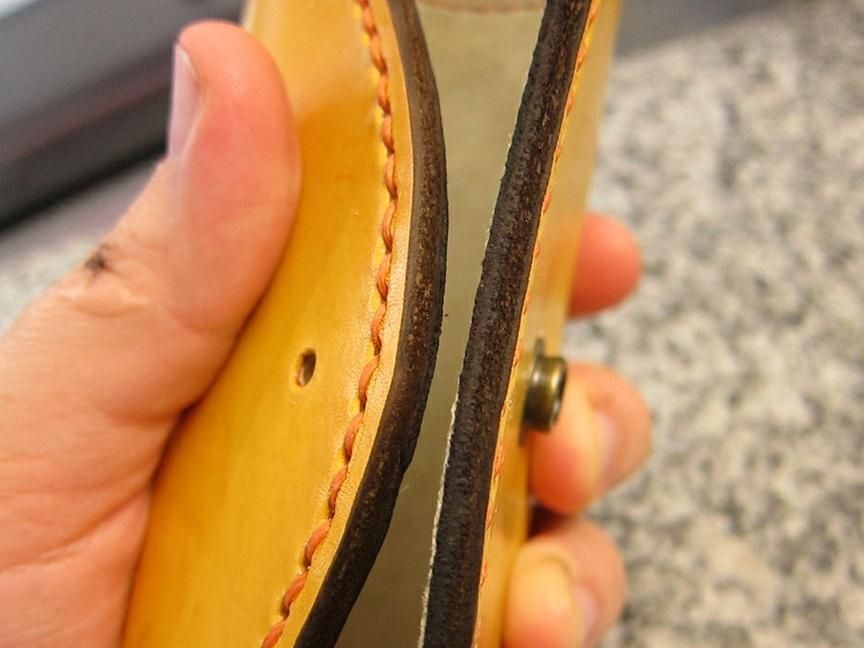
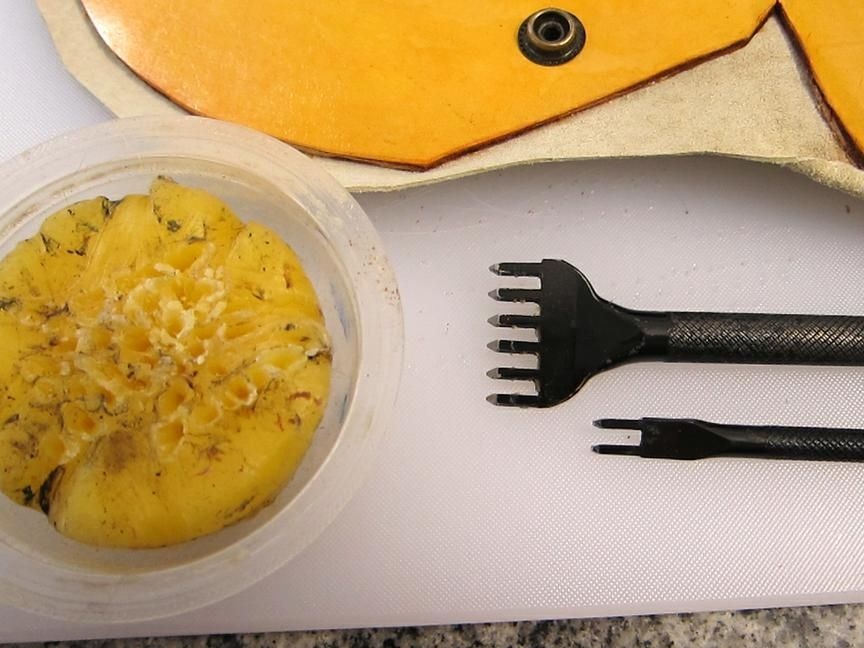
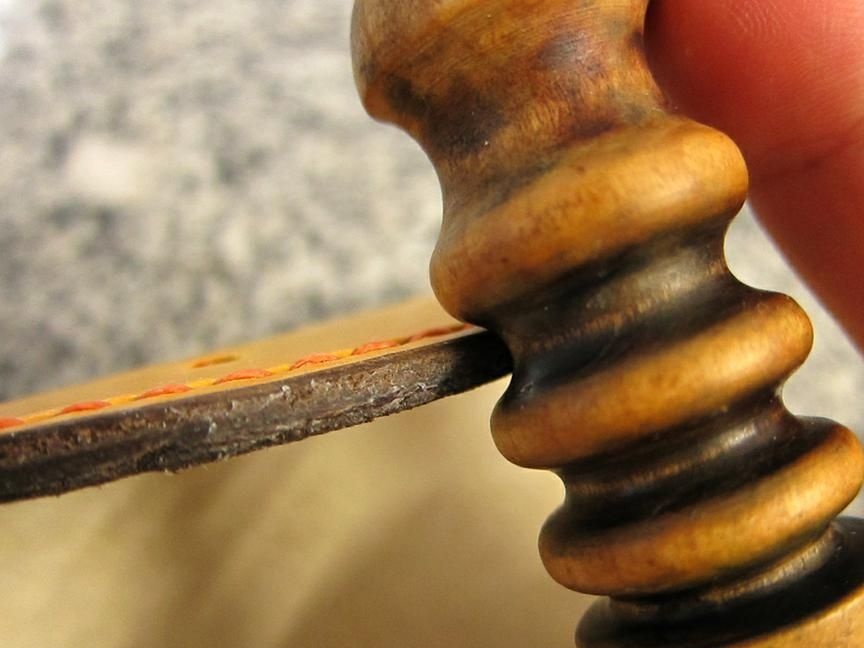
Let the paint dry, and then take pieces of wax and go through the slices. Then we take a special peg to polish the slices, and begin to polish over the wax.
Next, you need to install the remaining buttons.
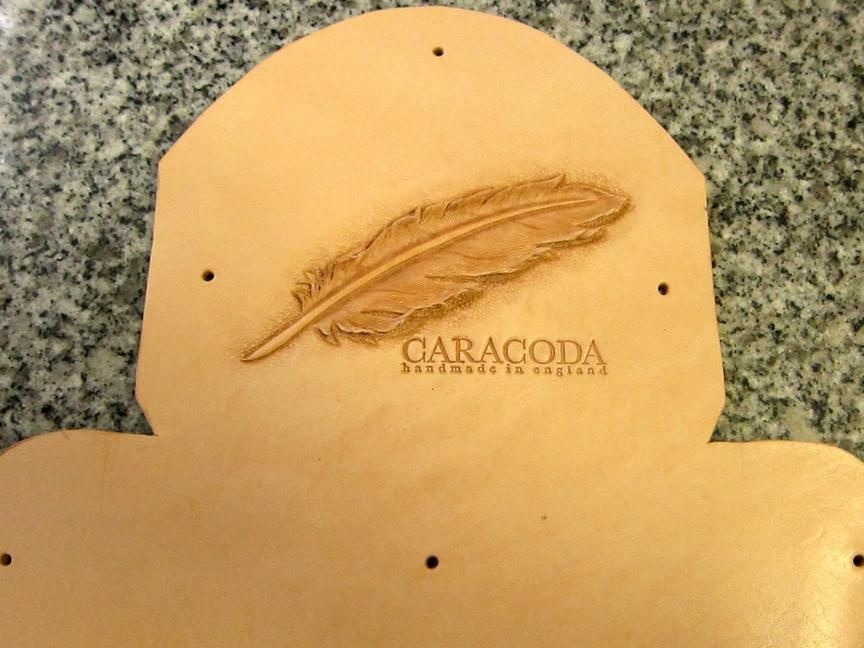
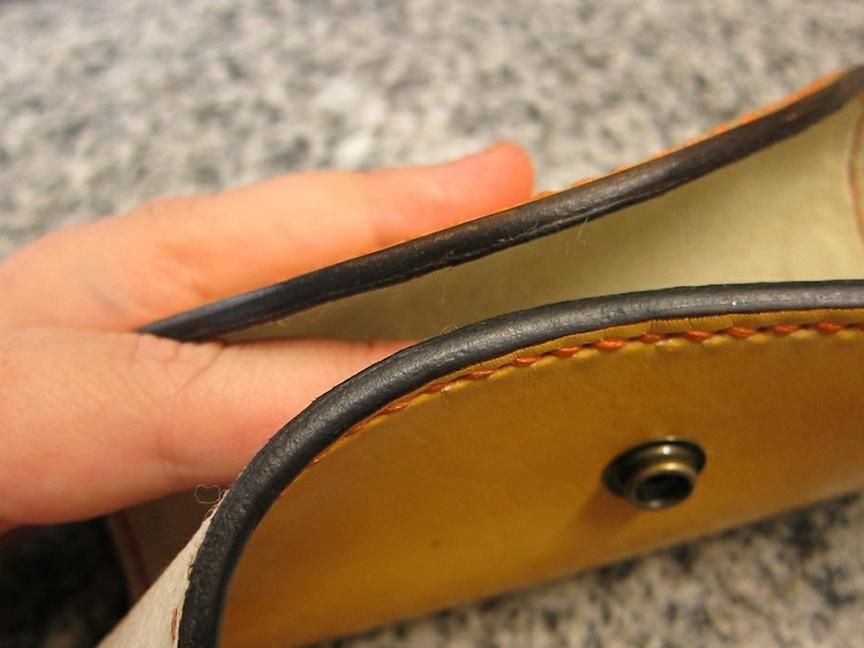
Now we fold the cover, and give it the final shape.
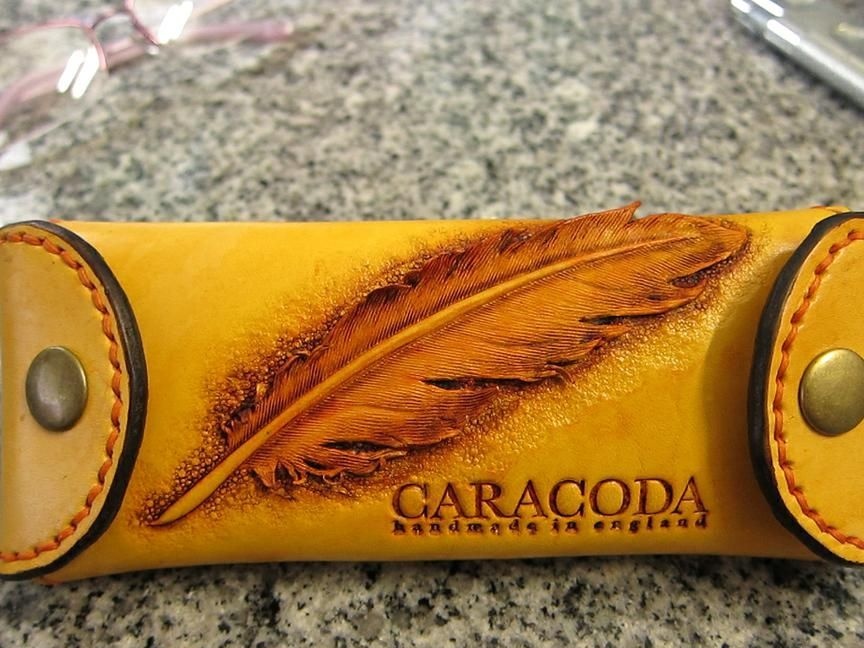
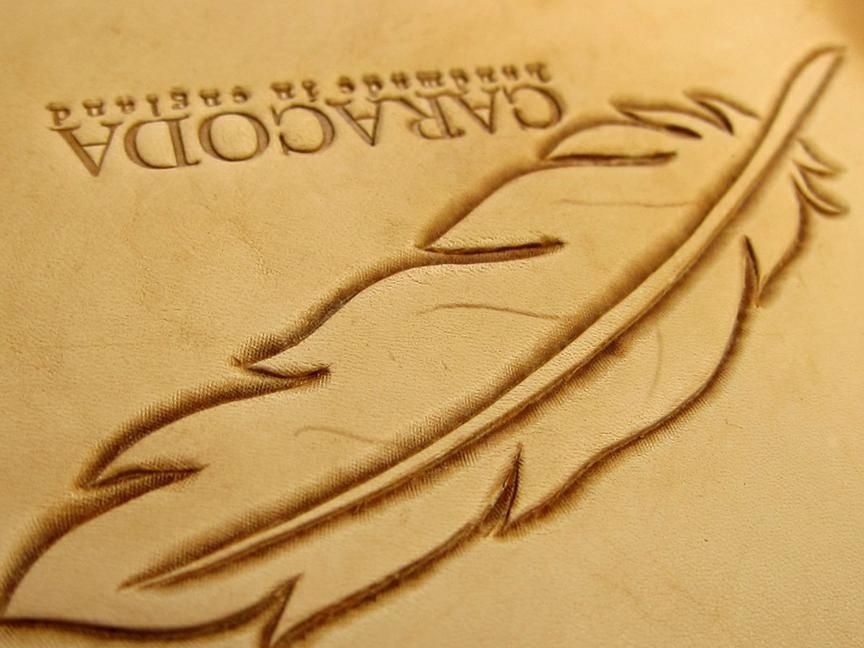
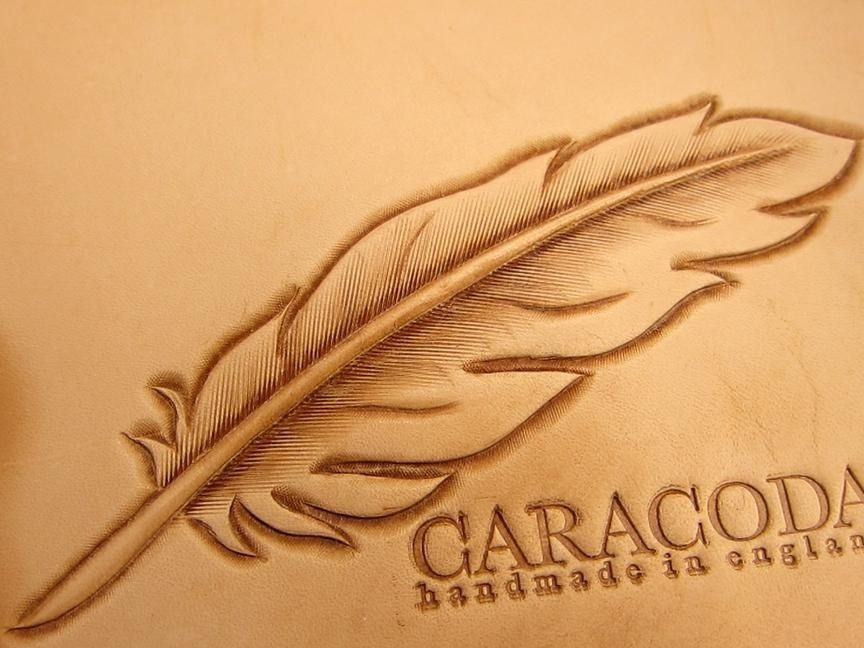
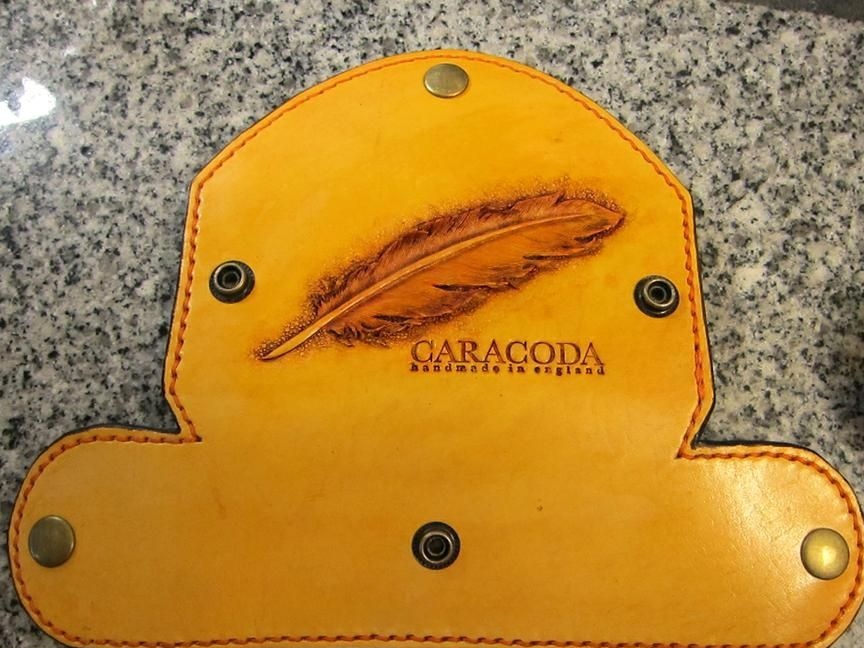
As a result of all the actions, we get such a beautiful case, which will serve as a case for glasses, or can be used as a pencil case for pens, and is also perfect as a gift.

Thank you all for your attention!