
Having a few beehives at home was always a dream of the author, so when he found a swarm in his area, he was really jubilant. Moreover, the bees were free, wild and there were a lot of them. He realized that it was an opportunity to create his own apiary, starting from the construction of beehives and ending with the assembly of equipment from scratch.
Unfortunately, his own hive of bees, which he stole from a neighboring site, collapsed, and 50,000 insects were left homeless. But, fortunately, to find a haven for lost bees, so a few days later they were attached to a cozy apiary in a nearby town.
But, this is not an online instruction for assembling hives, and the author cannot tell anything new about the latter, however, it is difficult to find enough information about making fumes with furs at home. This was the first (and most successful) equipment that he created and is ready to share with the amateur society. homemade.
The principle of the smoker's work is to pump air into a metal canister using bellows and to control the smoke from burning leaves and brushwood. The “fumigation” itself causes an instinctive reaction in the hive, as in forest fires: the bees attack the honey until they become sleepy. This makes them fairly flexible, so that you can interact with them with your hands, and eliminates bites and any aggression.
This design is based on the original design by Moses Quimbi, created in the 19th century, and is considered the standard bee smoker to this day.
DIY materials and tools
Instruments:
• Hacksaw / metal cutting scissors / gear cutting mill
• Hammer and anvil
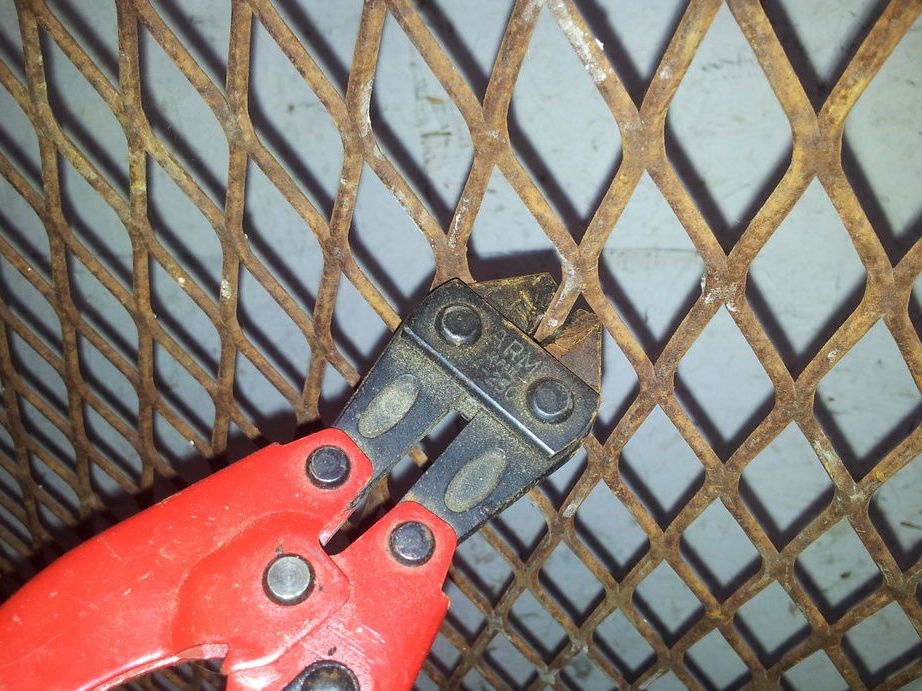
• Strong nippers
• sharp knife
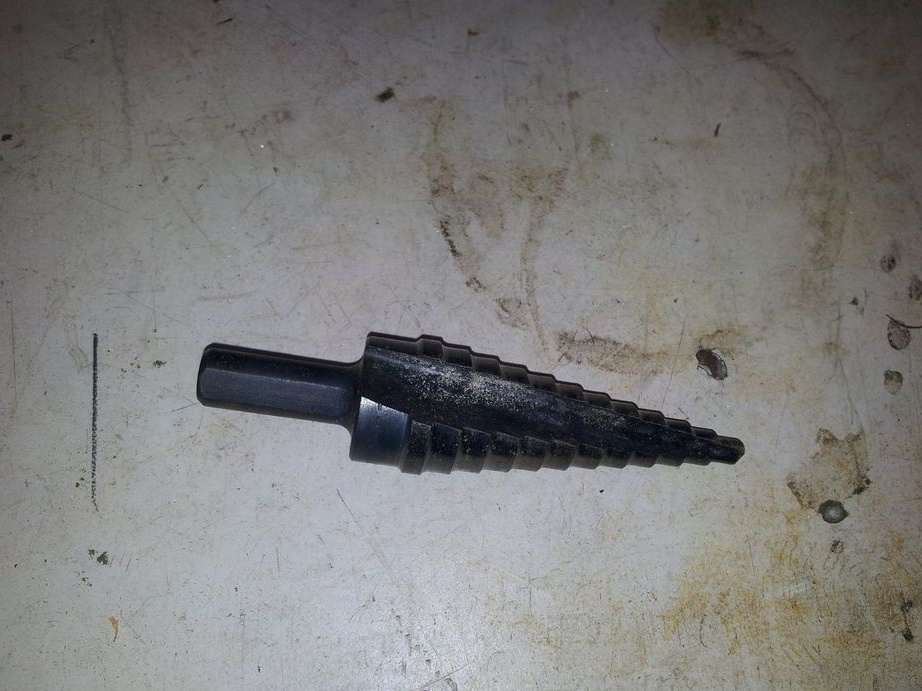
• Hammer drill
• drill bit
Materials:
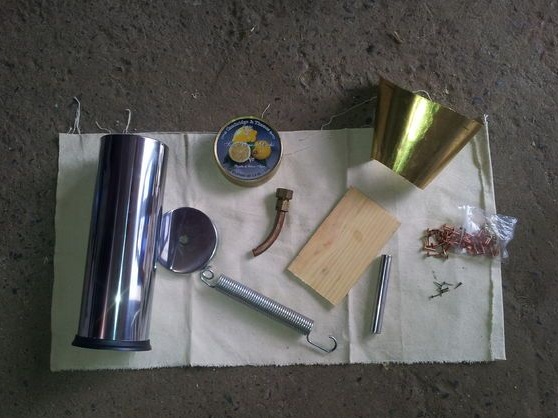
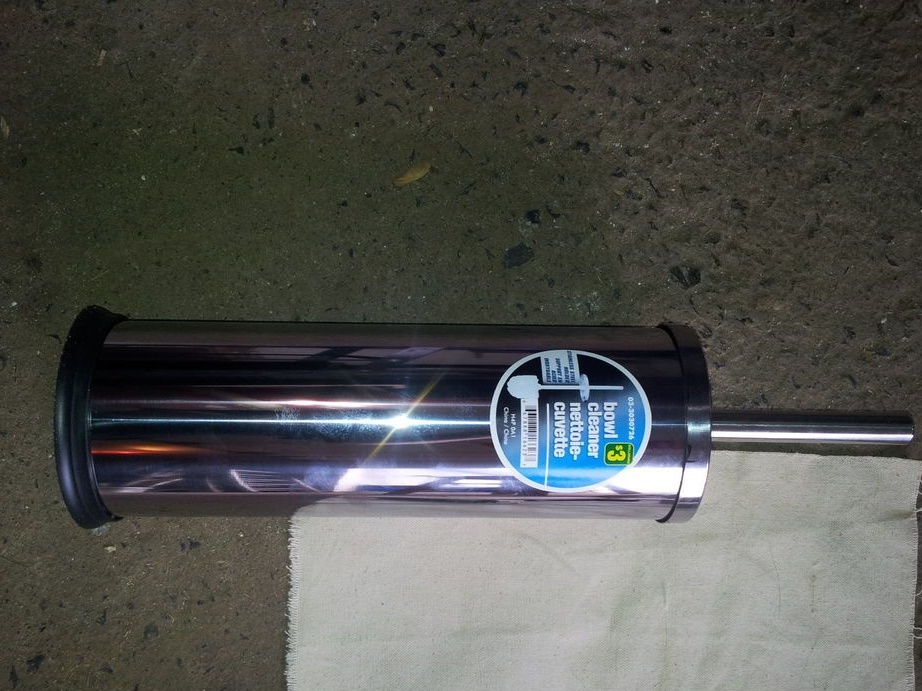
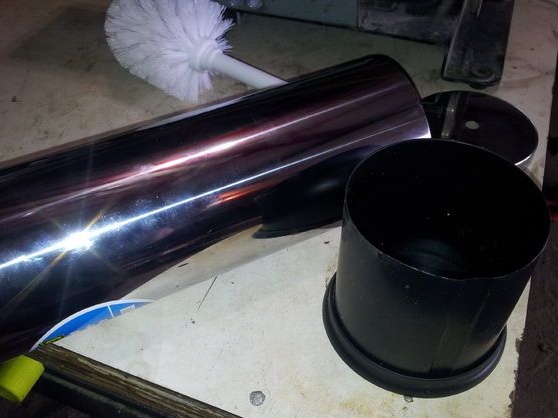
• Stainless steel toilet brush stand
• A piece of leather 1.2-16 mm thick
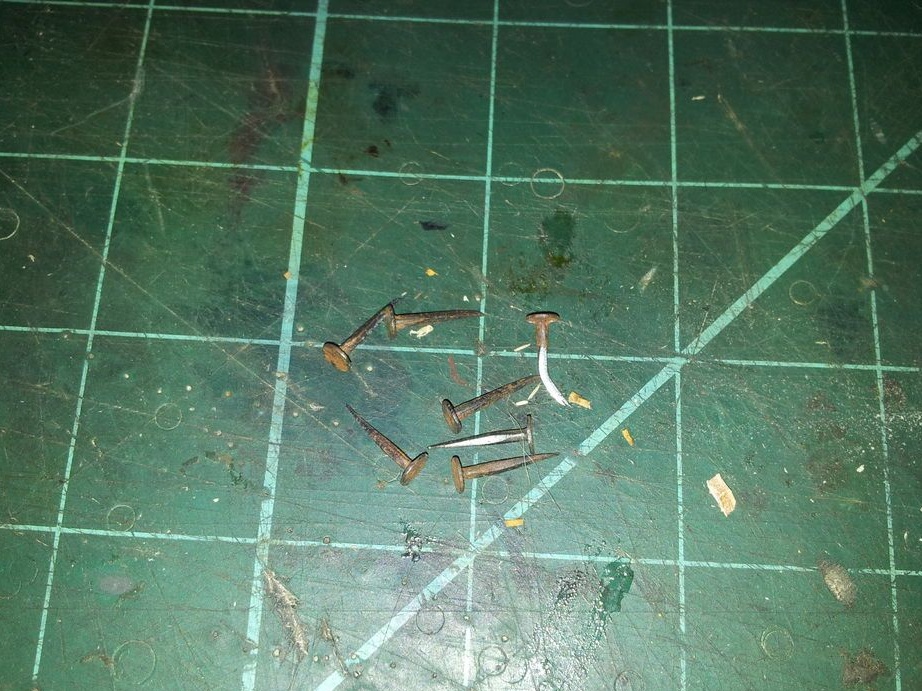
• Ship nails
• Brass sheet or branching copper pipe
• Empty candy jar
• Big spring
• Two pine planks 9x15x0.5 cm
• Copper rivets or bolts with nuts
• Self-tapping screws
• Art canvas / leather or other thick material
The process of making a smoker
Step 1: Cigarette Lighter
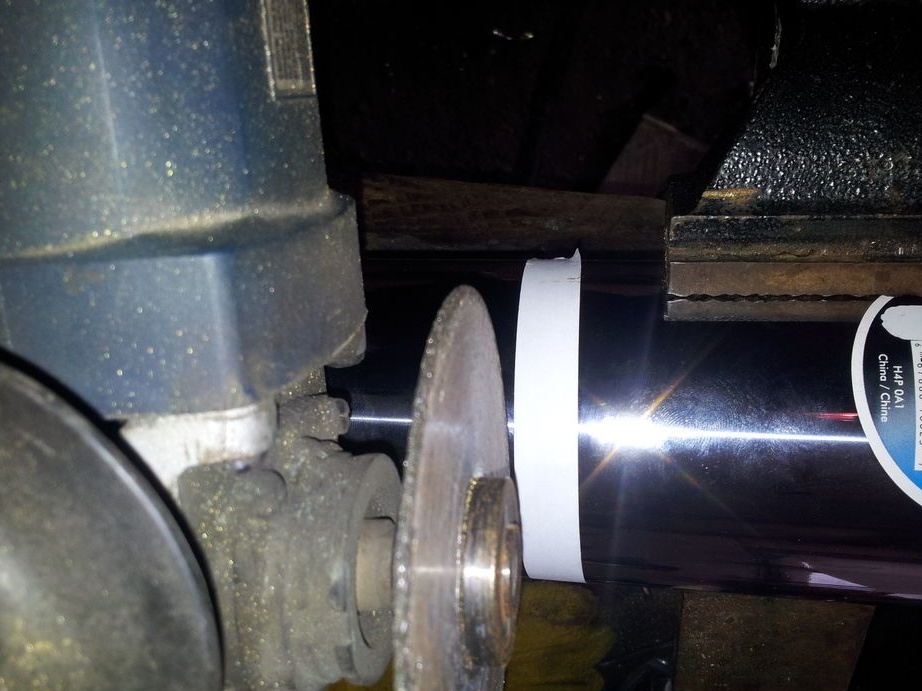
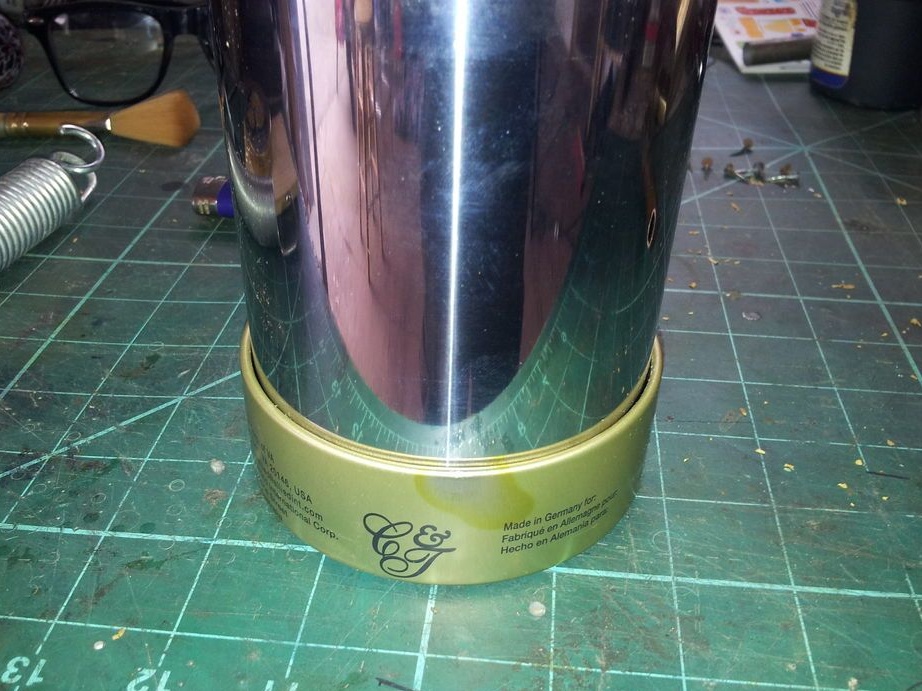
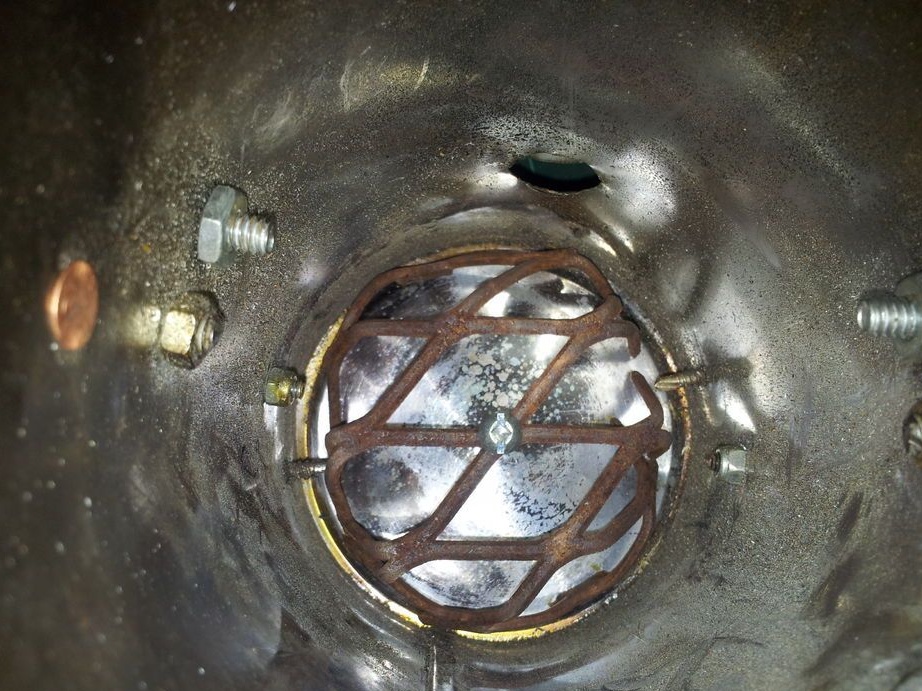
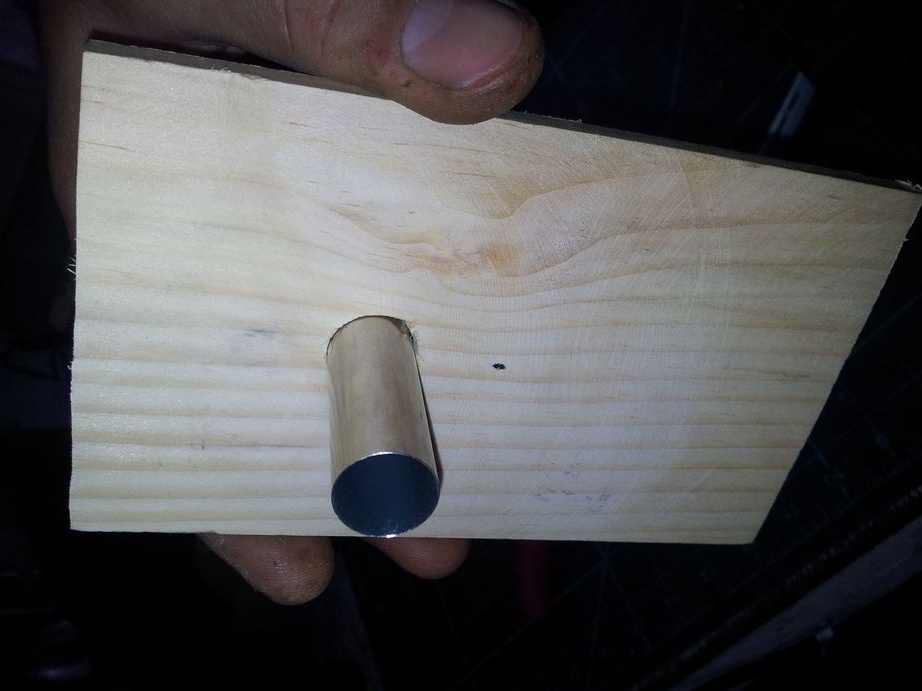
First of all, it is necessary to disassemble the can for the toilet brush and remove all plastic parts. There should be an empty stainless steel pipe. Using a saw / scissors for metal or gear cutting, you need to cut the pipe to a height of about 17-20 cm.When the pipe is shortened, you need to create the bottom of the candy jar. The author was lucky that the inner diameter of the jar and the outer diameter of the pipe were approximately the same, however, you can experiment with finding other metal objects of suitable size. When the bottom is found, it should be fixed with several screws.
Do not worry about the caramel residues in the bank. At the first ignition, everything will burn. It is only necessary to make sure that neither people nor bees inhale such smoke until it burns out completely.
It is necessary that an empty space forms between the bottom of the cigarette lighter and the ignition, so that the brushwood and leaves burn more evenly. This can be achieved if a circle is cut out of a metal mesh and bent at the edges, the author did not do this because he drilled a hole in the bottom and screwed the mesh, but this is not necessary. However, this can be useful when a hot piece of metal falls on the beekeeper when cleaning the fume.
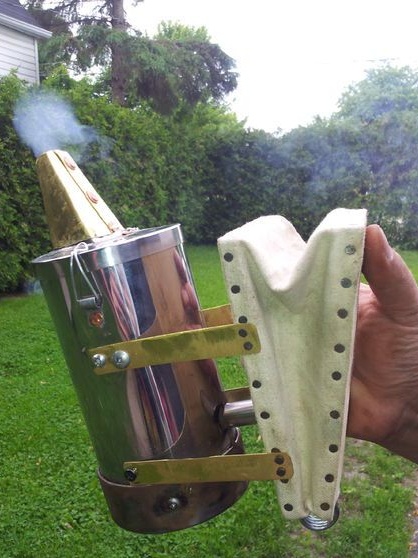
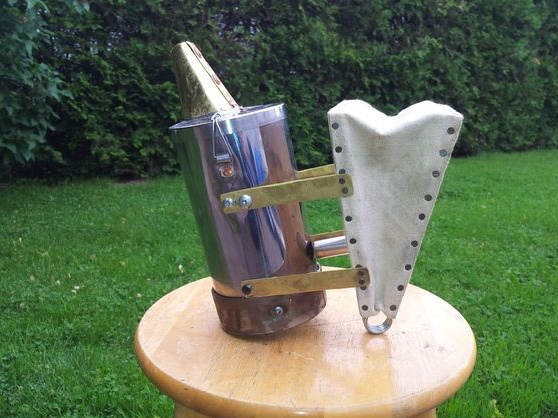
Step 2: Spout
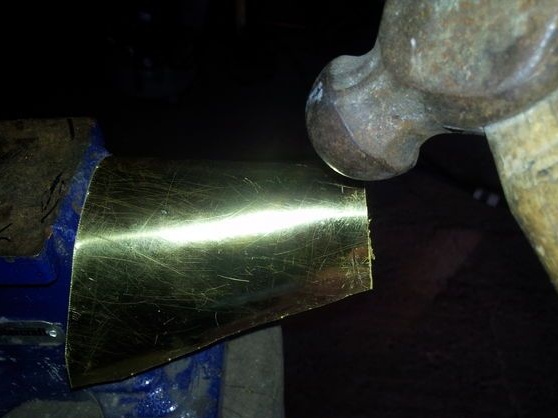
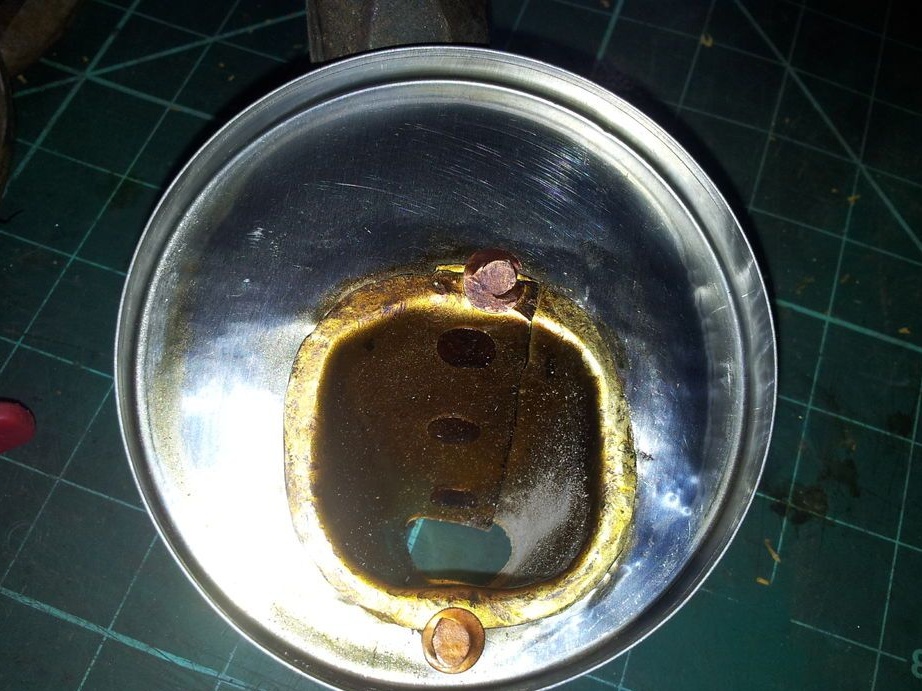
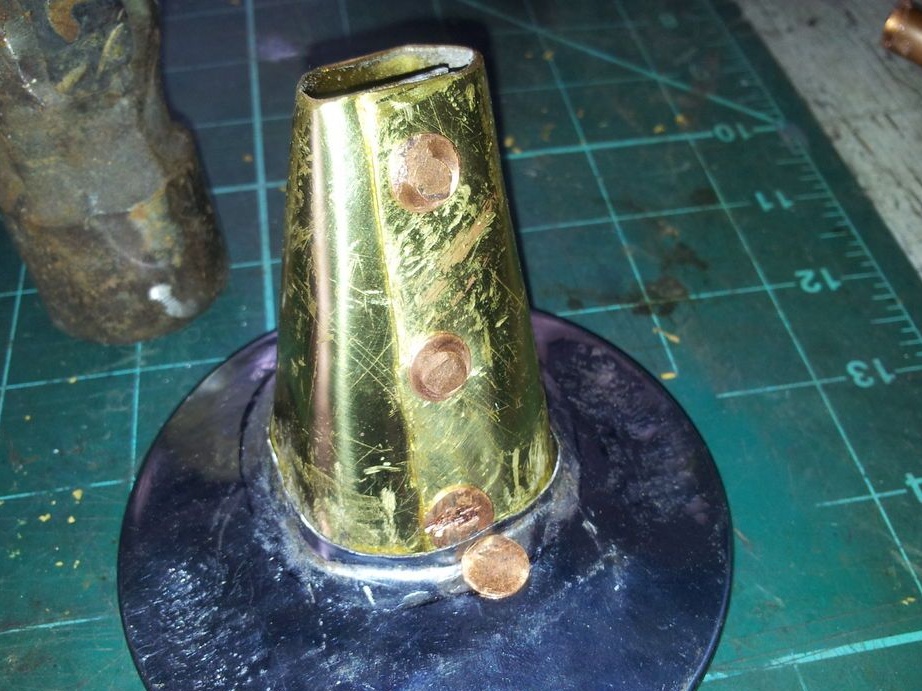
For his smoker, the author created a spout from a sheet of brass, but a sheet of any metal is suitable. The author carved it in the shape of a funnel and with a hammer drove it around the tail of the anvil, and then drilled holes and riveted it at the seams. He then hammered the bottom edge to attach the lid.
The cover was made from an old toilet brush cover. The author used metal scissors to expand the hole so that the funnel is firmly attached from the inside and then secured with rivets. The author bought 2 sets of a toilet brush to experiment and eventually created another nozzle from a curved copper pipe with a diameter of 1.2 cm. If you choose this path, it is better to choose a pipe diameter of at least 2.4 cm.
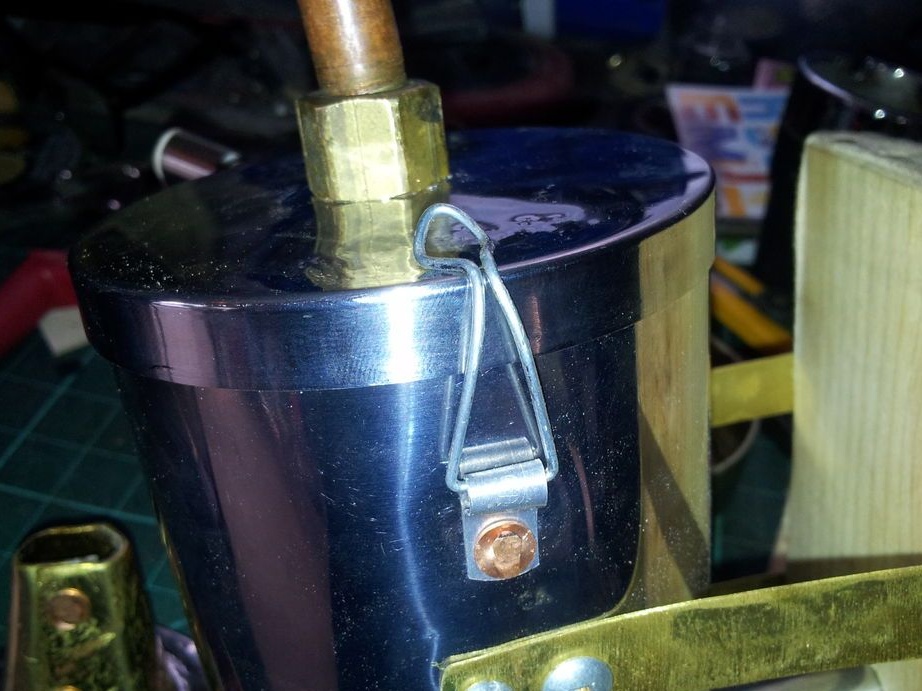
To attach the lid to the cigarette lighter, the author made a couple of clip-latches, which he attached on both sides of the smoker and snapped onto the lid. Thanks to this, the smoker quickly opens to ignite and add fuel.
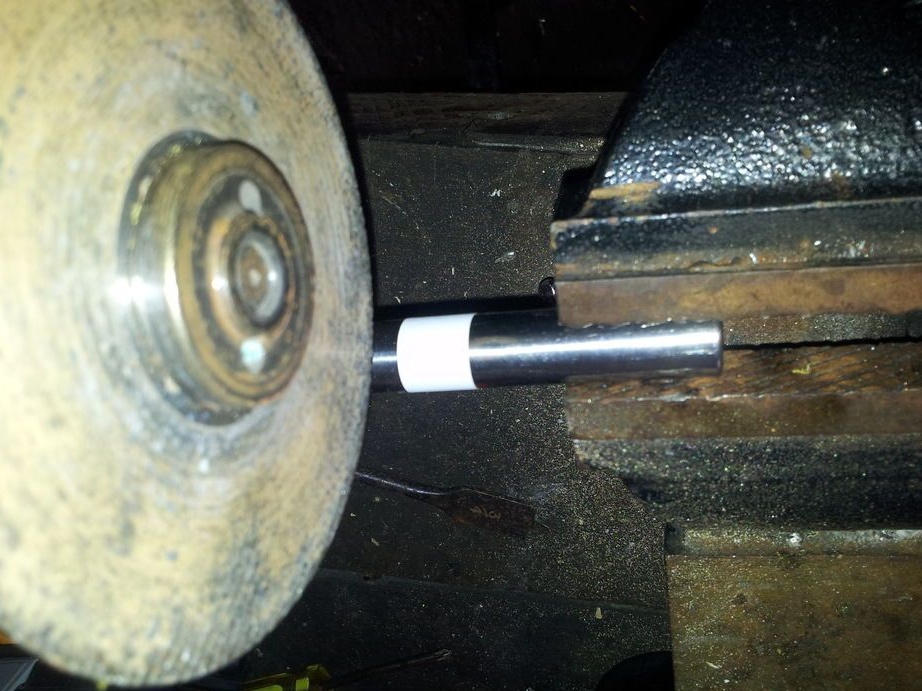
When the latches were ready, the author cleaned up the excess with a polishing disc, but it is not necessary to make the smoker very beautiful and neat, because it will still heat up. In addition, secondary materials are taken as a basis. However, a little product still loses its appearance of homemade products.
** Attention ** if there are no rivets at hand, you can use self-tapping screws or small bolts and nuts.
Step 3: Frame for bellows
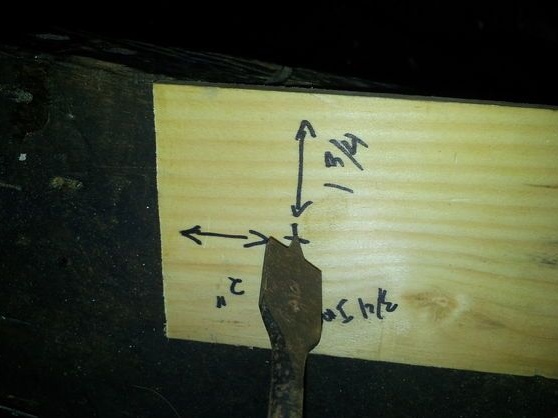
Fur is an ingenious invention that launches air through a one-way valve, and an outlet valve that releases air only works when the bellows are compressed. In one of the boards 9x15x0.5 cm, the author drilled a hole 1.5 cm in diameter 5 cm from the base. Then, he nailed on top of a piece of skin. This cover will be on the inside of the bellows and will act as a one-way valve that lets in air, but does not allow it to go outside.
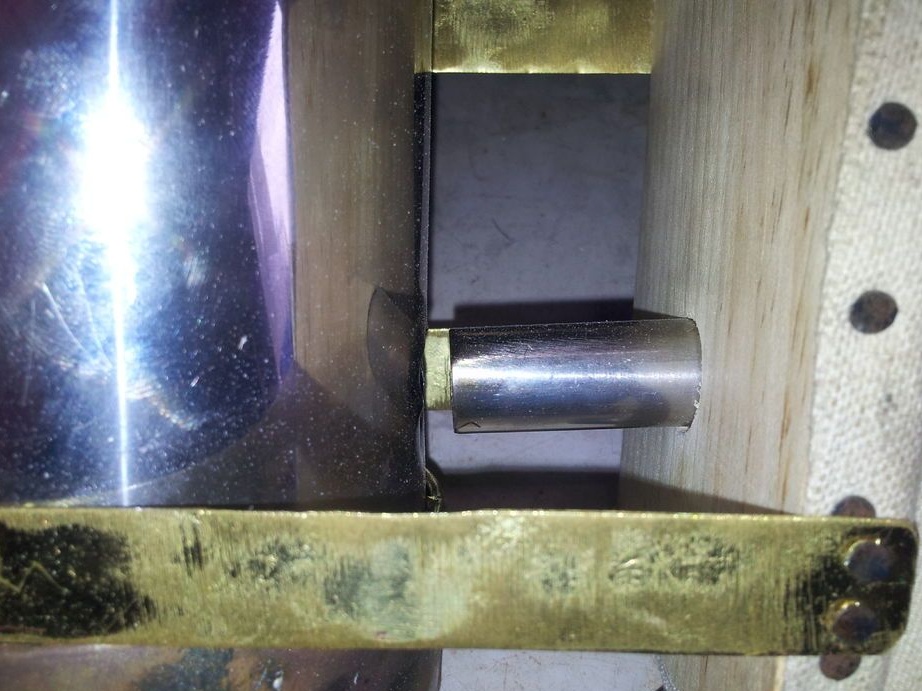
In another plank, he drilled a hole 1.2 cm 3.8 cm from the base. Then he took a metal pipe, previously acting as a toilet brush handle, and inserted it into the hole. The tube has an extension on one side, so you don’t have to worry that it will fall out. You can add a little glue around the edges to finally prevent it from falling out.
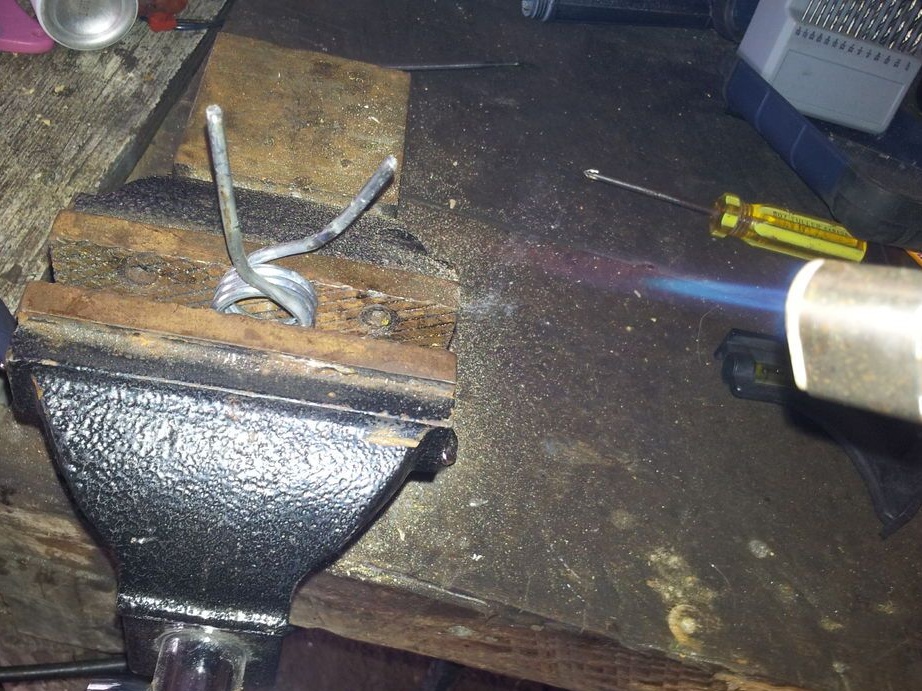
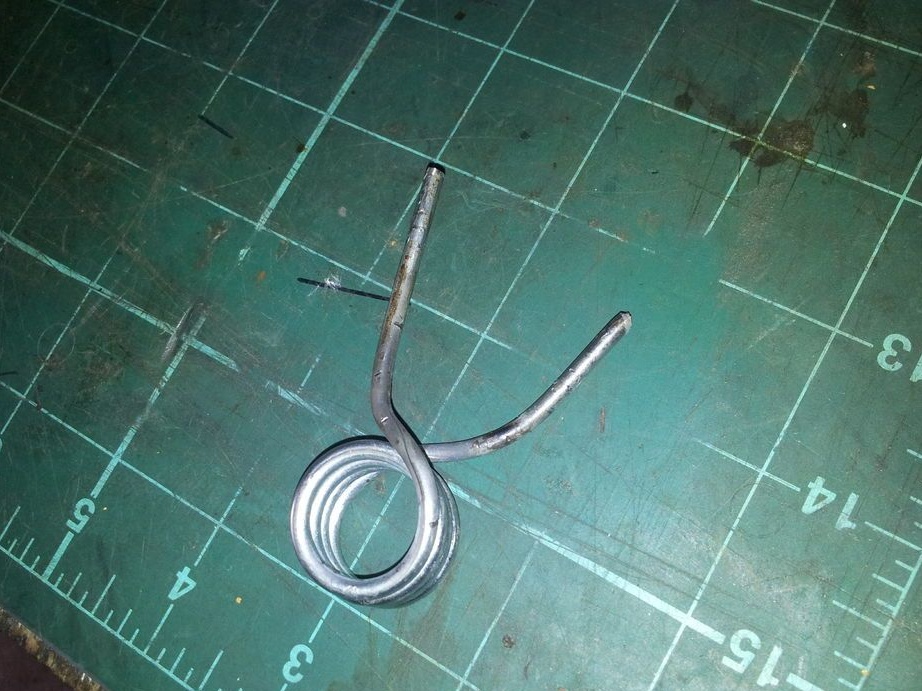
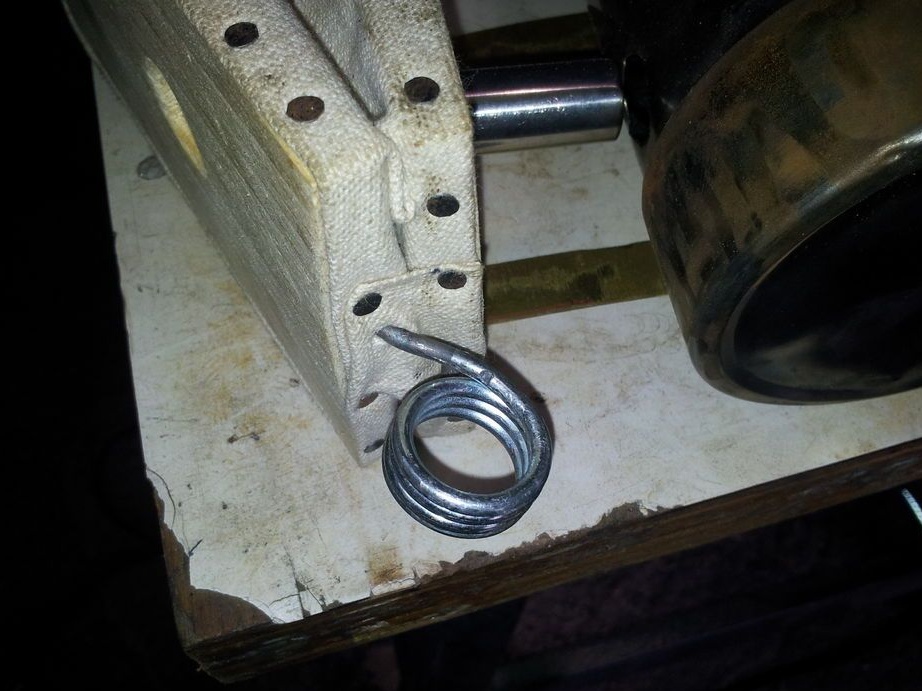
The spring allows you to handle the bellows with one hand, returning them to the open position, so that effort is required only to compress the bellows. First, the author cut off several turns from the spring, heated the ends with a burner and straightened them. He then drilled small holes at different ends of the boards so that the spring branches entered them. The last photo of the next step shows how the spring should be fixed in the board.
** attention ** do not insert a spring before wearing a bellows cloth.
Step 4: Cloth Furs

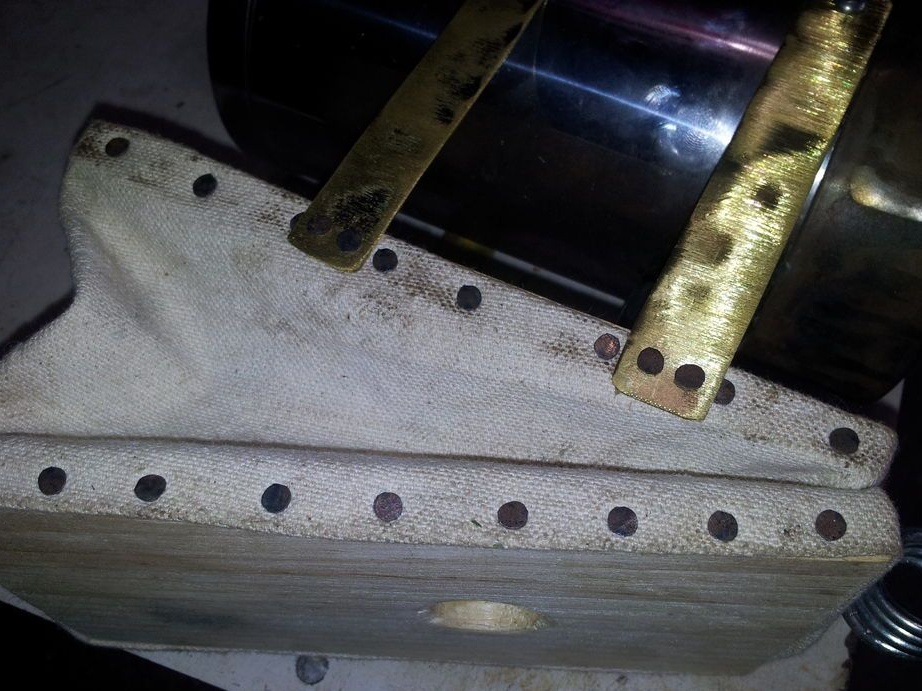
Ideally, leather will be the best material for furs, but a thick canvas or other thick material is also suitable.
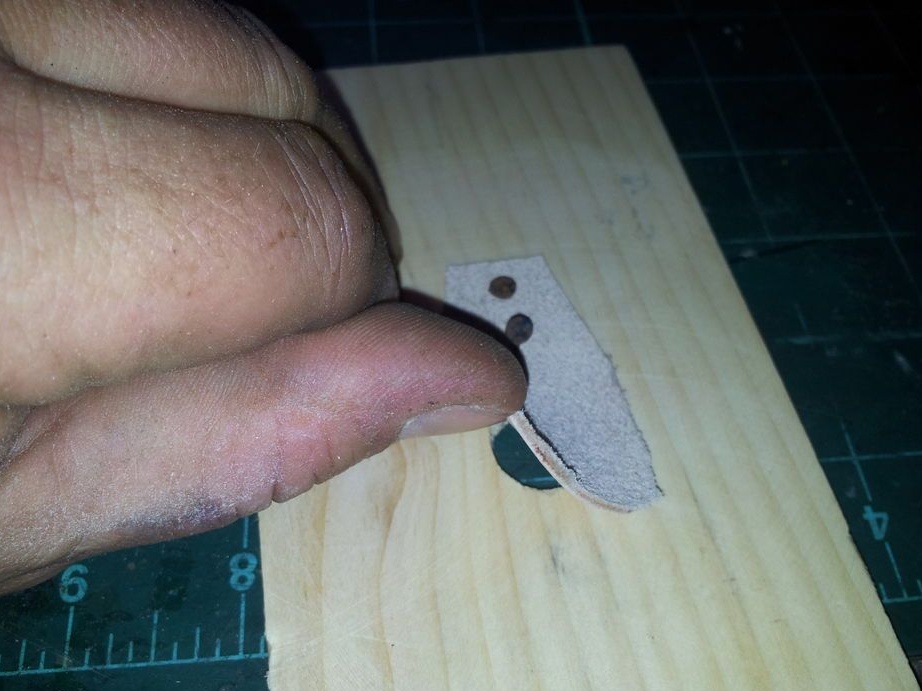
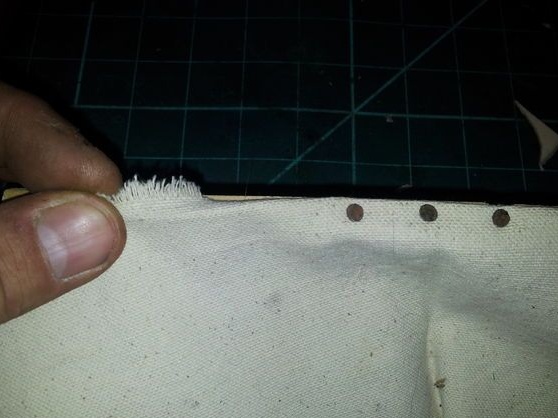
First of all, the author cuts a piece of canvas 50 cm long and 10 cm wide. Then he sharpens 3.5 cm from each edge, thus obtaining the shape of an elongated diamond. It is important that in the middle there is approximately 8 cm of canvas 10 cm wide. This will be the top of the bellows, and it should remain flat.After trimming the fabric, the author cut the ends so that they did not wear out, then attached them to the edges of the frame with furniture rivets at a distance of 1.2 cm from each other.
When the edges of the fabric were fixed, the author installed a spring. Each edge of the spring was only 3.5 cm in length, so it was enough just to stick them into the holes without additional fastening.
Step 5: Combine the Furs and the Fumigator
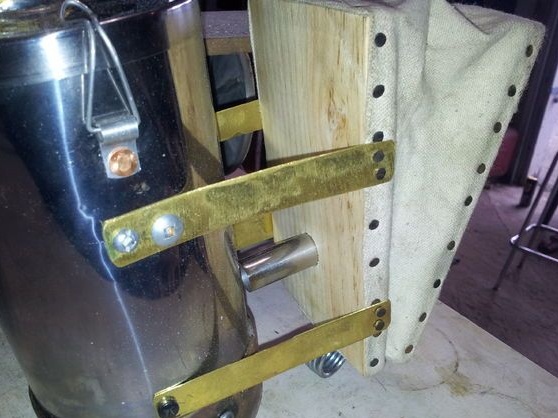
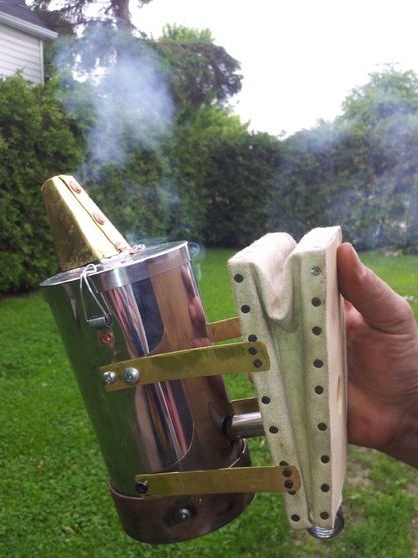
As compounds, the author used brass strips 2 cm wide, attaching them with buttons at one end to the outside of the bellows, and the other screwing them to the sides of the fumigator. Fur should be exactly 3.8 cm from the metal body.
As you can see in the images, the outer part of the bellows is not connected directly to the cigarette lighter and they are separated by about 3.5 cm. This prevents the ash and sparks from getting onto the bellows and setting them on fire.
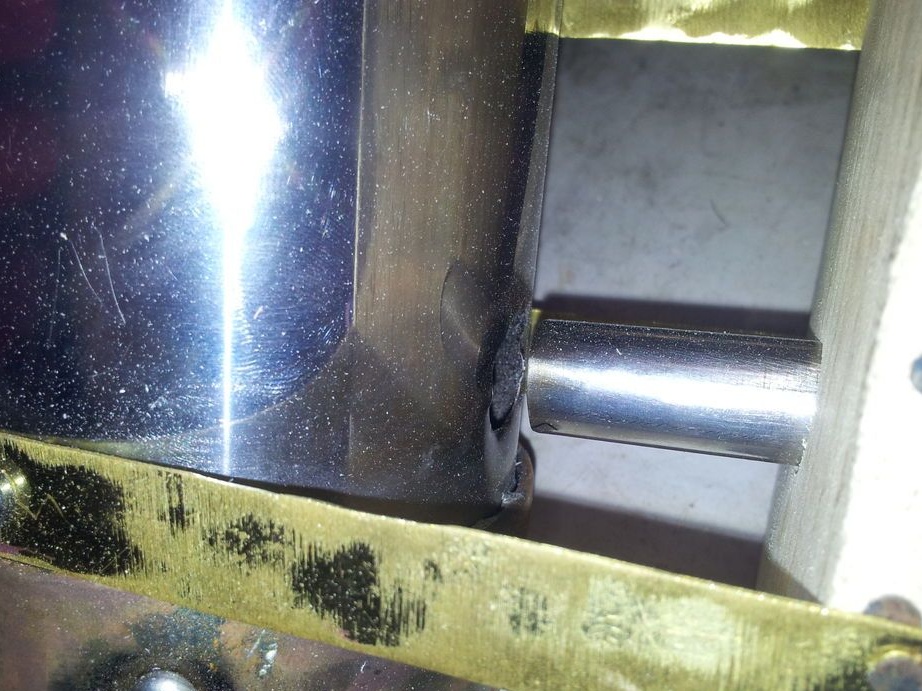
Then the author punches a hole in the cigarette lighter with a chisel. It should be exactly 1.2 cm in diameter and 6.3 cm from the bottom. The outlet tube extends into the bellows by about 3 cm, and the bellows are screwed to the metal body using brass strips.
It is important to make sure that there are no gaps between the bellows and the cigarette lighter and nothing hangs, as the outlet pipe should fit snugly against the hole in the metal case.
Step 6: Test Mechs Drive
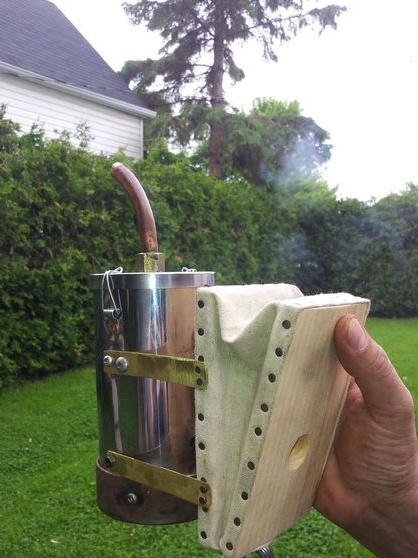
The author opens the lid and fills the cigarette with leaves, moss and brushwood from the ground, rams them, but not too tightly so as not to block the air circulation. Then, with a lighter or burner, he sets fire to dry leaves and makes sure that the fire is engaged. Once the burning has begun, it returns the lid to its place. If desired, you can add a little green material, such as grass, to increase the amount of smoke.
Closing the lid will cause the fire to break out, but the dry debris must smolder and continue to burn, creating a huge amount of smoke. During the test, a full cigarette lighter burned out in exactly 20 minutes, and a new ignition was required. The author recommends periodically pumping up furs, even when smoke is not needed to maintain fire.
Step 7: Done
That's all. The ability to create your own smoke house for a personal apiary was a fantastic experience for the author. Once there was no special equipment for beekeepers, and they had to invent their own tricks for breeding bees. This is not just saving money, but the ability to do something closely related to a hobby do it yourself and to know that if successful, the merit belongs exclusively to the creator.
Thanks for attention!