
Dear site visitors. From the material presented by the author, you will learn how do it yourself it is possible to lay down a fireplace in a two-story house, and the second floor will also be heated from the same stove.
Laying the stove, even the simplest one, requires attention, diligence and hard work, because it is a complex and painstaking task. But having studied the photo report, much will become clear to you and you will be able to lay down a similar oven for yourself.
Professional stove-makers strongly recommend to beginners !!! First, try to fold the oven without a solution (dry) in order to learn from your mistakes and not to be allowed in real masonry! Everything is within the power of man, the main thing would be desire and you will succeed!
And so, let's take a closer look at all the stages of construction and figure out what the author needed to create this fireplace stove?
Materials
1. red ceramic brick
2. fireclay refractory brick
3. red clay
4. river sand
5. roofing material
6. metal corner
7. grate
8. gate valves
9. stove doors
10. Ashpit
11. carbon black
12. wire
13. sheet metal
Instruments
1. trowel
2. trowel
3. putty knife
4. Bulgarian
5. stone diamond blades
6. corner
7. plumb
8. ruler
9. level
10. mallet
11. hammer
12. solution container
13. drill
The process of building a fireplace stove with your own hands.
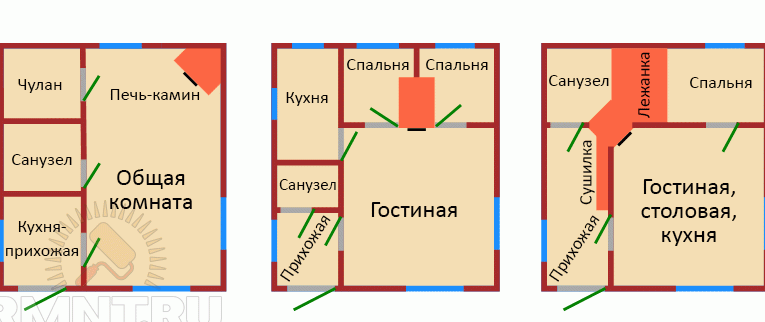
And so, the first thing to do is to determine the location of the future stove, since this stove will heat 2 floors, it is expedient and easier to put it in the middle of the room.
Basically, the stoves in the houses are located in the center of the hut, so our grandfathers and great-grandfathers built. But still, the location depends on the design of the house itself, as well as the layout of the rooms.
For example, fireplaces are built mainly along the wall, or in the corner, and in this case the stove is combined and the option “middle” was chosen. Also, the author offers layouts of stoves.
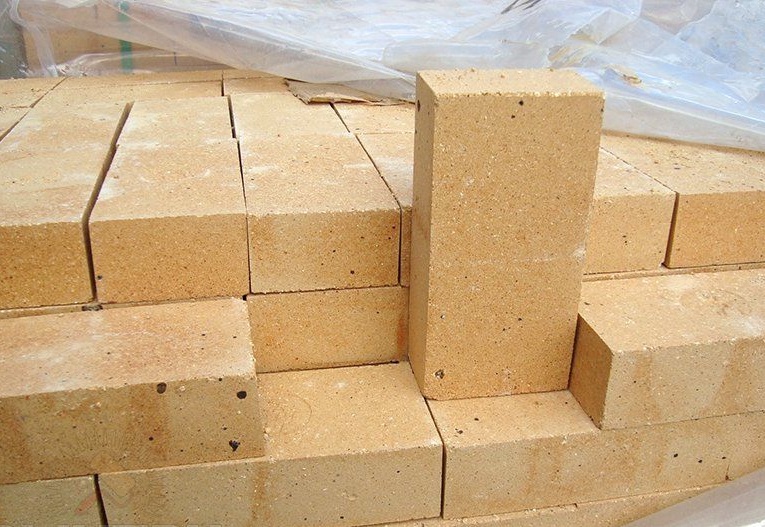
For masonry, you should immediately determine the brick and its quality. As a rule, stoves are laid out of red ceramic full-bodied bricks, but it is advisable to put the internal combustion chamber from fireclay refractory bricks, it has such a yellowish color and tolerates high temperatures well.
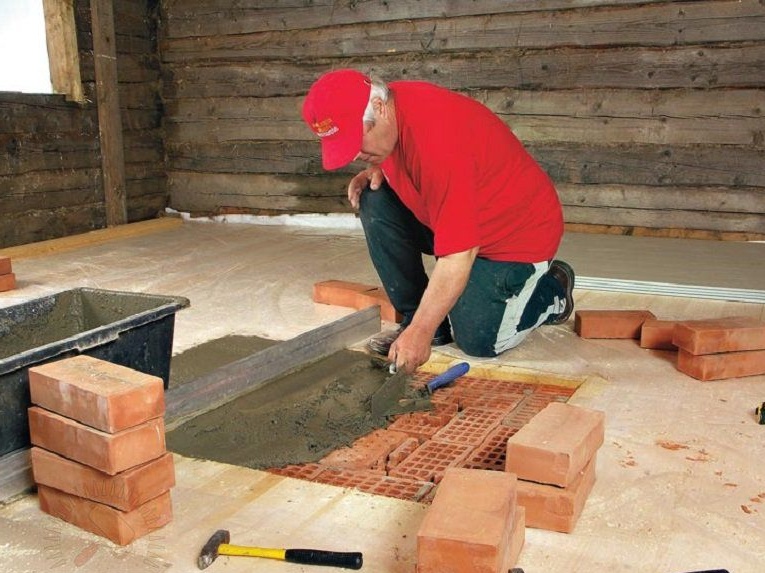
The basis of the fundamentals is directly the arrangement of the foundation, the best is concrete poured into the formwork, larger than the furnace. For example, when stoves were built in villages, oak logs or hemp were used as the foundation.Now things are going well with the materials, you can afford a solid and solid foundation. As relies on the foundation foundation, insulation in the form of roofing material is laid.
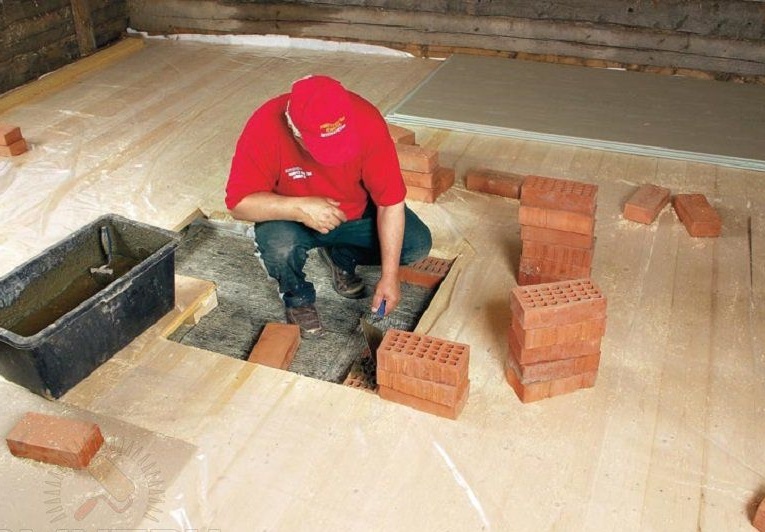
The lower part of the brickwork will be laid on the cement mortar. But only before the beginning of the furnace !!!

As we can see in the photo, the master uses a hollow red brick and generously fills it with cement mortar.
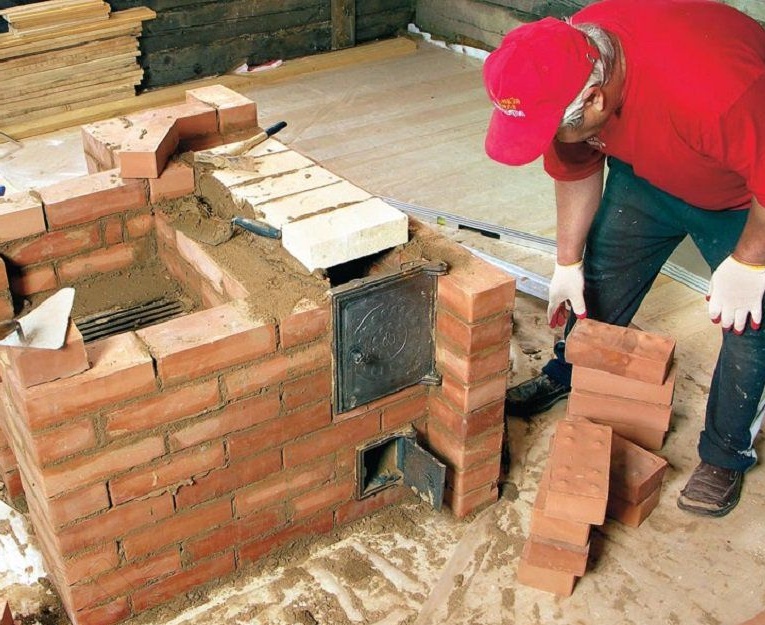
Then the author proceeds with the laying of the walls of the furnace.
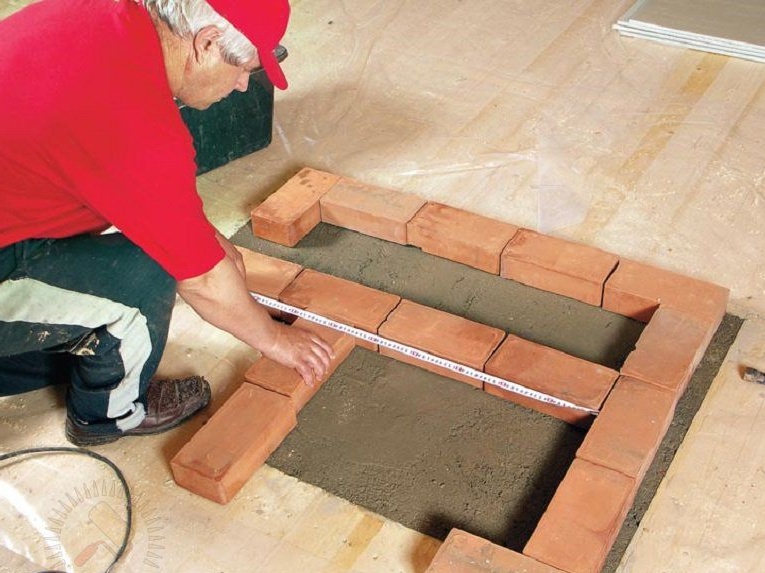
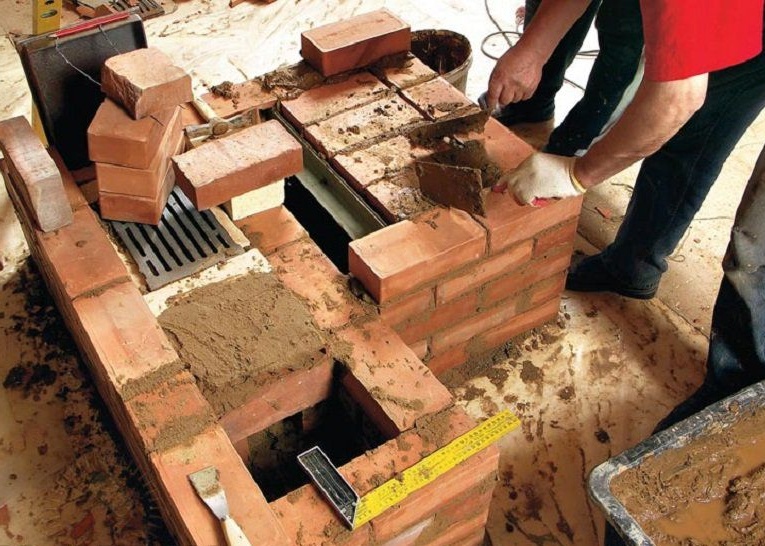
Since the stove will be combined with the fireplace, the corresponding base is also divided into a fireplace and a firebox.
Accuracy plays an important role in the masonry, and each row is placed according to the damage, strictly from the corner.

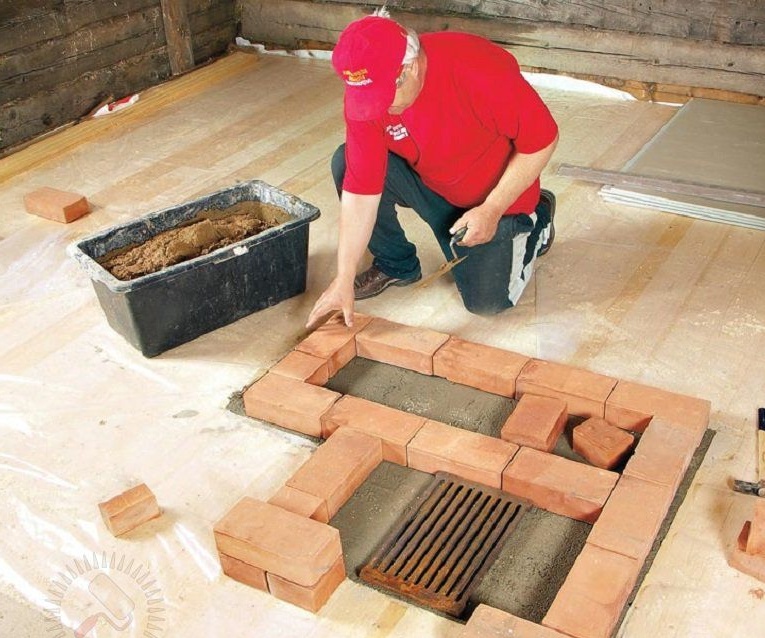
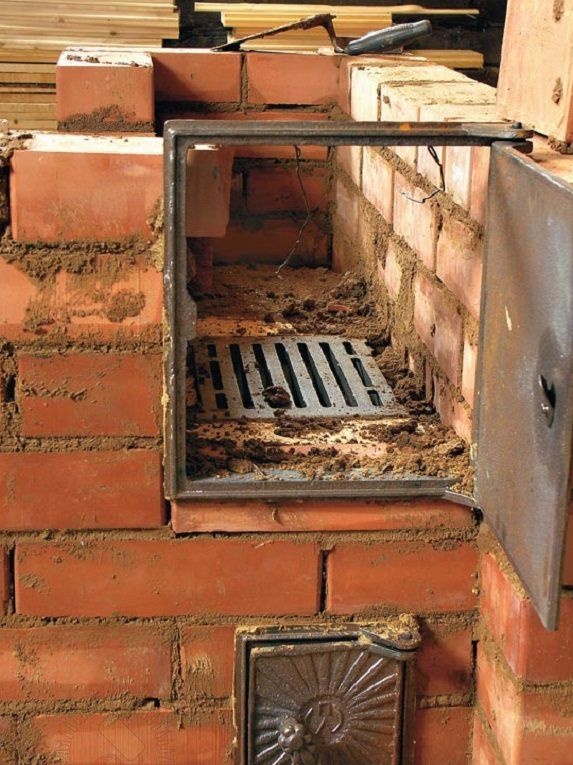
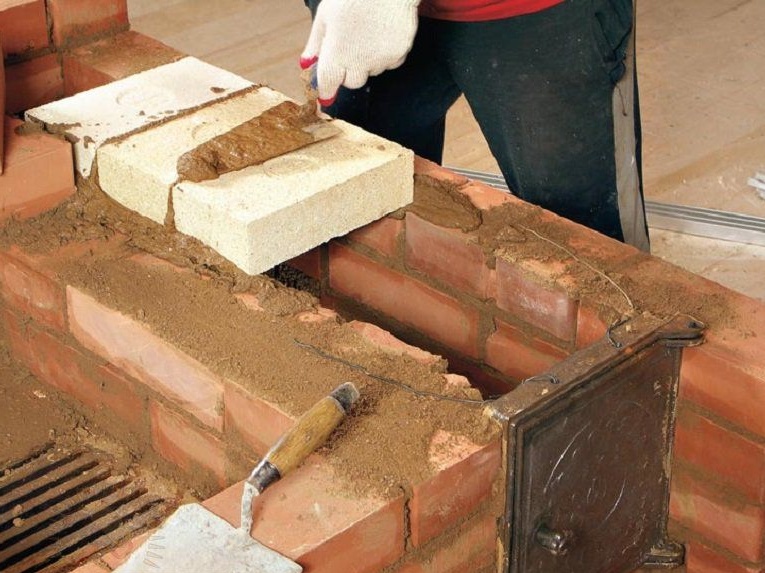
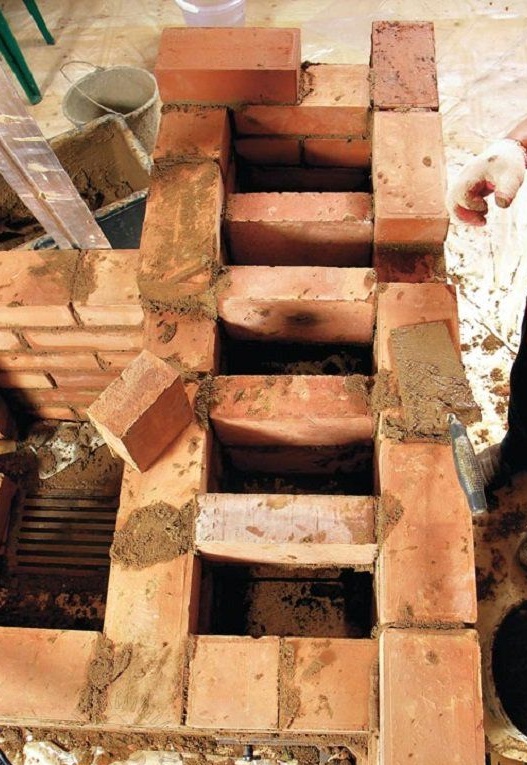
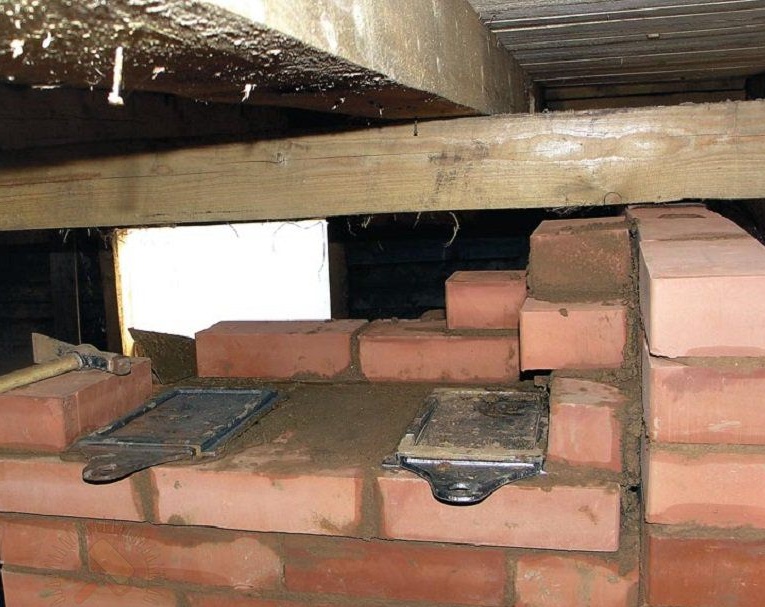
The door of the ash chamber is installed, it also plays the role of blowing fresh air into the furnace.
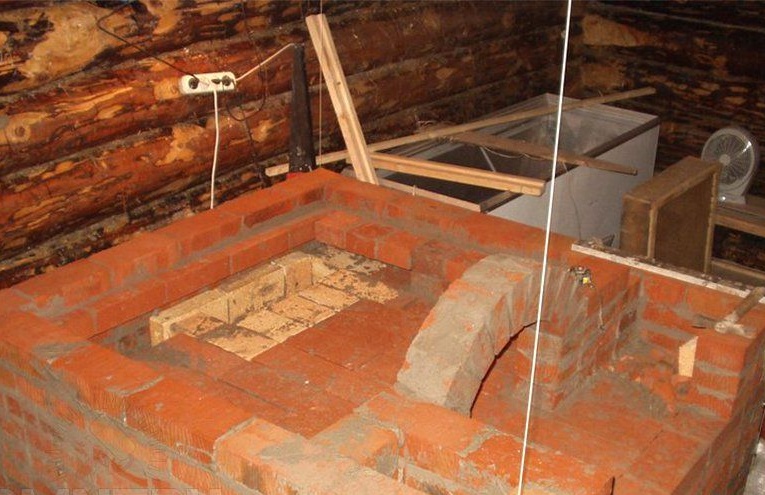
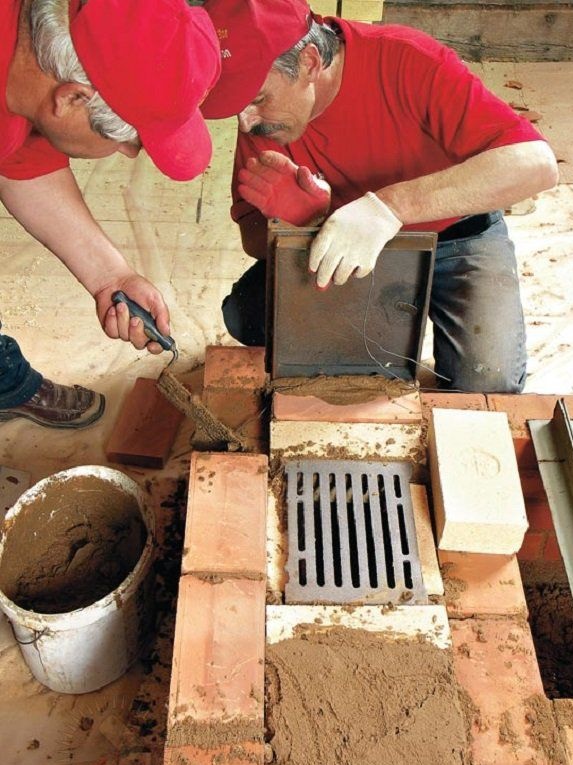
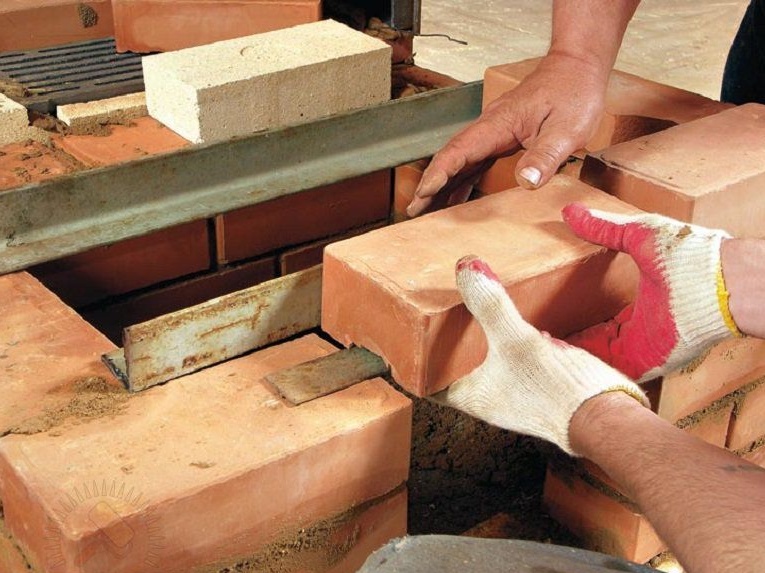
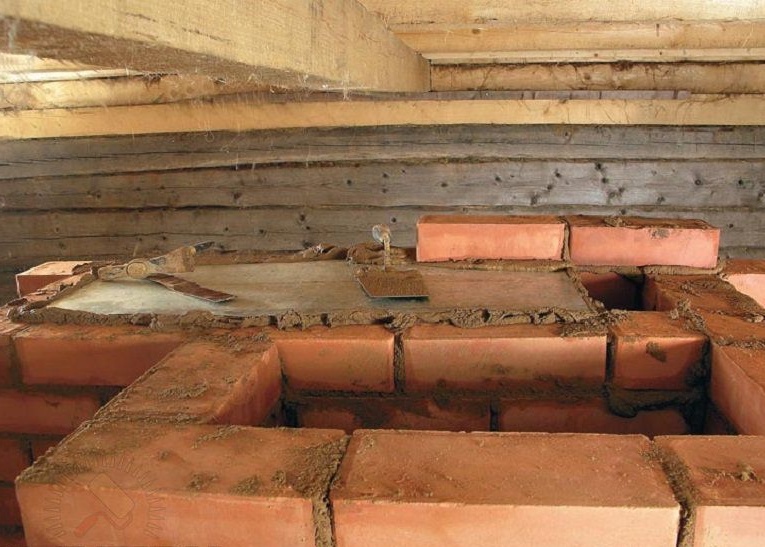
On top of the ash chamber, the grate is laid. First, a cell is made of refractory bricks.
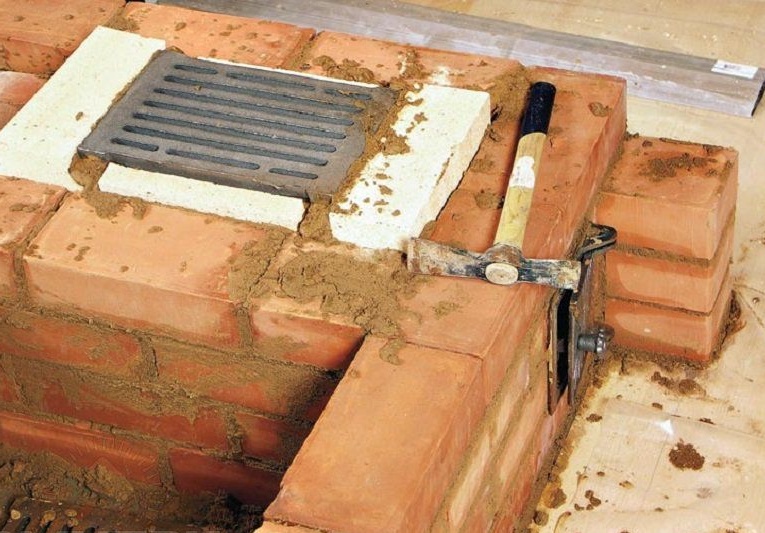
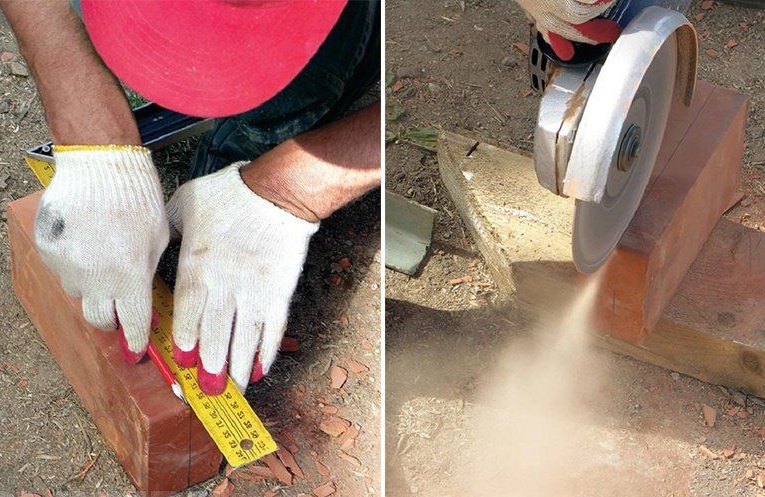
When laying the furnace, a lot of brick will have to be chopped, so in order to minimize the consumption of brick, the master uses a grinder with a stone disc.
Then the furnace door of the combustion chamber is installed, fastened with a wire.
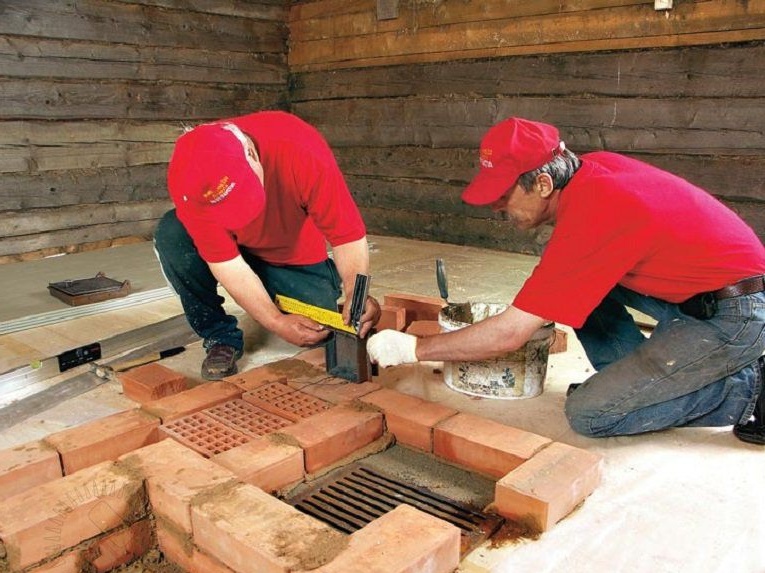
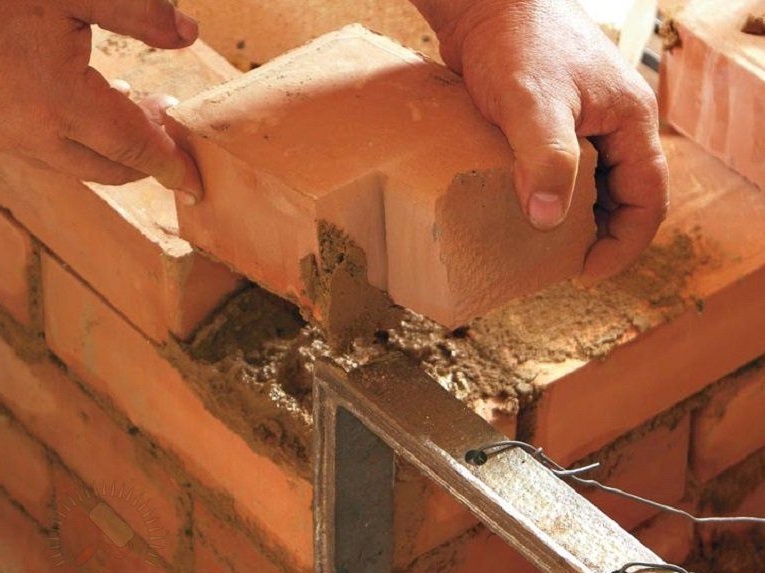
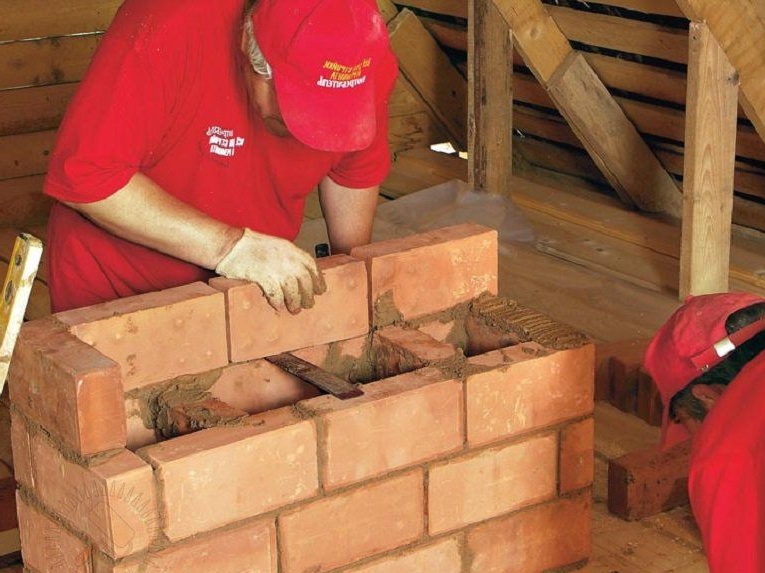
Next, the walls of the furnace rise.
From the side where the fireplace will be located, the master arranges a corner in order to lay the brick, for a better fit, the groove was sawn in the brick.
Masonry fireplace.
The lower part of the fireplace, designed for drying and storing a small amount of firewood.

Thanks to the grinder, the brick can be cut to a certain size and fit very tightly.
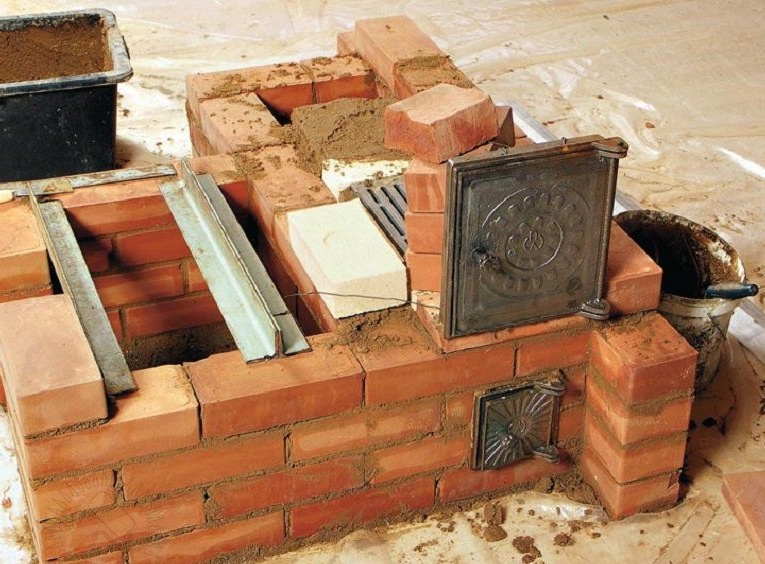
This is what the combustion chamber door looks like.
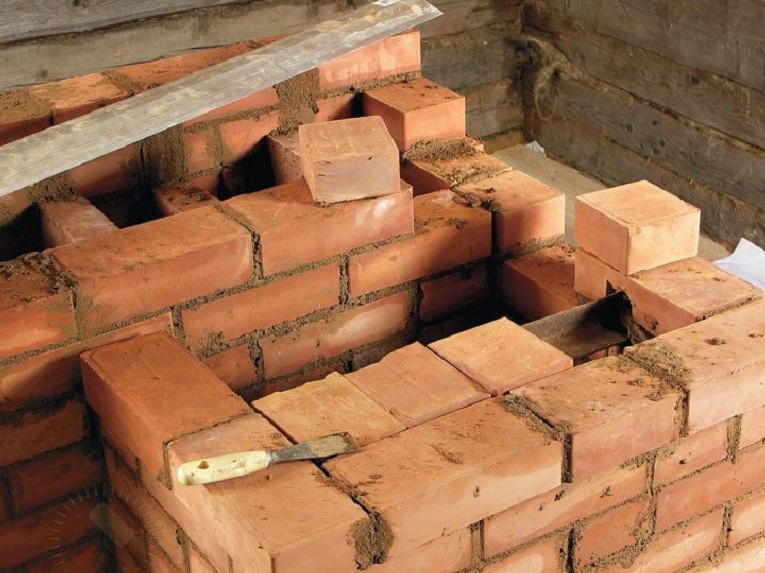
The upper part of the furnace is laid out with refractory bricks, on clay mortar.
Here is the combustion chamber ready. Next, the author proceeds to create a chimney.
The master makes a metal spacer.
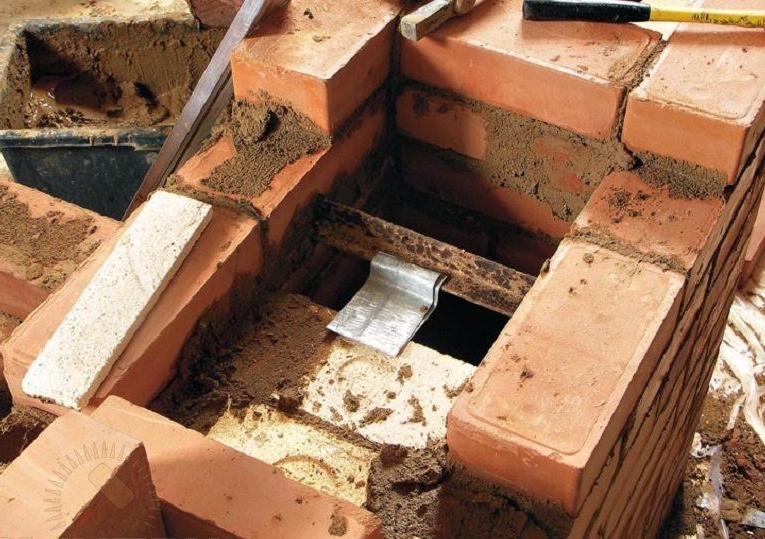
And already laying brick on it.
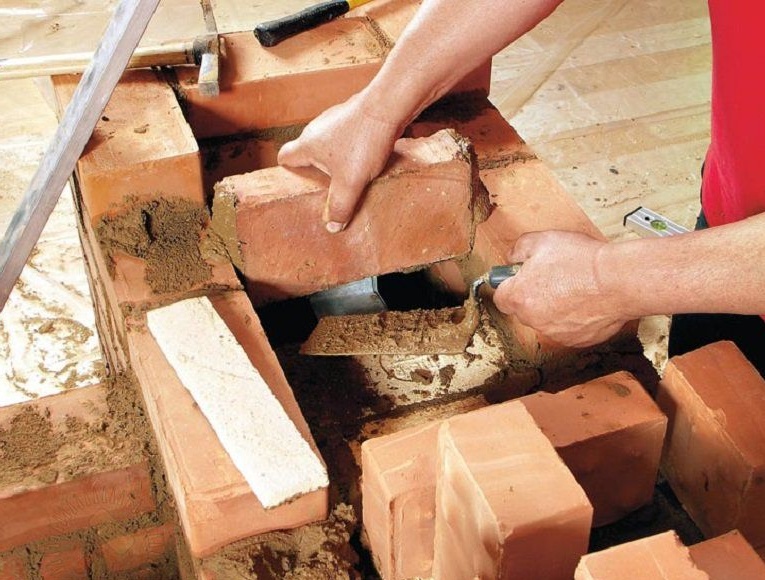
In order to be able to freely clean soot, plugs are installed. During operation of the furnace there is such a problem as accumulated soot, it makes it difficult to pass gases and the furnace begins to smoke, so in order to solve this problem in a short time, you should open the plugs and clean the passage from accumulated soot. Everything can be used further)
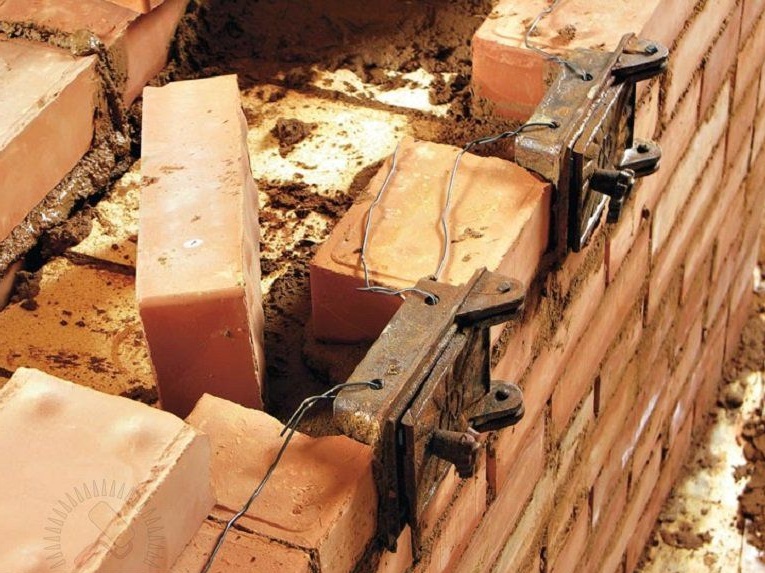
Masonry chimney wells.
The chimneys are then laid up near the stove with a "snake" by the fireplace with a "pipe"
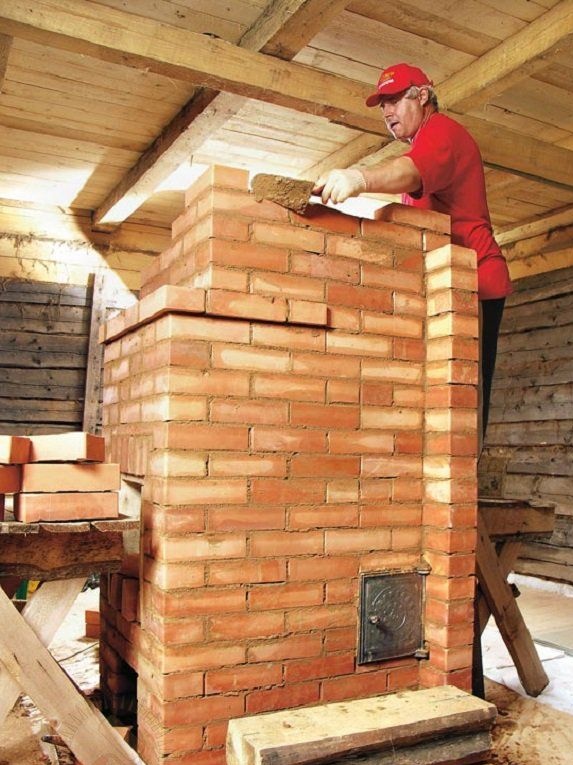
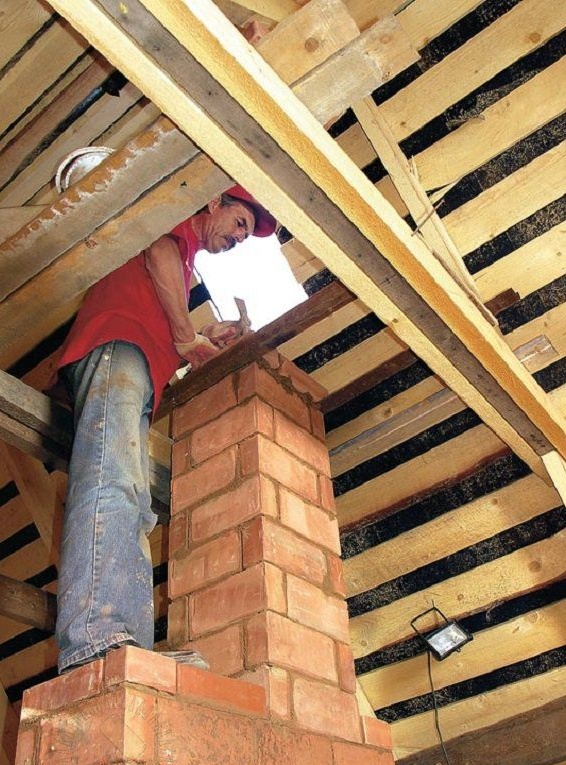
And now the stove has already grown under the ceiling.
A metal sheet is laid on the chimney of the furnace, and on top of 2 layers of brick, this is done to compensate for the pressure inside the furnace.
Each chimney has its own valve.
After the valves, the chimney merges into one and goes to the second floor of the building. Note!!! Here the author uses a kind of trick, namely, the brick is placed directly on the edge, inside the chimney has a serpentine shape, which allows for a short period of time to warm up the room on the second floor to the optimum temperature.
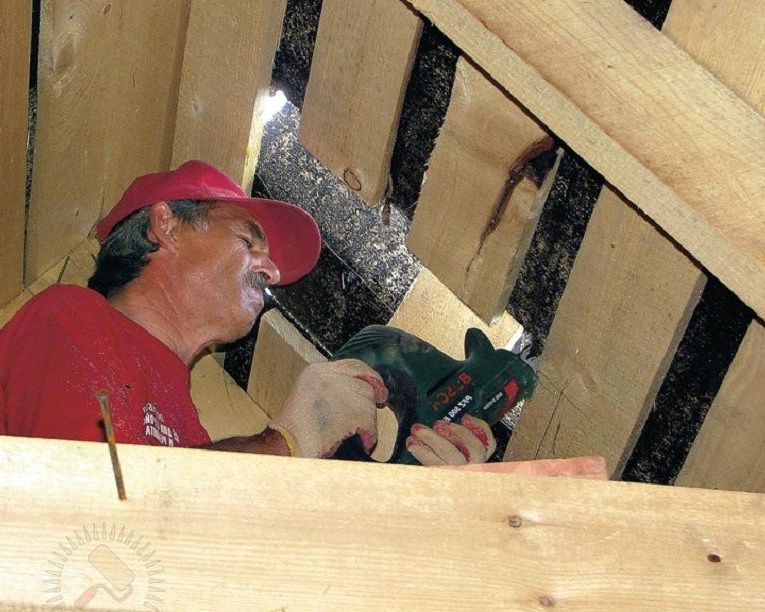
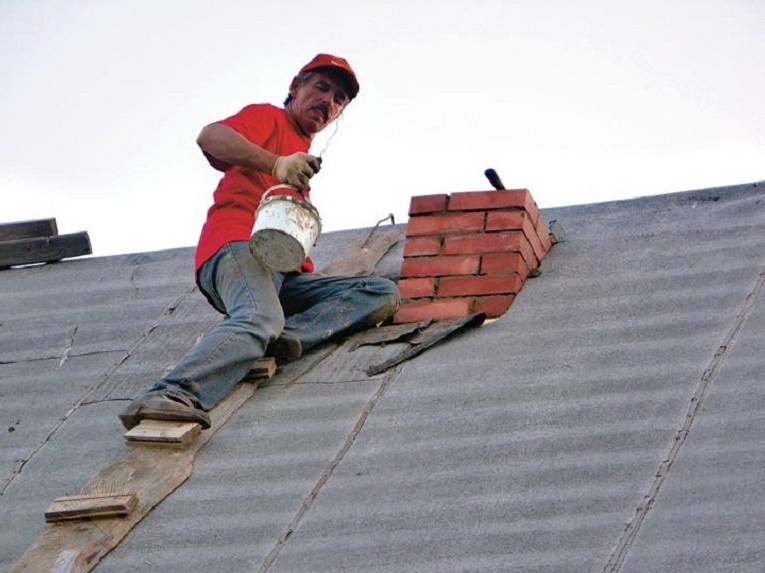
In the roof, the master makes a hole with a saber saw, or with an ordinary hacksaw.
As you can see, the pipe is also laid out with brick on the rib, which by the way saves construction material very much, and mainly facilitates the construction.
Also, the pipe should be fixed with metal corners for greater reliability. Then it is advisable to plaster such a masonry, and ideally also to tile.
At the exit, the pipe continues to be laid by the traditional method on a full brick.
Attention! The pipe must be strictly above the ridge of the roof, at least 50 cm. Otherwise, it will blow in the wind.
Here, in fact, the author obtained such a fireplace stove, it remains to plaster it and cover it with stone or tile to give a more aesthetic appearance. The work is certainly difficult, but doable)
Do not immediately start laying the stove, study the special literature! Then try first to put down a simple oven (dry) without a solution. And only after gaining a certain experience, you can safely get down to business!
This concludes the article. Thanks for attention!
Come visit often, do not miss the latest in the world of homemade goods!
This article is for informational purposes only!