Dear site visitors. From the material presented by the author, you will learn how
do it yourself You can fold a full-fledged Russian stove.
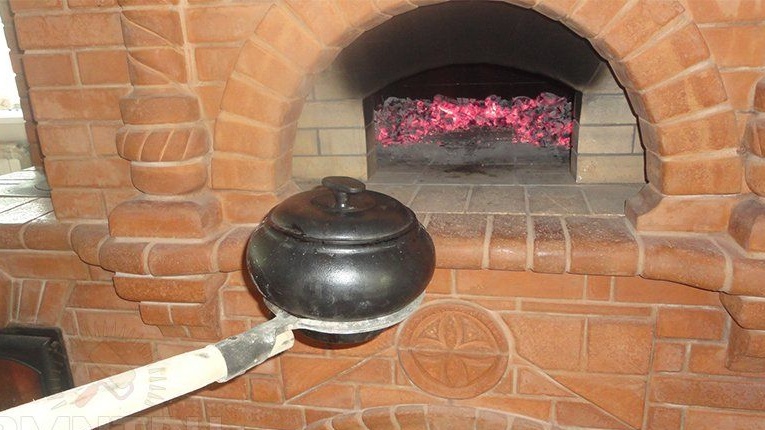
This oven is universal for a villager, because it heats the house giving its warmth, and it also prepares the most delicious food: cabbage soup, borscht, pies, potatoes, and a lot of all sorts of stuff. If you don’t put it in the oven, you will get a culinary masterpiece.
Also, a special difference between our stove and foreign analogues is, of course, the presence of a stove bench. Many people remember how the grandmother in the village laid the kids on the stove if the children were cold. On the stove, the body warms up well and the ailment leaves.
And so, let's look at the step-by-step instructions for masonry and presented by the author of 3D
model. And also we will figure out what exactly is needed for the construction of the furnace.
Materials1. red ceramic "solid" brick
2. red clay
3. river sand
4. grates
5. view
6. gate valve
7. water tank
8. corner
9. cement
10 rubble stone
11. fittings
12. board
13 nails
14. steel wire
15. hob
Instruments1. trowel
2. plumb
3. corner
4. metal ruler
5. Bulgarian
6. level
7. mallet
8. hammer
9. roulette
10. hacksaw
11. trowel
12. putty knife
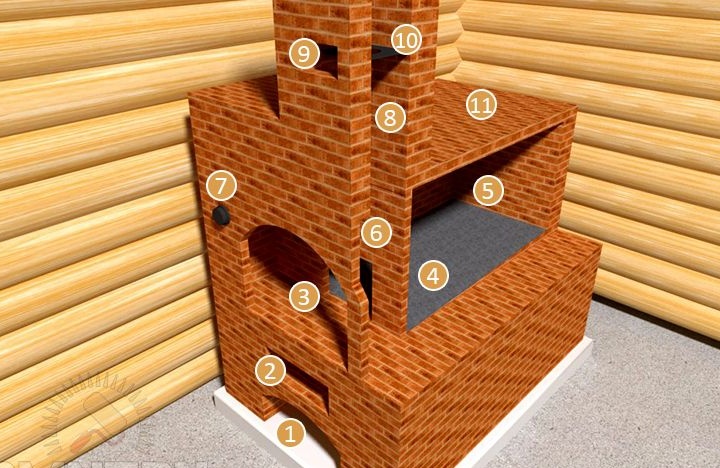
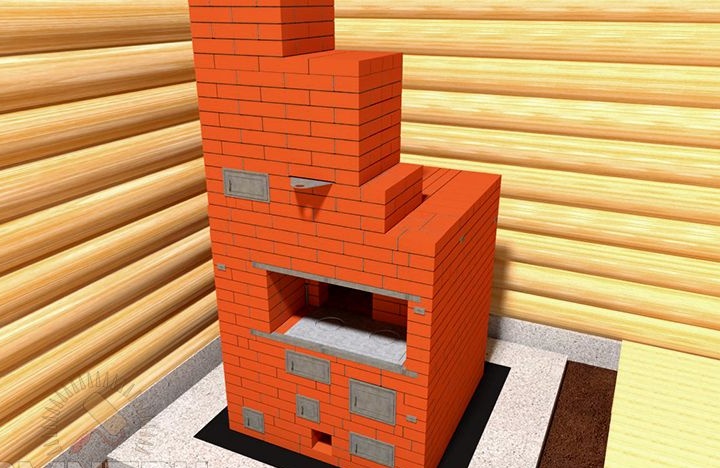
The process of building a Russian stove.And so, the first thing the author gives us is to get acquainted with the general view and structure of this furnace.
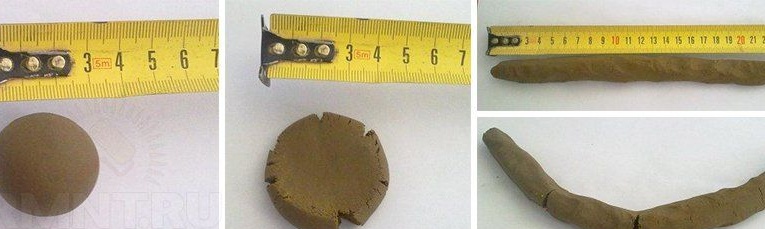
Next, you need to choose the optimal grade of clay for the stove solution. The simplest and most tested for centuries is presented below.
You need to take a small lump of clay and roll the sausage, then start bending it into a ring and the smaller the bending radius at which the clay begins to crack, the better the clay. You can also roll a ball of clay and squeeze it with your fingers, when compressed by a third of the diameter of the clay, it will begin to crack, which means that clay is perfect for preparing a solution.
If, when the kolobok is compressed to the middle, cracks begin to occur, then the clay is rather oily and will require more sand added to the solution in order to impoverish the mixture.
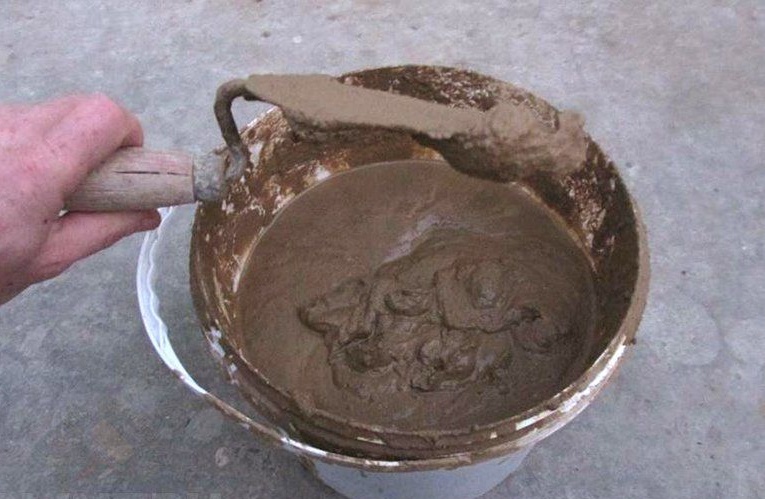
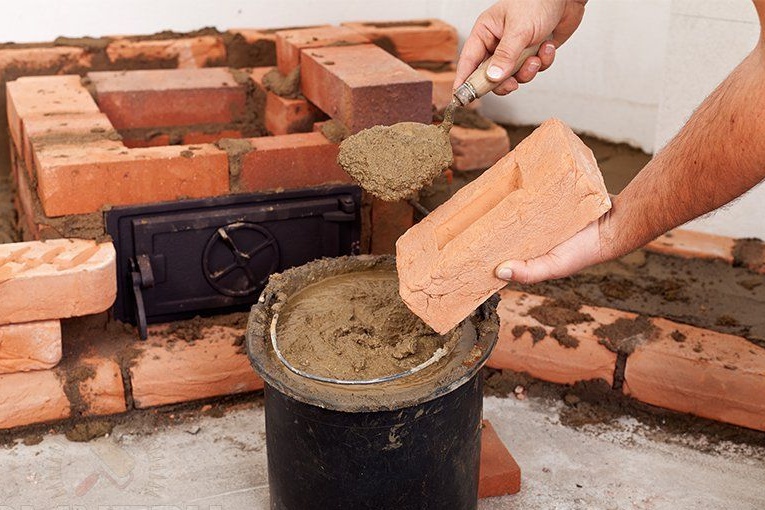
The clay itself should be prepared with a reserve in advance, and before preparing the solution it must be soaked for several days. After the soaked clay, you need to knead with your feet in a diseased container, like a bath or a trough. Then sand is added: the ratio should be 1: 2 and 1/2 water of the total clay.The mixture should not contain lumps of clay or sand, everything should be elastic and uniform.
Test the solution for suitability as follows: take a trowel and draw through the solution (forming a groove) the clay should not leak, and torn cracks should not form at the edges, the mixture should be plastic, but not liquid. An example is shown in the photo below.
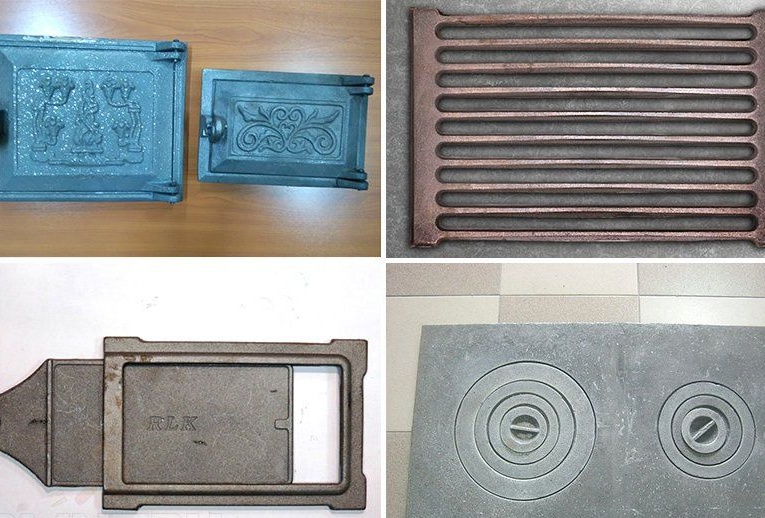
You should also buy grate, stove doors and dampers, hob, corner.
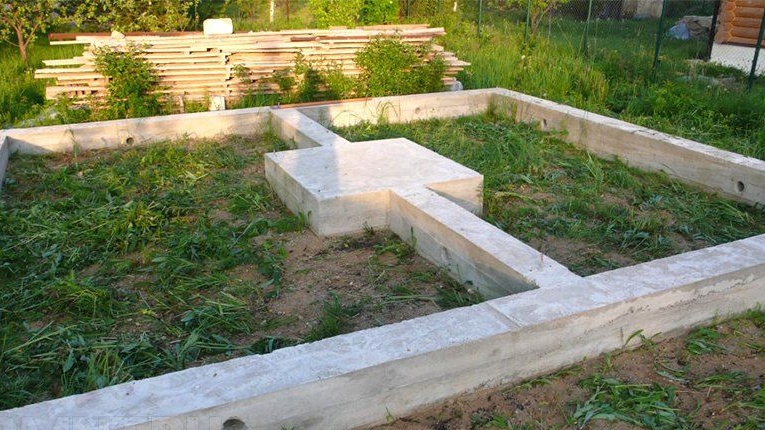
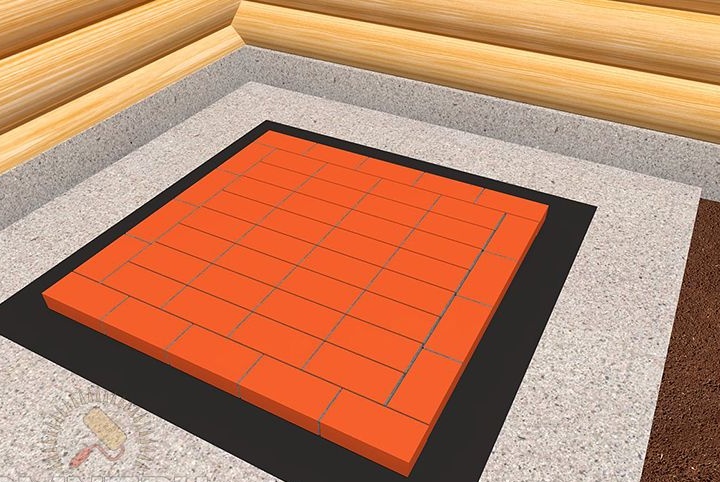
The most important thing in the construction of the furnace is its foundation, namely the foundation. The best way to lay it at the beginning of the construction of the house, because then when the house is already built, it will be quite problematic to dig a hole in the built house and drag it into the street. Here is a simple example of how this can be done (see photo below =>) But again, there are several nuances, it is not recommended to connect the foundation of the house and the stove "if it is the foundation of load-bearing walls" with secondary ones, because according to calculations the stove will heat 2 rooms, so much depends on the architecture of building the house itself.
The classic scheme of installing the stove in Russian villages, the stove is located in the corner, at least this is done to save space "living space" as it is fashionable to say today.
The subflood was located strictly to the window, strolling through the village in the morning in the windows you could see the lights of the stoves, and after the housewives opened the stove and put the bread to bake, Oh, what a smell is on the street! Inexpressible!
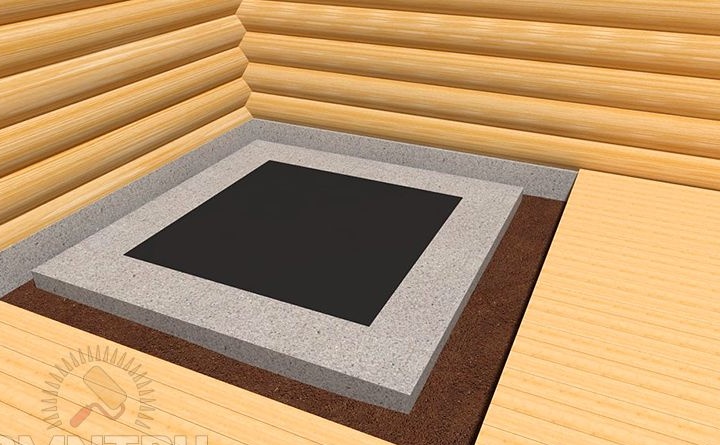
The foundation should be laid a little lower than the floor level, at the edges there should also be a distance of at least 5 centimeters. For example, as shown in the photo.
For general development.
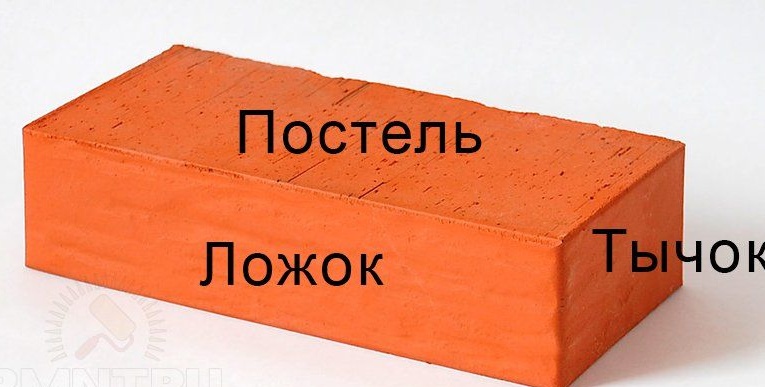
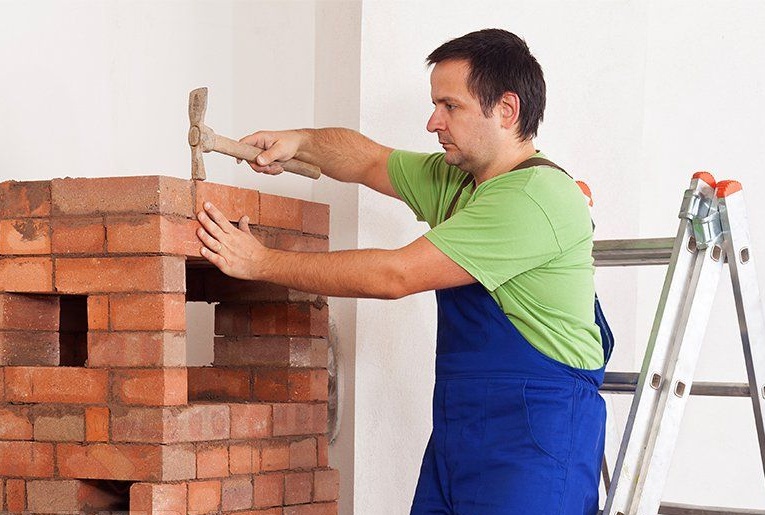
Attention!For bricklaying, an exclusively solid brick is used.
Because solid brick stores stored heat well.
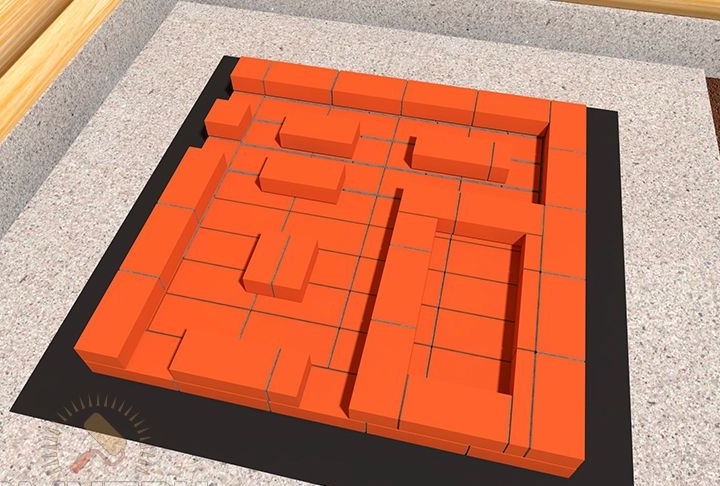
Further, the author introduces us to the detailed ordering of the Russian stove and its 3D model. We begin to disassemble from the very first row.
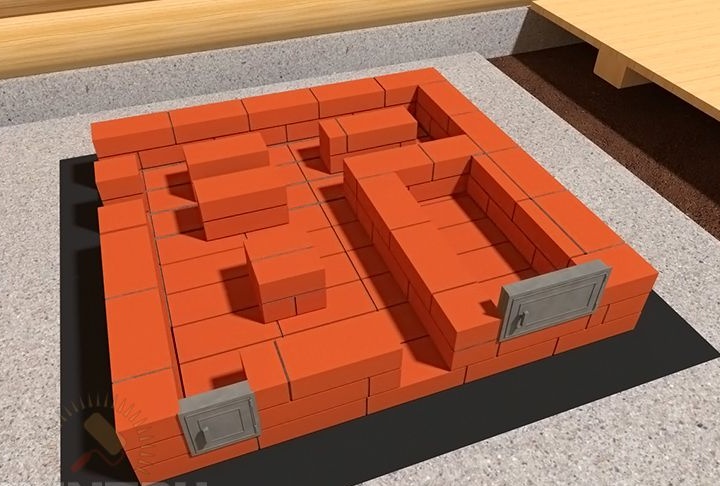
The second row is formed of cleaners and an ash chamber.
Doors are installed, which are fastened by burnt steel wire.
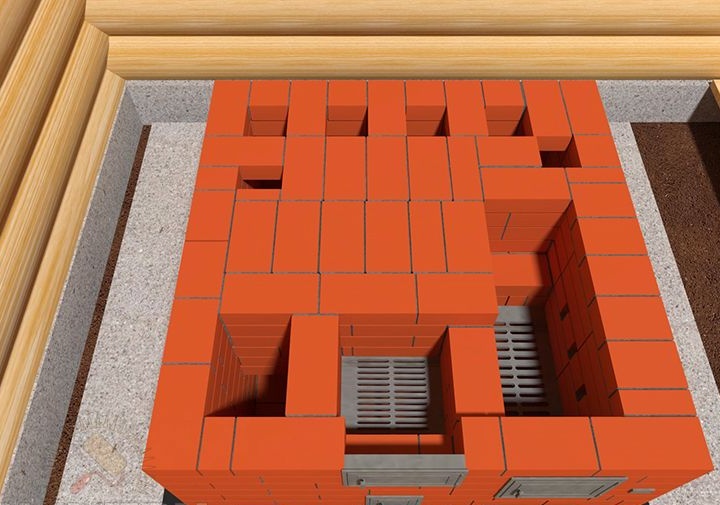
Overhead channels overlap.
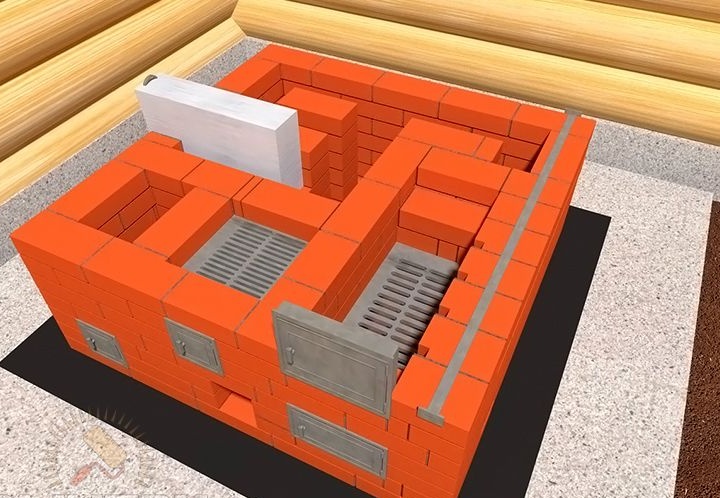
The grate of the grate is laid.
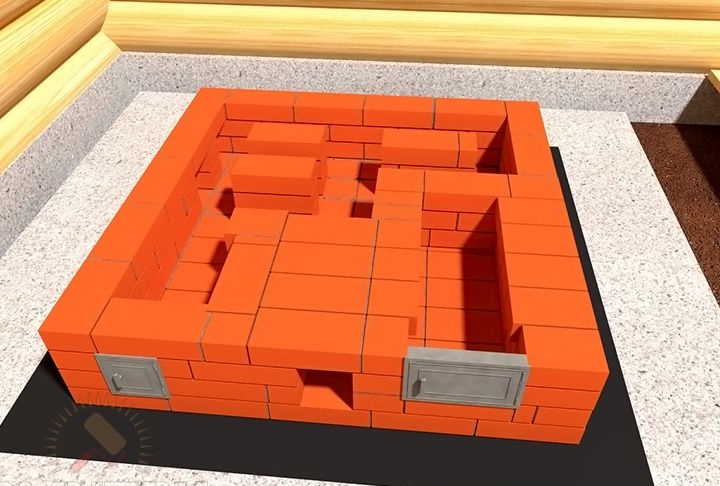
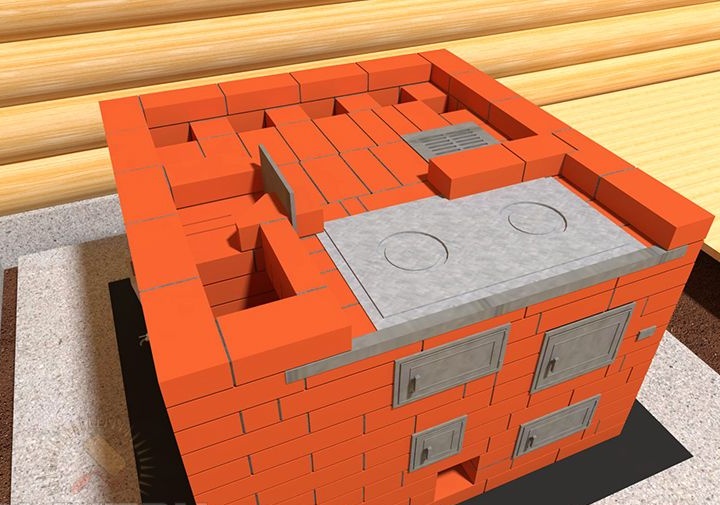
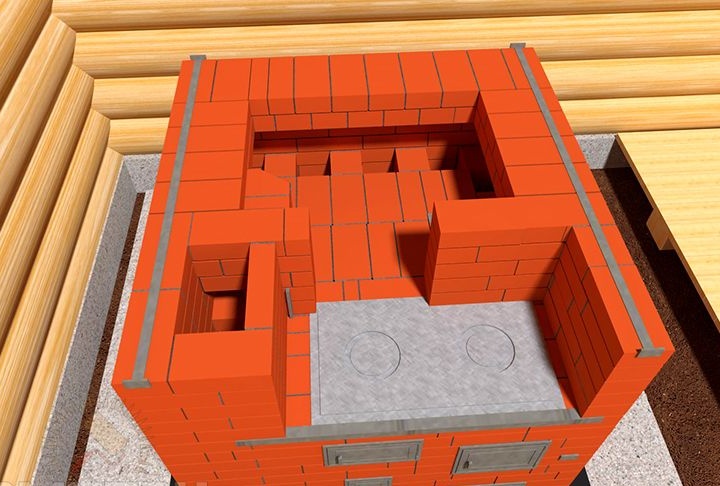
A water tank is placed, the fuel chamber is lined with refractory bricks.
The grate of the stove is installed.
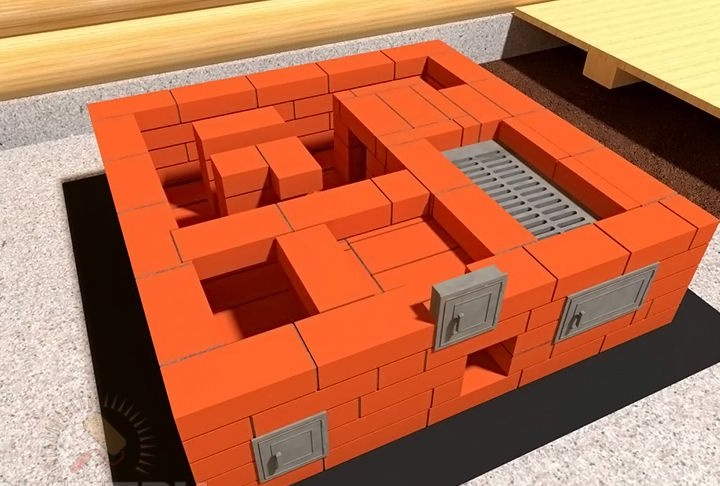
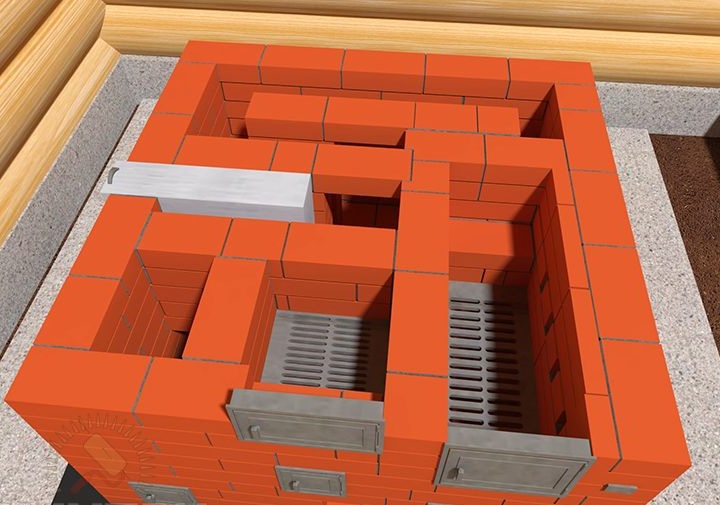
The laying of channels continues and the doors of the fuel chambers are put.
The arches of the fireboxes are connected.
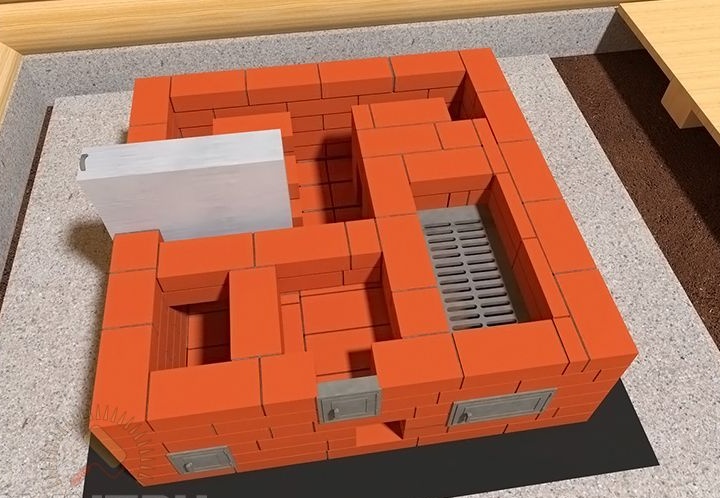
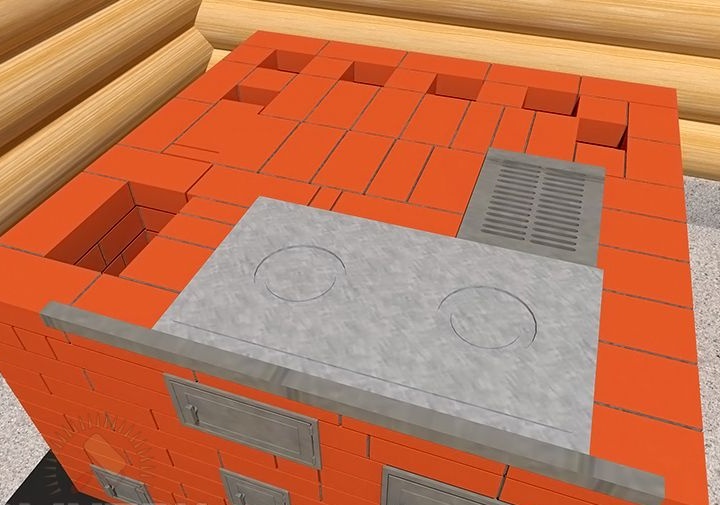
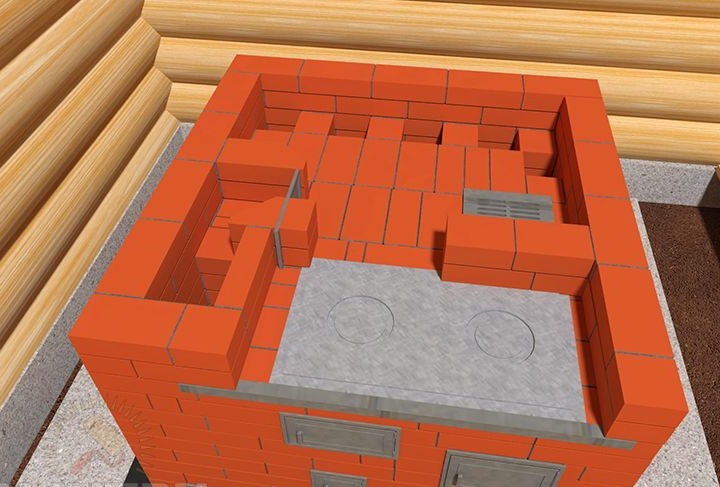
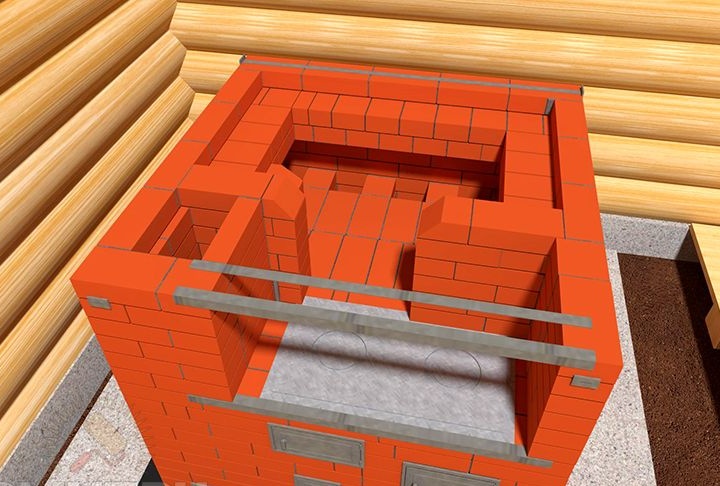
A hob is placed.
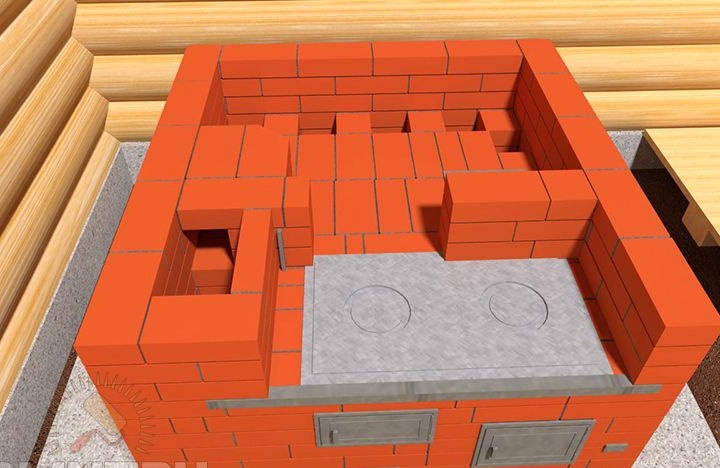
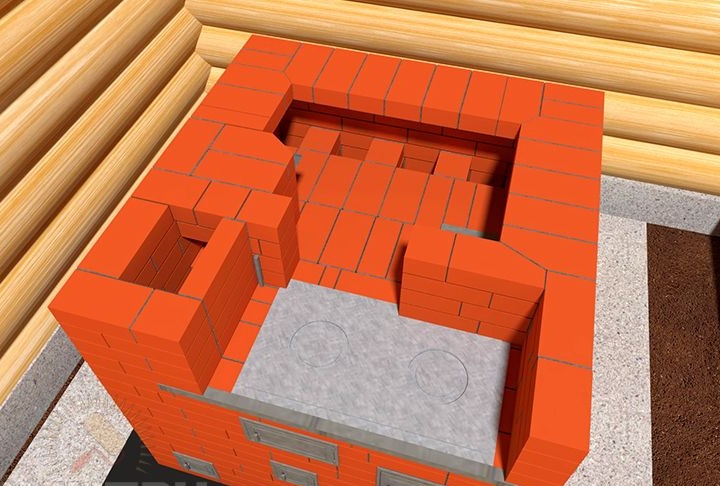
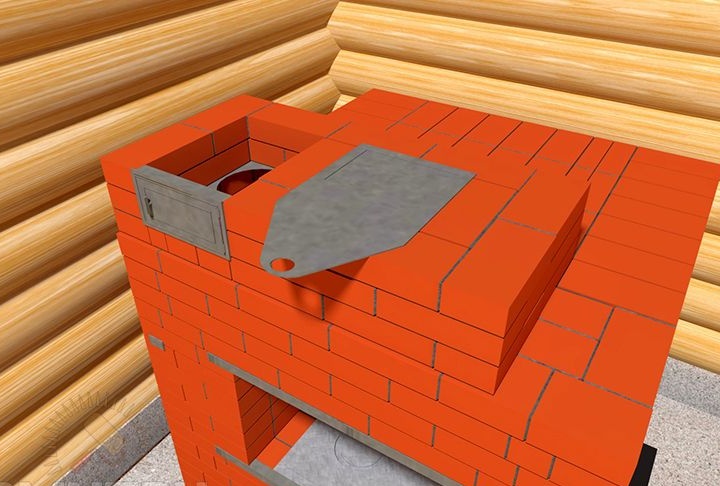
The masonry of the walls of the furnace begins, and a shutter is also installed, it is also a summer valve.
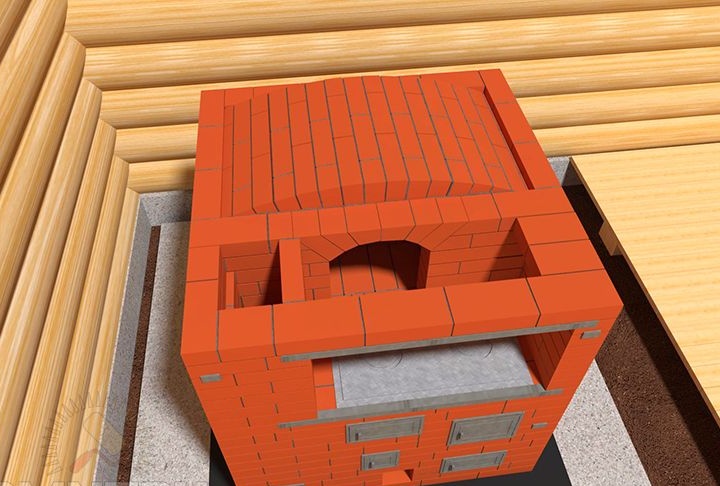
Then you need to make a wooden template for laying the arch of the furnace.
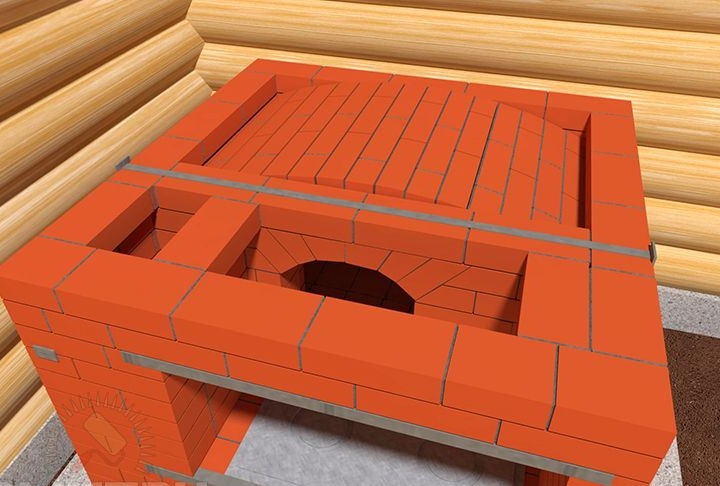
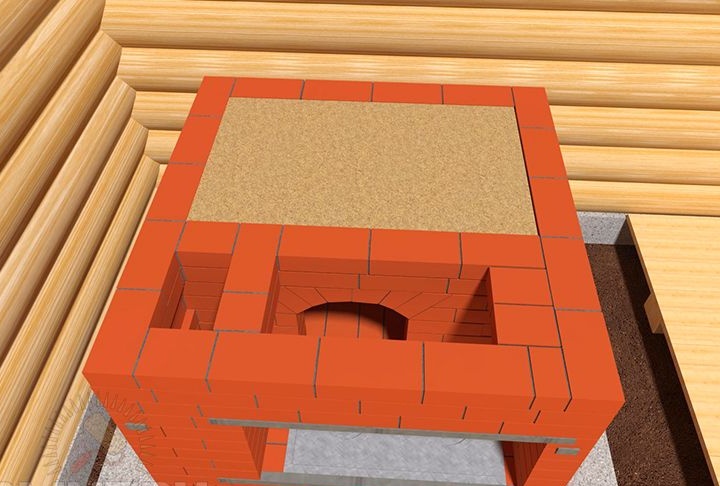
The vault of the crucible is overlapped, then the retort is placed.
A metal screed is made.
The furnace roof is covered with sand and well compacted.
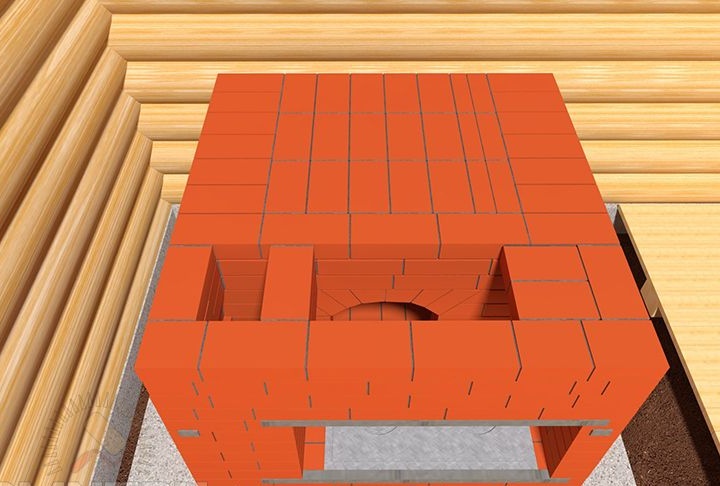
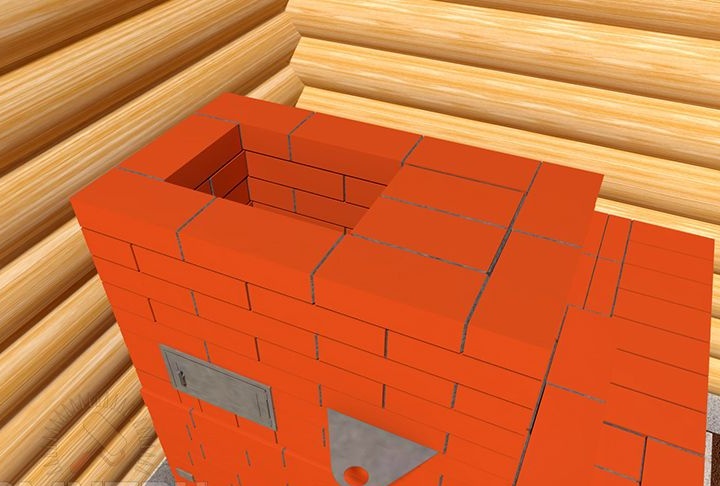
The furnace is closed, and the overtube narrows higher in the masonry.
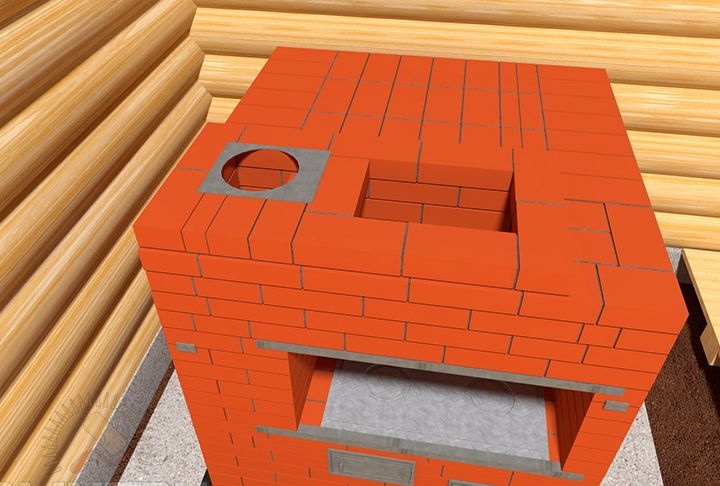
Chimney masonry.
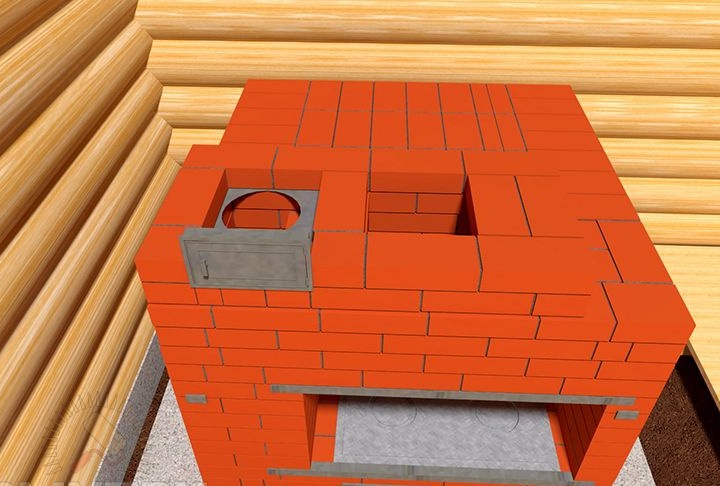
The overtube is blocked by the furnace flap.
The space is gradually connected to the chimney.
Further, the chimney begins to taper to the top in the form of a ladder, after the masonry moves to the attic and the roof, according to the author, you can use a weak cement mortar, because a brick pipe on a clay mortar will quickly become worthless, it may even collapse. Be sure to protect the brick pipe with a metal cap with a spark-extinguisher.
Also, the pipe should be raised in the masonry at least 50 cm above the level of the building roof ridge, otherwise it will be blown out.
And so, familiarization with the masonry and the device has been completed, but do not immediately rush to get down to business, first read the additional literature of professional stove makers. Professionals recommend to beginners! First you need to lay down a simple oven (dry), that is, without a solution, in order to first learn the basics of furnace business, and only then, taking into account your mistakes, you can try to lay an oven (simple design)
This concludes the article.Thanks for attention!
Come visit often, do not miss the latest in the world of homemade goods!
This article is for informational purposes only!