
Hello everybody!
How to get to the subject, which is at an unattainable height for you? How to collect fruit from the very top of the tree or paint the house? Such questions, most likely, have visited you more than once, it was for these purposes that a special devicecalled Stepladder.
Step-ladders are, perhaps, the most popular and necessary ladders, they are used in everyday life, and in other areas of activity.
This article will describe a method of manufacturing a ladder, with a detailed photo report.
To make the stairs we need:
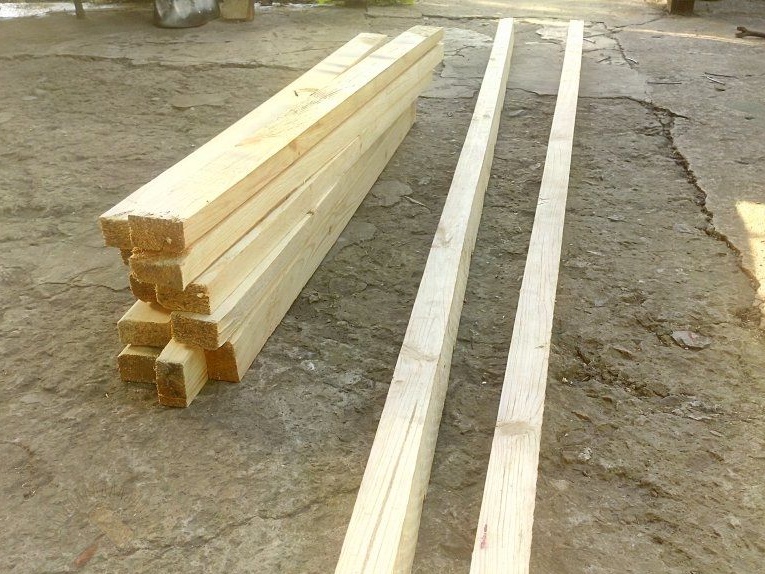
Materials:
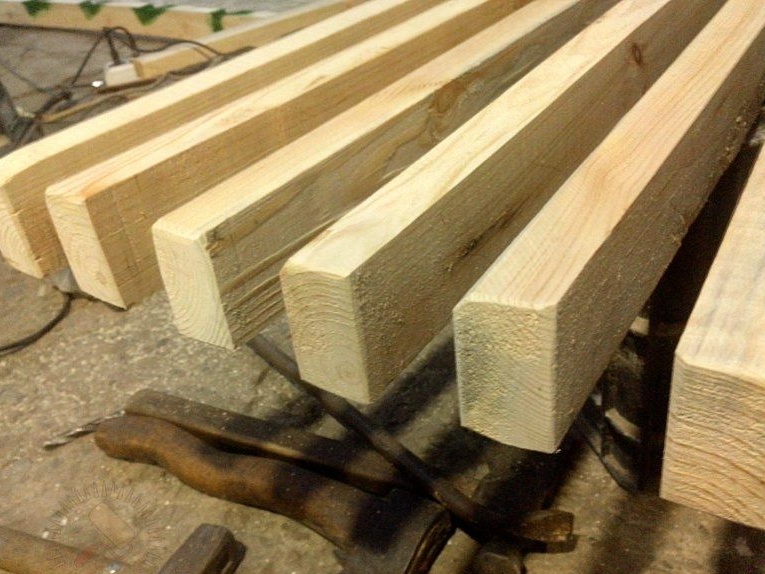
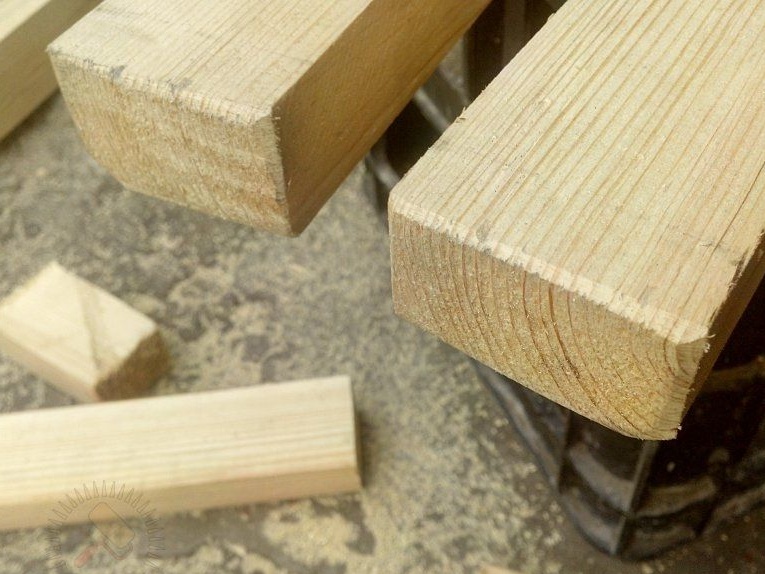
- two beams 60 * 40 mm;
- beam 50 * 35 mm;
- self-tapping screws;
- paint.
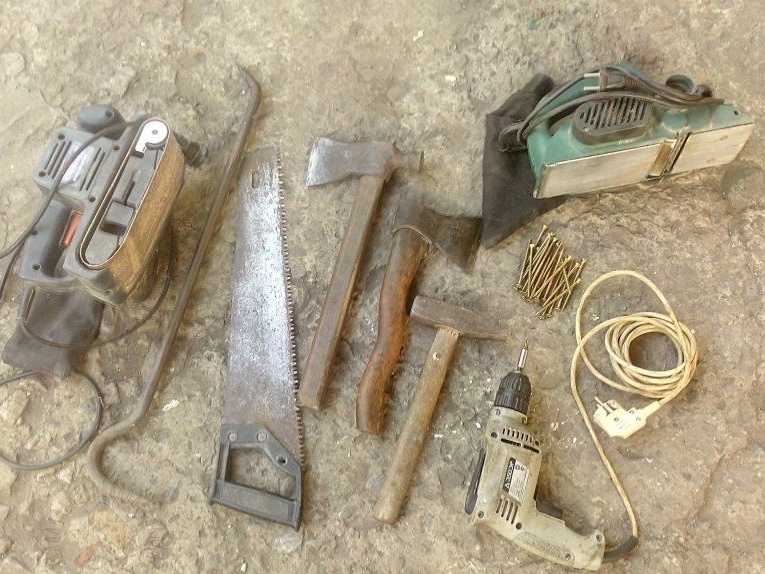
Tool:
- a hacksaw for wood, or other available cutting tool;
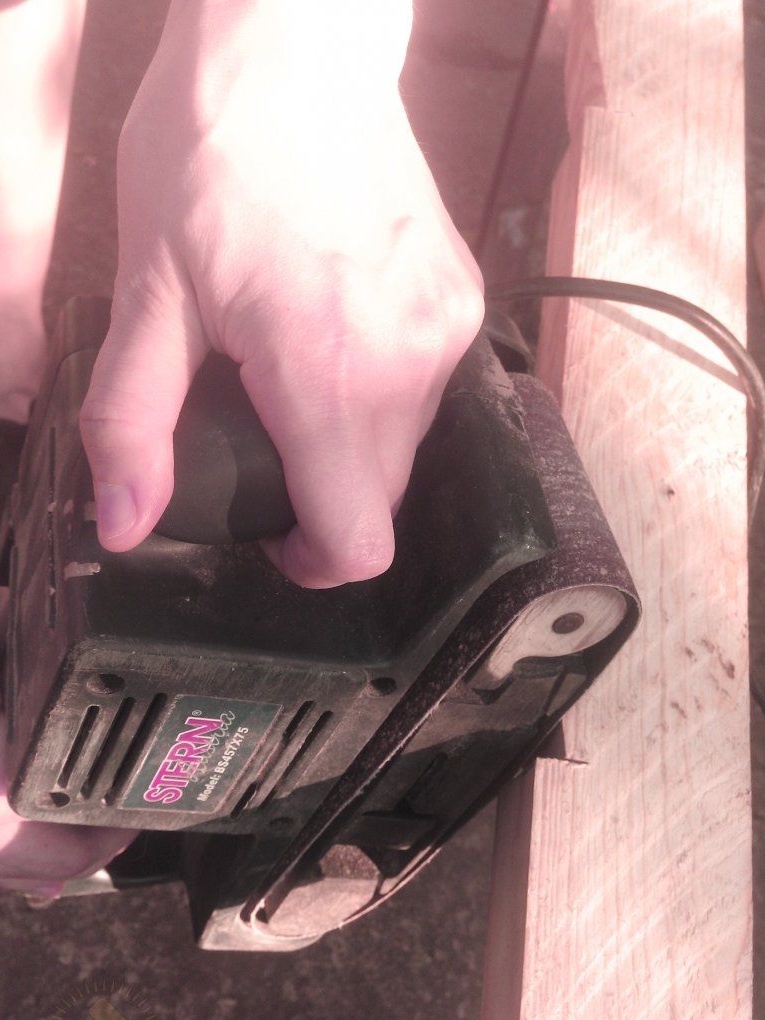
- Sander;
- drill;
- hammer;
- ax;
- mount.
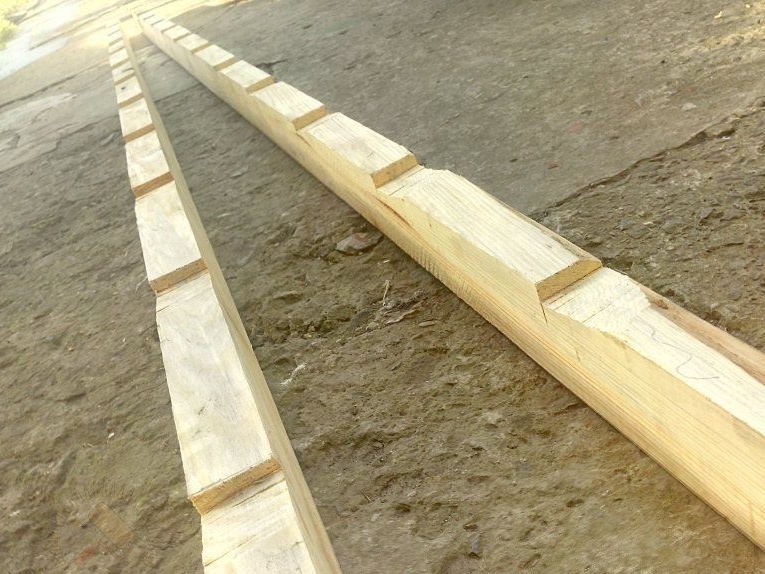
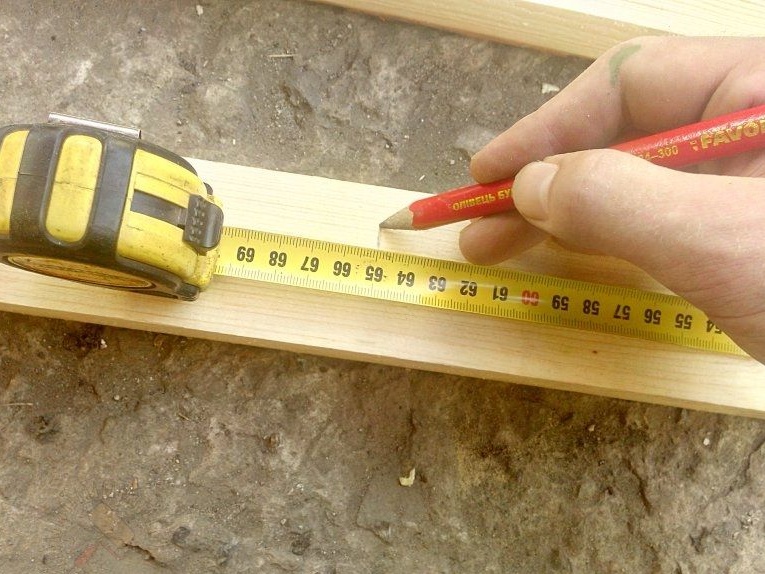
To begin with, we take two vertical bowstrings with a bar section of 60 * 40 mm, we take its length at our discretion, in this case the length was 3.6 m.
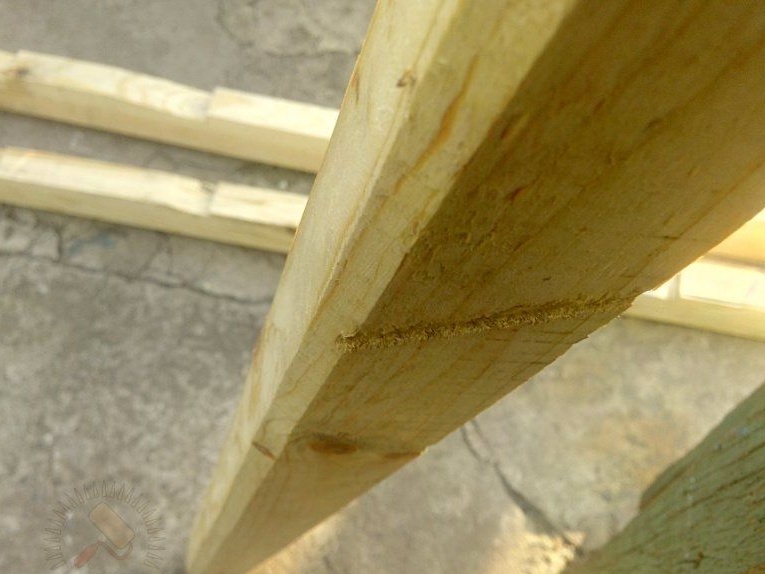
In order to make the staircase strong and the upper edge of the steps to be horizontal when tilted, we make special notches, mark out where we plan to install the steps, we take a distance between the crossbars of 30 cm. We use a beam for steps with a cross section of 50 mm, according to these sizes make markup, apply it on both sides of the bowstring. Next, note the notch depth - 15-20 mm. The resulting marks are interconnected by an oblique line, as shown in the photo.
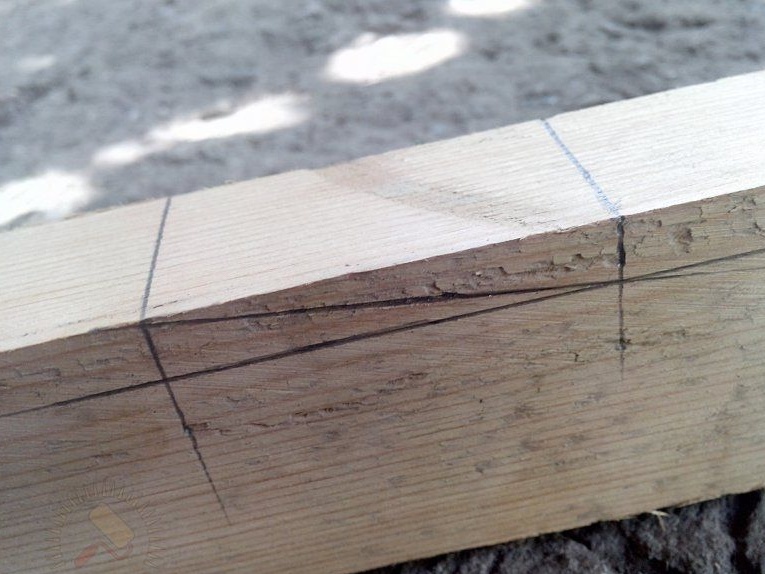
Then, using a sharp ax and a hammer, we remove a part of the wood at an angle, but before doing this, use a hacksaw to make a recess along the marked line, so that the beam does not split in an unnecessary place for us.
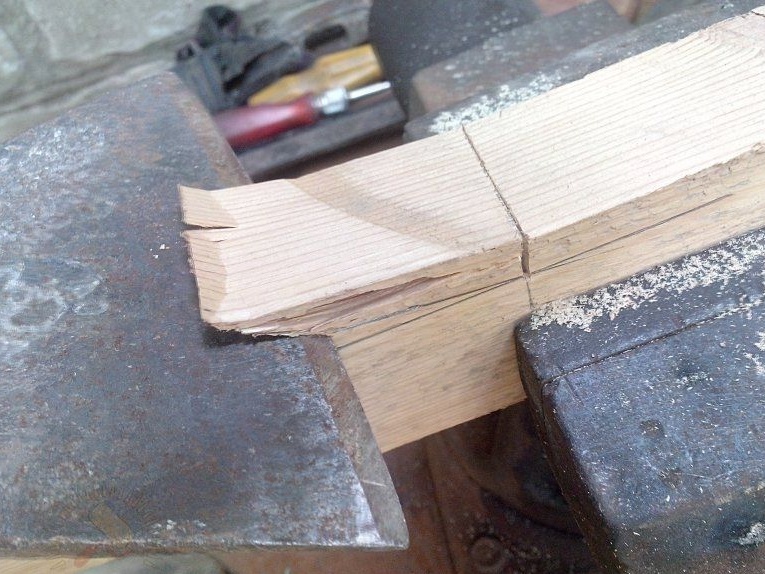
We use an ax as a planer, aligning the notch angle.
In a similar way, we make nicks on both strings.
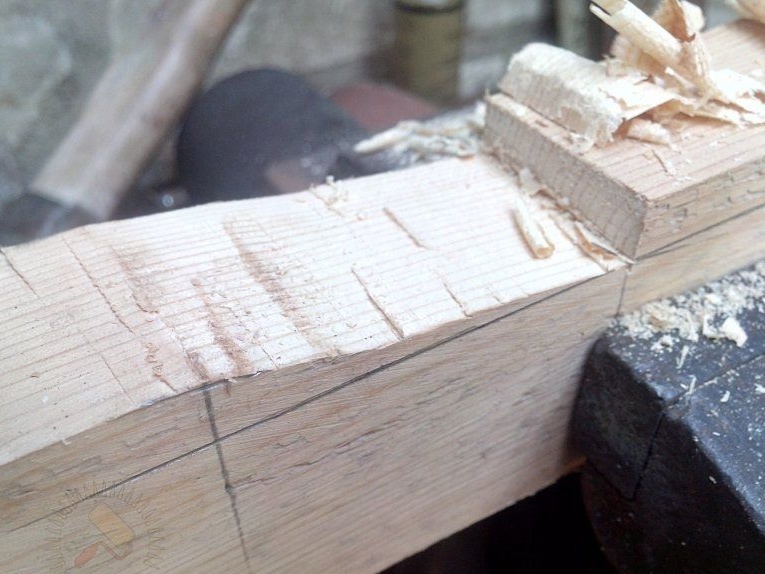
Next, using a grinding machine, we process the surface of the beam.
It is necessary to carefully align the notches made by us.
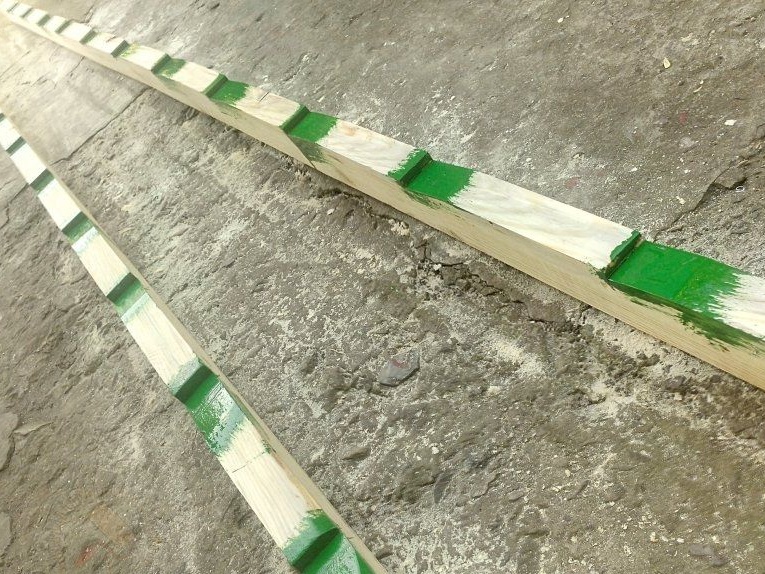
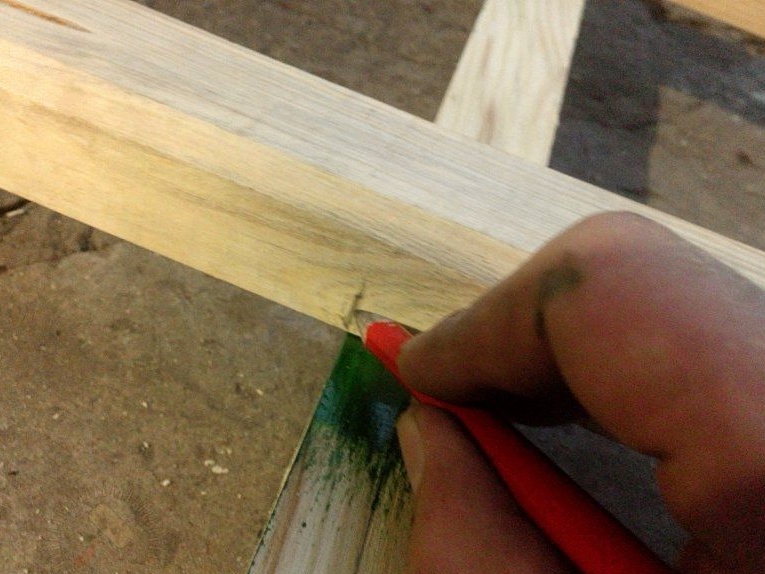
Now with the help of paint we paint the inside of the nicks. Set them aside until dry.
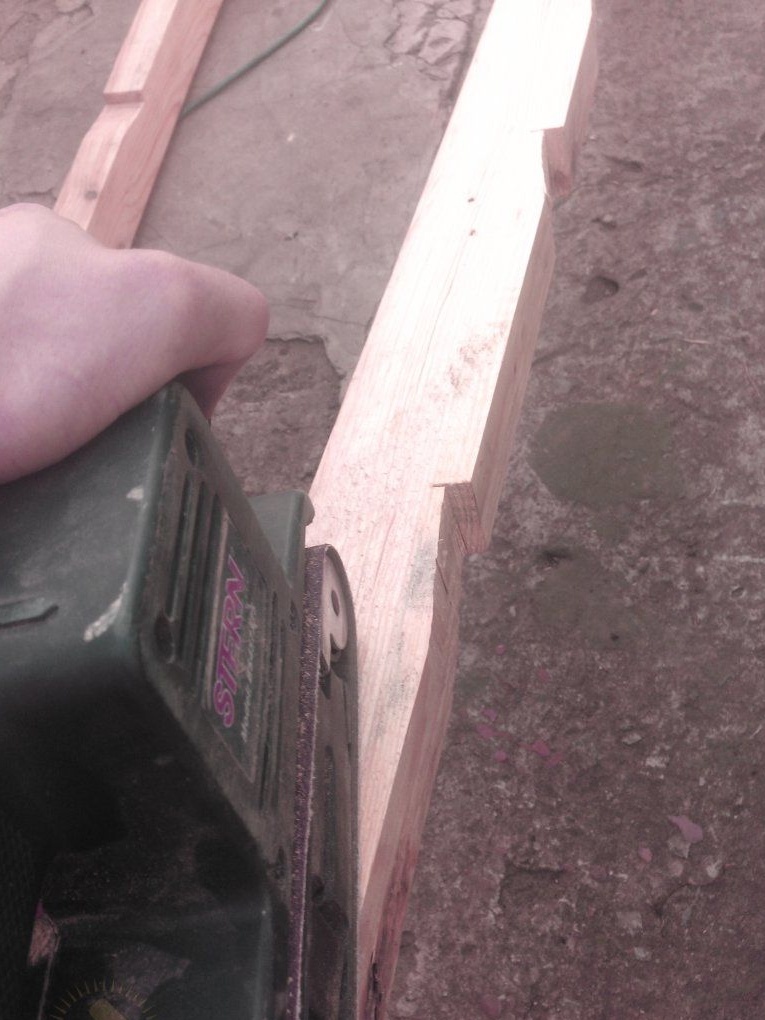
Next, we take a bar with a cross section of 50 * 35 mm for the steps, it needs to be slightly modified. We take a plane and with it we remove the chamfer. We do the same operation on each bar.
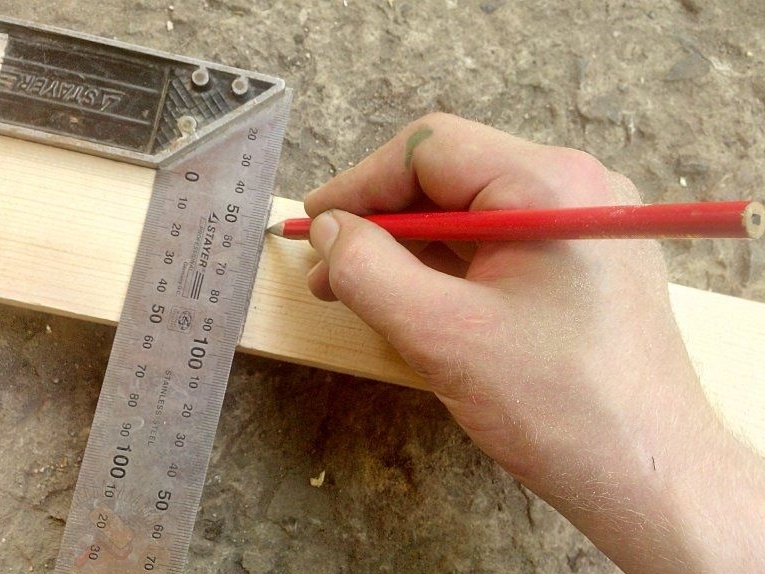
Then you need to make one of the sides of the bars basic, for this we take an angular ruler and draw a markup with a pencil.
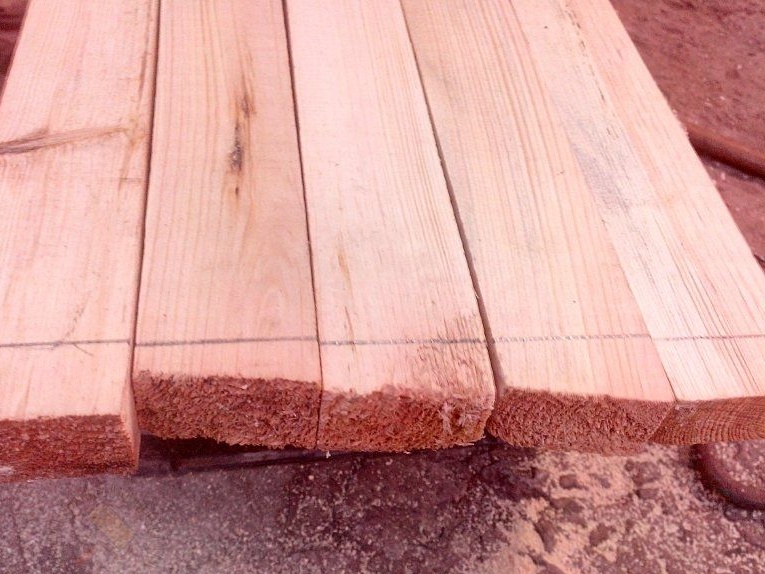
When everything is ready, with the help of a cutting tool we saw off all uneven edges, after that we process the surface with a grinder, we smooth the ends.
Now you can proceed to the manufacture of the upper and lower rungs of the stairs. In order to distinguish the top and bottom of the stairs, it needs to be done with a slight narrowing. The top should be shorter than the bottom. We take the width of the stairs 65 cm from the bottom and 55 from the top. Sizes can be taken by others at your discretion. Using tape measure the length.
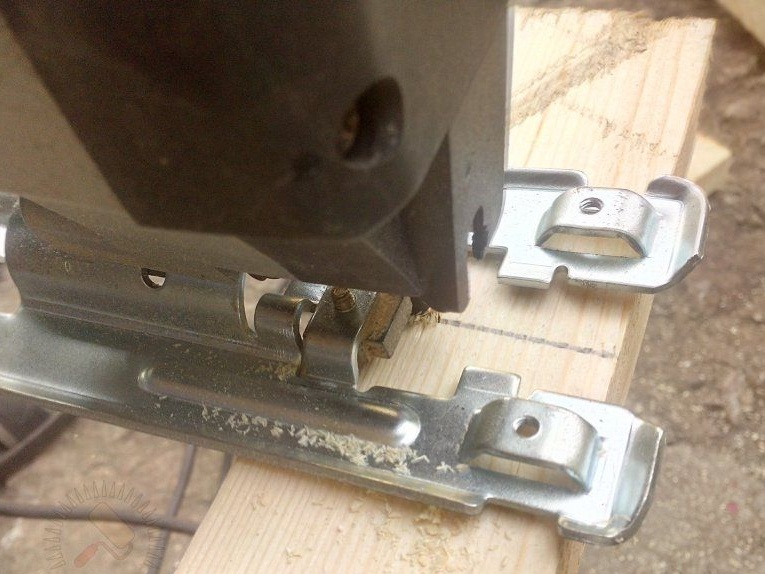
With the help of a square, we mark up in the place where the future step will be cut.
We start the cut.
When the steps are ready, we process the ends with a grinding machine.
Next, at the edges of the beam we find the center, for this we need to deviate from each of the edges by half the thickness of the bowstring (20 mm).

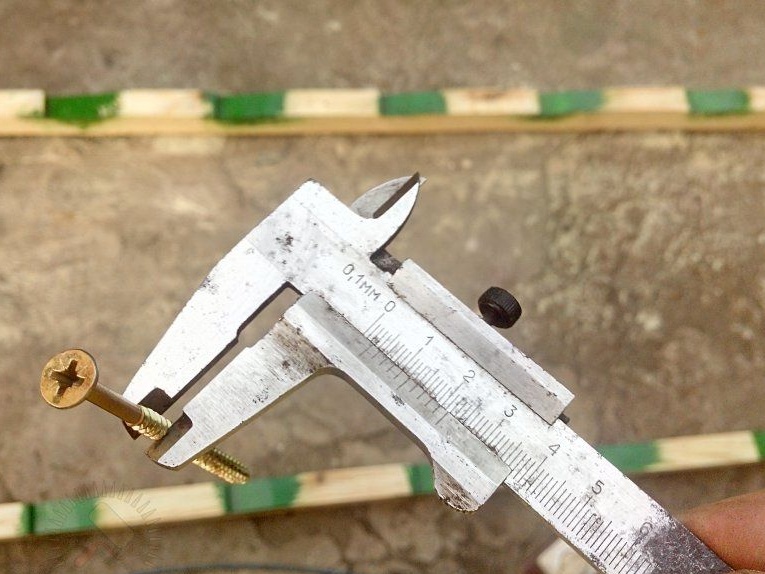
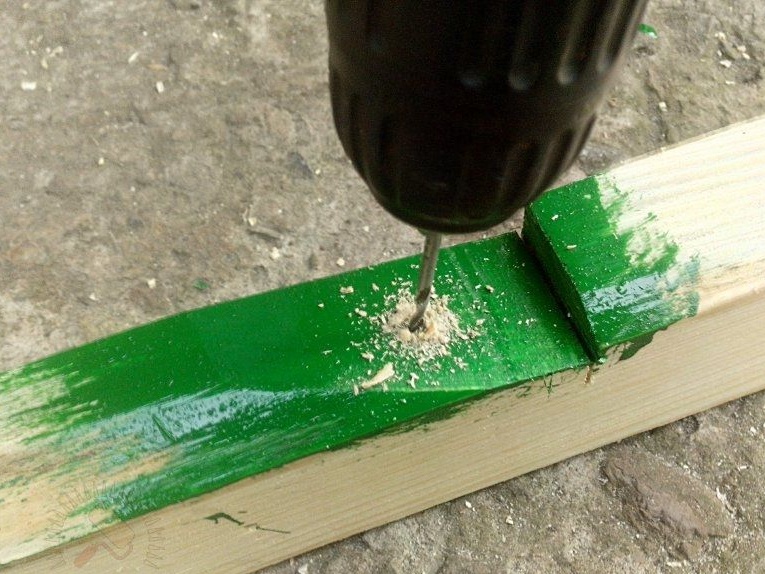
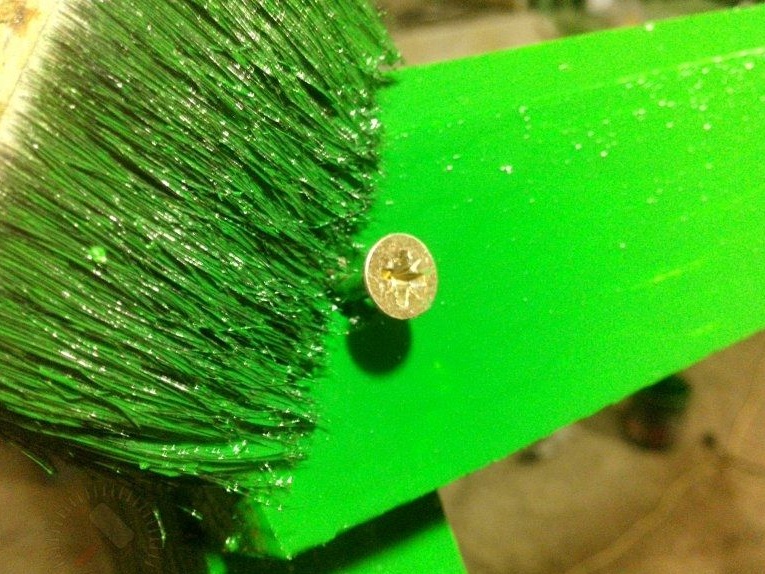
Then, on the marked centers, we make holes for the screws. The self-tapping screw should pass freely into this hole.
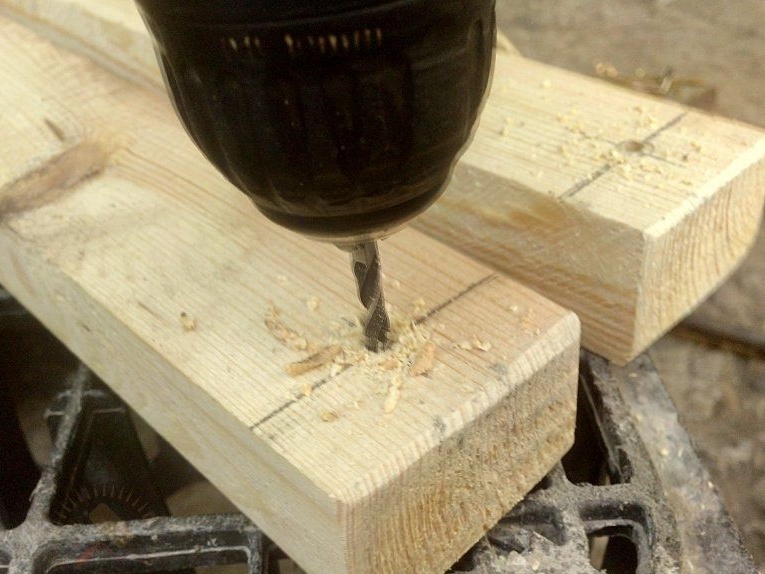
We make a countersink using a larger drill bit for this.
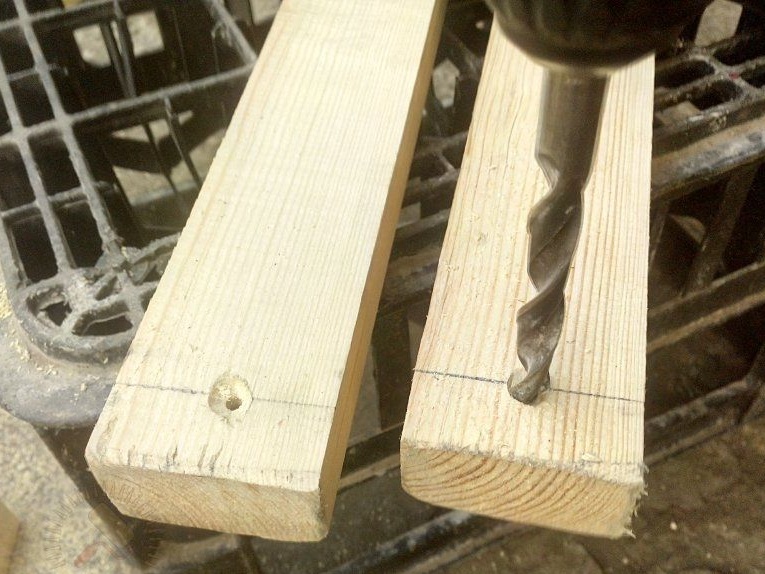
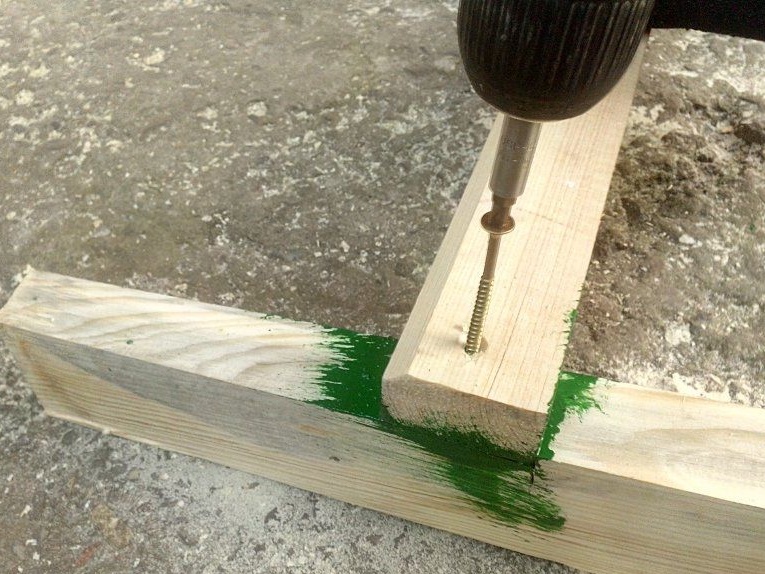
Now set the upper and lower crossbeams by placing and aligning them in the notch. The ends of the steps are made flush with the side parts of the bowstring. After that, through the existing holes in the steps we make a mark of the place where you will need to drill a hole. They are needed so that the screws when twisting do not split the wood. The holes were made with a drill 0.2-0.3 less than the thickness of the screws.
Now you can fix the step in its place, but before that you should paint the pressure side of the crossbar.
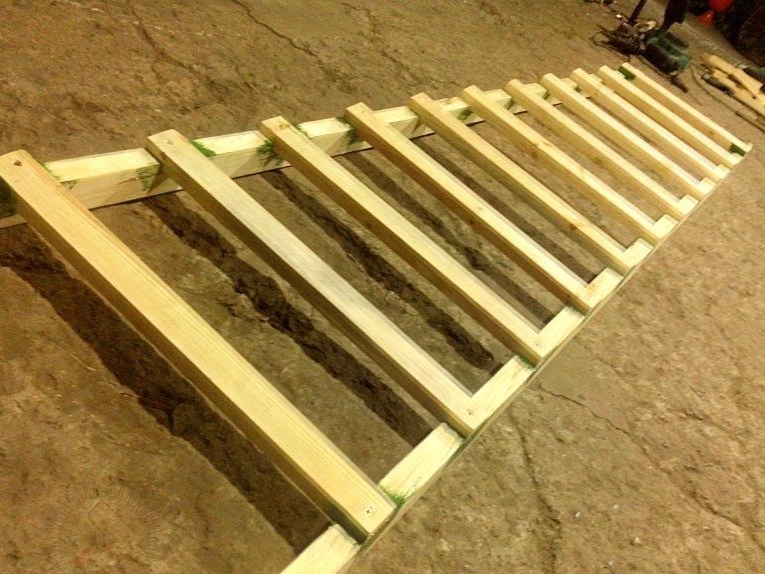
When the necessary dimensions are set for the stairs, add the missing steps, for this we lay out the prepared bars in the notches, exposing the base ends flush with the side parts of the bowstring.
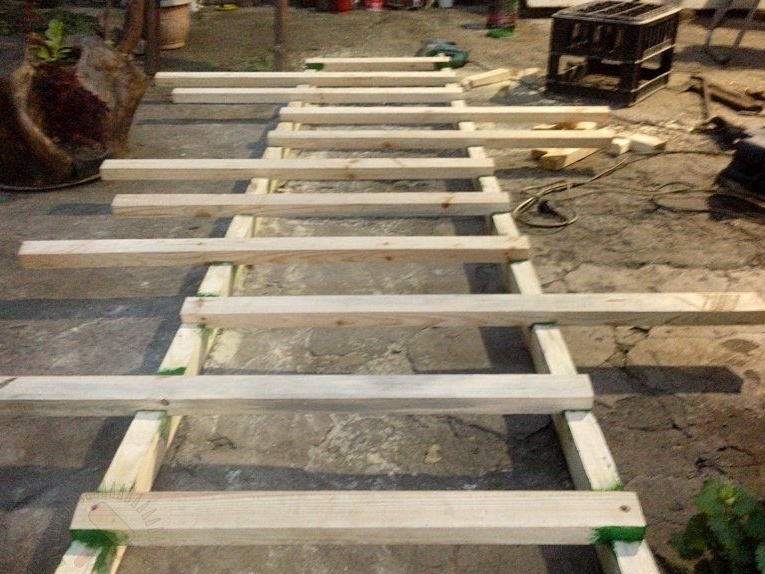
We mark the length necessary for us on the back of the bowstring, draw lines using an angled ruler, then cut off the excess parts, the ends of the steps need to be sanded. We install the steps in the same way as the first two. There should be 11 steps in total.
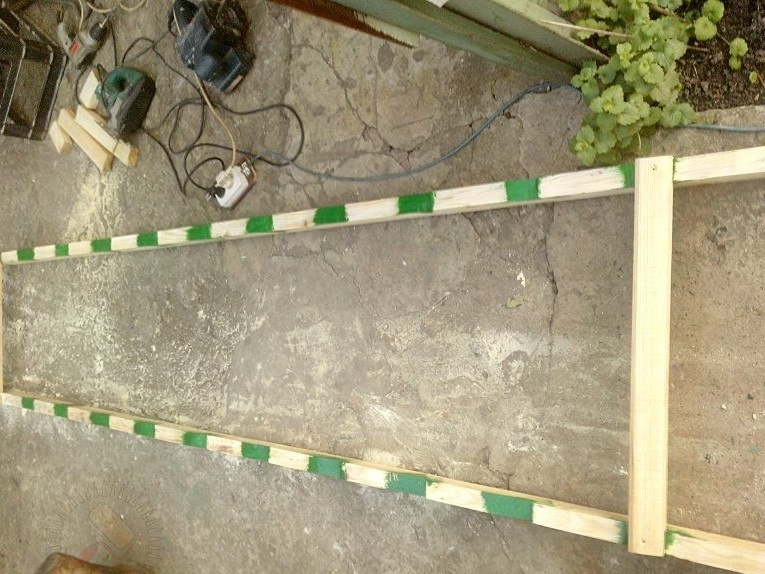
Now let's move on to painting the product. In order for the paint not to clog the slots of the head of the self-tapping screw, they need to be slightly unscrewed. We make painting. When everything is ready, screw the screws back.
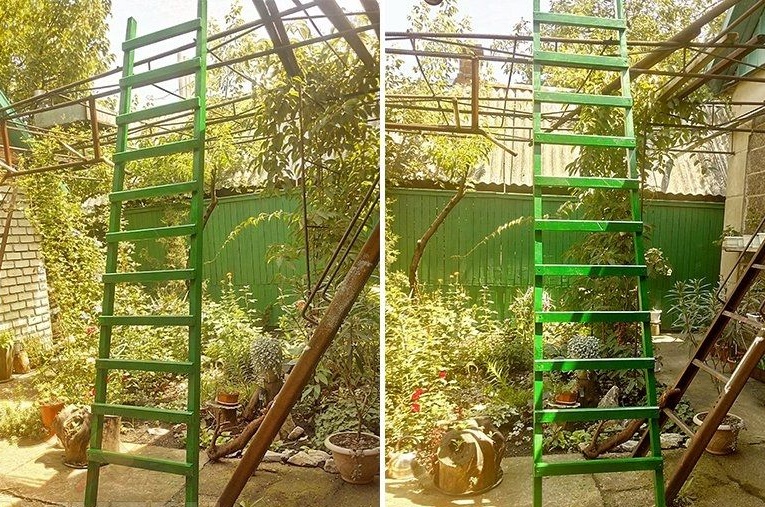
If after when you applied the paint, you notice that in some places the wood began to shine through, then it is worth applying another layer. When the paint is completely dry, this ladder is ready for use.
The article is finished, thank you all for your attention.