
It’s great when there is a place for rest on the summer cottage, and of course a barbecue or stove, so that you can cook a lot of different meat dishes in the fresh air. What could be better than a family vacation in the country.
And so let's take a closer look at how to build this furnace and what will be required for this?
Materials
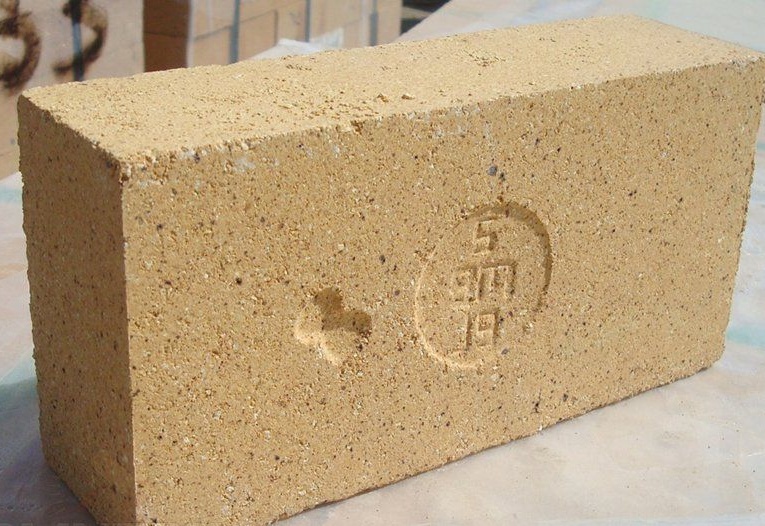
1. red brick
2. refractory brick
3. fittings
4. knitting (steel) wire
5. damper
6. corner
7. stove door
8. grate
9. ash chamber door
10. steel plate 2 mm
11. board 30 mm
12. clay
13. sand
14. cement
15. gravel
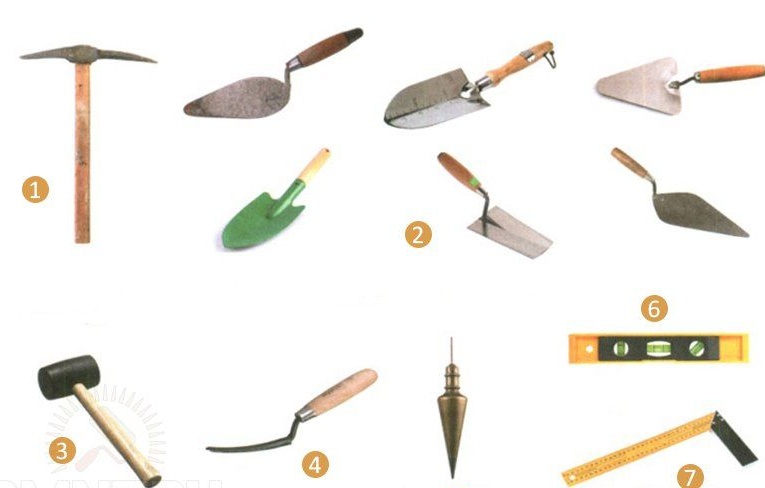
Instruments
1. mallet
2. trowel
3. putty knife
4. trowel
5. pickaxe
6. plumb
7. hacksaw
8. hammer
9. level
10. corner
11. roulette
12. Bulgarian (wheels on stone)
13. metal ruler
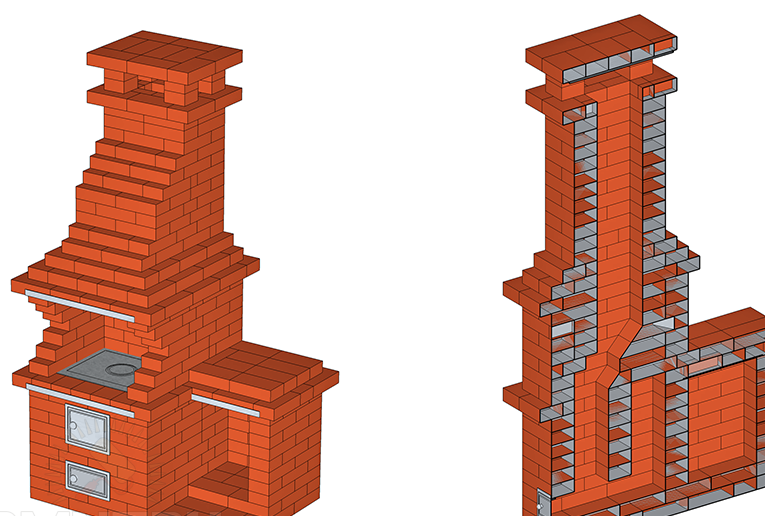
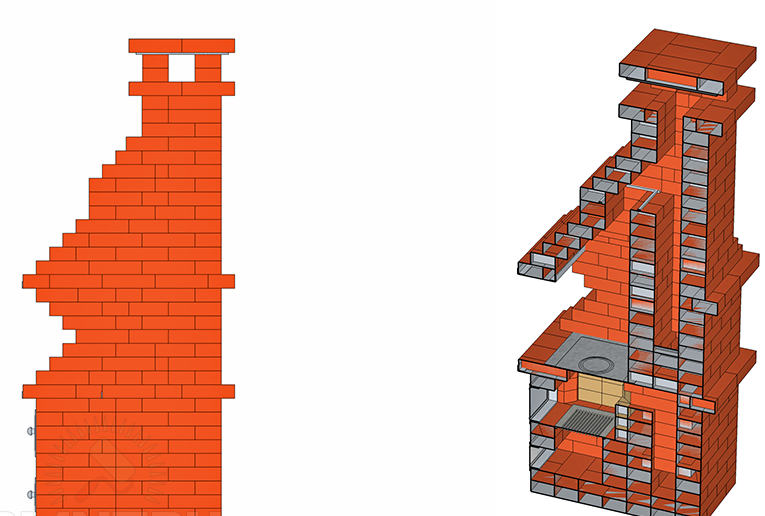
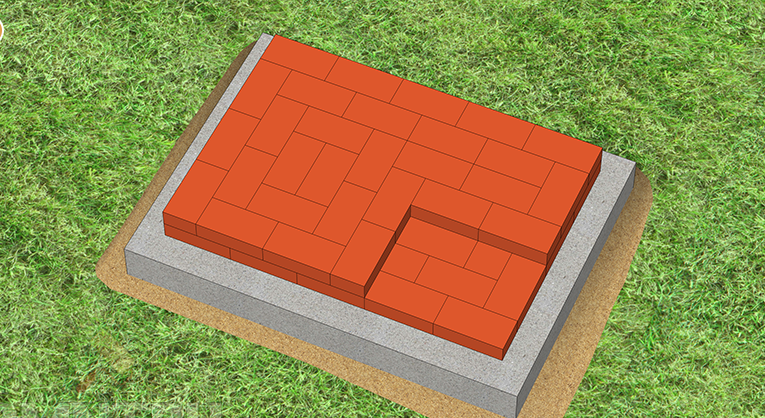
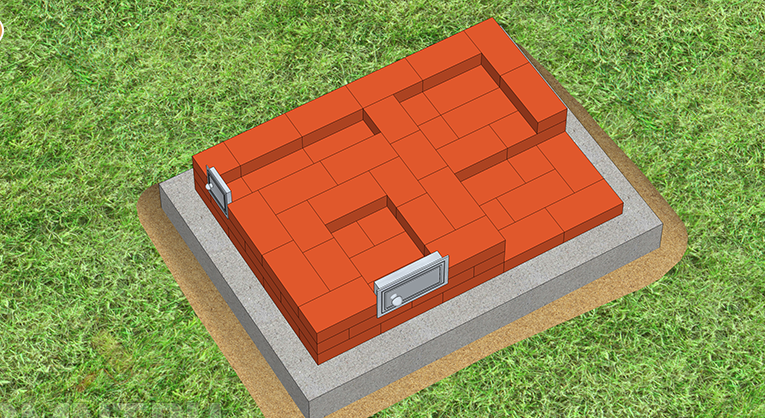
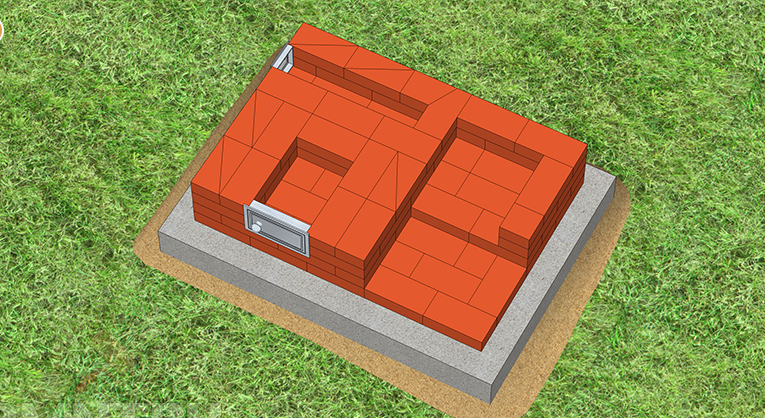
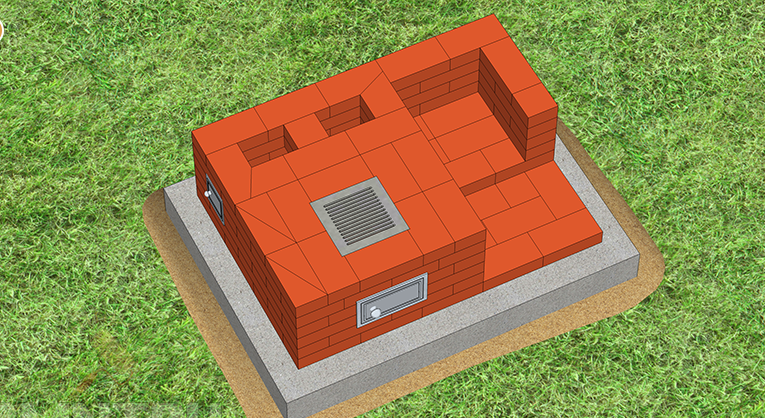
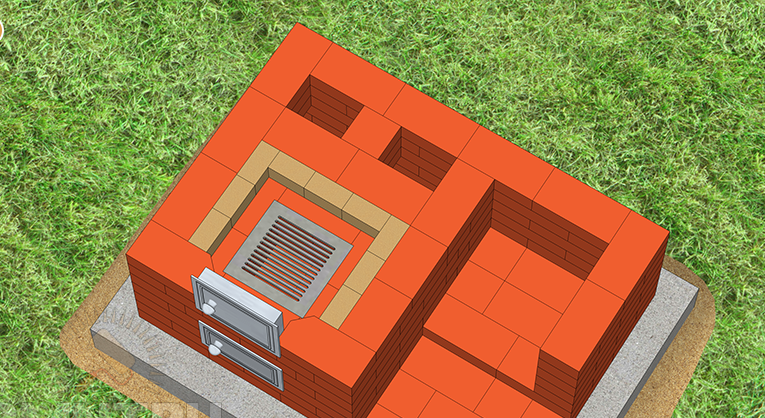
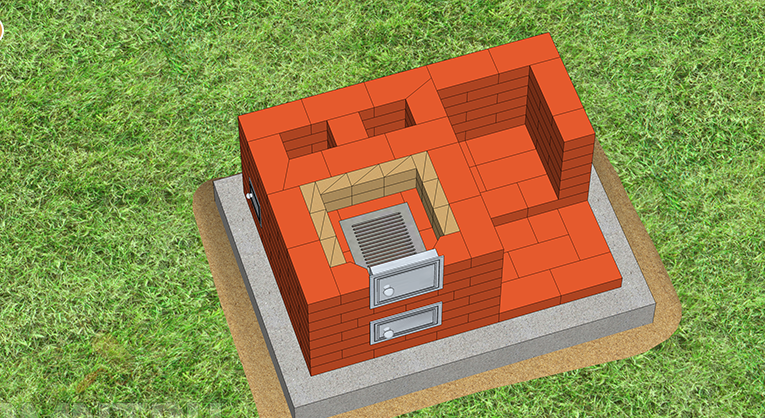
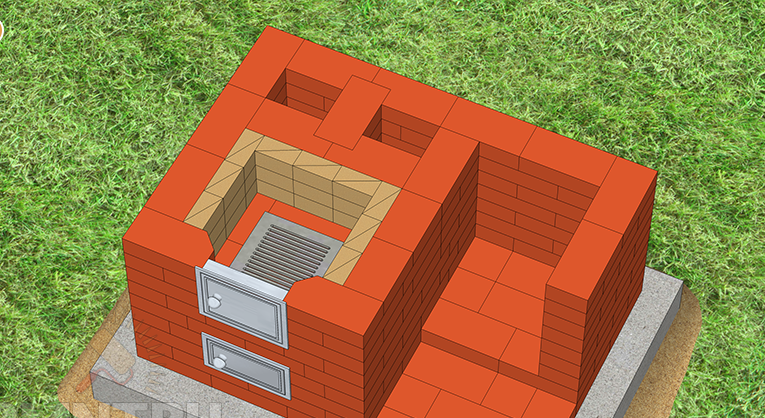
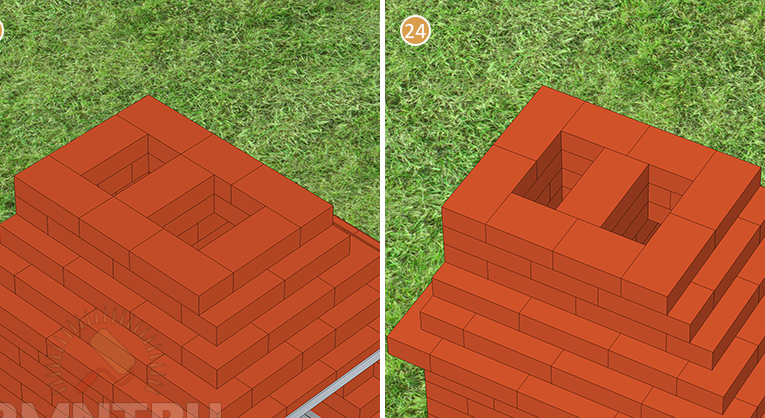
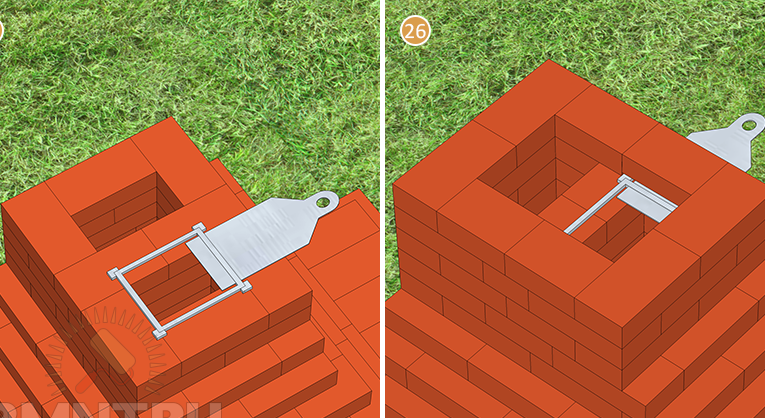
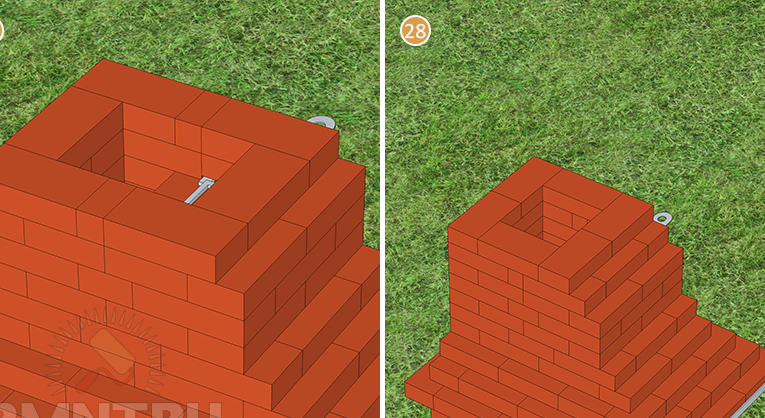
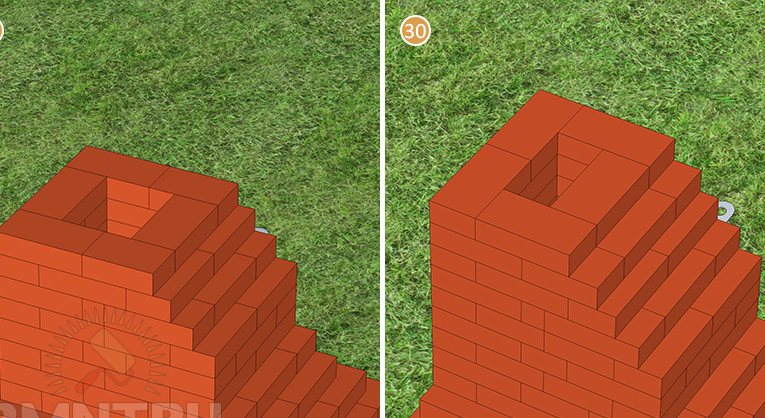
Furnace construction process and detailed 3D model
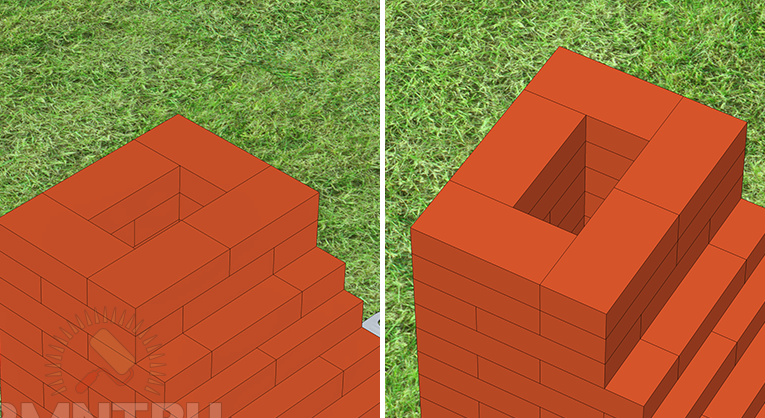
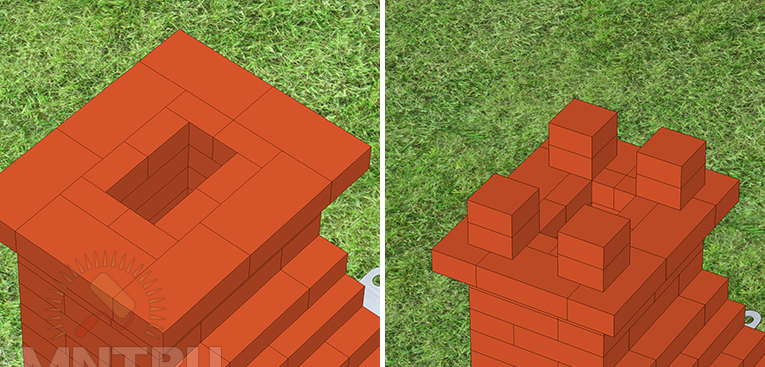
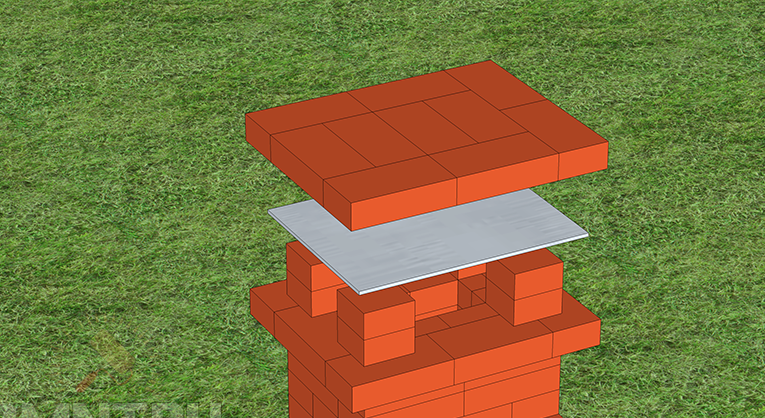
And so, it’s not so difficult to lay down a simple barbecue oven if you have little experience with bricklaying, you can also use your imagination when designing the shape of the furnace, but without naturally deviating from building codes and laws, otherwise it will turn out not a furnace but torment)
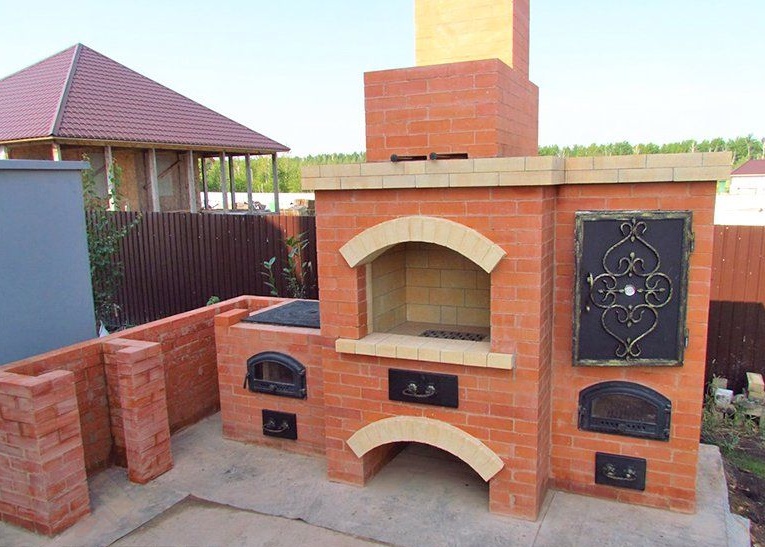
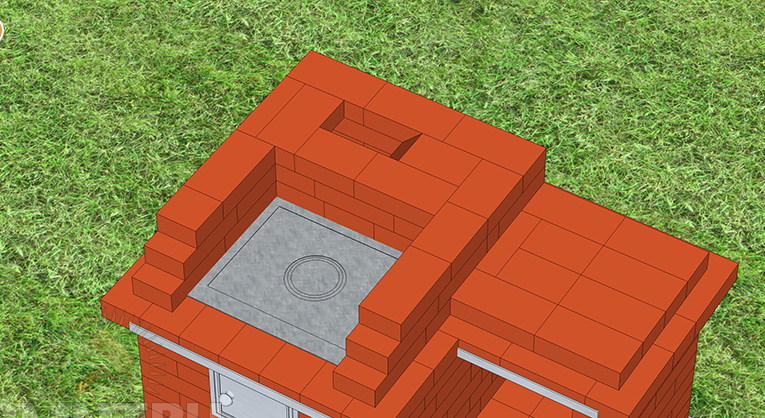
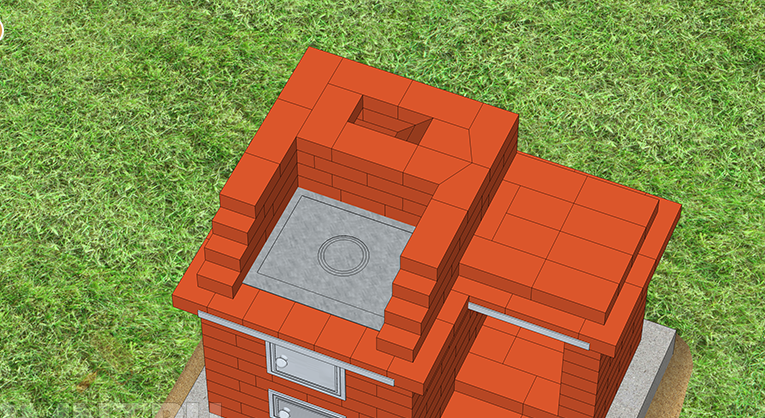
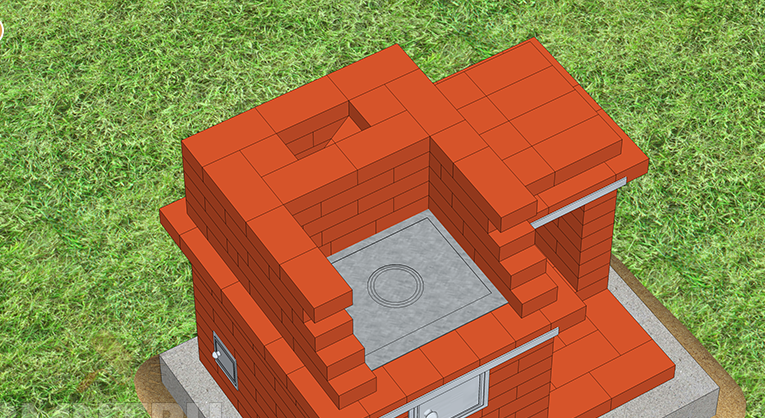
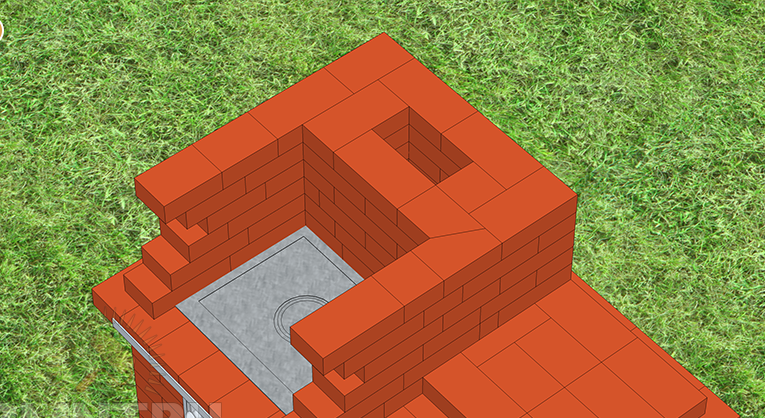
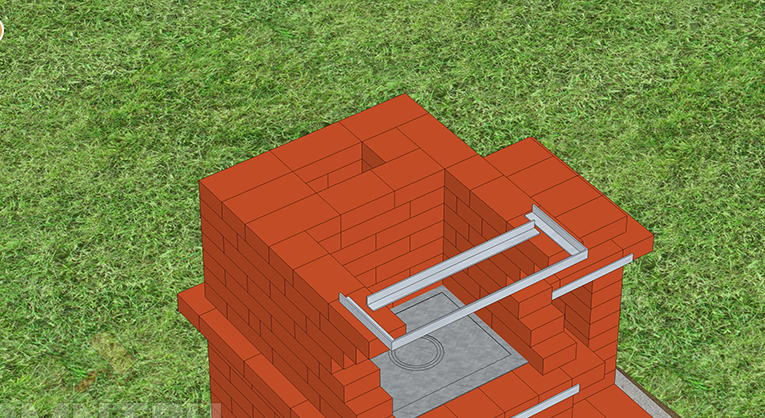
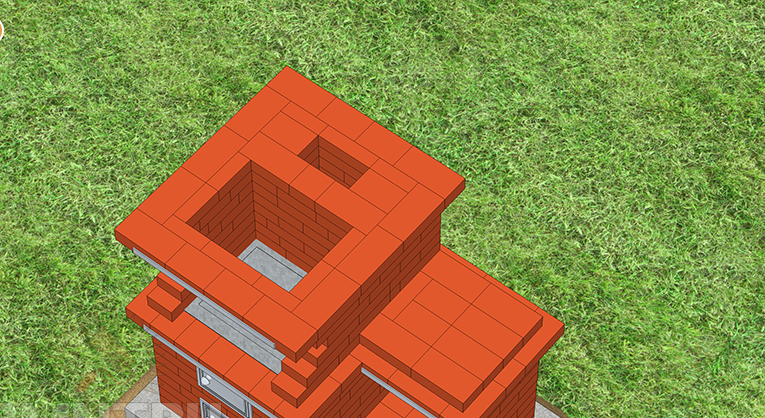
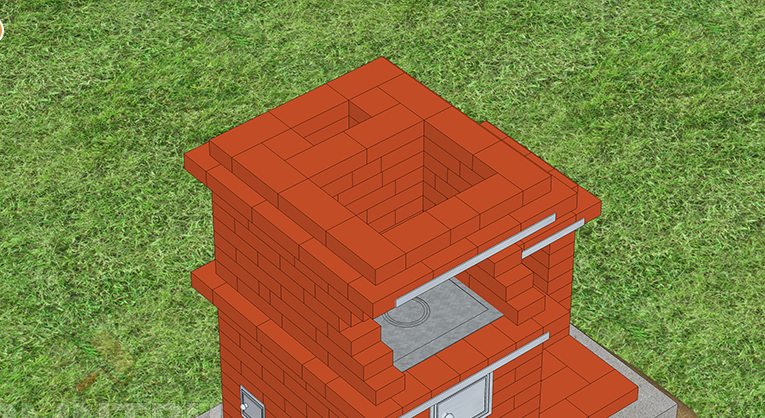
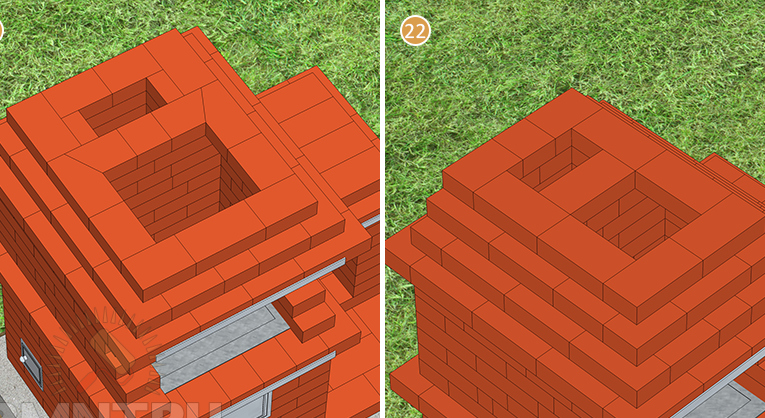
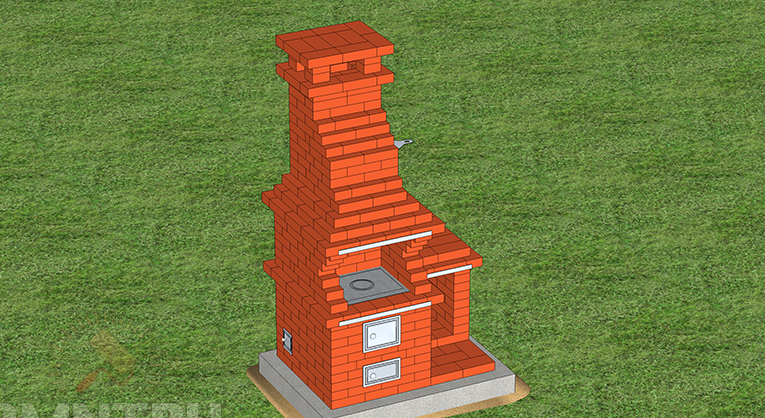
The barbecue oven with a stove presented in the author’s material is a bit complicated, but if you carefully understand everything, then it is quite possible to build such a furnace. For general familiarization, the master gives us a couple of diagrams of this furnace.
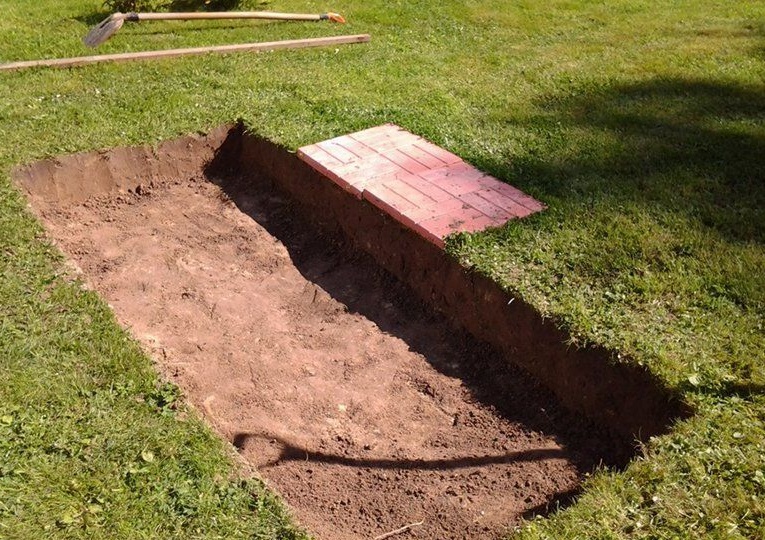
First of all, you should choose a place on your site under construction, it should be located no closer than 7 meters from the capital walls of the buildings "fire safety measures". Choosing a suitable place, you need to clear it of possible debris, stones, shrubs.
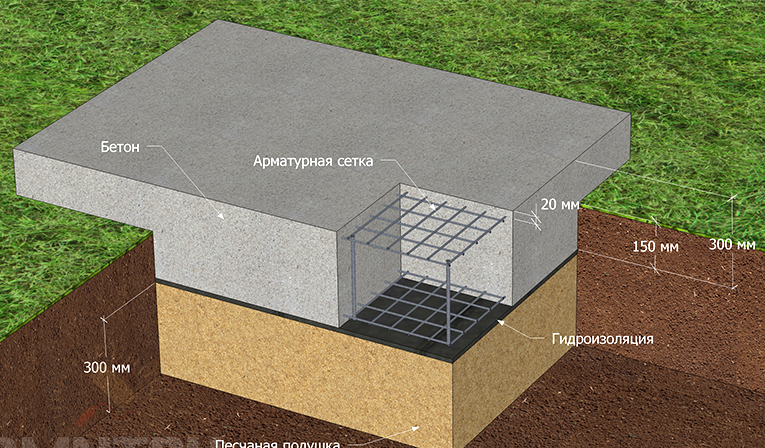
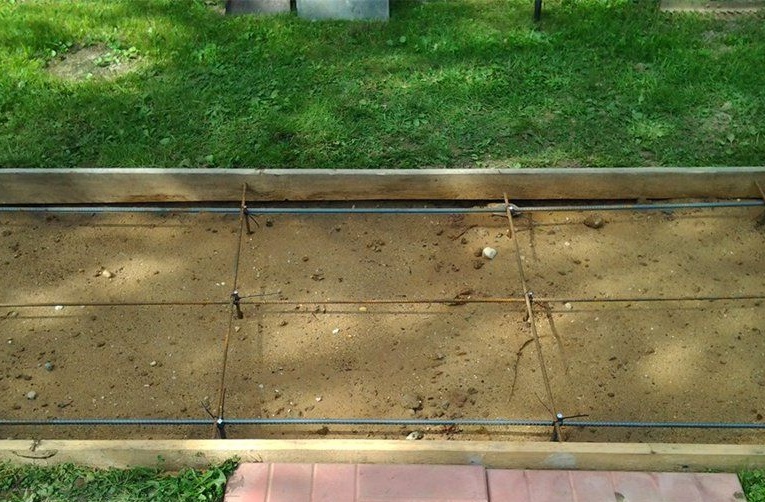
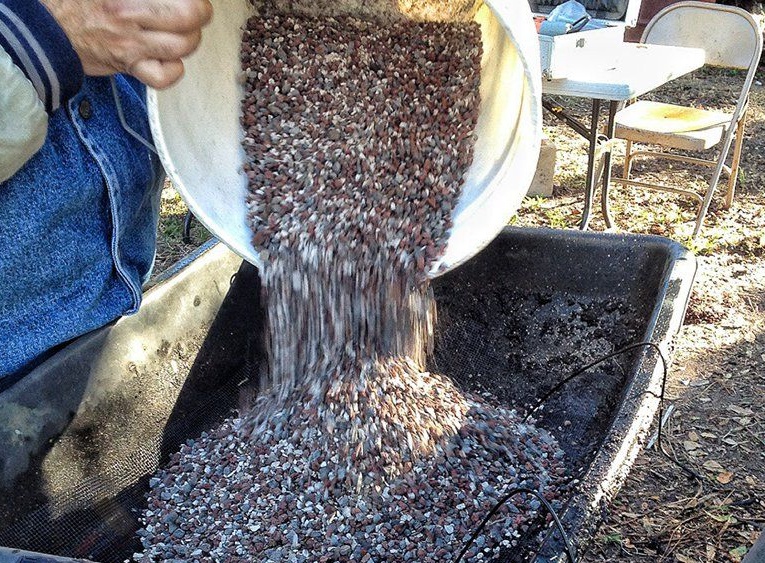
Next, dig a hole with a depth of at least 50 cm, lay a sand cushion on the bottom, moisten with water and ram. After the formwork is done and the reinforcement is laid inside the pit and connected with each other with a knitting wire. Preparing a solution of 1: 3 and 4-5 parts of gravel.
Here the author indicated the scheme of the foundation plate for the furnace.
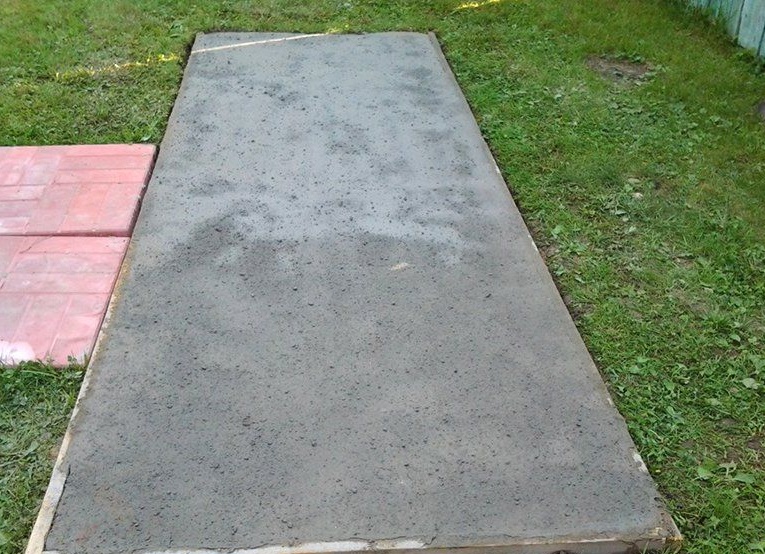
The laying of the furnace can only begin after the cement hardens and hardens, and this happens at least 6-7 days at an ambient temperature of +20 C, but if the temperature is lower, then the ripening time will be longer, up to 14 days.
The first rows of kiln masonry are usually laid on cement mortar in order to create a more solid foundation, but only the first! It is quite possible to use cement to the ash chamber.
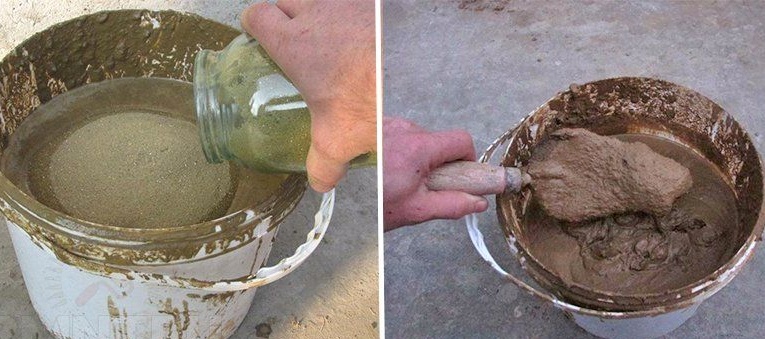
Further, the whole furnace will be placed solely on a clay solution, it is better to use red clay. Clay should be stored in advance and in good use, then it must be soaked in a large container, by type (trough) for several days. After the clay is thoroughly mixed and kneading (legs). It should not have large lumps.
Then the master prepares the clay solution.
The composition of the mixture for varieties of clay:
Bold 1: 2.5
Average 1: 1.5
Skinny 1: 1
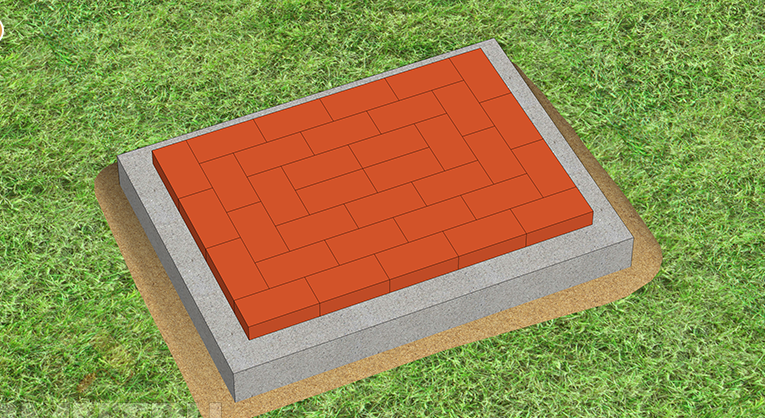

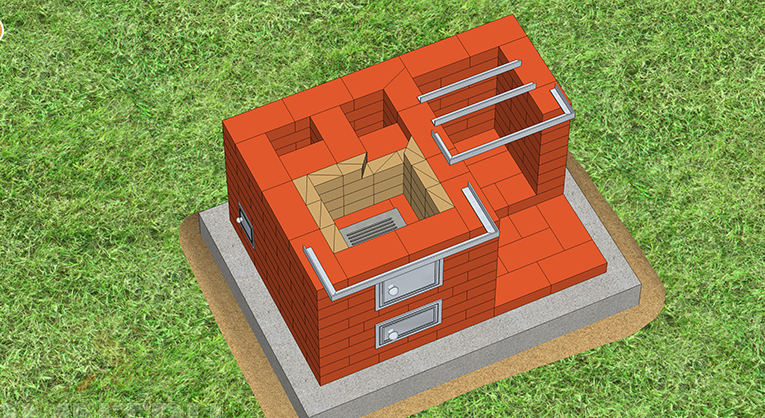
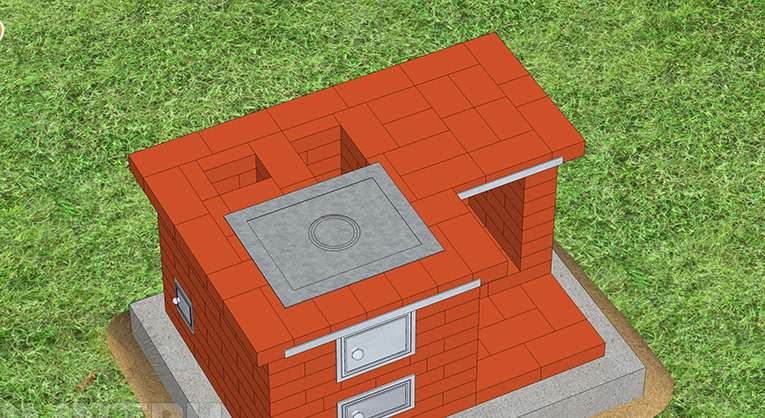
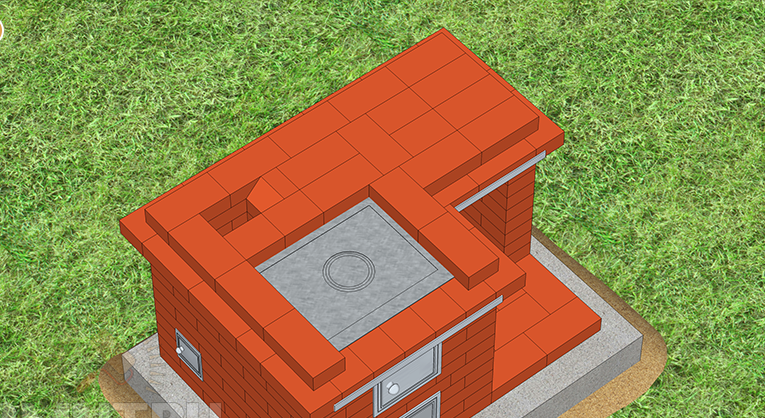
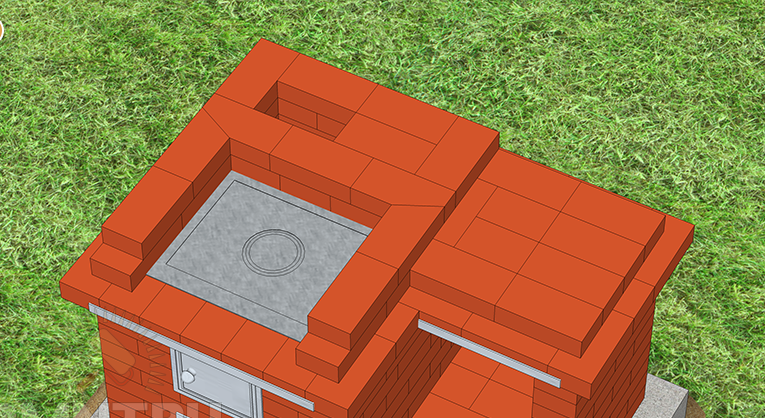
And in the end, what should happen)
Fold the trial, simple oven without mortar (dry) But only then, when some kind of consideration and concept has already been formed, what you are doing) can be taken for a more serious masonry. "Experience comes with time" And you will not immediately become a stove-maker.
This concludes the article. Thanks for attention!
Come visit often, do not miss the latest in the world of homemade goods!
This article is for informational purposes only!