
Hello everybody !
Today in this article we will make a bird feeder for feathered friends. The design is not complicated, everyone can repeat it. To do this, stock up on desire and the necessary tool.
To make a bird feeder, we need the following:
Instruments :
- angular ruler;
- a pencil;
- hammer;
- drill;
- a hacksaw for wood.
- the crown.
Materials:
- a board 20 mm thick;
- 2 loops;
- nails;
- self-tapping screws;
- plexiglass.
Well, let's start the manufacturing process!
The author encloses detailed detailing and drawing.
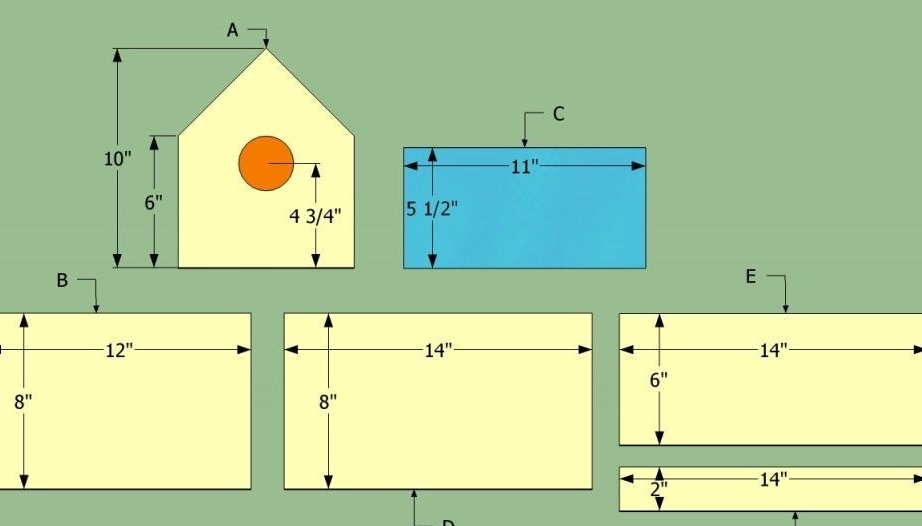
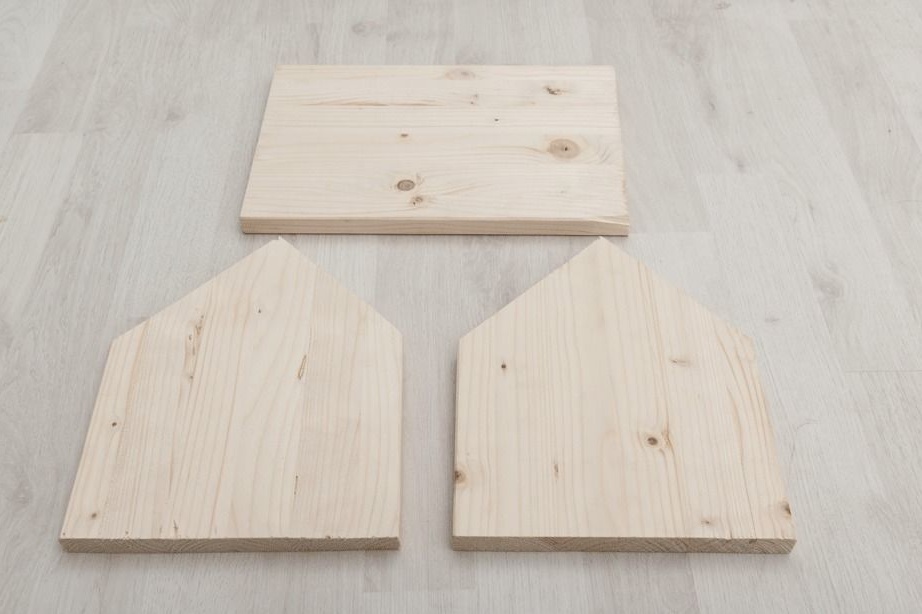
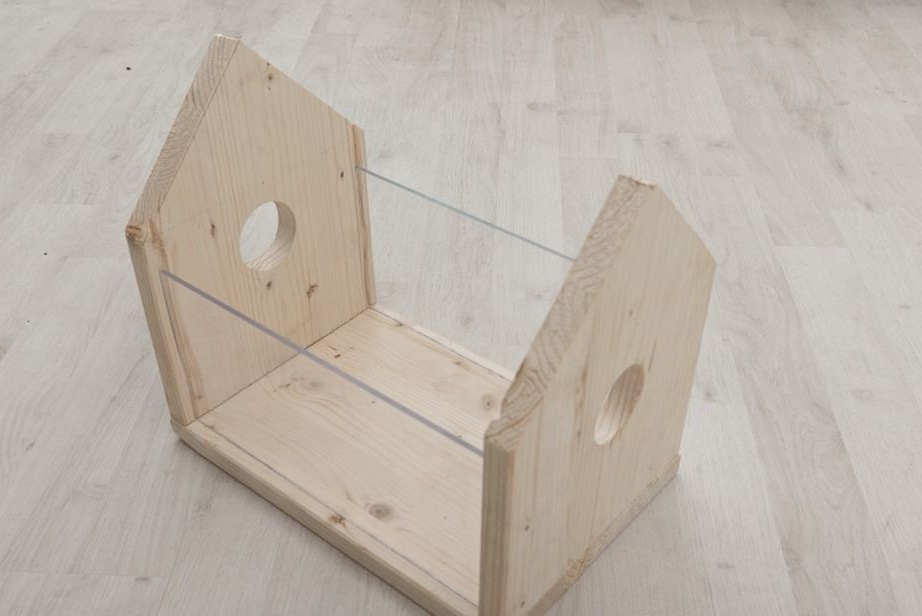
A. - front and back wall - 2 pcs., Height 10ʺ (254 mm);
B. - bottom - 1 pc., Length 12ʺ (305 mm), width 8ʺ (203 mm);
S. - the side walls of glass or plexiglas - 2 pcs., Width 11ʺ (280 mm), height 5 1/2 / (140 mm);
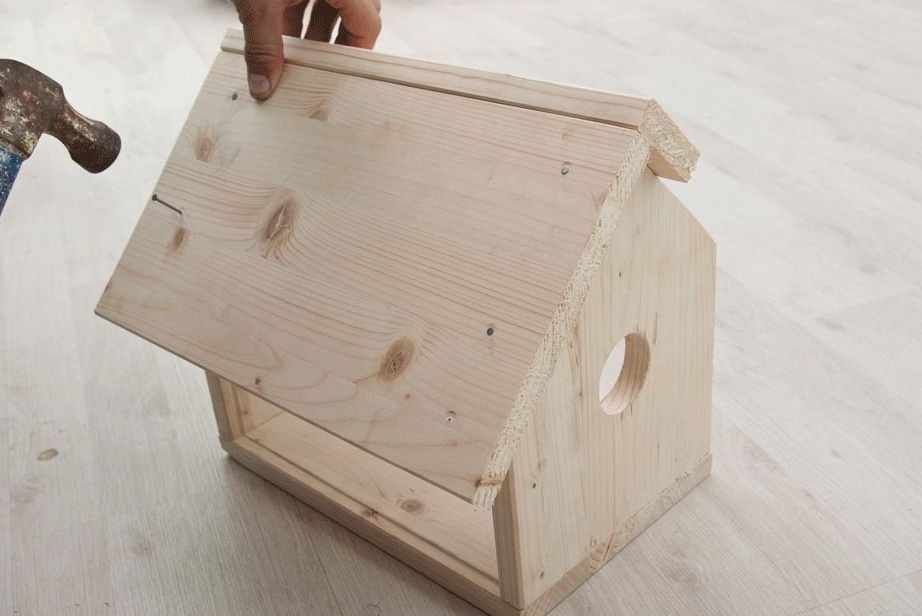
D. - the integral part of the roof - 1 pc., Length 14ʺ (356 mm), width 8ʺ (203 mm);
E. - the opening part of the roof, consists of two parts with a width of 6ʺ (152 mm) and 2ʺ (51 mm).
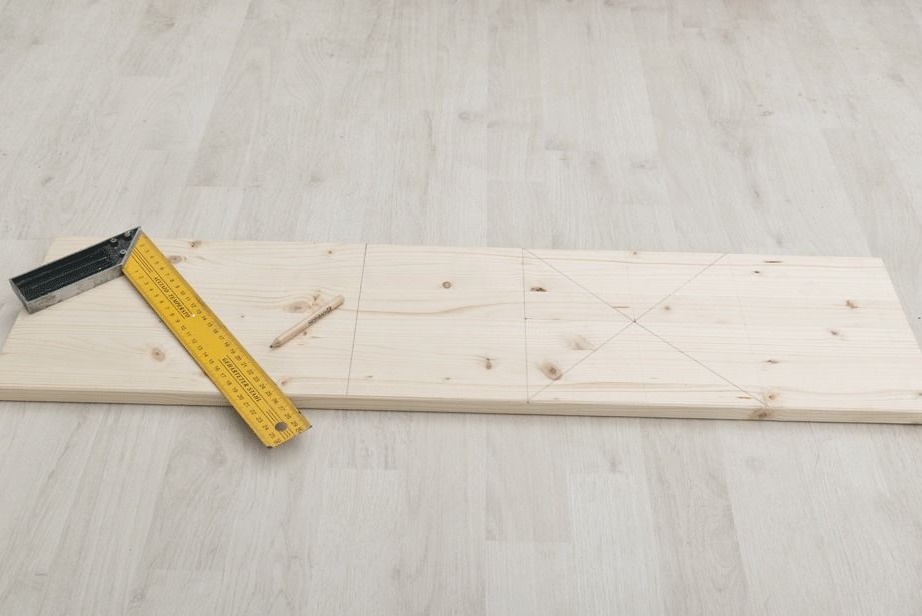
We take a wooden board on which we mark up, according to the above sizes. To do this, use a ruler and a pencil. Then, when everything is ready, we make a cut into the elements necessary for us, we use the cutting tool you have.
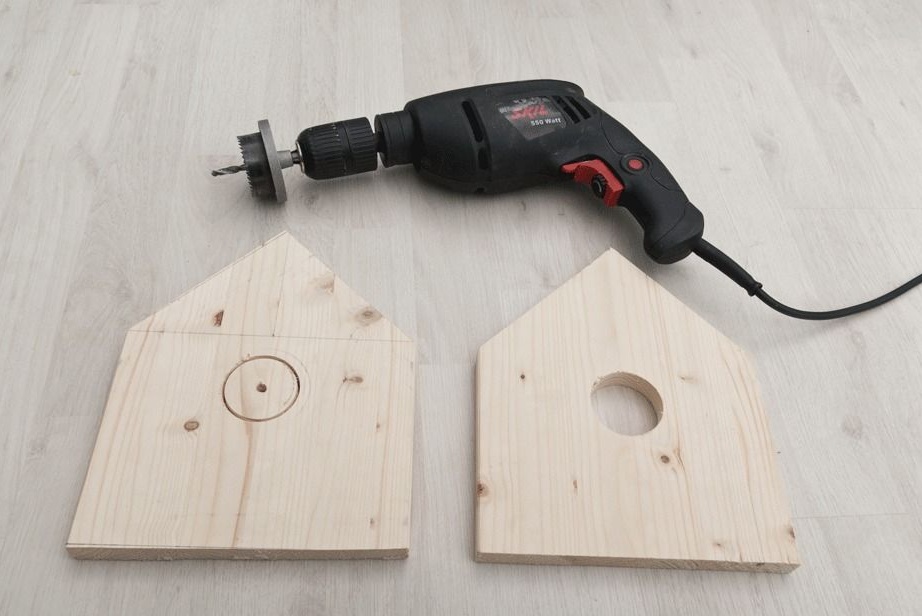
Next, we take the front and back walls, on which we mark the future holes, cut them using special cutting crowns for this.
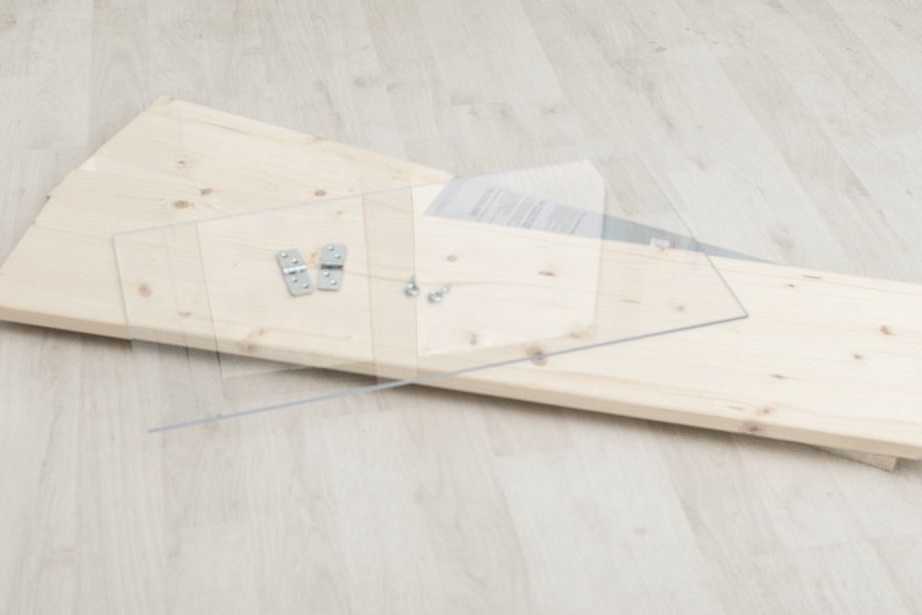
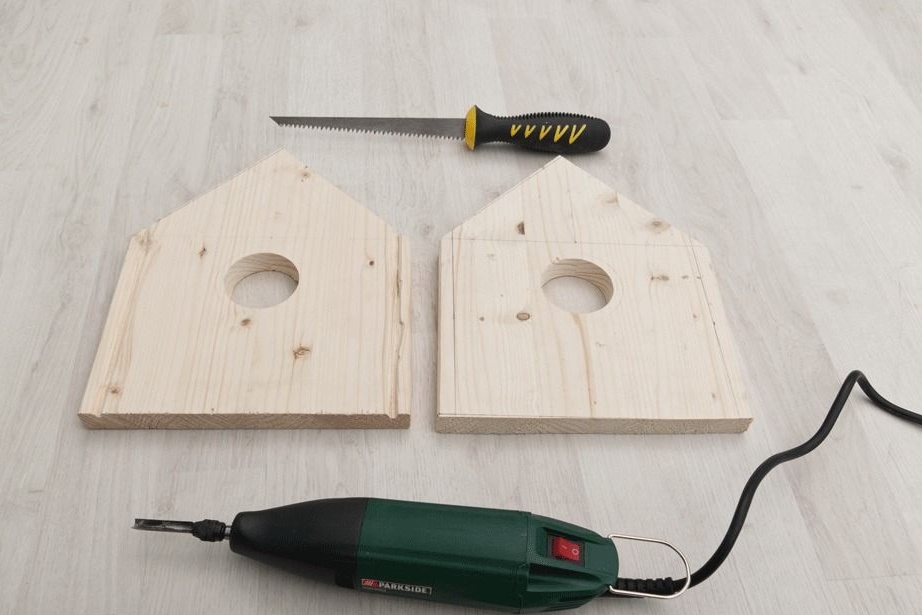
Next, at the edges of the walls, you need to make two grooves, make the markings 1 cm away from the edge, cut them out with a small hacksaw and a chisel, plexiglass will be installed in them later (you can use ordinary glass). At the end of this operation, we grind the surface.
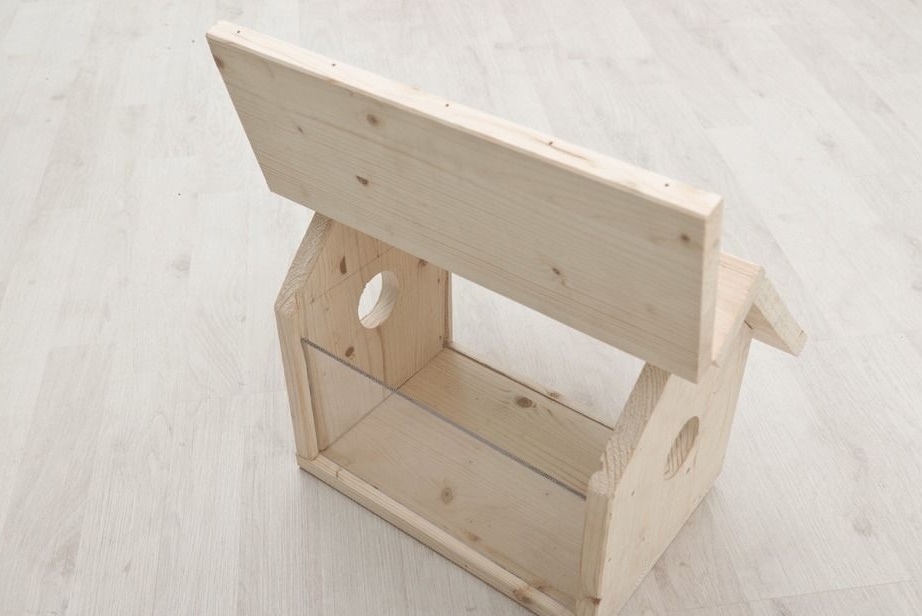
Now we proceed to the assembly of the structure.
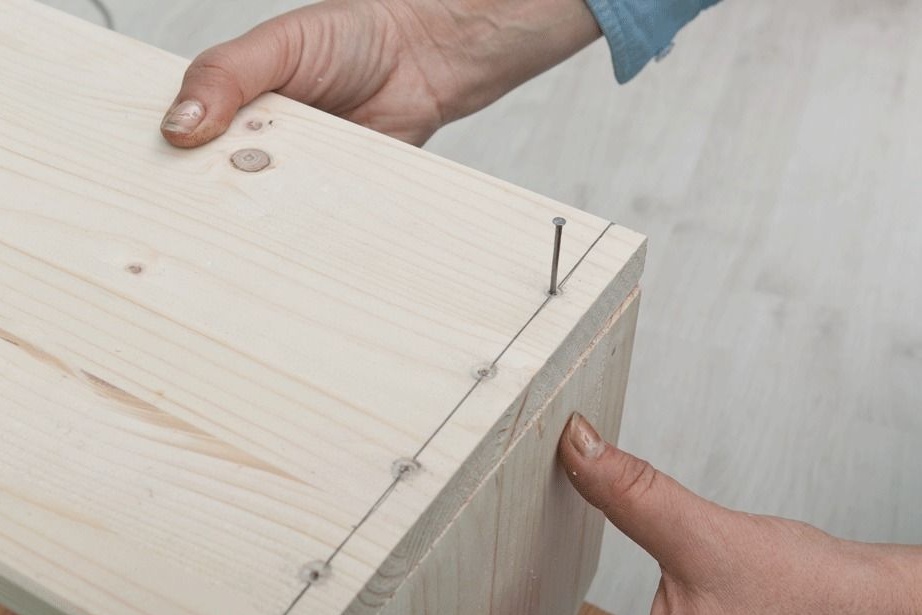
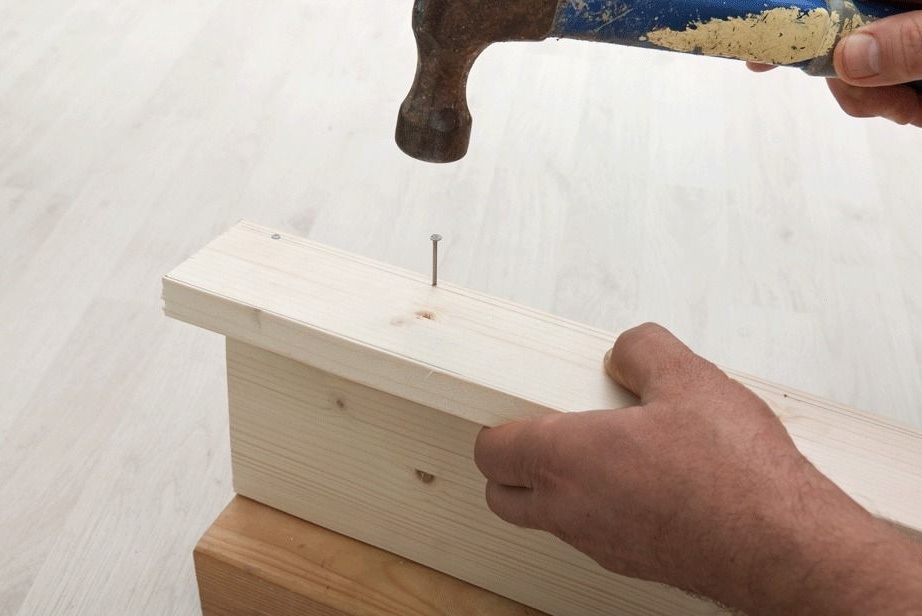
We take the lower part, to which we fasten the front and back walls, fix them together with nails or screws, after making holes for them, they are needed so that the wood does not crack during the fastening.

When this design is assembled, we install the side glass walls in the grooves, which we cut according to the presented dimensions.
Next, go to the roof fasteners.
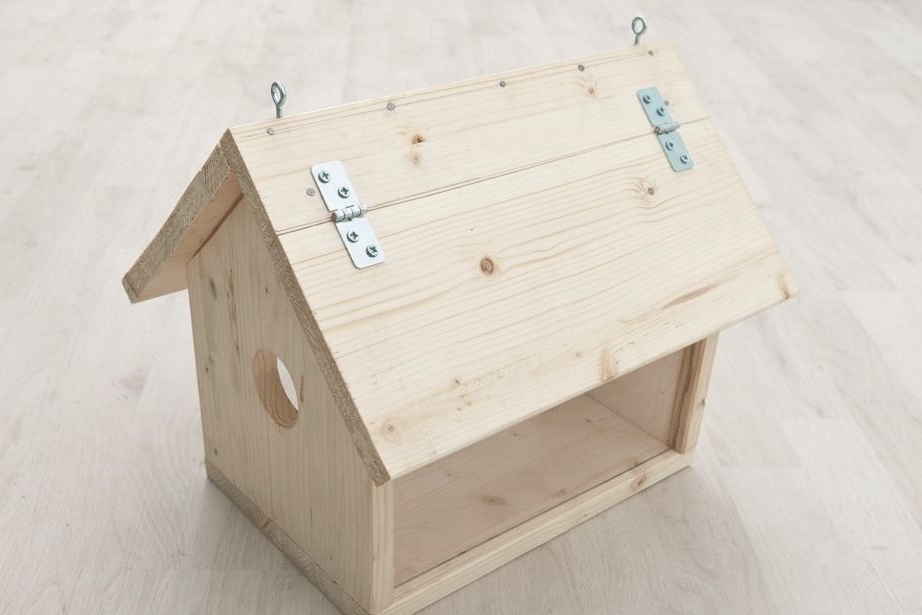
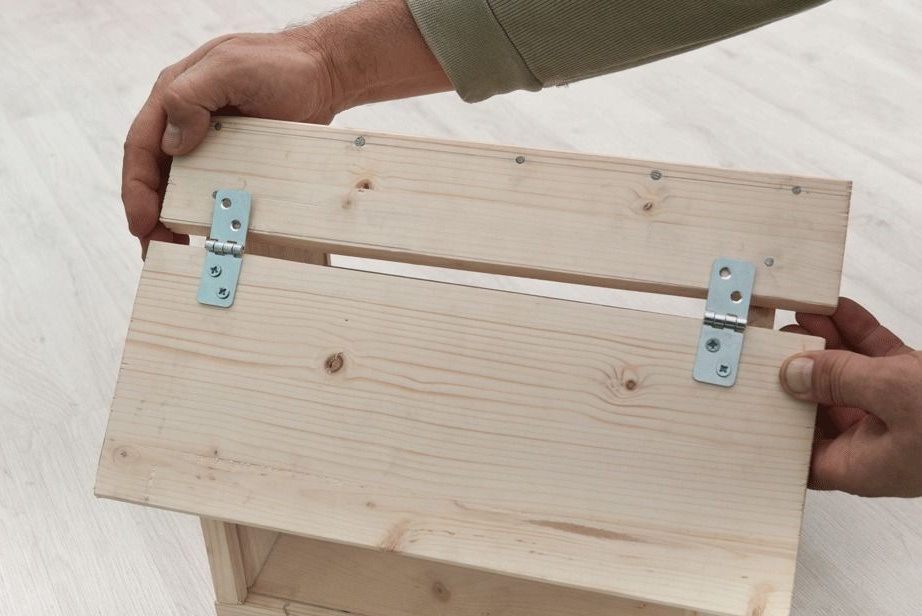
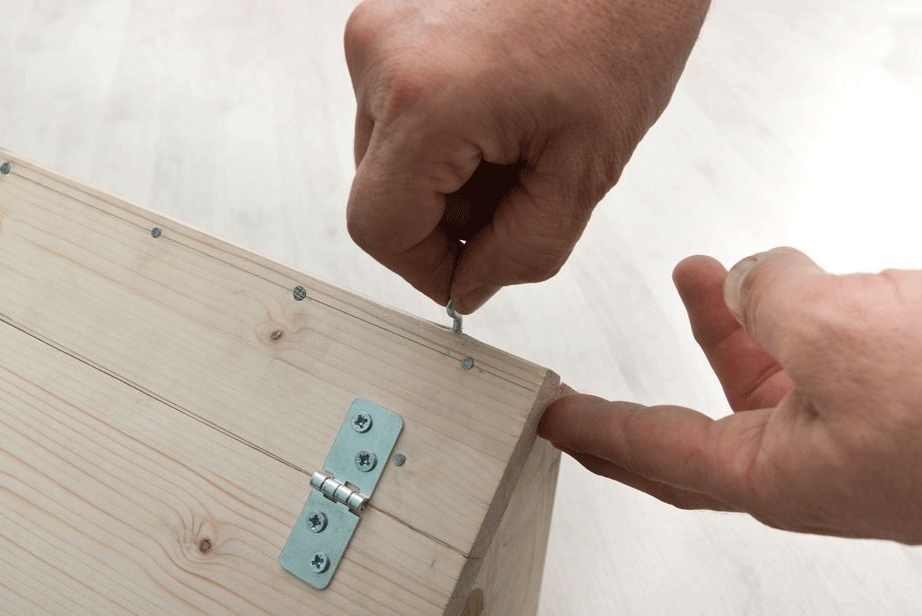
To do this, take the cut out elements and install them.One part of the roof is integral, we install it flush with the upper angle of the side wall, the second part has two separable parts, install the smallest and fix it, fixing it with nails in the upper part, and on the sides. We need the second largest part in order to make the roof movable so that it can open, we use two small hinges, which we fasten with self-tapping screws. A movable roof will allow us to add feed for birds, as well as to clean the inside.
When the structure is assembled together, we take sand paper and grind the surface, remove sharp edges and burrs.
In order for the feeder to be hung in the right place for us, we screw in two special loops at the top of the roof.
As a result of the actions taken, we get such a simple bird feeder in manufacturing. If desired, the feeder can be painted and coated with a protective coating.
This article is over, thank you all for your attention!