
Hello !
Today, the author of the article will tell you how to make a rocking chair for your child. It will consist of five main elements that are fastened with two tie rods. The design will, if necessary, be easily disassembled and assembled back. Everyone can make such a chair, it is enough to have the right tool with you. The entire manufacturing process is described in detail, and has a complete photo report.
In order to make a rocking chair do it yourself we need the following:
Instruments :
- a circular saw;
- Miter saw;
- manual frezer;
- jigsaw;
- a printer;
- grinder;
- a set of hexagons.
Materials:
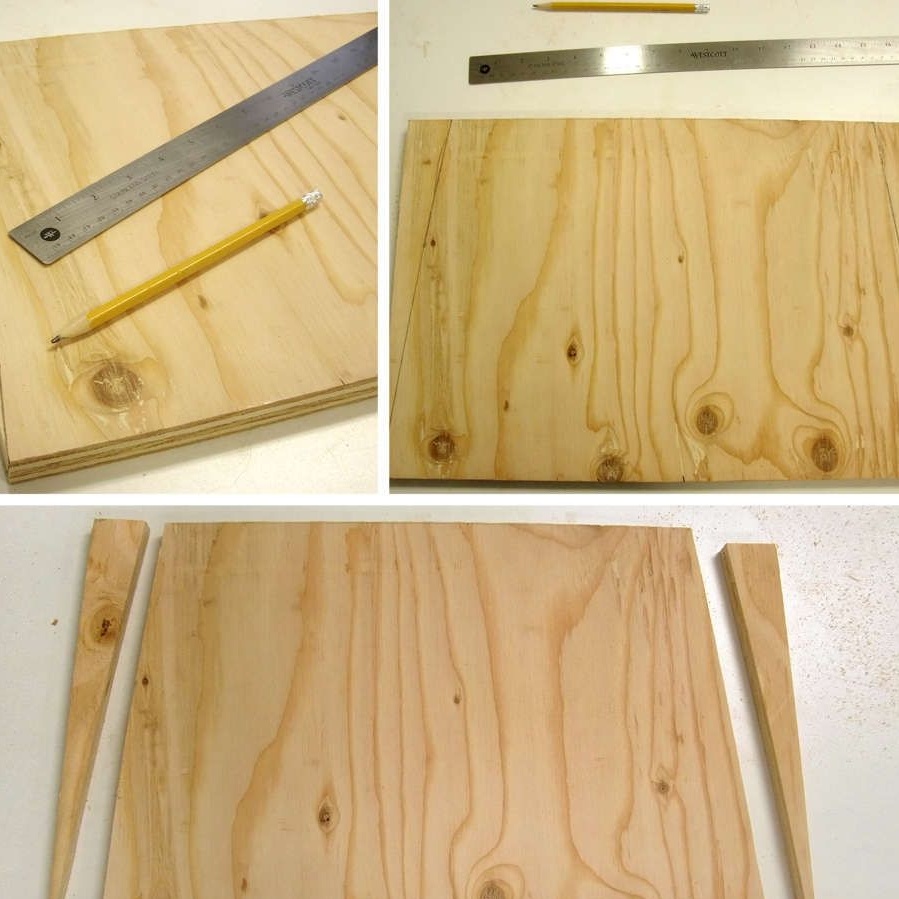
- plywood 18 mm thick;
- paint;
- clear nail polish;
- cardboard;
- two hairpins 50-60 cm long;
- 4 end nuts for threaded rods.
The author used the following workpiece sizes:
- two sidewalls: 40 * 65 cm;
- seat: 31 * 46 cm;
- back: 38 * 60 cm;
- spacer: 5 * 42 cm.
We proceed to the manufacture of sidewalls.
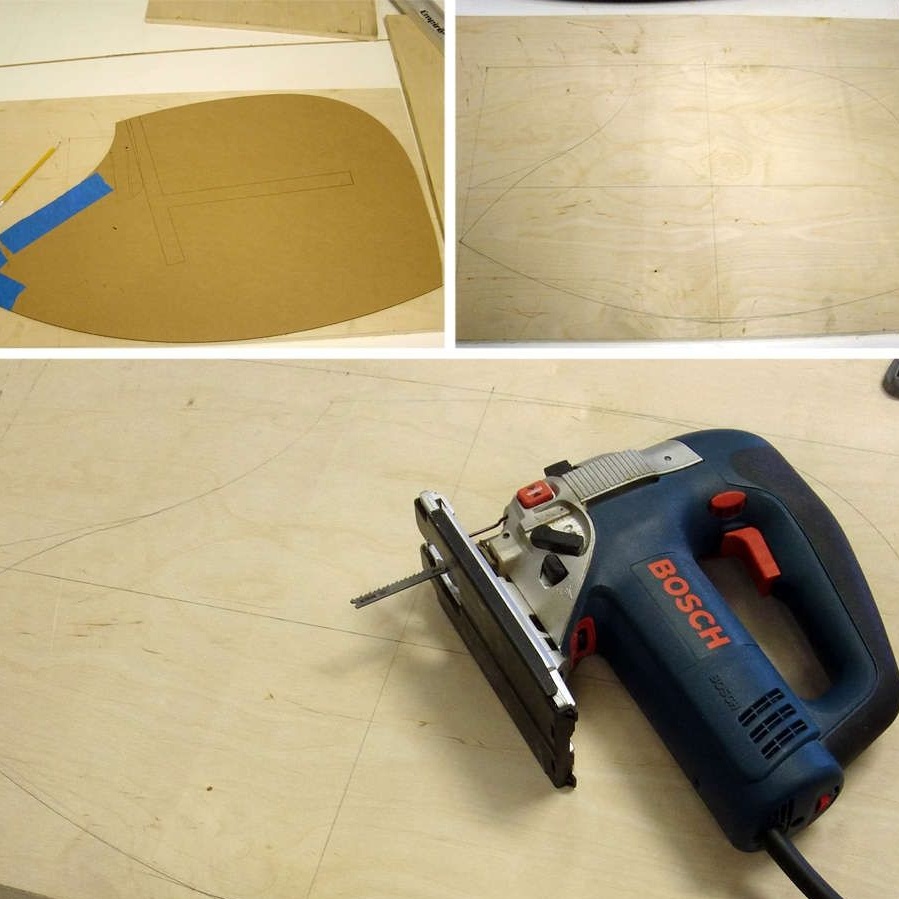
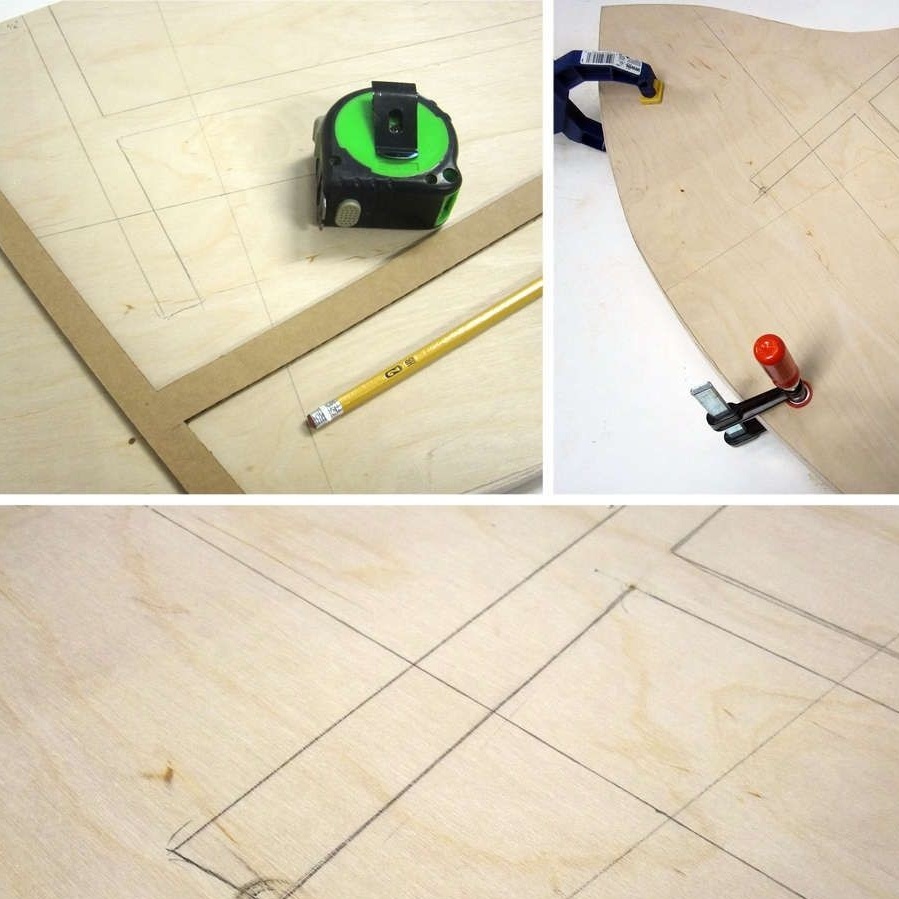
According to these schemes, we make a template that we print on paper, scale the details to fit our or proposed sizes. Only the width of the grooves remains unchanged, we make them based on the thickness of the plywood.
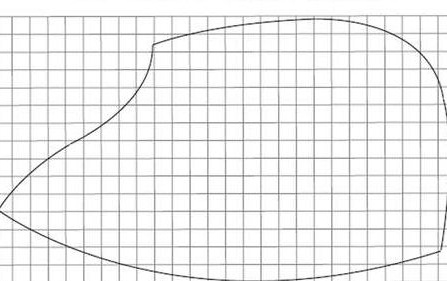
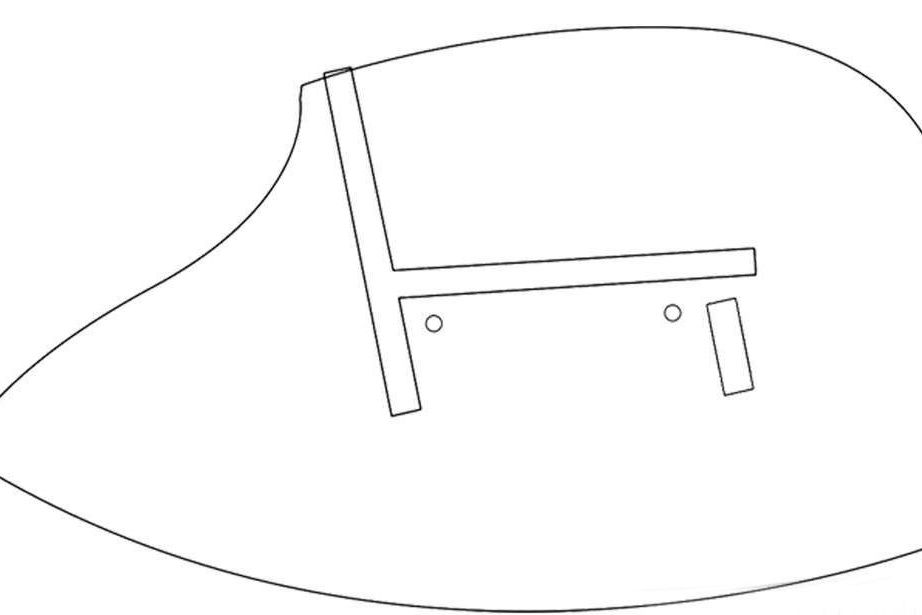
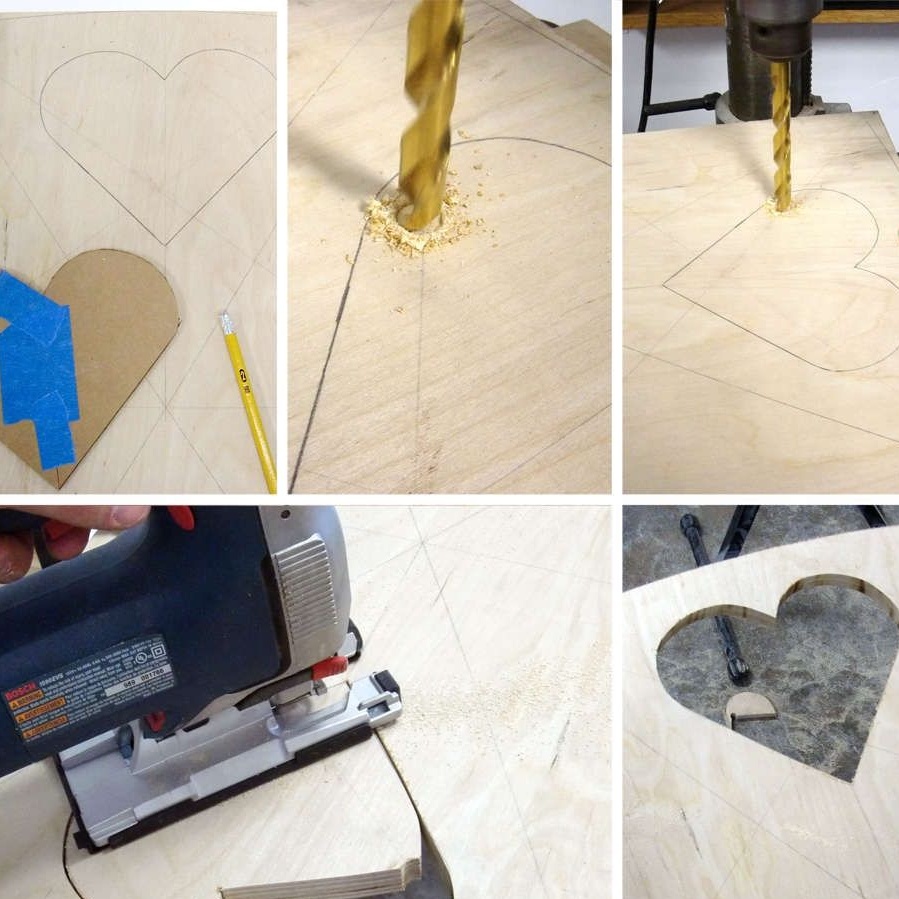
When the template is cut out, we take it and apply it to the plywood sheet, then with the help of a pencil we transfer the contour of the sidewall. Then we cut out the element using an electric jigsaw. We use the resulting part as a template, put it on a plywood sheet, and fix it with clamps, then cut along the contour, then grind the edges, fitting both parts, they should be identical. Next, we mark the grooves, in order to clearly apply them to the lower sidewall, drill small holes at the corners of the markings, the drill should go through, then you need to connect the holes with a line, so you can determine the location of the necessary grooves.
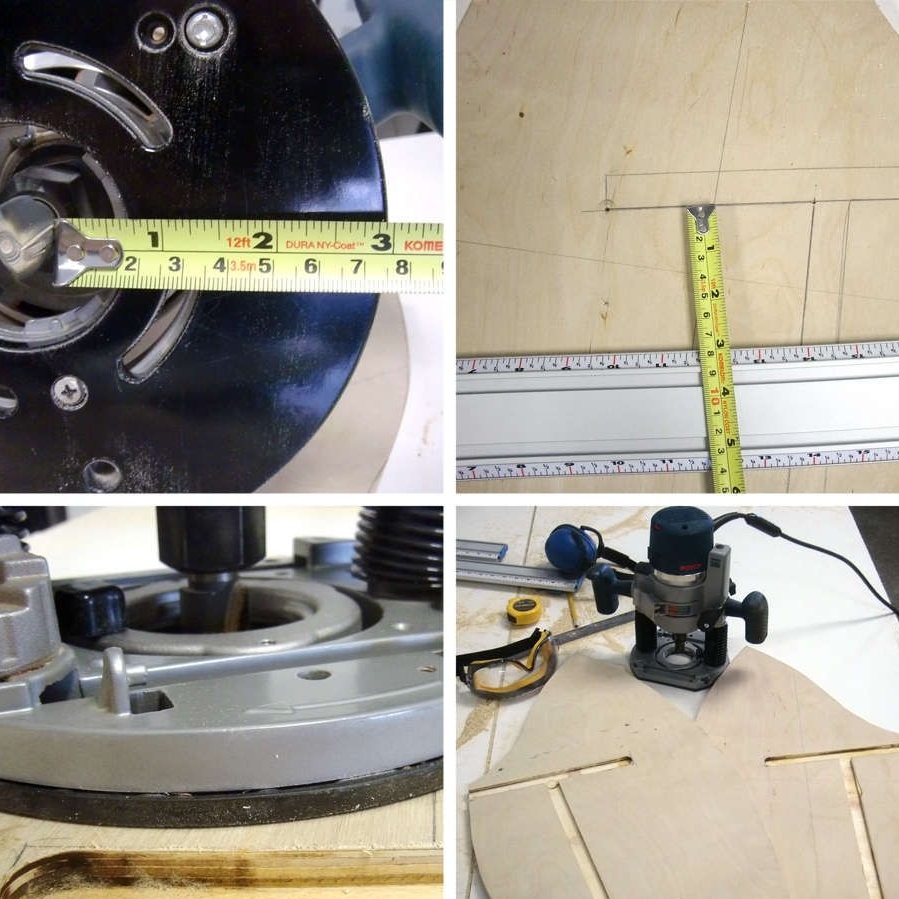
When the necessary marking is applied, we take a manual milling cutter with a straight mill, and we make grooves according to the drawn marking, their depth is approximately 6 mm.
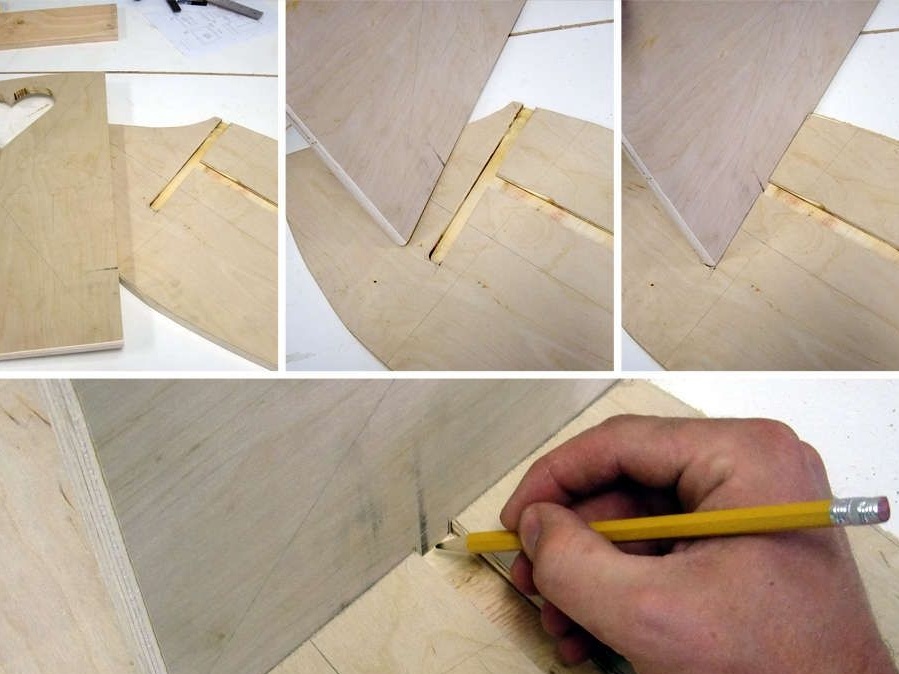
Next, go to the seat. The width of the seat can be chosen at your discretion. The author decided to make it wider so that it could fit a child and a couple of his favorite toys. The seat has a narrowing towards the back. We choose the angle at which the sidewalls will be located, for this we first draw the markings and cut off the side parts at a small angle.Then we collect the received parts and look at what happened, if the angle turned out to be insufficient, we cut it off again. In order for the edge of the seat to fit snugly into the grooves, it must be narrowed to the edges.
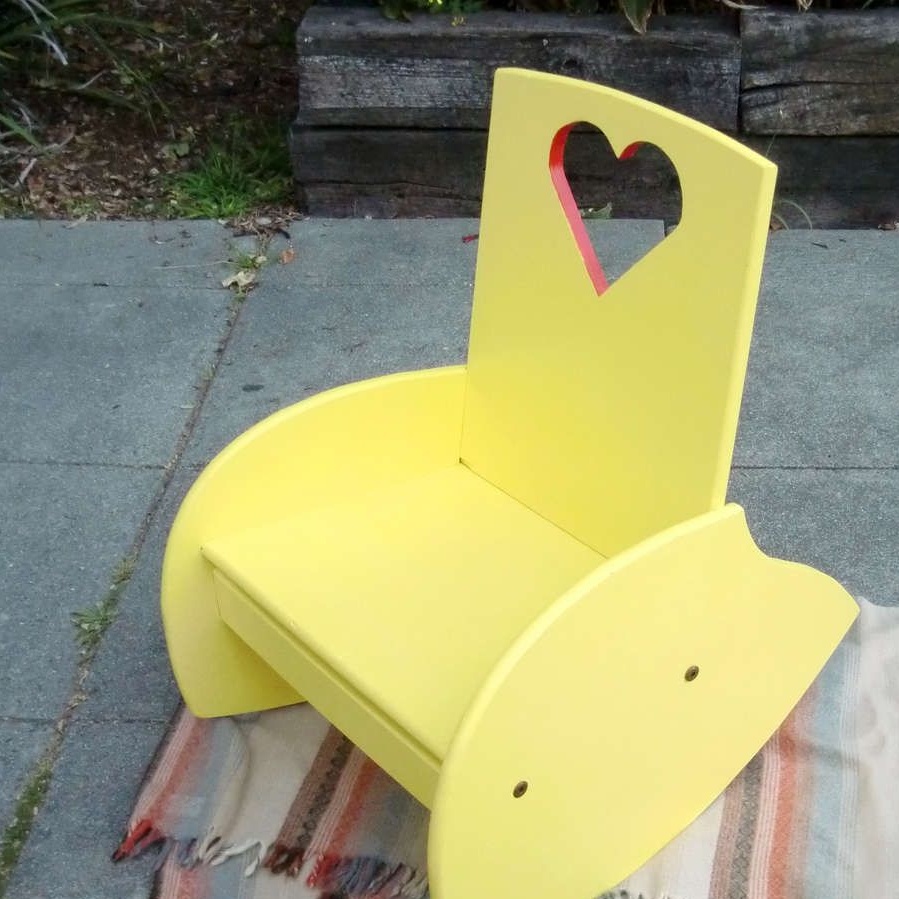
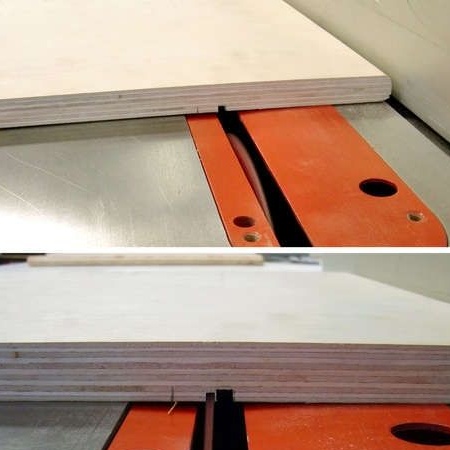
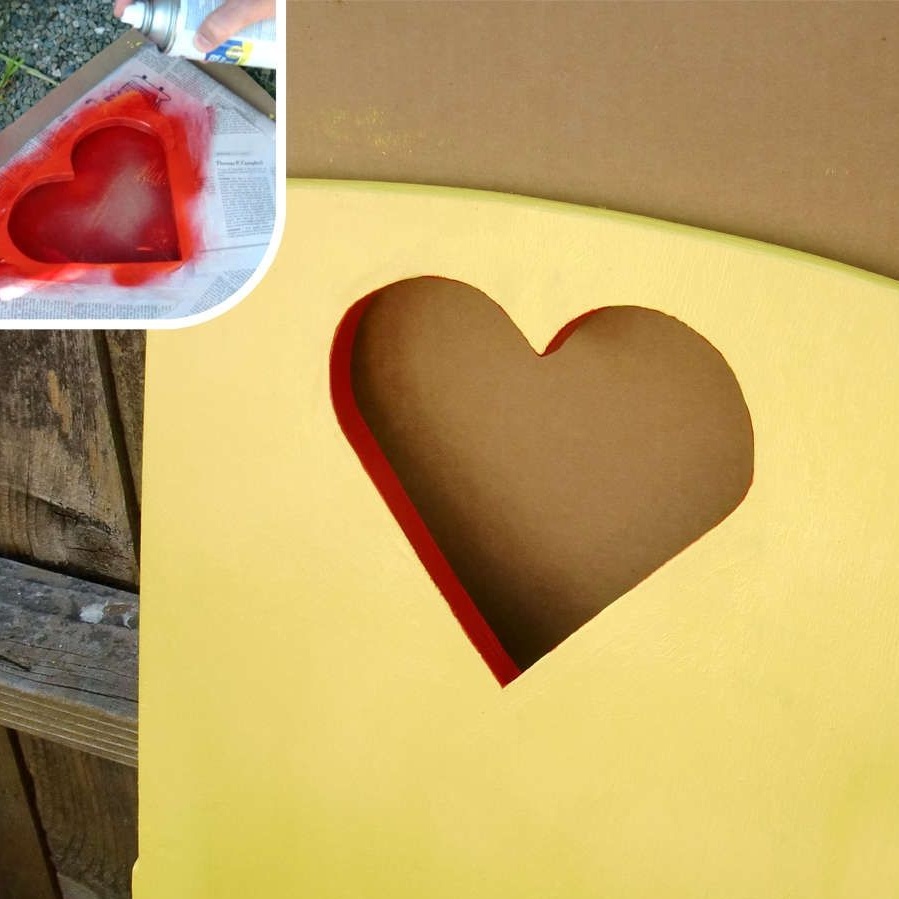
Now move on to making the back. Its width should be the same as the trailing edge of the seat. We customize its dimensions with a circular saw. Next, you need to round the top edge of the back, as well as the front edge of the seat. For these purposes we use sandpaper. Then we will decorate the back of the seat with a curly neckline in the shape of a heart. We print out the selected template, transfer it to the surface of the back. Next, using an electric jigsaw, cut out the figure.
When the previous operation is over, cut out the groove for the seat on the back. To do this, you need to collect the back and side parts, and then make markings in those places where the back meets the grooves of the seat and sidewalls. We connect the two received marks in one line along which we cut the groove with the help of a milling cutter.
Next, we make the spacer. For this, it is necessary to assemble all the parts together, after which it is necessary to make measurements. We measure the distance between the sidewalls, taking into account the depth of the grooves, according to the dimensions obtained, cut out the spacer.
Then we take sandpaper or a grinding machine, with which we smooth the sharp edge.
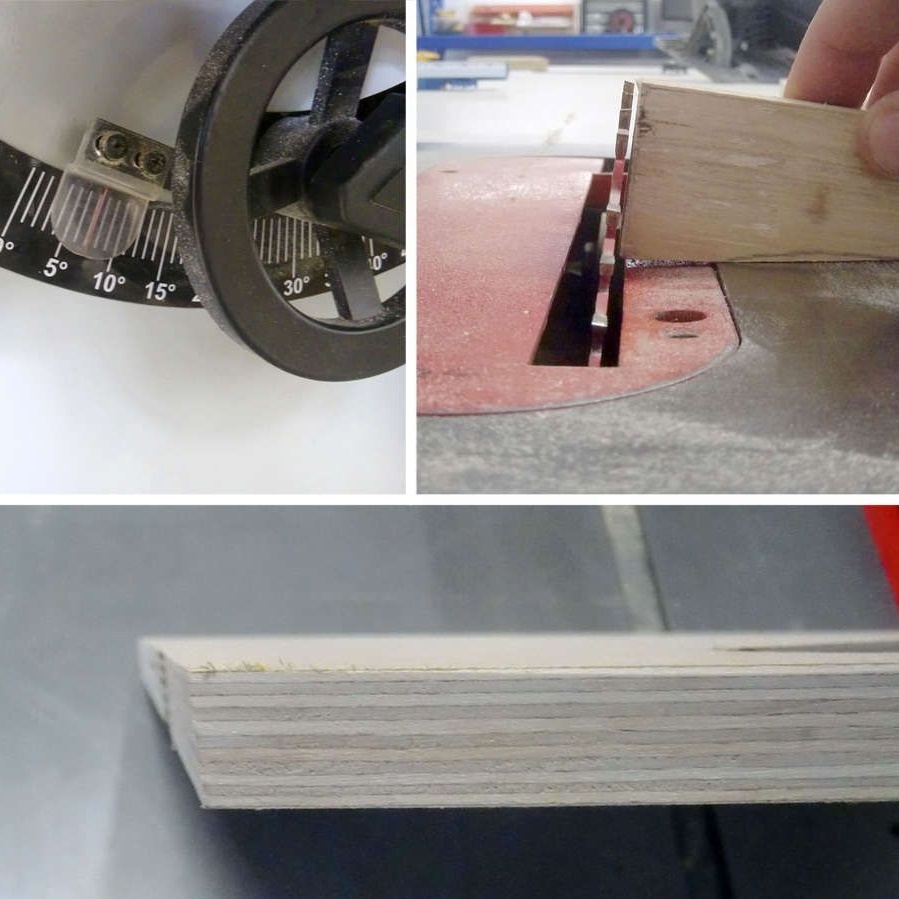
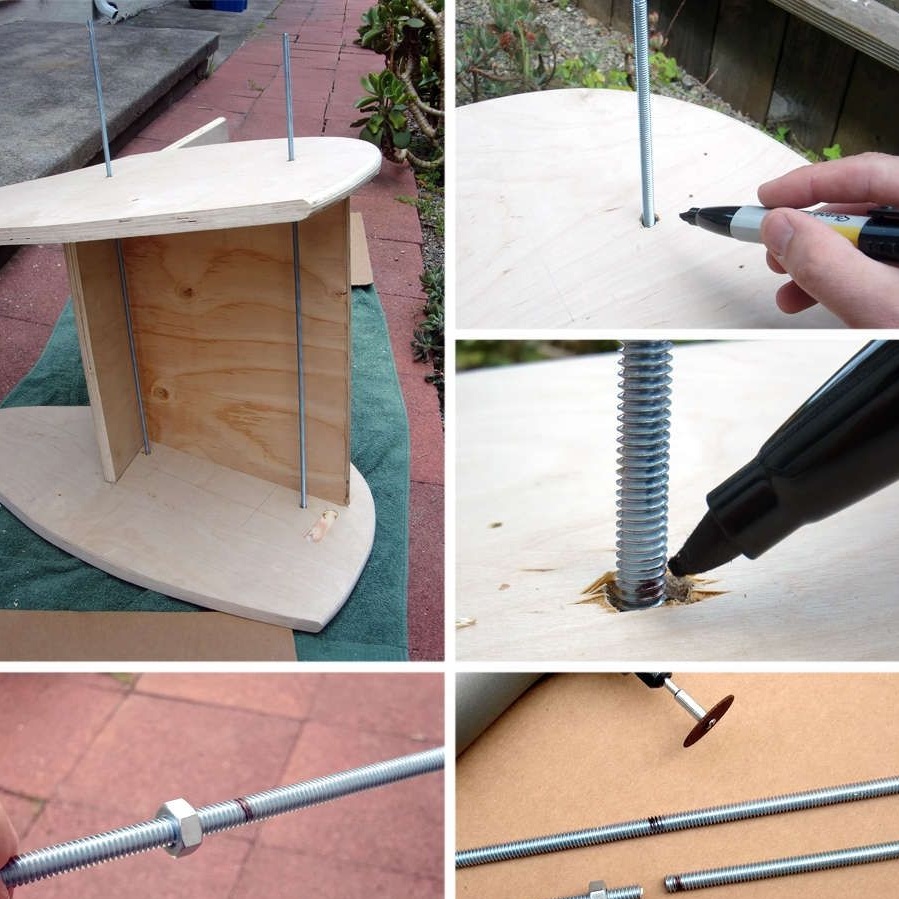
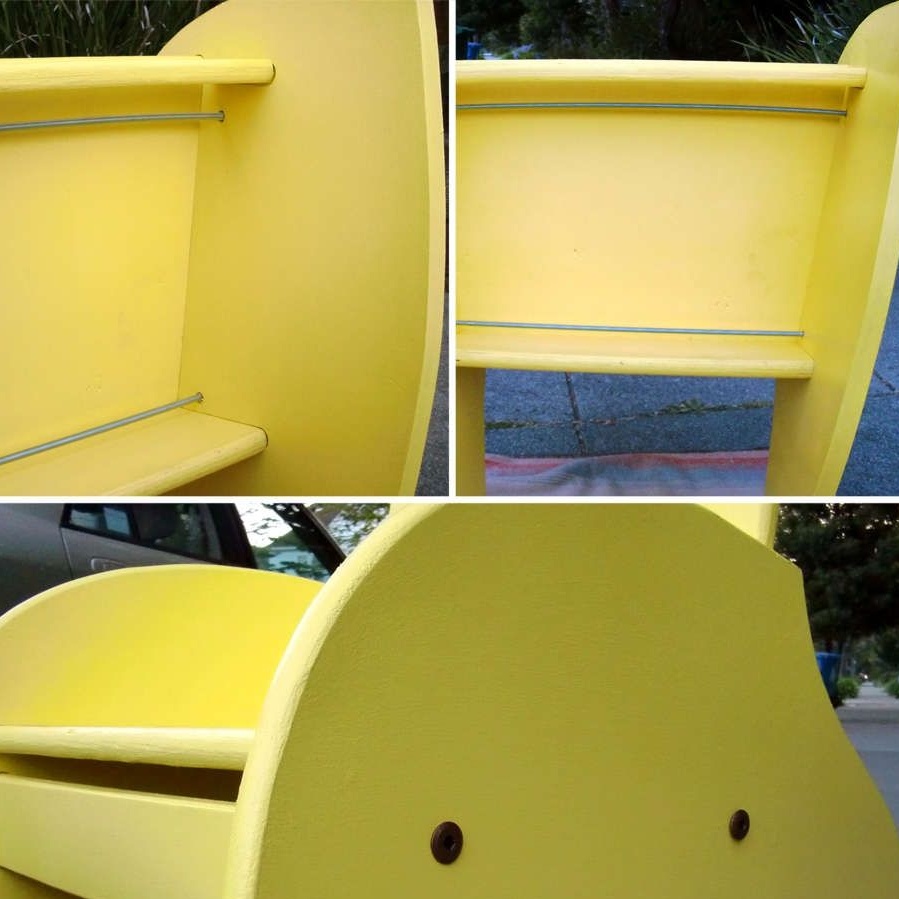
Now we turn to the fixing element of the structure - the hairpin. We need two of them, they need to be installed under the seat of the chair, one near the strut, the second tight to the back. To do this, we take a drill, the diameter of which must correspond to the diameter of the stud, and with it we make guide holes in the side walls, they should turn out on the same axis. After the holes are ready, install the studs in the holes, and mark the desired length for us, after which we cut off the excess parts using a grinder. We will tighten the side parts with end nuts.
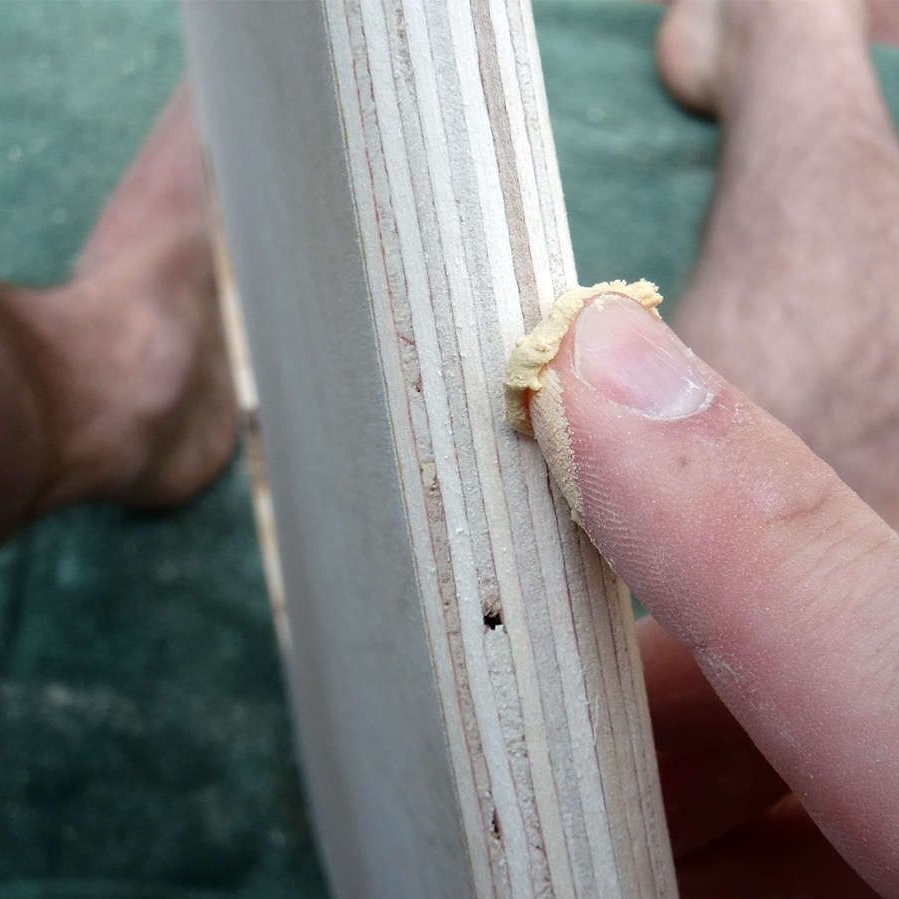
Since cracks and voids could appear on its surface after cutting plywood, which spoil the entire type of structure, we remove them, for this we use a special wooden putty. When all the voids are filled, wait until it dries, about 30 minutes, then grind the surface.
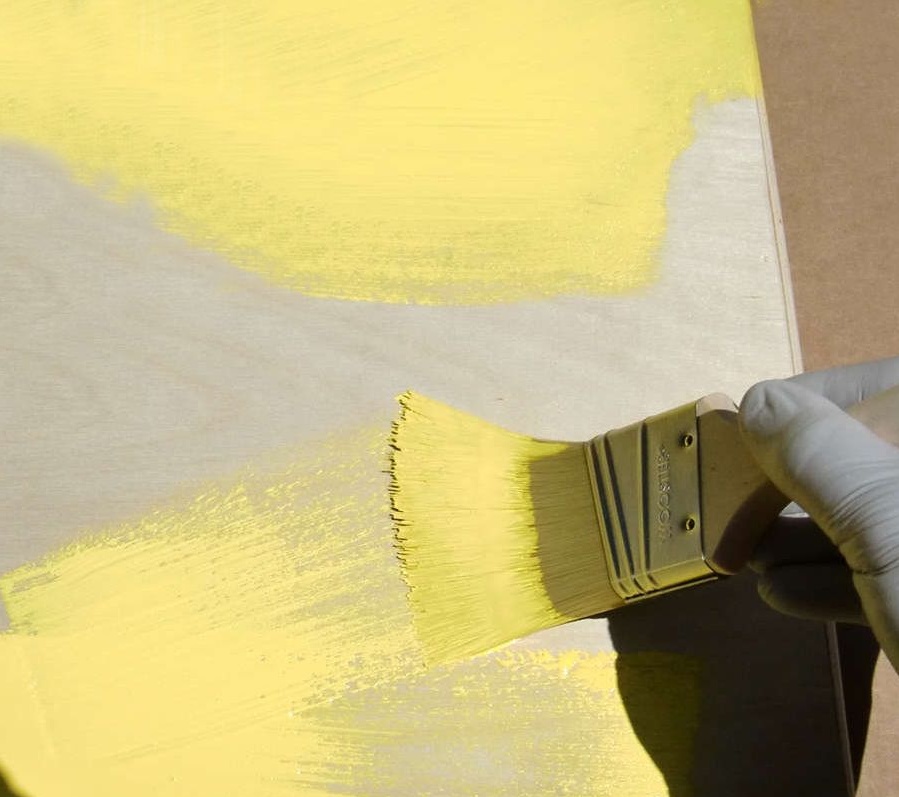
Now you can paint. Since the chair is made for the child, the paint should be chosen one that does not contain toxic elements. We read information about the composition at the bank, or we consult with the seller in the store. We choose the color of paint at our discretion, or we paint in the colors chosen by the author. We open the holes for the nut with decorative plugs.
As a result of all the actions, we get just such a baby rocking chair, which your child should really like.

The article is over, thank you all for your attention!