

Hello to all lovers homemade, each of us, to some extent, wants to do something different, since this is original and only you have. So why not make the original shelf do it yourself, which will be easy to manufacture without losing functionality. As the author made this shelf, I will tell in this article, to call it just as appropriate a modular shelving. Before you start doing homemade work, you need to understand what is needed to create it.
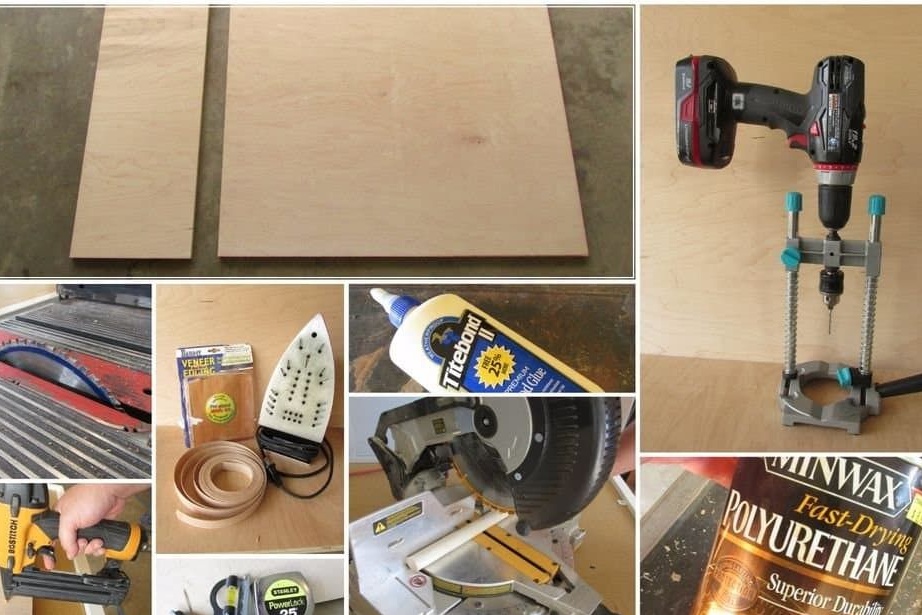
In order to make an unusual shelf with your own hands, we need:
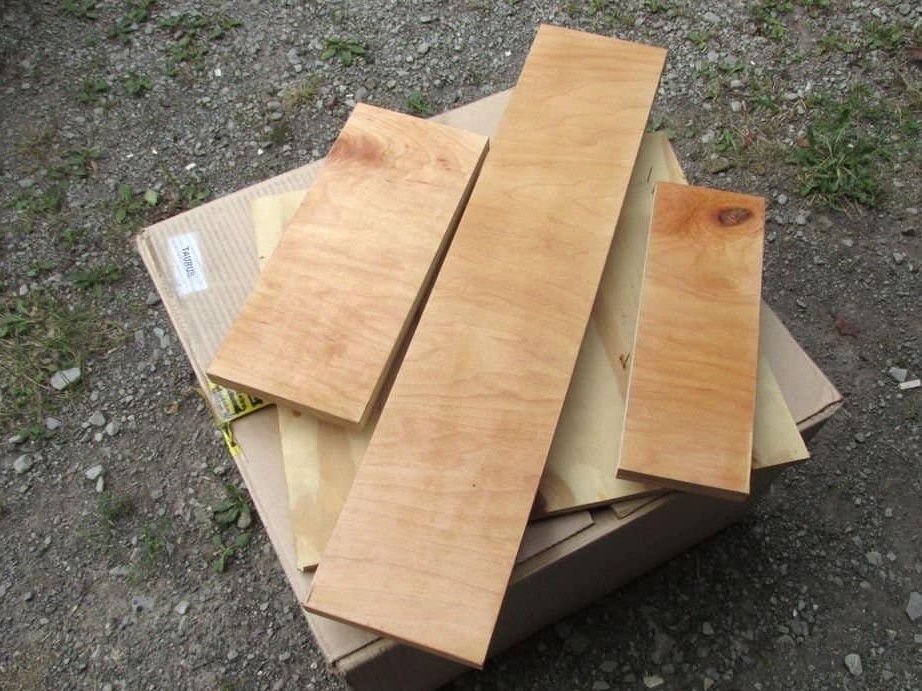
* A piece of plywood from any wood species, 20 mm thick and 1.2 x 1.2 m in size
* Small pieces of plywood under the shelves, thickness 20mm
* Wood dowels
* Screws and washers for them
* Polyurethane for wood finishing
* Veneer for plywood cladding
* Joiner's glue
* Plywood sheet
* A circular saw
* Electric drill
* Saw goniometer
* Drill set for drill
* Nails
* Grinder
* Roller molar
* Building level and tape measure
That's all the materials and tools that we will need for further steps.
Step one.
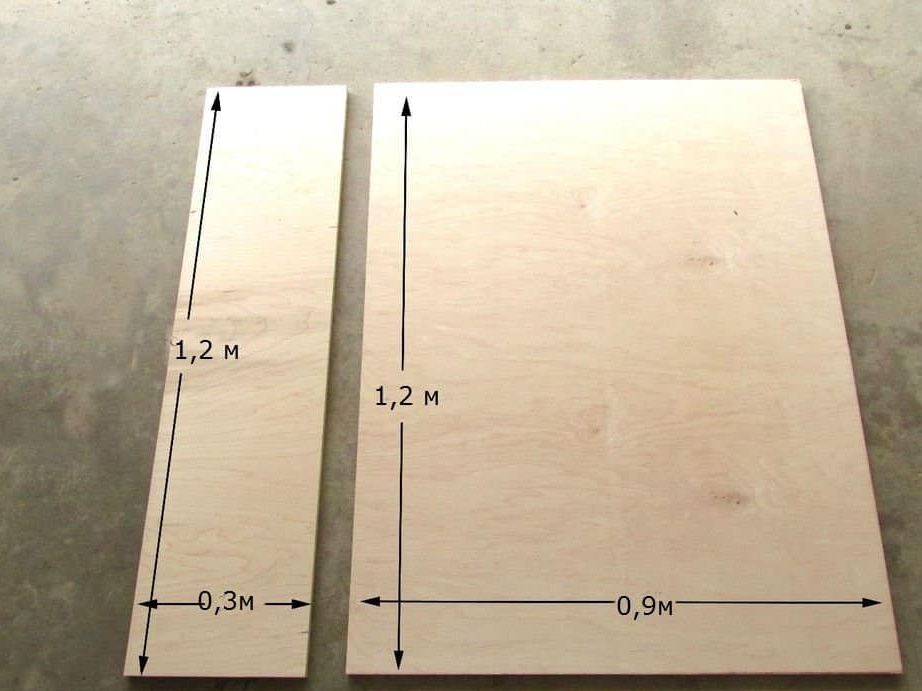
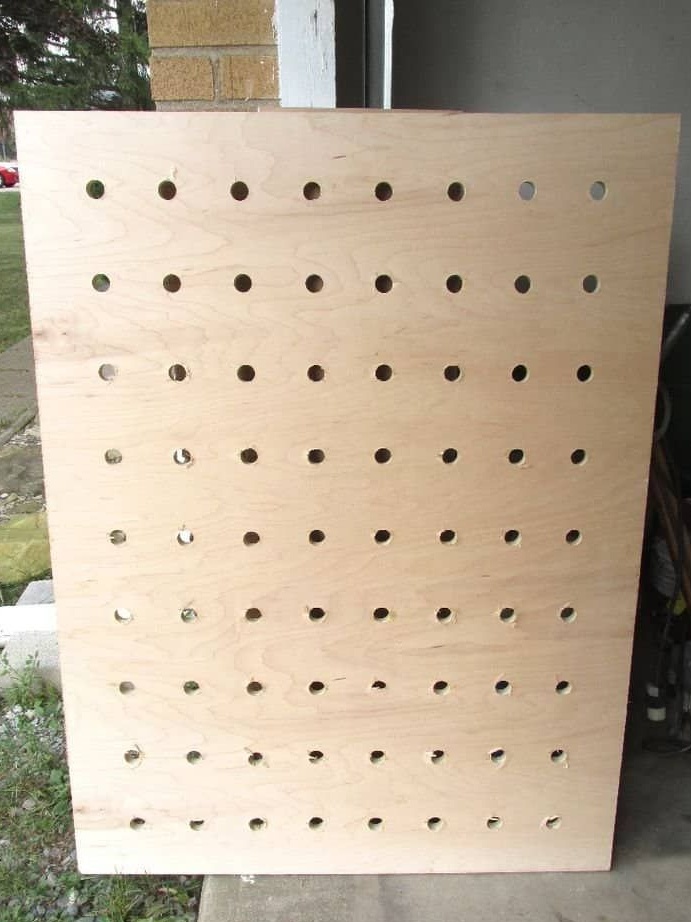
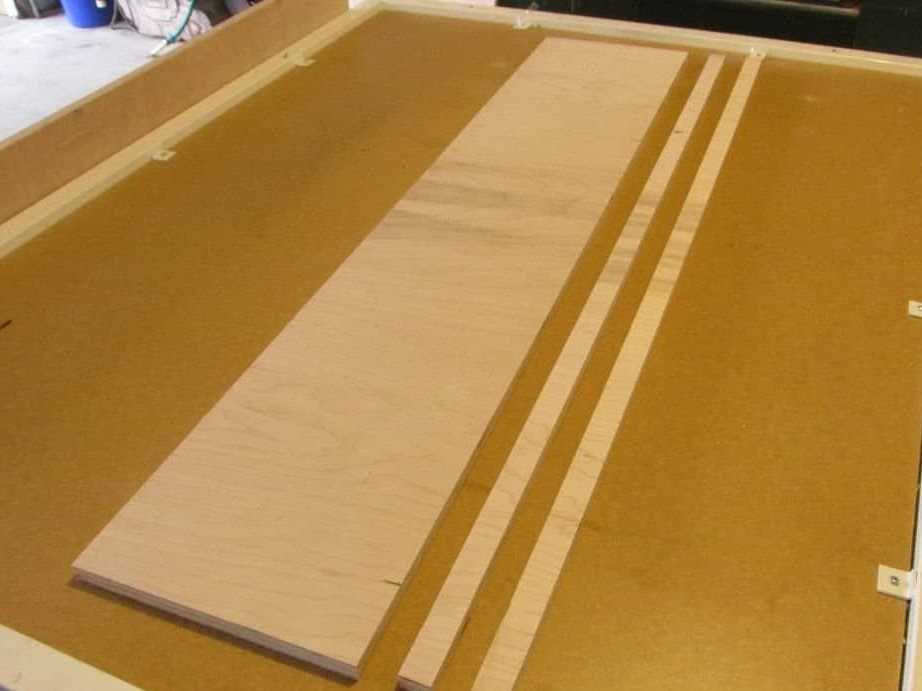
First of all, you need to use a circular saw to cut a plywood sheet, so that in the end you get two segments measuring 0.3m by 1.2m, and another segment measuring 0.9m by 1.2m. A smaller section will be needed for aprons, as well as fixing the main part of the shelf to the wall.
Step Two
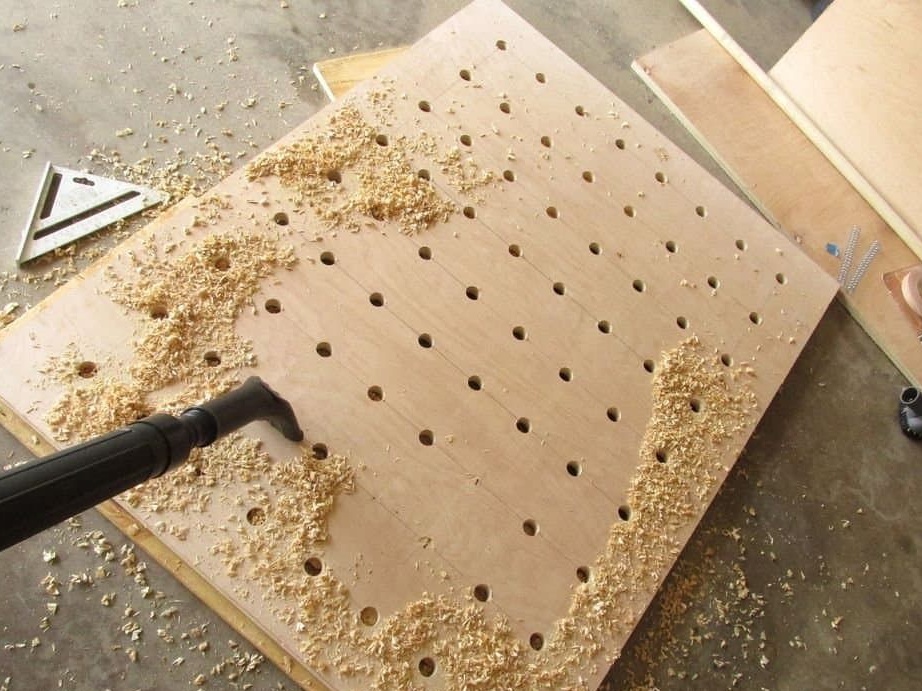
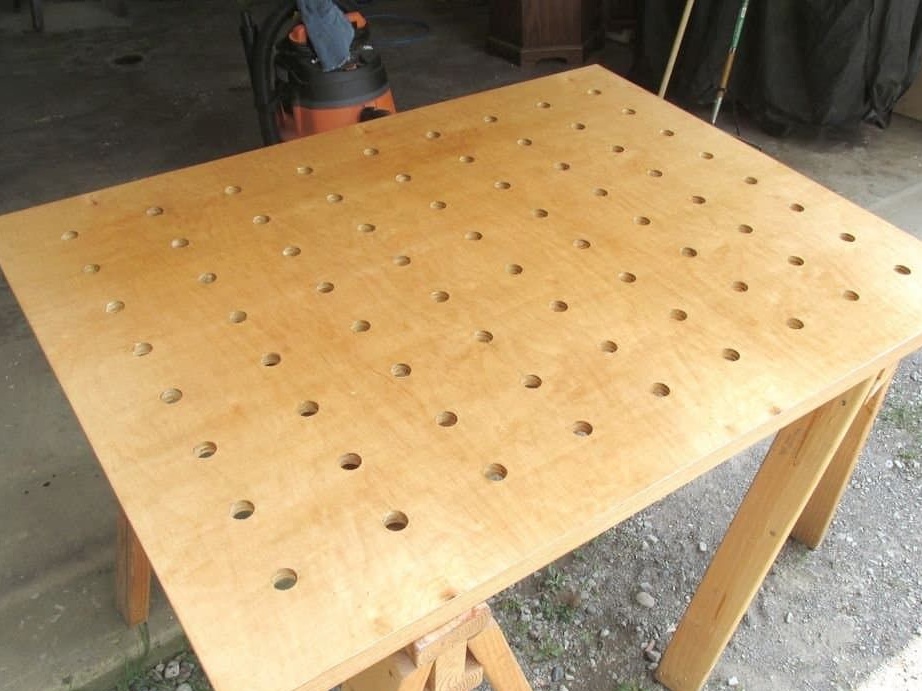
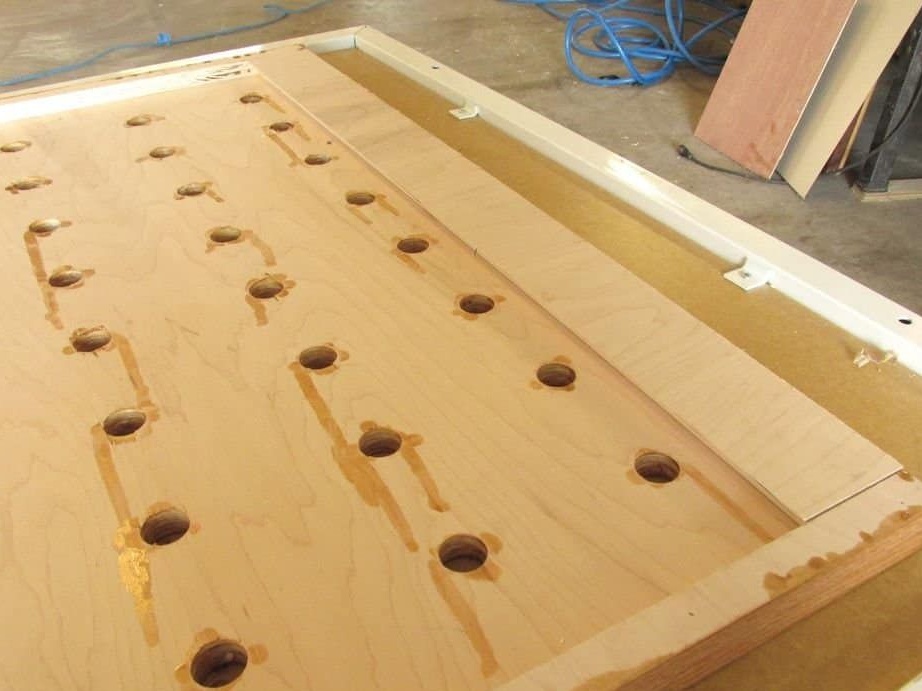
At the second stage, you need to draw a large part of the plywood, which will be the main one for the shelf, namely the base with holes. To get fairly even distances from each hole, it is best to make a grid with the number of lines of 8 by 9, which in the end turned out to be 72 cells, which means there will be as many holes.

Step Three
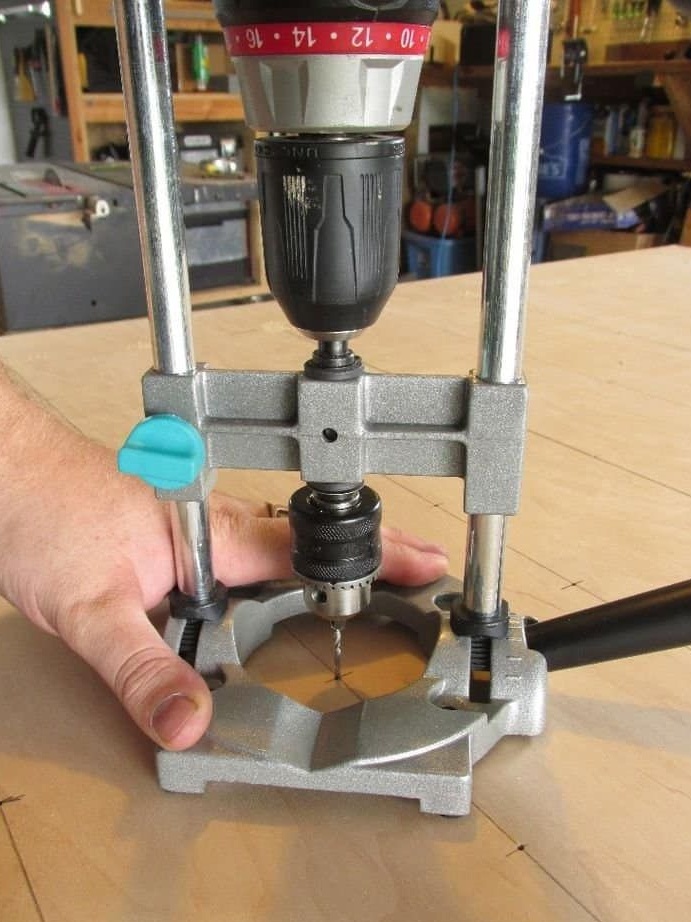
Now you need to make holes in each of the squares drawn earlier, you don’t need to drill with the finish size of the drill right away, first make sure that the holes made by the smaller drill did not go to the side, as this will affect the result of the work, the shelves in this case can turn out to be crooked, only after you have made sure that the holes are drilled strictly perpendicularly, you can drill under the diameter of the dowels. In this step, the drilling machine will help well, its bed and drill just has an angle of 90 degrees.
Step Four
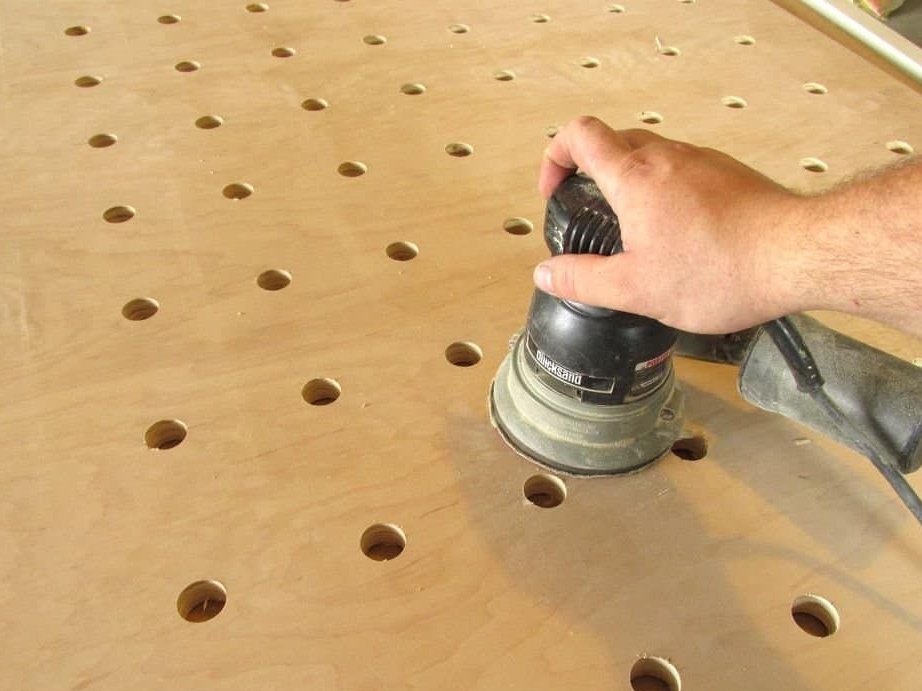
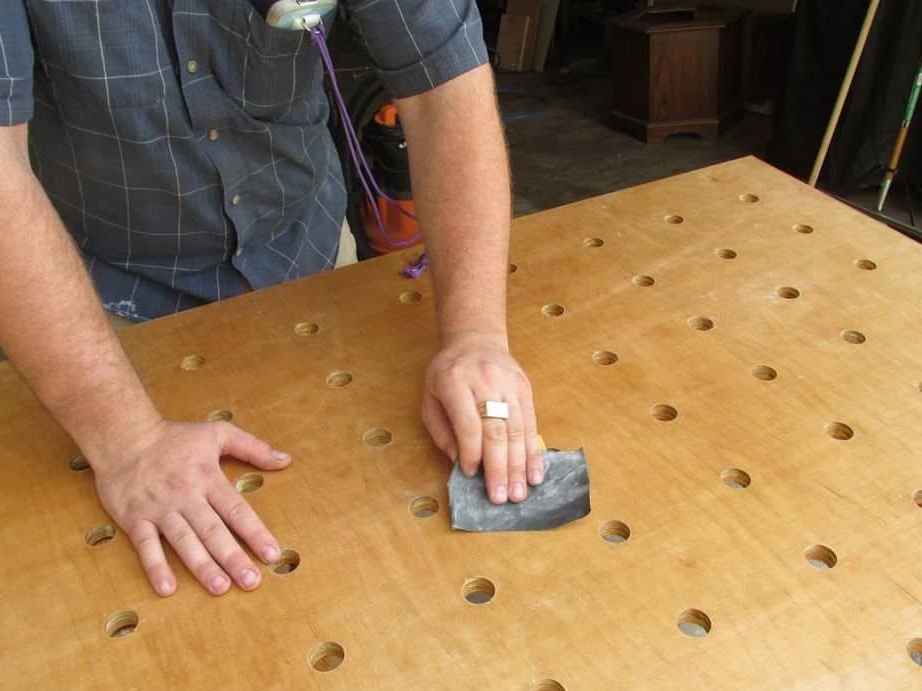
As in other homemade products made of wood, sanding will not be possible. We grind the surface with a circular grinder, and a belt grinder is also suitable. Gradually increase the amount of grit sanding to achieve a perfect smooth surface.
Step Five
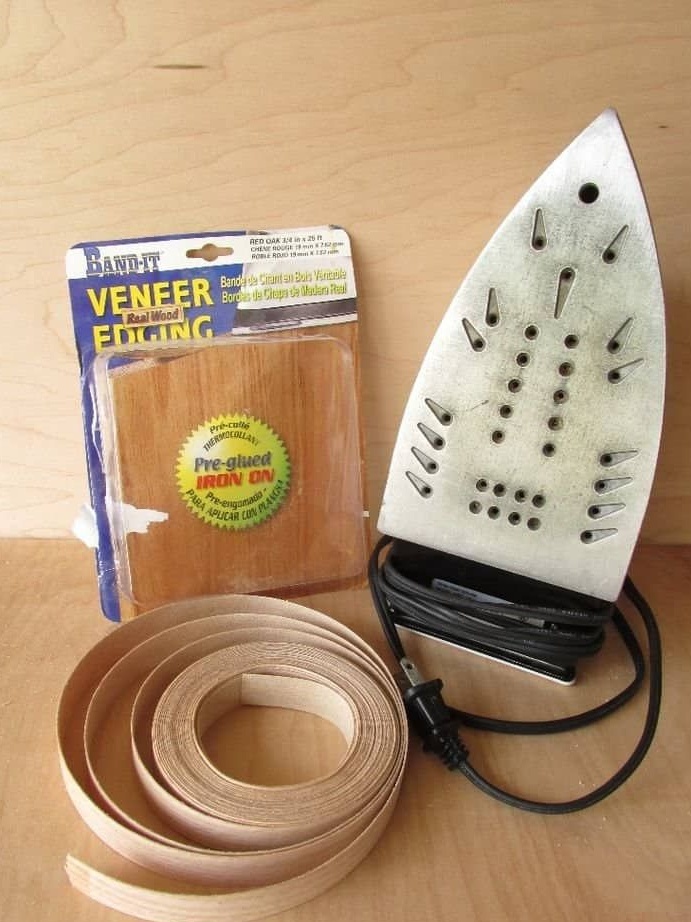
At the ends of the plywood, the cut points look ugly, which is not at all suitable for a shelf. We will cover these places of cuts with veneer for facing the edges. Follow all the instructions strictly and do not rush.
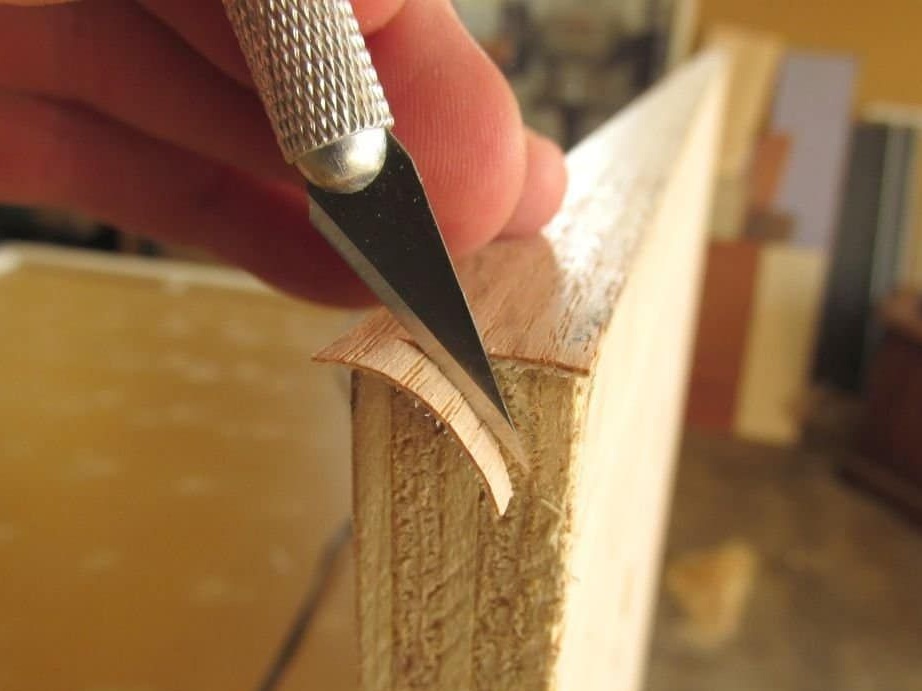
After the veneer is fixed, you need to cut off the excess with a knife.
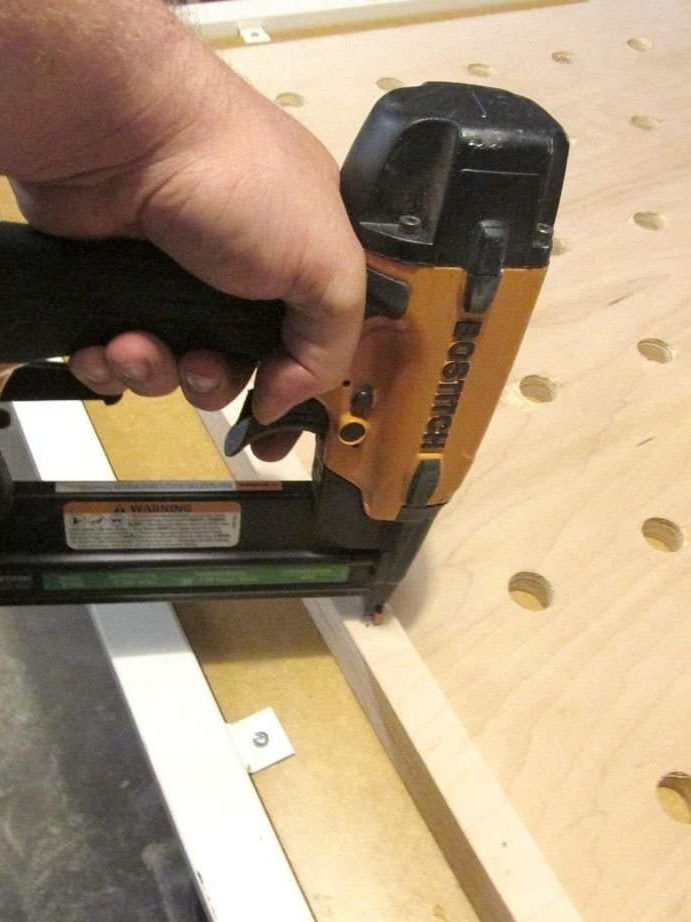
Step Six
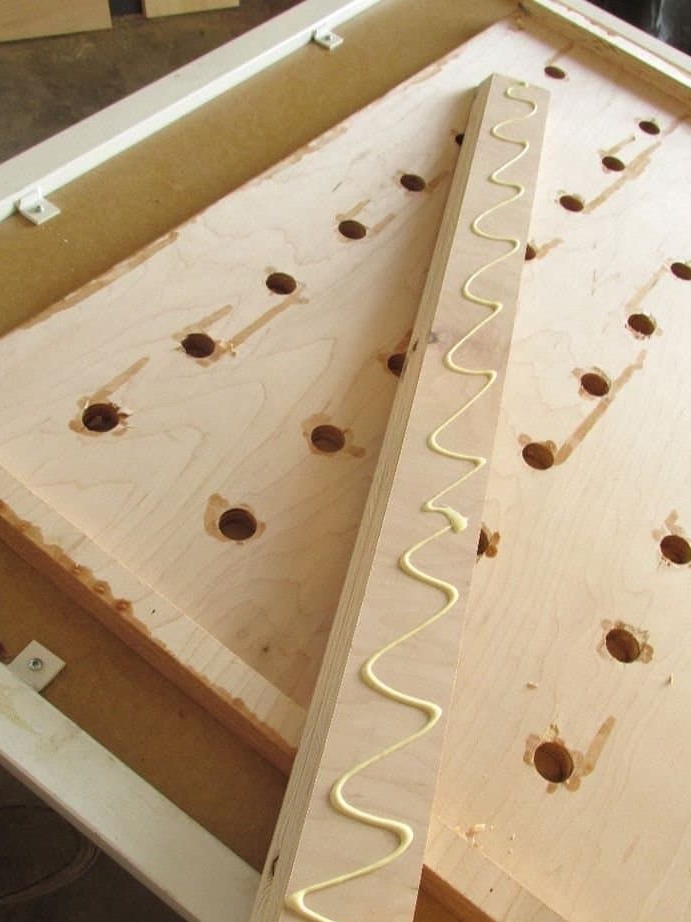
Now you need to make a mount with which you will hold the shelf on the wall. We make a fastener from a previously cut piece of plywood, the width of each fastener should be 2.5 cm. Using screws, we fasten them to the edges of the stand, as close as possible, before that, glue the joints with glue.
Seventh step.
After the glue dries, we proceed to the processing of the base with polyurethane, this method is not necessary, in your manufacture of shelves you can use another processing method to create the interior. You can also polish the surface.
Step Eight.
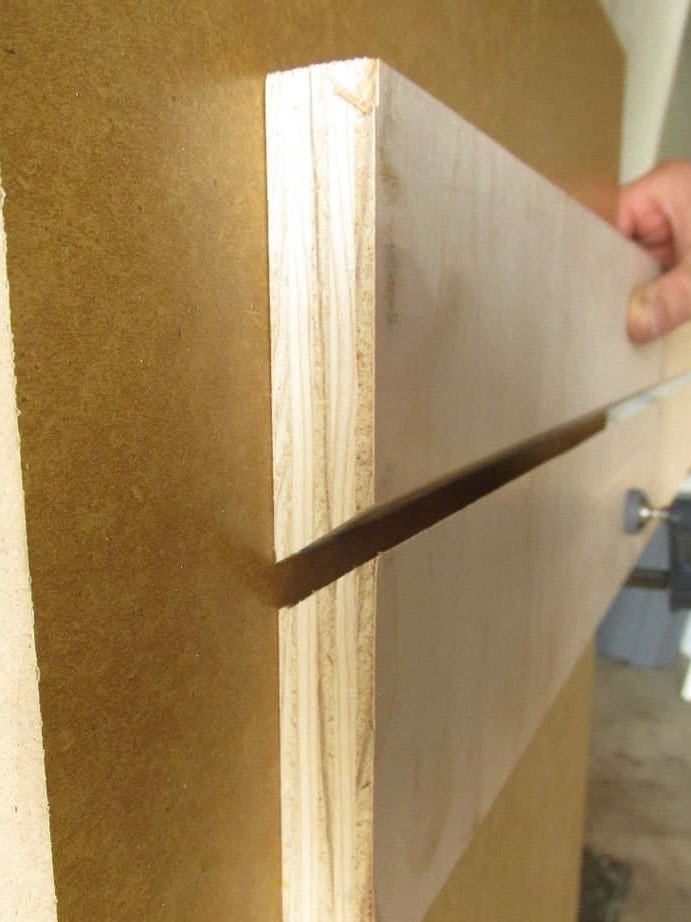
The fastening of this shelf is conceived in the style of the French clamping system, so the boards at the back need to be cut a little and make an angle of 45 degrees from the edge. We glue the finished French fastenings behind the base of the shelf, placing across.
Step Nine.
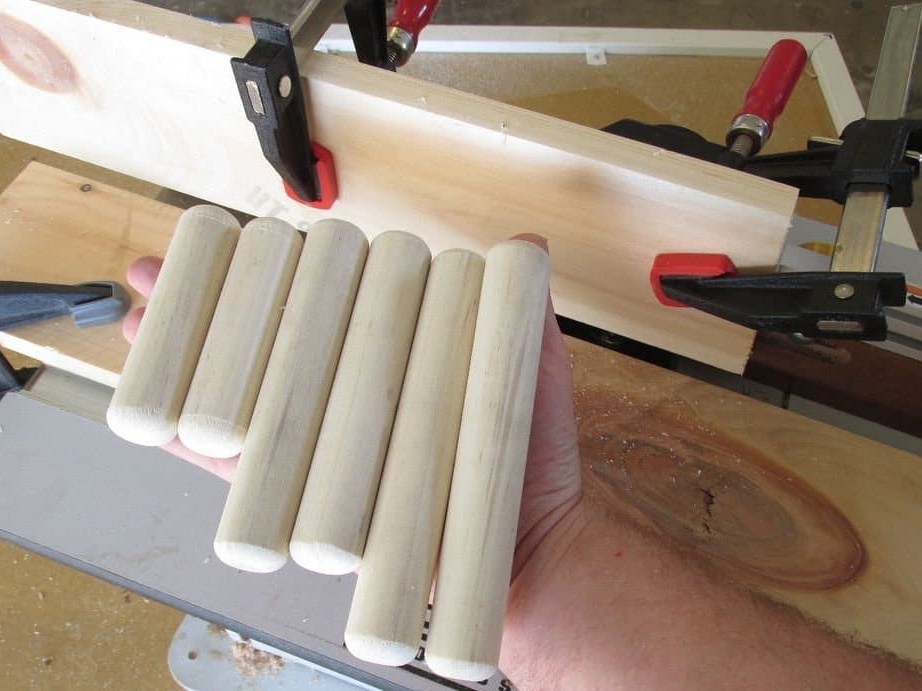
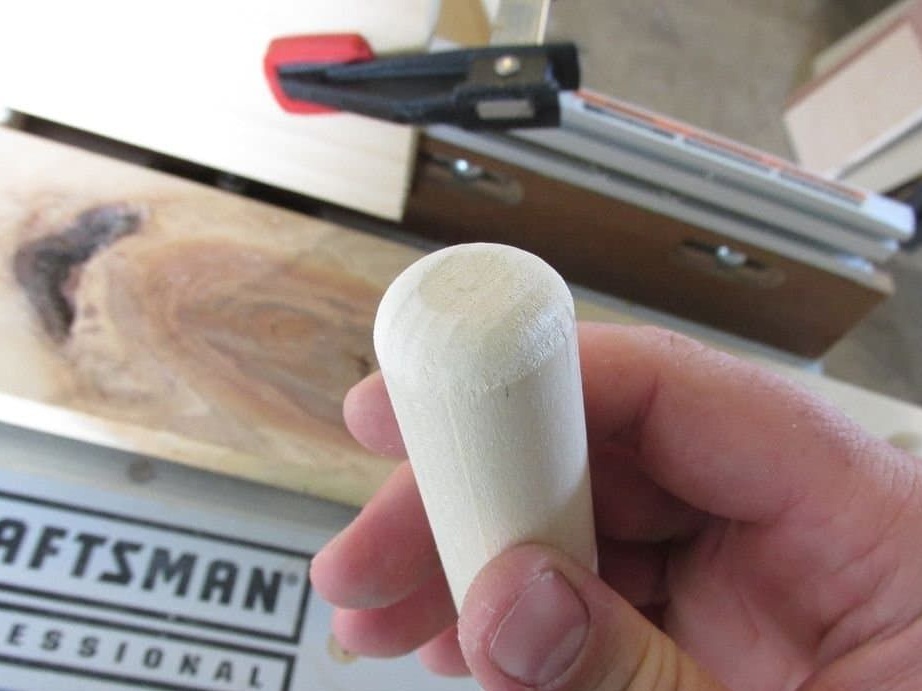
The main distinguishing element of this shelf is the dowels that will hold the shelves themselves. Therefore, now you need to make them the desired section and length. We cut the dowel into smaller parts with a circular, the length must match the full width, taking into account the fact that the dowel will go into the rack for a certain length. After cutting the edges you need to process on a grinding machine, and also round off a bit for the convenience of pulling them out of their seat and moving to another hole.

Step Ten
It's time to make shelves, we make them from previously prepared plywood. The width and pancake of the shelves can be different, do it at your discretion, you can also make shelves of different lengths, and then arrange them in the right order. After that, we also veneer the plywood and process it based on preferences, be it polyurethane or wood oil.
Step eleven.
In fact, the shelf is already ready, but now you need to make fasteners on the wall. We make fasteners on the wall from the remnants of plywood in the form of a frame with transversely fixed boards, with an edge angle of 45 degrees for the same French fasteners made on the shelf.
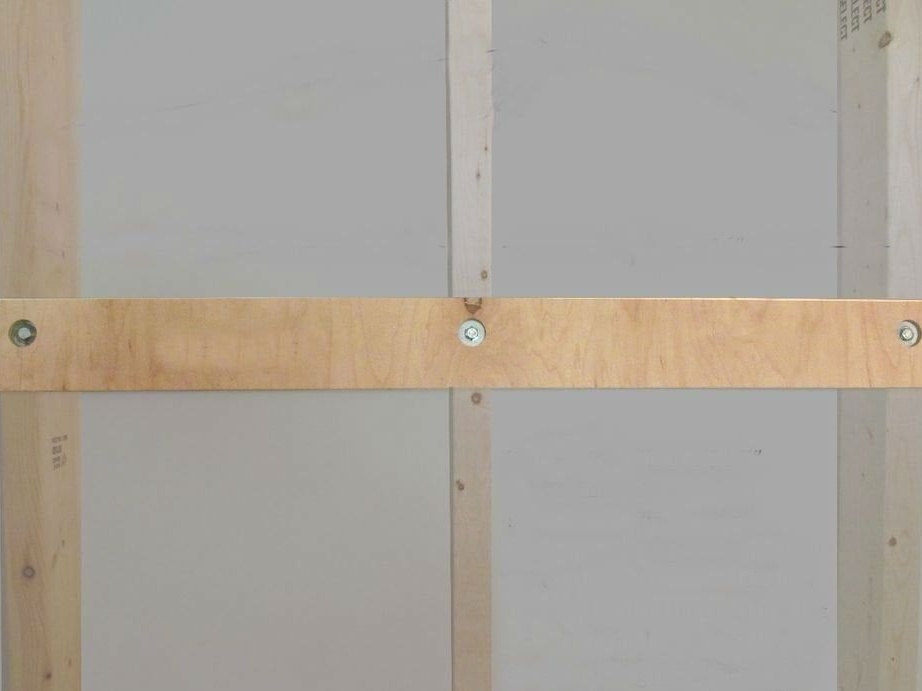
The hook in this case turns out to be very strong and dense, giving no chance for the shelf to fall. This pattern is, the heavier the shelf, the more difficult it will be to displace.
Now you can fix the shelf to the finished hardware on the wall and place the shelves.
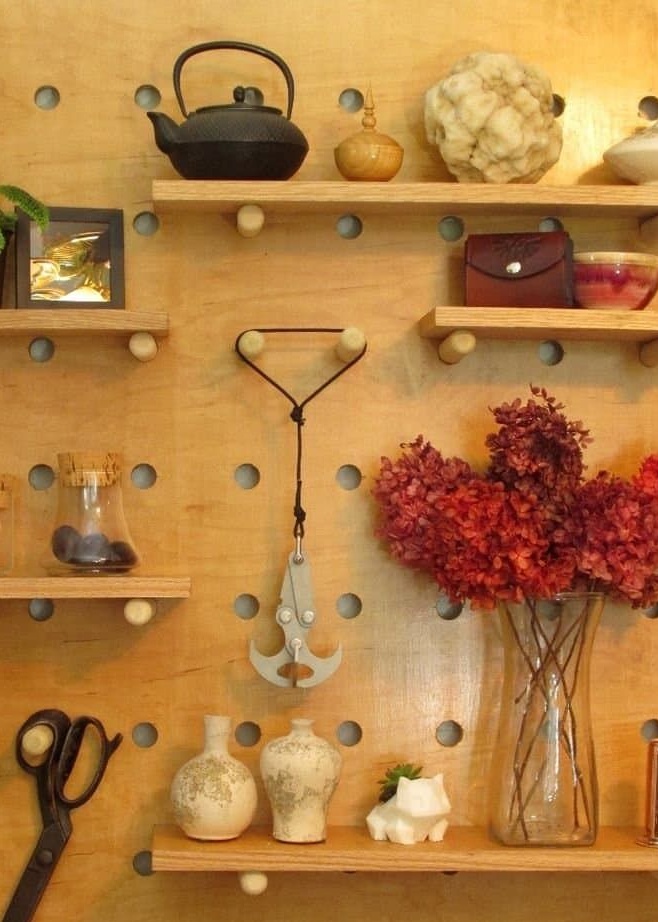

On this, the home-made shelf is ready, it turned out to be quite functional and also original. Thank you all for your attention and good luck in new interesting homemade products.