Dear site visitors, from the master class presented by the author, you will learn and learn how to make a labyrinth with a mechanical drive on your own, where gears play the role of joysticks, as well as learn the secrets and secrets of electroplating, which is so fashionable and popular today.
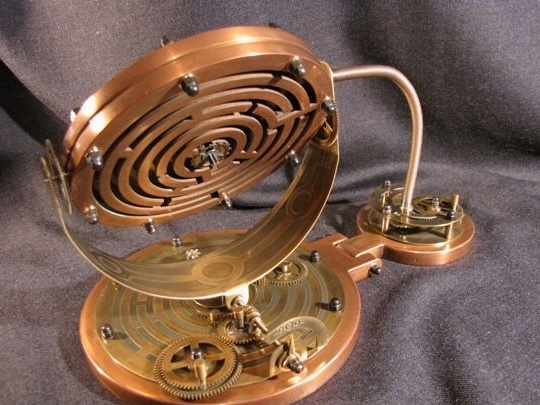
The labyrinth created by the author has two working surfaces for passing the ball, that is, after passing the first stage you get to the second already in an inverted state.The mechanism is driven by the servo gears, which makes the design itself more interesting. Also get acquainted with all the intricacies of the galvanic coating of parts with metal. in this case, copper was used; precious metals can be used by the same principle.
And so, let's take a closer look at the whole process of creating a maze. And also find out what exactly the author needed to work?
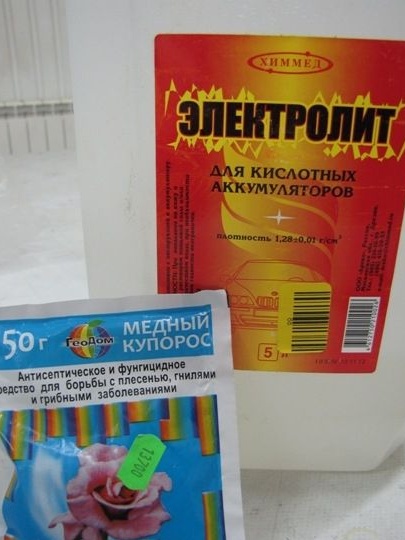
Materials 1. acrylic 5 mm 2. weapon toning 3. electrolyte 4. alcohol 5. copper sulfate 6. graphite (in a spray can) 7. copper plates 0.3 mm 8. copper wire 9. gears 10. cable 11. brass plate 12. ferric chloride 13. self-adhesive film 14. metal ball 15. copper tube
Instruments 1. hacksaw 2. drill 3. laser cutting machine 4. velvet 5. GOI paste 6. file 7. plastic containers 8. three-liter jar 9. stationery knife 10. ammonia bath 11. iron chloride tank (for etching a pattern on a metal) 12. pliers 13. sandpaper 14. laboratory power supply 15 in 2 A
The process of creating a mechanical maze do it yourself.
And so, the first thing the author bought in the store was chemistry such as electrolyte, copper sulfate (garden), alcohol.
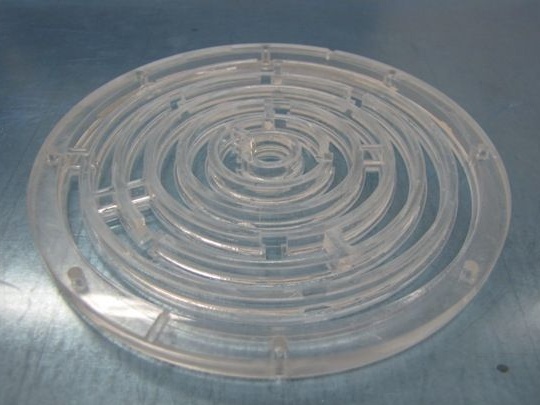
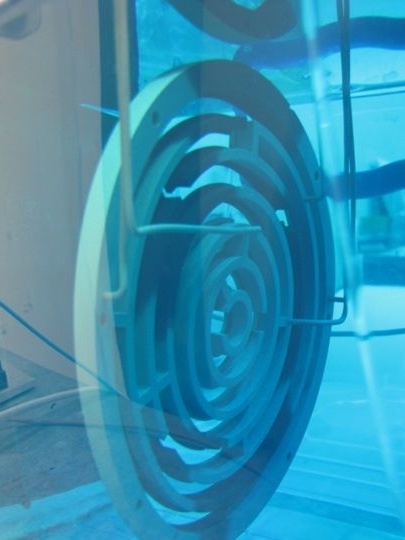
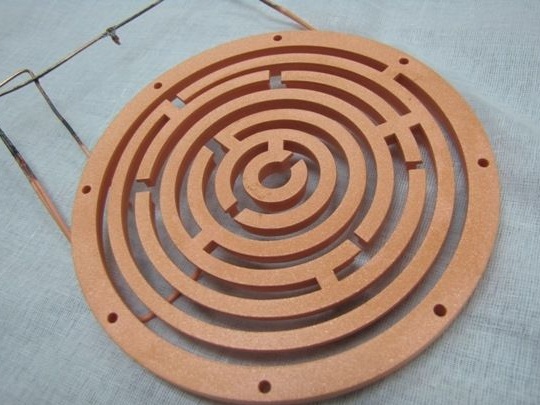
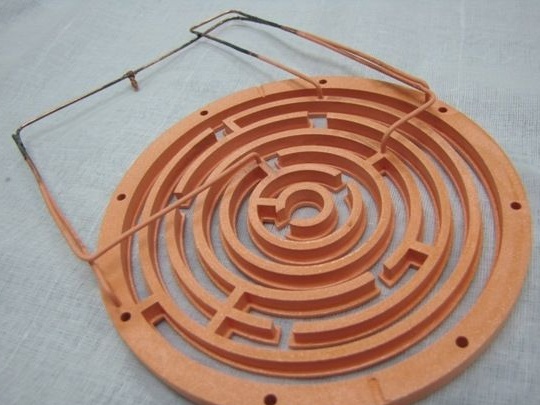
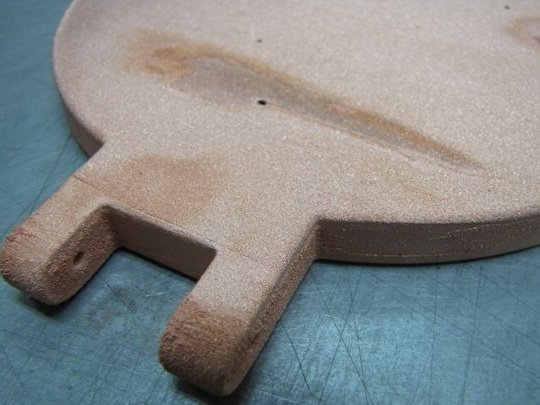
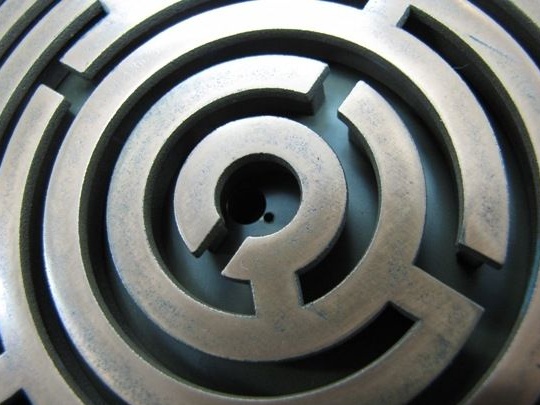
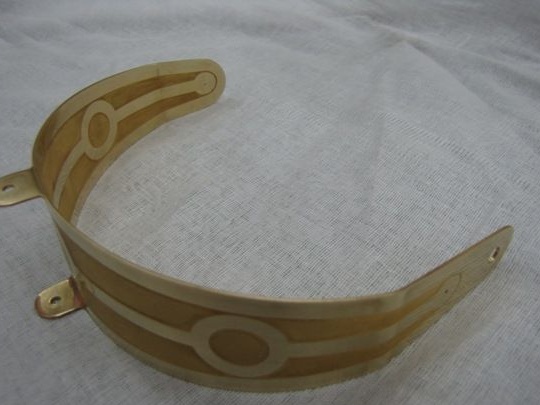
The labyrinth blank itself is made of 5 mm acrylic with laser cutting 1.5 mm, the second half of the track is made of the same acrylic, but the pattern is already located in the opposite direction, after which the two parts are assembled together.
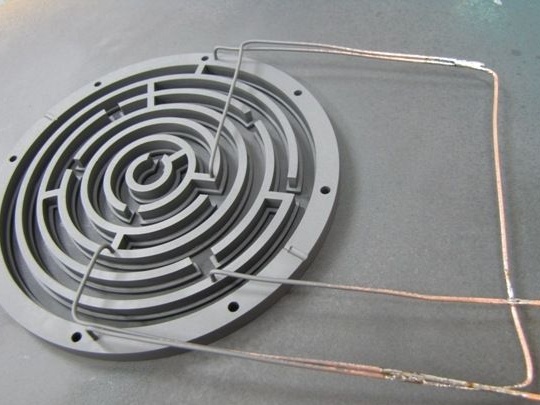
The workpiece is first thoroughly wiped with alcohol in order to degrease the surface and after everything dries up, the area is covered with graphite varnish from a spray can. After connecting the copper contact.
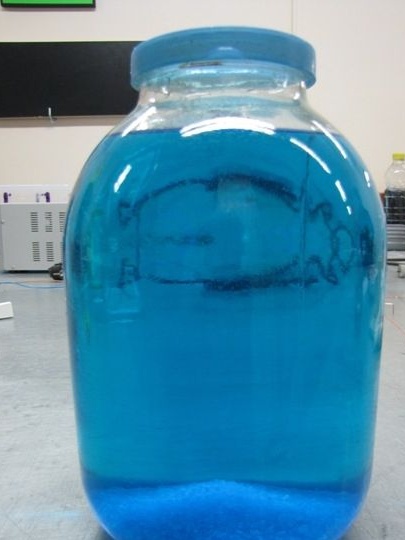
In a three-liter jar, a working solution is prepared in the ratio: 3 liters of heated electrolyte and 250 grams of copper sulphate, the resulting mixture must be settled for at least 2 hours.
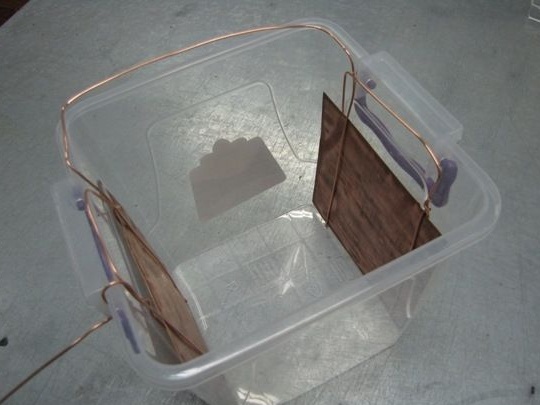
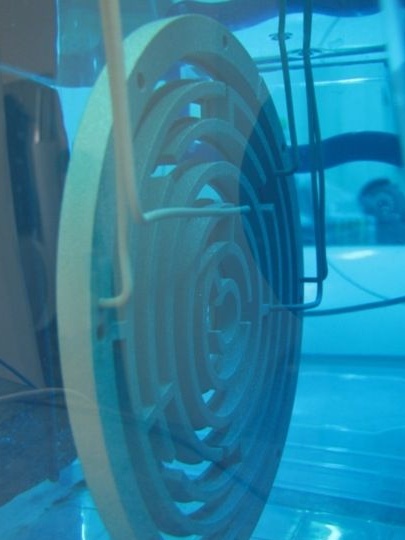
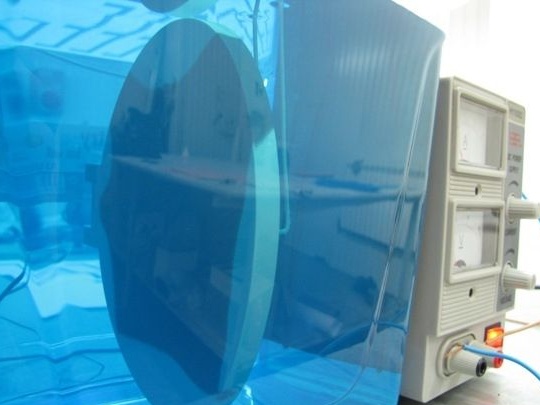
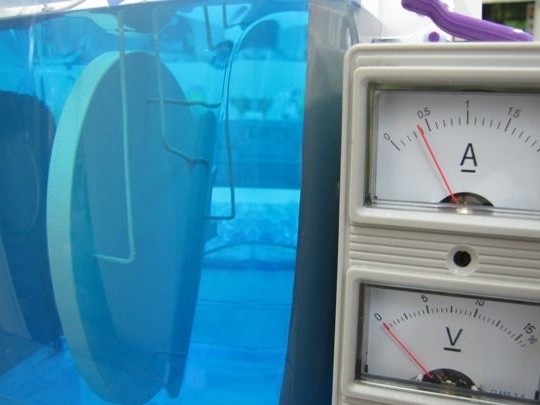
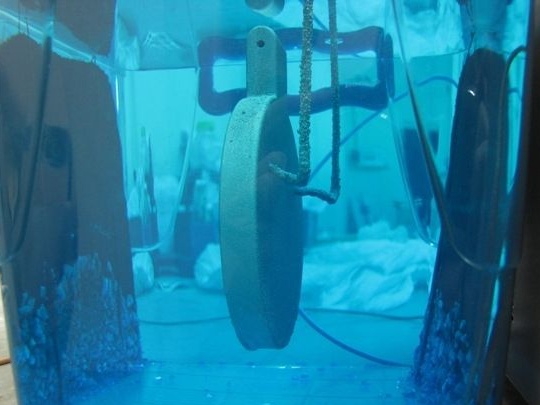
A plastic container is prepared and 0.3 mm copper plates are installed.
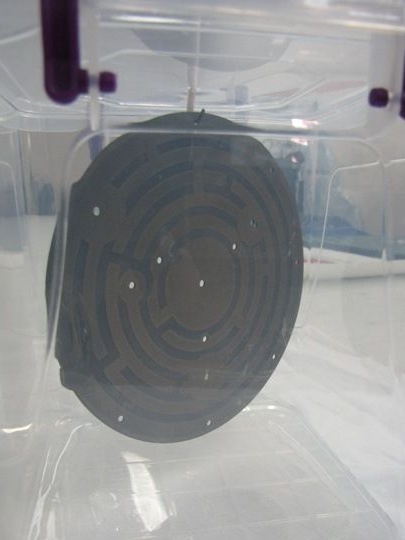
ATTENTION!!!The solution from a three-liter jar into the container is carefully poured on the wall so as not to create splashes that can get on the skin of the hands or face. In case of contact with skin, rinse immediately with water !!! After that, 100 g of alcohol is added to the solution and the workpiece is immersed.
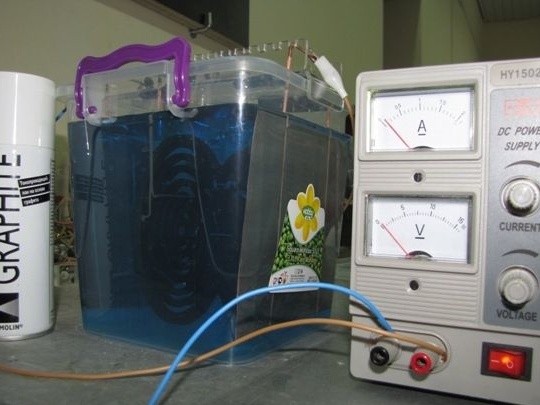
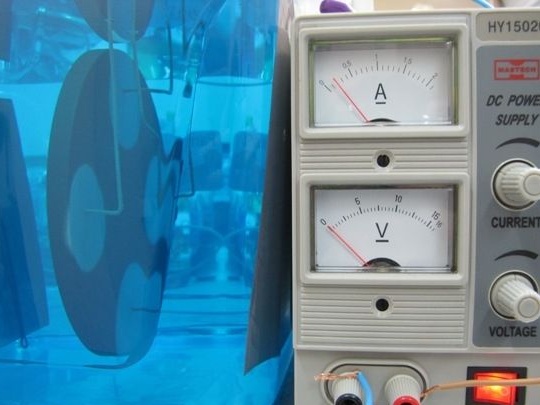
CONNECTION! The laboratory transformer should be connected in the following sequence :( +) to copper plates, and (-) directly to the workpiece. The current strength is 0.1 A and 0.5 V, you must first make sure that there are no air bubbles on the surface of the workpiece and only then the necessary voltage is supplied.
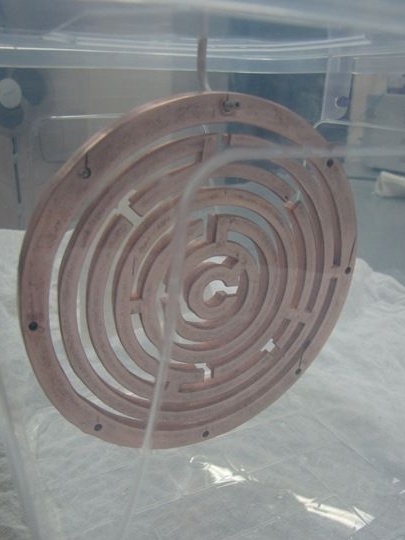
After 1 hour from the contacts on the workpiece went to the deposition of copper. And for 5 days, the workpiece was almost dragged on by copper.
After 9 days, the workpiece was pulled by copper, after which the author increased the current strength to 0.3 A.
Thus, the process went on for 3 weeks until the copper plates were completely dissolved. After that, the workpiece was removed from the container, after disconnecting the contacts and disconnecting power.
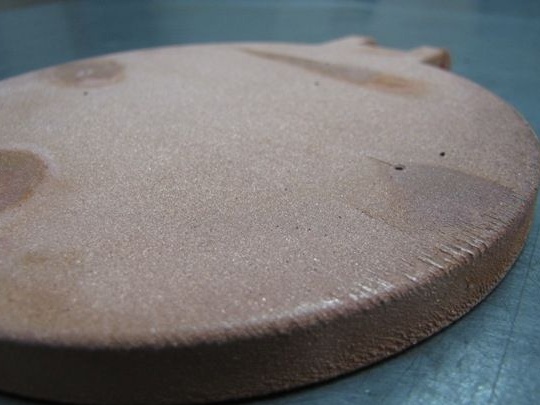
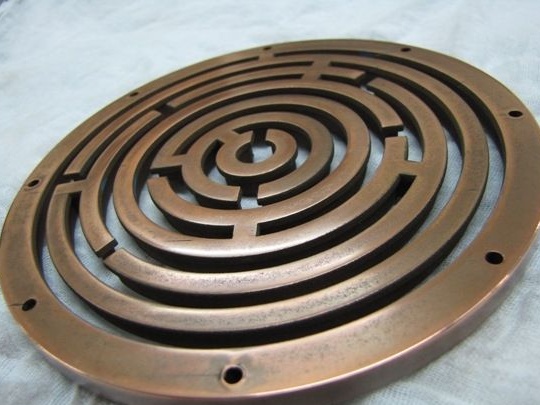
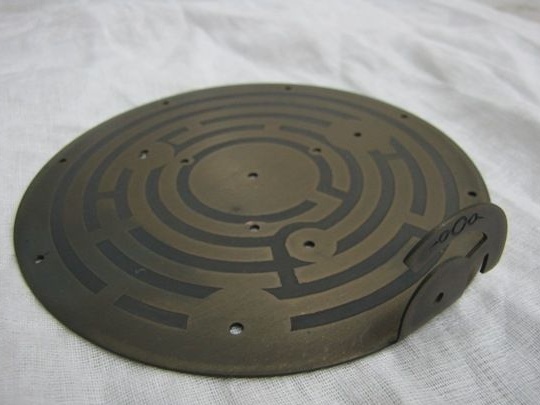
The copper layer was 0.3-0.4 mm, which the author was very pleased with.
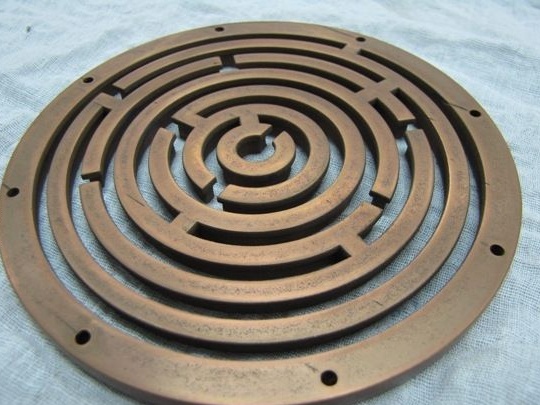
Then the master polishes the workpiece with sandpaper manually, carefully and carefully, so as not to remove the excess.
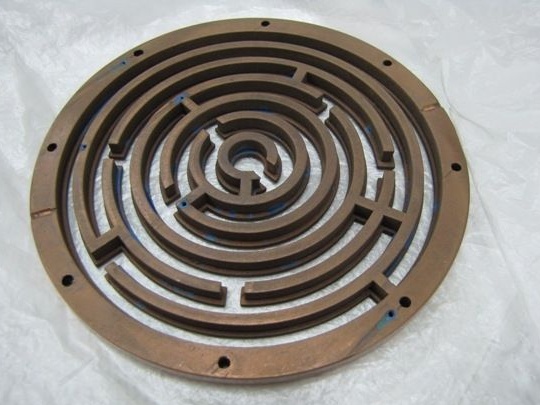
The second side of the maze was made in a similar way. Next, the master proceeds to slow down the following details. The author decided to increase the current strength to 0.2 A in order to speed up the process.
A day has passed.
The process is slow and even.
After the workpiece was completely tightened, the current was increased to 0.4 A and left until the copper plates completely dissolved.
15 days passed and the plates completely dissolved, the workpiece was removed, but the surface turned out to be rather rough, unlike the maze, small deposits were also visible at the contact points. All this is associated with an increase in current strength.
Loose surface.
But in essence there is nothing terrible, everything will be sanded.
A small part is also immersed in the solution. The current strength at the beginning of 0.2 at the end of the process is increased to 0.6 A.
Done) It's been 13 days.
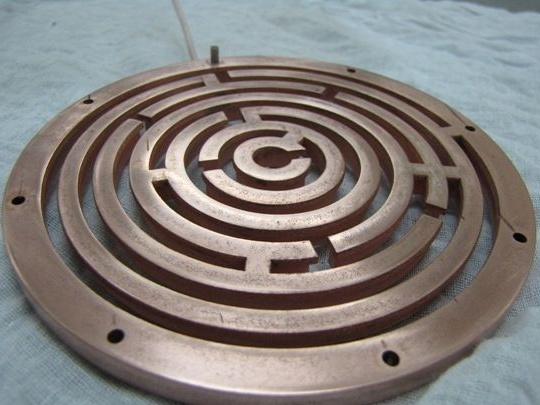
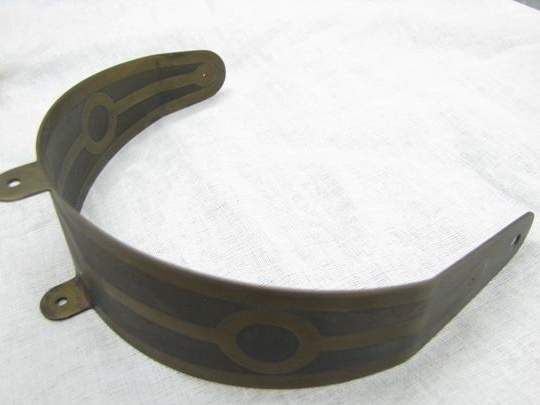
The experience obtained by the author shows that with a small current strength the surface turns out to be smooth and even, and with an increase in roughness. After the copper-plating process, the obtained parts take turns visiting the ammonia bath for patination.
Here is the result.
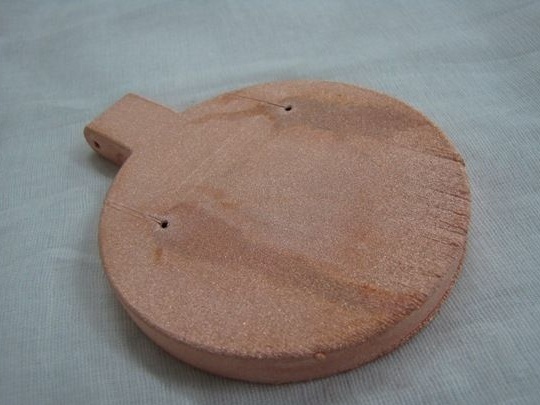
The second blank.
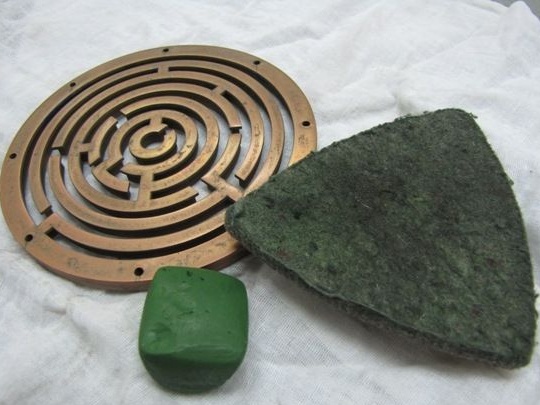
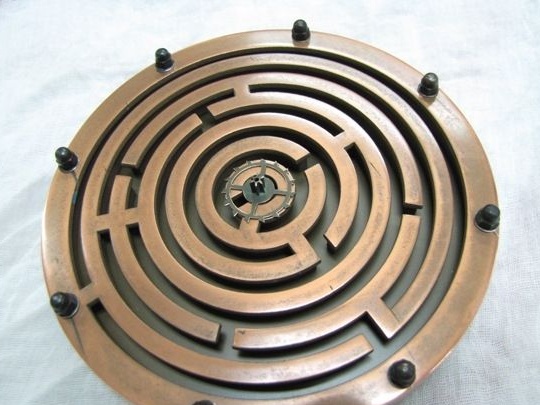
The surface of the labyrinth is polished, processed with velvet and GOI paste.
That's actually what happened in the end.
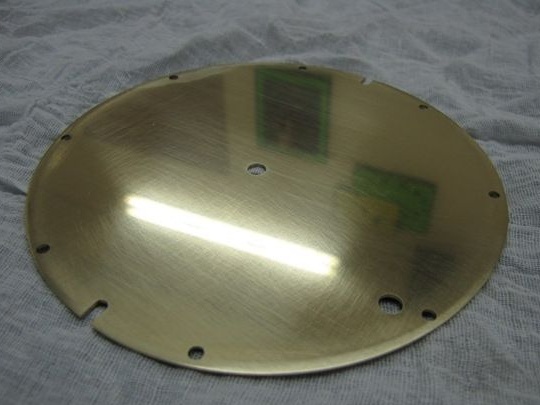
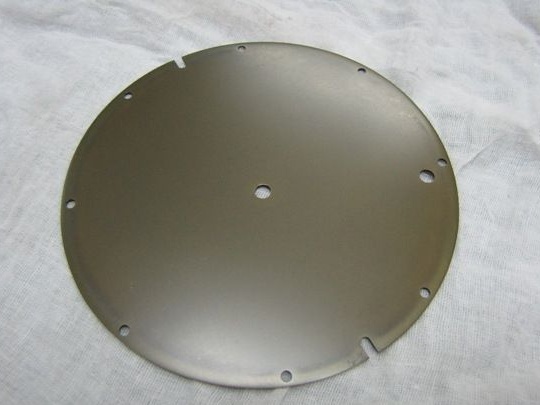
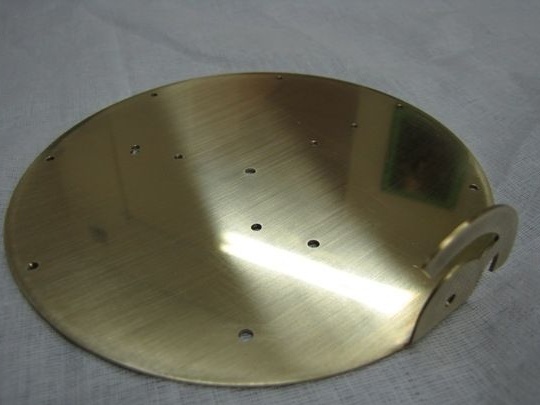
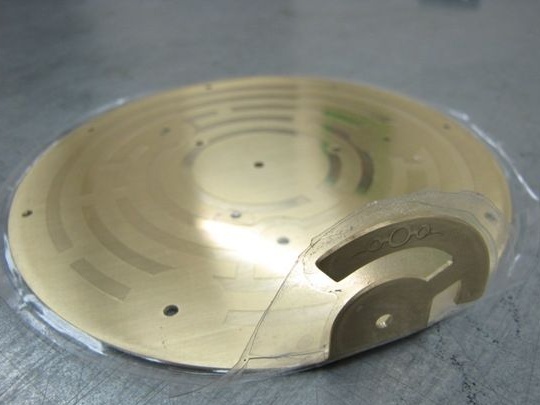
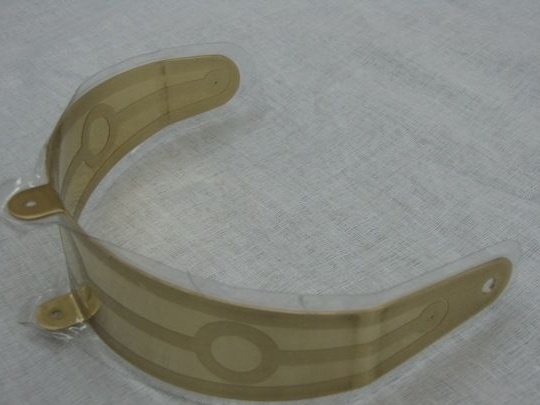
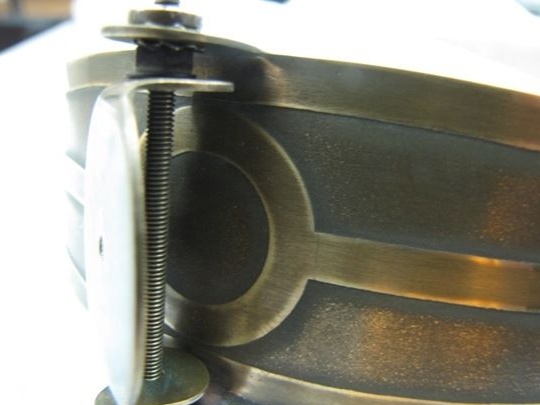
A connecting plate with holes for a ball and connecting bolts was cut from a brass sheet 1 mm thick.
Patented and polished.
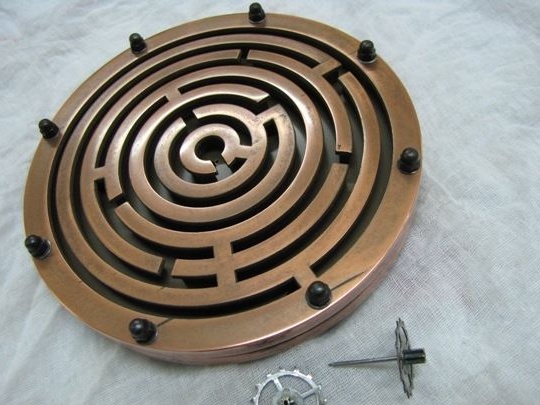
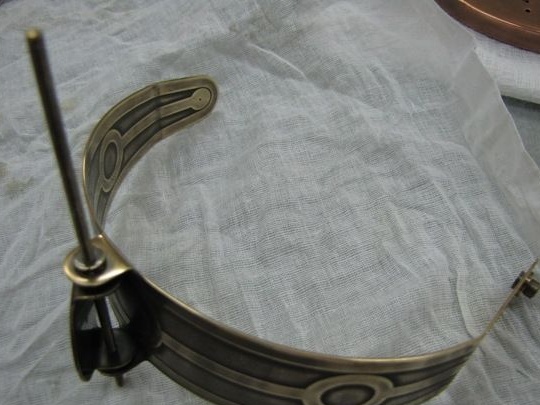
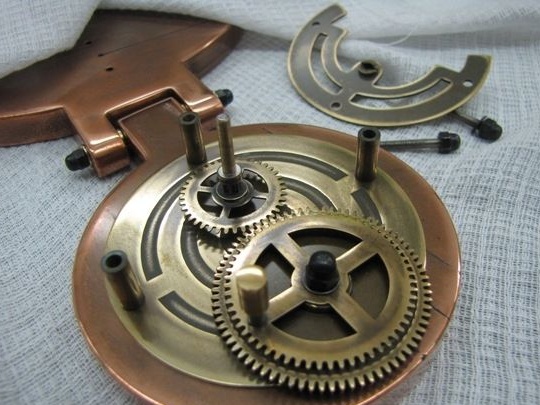
The labyrinth itself is assembled directly.
The result was a two-way maze.
The author made the blackening of nuts tinted for weapons.
A little tinting is applied to the nut and warmed up with a building hairdryer.
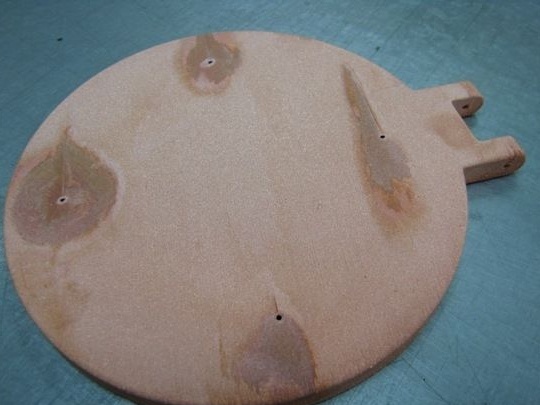
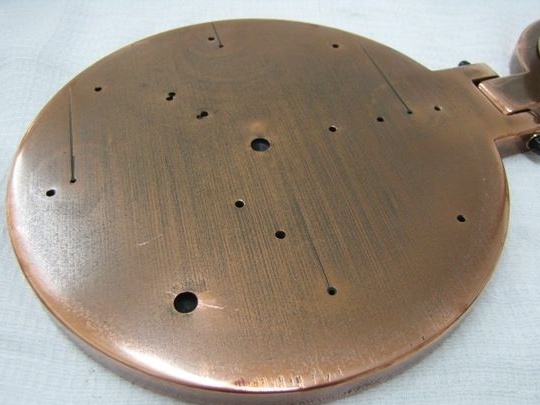
Holes for installing gears were drilled on the base.
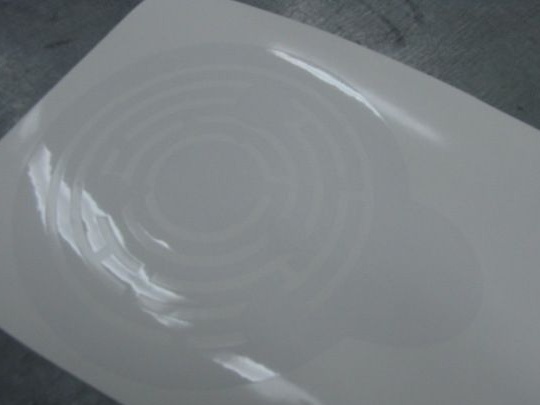
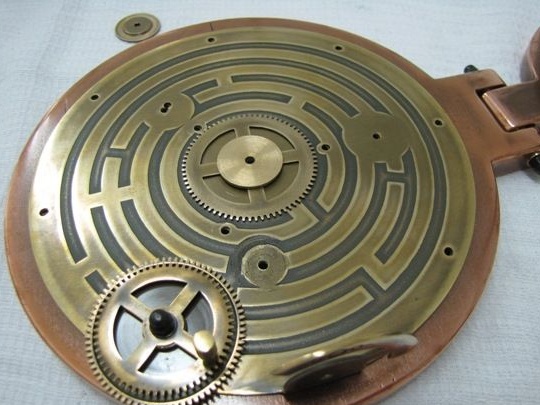
Then a film is applied with a pattern cut through it.
That is, the exposed part of the metal will be etched, and under the film will remain intact.
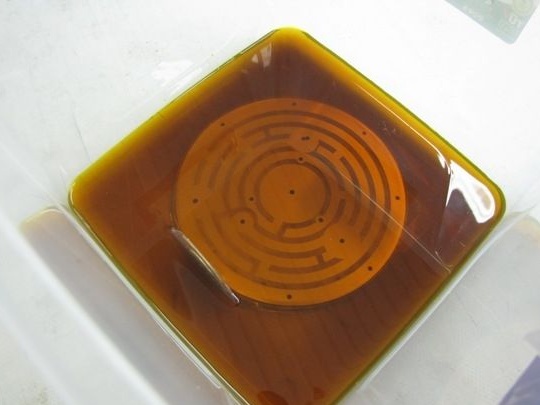
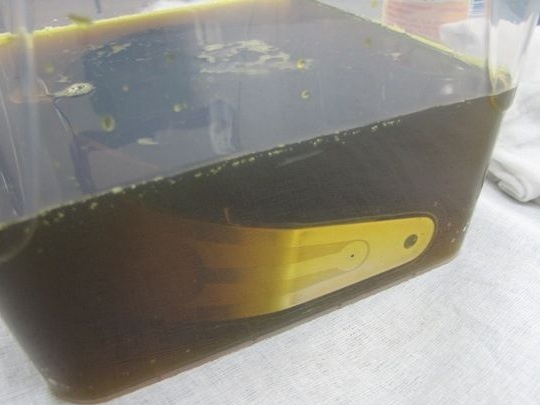
Next, the process is carried out in a plastic container with ferric chloride, due to the transparent film the whole process can be observed visually.
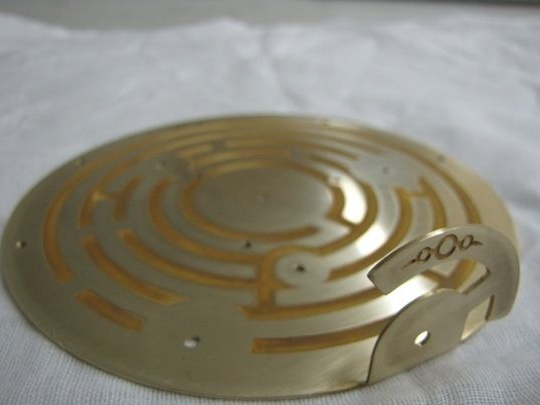
That's actually what happens in the end.
Next, the workpiece is sent to the bath with ammonia vapor for patination.
Here is such a beauty at the exit.
Etching the workpiece from two sides.
Immersed in ferric chloride.
The output received a picture from two sides.
Patinated in an ammonia bath.
3 mm stud installation.
Screwed on.
Base.
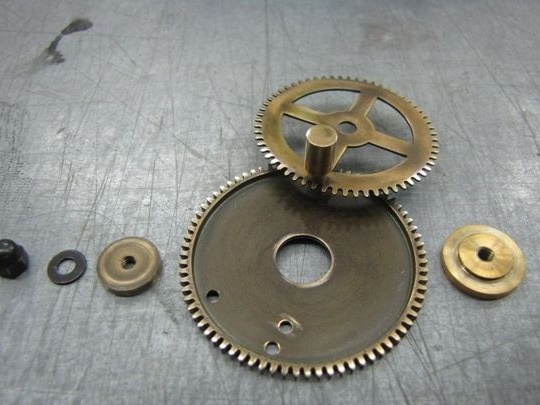
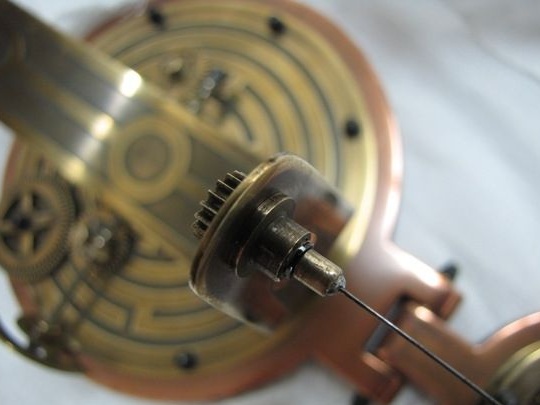
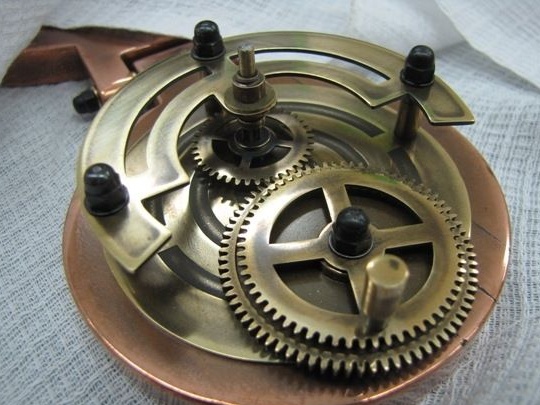
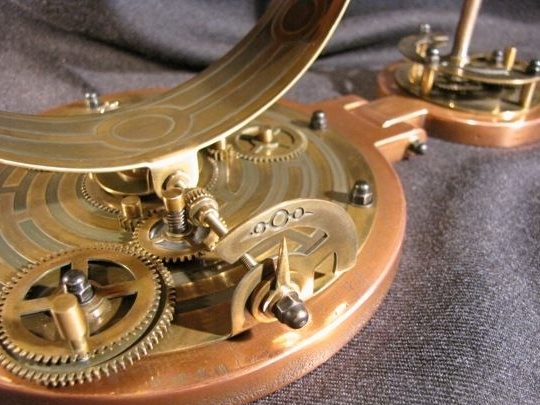
Assembling gears in the joystick.
The rotation mechanism is going.
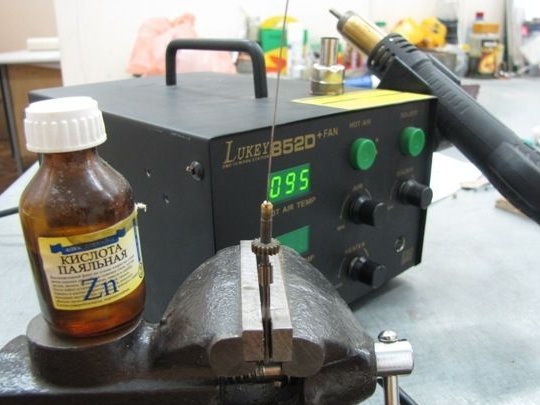
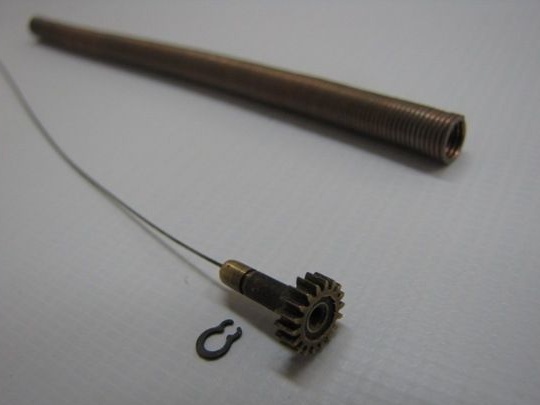
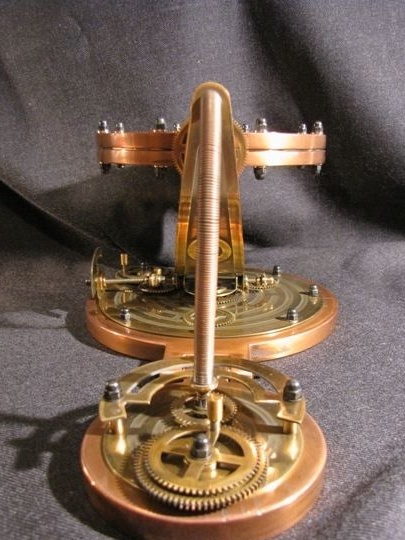
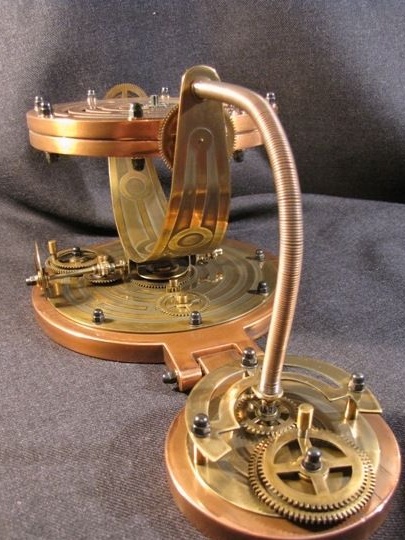
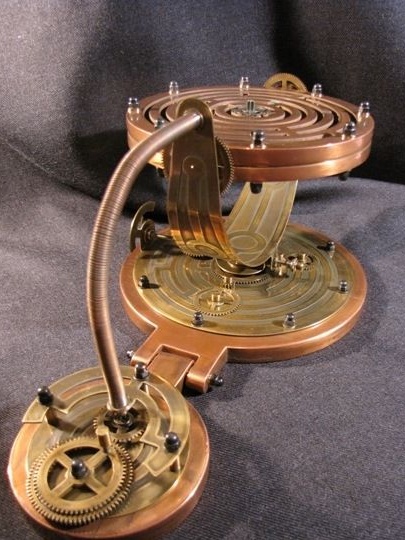
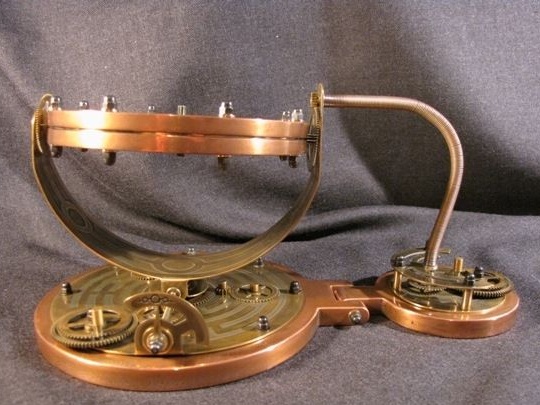
Soldering the drive.
This drive consists of a guitar string, casing and gear.
the gear was locked and clad in a casing.
The core was soldered.
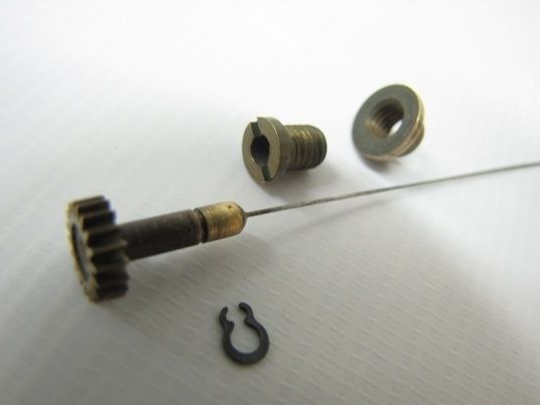
Assembly of the rotation mechanism.
The gear has a convenient handle.
And now the whole mechanism and the labyrinth is assembled into a single design.
By tradition, among the masters, control photographing of the finished product was made.
Also, the author provided video for viewing and familiarization.
That's the way the author created a unique and rather unusual mechanical labyrinth, which is important today, the main thing is the uniqueness that is well appreciated. So the guys who have read this material are on the right track to their success. Engage in creativity, grow on yourself, learn from the masters, create.
This concludes the article. Thank you very much for your attention! Come visit often, do not miss the latest in the world of homemade goods!