Dear site visitors, from the master class presented by the author, you will learn how to independently build a change house on your land plot. This building is necessary for the first time when buying a new and uncultivated land plot on which it is planned
construction capital home. At the time of construction, the change house will protect you from the weather, serve as an overnight stay and a place of rest, you can also cook food in it, change clothes and store tools and garden tools.
Basically, these buildings are easily erected frame type on a shallow foundation, in our case, "plate". The base is assembled from a wooden bar and board, and OSB is sheathed on top with a plate, by the way a rather popular material today. The roof is made in 2 slopes and covered with light roofing material, such as flexible tiles or roofing material. Inside, you can insulate with mineral wool and finish with clapboard and in a current house it will be possible to dwell until mid-autumn, and if you put the stove in, you can continue building in winter))
And so, let's look at what exactly the author will need to build a change house?
Materials1. beam
2. board
3. lining
4. OSB
5. roofing material
6. soft tiles
7. screws
8. metal fasteners
9. nails
10. cement
11. sand
12. fittings
13. wire
14. loops
15. paint
Instruments1. jigsaw
2. punch
3. drill
4. screwdriver
5. hammer
6. roulette
7. shovel
8. pliers
9. corner
10. level
11. a concrete mixer or a container for preparing a solution.
12. brush, roller
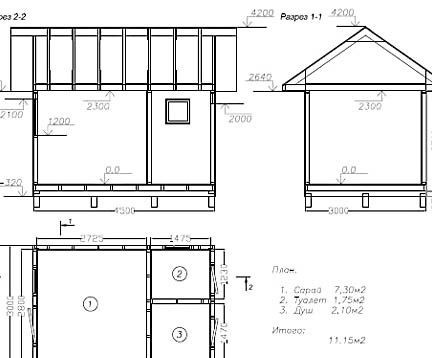
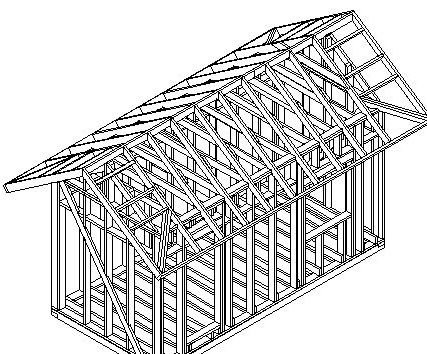
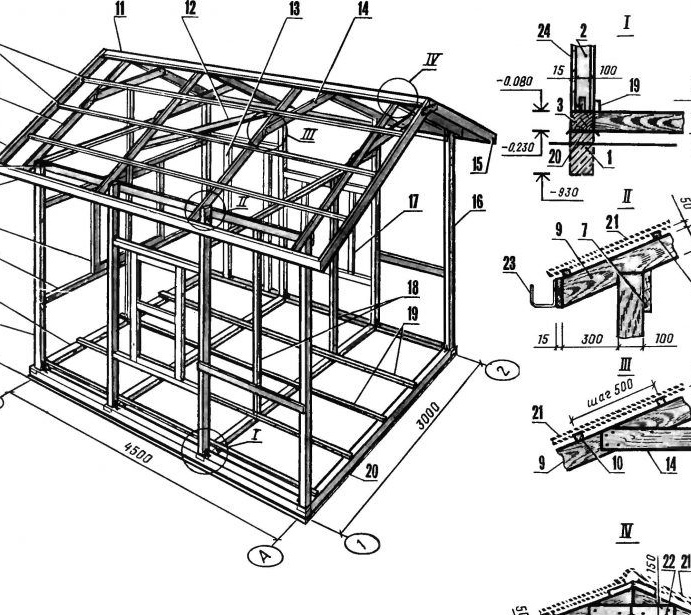
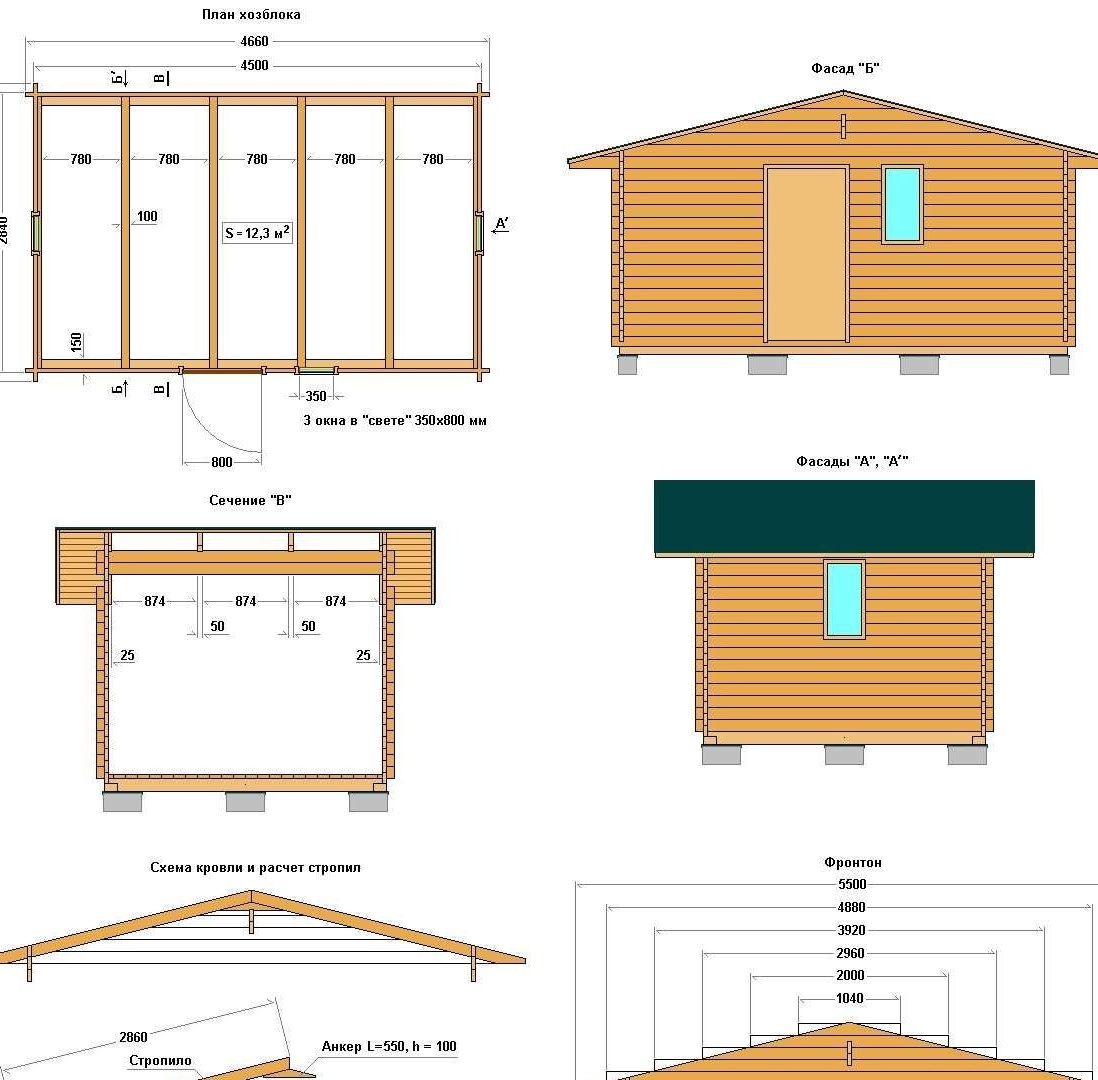
Walkthrough on the construction of a change house do it yourself.Any construction should begin with the preparation of estimates, drawings, diagrams, and layout of the building plot. As the old Russian proverb says “Measure seven times, cut once” Below are drawings of change houses with a 2-pitched roof.
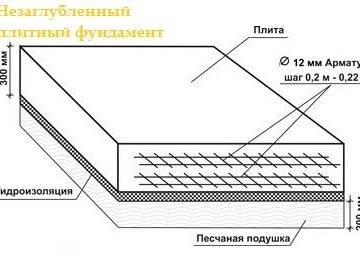
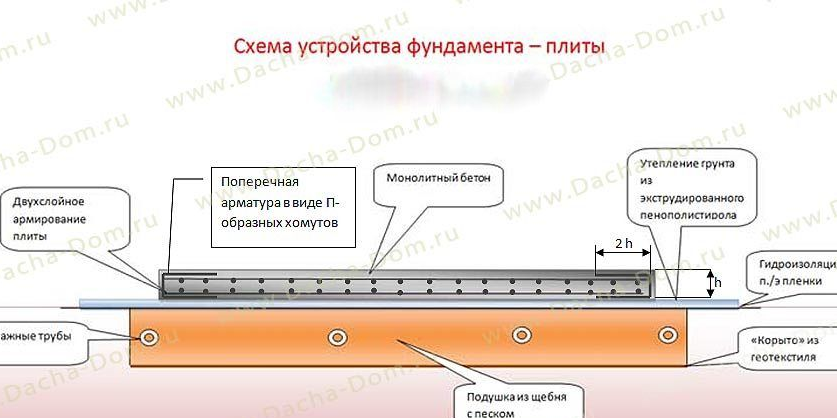
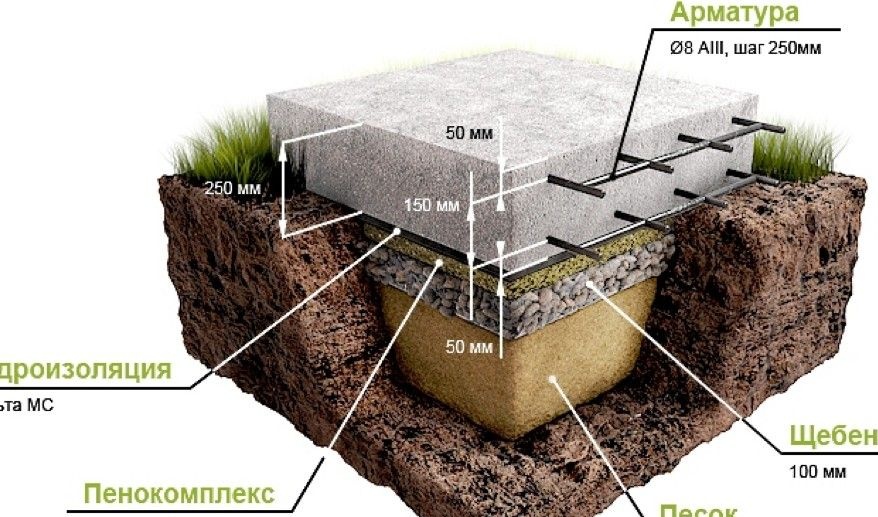
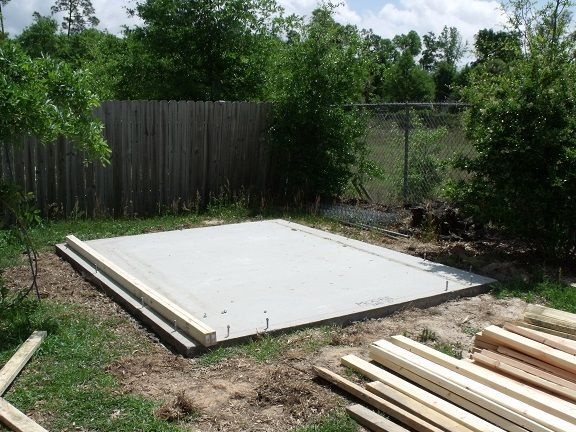
As mentioned above, the foundation for frame construction is best suited as a slab in the form of a slab, the diagrams and the drawing of the correct creation of the foundation of this type are also presented below.
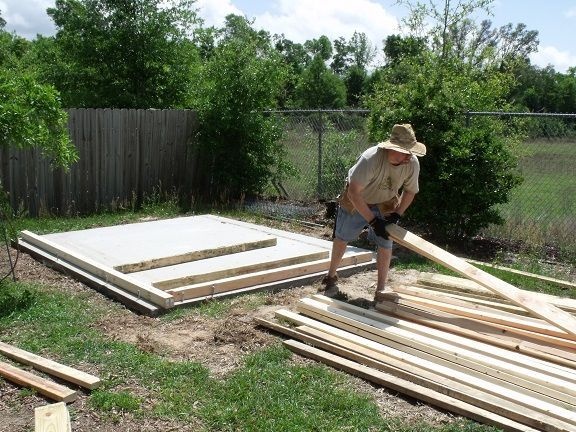
After studying all the subtleties and nuances, the author set to work. First of all, I chose a suitable place on my site, cleared from the bush, stones. Then he marked the perimeter for pouring the foundation, dug a hole according to the scheme and, following all the instructions, filled the slab.After that, you need to wait a couple of weeks until the cement dries and gets stronger, as well, builders advise periodically to moisten the slab with water periodically, so the cement will not dry out and become stronger.
As soon as the specified time passed, the author started directly to the construction of the frame, for which he drilled holes in the slab at the edges with a hammer drill for anchor bolts and screwed the beam, having previously laid a waterproofing layer in the form of roofing material.
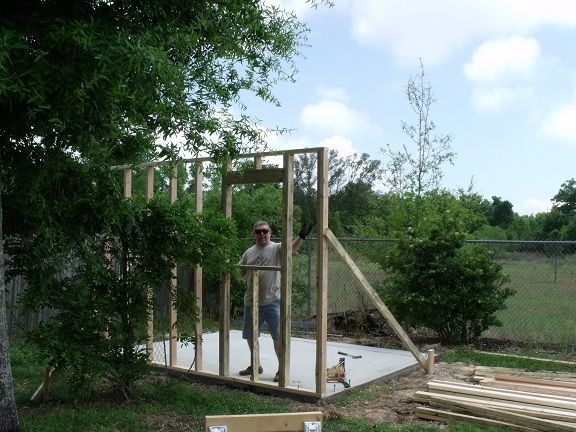
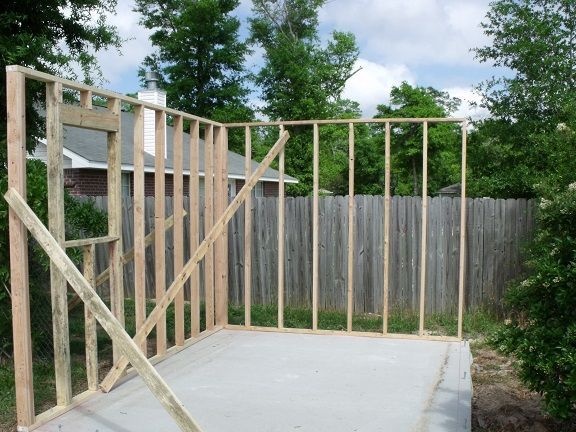
Then the master prepares the beam for the erection of the frame itself.
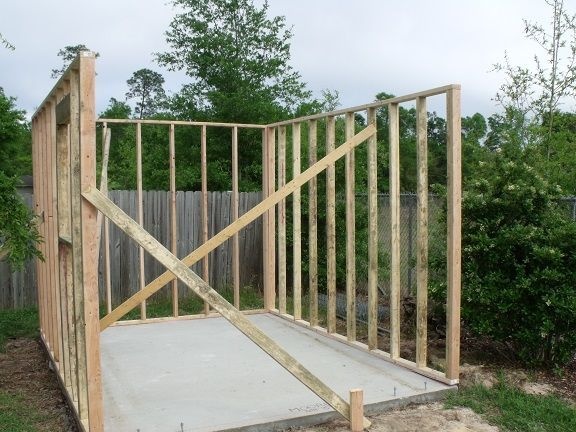
Racks are installed vertically and screwed with screws to a horizontally positioned beam bolted by anchors to a concrete slab.
In order that the design does not lead away, he puts jibs.
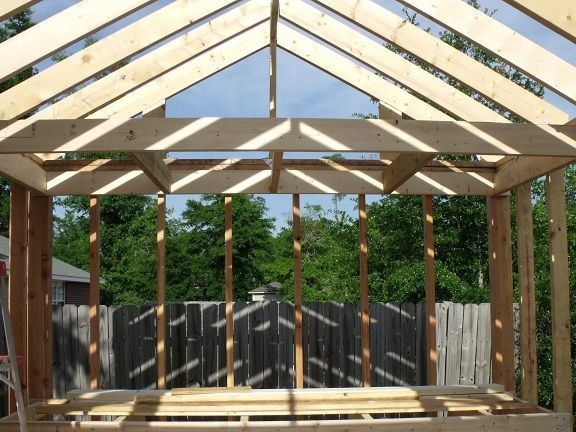
And now 3 walls are ready.
In the upper part it is also connected by a bar.
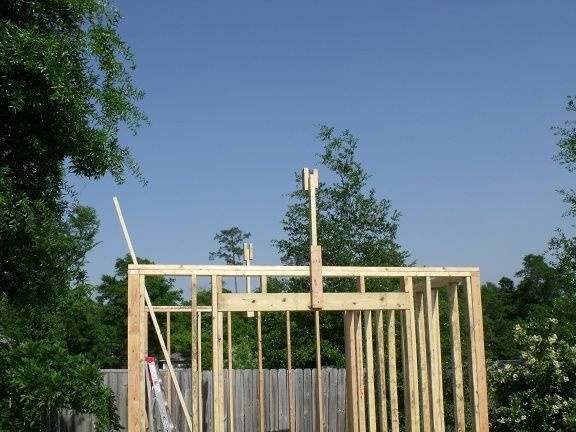
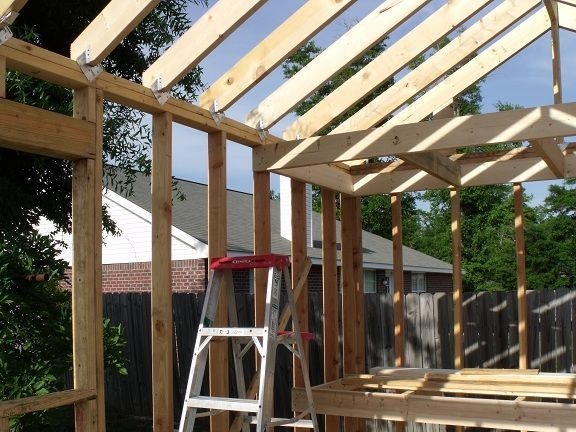
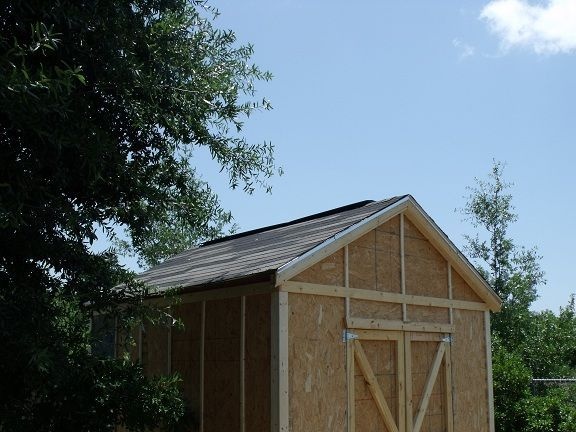
After which the master proceeds to create a 2-pitched roof.
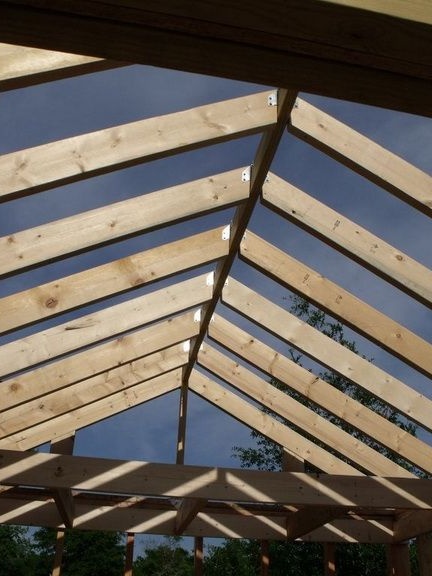
Makes a skate.
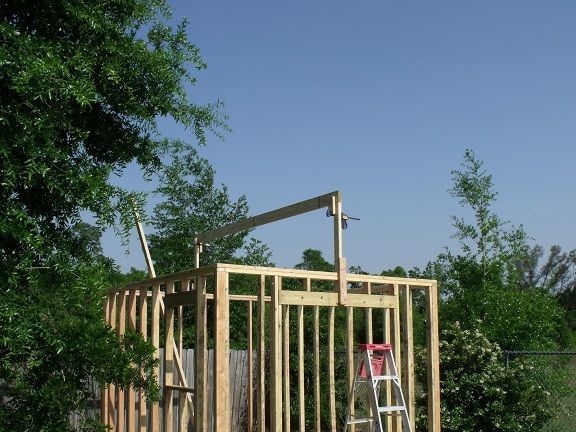
Fastens the rafter system.
Also, the author made struts to strengthen the design.
The rafters are mounted on special metal fasteners.
Both at the top and at the bottom of the ramp.
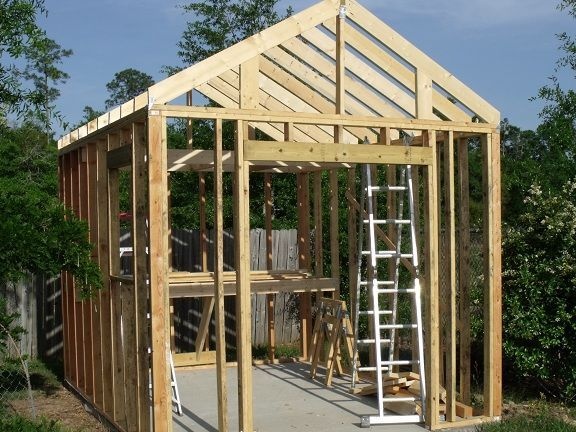
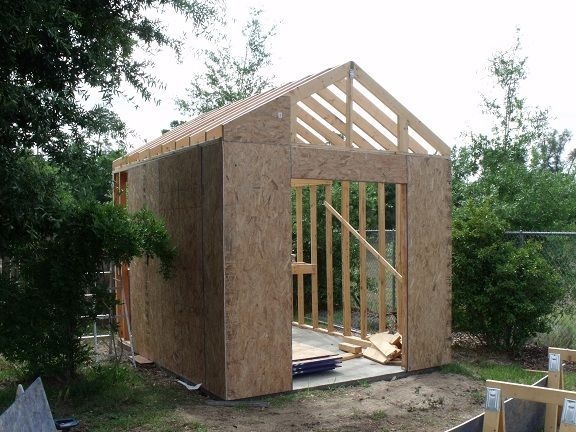
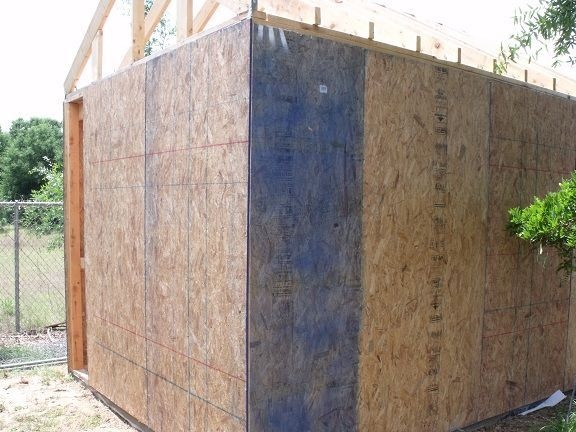
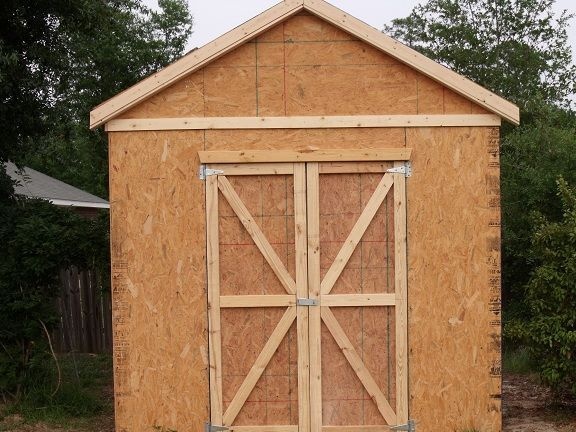
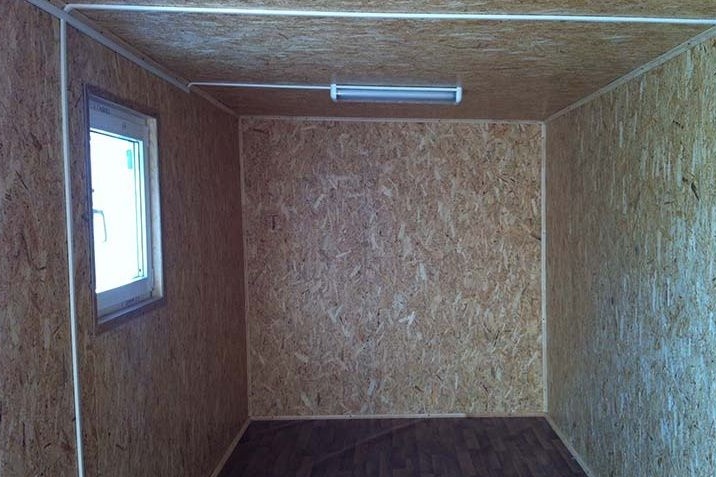
The frame is fully assembled and it's time to finish the walls of the OSB, workpieces are cut to the size of vertically arranged bars and are chipped.
This material is very good in terms of quick installation, the walls close very quickly, in the presence of ready-made pieces cut to size.
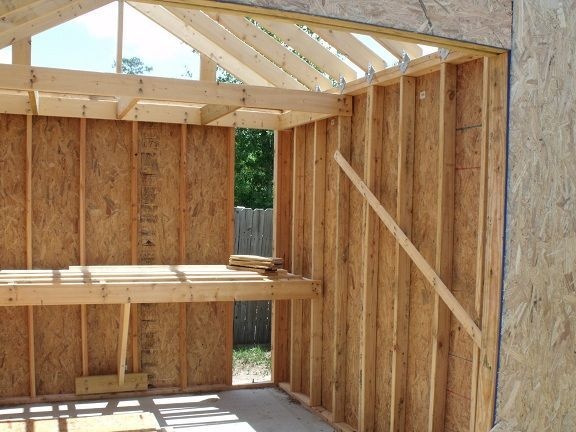
So the change house looks from the inside, by the way, in these cavities between the bars you can fill in mineral wool and thereby insulate the house.
We leave a place under the doorway.
Inside view, the roof can also be insulated.
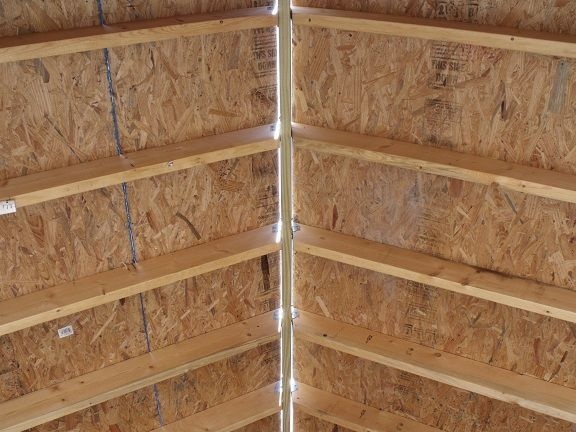
The roof is also covered with OSB tiles, because under a soft roof a flat and smooth surface is required, and these panels are very well suited for this.
Flexible tiles are best secured with galvanized studs for roofing.
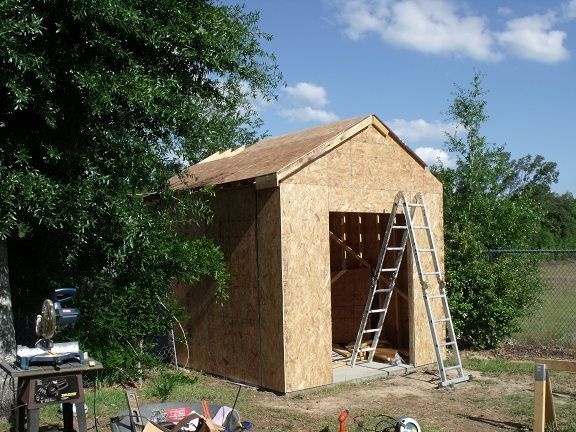
The door is hung.
That's actually what happens.
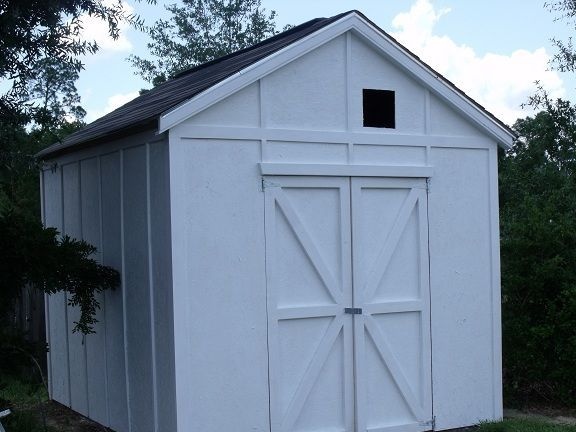
After all the basic work is completed, the author proceeds to the painting work.
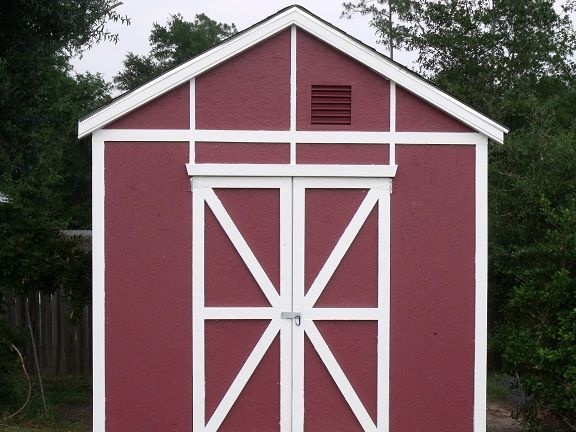
The result was such a cool change house.
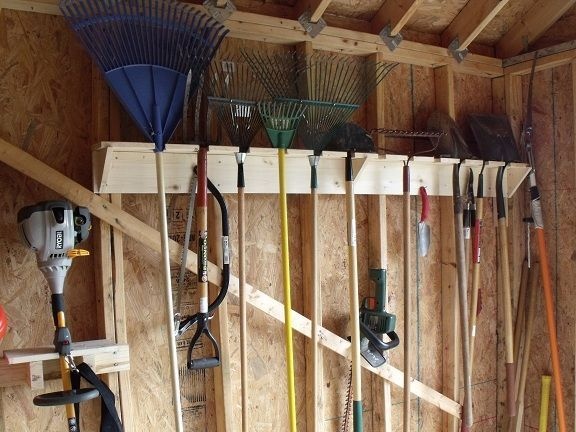
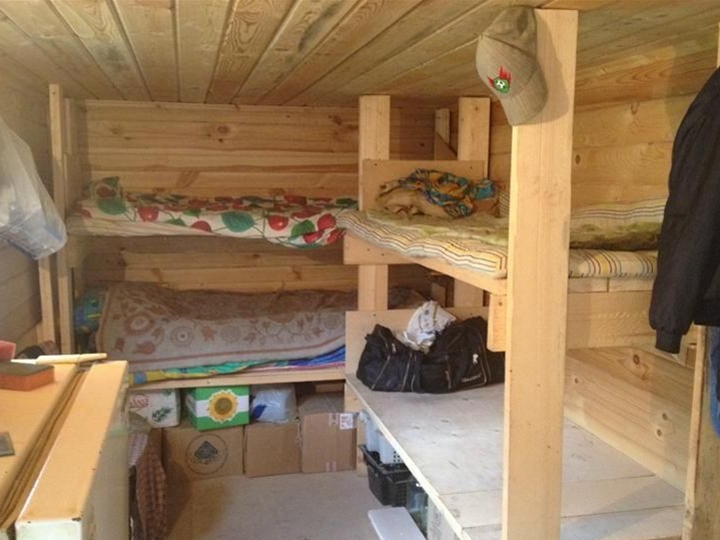
It can also be divided into several zones, for example, one part is reserved for tools and garden tools.
And the second half directly for domestic needs, you can whip up wooden bunks, shelves and a table.
If possible, then conduct and connect electricity.
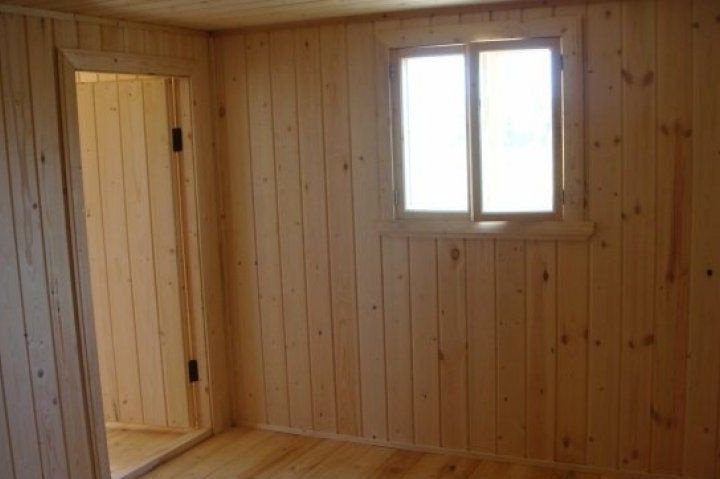
The residential part can be finished with clapboard.
As you can see, there’s nothing particularly complicated, everything is within the power of a person with a goal set, as they say, “No gods burn pots.” After you build a capital house, you don’t need to part and break the change house, it can be converted into a barn or a small workshop, either make a guest house or give it to children as a game house, there are many options)
This concludes the article. Thank you very much for your attention!
Come visit often, do not miss the latest in the world of homemade goods!
This article is for informational purposes only!