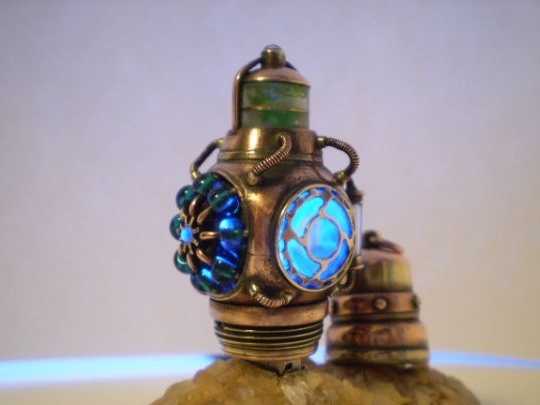
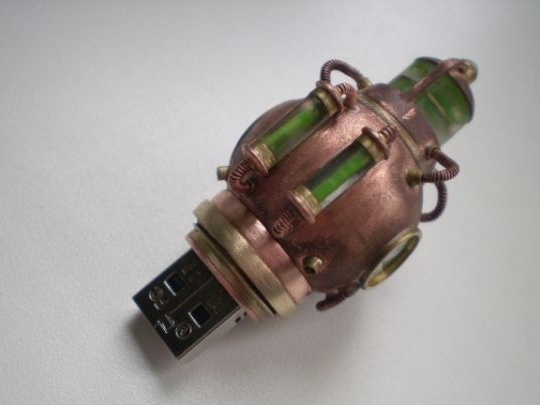
Dear site visitors, from the master class presented by the author, you will learn how to make an unusual and unique case for a flash card in the Teslapank style
Today it has become quite fashionable to make cases for computer equipment
do it yourself, for the reason that they are monotonous, but many want to differ and surprise) Modding and
Steampunk new hobby of the young generation, which is becoming more and more popular and famous.
The main material in this case is copper and brass, as well as unnecessary and broken mechanisms of old alarms, clocks of their inside (gears and springs) In general, craftsmen simply create unique handicrafts from rubbish and rubbish that cost decent money by the way.
So our master, who has been fond of steampunk and modding for quite some time, decided to create another unique masterpiece. And he does it very well, because he gained invaluable experience working with metal, which he shares with the people. And so let's look at what exactly he needed to create a flashcard case?
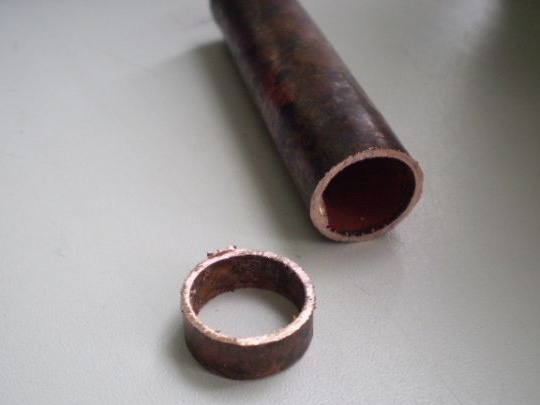
Materials1. copper pipe 15 mm, 20 mm
2. brass tube
3. copper wire 1 mm, 0.5 mm
4. fishing line 2 mm
5. LED
6. lacquer glowing in ultraviolet light
7. glue-second
8. epoxy resin
9. plexiglass
10. copper chain rope
11. brass tube
12. copper plate
13. dial printed on glossy photo paper
14. solder
15. gear
16. plastic tube
Instruments1. drill
2. hammer
3. glass ball and nut
4. hacksaw
5. scissors for metal
6. file
7. scalpel
8. notch blade
9. vernier caliper
10. ammonia bath
11. GOI paste
12. sandpaper
13. velvet
14. burner
15. file
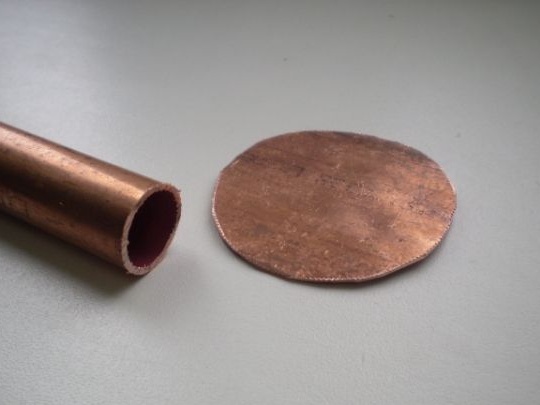
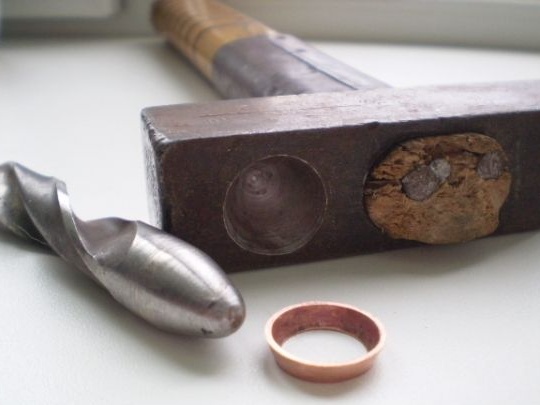
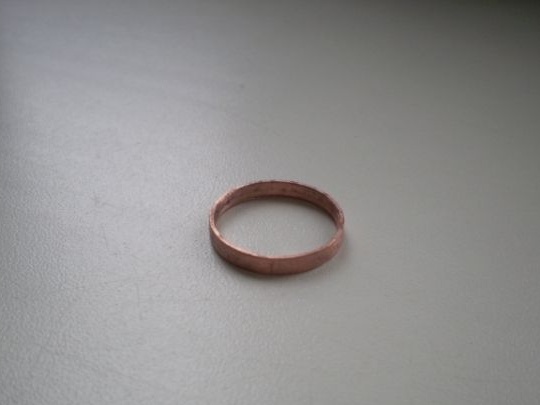
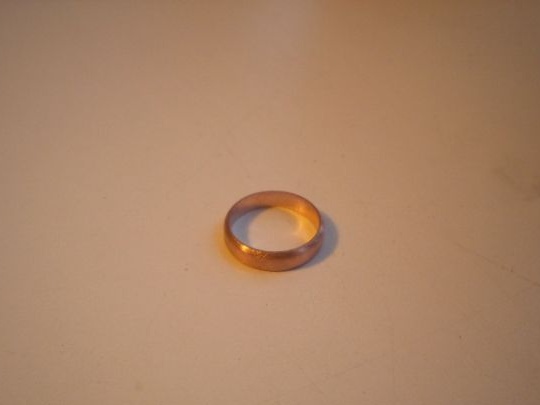
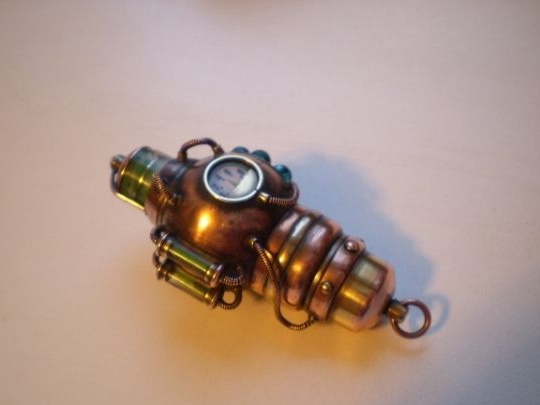
Step-by-step instructions for assembling the flash card housing "Tesla"The author’s favorite material for work is a copper pipe, which can be purchased at any hardware store. Having taken the required length, the master sawed it lengthwise and milled it into a flat plate with a hammer and a smooth metal surface. The thickness of the workpiece is 2 mm.
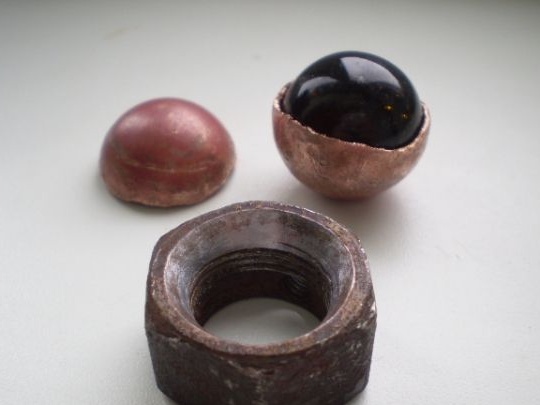
Then, using a glass ball, a nut and a hammer, the surface bends, it is also recommended to anneal the copper with a burner, so it becomes softer for a short period of time and it can be molded.
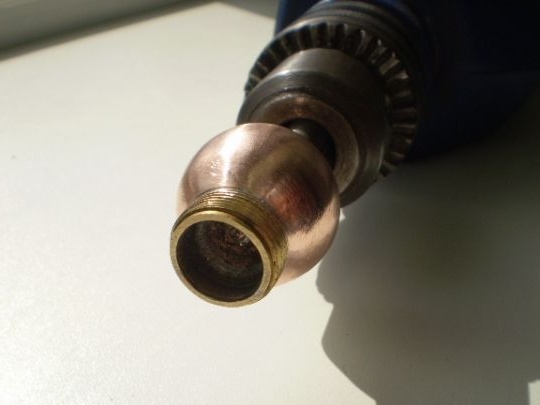
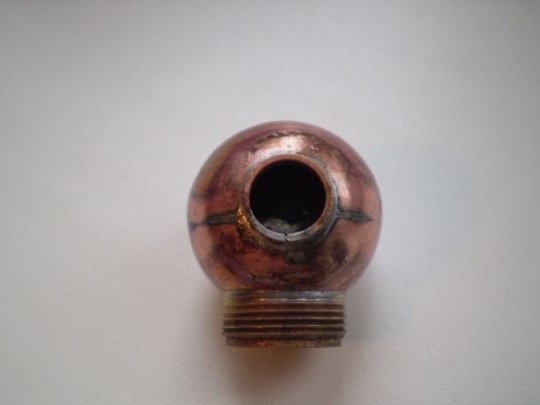
The author decided to twist the spherical body, for which he drilled a hole exactly in the middle.
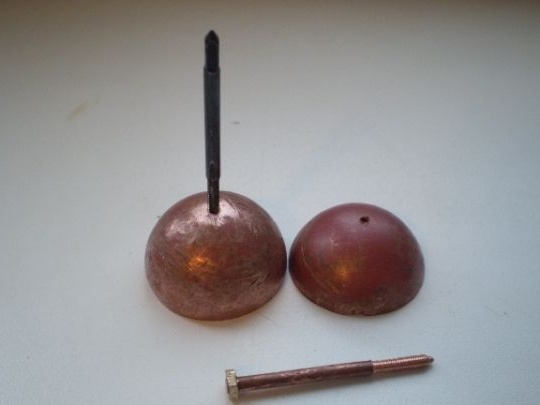
The following is a detail from the plumbing, as well as its thread.
Solders to a spherical body.
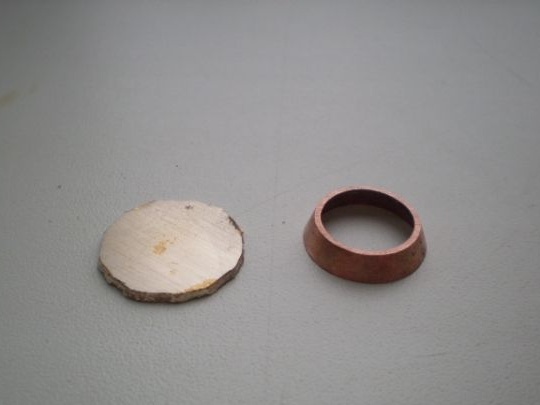
Excess solder grinds with a drill.
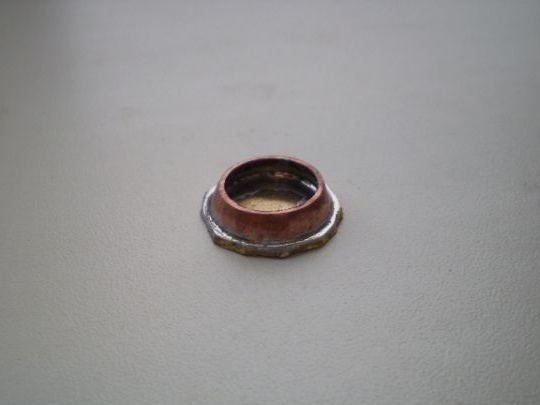
That's actually what happened.
A hammer was made from a hammer.
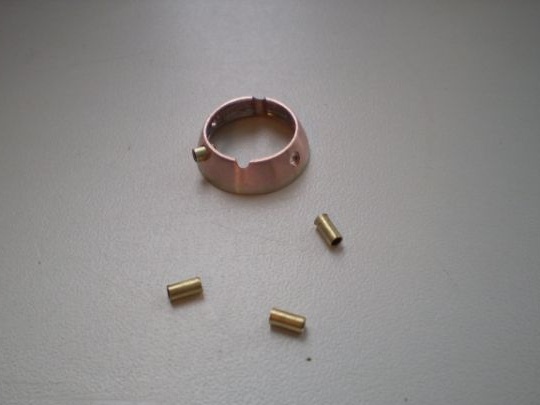
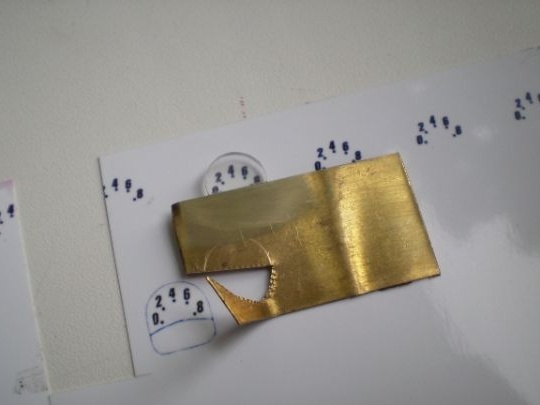
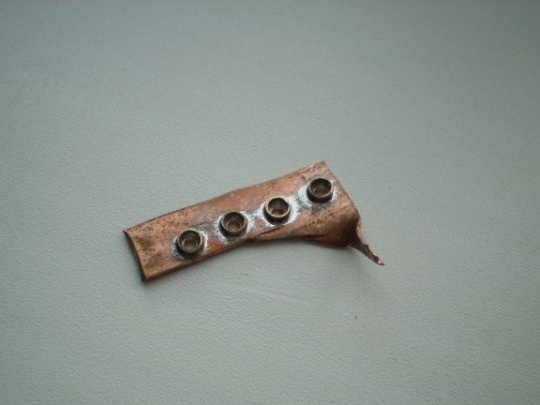
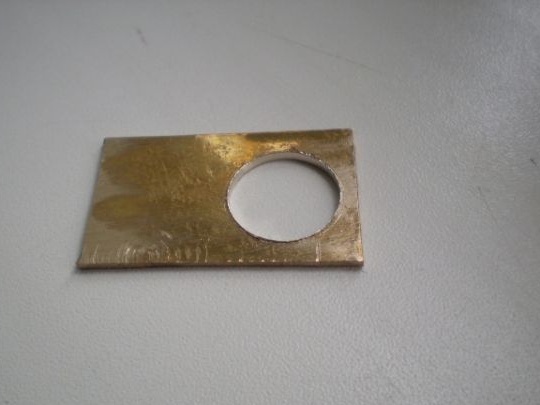
A piece of brass is cut out.
Soldered.
A notch cuts a brass tube with a notch.
Drills holes and inserts ducts into them.
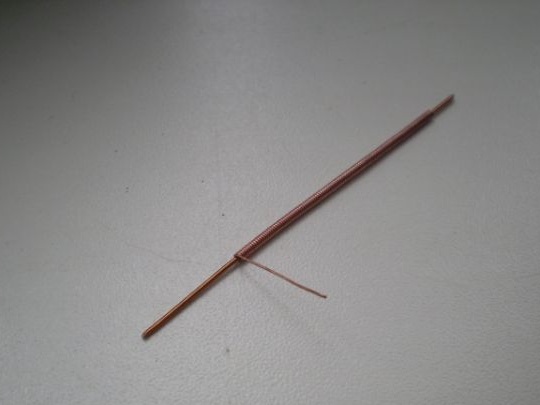
Then he takes a copper wire 1 mm thick and winds a 0.5 mm wire on it.
Inserts into prepared brass tubes.
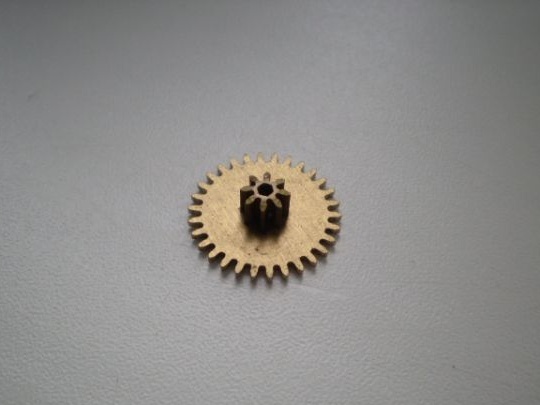
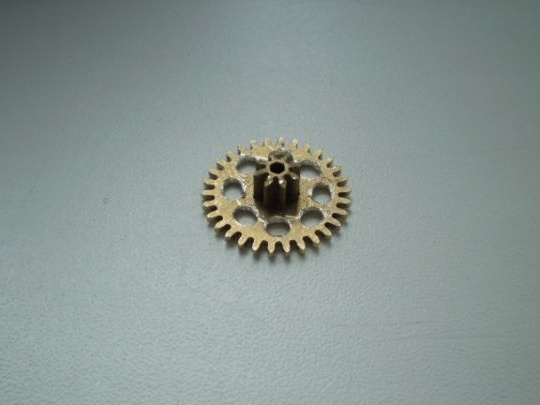
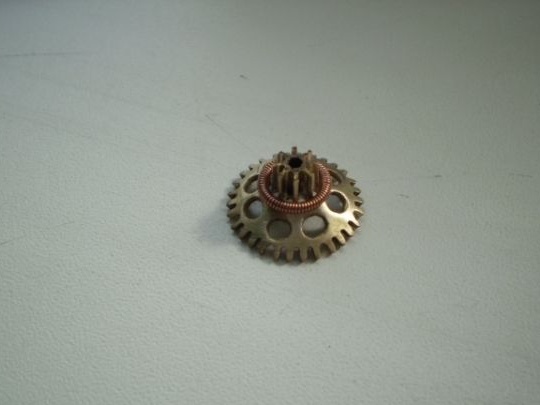
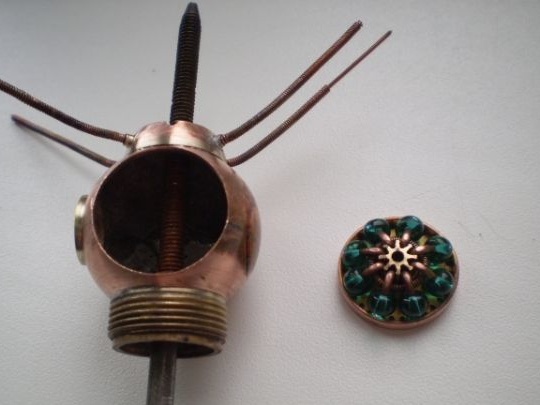
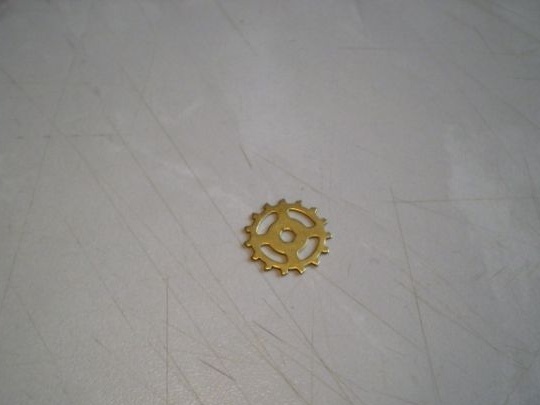
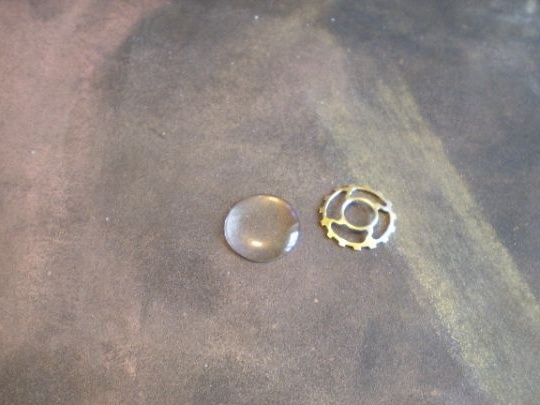
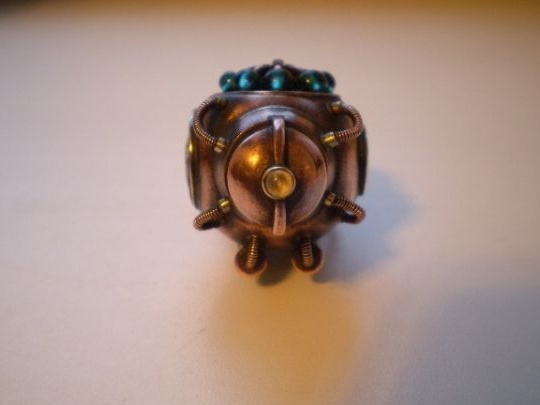
Then he takes the gear from an old Soviet alarm clock.
Drill holes.
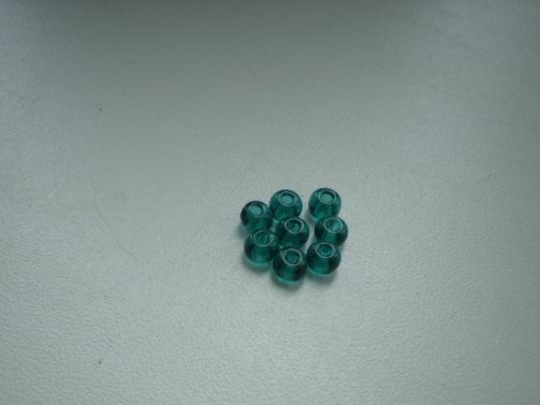
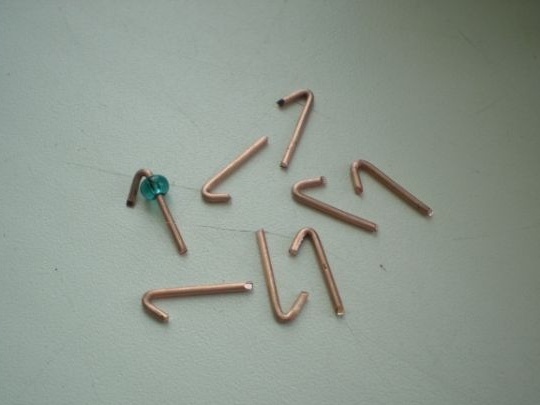
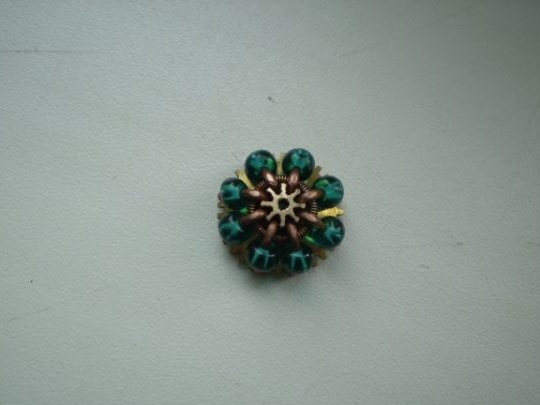
Take glass bead beads.
Threads them with copper wire.
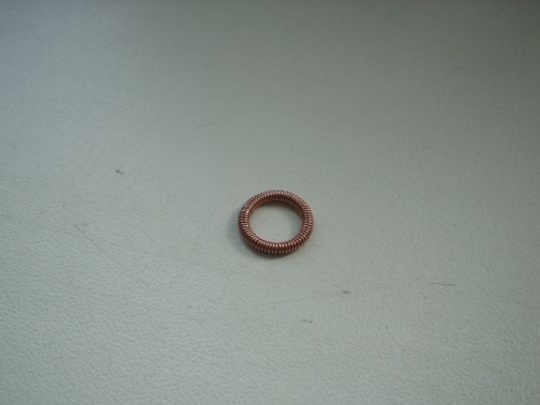
Twists a ring of copper wire.
Installs on gear.
Fastens the wire with beads.
Makes another ring.
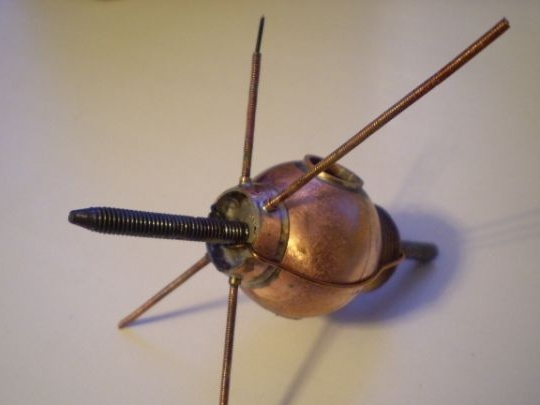
Solders everything in one design.
Preparing for installation.
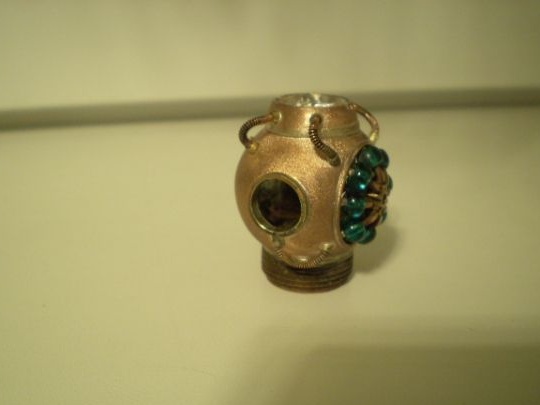
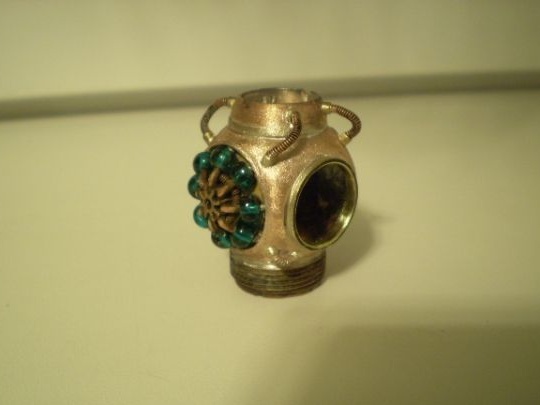
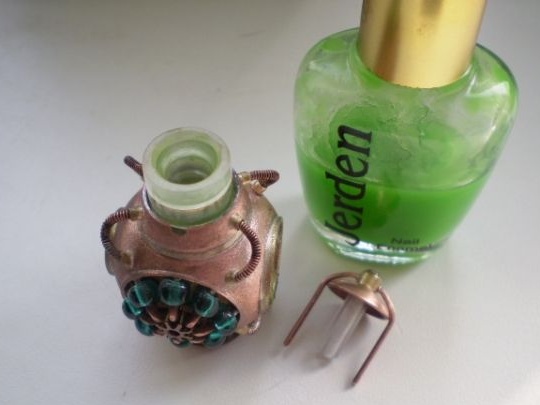
It is inserted into the housing.
It is soldered, and then the excess solder is removed and processed with sandpaper.
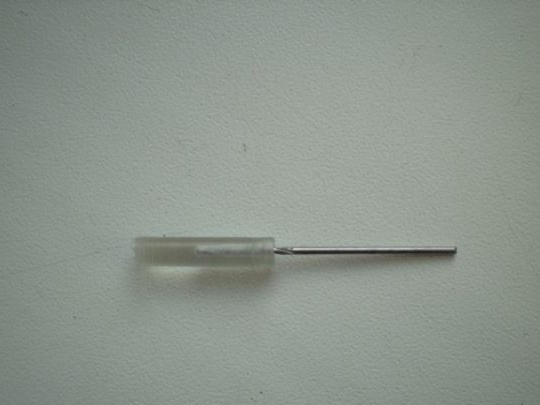
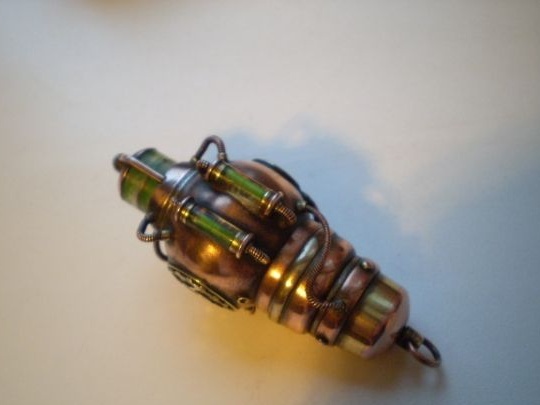
Goes to the manufacture of the upper part.
Slices a small piece of plastic tube.
Inserts copper wire.
Here's what happened.
Drill a hole.
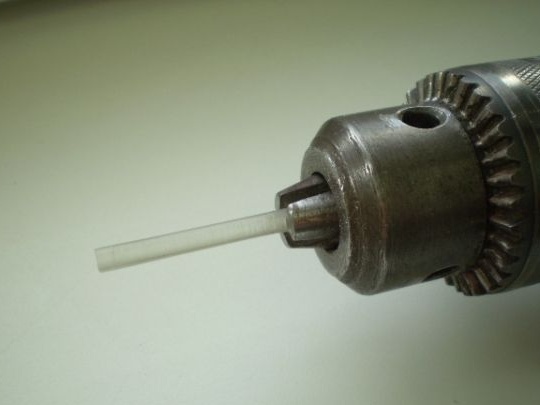
The master uses a 2 mm thick fishing line as a fiber.
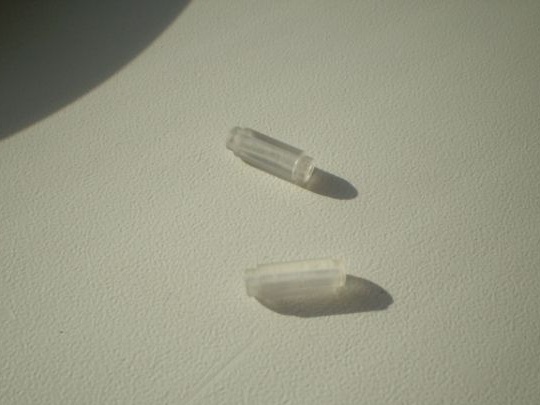
Inside the plastic tube, varnish glowing in ultraviolet is poured.
Assembled.
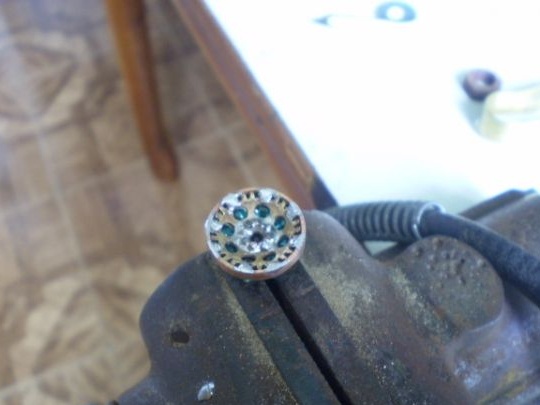
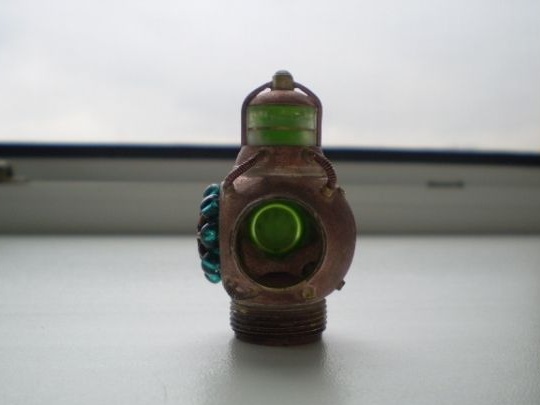
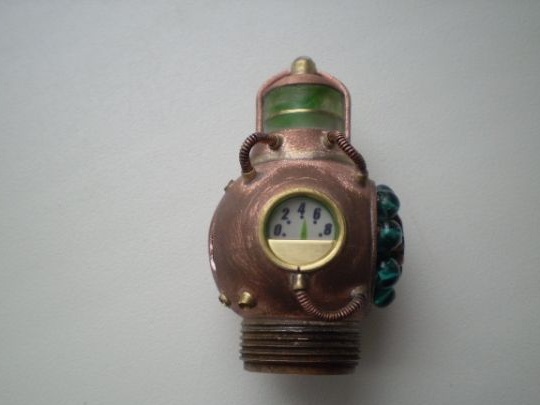
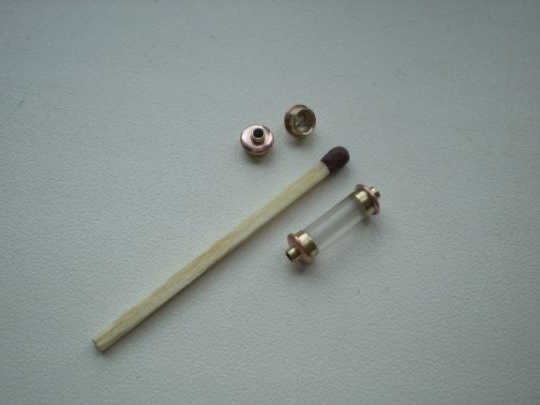
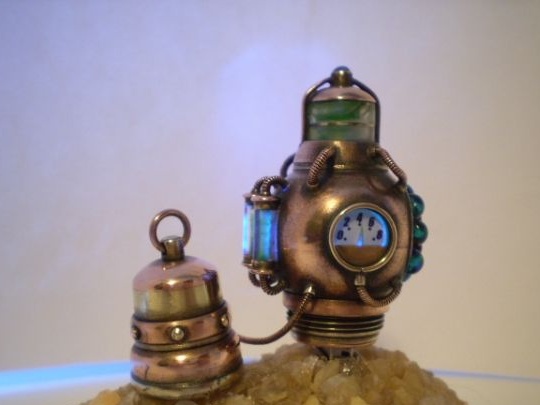
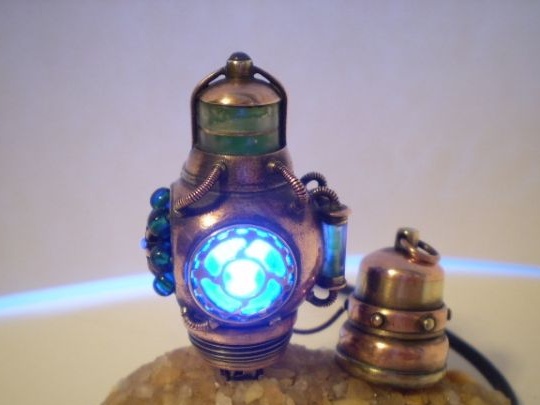
Further, the author proceeds to the manufacture of a manometer.
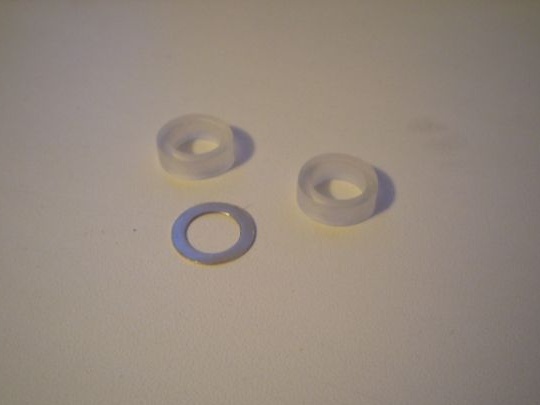
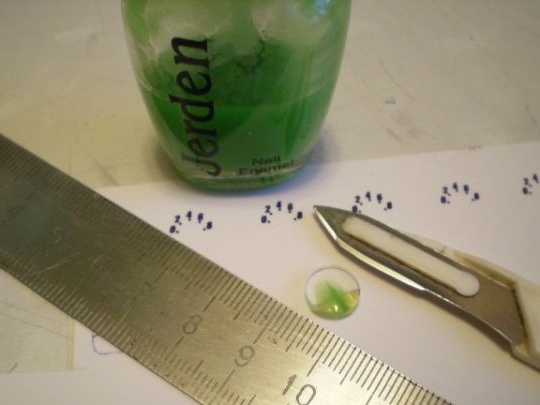
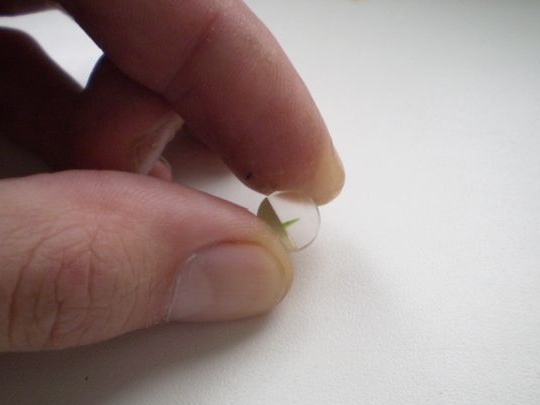
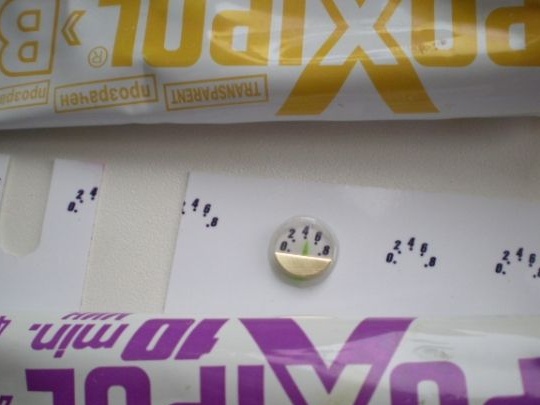
On plexiglass, I scratched the arrow on the back side and varnished it, just glued a brass plate on the glue for a second.
What actually happened as a result.
Glues into the body on "Poksipol"
Directly in the housing.
Beauty)
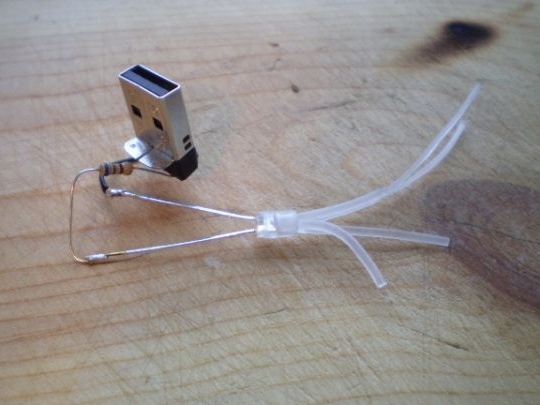
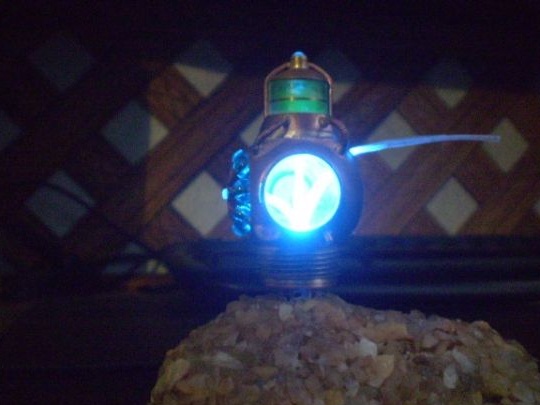
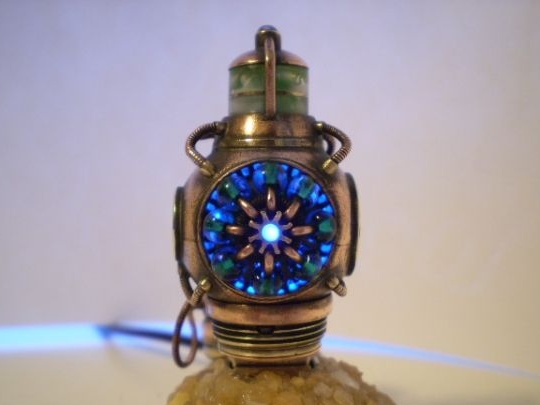
A piece of helium paste is put on the LED.
2 mm fishing line cuts are inserted.
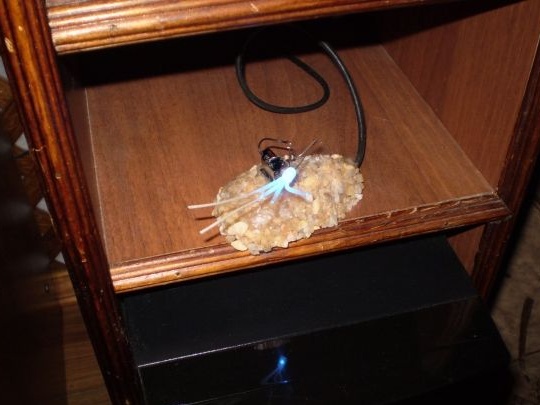
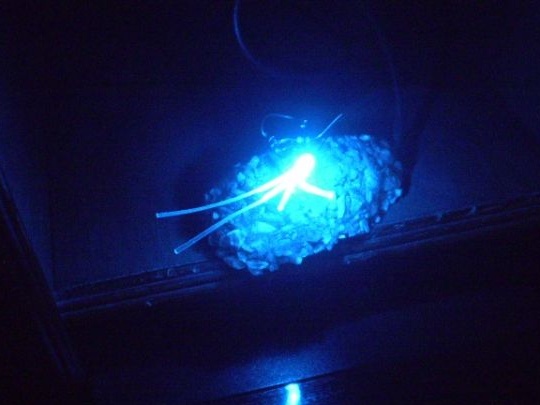
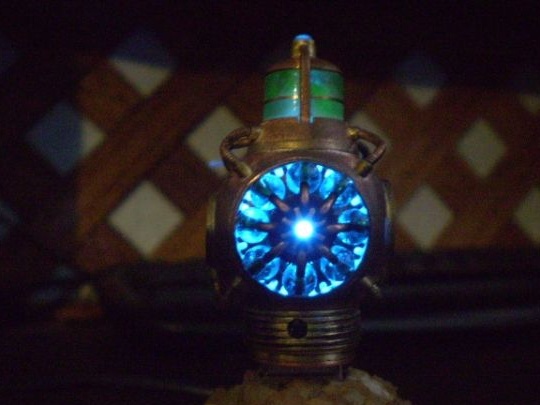
Health Check.
It glows in complete darkness.
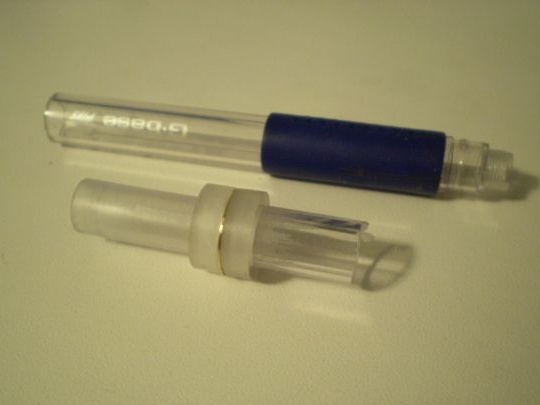
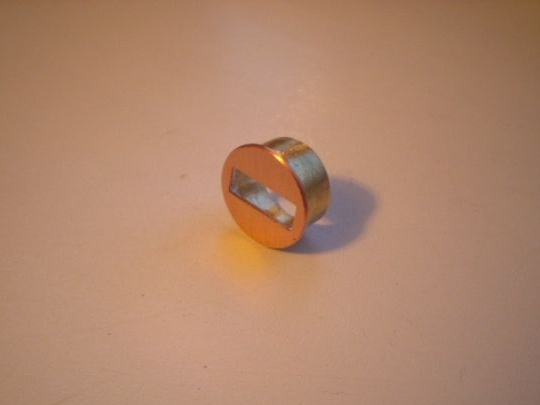
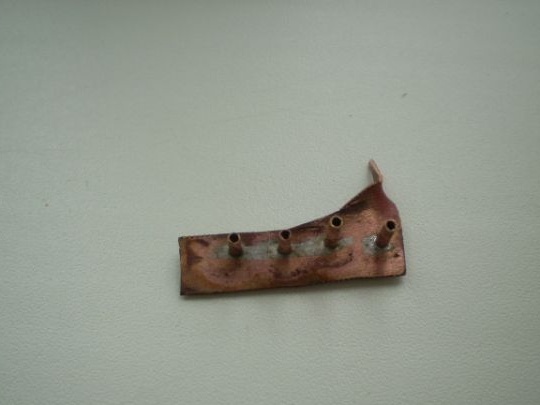
Making fasteners for flash cards.
Saw a hole.
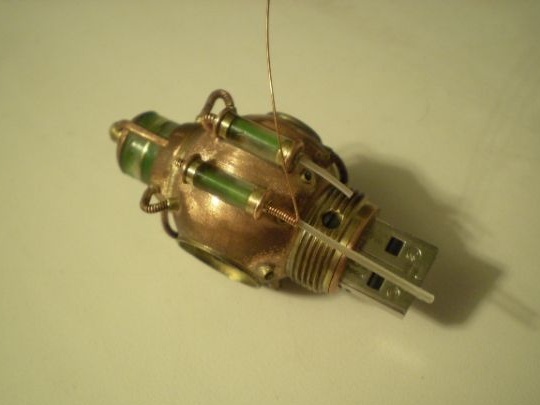
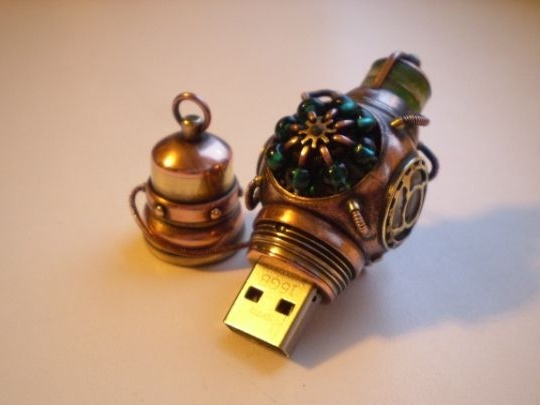
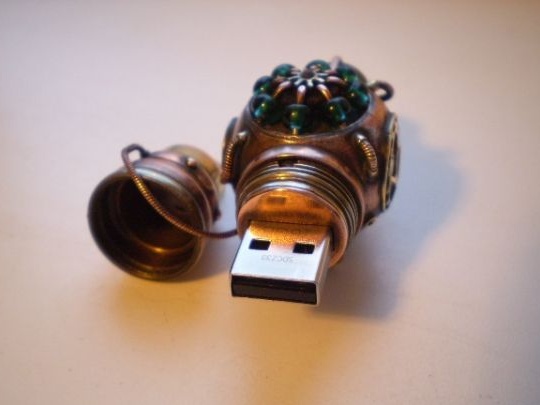
Inserts a flash drive.
Rear end.
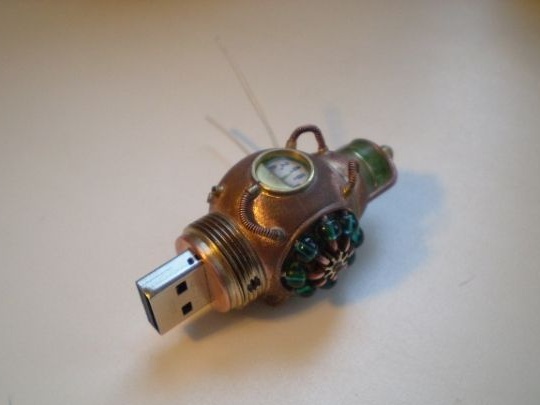
Here is the result.
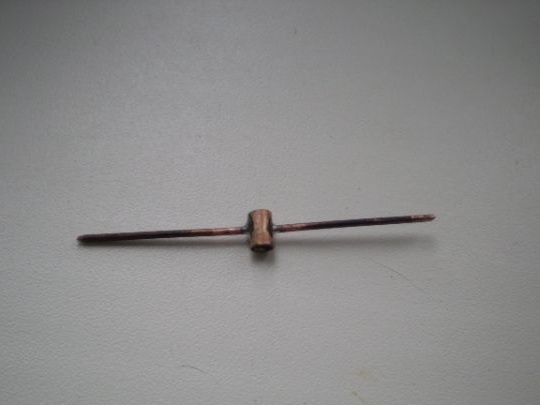
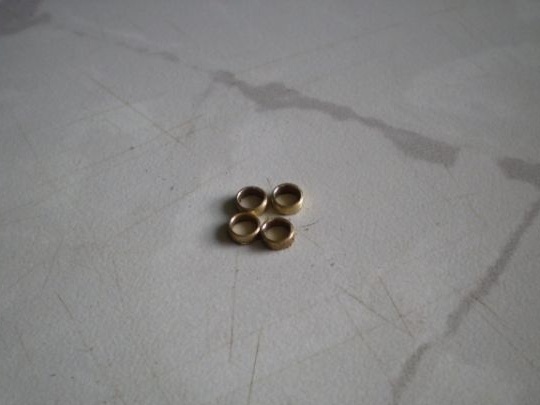
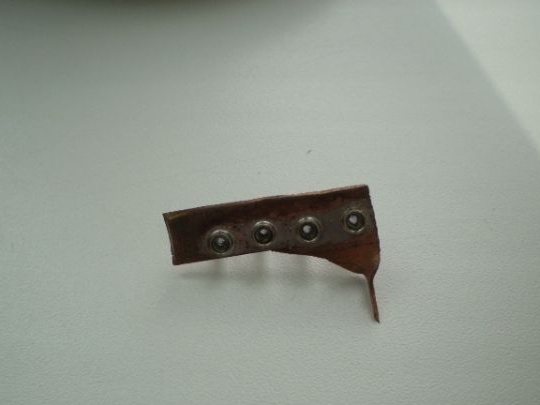
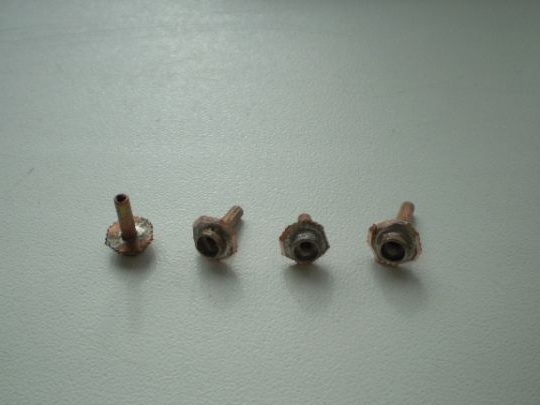
Two bolts of this kind were made for fasteners.
Put together.
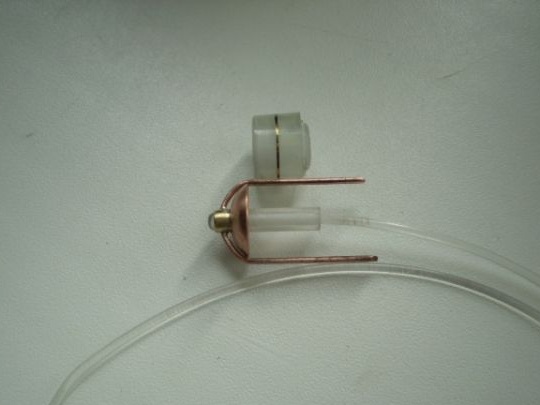
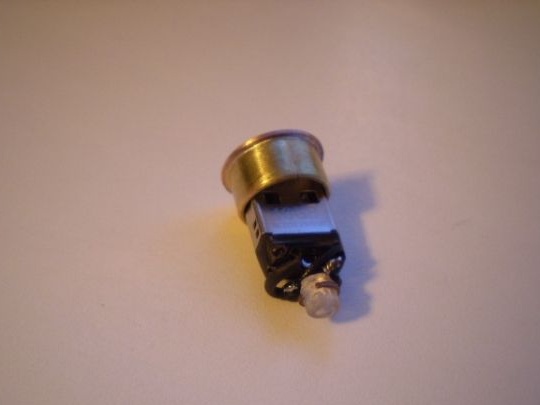
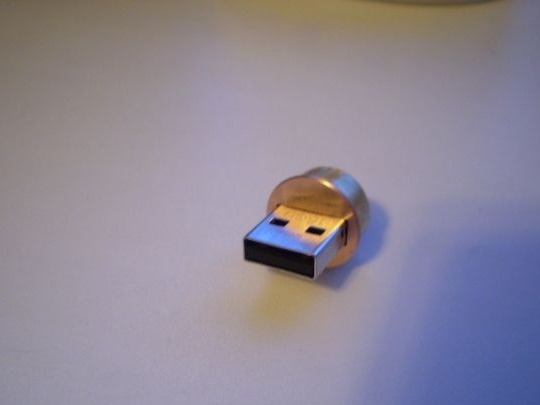
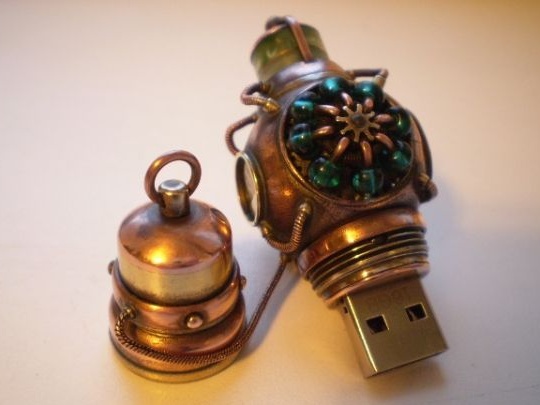
Then the author plugged the product into the USB connector.
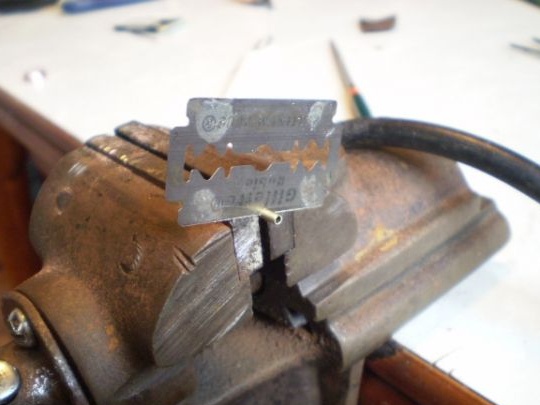
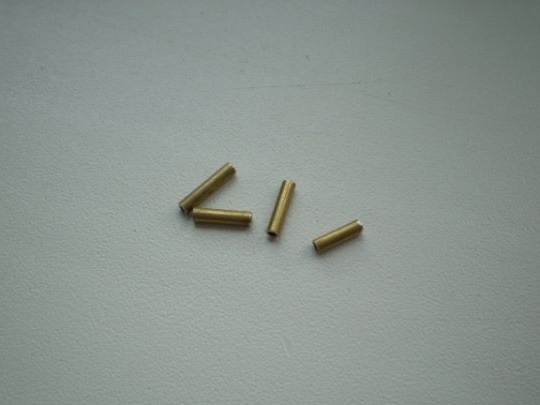
Making very small parts.
Now look at the ratio to the match. The author is simply Lefty of the 21st Century. !!
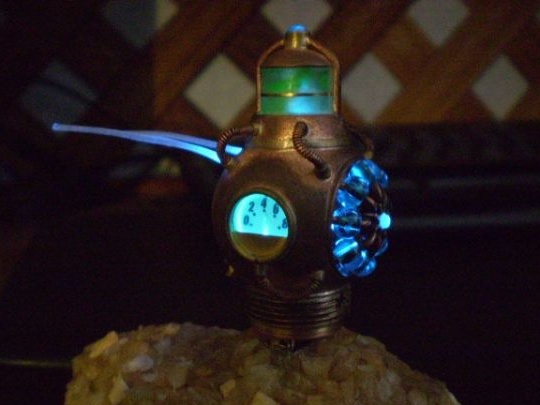
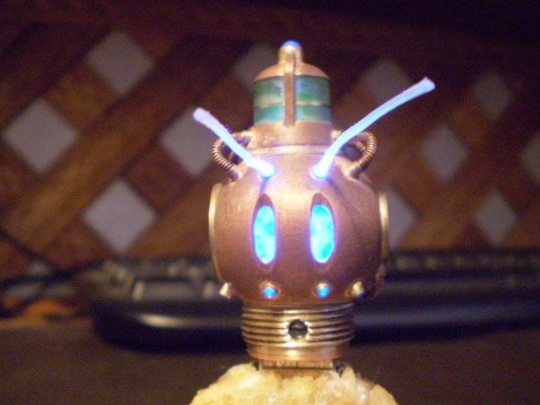
Installs flasks filled with varnish and wraps the fishing line with copper wire.
Health Check.
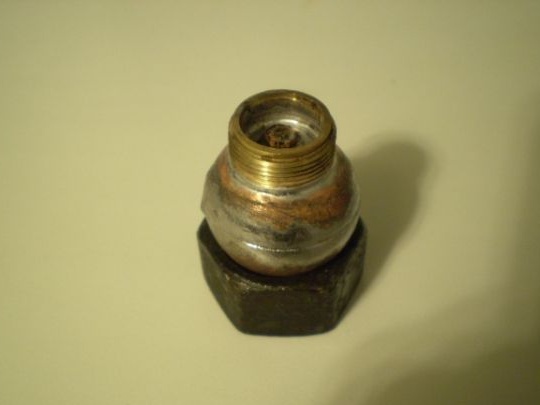
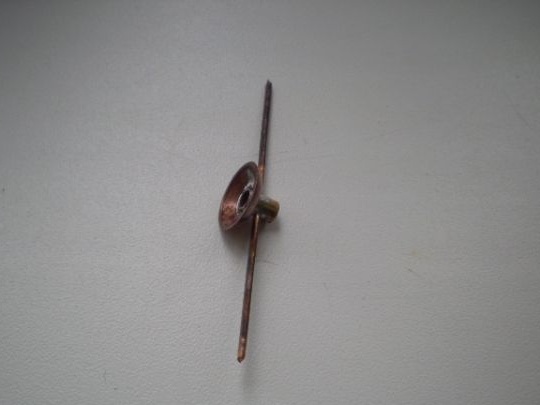
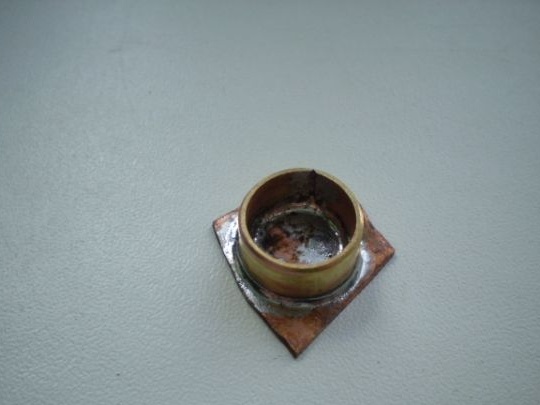
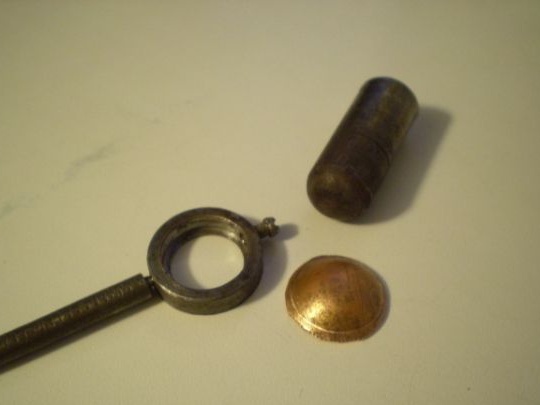
Halved the thread from the crane axle box.
I polished it.
Made a spacer from a copper tube.
Installed.
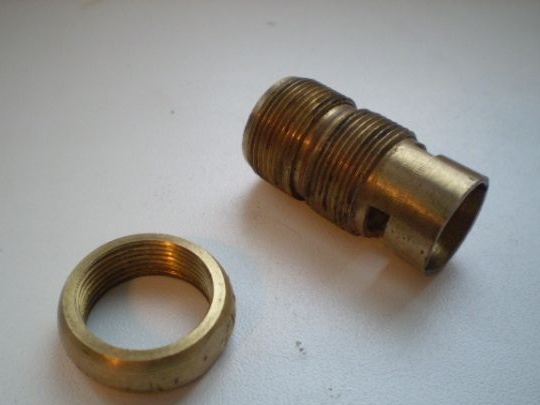
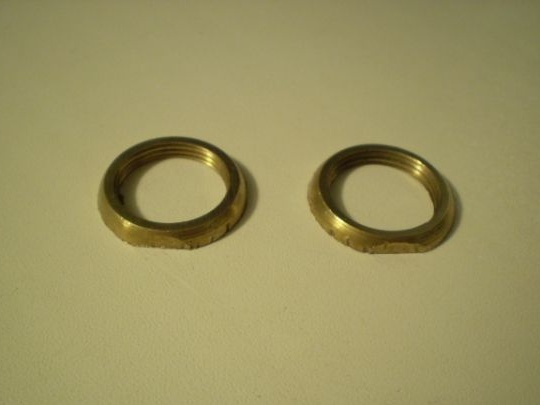
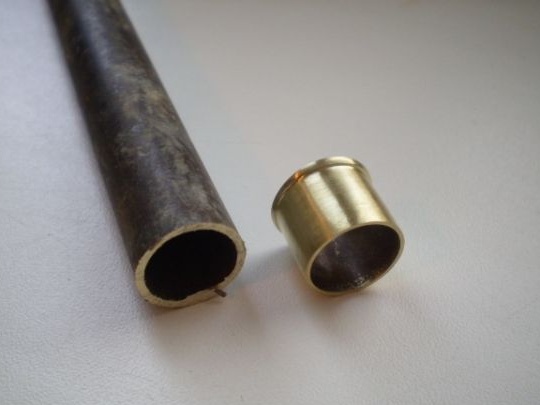
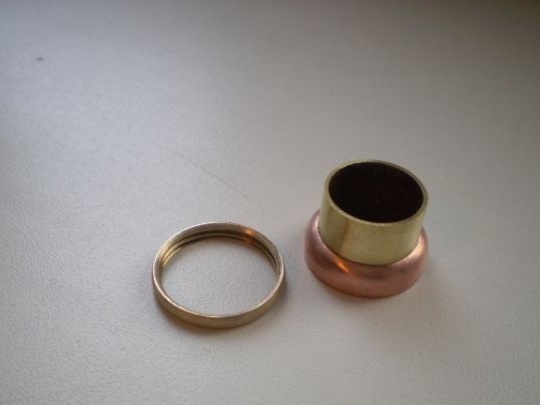
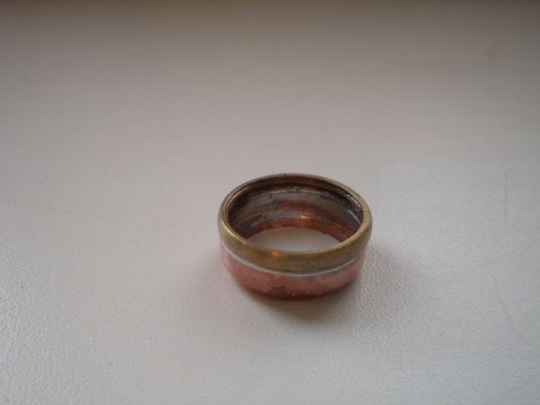
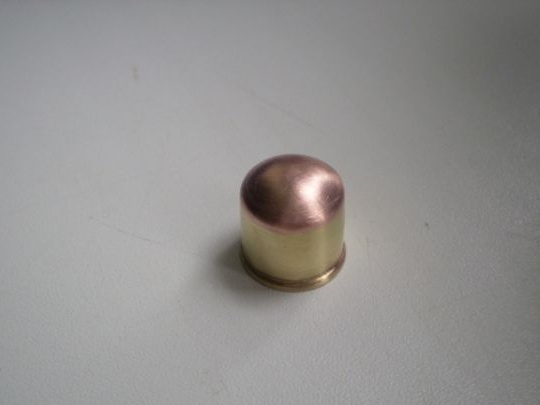
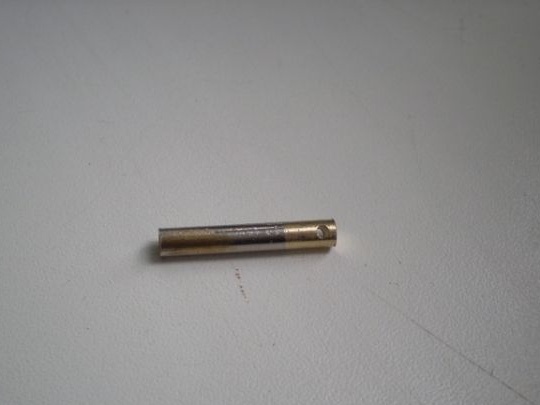
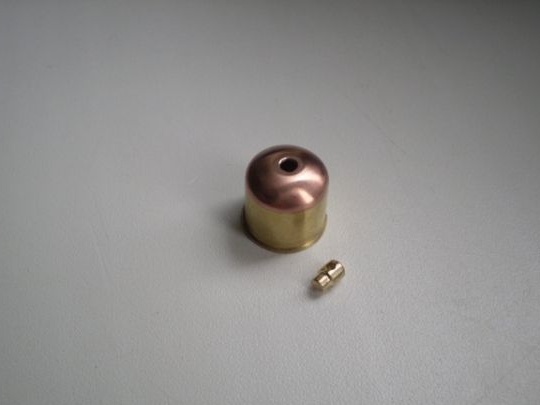
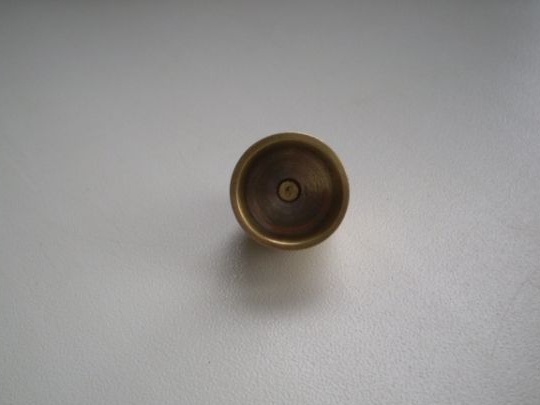
The cap will be made of a 15 mm brass tube.
Copper tube 22 mm.
It is inserted into each other.
The thread is soldered.
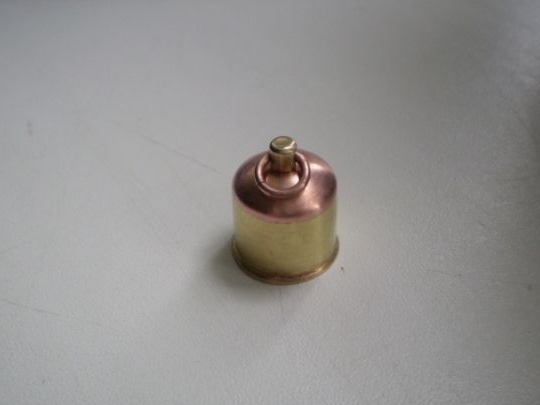
Fitting.
Cap top.
Soldered.
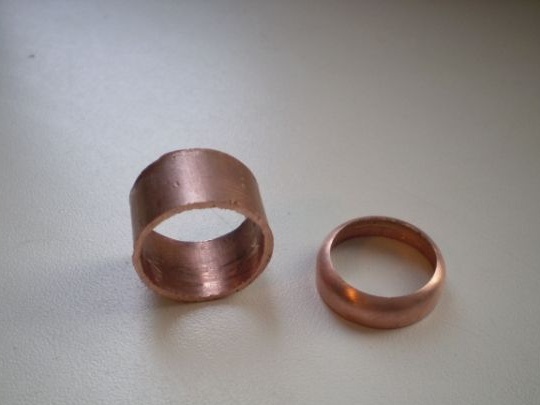
Spacer.
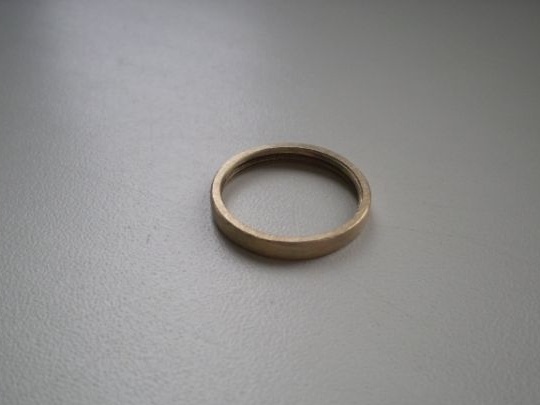
Such a brass ring.
Here is the result.
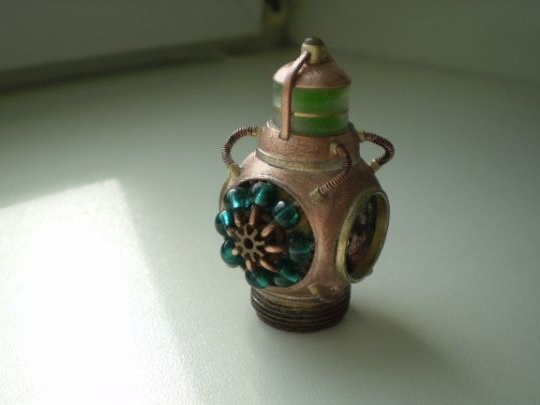
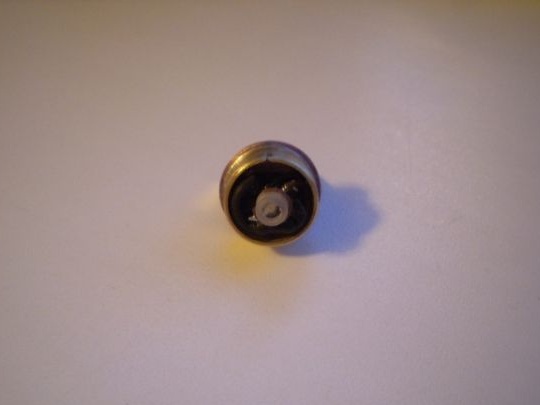
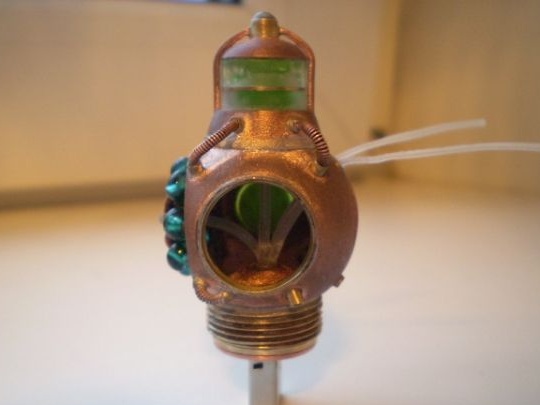
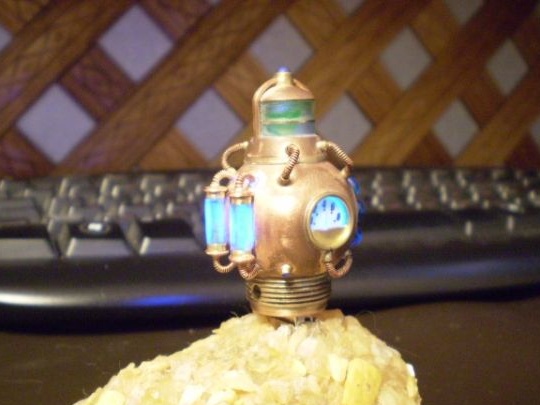
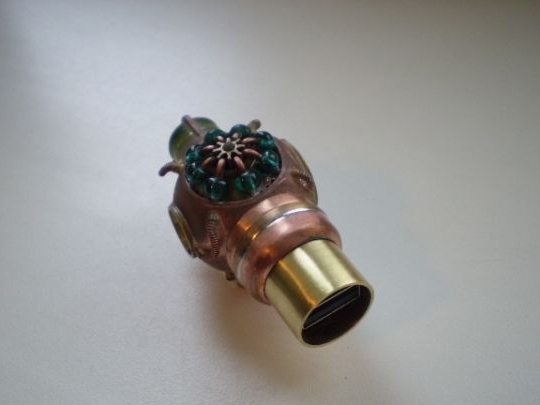
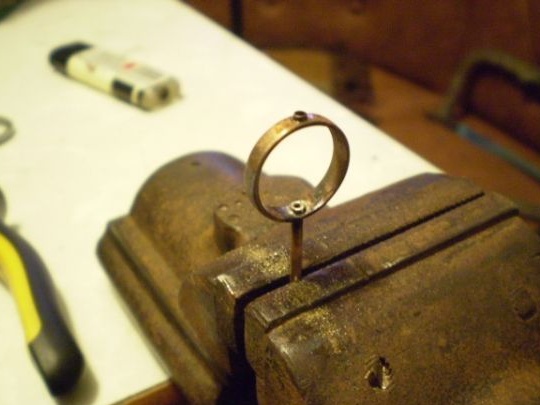
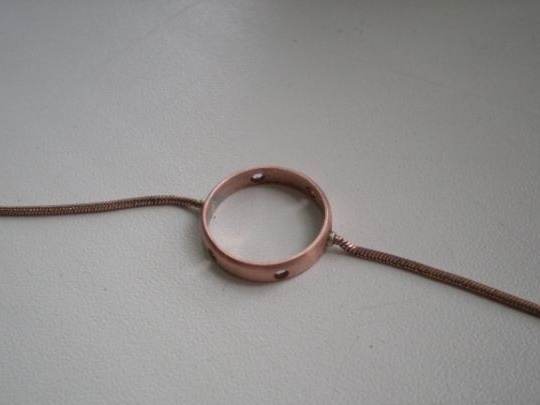
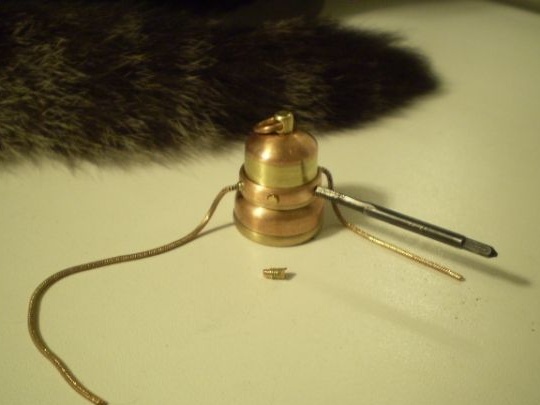
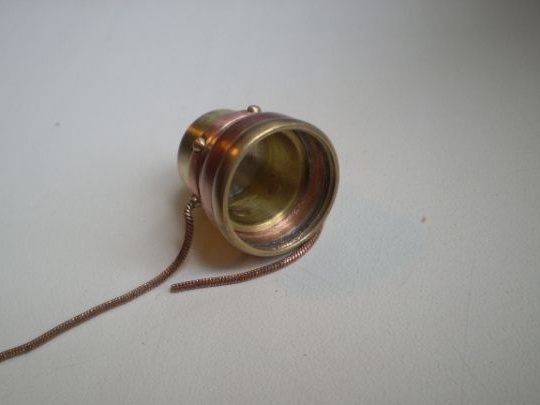
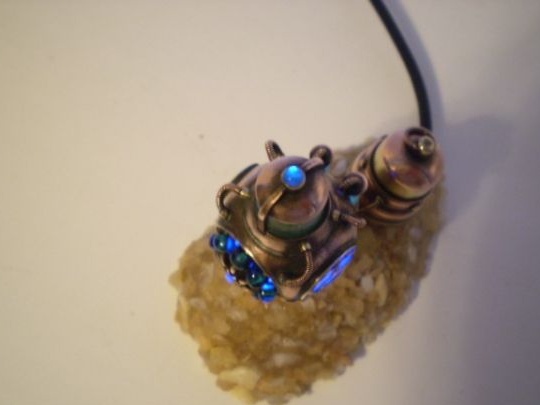
Then a copper ring with a chain-rope is made.
Makes a window in the form of a gear.
Puts everything in an ammonia bath, where copper and brass are covered with a patina.
Then he polished the surface with GOI paste and velvet.
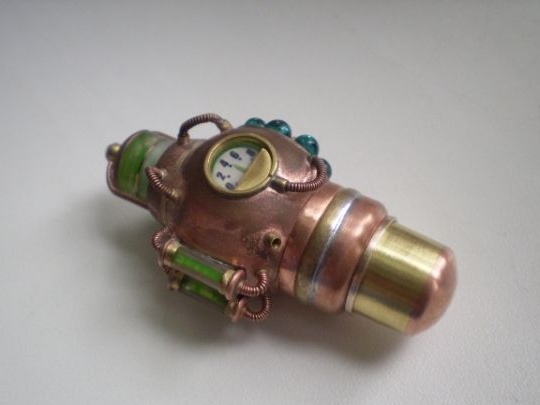
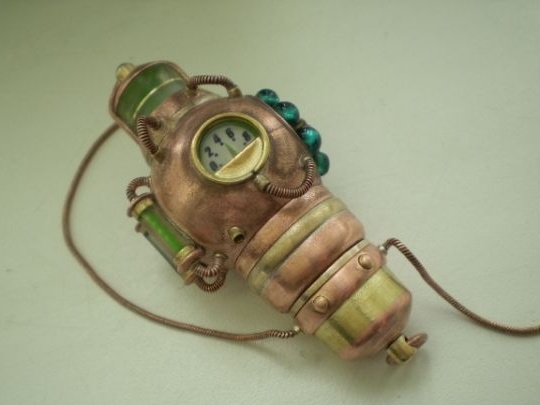
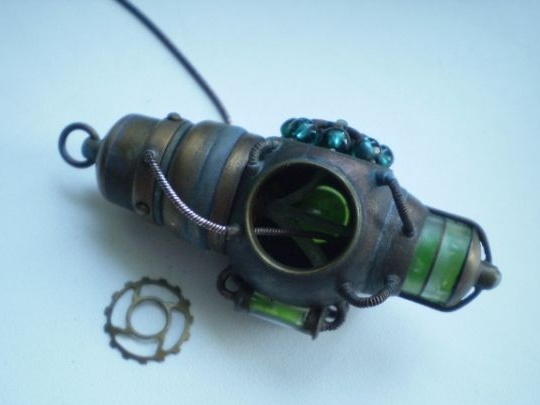
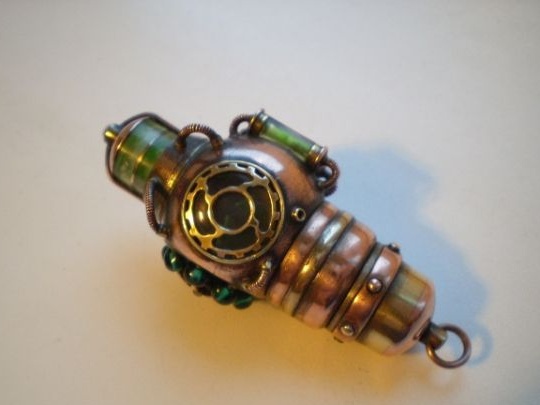
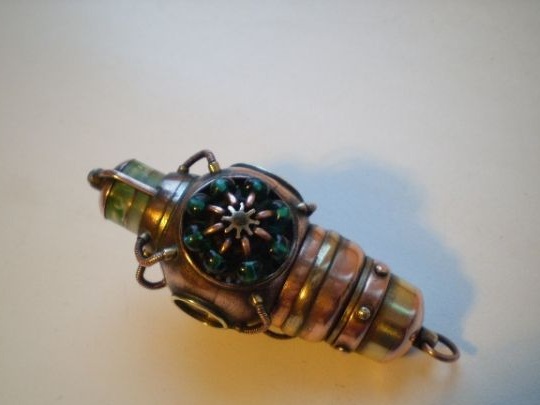
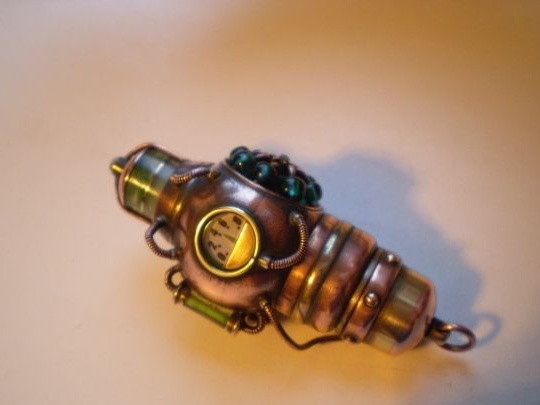
And according to the tradition established by the masters, he made control photographs of the finished product.
Thus, the author obtained a unique and wonderful Tesla flash drive, which the master wanted to achieve.
These handmade products are not very bad and are appreciated among steampunk lovers.
So, learn a good deed from the masters, learn how to work with metal correctly. Engage more in creativity, create.
This concludes the article. Thank you very much for your attention!
Come visit often, do not miss the latest in the world of homemade goods!
This article is for informational purposes only!