Dear site visitors, from the master class presented by the author, you will learn how to independently make a sandbox for your children, which can be placed in the courtyard of the house or in the country.
As everyone knows, the kids love to play in the sandbox, sculpt figures, castles, and just mess around pouring sand from place to place) The activity for the child is very exciting and he can play in the sand for hours, while parents can do important housework but the child must remain within sight, under supervision.
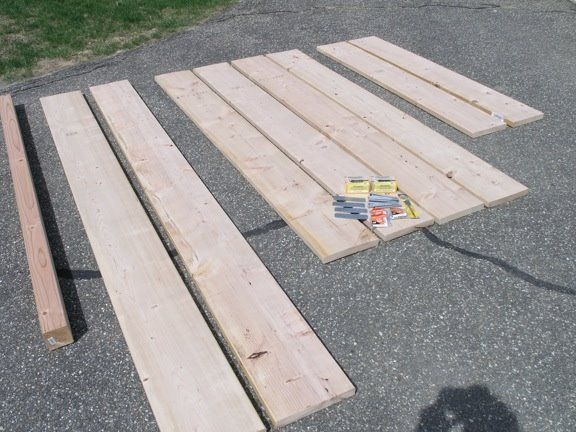
For the manufacture of sandboxes, it is best to use environmentally friendly material (wood), which will require boards 30 mm thick and 1.8-2.4 m long, as well as a 50x50 bar for attaching corners. From the boards you need to make a box, then polish it carefully so that the child does not get scratched and does not get a splinter. For durability it is necessary to cover with a special impregnation for wood, and then paint in a bright and joyful color. Before installation, the top layer of turf is removed and agrofibre is laid so that worms and bugs from the earth do not crawl into the sand, and sand does not sink into the ground.
And so, let's look at what exactly the author needed to make a sandbox?
Materials1. 30 mm board
2. beam 50x50 mm
3. bolts, nuts, washers, engraver
4. screws
5. paint
6. putty for wood
7. agrofibre
8. staples (for a stapler)
Instruments1. hacksaw
2. drill
3. screwdriver
4. ruler
5. pencil
6. roulette
7. key-head
8. putty knife
9. brush
Step-by-step instructions for creating a children's sandbox do it yourself.Before you start
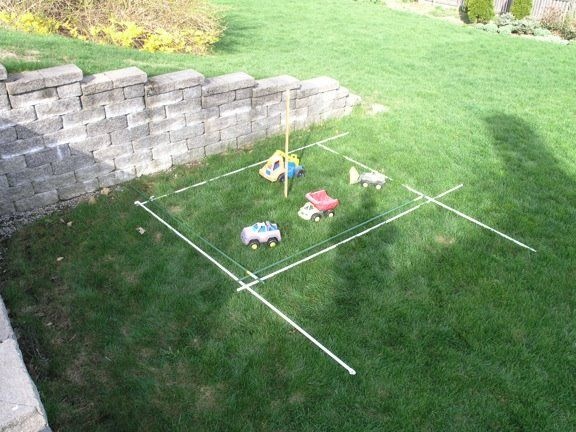
construction you should decide on the selection and layout of a suitable place on the site. The sandbox should be in full view of adults so that the child is in control. Children need the sun), but in moderation, which means they need a canopy that protects them from ultraviolet radiation or, as usual, they make fungus. Space should not be blown through with a through wind. The sandbox can also be placed next to a tree that will let in the optimal amount of light and hide from the wind.
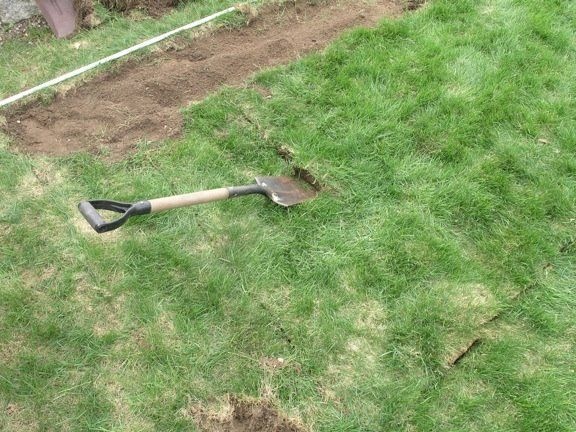
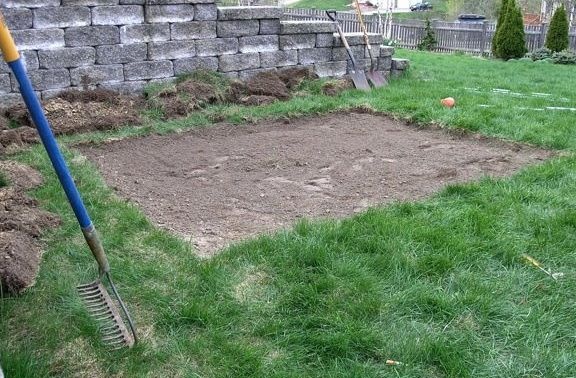
Having decided on the place, it needs to be cleaned and marked out.
Next, you need to choose the size of the future sandbox, in each individual case it will be different, based on how many children are calculated.
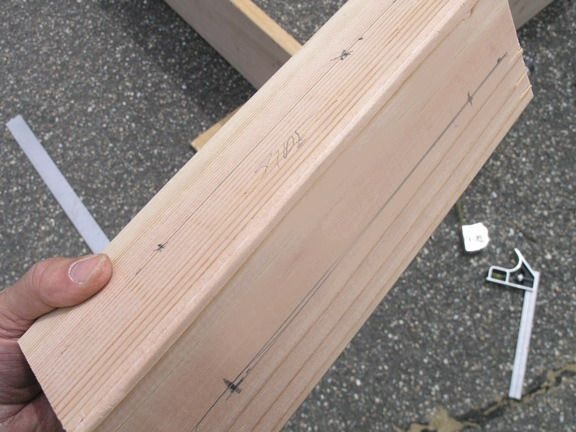
Then you need to prepare the boards, namely how to plan them, it will turn out to be even and smooth.
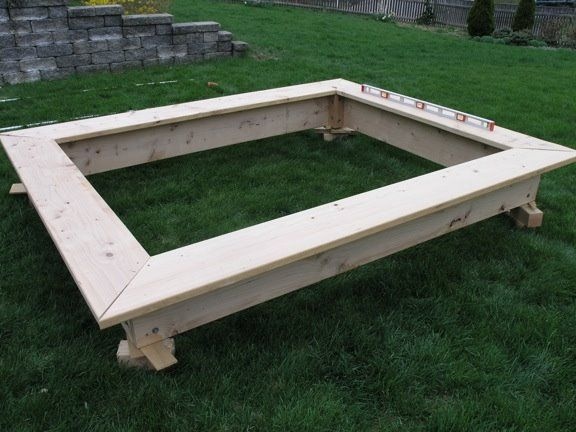
First you need to try on and figure out how everything will be located.
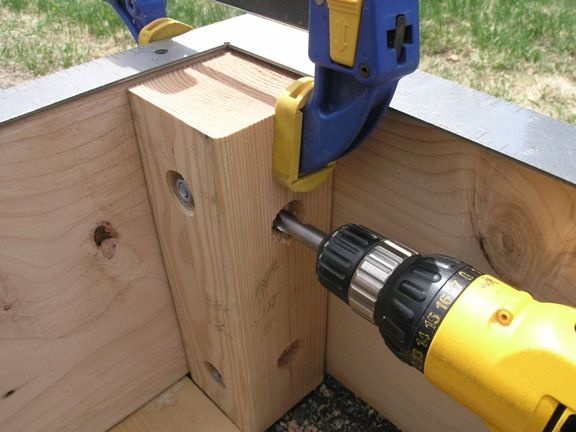
The corner is sawn along the height of the board.
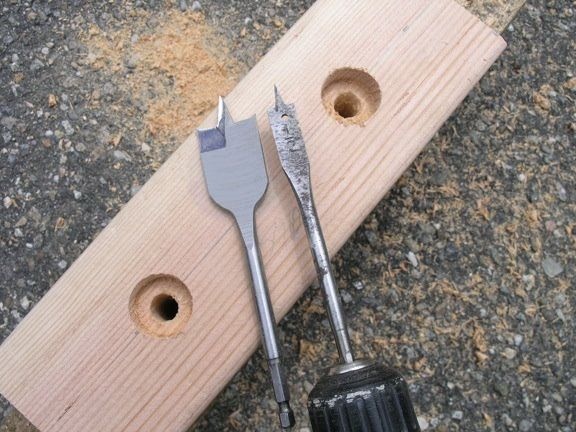
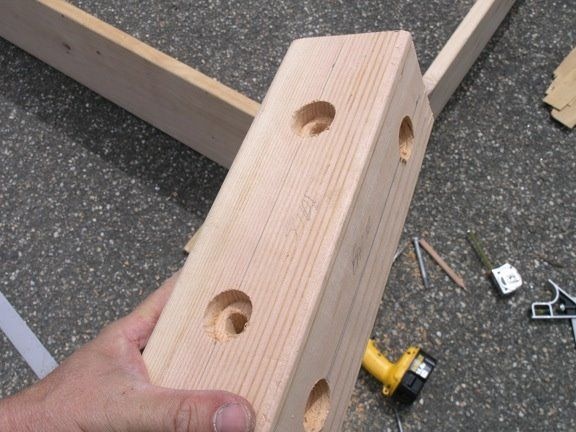
2 holes are drilled in the upper and lower parts, then drilled with a crown - this is done so that the nut is recessed in the cavity of a wooden beam.
In the same beam, 2 more holes are drilled in exactly the same way, but the height is different, so that later the joints do not intersect.
And so all 4 bars.
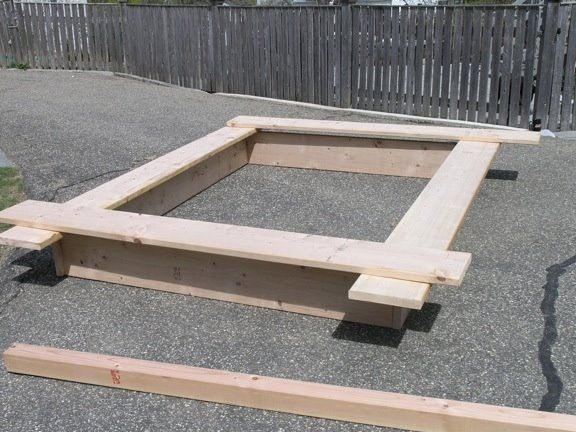
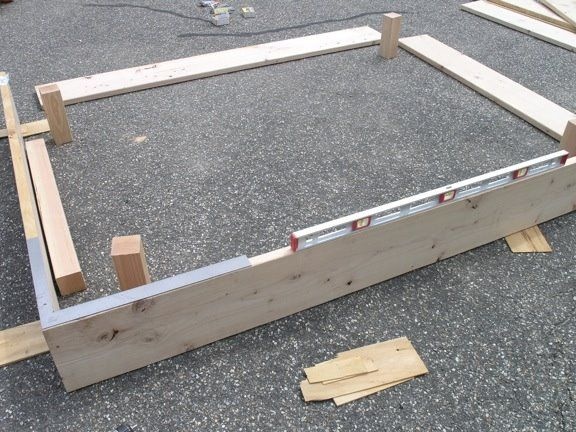
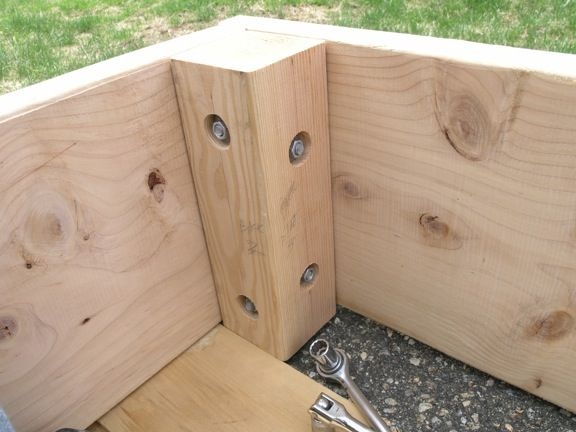
After which the author begins to fasten the boards together by a threaded connection.
It turns out the beam located in the corner fastens 2 boards.
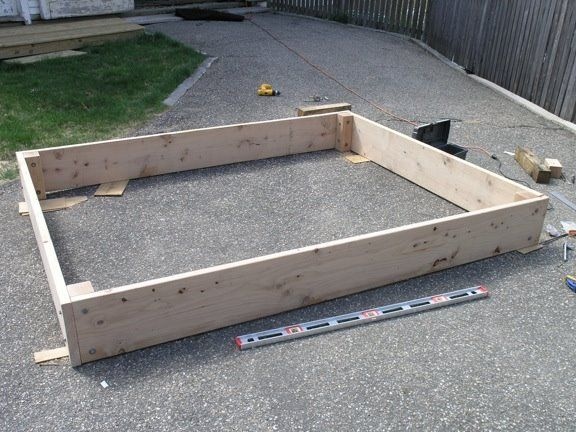
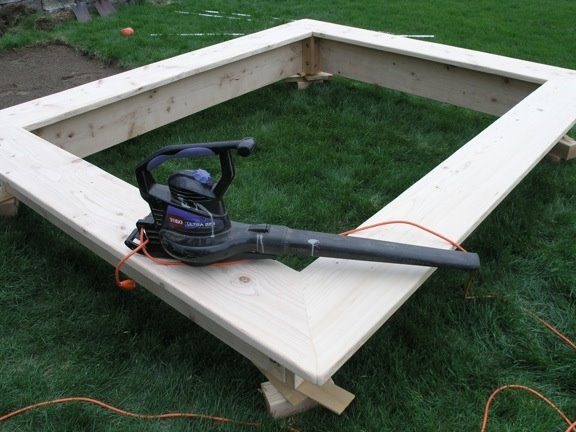
So the box itself is going.
On top of the box, you definitely need to make benches so that the child is comfortable sitting and playing.
Sawing blanks, trying on.
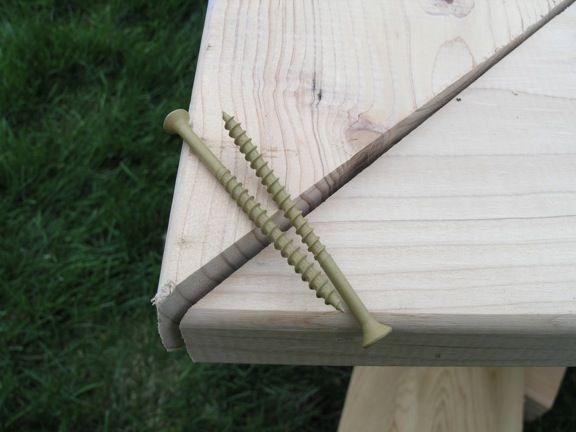
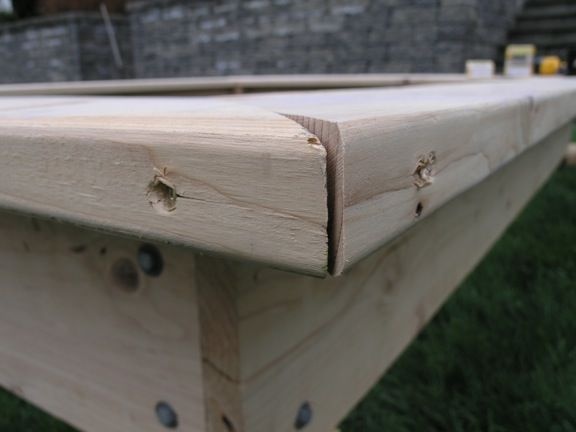
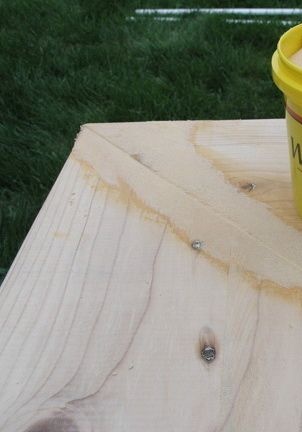
The corners of the benches are twisted using self-tapping screws.
The master also drowns the screw into the cavity of the board, so that nothing sticks out of it.
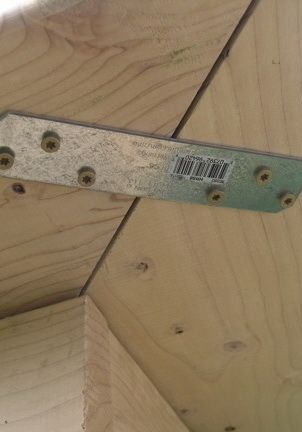
For greater reliability, it secures everything from the back with a metal plate.
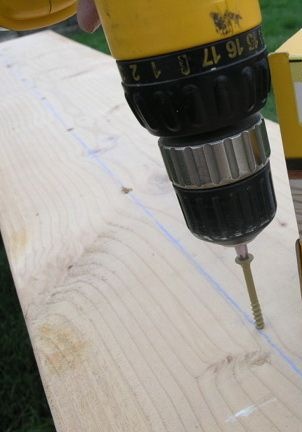
Screws the bench directly to the box, where he previously drew a guide line.
The joints where there are cracks, cracks, the master closes with a special putty for wood, it can also be used to seal the heads of screws recessed into the wood, that is, everything will turn out uniformly and accurately. By the way, you can easily make such a putty yourself, you need to take a few small sawdust after grinding and add carpentry glue to them, stir in some kind of glassware and bring to a homogeneous mass (in the form of semolina) and then you can putty. This putty will be no worse than the store.
The putty surface must be allowed to dry and then sanded thoroughly.
The dust formed during grinding should be blown off and wiped with a damp cloth.
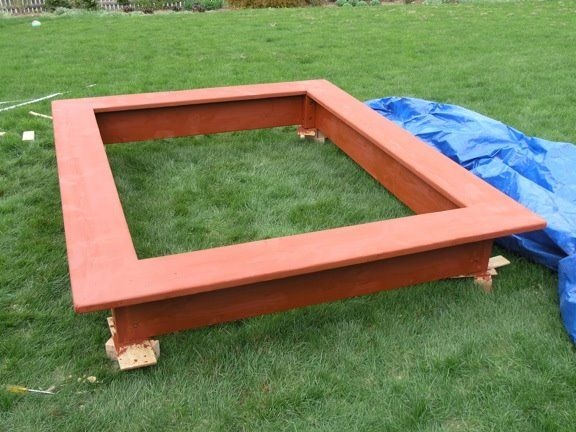
In order for the sandbox to turn out to be durable, it needs to be covered with impregnation, and then painted in a bright joyful color.
And so, the box itself is ready, now it is necessary to remove the turf layer on the territory of the marked area.
You don’t need to go deep, just remove the top layer of turf and that's it.
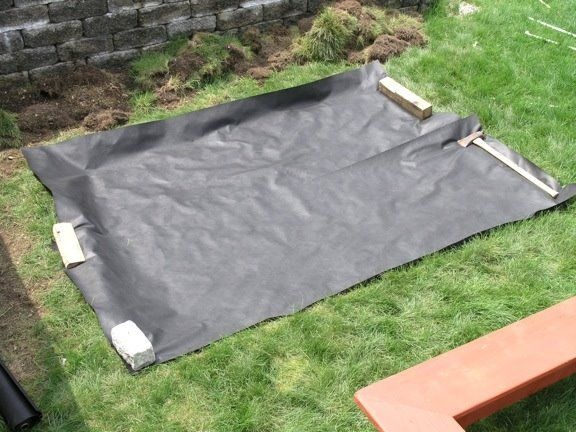
To protect the sand from the penetration of worms and bugs from the ground, it is necessary to lay a layer of agrofiber, or fix it directly to the very bottom of the box with a stapler.
The sandbox itself is put, then it remains only to fill the sand.
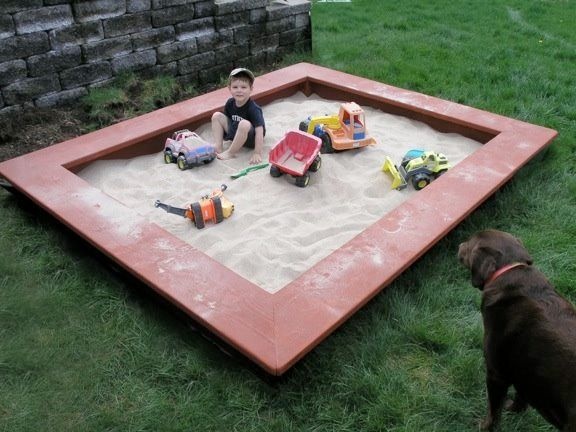
Thus, the author obtained a simple and budget sandbox, which he actually wanted. The child was also satisfied and now plays for hours on end, while the Father, meanwhile, can do serious business in the yard, periodically looking at the baby naturally.
As you can see, everything is quite simple and within the power of anyone who wants to make the same sandbox for their children on their site.
This concludes the article. Thank you very much for your attention!
Come visit often, do not miss the latest in the world of homemade goods!