

Materials: speakers, MP3 module 3 , thin connecting wires, bolts and nuts by 3.
Instruments: screwdriver, drills, spray can, drill, files, screwdrivers, pliers, wire cutters, soldering iron.
After reading the title homemade you most likely have a question, why the “adventures of the master screwdriver”? Everything is very simple, the columns that I used were old, and not one fun story of my youth is connected with them, and the name itself somehow entered my head :) So, since you started reading, please read through to the end, then the questions will disappear :) I make my home-made products from more out of need, in anything. This time I needed a "talker" in garage, I wanted to listen to the radio and twist my music. I have a pure radio in the garage, a small speaker reproduces many high frequencies, and this sometimes makes me nervous. You’ll make it louder - it hits the ears with high frequency, but if it’s quiet, then you can’t hear the fig. As you can see, because of my nit-picking, I had to make more or less worthy acoustics. Eardrums required a good dense bass :). The purchase option I dropped immediately, it’s not worth it. But to make something out of the available materials, yes, you can. To create a "talk" I took a musical MP3 board (all the time I want to translate on aliexpress), but it’s easier to use an MP3 panel / module. This piece is quite popular and the people embed it in almost everything !!! I’ll regret it and start with it, it will be more understandable, first the MP3 socket, and then the speakers.
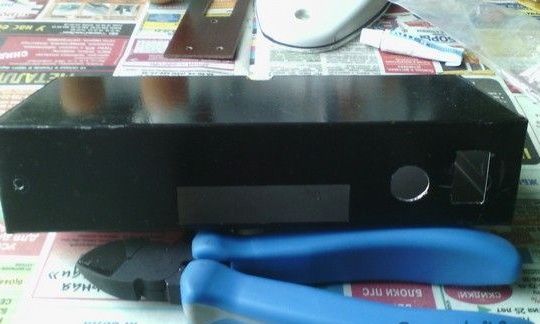
MP3 socket is not expensive and is very suitable as a good budget option reproducing sound. She reads tracks from an external medium (USB SD) and produces sound, she does not have a powerful amplifier, so you need to have your own. To begin with, I ordered a panel from a friend’s rank and started looking for a decent “house” for her. Break all the “necessary junk” I find here is such an iron box.
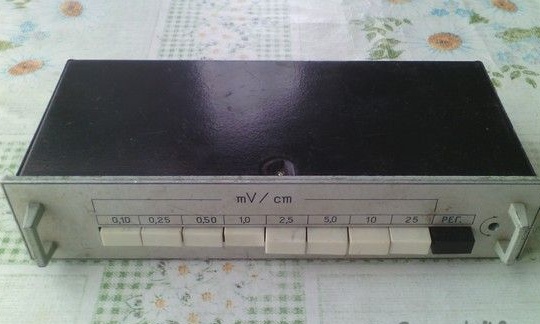
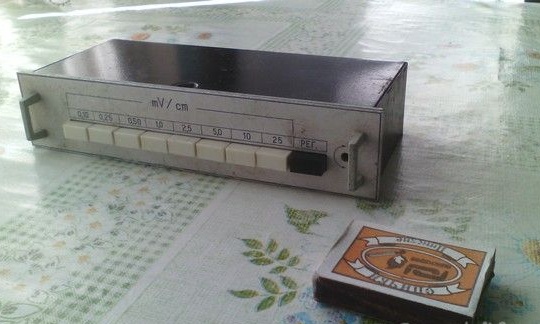
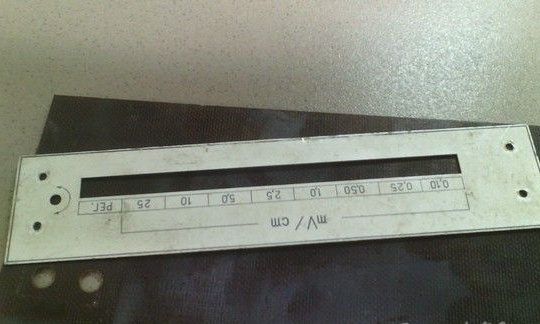
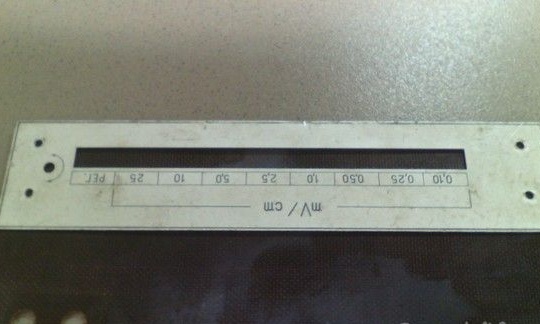
“It will do for a garage loaf,” I thought, and settled on this option (there simply weren’t others). That's what this device is, and how it fell into my hands, I don’t remember everything. It looks like a deck that was inserted into a larger device.On the reverse side there is a contact connector, small handles on the front panel say that my version is on the right track. A small hole on the right side and a button with the signature "reg", suggest that this is a fine tuning. With millivolts everything is clear, but cm what is it, I don’t know, can conductivity be? If anyone knows, say, it will be interesting to listen.
Okay, open and look what's inside.
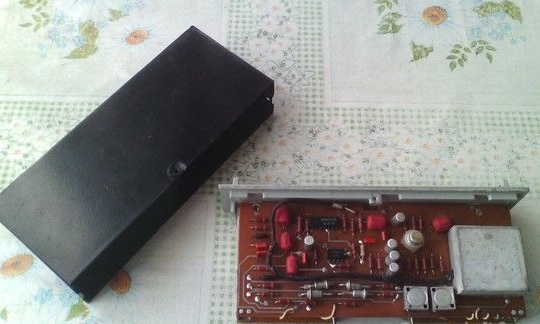
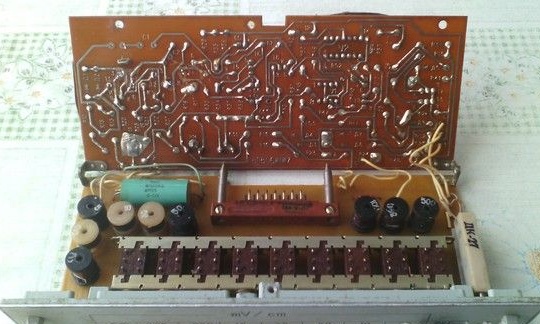
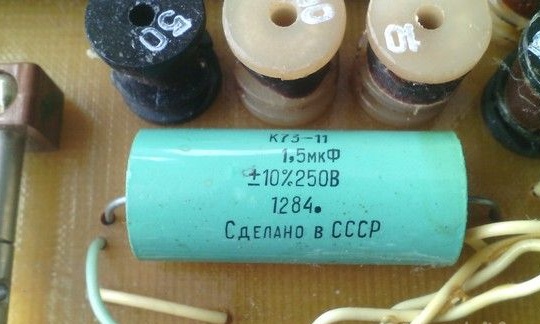
When I see such an inscription, I take pride directly, “Made in the USSR” as a standard of reliability, quality factor and faith in a bright future.
This is the connector about which I spoke above (of dad) :) There is also an OTK, everything is as it should.
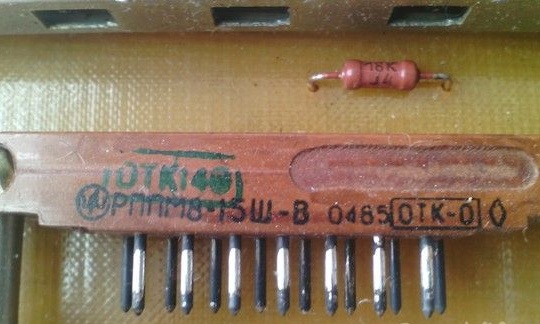
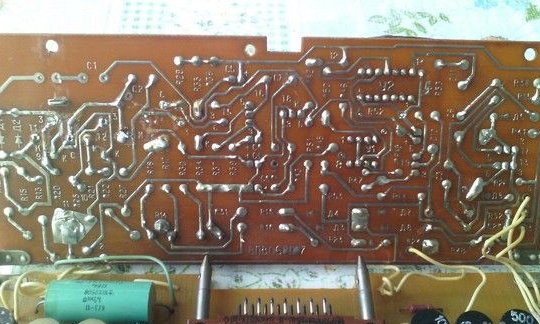
The quality of the tracks at the height, everything is clearly soldered. By the way, I soldered the buttons with an ordinary building hair dryer, and the Sovdep tracks did not fall off from the high temperature. This once again speaks of the quality of the Council of Deputies. I respect things of this kind!
I replace the aluminum front panel (thin) with a regular textolite one, to insert an MP3 module there.
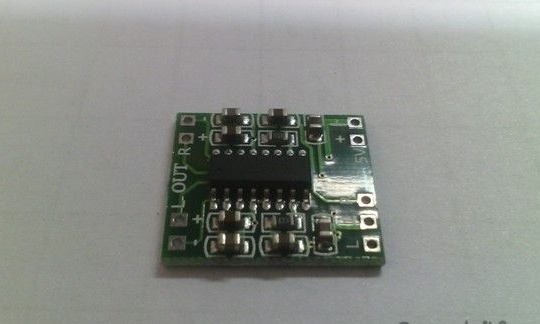
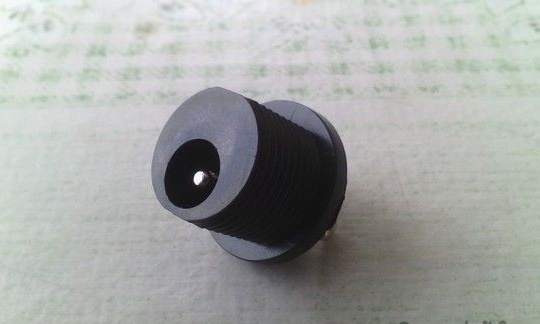
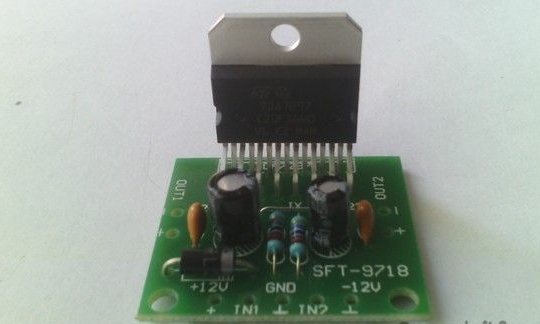
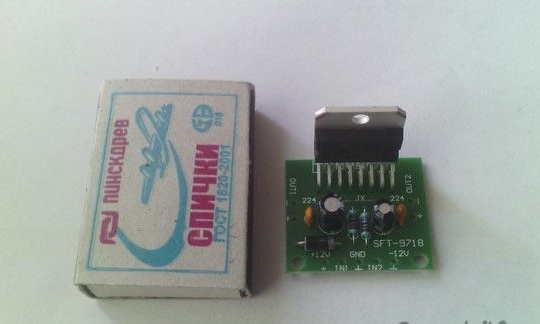
Here is a socket I will embed. It differs from others in cheap price, lack of bluetooth and power from 5V.

I cut a hole in the textolite and aluminum (which is thicker).
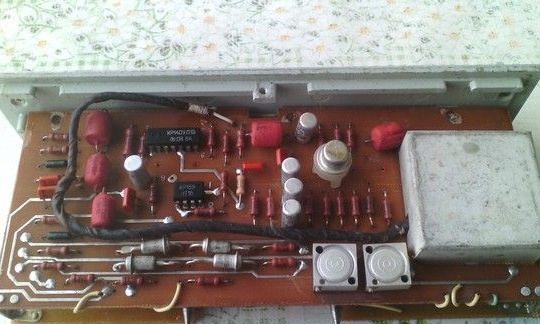
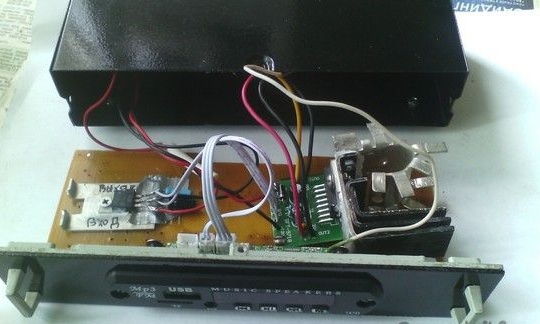
I pass to the "stuffing" of my musical "talk". I have all the "insides" on an already empty board.
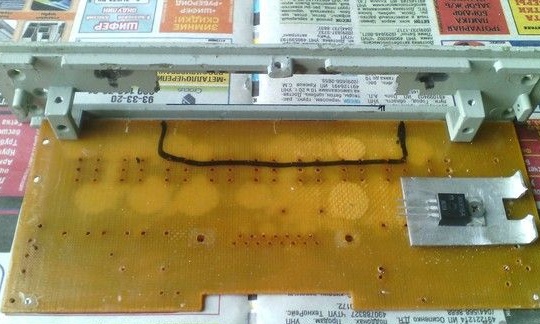
I will feed the “talker" from the 12V battery.
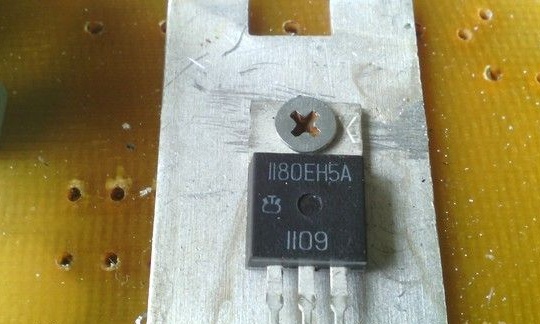
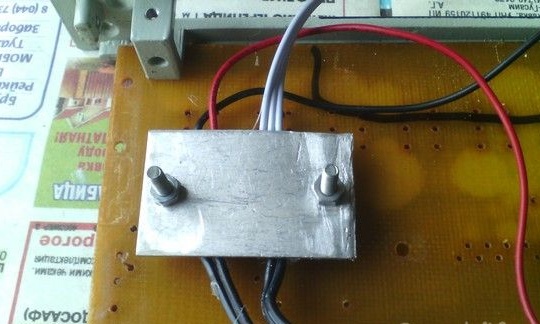
MP3 board asks for 5V, to lower the voltage (from 12V to 5V) I put the voltage and current stabilizer 1180EN5A, that is, the well-known KRENK. 1.5 And enough "for the eyes" for the MP3 module.
Now you need a sound amplifier. I had one Chinay mini amp, I decided to put it in the absence of others. His power is weak 2x3W, eats 5v. Before that, I checked him and he “purred” pretty well for such a baby.
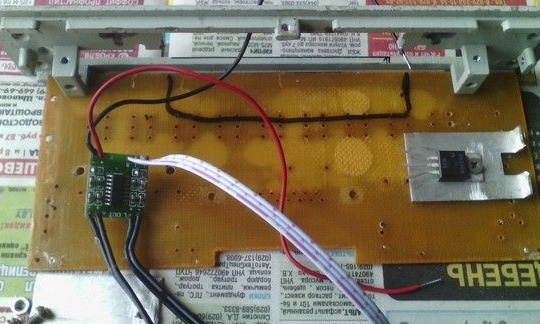
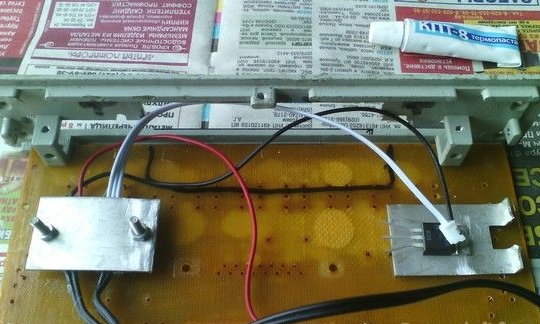
I solder all the wires.
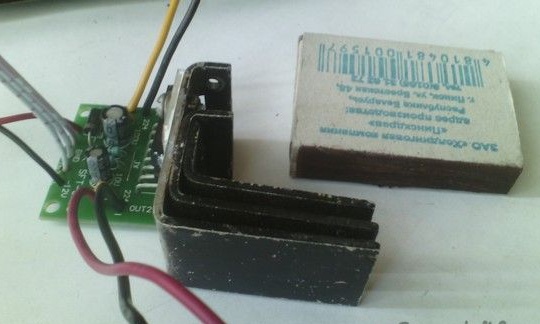
Just in case, I do the cooling of the microcircuit, this will be at the same time the mount.
The moment of truth has come and I am connecting an MP3 module with an amplifier. But it’s a strange thing, from the speakers there is a splop and grunt, but not like music. Damn, e-mine, what kind of garbage. In frustrated feelings, I mentally sort through possible jambs. Only one thing comes to mind, a healthy amp !!! And it happened, I soldered it and connected it from the flash player, the result is the same as with the MP3 module. Okay, I don’t intend to give up and will finish the job. But in general, in this homemade product I was completely harassed by failures, you know, it happens, you do something and how to say it all goes wrong, the amp burns out, then the paint doesn’t go well (the case with speakers). Although I do not believe in things of this kind as a “bad look”, but sometimes you come across this and start to think. The fact is that I brought my “talker” to work, and by the availability of free time I did it. When everything was ready, and I was going to test the performance, one person looked enviously (you could clearly see how the brow jars) at my invention and that’s all ... ... pi ... no, the fig does not start. Then I began to pursue the jambs with this homemade product (as I wrote above). Homemade stretched out indefinitely. Such a queue of jambs sometimes “knocks” me out of the rut for a while, but also stimulates me to fight and “finish off” my plan. It turns out as a motivator of action. I wonder if anyone had something similar, please share, I will read it with pleasure.
I had to turn to the friend’s rank again :), the benefit of the amplifiers was heaps for every taste and power !!!

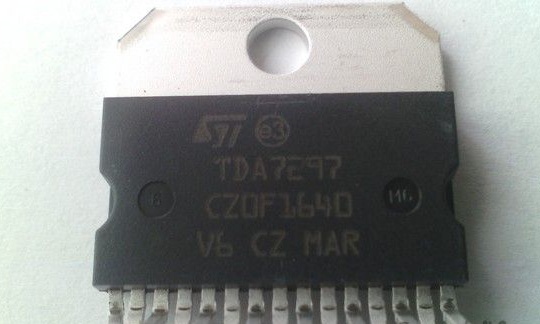
My choice falls on a modest whale kit. The amplifier is made on a TDA7297 chip and has a power output of 2x15W. Well, great, even better, thumping will be louder! In the meantime, waiting for the amp, you need to take a break at something else.
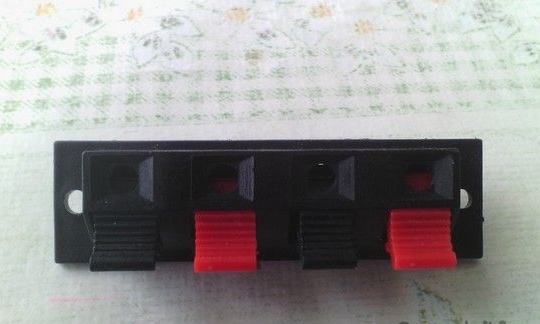
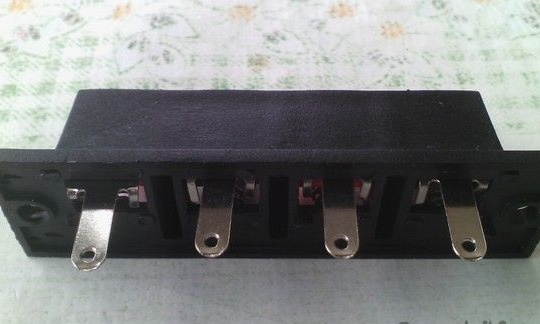
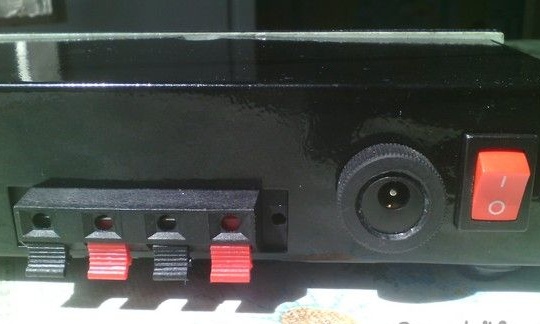
For example, we will need a terminal block to connect the speaker wire.
The connector (mother) for connecting the "talker" will not hurt either!
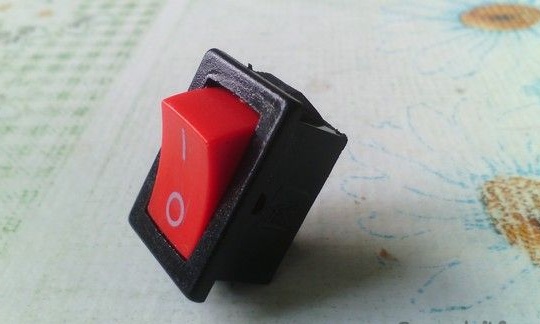
Necessarily need a power button.
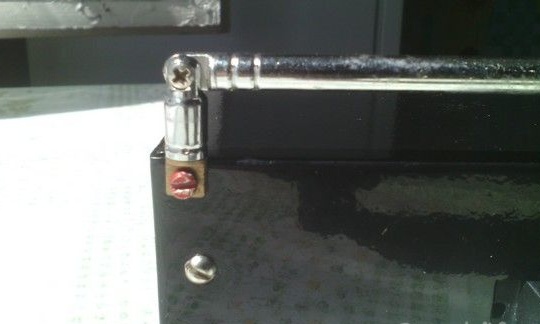
Well, we take the antenna to this gang. I had one without fixing, I had to come up with it.
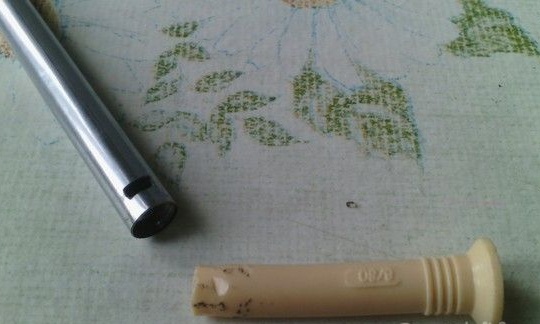
Inwardly inserted a piece of nail dowel for rigidity.
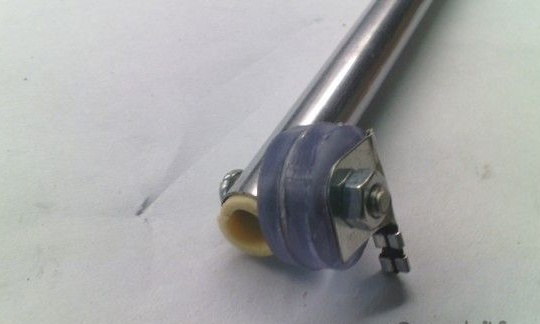
I drill and put two silicone gaskets. Silicone holds well and the antenna in the extended state does not fall. If I knew that I would find another (I will describe it a bit below), then I wouldn’t have chopped as much, but oh well, experience too.
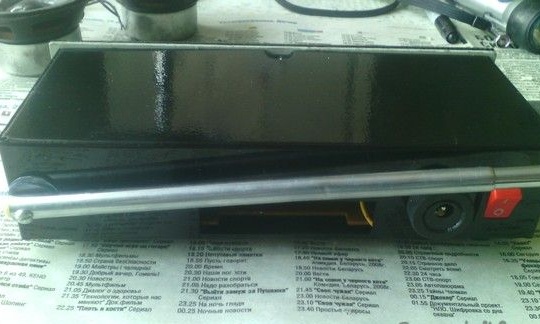
In the back, I cut out under the switch, connector, drill under the antenna. Under the terminal block is not necessary, I will use the native (in the center).
In the role of the legs, I use the usual rubber cork from under drugs.

Good thing, I liked it myself.
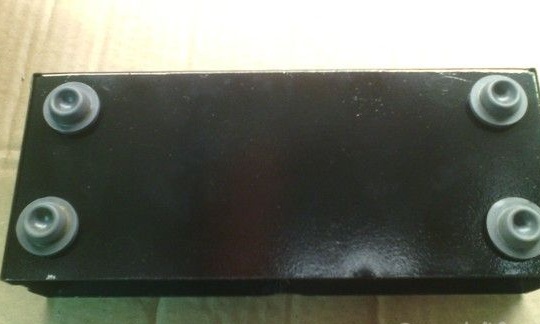
I attached them with a bolt to 3. You can use glue, you can use double-sided tape.
The back panel in all its glory!
Purely by chance I found another antenna in the garage. Before me was a painful choice, to leave the old or still new to fix. The antenna found in the garage was already with the mount ready and was beautiful, which outweighed it, figs with it, I put a new one !!!

The old hole from the first antenna had to be closed with a bolt.
So, time “runs” and the rank of friend :) makes me happy whale amp :).
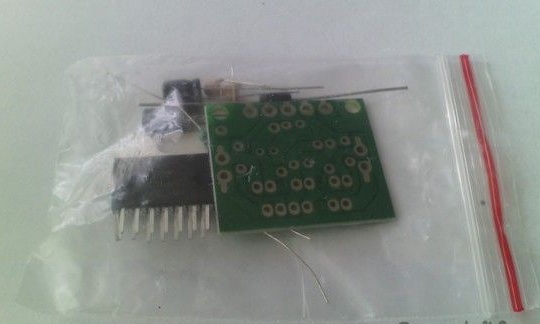
This is not the first time I have ordered in this store, everything is clear, a good seller until I let you down!

The set consists of a microcircuit, 2 electrolytes, 2 films, 2 resistors, 1 diode and a board.
To solder such a whip to me is only a joy!
Everything is written on the board, where and what to connect and solder.
The chip needs a radiator, and if the place allows, do not skimp on its size.
Taught by bitter experience, I first decided to test the amplifier for performance and only then shove it into the case. I drove it a little, touched the radiator, it’s warming up, well, it's normal, it should be warming up. There was space in the case, and for greater certainty, I am attaching an additional radiator.
And now you can mount everything in the case.
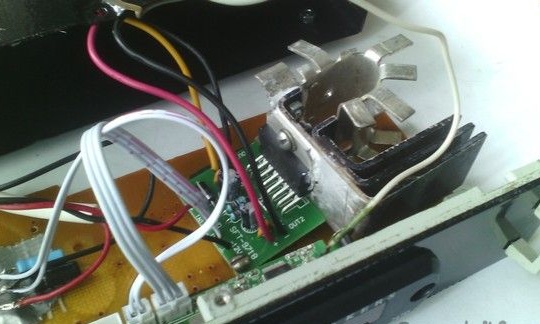
The chip must be smeared with thermal grease and tightened to the radiator.
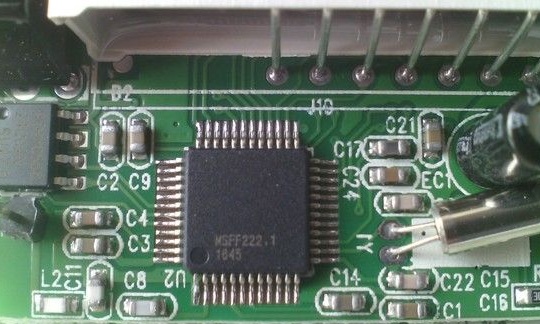
MP3 board works on such a chip (maybe someone is interested).
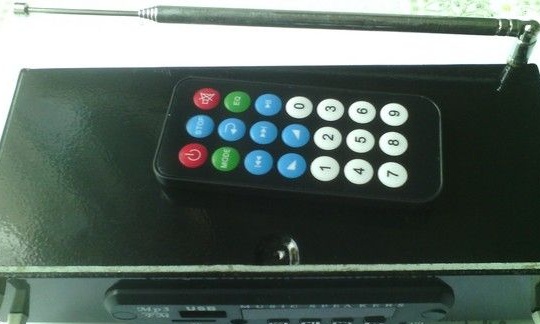
"Talker" is almost ready and I decided to finalize the remote control, you ask what is there to modify, everything is ready already. However, you can make one detail, with which it will become much more convenient to use.
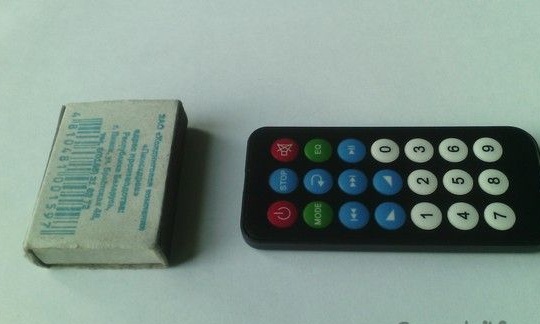
I pulled here such a magnetic strip. The top is plastic and the bottom is magnetic tape.
We separate the magnetic tape and glue the desired piece on our remote.
With such a "magnetic" remote control it is very convenient, you can mount it on any metal surface, whether it be a rack in the garage or a refrigerator at home. Yes, and it is worth taking a habit at the end of listening to put the remote control on the speakers. So he certainly will not get lost !!!
According to my idea, the pens and the edging remain gray. When everything is black, also not very, it will look clumsy.
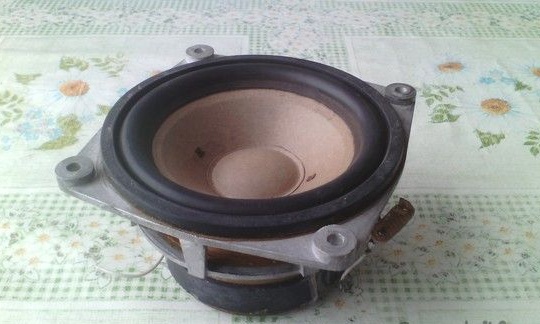
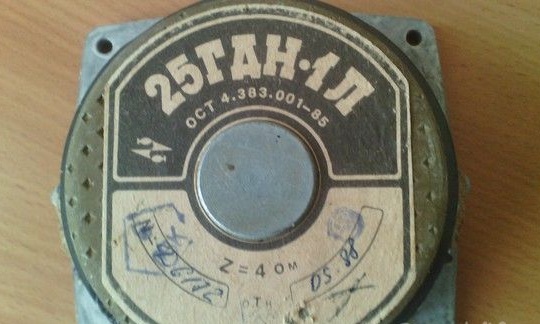
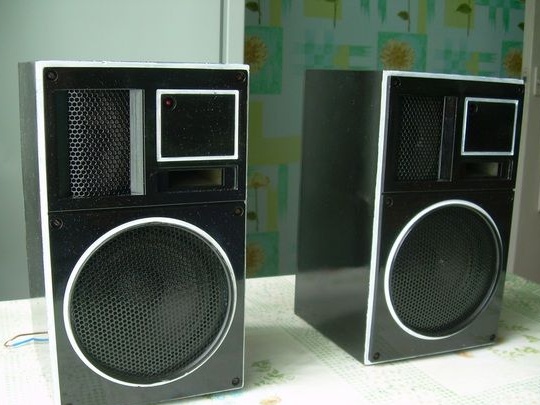
Now I turn to the columns. This does not mean that I did everything in such a sequence, it’s just so convenient to describe, and it will be more understandable to you. I do not like when everything is in a bunch. Here they are, my beauties :) Sonnet 10AS-231
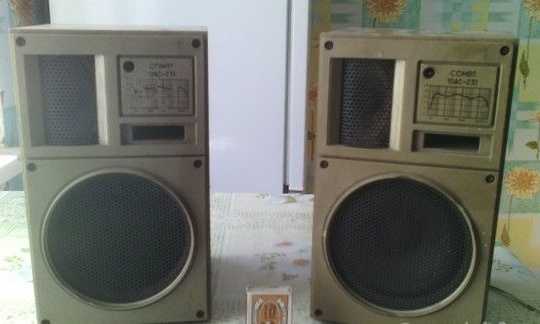
Yes, sometimes they got it. Once upon a time, these speakers came with a player that my aunt gave me as unnecessary. I gladly dragged everything home and let's be smart with the connection. I used the player as an amp. The sound was taken from the tape recorder "Spring", passed through the player and speakers. It turned out an ancient music center, so what, he bombed not badly. At that time, bass-reflex type speakers were already made that used the return stroke of the speaker diffuser. My speakers were pretty good bass despite their small size. Therefore, as soon as my friend got a car, they were destined to settle on the back panel of our "cool" six.

I rummaged through the old archives and found a photo of our “swallow”. Ehhhhhh there were times, it was fun, about 18 years old we were. We rode all night long, and the low-frequency bass burst out of the window of our car. Restoring the columns, I nostalgic and recalled past times. I think everyone has some kind of thing that reminds of a certain period of time, and if it is cheerful and pleasant, then restoring such a thing is doubly pleasant. And now, about 15 years have passed and I needed my speakers for the “talk”, I decided to restore them and give the “second life” as much as possible. They were found in the cottage of my friend, Pashka did not treat them very carefully and had to collect one column for spare parts.
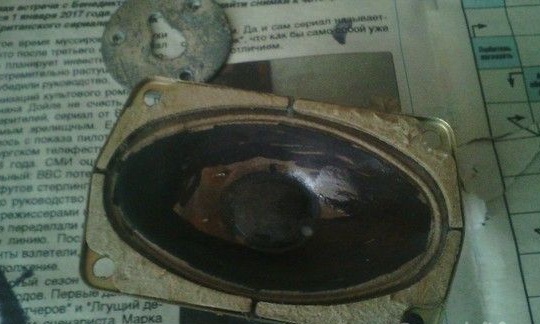
Frequency response.
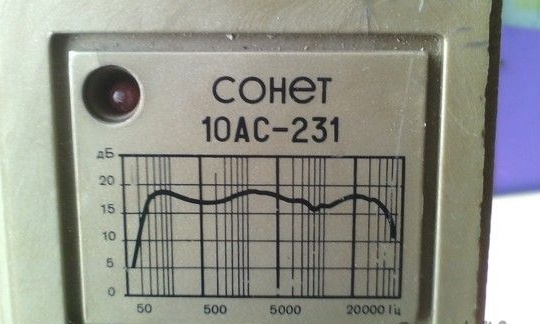
1988 release.
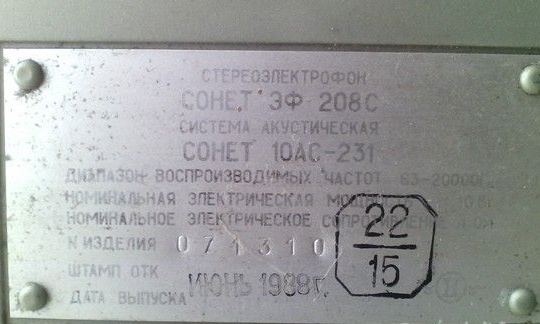
63 Hz to the "bottom" is not so bad.
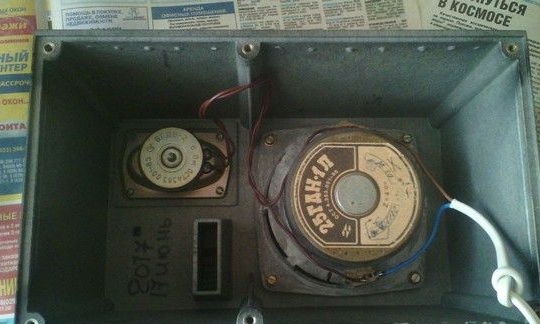
Inside one column, I find just such a board. It looks like a filter.
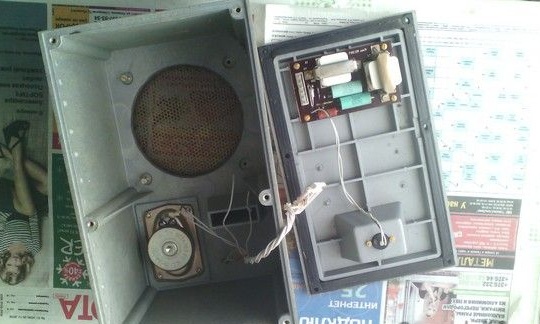
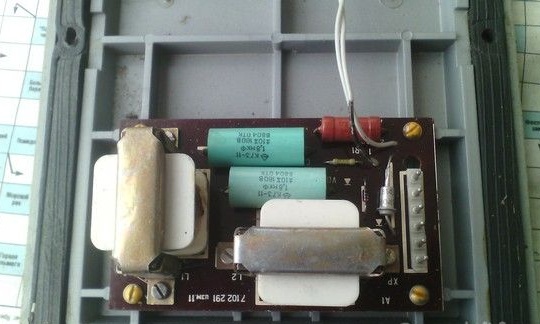
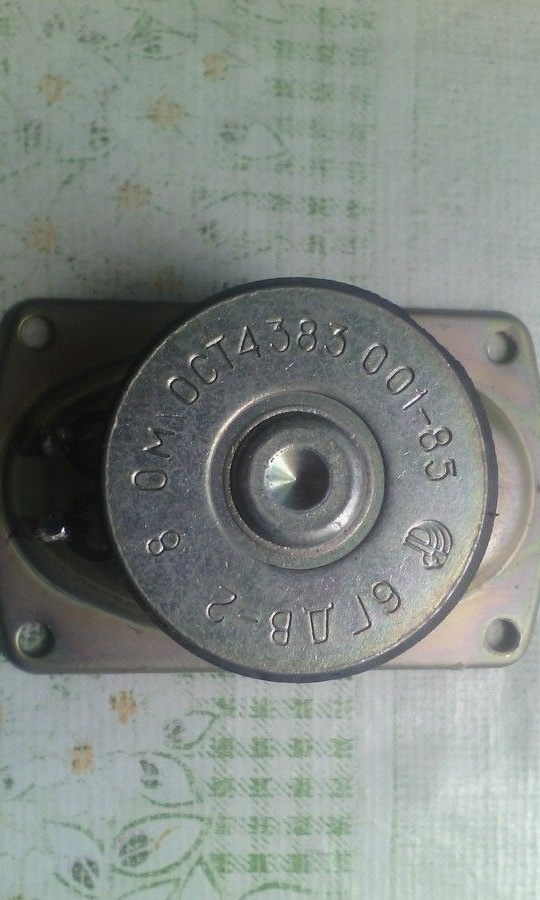
Speaker
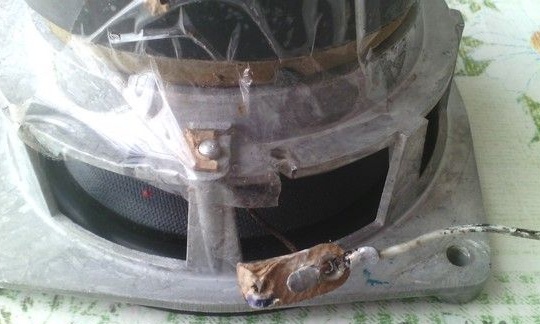
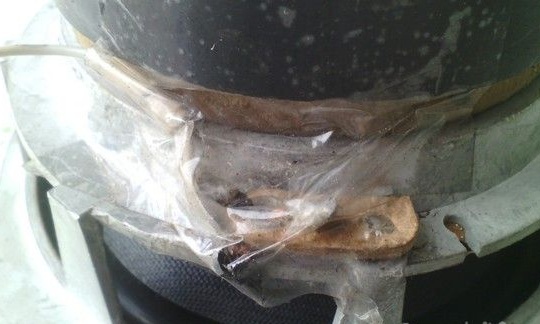
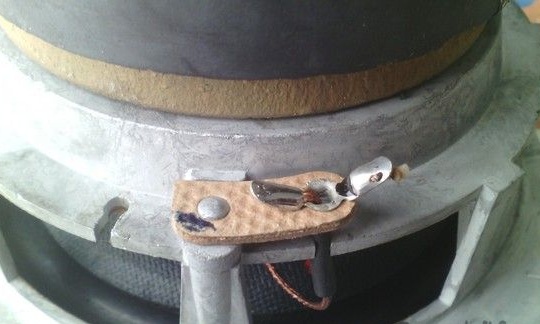
On one speaker on both sides, the terminal contacts were in terrible condition.
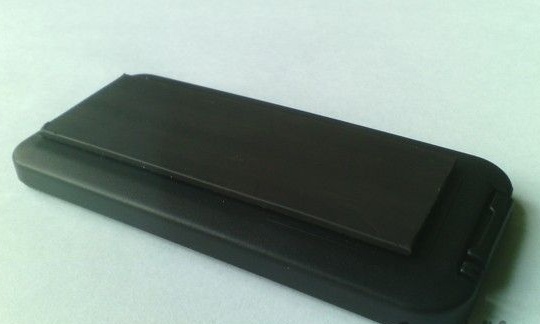
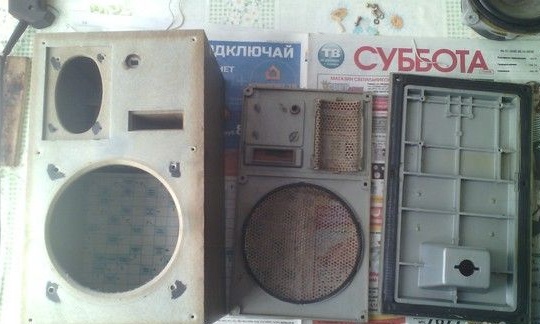
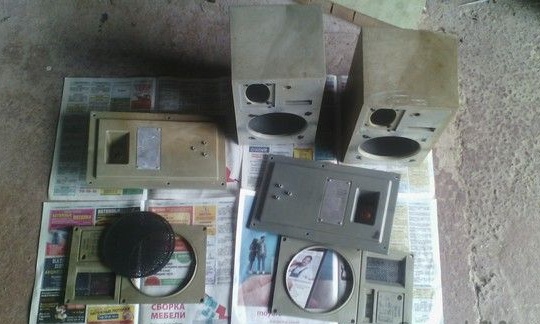
I disassemble the column for parts for painting.
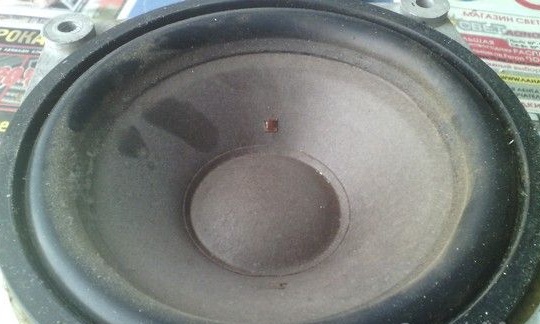
With the second speaker, everything is fine.
Just a little dusty :)
High frequency.
Speaker designation.
I dismantled the speakers in the garage for painting.
I decided to dust the protective grilles too, the difference is visible visually.
I will not bore you with too detailed photographs of painting the columns; I’d better describe the whole process. I bought a spray of black car paint and started painting the speakers. Prior to this, I spray-painted the case of my “talker” with this spray can, of course I didn’t have enough for the speakers. I’ve dusted up with more, but there were gaps, and I didn’t want to leave in a jamb, my conscience did not allow. I went for the second, but it turned out that it wasn’t exactly like that, it was the same company just not for autouniversal. I read the composition and compare it with the old one, the same thing, well then, the norms and buy universal. Eh ... damn it, as the saying goes, “I would know a purchase, I would live in Sochi.” My columns have stood up for 24 hours and I, unaware of the impending disaster, undertake to redress. I start to get dusty and immediately I feel that the paint is somehow lying down. After going through all the details once, to my dismay I notice that in some places the "old paint" was "lifted up", the view became as if the columns were cracked. Blinnnnnnn cant !!! Small cracks were not everywhere, but they were enough to spoil my mood !!! The composition of the paints is the same, the time for drying gave what is wrong ??? It was pointless to do something on that day. Later I come to the garage with a small emery and easily go through the spots with cracks. Oh, chore, but necessary. I went for the third time to paint, this time I chose a varnish-paint for brake pads (it happens sometimes). It was liquid, it was necessary to carry the spray away, but it dusted well. I described the whole process specifically for those people who think that this is all done easily and simply.
Colored columns collect and solder the speakers.
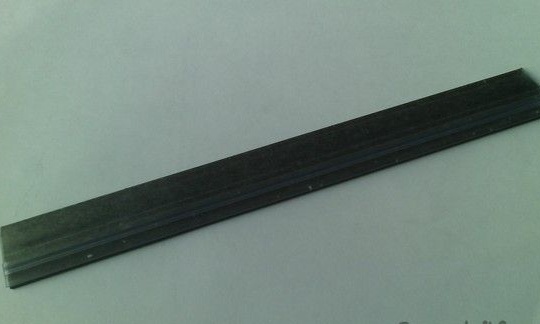
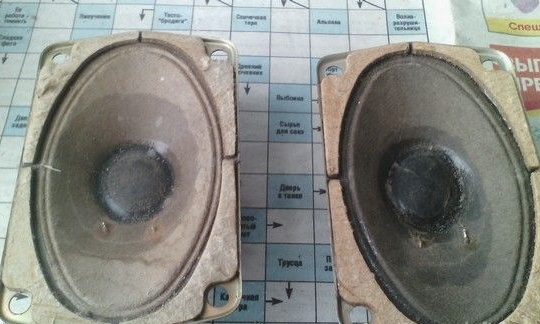
The speaker diffuser has faded over time and will not look very beautiful through the mesh. Black marker can easily restore color.
And so with everyone.
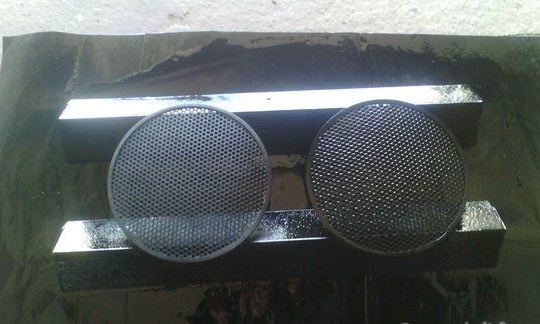
Well, here are finally my restored columns. Since the "talker" had white handles and a fringing, the speakers are also in the subject. Gently tint the edging with white paint.
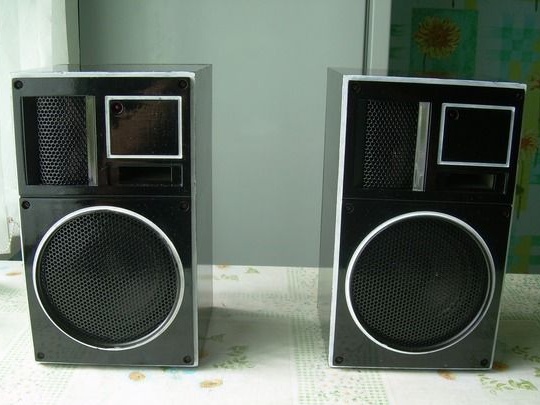
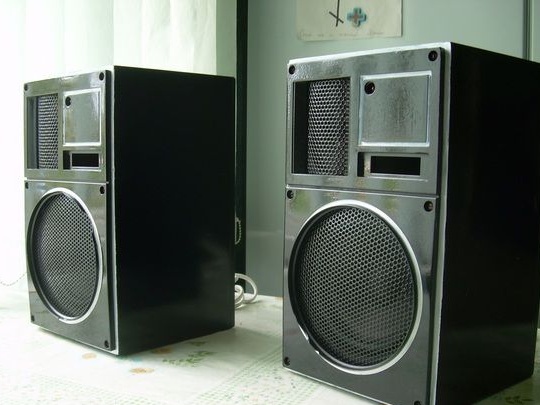
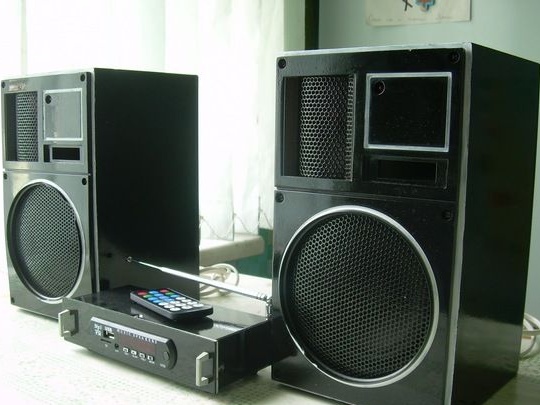
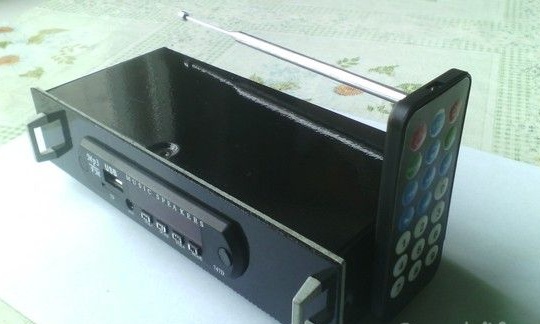
A couple of photos of the completed project!
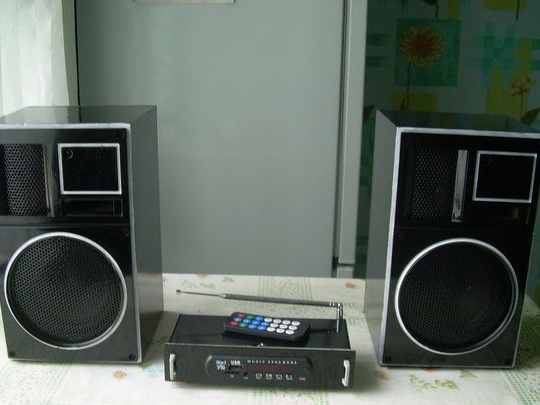
Well, I got such musical acoustics. I did it, looked from all sides, it was a pity it was to enter the garage :). Not bad happened !!! The only thing that overshadowed me a bit was the incomprehensible background that the panel gives (checked). The fact is that when the socket is turned on, it does not matter whether the radio is playing or from a flash drive, the background is heard, it sounds like a squeak, but a little lower. When you turn it up louder, the sound interrupts the squeak, you pause, again you hear a nasty background. It seems that a crowd of mosquitoes has settled in the nutria, and they are trying to stop me from listening to music in unison :). I have already made 2 of these (exactly these) to my friends, and the most annoying thing is that everything is fine with them, but not with me. Maybe someone faced such a problem? For this reason, I’m not very worried about Alashka’s shaft, and you can bribe a spare.
In general, I was pleased with the work done, I liked to restore the speakers and nostalgic. "Talker" turned out beautiful and even a little stylish or something. I hope to serve me will be my musical acoustics faithfully !!! Thank you for your attention, all success in the creative industry !!!!!!