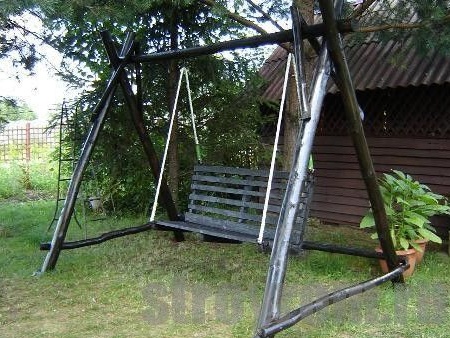
Dear site visitors, in the presented master class, you will be shown how to make a garden swing from natural material yourself.
Today it has become quite fashionable to put swings with a large bench for 2-3 people in summer cottages and in the yards of private houses. On such a swing you can swing the whole family) Especially to their liking they fall naturally to children, they can spend a long time on them.
This type of swing is of course also sold in stores, for any choice, but the price does not always please the buyer and it is easier to make them
do it yourself. The main material is 10-15 cm logs that you can get for free. Pine poles are best suited, willow can also be used. The frame is assembled from 2 supports twisted in a crosshair with a threaded connection.
And so, let's look at what specifically will be required to build a garden swing from natural material?
Materials1. logs 10-15 cm long 2-2.7 m
2. threaded rod
3. engraver
4. nut
5. washer
6. nylon rope
7. carabiner
8. beam 5x7 cm
9. self-tapping screw
10. paint for wood
11. alkyd varnish
Instruments1. hacksaw
2. drill
3. ax
4. screwdriver
5. hammer
6. roulette
7. grinder or hacksaw for metal
8. brush
9. knife
10. ruler
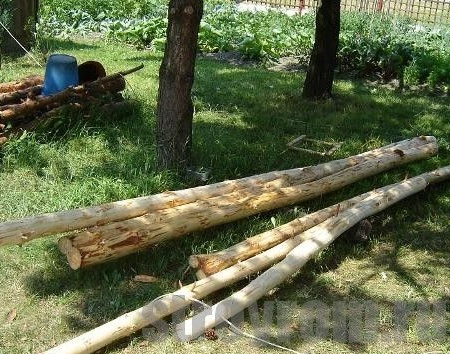
Step-by-step instructions for creating a garden swing with your own hands.As already mentioned above, the best material for assembly will be pine poles, which must be prepared, dried and cleaned of bark in advance. You can clean the bark with an ordinary ax. For spacers, you can use simpler wood, for example, willow with which it is also necessary to remove the bark. It is imperative to get rid of the bark, because moisture will accumulate under it, friends will be divorced (bugs, larvae, etc.)
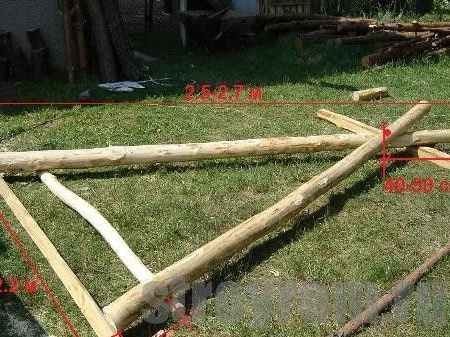
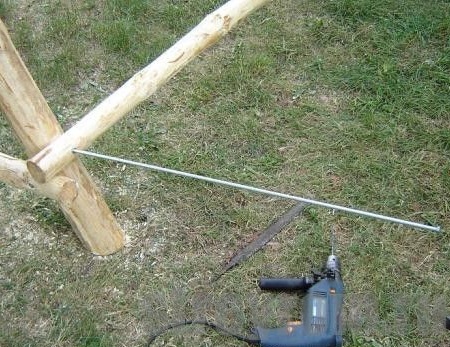
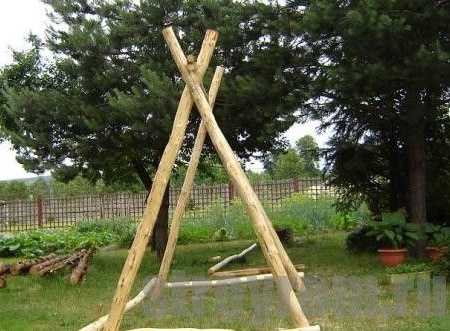
Next, from the prepared logs we collect supports, the length of the poles should be 2.5-2.7 m. In the upper part, a crosshair with a reach of 40-50 cm is made. In the lower part we make a spacer in the form of a willow pole, drill holes and tighten with a threaded connection. The author left his sizes in the photograph, read carefully.
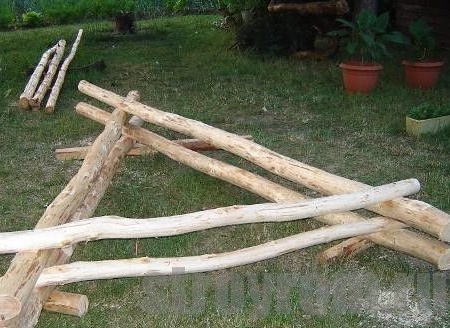
The second support is made in a similar way.
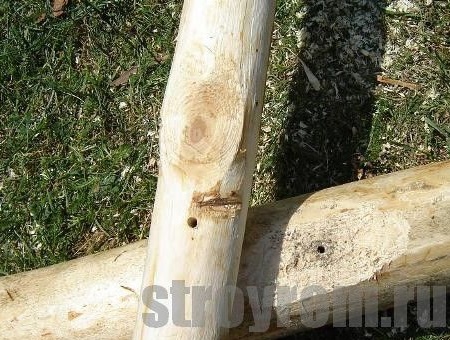
After that, the assembly of all parts into a single structure begins, the joints are cut with an ax and a hole is drilled with a drill.
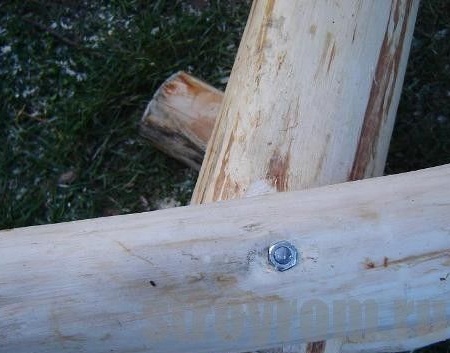
A threaded rod is inserted into the connection of two logs and tightened with nuts, it is also advisable to use washers and an engraver, and the rest of the thread is simply sawn off with a grinder or a hacksaw for metal.
The author's connection is as follows.
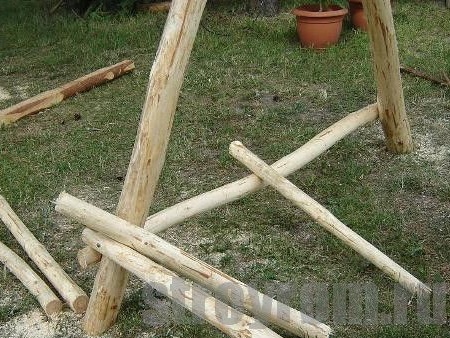
A spacer is also made in the back of the swing.
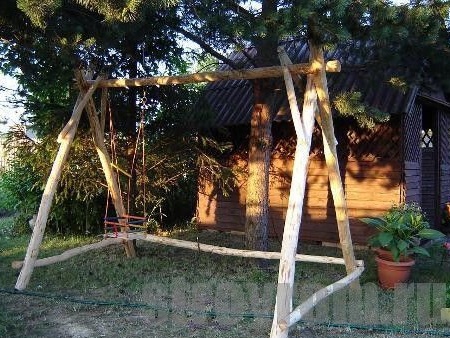
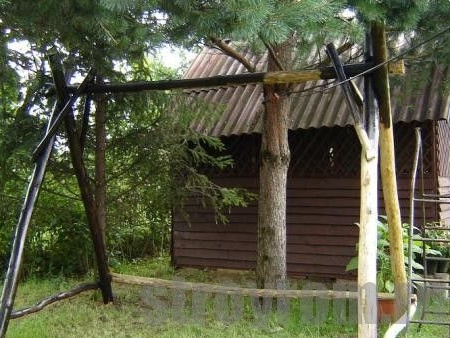
Assemble the frame with an assistant to support the support. The bulk of the work is done.
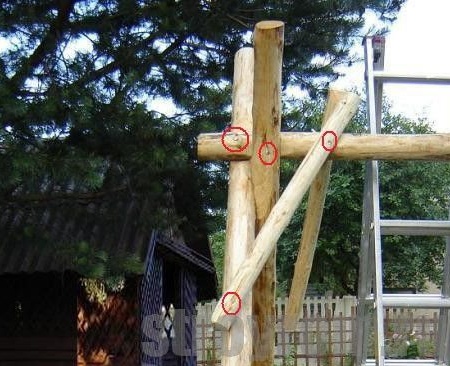
Then, to strengthen the rigidity of the structure, we fasten the jibs in the upper part to the same threaded connections, the connection points are highlighted in red circles.
To make the swing more stable, you can do the following .. You need to dig a hole 30-40 cm deep under each leg and pour it with concrete, insert a threaded rod and wait until the posts harden, and then the swing legs are simply screwed onto the concrete posts in the ground with studs and tightened with nuts.
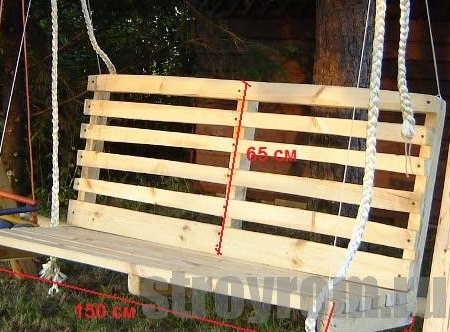
Next, you need to make a bench, for which the author used a 5x7 beam and a 3cm wide rail, first he assembled the frame from the beam and sheathed with a rail, it turned out to be an excellent bench. You can also sew pillows and a small mattress (optional)
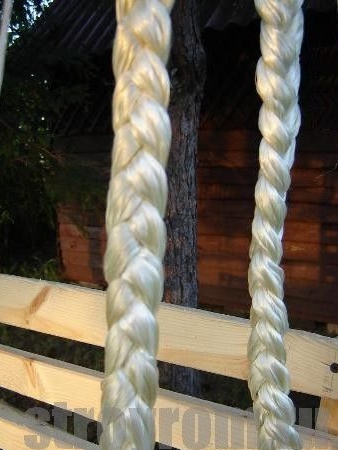
The bench is hung on a nylon rope, the holes in the beam are drilled to the diameter of the rope, then it is pulled and a regular knot is tied which will not give the rope a return stroke.
After that, the bench is suspended on a crossbeam and fastened with carabiners.
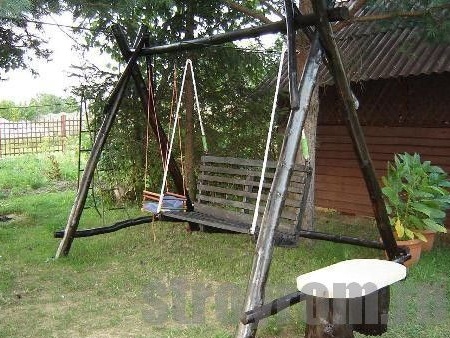
In order for the swing to stand for more than a dozen years, they need to be painted and varnished.
The author stained with wood paint and, after everything had dried out, additionally covered it with alkyd varnish.
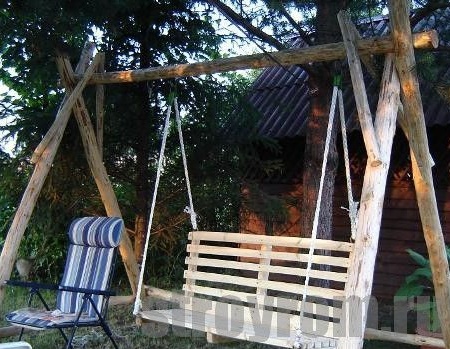
That's actually such a wonderful swing that our hero turned out to be, very budgetary because at least a minimum was purchased from the materials, which had a positive effect on the family budget. Here you can also make a small roof or canopy, so you can hide from the sun and precipitation. As you can see, everything is quite simple, and most importantly cheap. So go ahead friends!
This concludes the article. Thank you very much for your attention!
Come visit often and do not miss the latest in the world of homemade goods!