Dear site visitors, from the master class presented by the author, you will learn how to make a corner yourself
furniture and shelves.
Today, people have begun to pay more attention to the interior, everyone wants to have unique furniture, so as not to repeat and you could pleasantly surprise guests. In furniture stores, of course, there is a huge selection of furniture, but as usual they are too overpriced, and the quality is poor. It is very simple to make corner furniture, and most importantly budget, because the material will be required at times less than for ordinary.
For example, to make an angular pedestal with doors, you need to make a marking and use the dowels or anchors to fasten the bars, on which the whole structure will be assembled.
And so, let's look at the list of necessary?
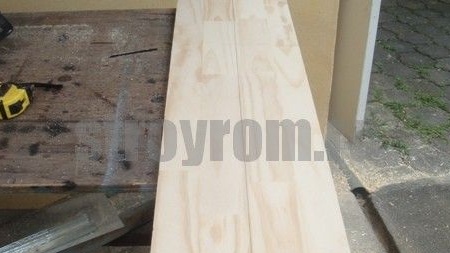
Materials1. wooden glued shield (or plywood, chipboard)
2. wooden beam 4x4 cm
3. screws
4. anchor or dowel
5. patch loops
6. magnets
7. stain
8. varnish
9. decorative metal bracket (for shelf)
10. wood glue
Instruments1. hacksaw
2. jigsaw
3. drill
4. screwdriver
5. screwdriver
6. brush
7. ruler
8. pencil
9. grinding machine
10. sandpaper
Step-by-step instructions for creating corner furniture do it yourself.In houses and apartments, corners are not functional and are rarely used, so you should pay attention to this and use this zone to the maximum. In the corners you can place corner sofas, shelves, cabinets, cabinets. etc.
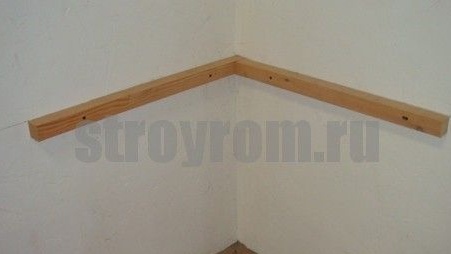
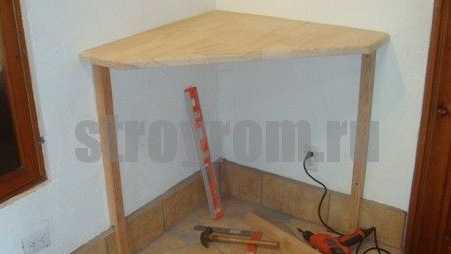
First of all, the author makes a marking for the subsequent fastening to the wall of 2 horizontal bars, which will form the basis of the cabinet. We measure the height at 3 points, that is, the middle and along the edges, as a result, it should be the same and draw lines with a ruler and a pencil.
After which 2 pieces are cut off from a 4x4 cm timber, they should be shorter by 2-3 cm on the countertop. Workpieces are screwed to the wall using anchors or dowels, strictly observing the marking line.
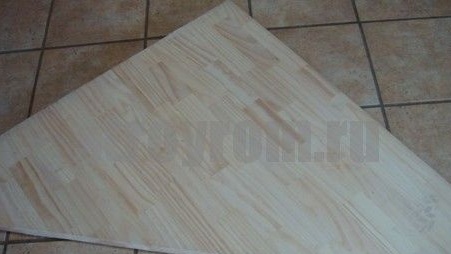
Further, the author cuts the countertop out of the shield, in each individual case the sizes will be different, it all depends on preferences and desires.
The corners are cut and the ends are 20 cm.
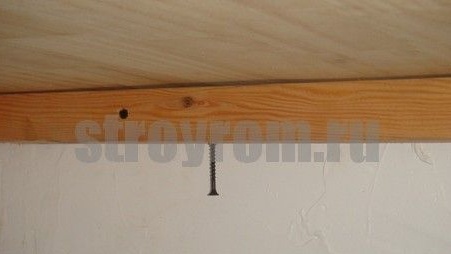
Then the countertop must be screwed to the bars fixed on the wall, it is best to do this from the back so that there are no signs of fastening from the outside, but simply a flat and smooth surface.
Attention! The length of the self-tapping screw should be less than the thickness of the beam and the board, that is, the beam 4 cm + board 2.5 = 6.5, then the maximum length of the self-tapping screw can be about 6 cm.
That's actually what was discussed and what should happen, a countertop without signs of attachment.
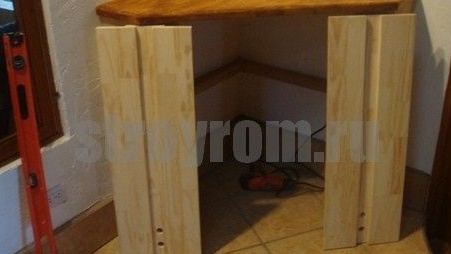
Next, the author sets the vertical bars, they are also attached to the wall.
A 20 cm board is screwed onto the ends, on both sides.
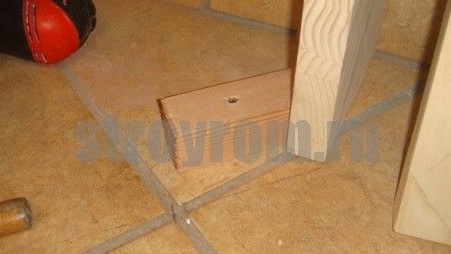
A small piece of timber is also screwed to the floor.
The top is also a small addition.
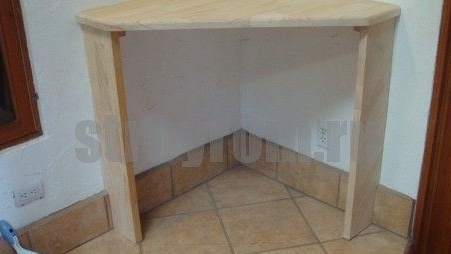
Then 2 more boards are taken and the ends are smeared with carpentry glue.
These planks are also screwed flush on the screws in the upper and lower parts.
And so the main work is done, it remains to make the doors and there will be 2 pieces, since the opening width is 60 cm, then the doors will be 30 cm each. They will be made of 2.5 cm boards and 12 cm wide, that is, 3 boards 12 + 12 + 6 = 30 will be needed on one door.
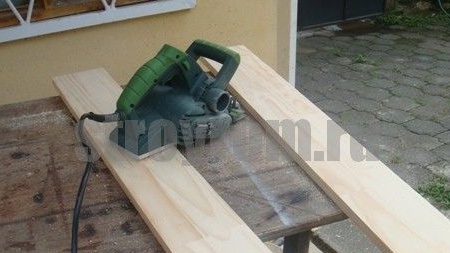
We pass the necessary boards with a planer, and then carefully grind.
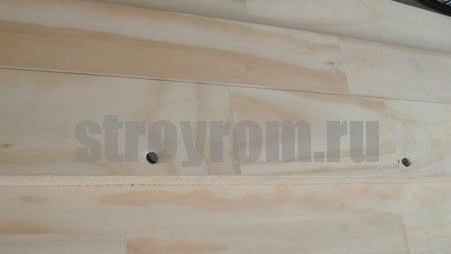
On one of the boards, marking is applied 3 cm from each edge and lines are drawn.
Drill 2 holes in the bottom.
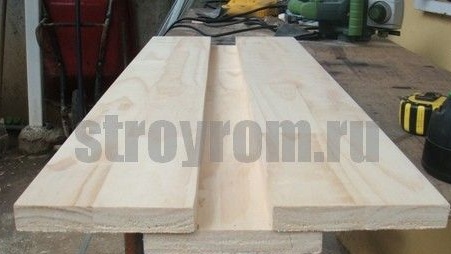
And from further attention! A board with a marking of 3 cm on the edge is smeared with wood glue and 2 boards of 12 cm are glued to it, which turns out ... The average board is 12 cm, and the fastener took 3 cm from each edge, which in total gave us 6 cm. the total width is exactly 30 cm.
A preliminary fitting is done and the front side is coated with a protective compound (stain and varnish)
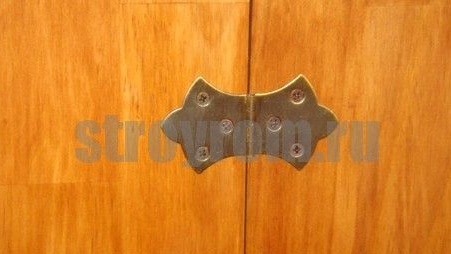
Doors are hung on hinges and fastened with self-tapping screws.
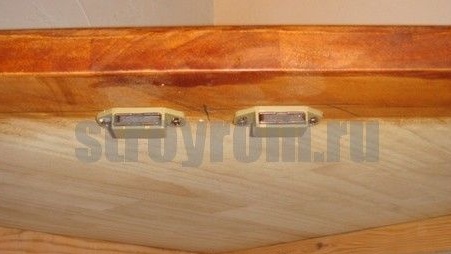
Magnets are installed.
That’s actually the stand is ready, everything is extremely simple and clear.
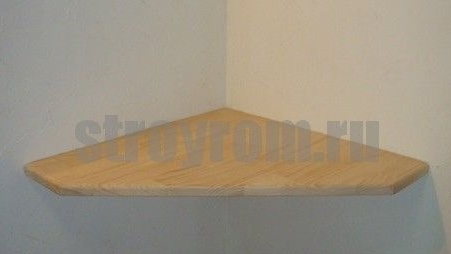
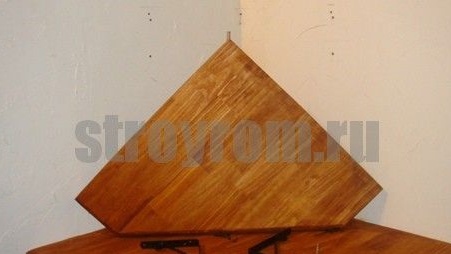
Also, in order to complement the functionality, the author also made a shelf, for which he took the second trim of a wooden shield and gave it the necessary shape. Covered with stain and varnish.
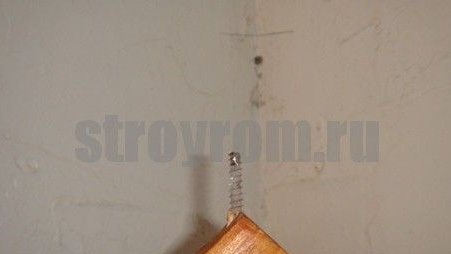
I screwed the self-tapping screw into the corner to half and bit off the hat with pliers, it turned out a metal pin, and in the wall in the corner I drilled a hole for the diameter of a bit of a self-tapping screw, this is necessary so that the shelf does not play under the weight of the objects laid on it.
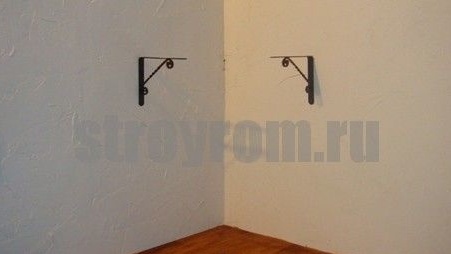
I screwed decorative metal brackets onto the walls.
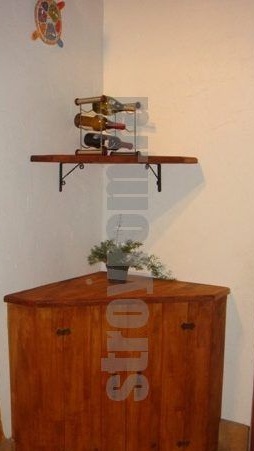
The shelf is fastened with self-tapping screws also flush, you can see the finished work on the main photo of this article. As you see, there is nothing complicated in this matter, and anyone who wants to can handle at least a little able to hold the tool in his hands. And most importantly, this furniture will be to the maximum budget, which is good for the family budget. A good option for a young family.
This concludes the article. Thank you very much for your attention!
Come visit often and do not miss the latest in the world of homemade goods!