

Materials:
- ceiling tile
- wooden ruler
- plywood 3 mm
- multi-colored adhesive tape
- reinforced adhesive tape (if any)
- paper clip
- bamboo skewers
- Whatman (for templates)
- nuts, bolts
- rubber bands for money
- wooden block
- plastic bottles
- steel wire
- threads
Instruments:
- cutter
- jigsaw
- square
- scissors
- pencil, marker
- PVA adhesives, ceiling and epoxy
- pliers
- screwdrivers
- screwdriver and drill
- hacksaw
- awl
- gas burner (or gas stove)
- sandpaper
- thermal gun
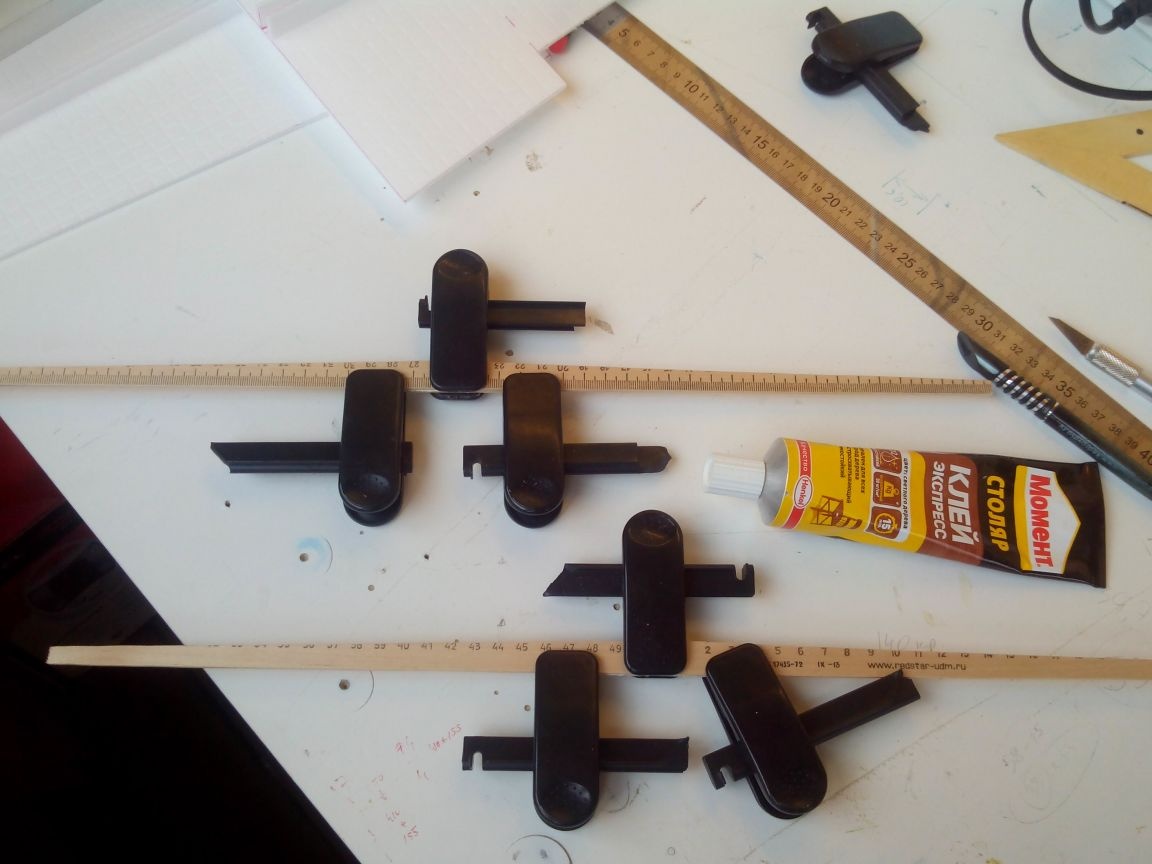
Electronics:
- motor -
- regulator -
- servos -
- propellers -
- traction locks -
- hogs -
- Collet clamp -
- batteries -
- equipment -
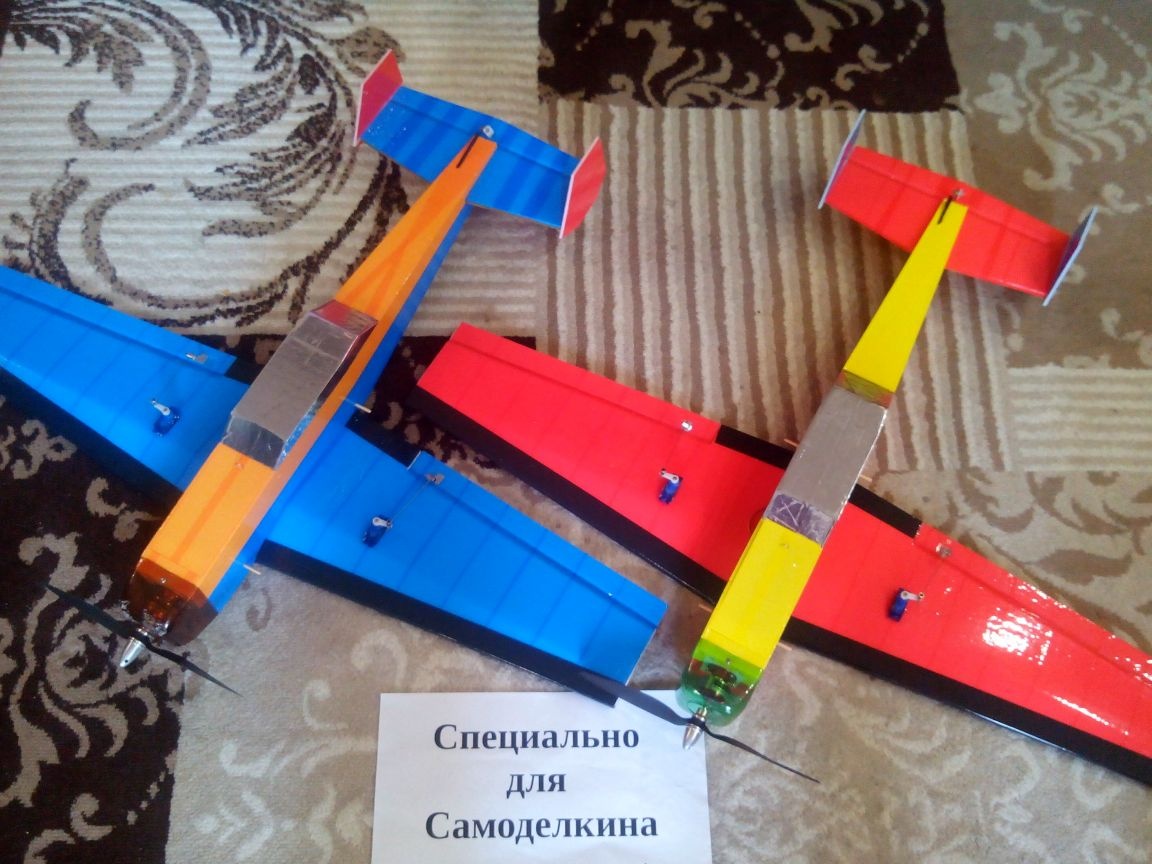
He served as a prototype.
Drawing of the model of the aircraft S-3603:
View online file:
For the needs of air combat, it was decided to shorten the wing, and to simplify the shape of the fuselage. In addition, this model will be without rudders, they are not needed here especially. The control will be on three servos: two on the ailerons, one on the elevator.
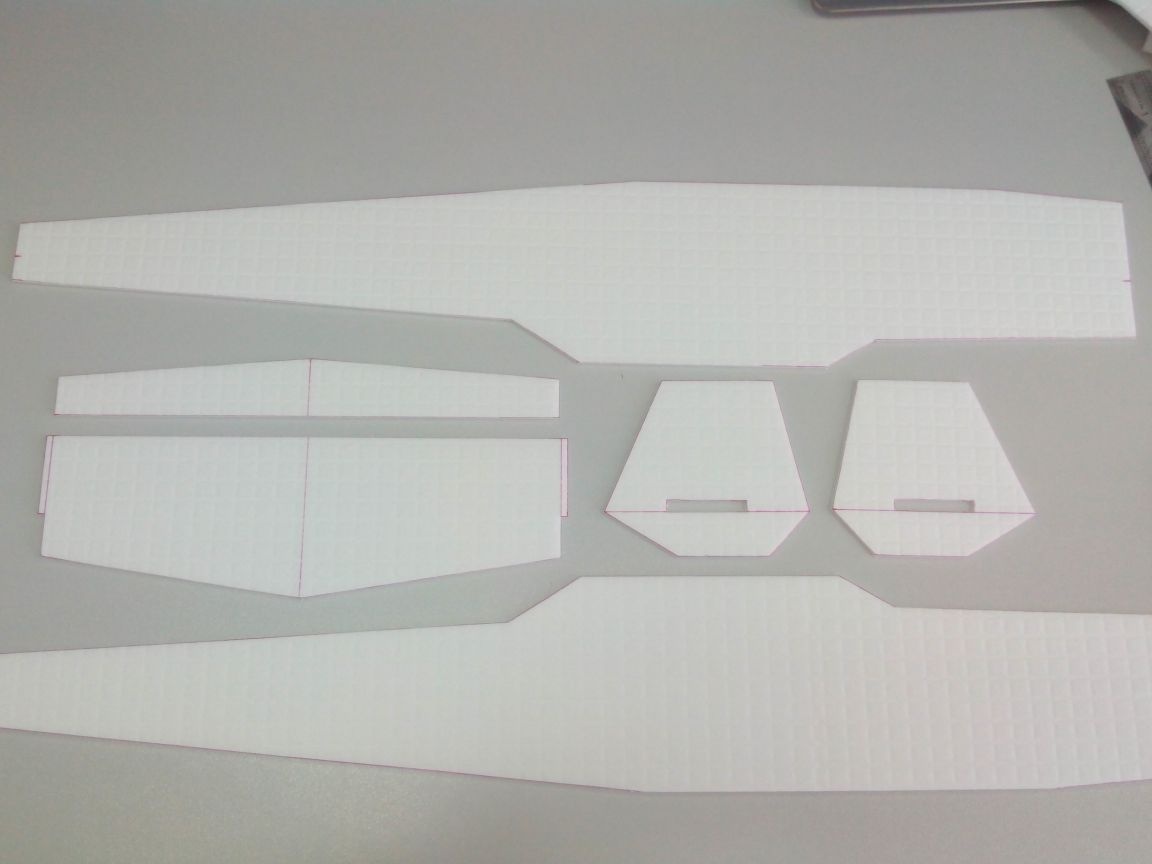
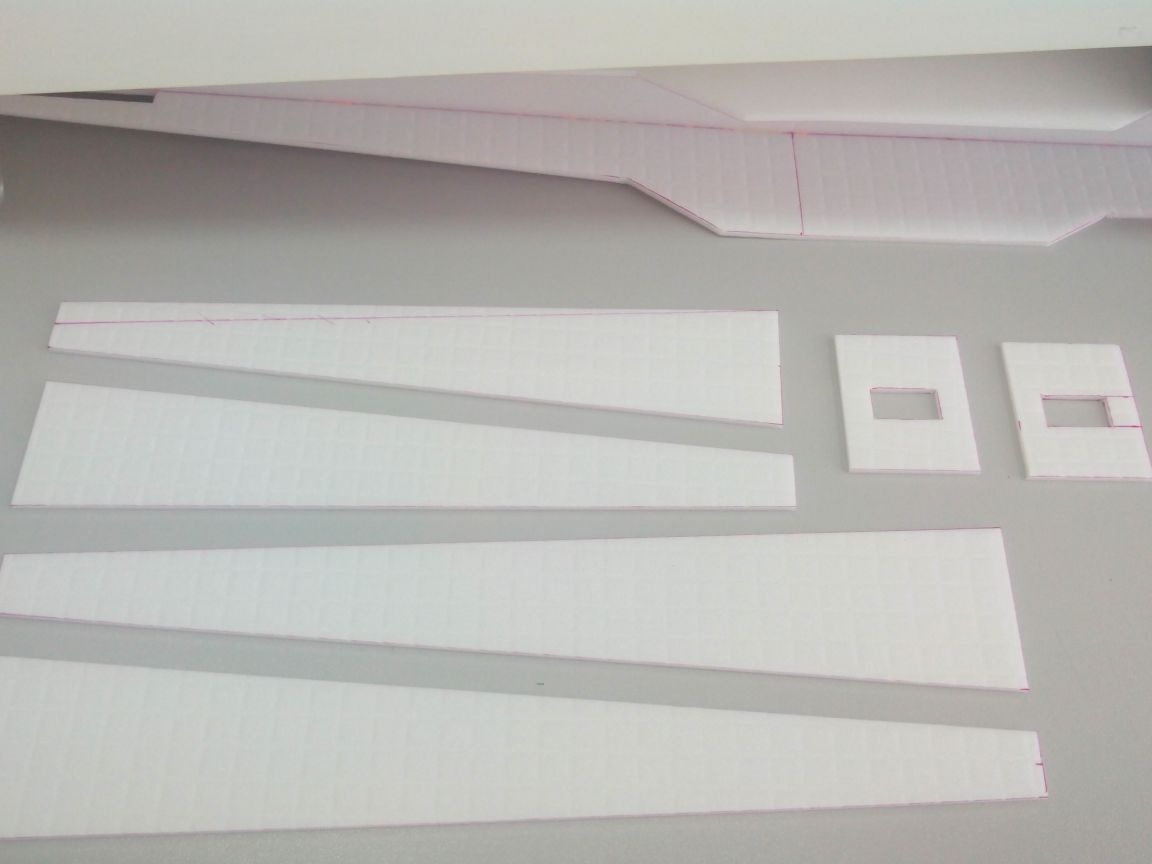
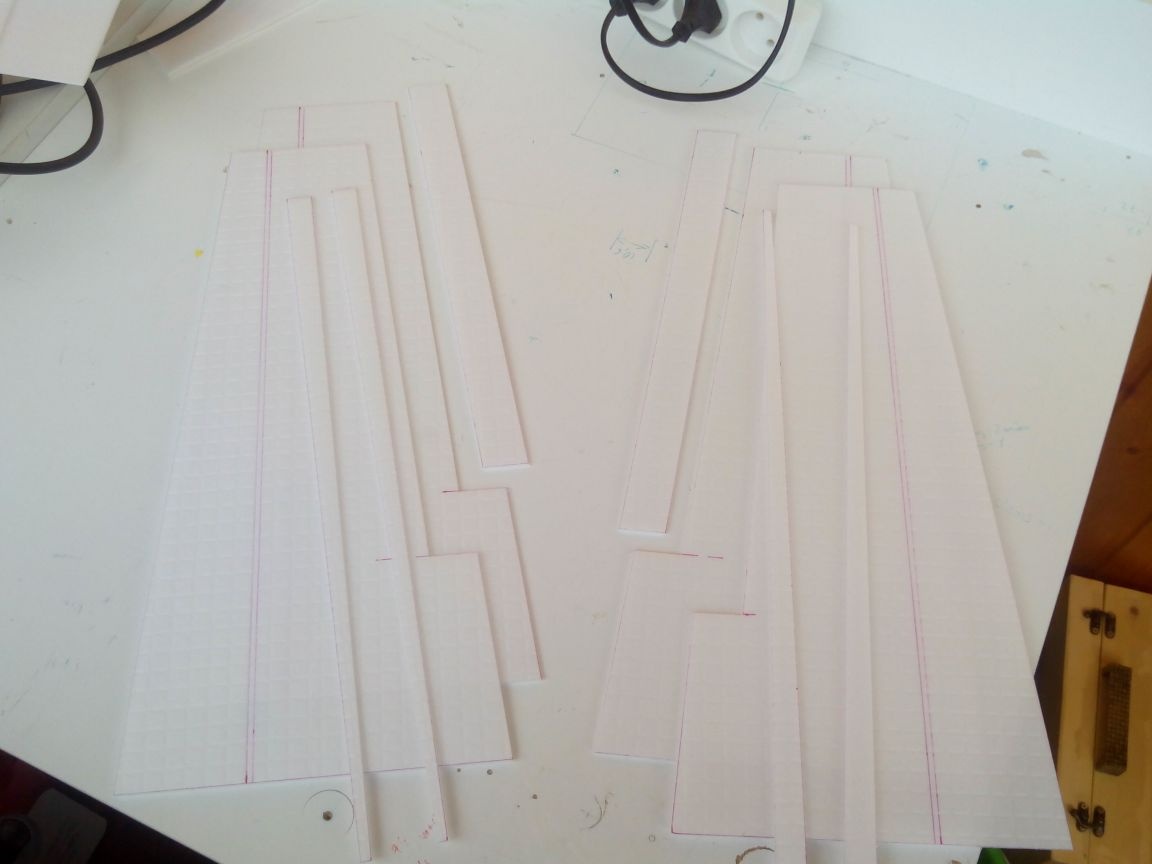
Step 1. Templates and details
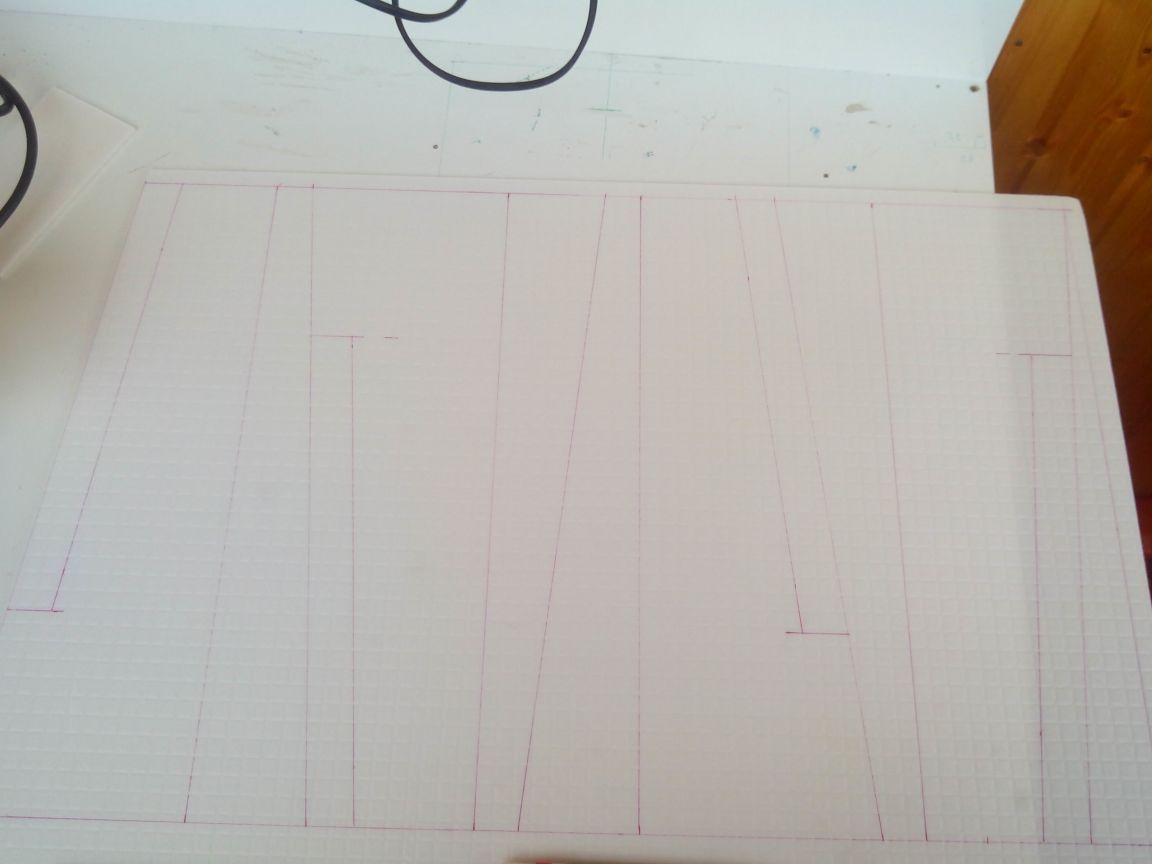
The keel template is drawn on a whatman paper in full size (dimensions on the photo are indicated).
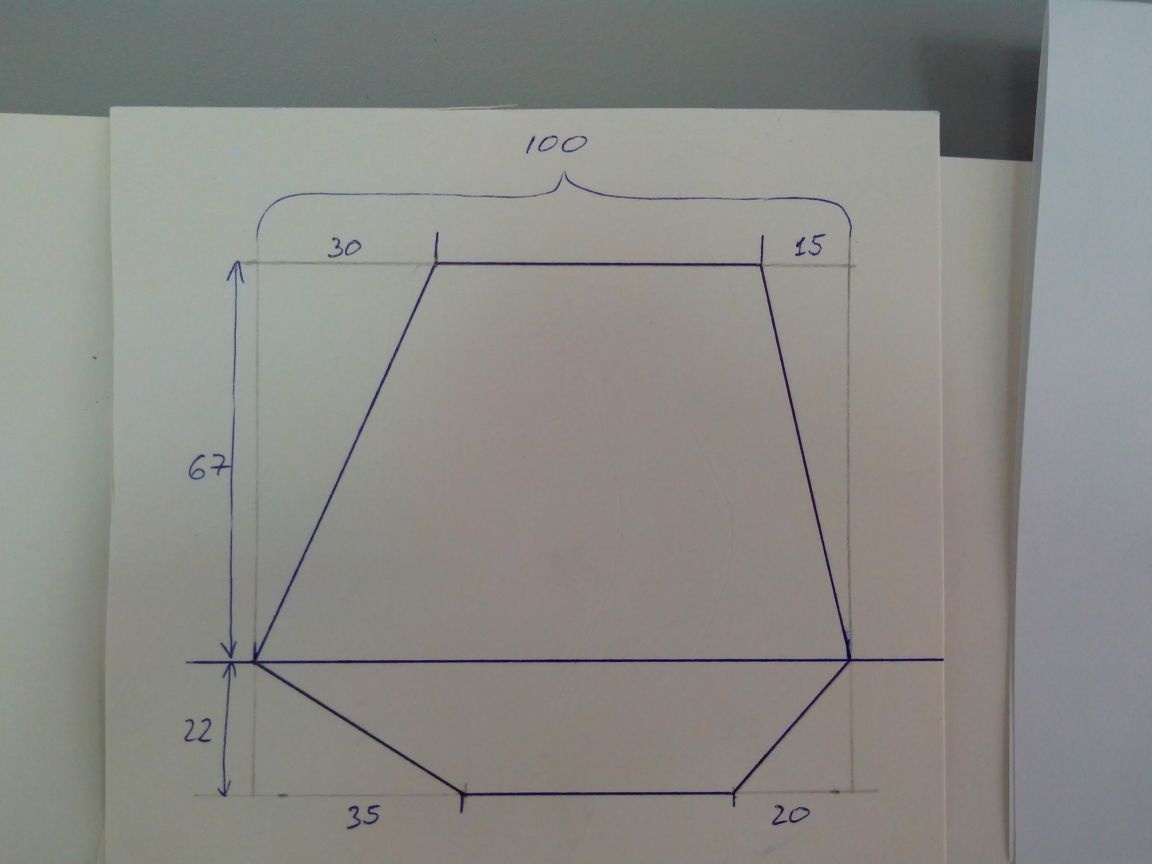
Similarly, we draw a stabilizer pattern.
The wing will be symmetrical with respect to two axes, and therefore it will be easier to draw on the ceiling than to make a template. Dimensions in a schematic drawing.
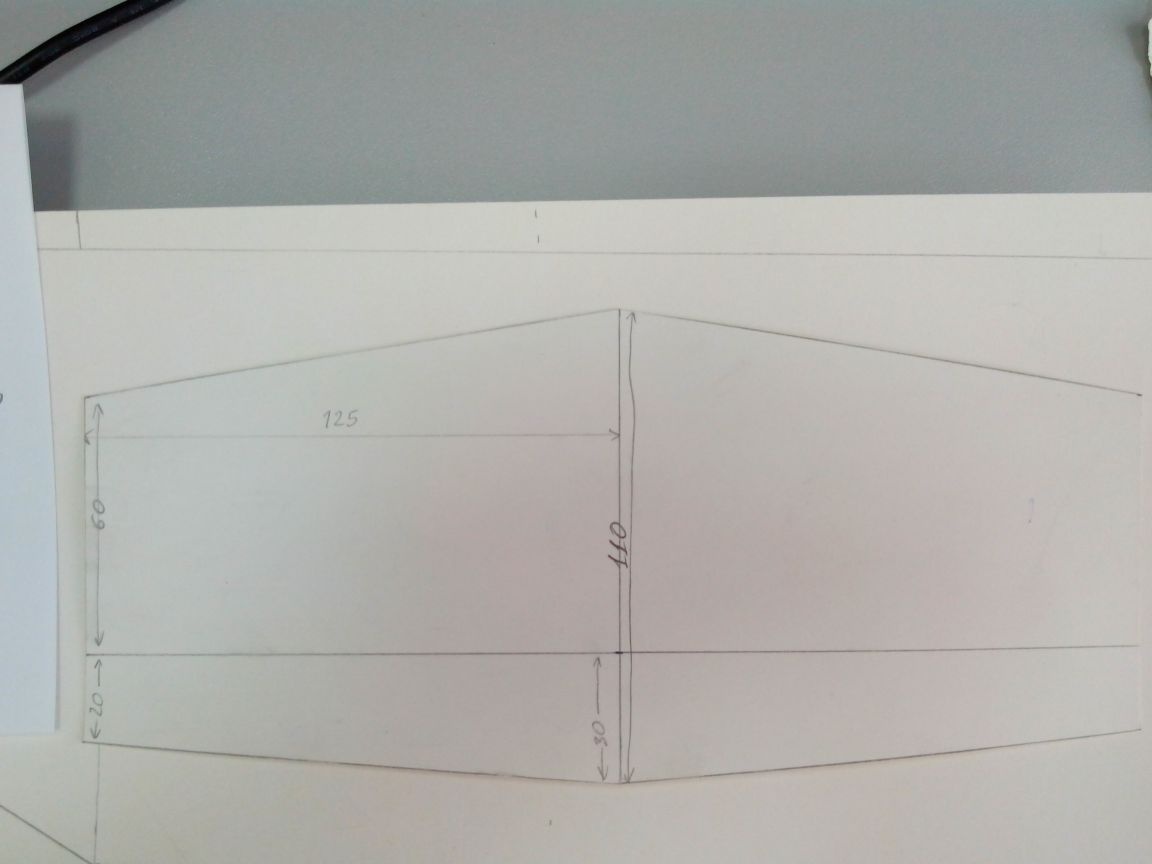
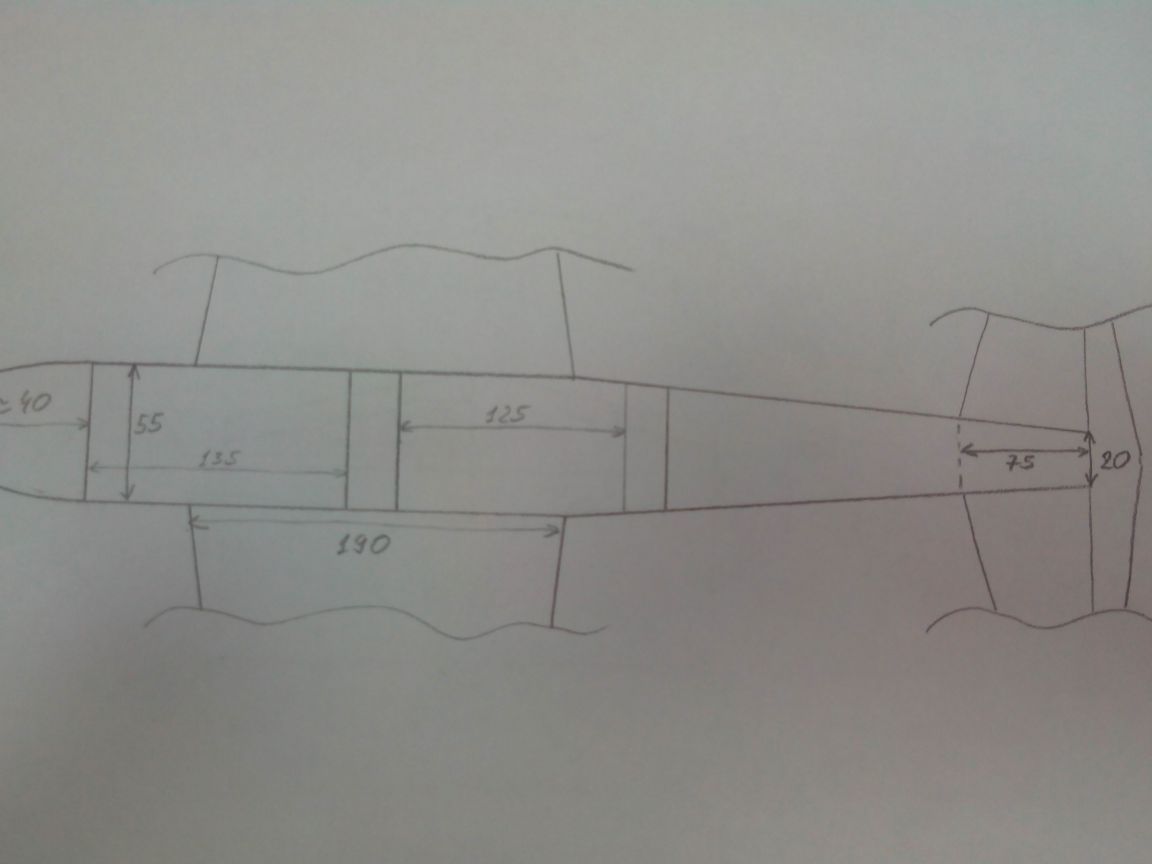
The side of the fuselage is also better to draw on whatman paper.
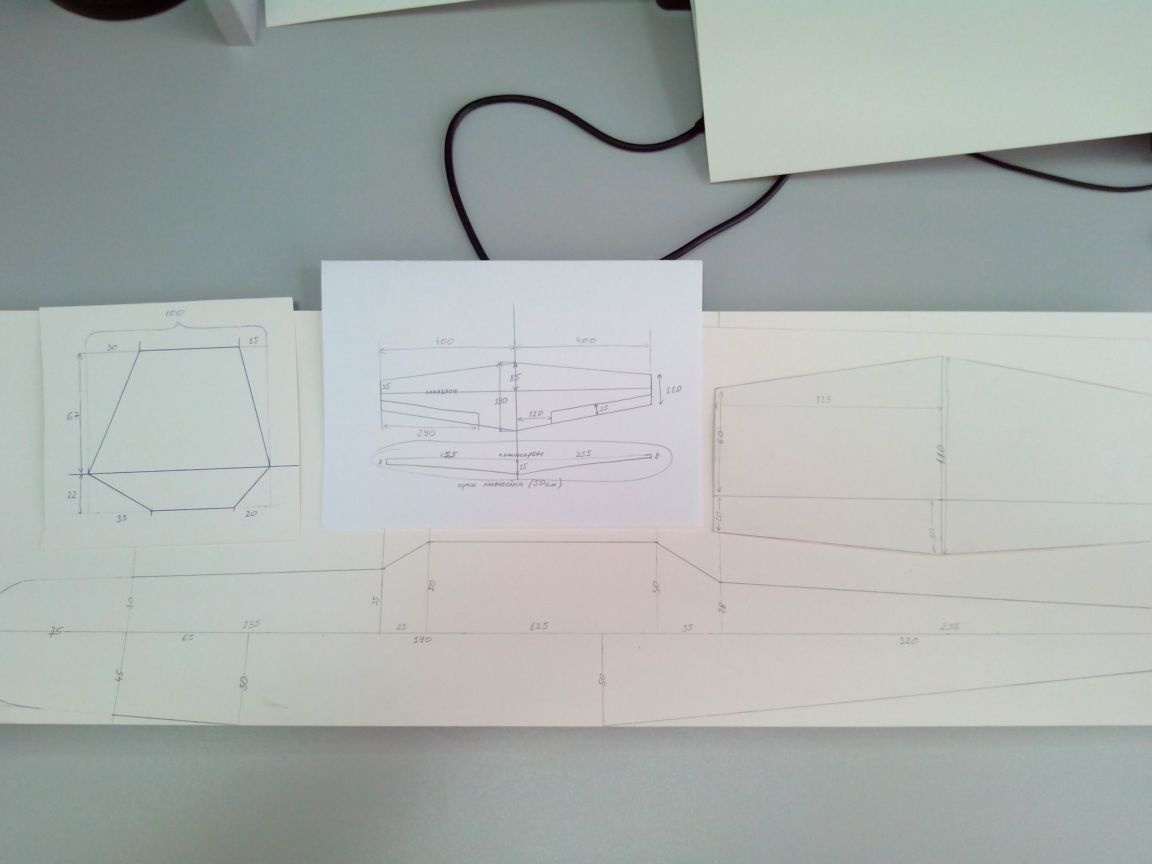
View from above.
When all the templates are ready, transfer them to the ceiling.
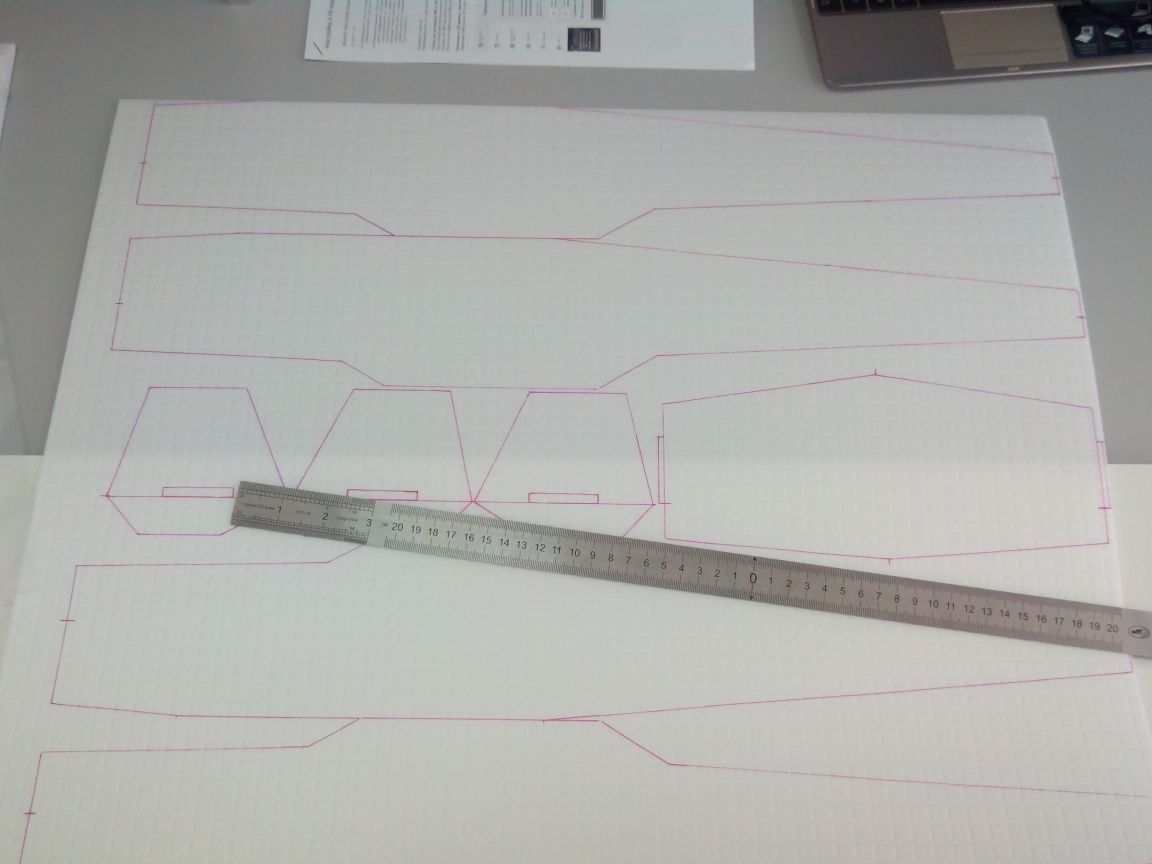
And cut with a cutter.
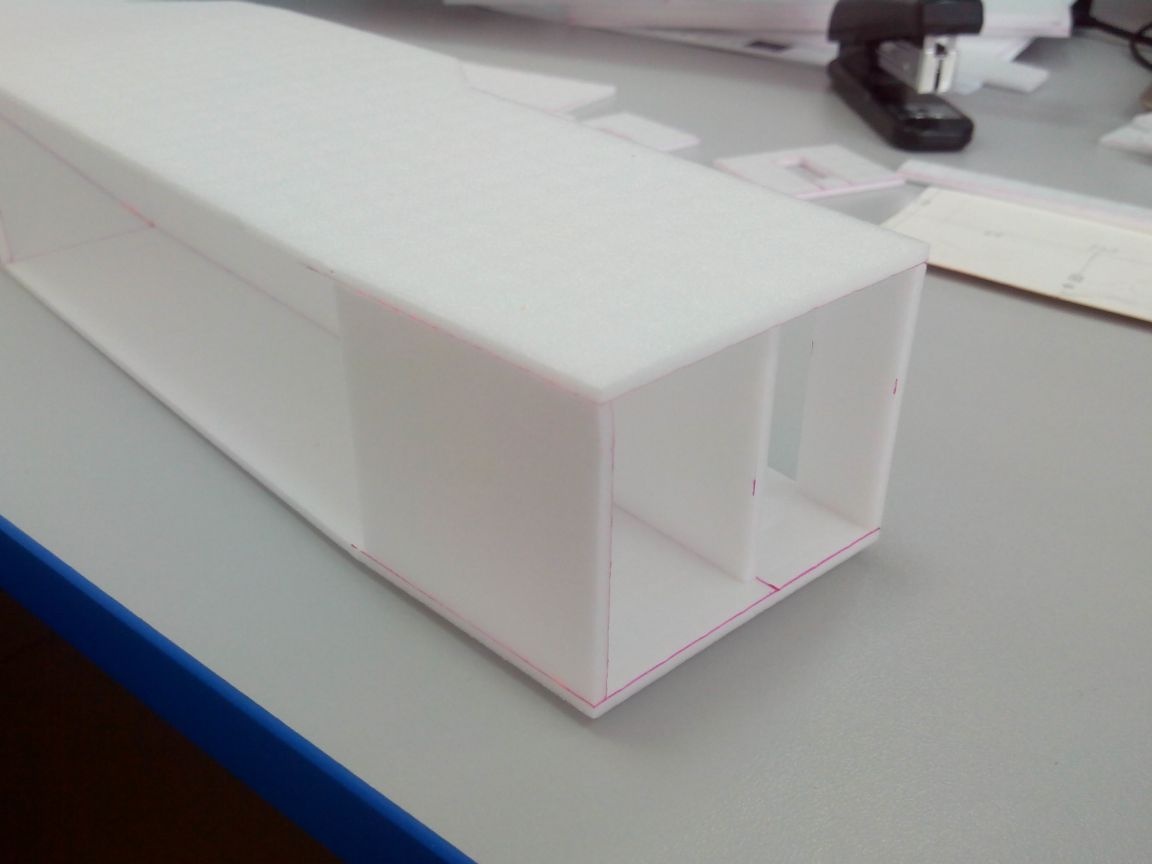
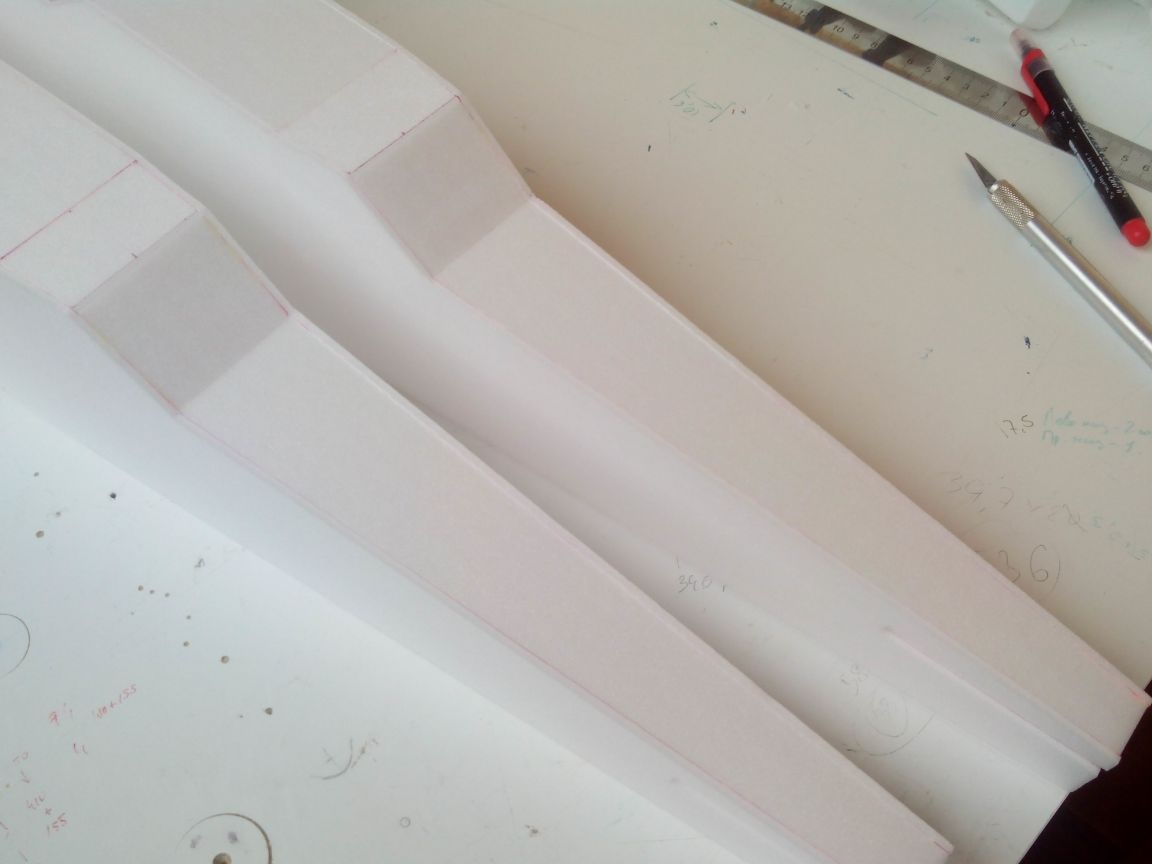
Step 2. Making the fuselage
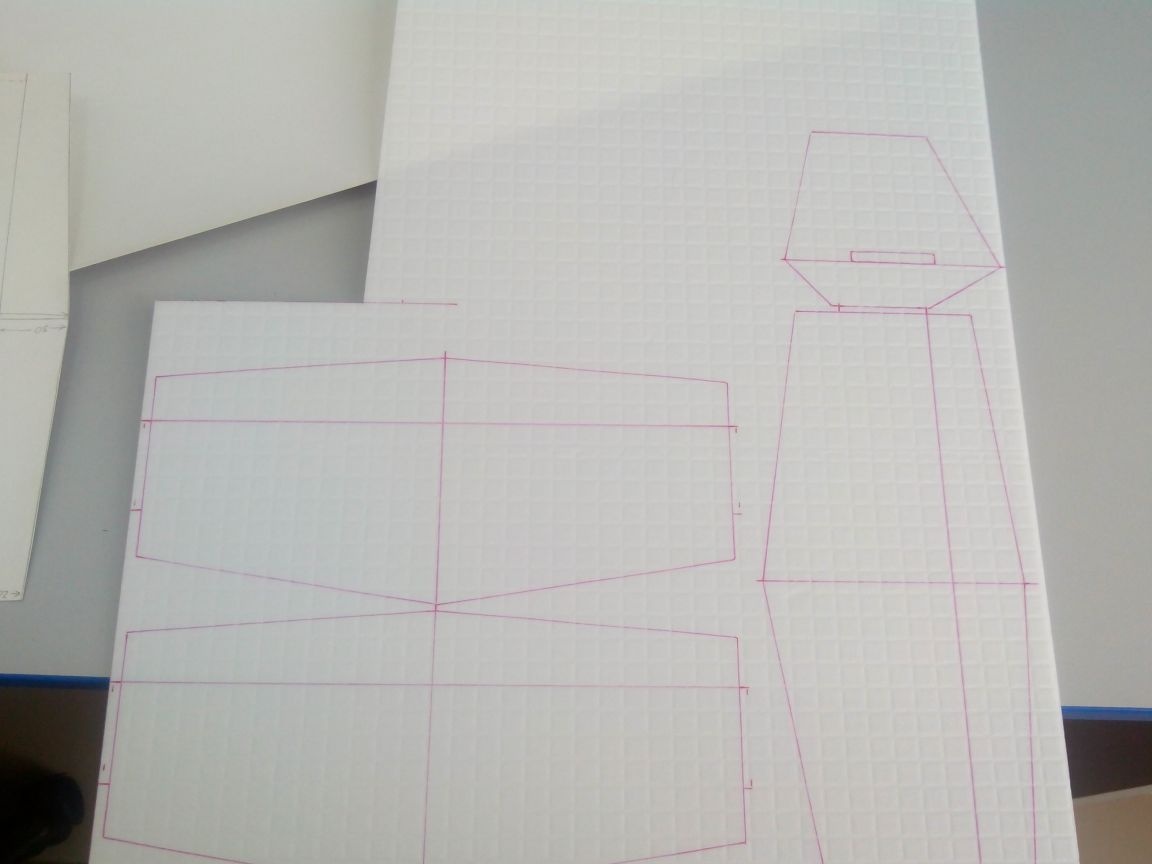
Cut the inner shelves into the fuselage.
Glue the tail flanges to the sidewalls.
Glue the second side of the fuselage
We glue the nasal shelves.
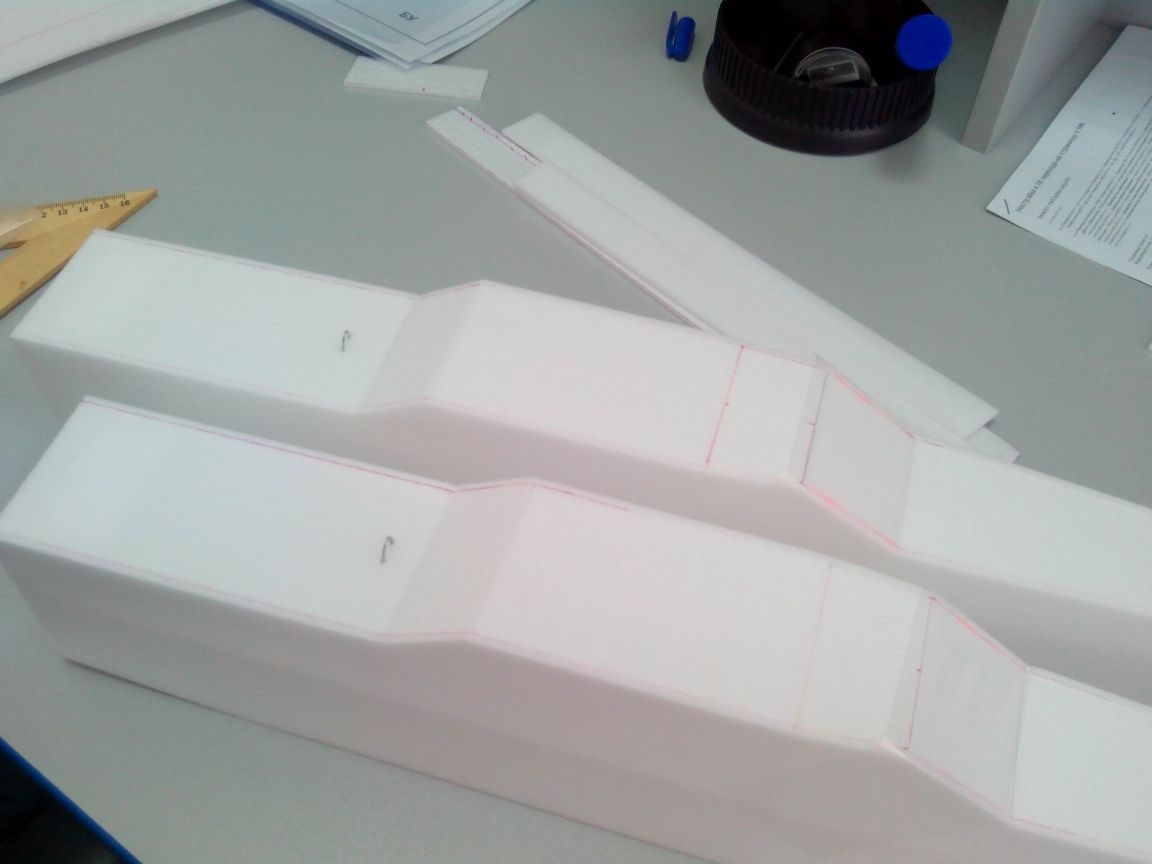
While the basics of the fuselages are drying, we cut out the parts for the bow and cockpit.
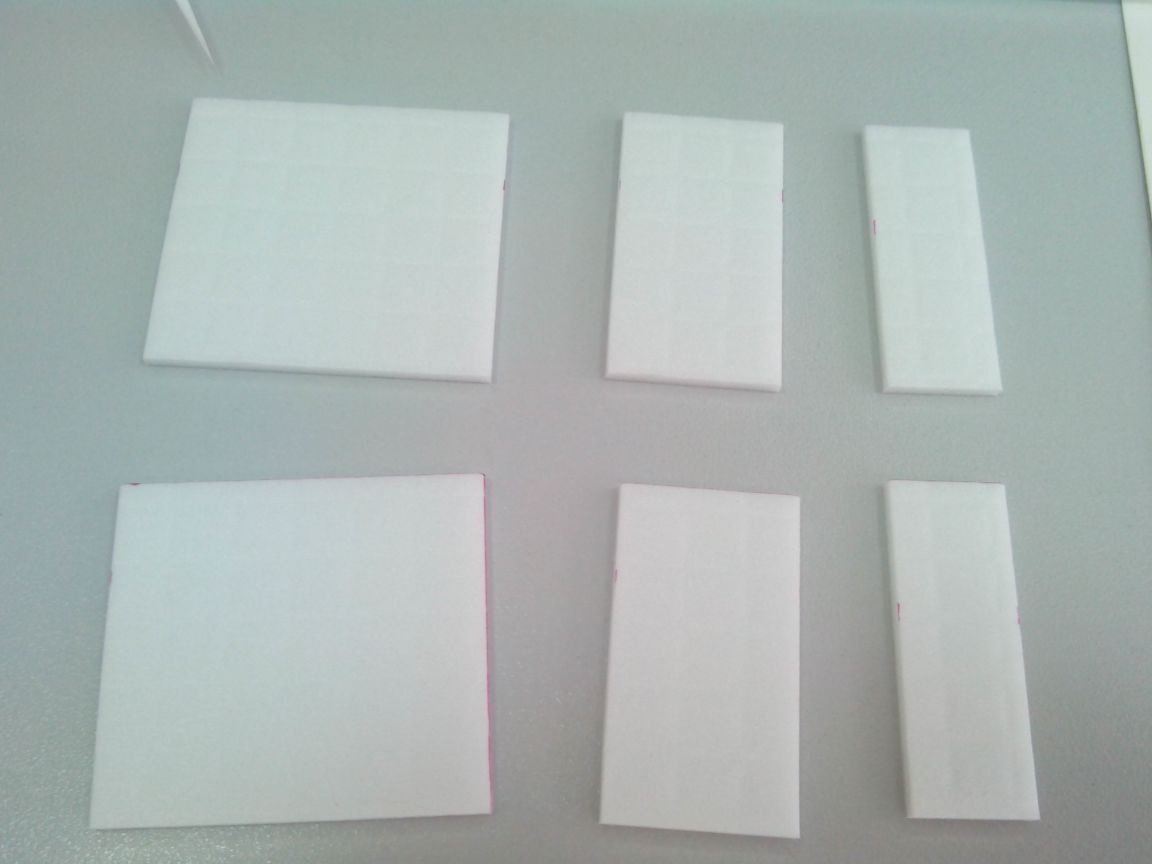
Then we paste them into the fuselages.
Additionally, we cut out the frames for the tail servos.
We glue these frames and the “windshield” of the cab.
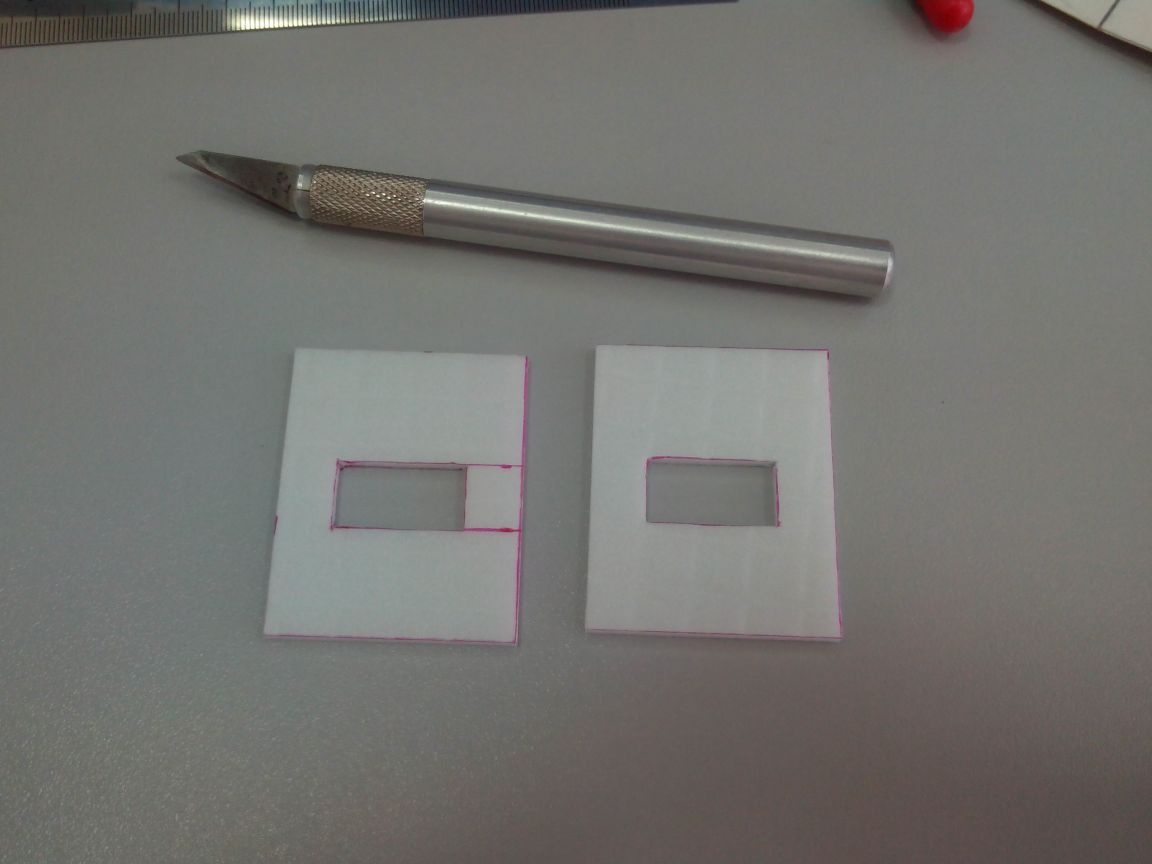
We glue manhole covers with electronics.
We make loops from a paper clip and glue it into the covers, placing a toothpick or a match under them. Top with ceiling glue or epoxy.
Inside the electronics compartment (bow), we glue the stops from the ceiling strips so that the lid does not fall through.

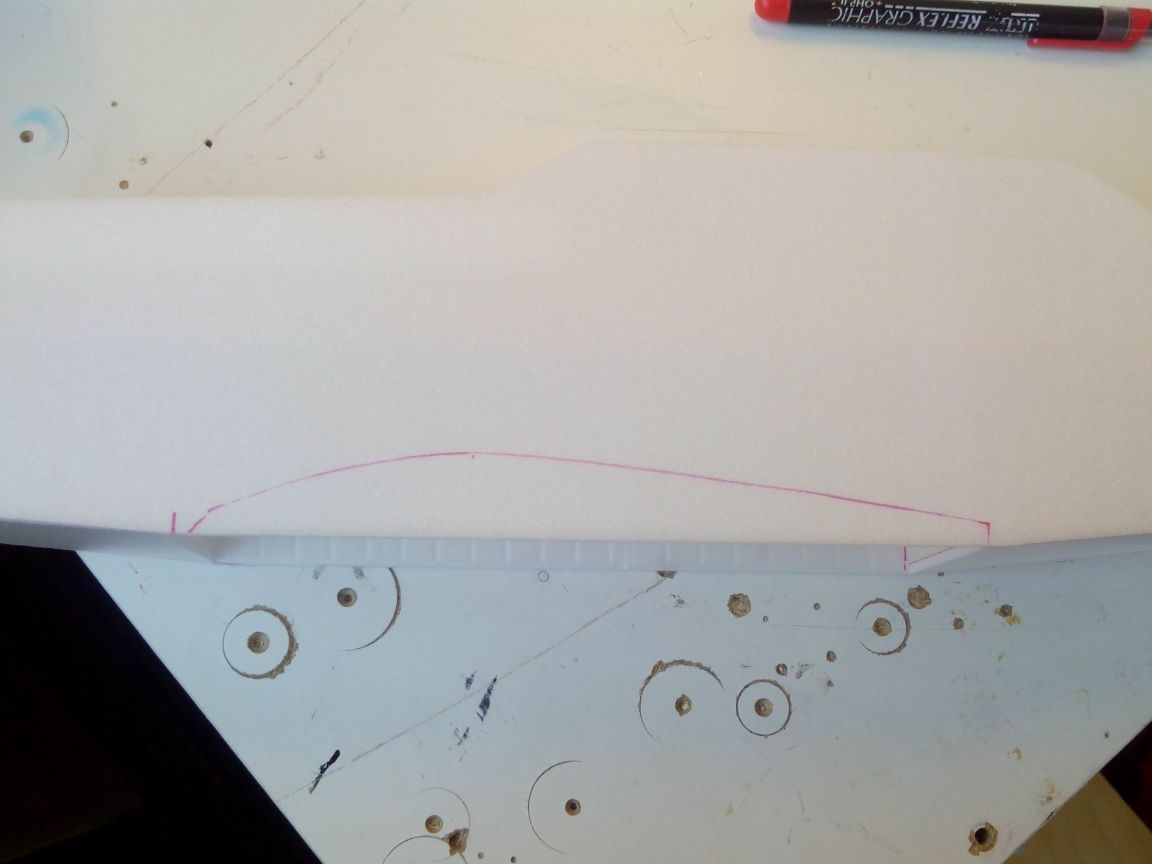
Cut out the details of the tail.
Glue the tail parts on top and bottom.
Fully glue the "cab".
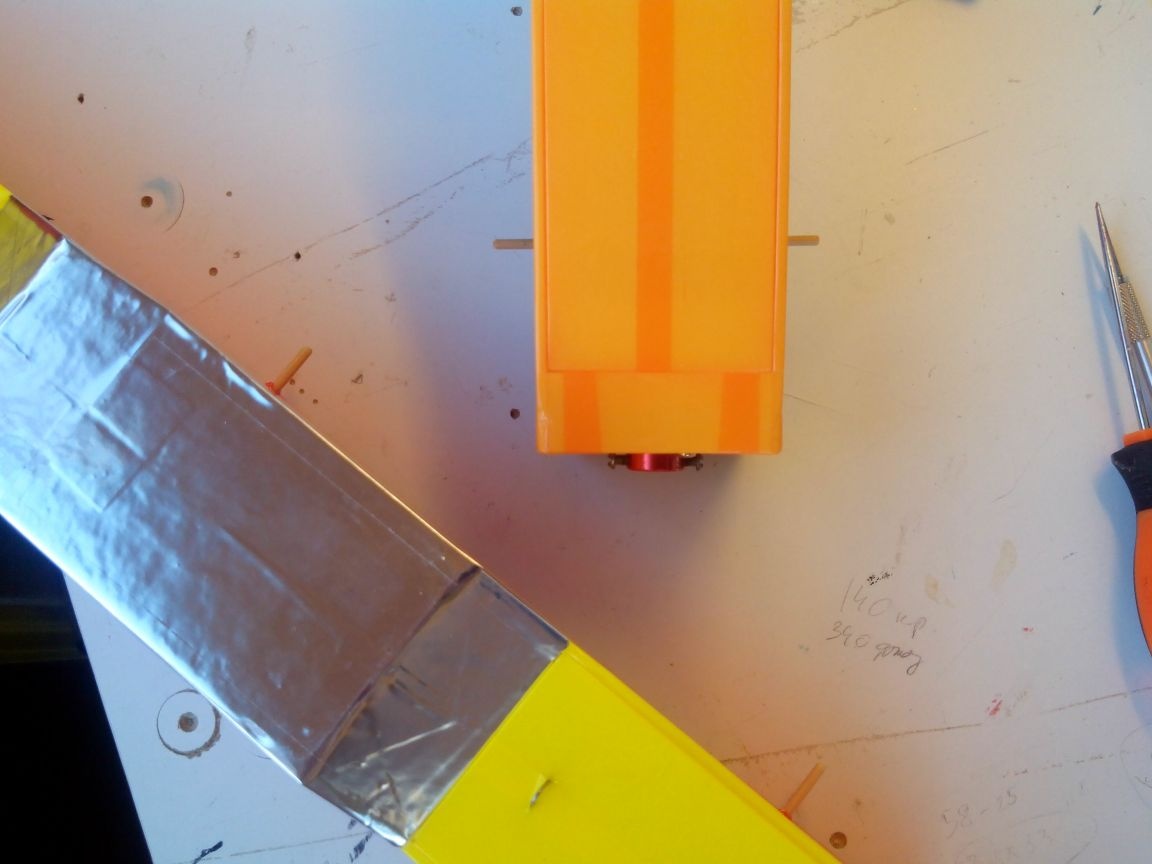
We cut engine mounts out of thin plywood and fasten the motor bases to them.
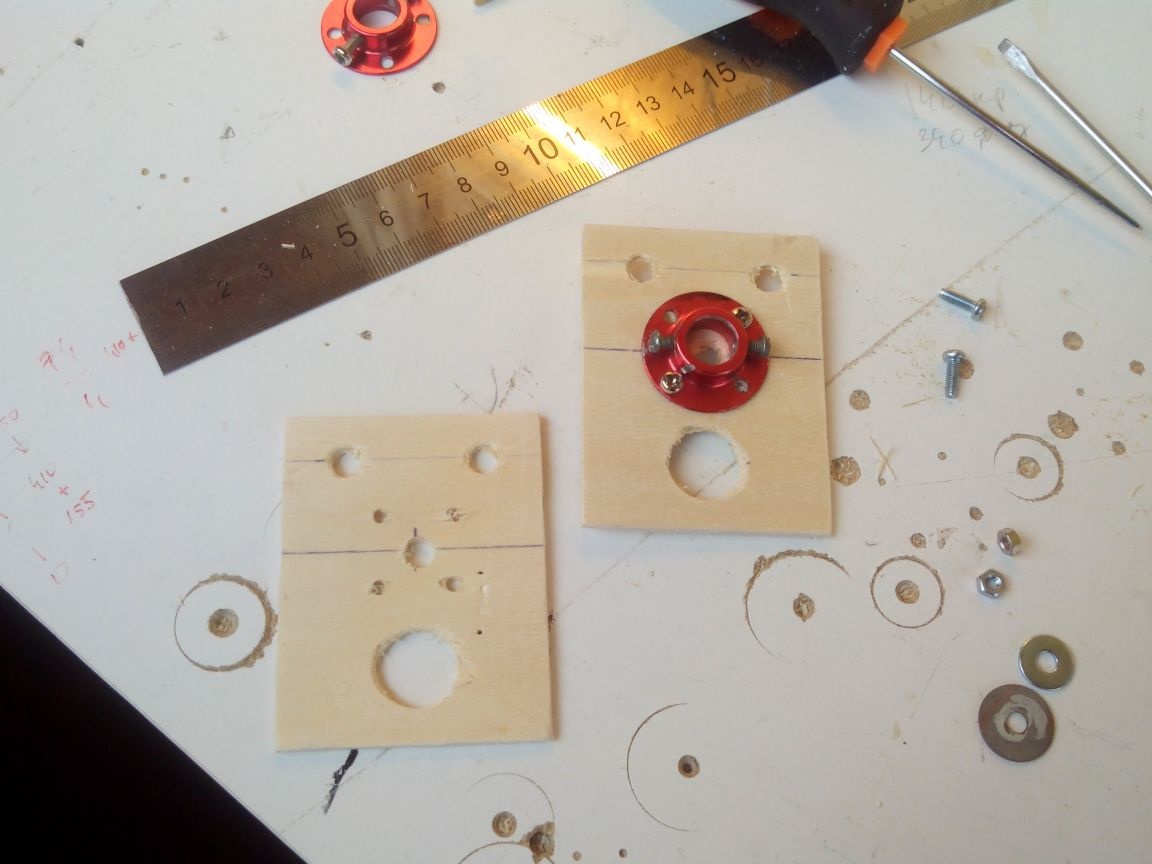
We paste motor mounts into the fuselages.
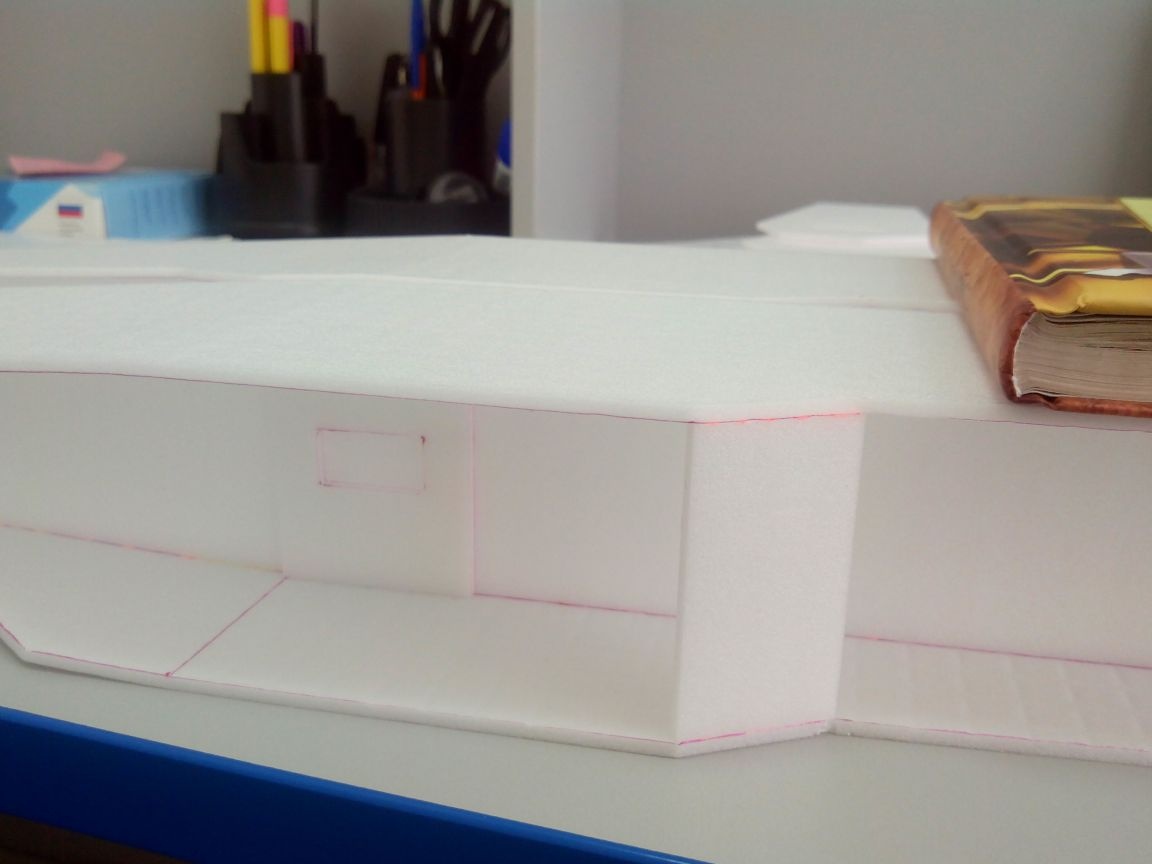
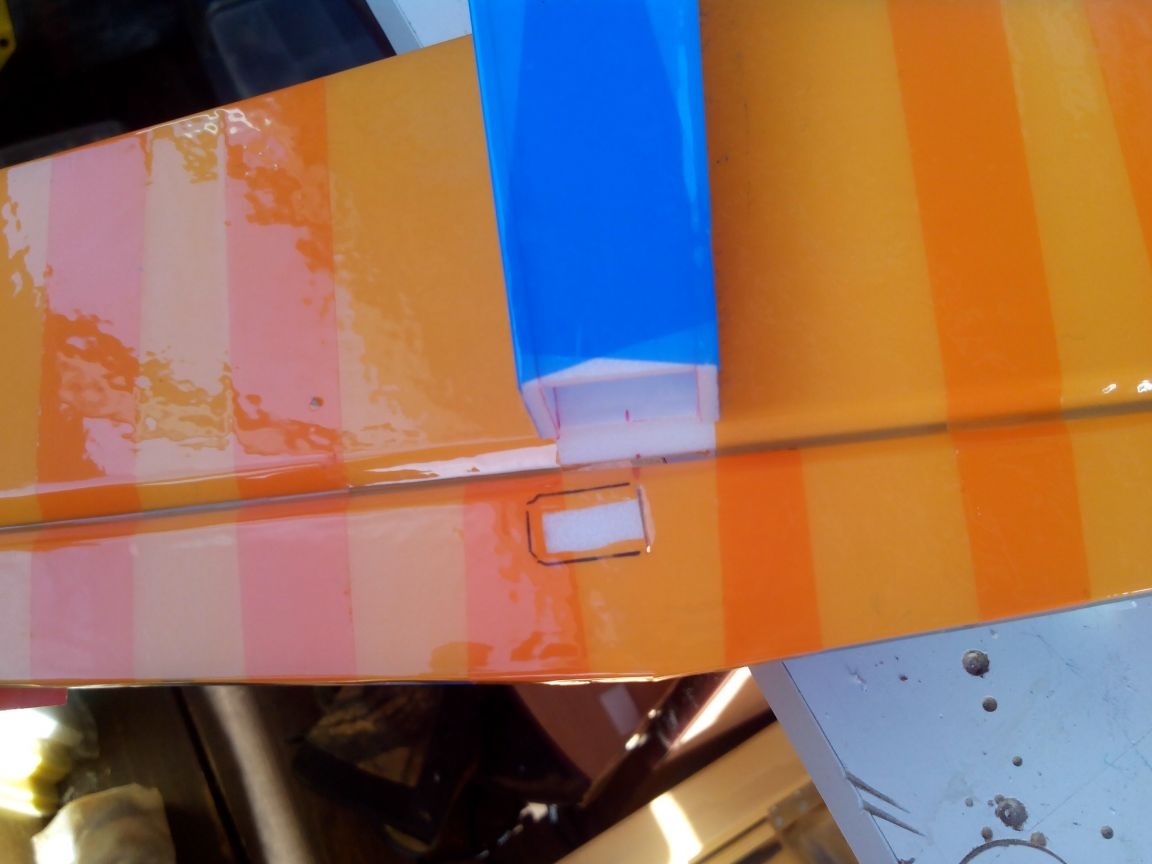
Mark the cutouts under the wing.
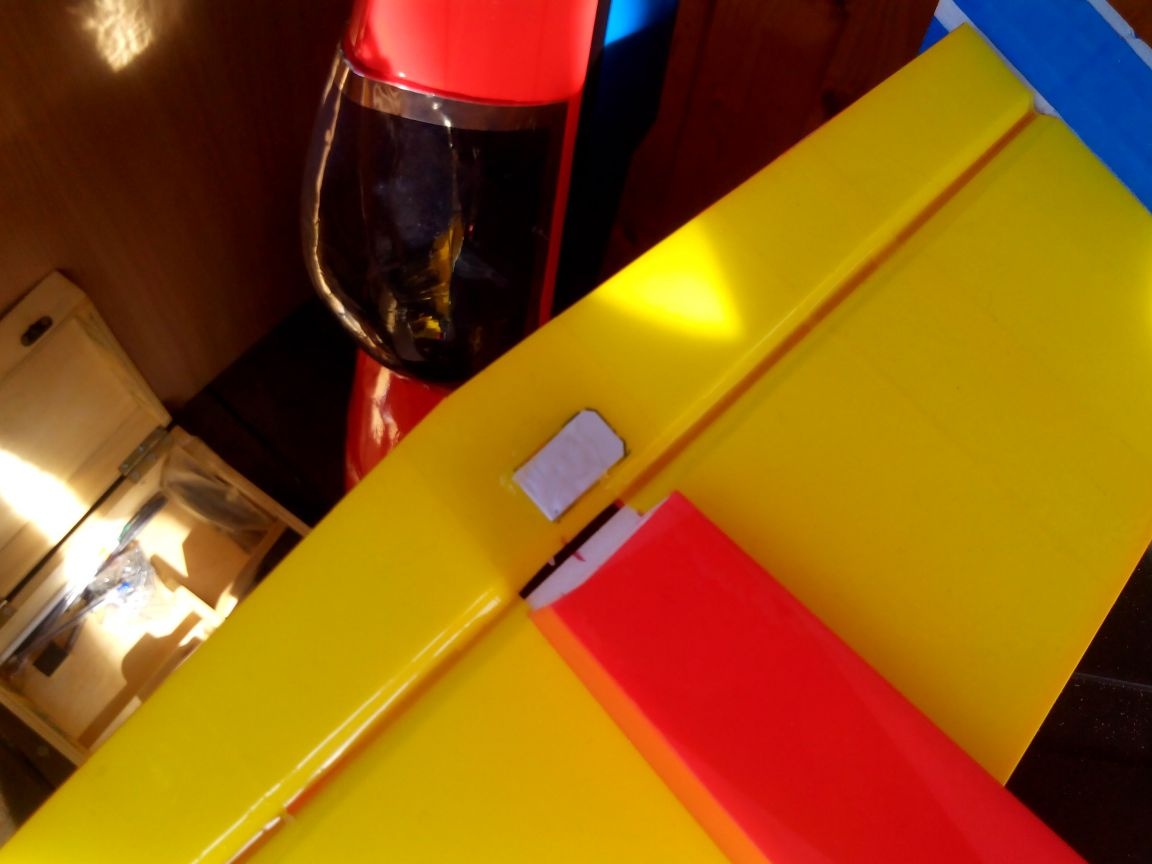
We cut out a place under the wing and paste rectangles from the ceiling in places where there will be bamboo sticks for gum.
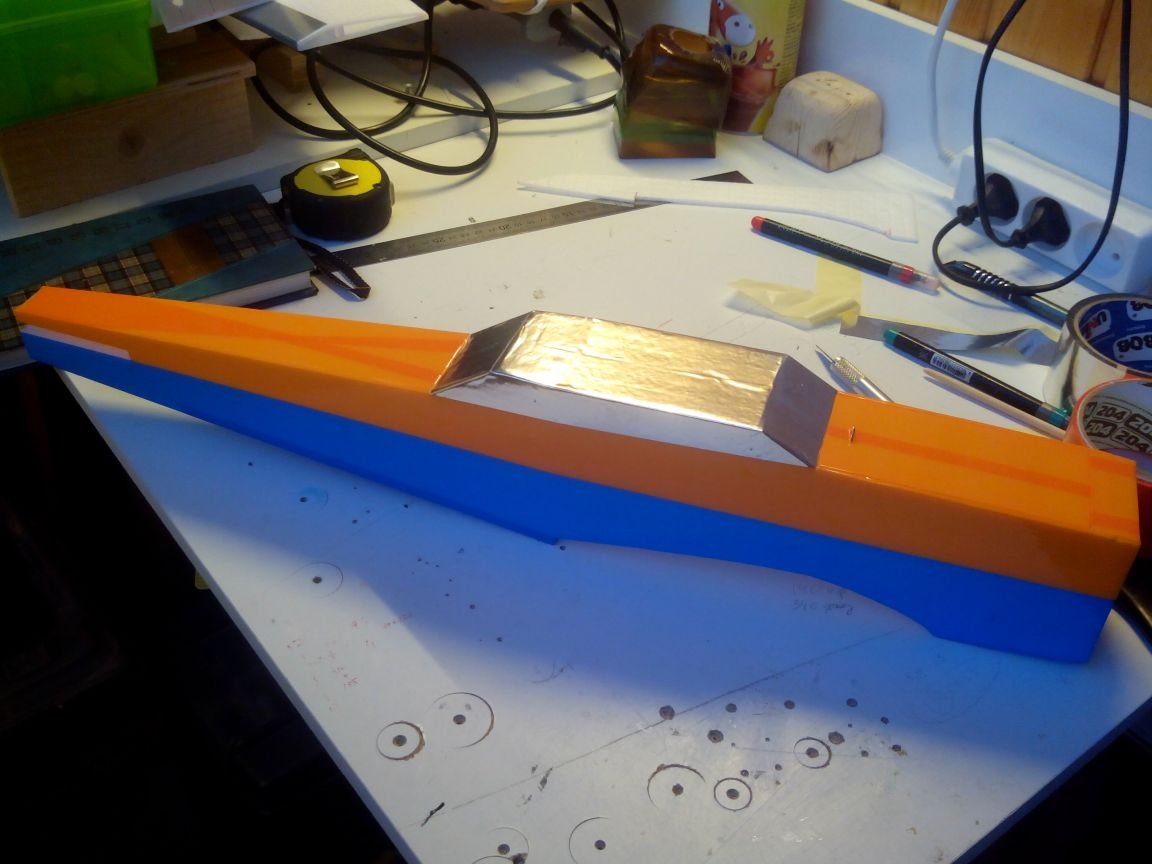
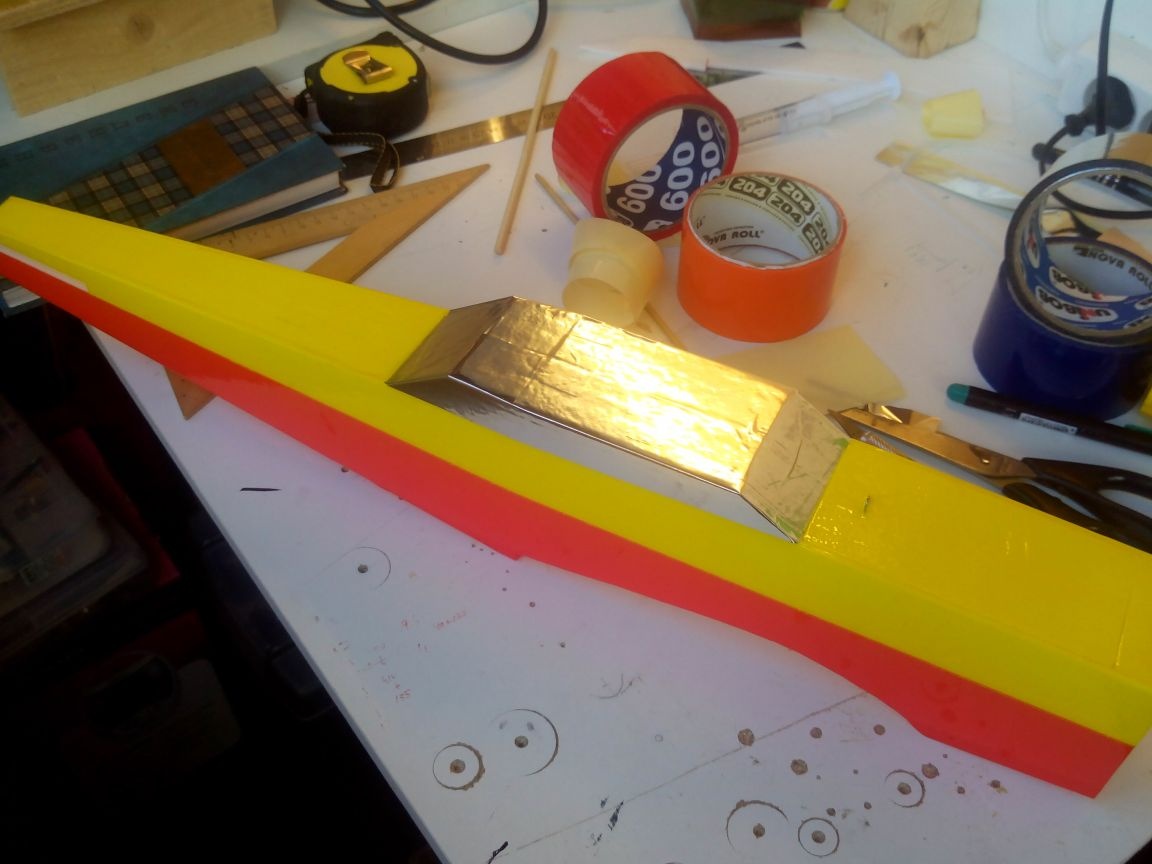
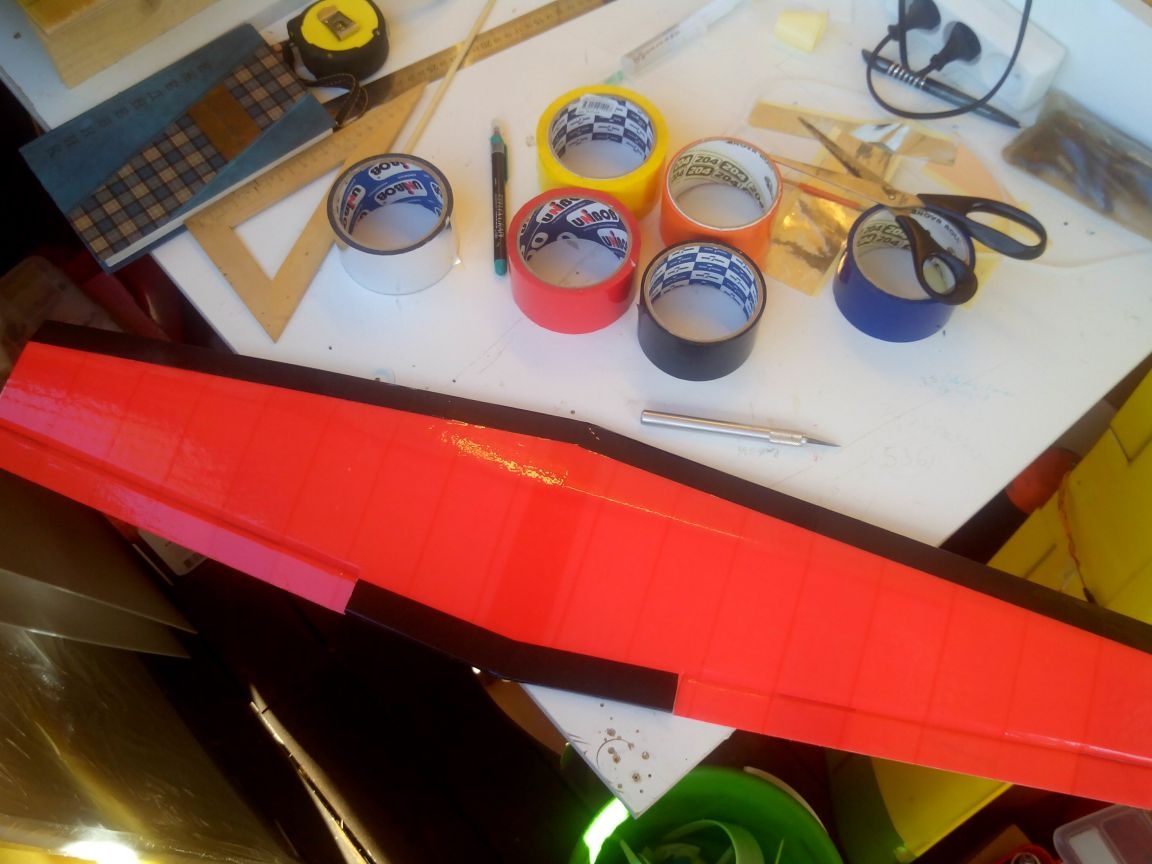
You can glue the fuselages with tape. Top and bottom are in different colors for good readability. In addition, each aircraft has its own color - so as not to confuse them in battle. We glue the pseudocabin with metal tape.
We glue the tail feather servos using a thermal gun.
With an awl, we make holes in those places where additional pieces of the ceiling were glued from the inside of the fuselage walls, and we glued bamboo sticks for the rubber bands of the wing mounts. The protrusion is about 15 mm from each side.
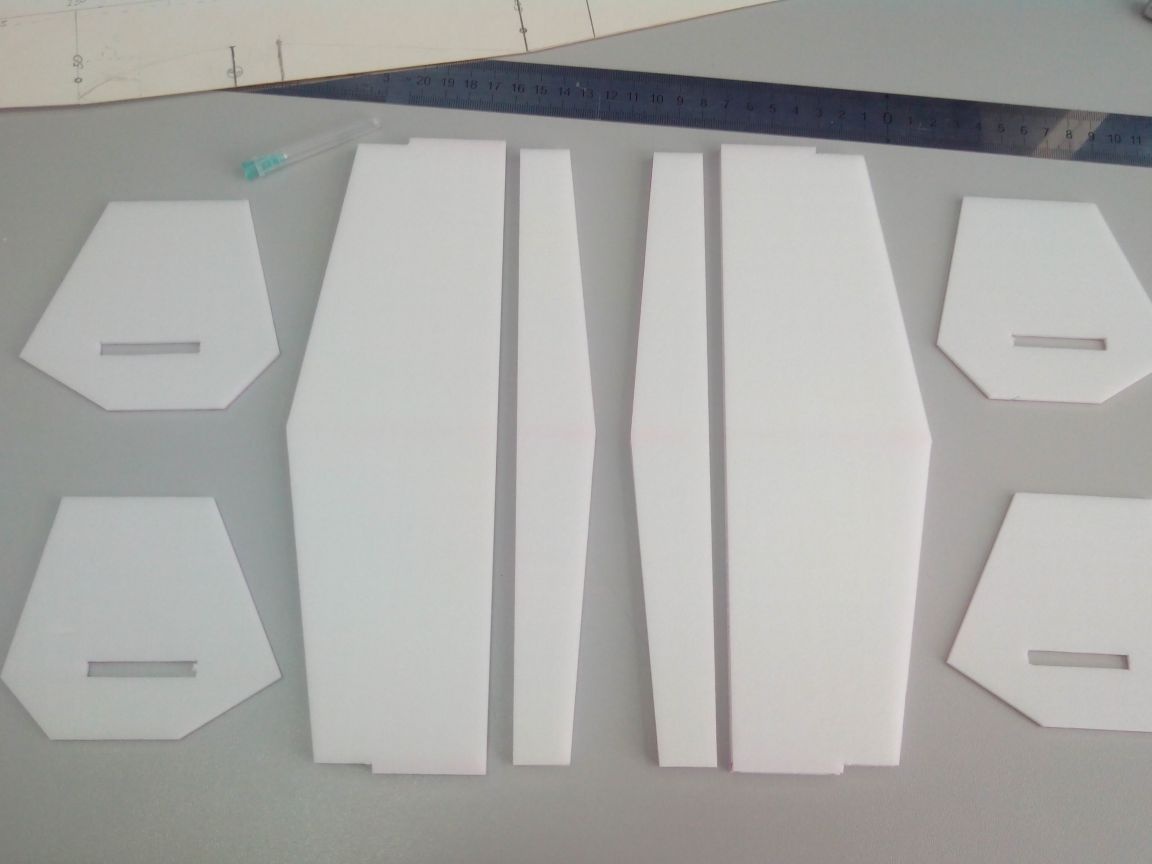
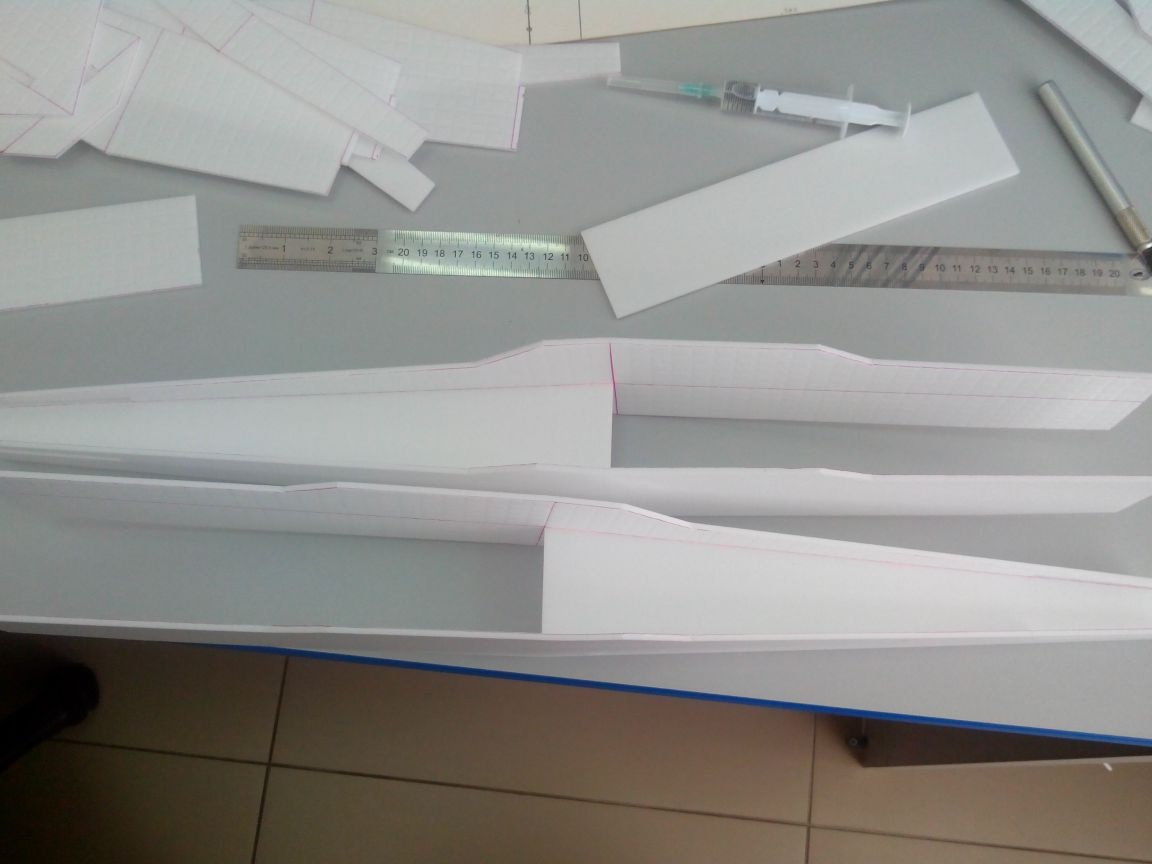
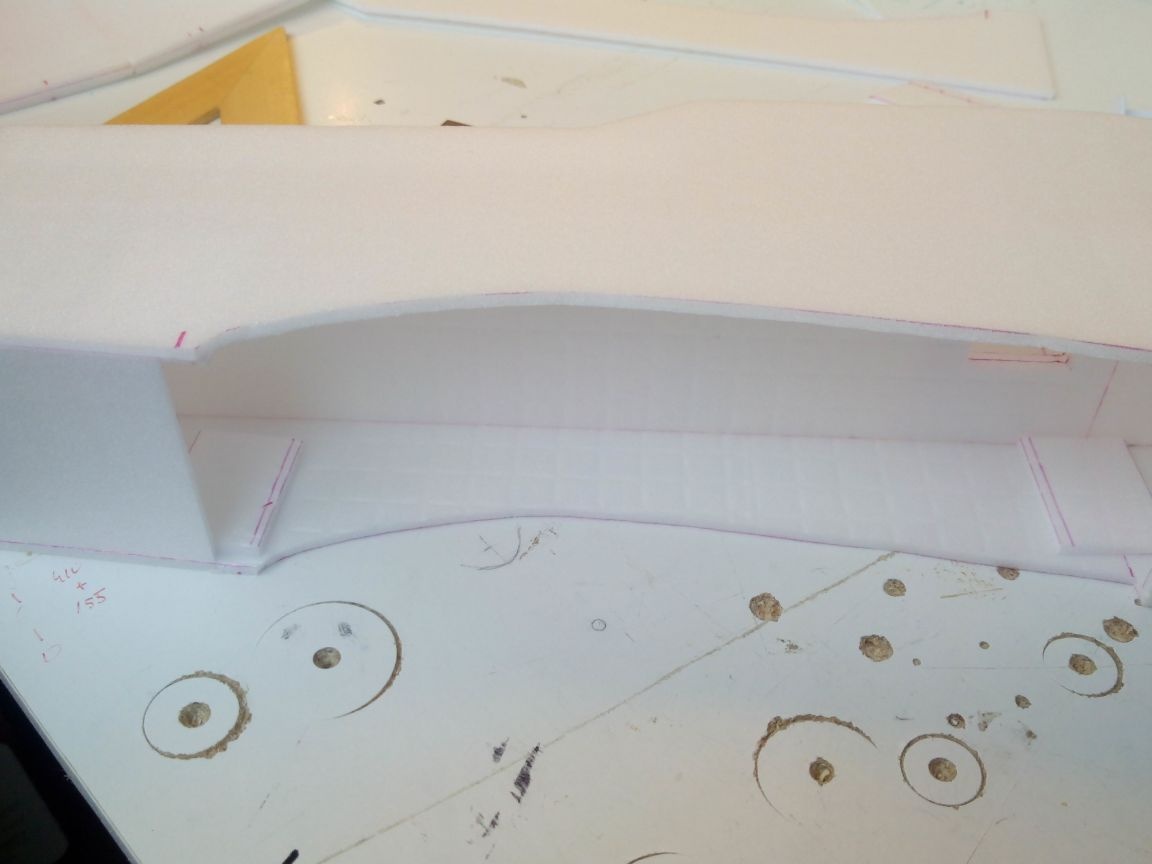
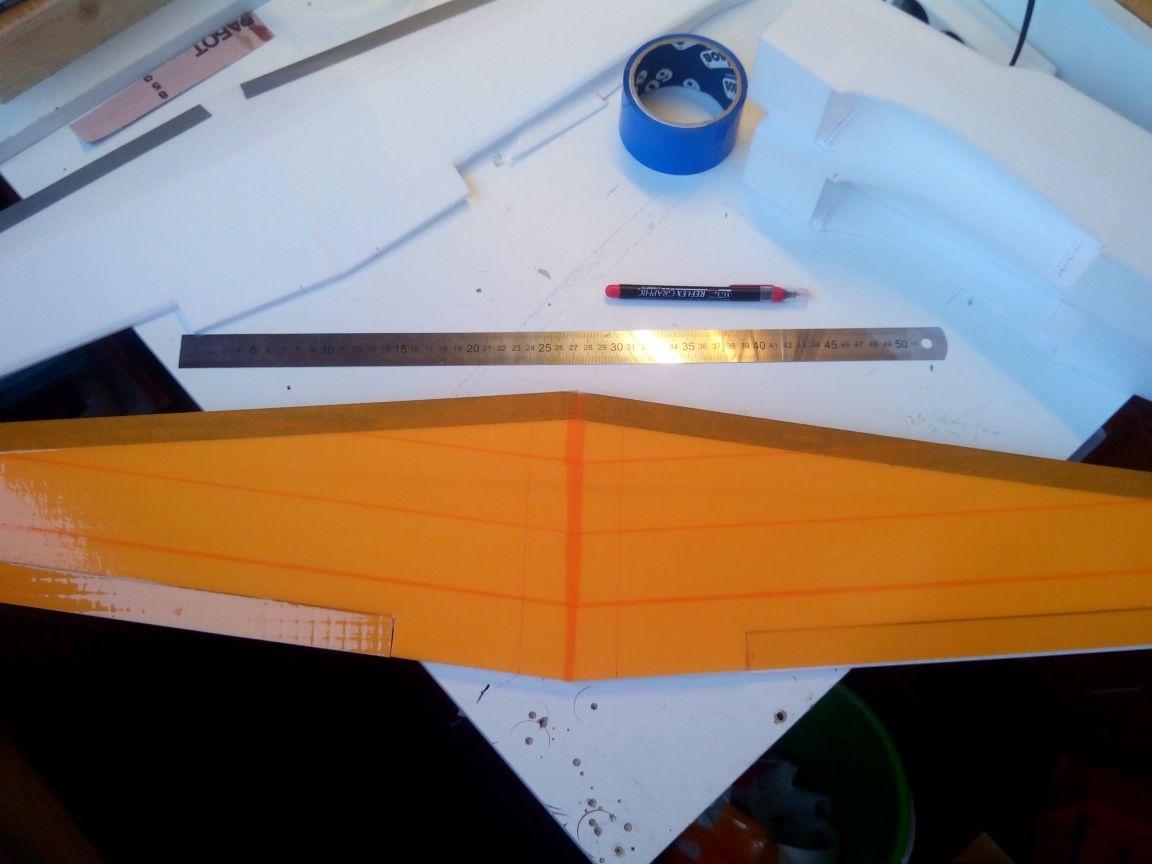
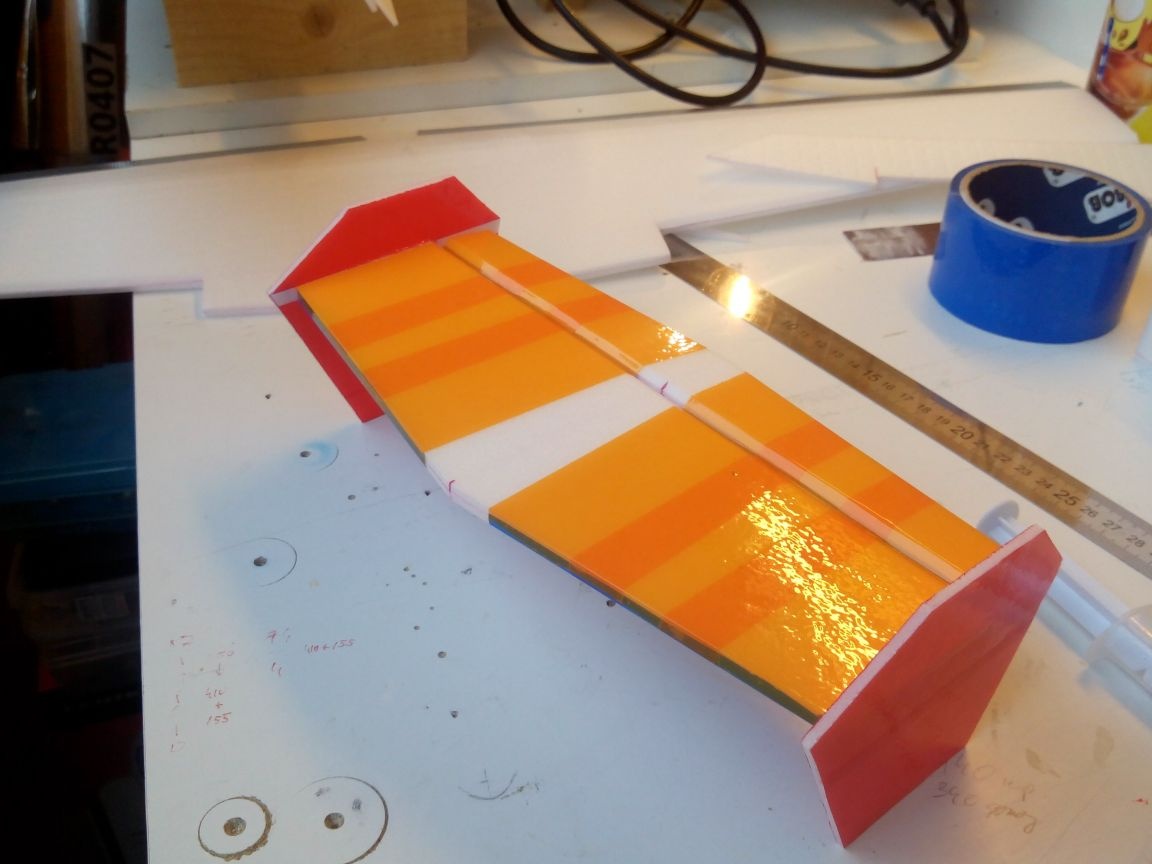
Step 3. Making wings
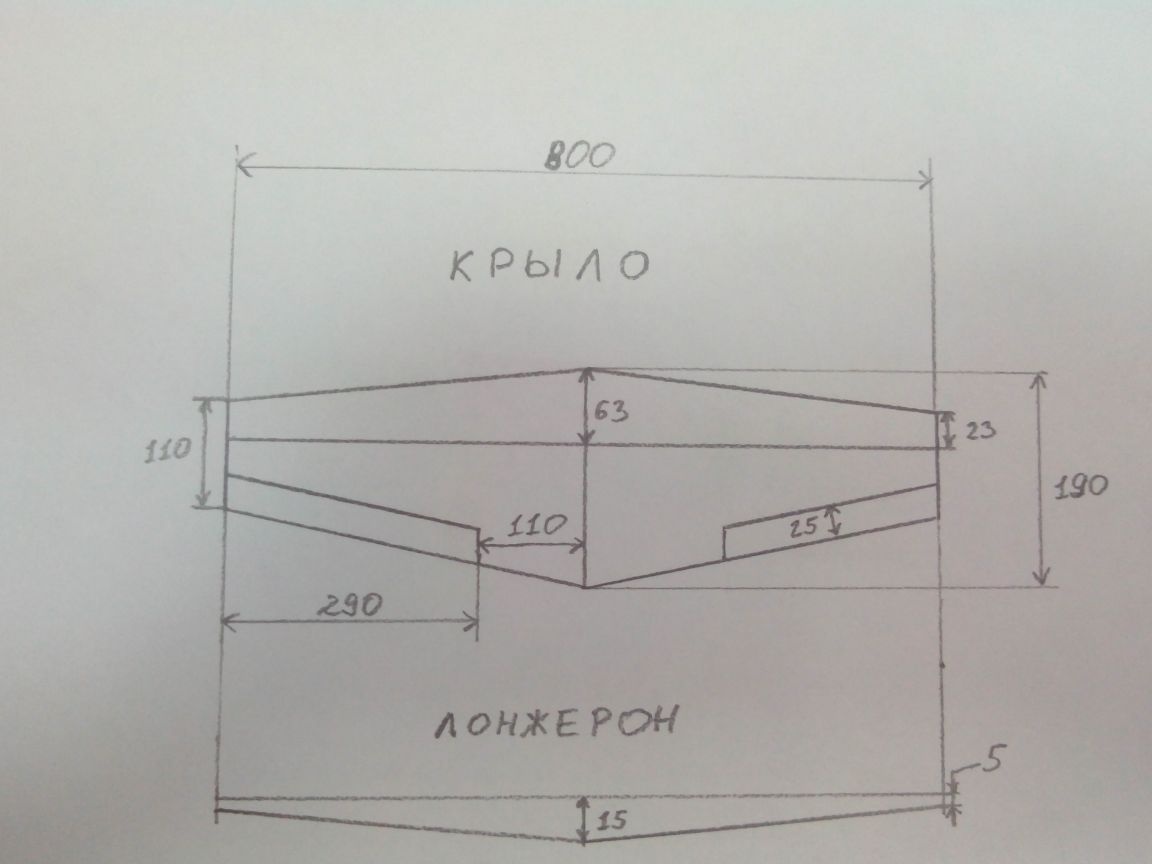
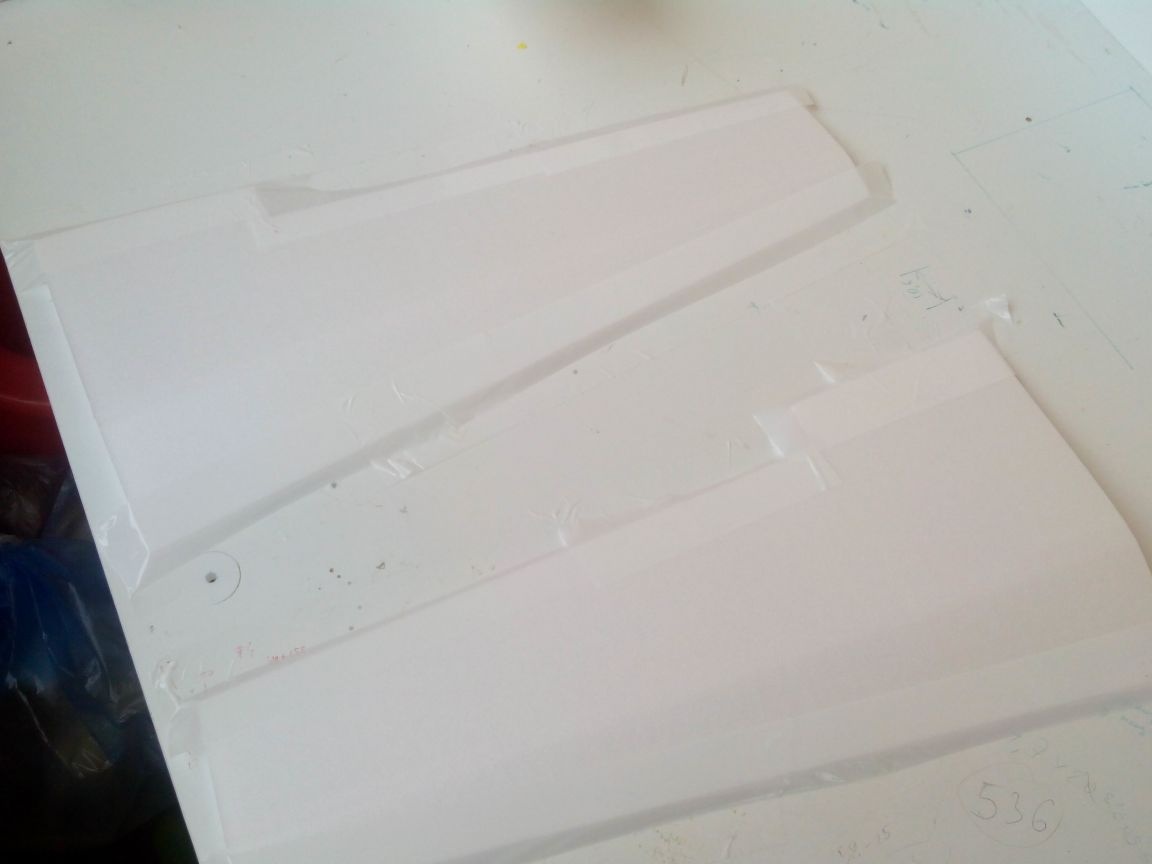
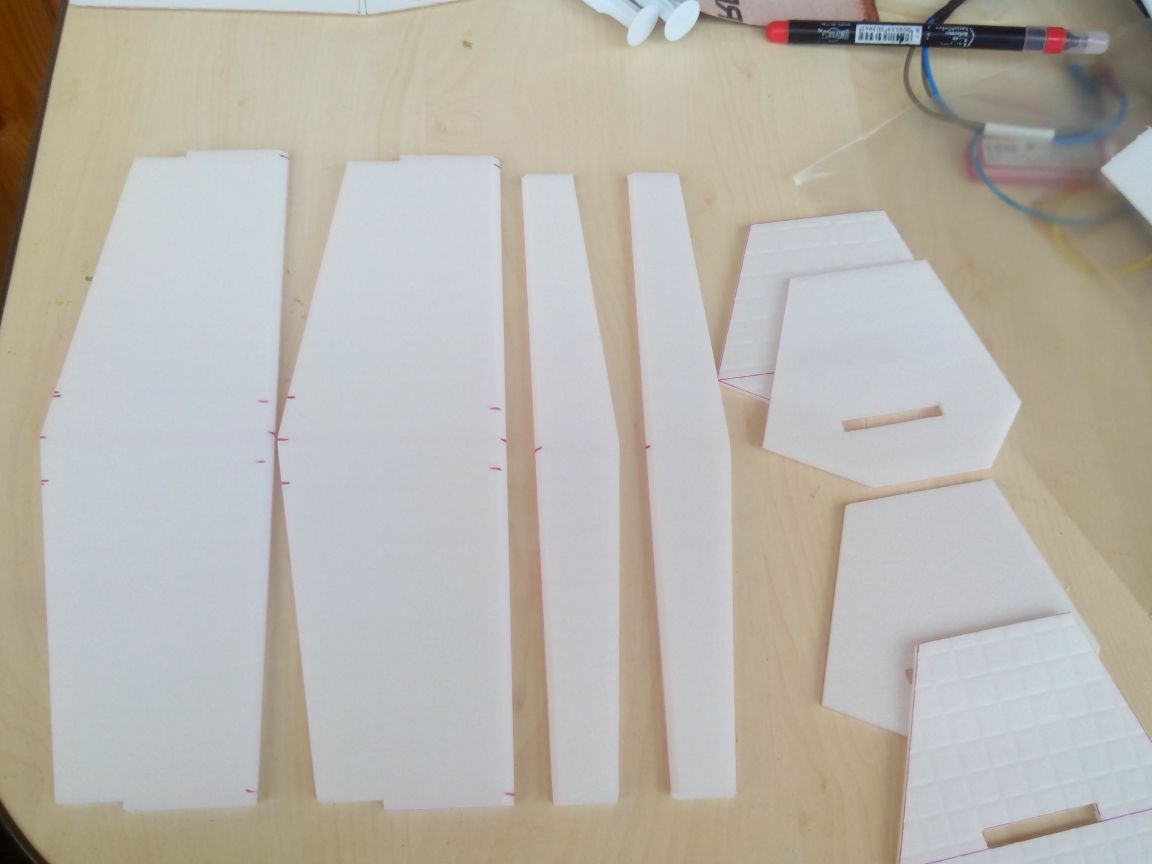
On the sheet of the ceiling we mark the halves of the wings.
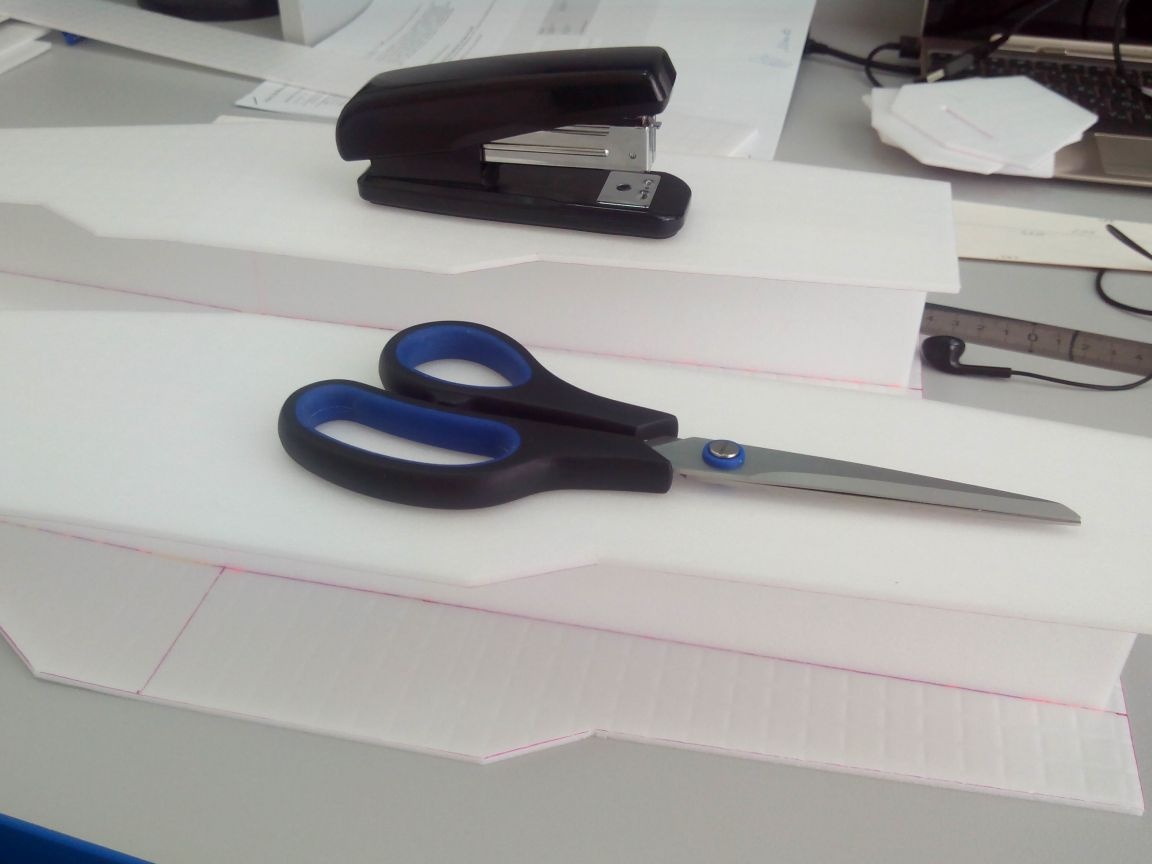
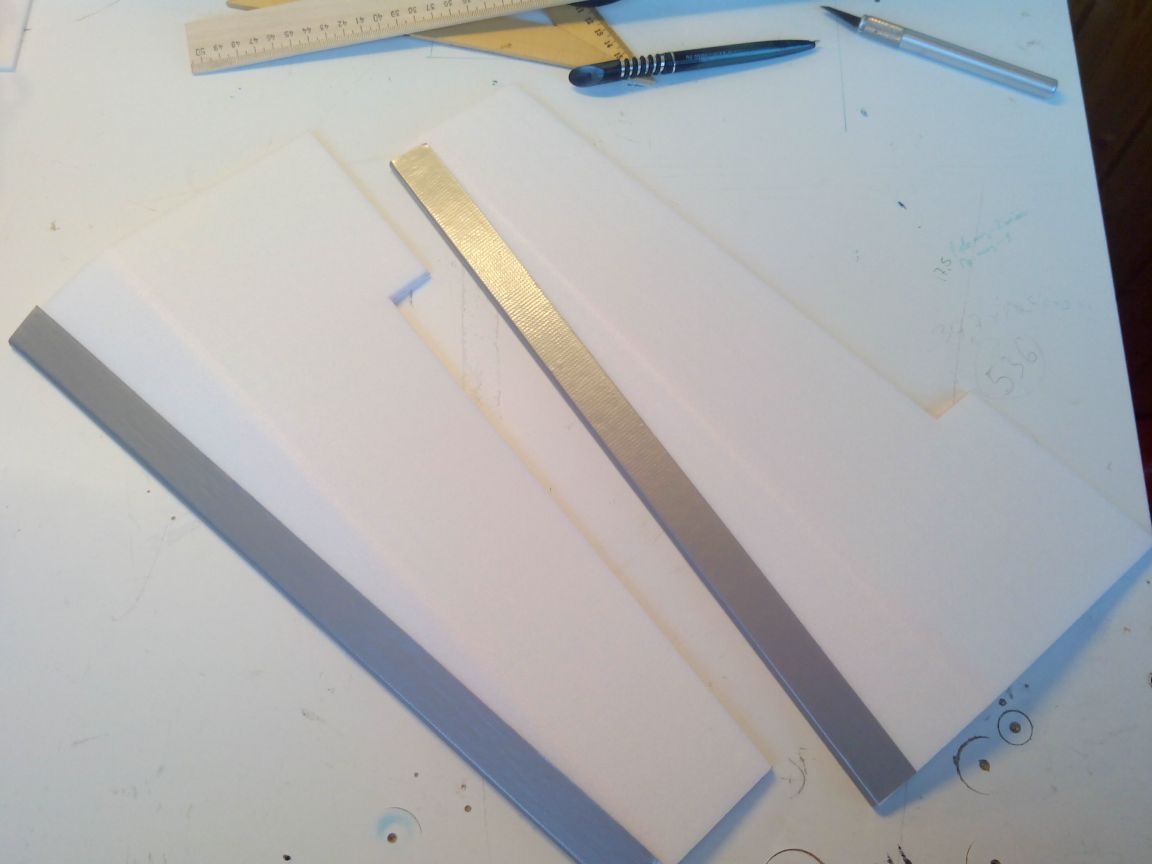
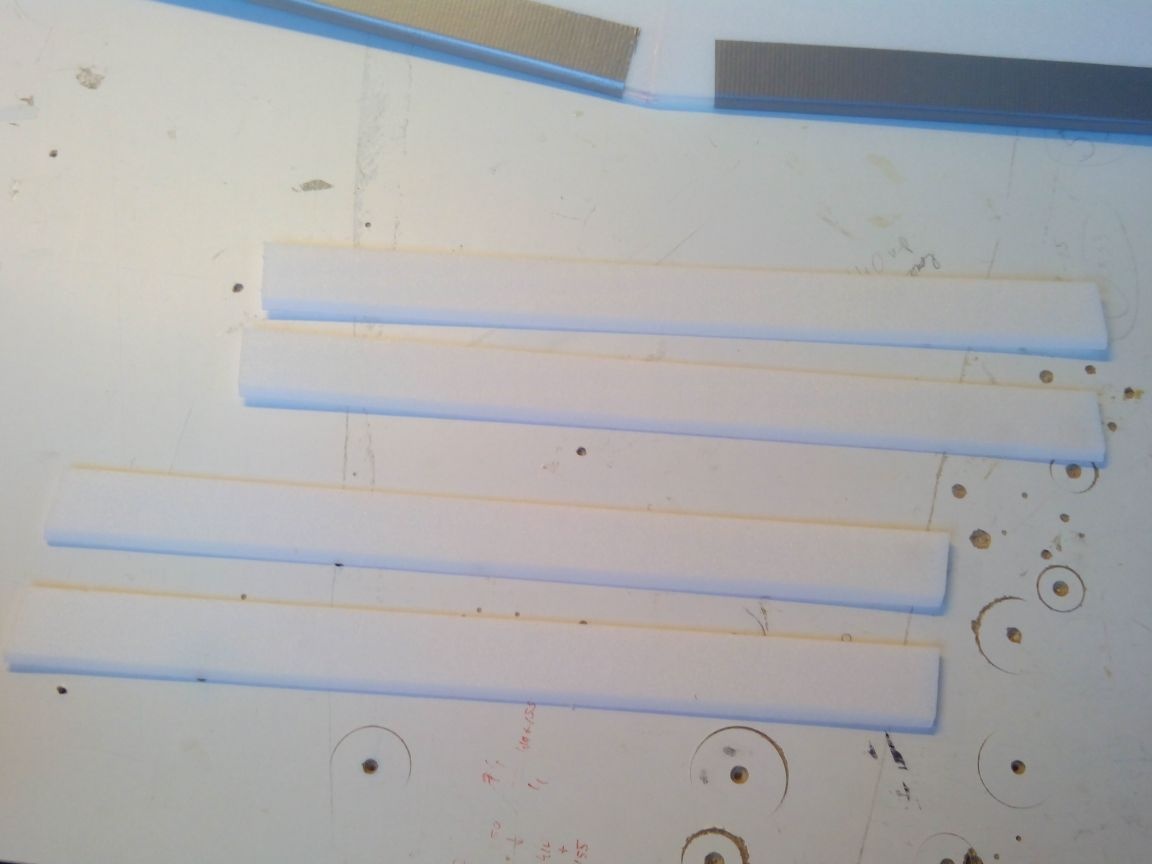
We cut out the details of the wings and side members from the ceiling.
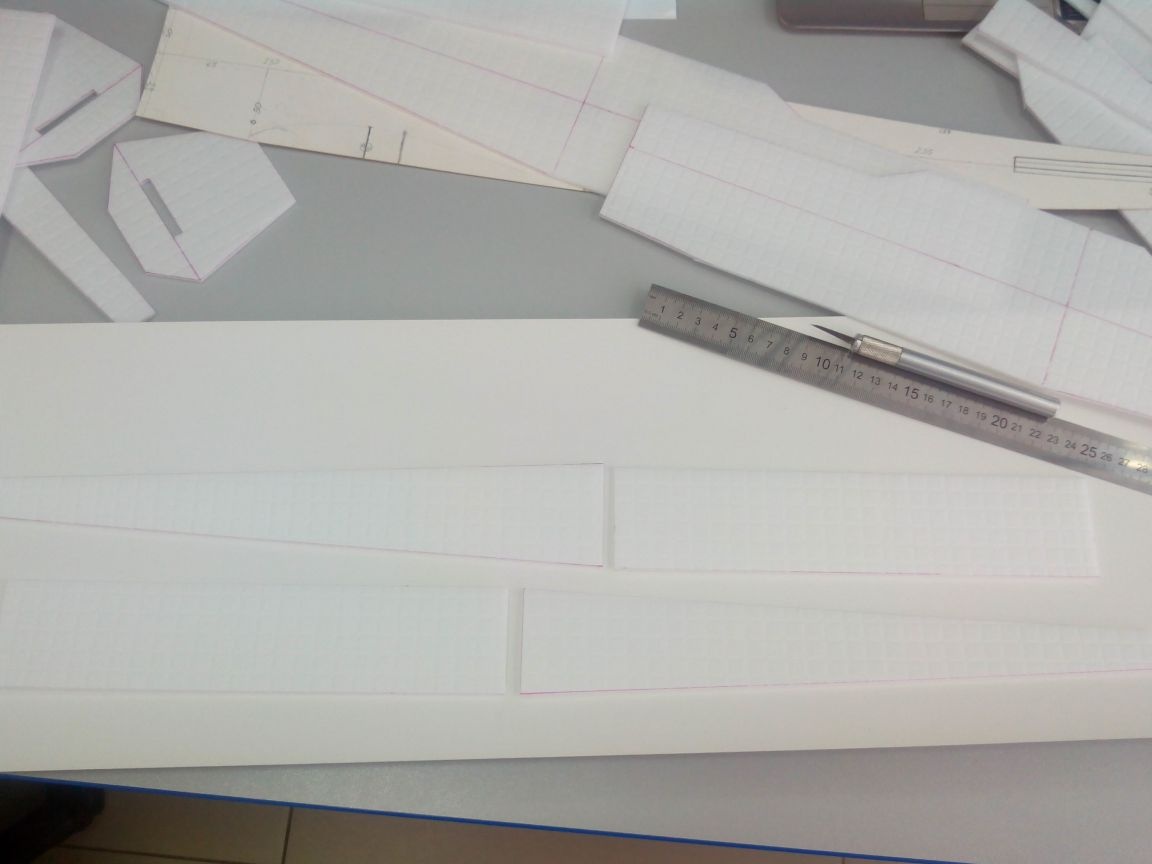
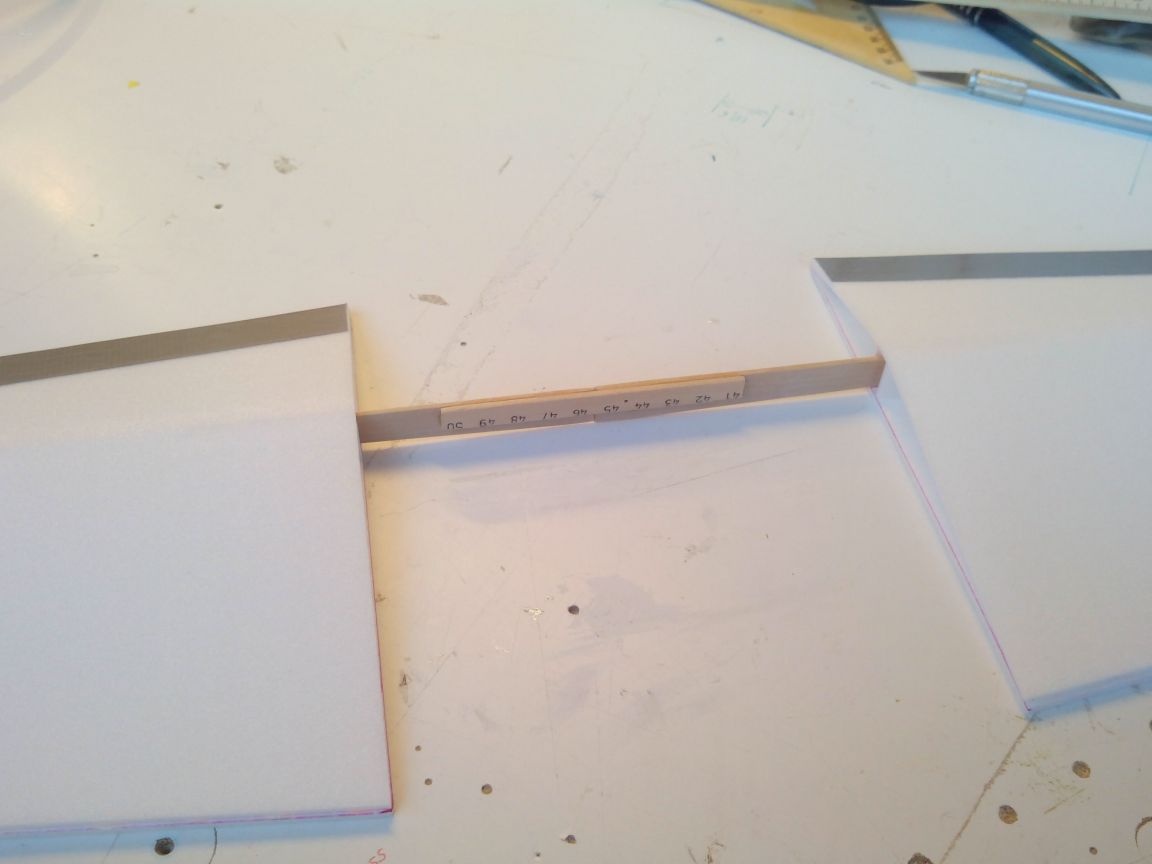
We glue the ceiling spars to the wing halves.
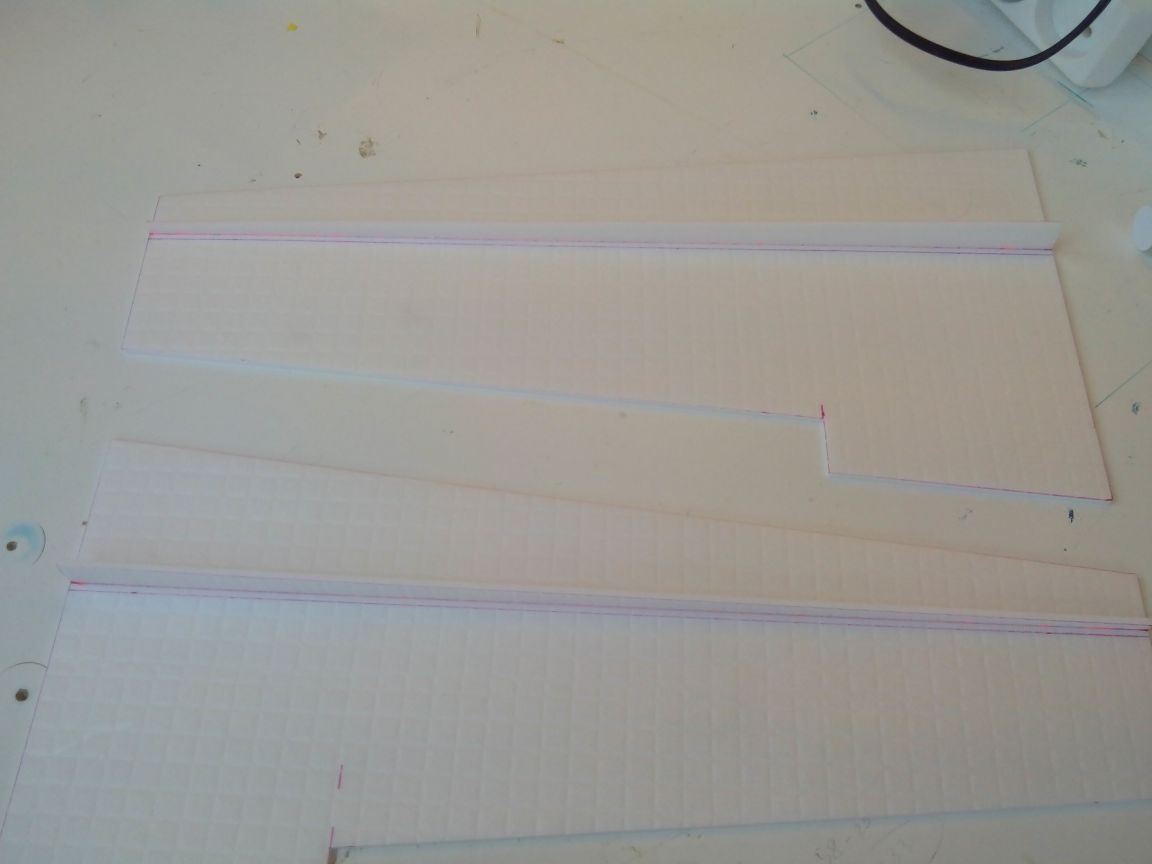
Between them, the distance is 3 mm, in the central part - 6 mm (in this place there will be a connecting part of the side member from the ruler).
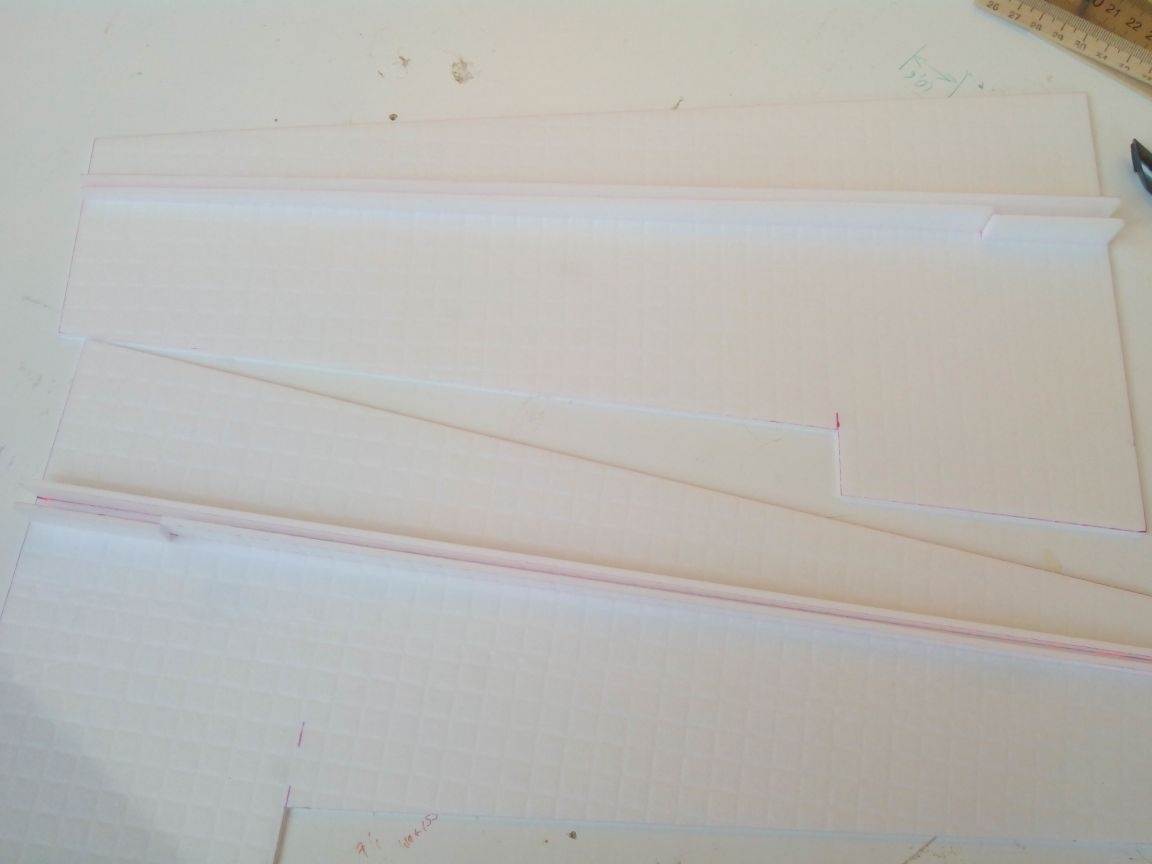
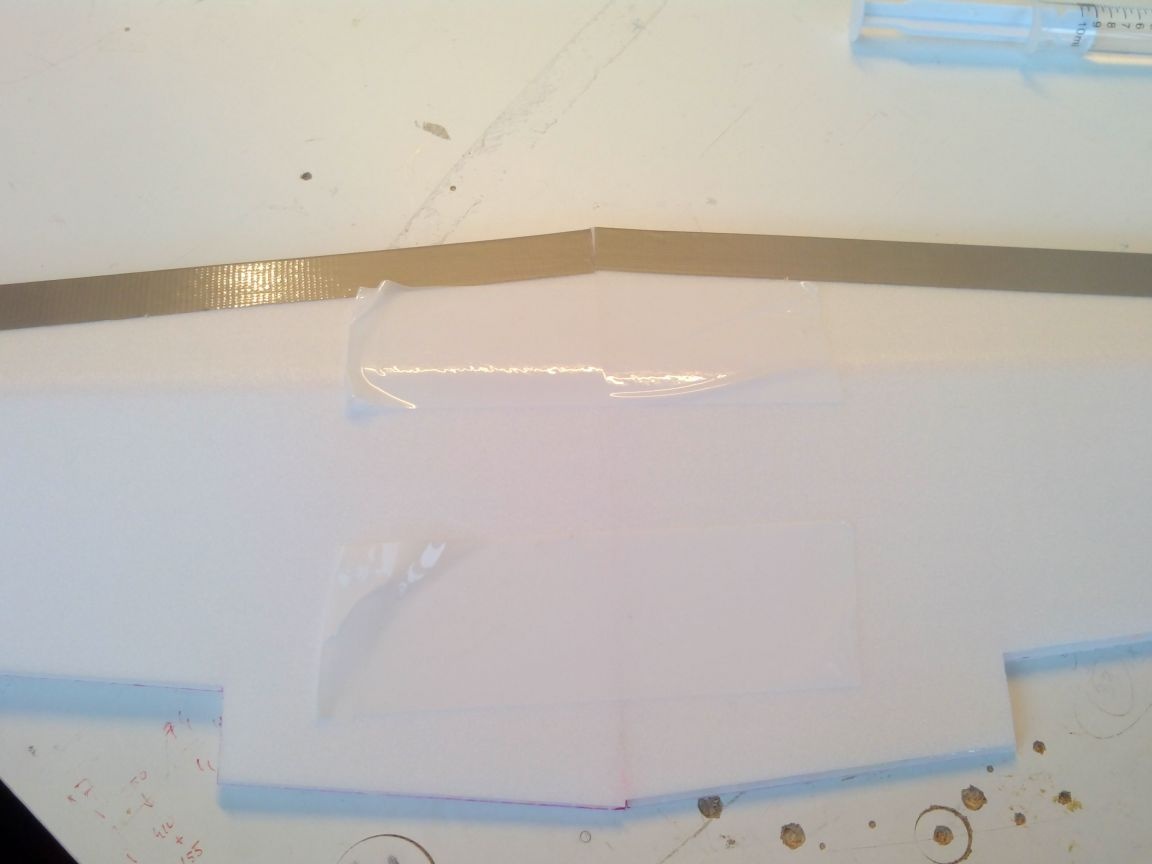
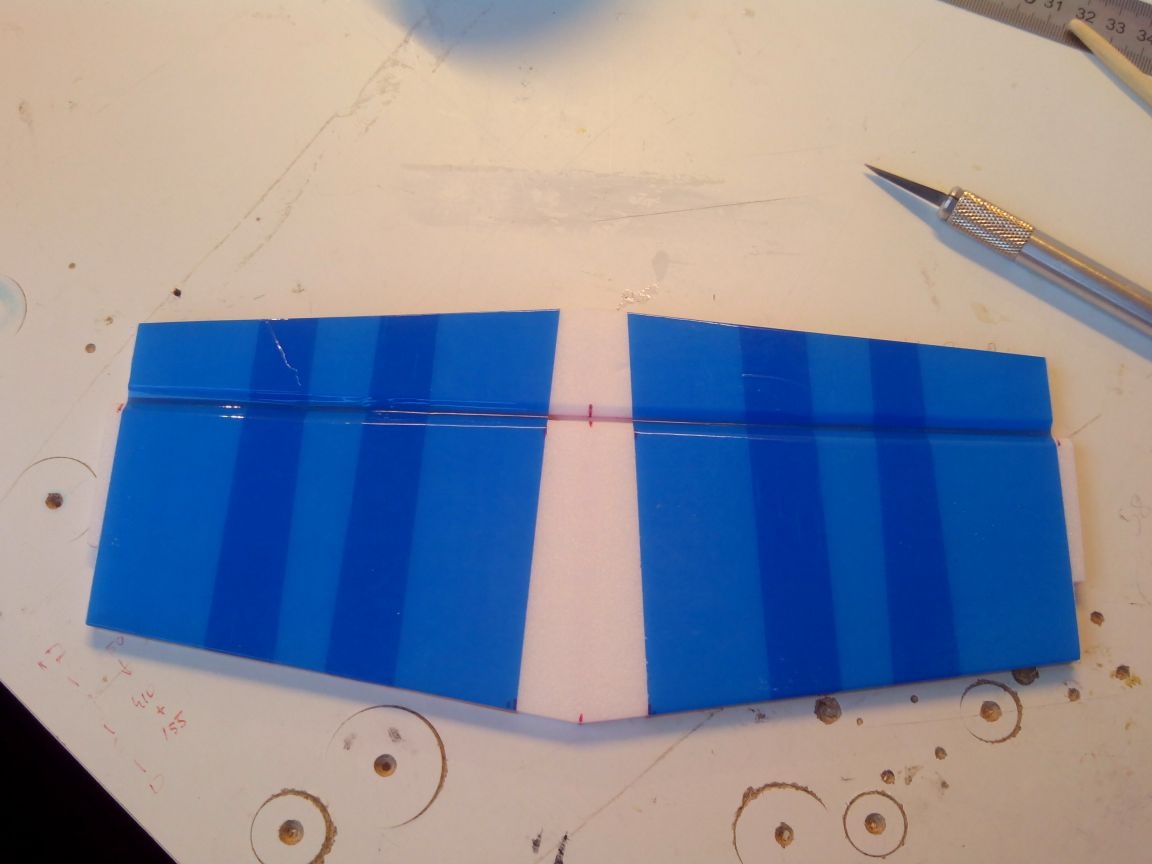
Glue the upper wing planes to the spar.
We glue the edges, pressing the wing halves to the table (with adhesive tape or cargo).
The leading edge can be reinforced with reinforced tape.
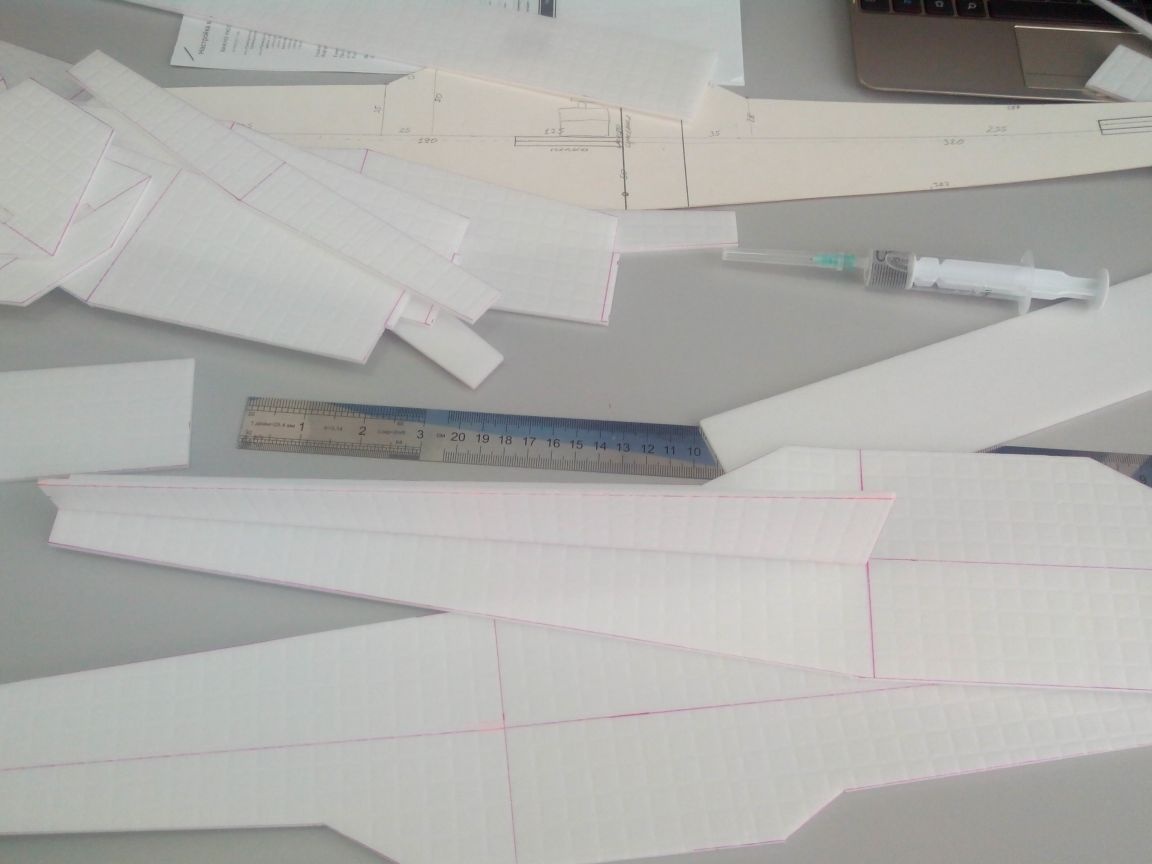
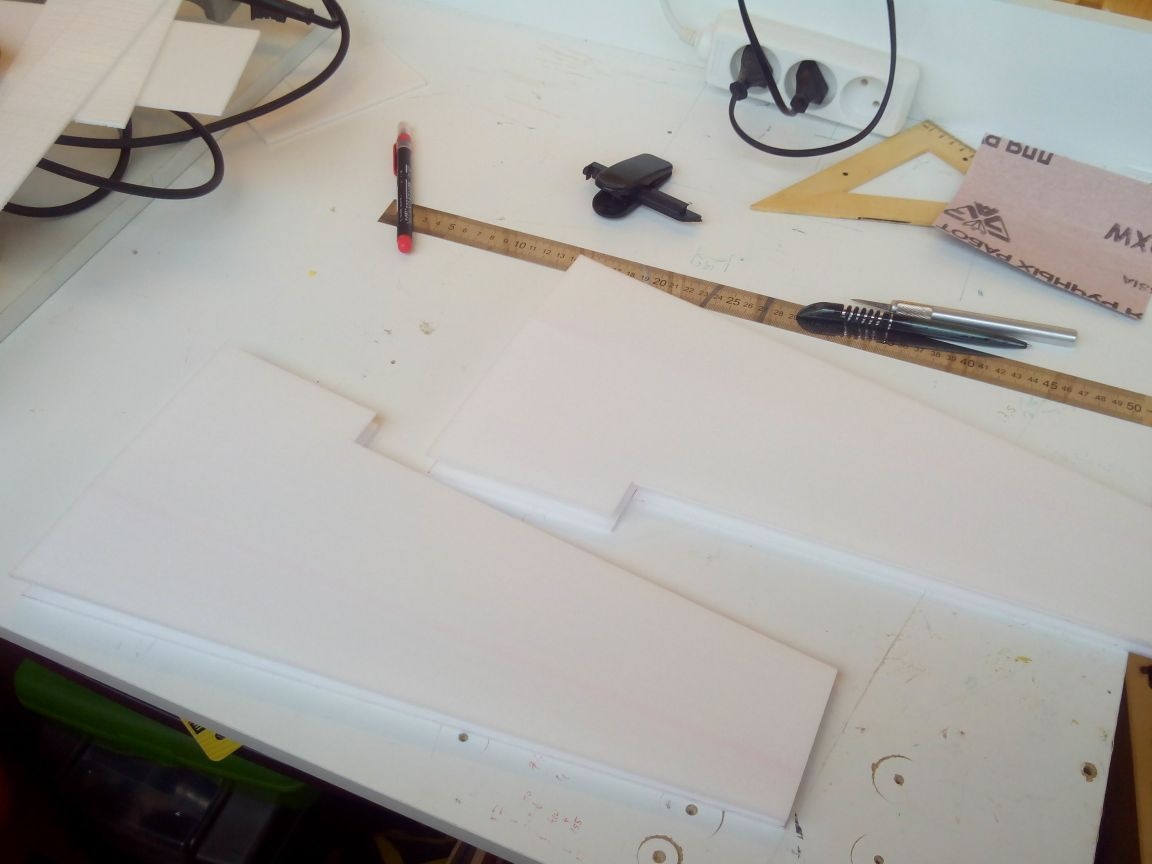
We mark on the wooden ruler spars for two wings at once.
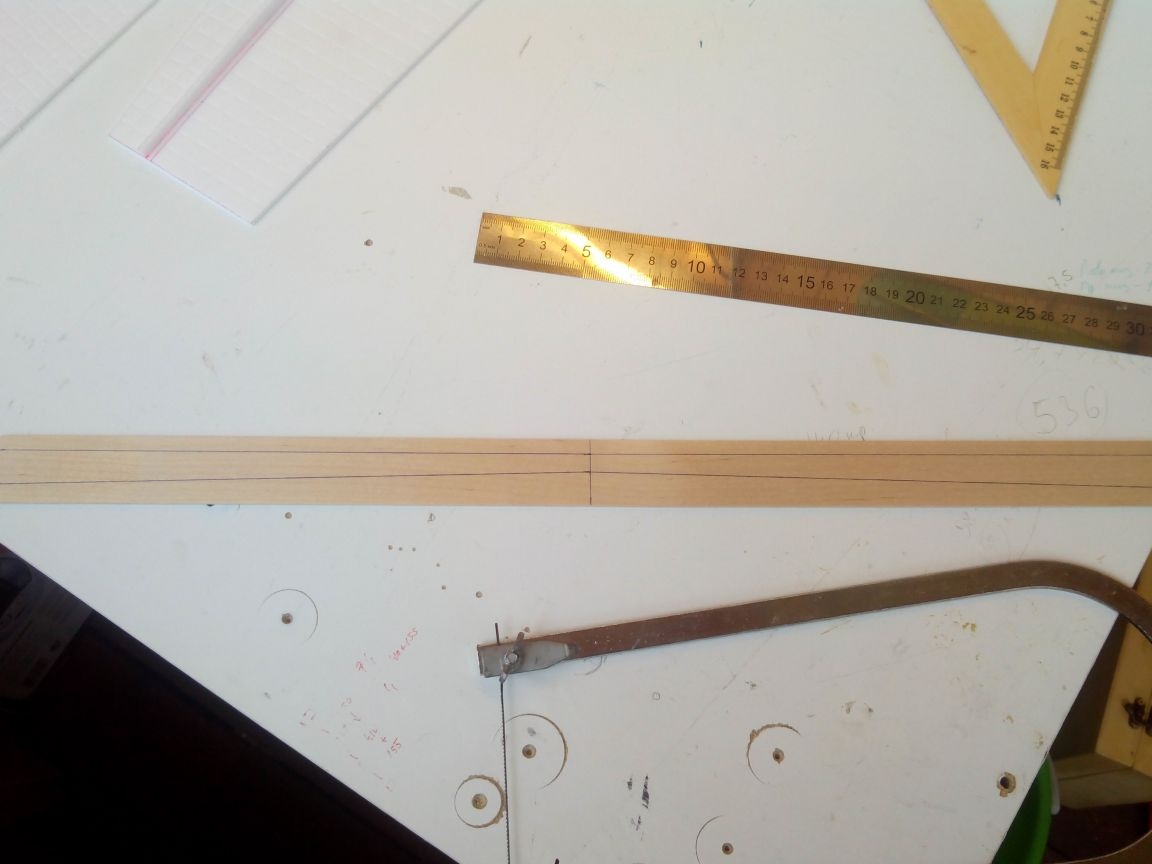
We cut out the parts of the spar with a jigsaw.
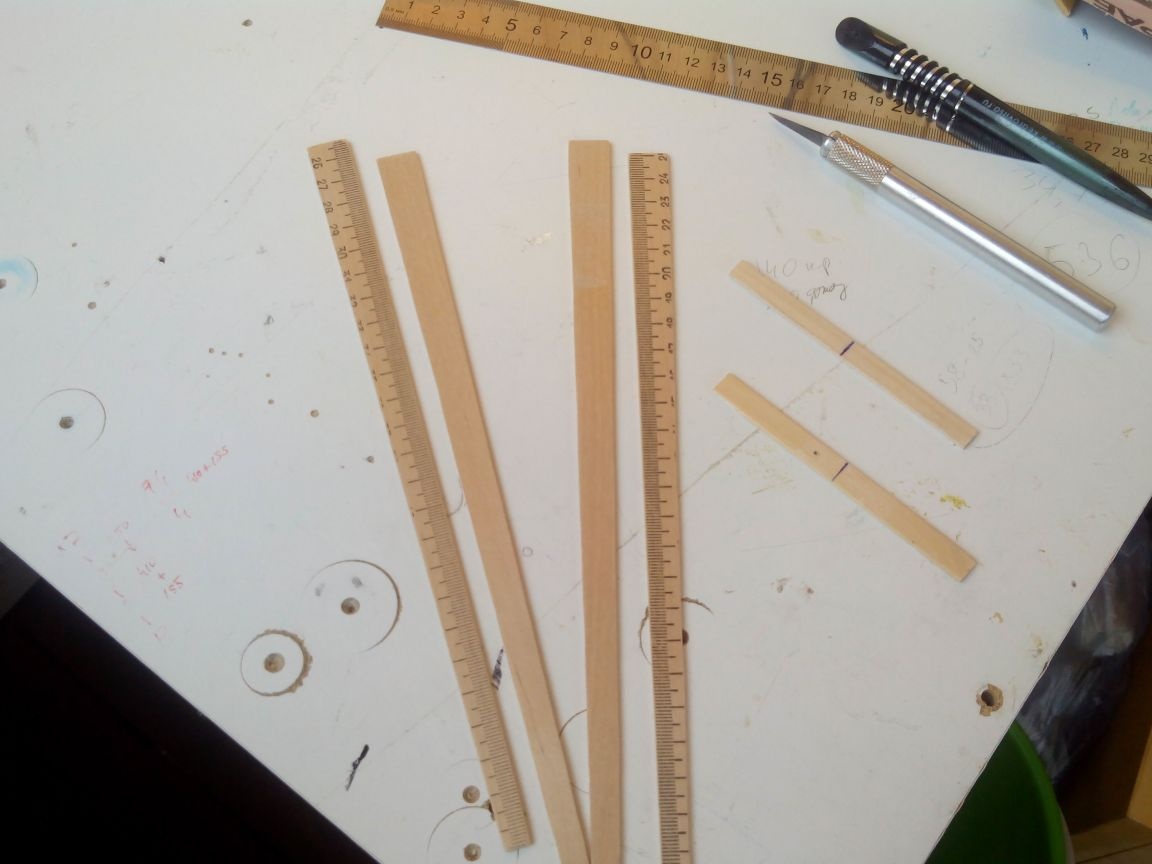
We glue the side members with PVA glue.
After the glue dries, insert the spar into the wing halves with the flat part up. Gluing it into the wing is not necessary, it will be easier to repair after accidents.
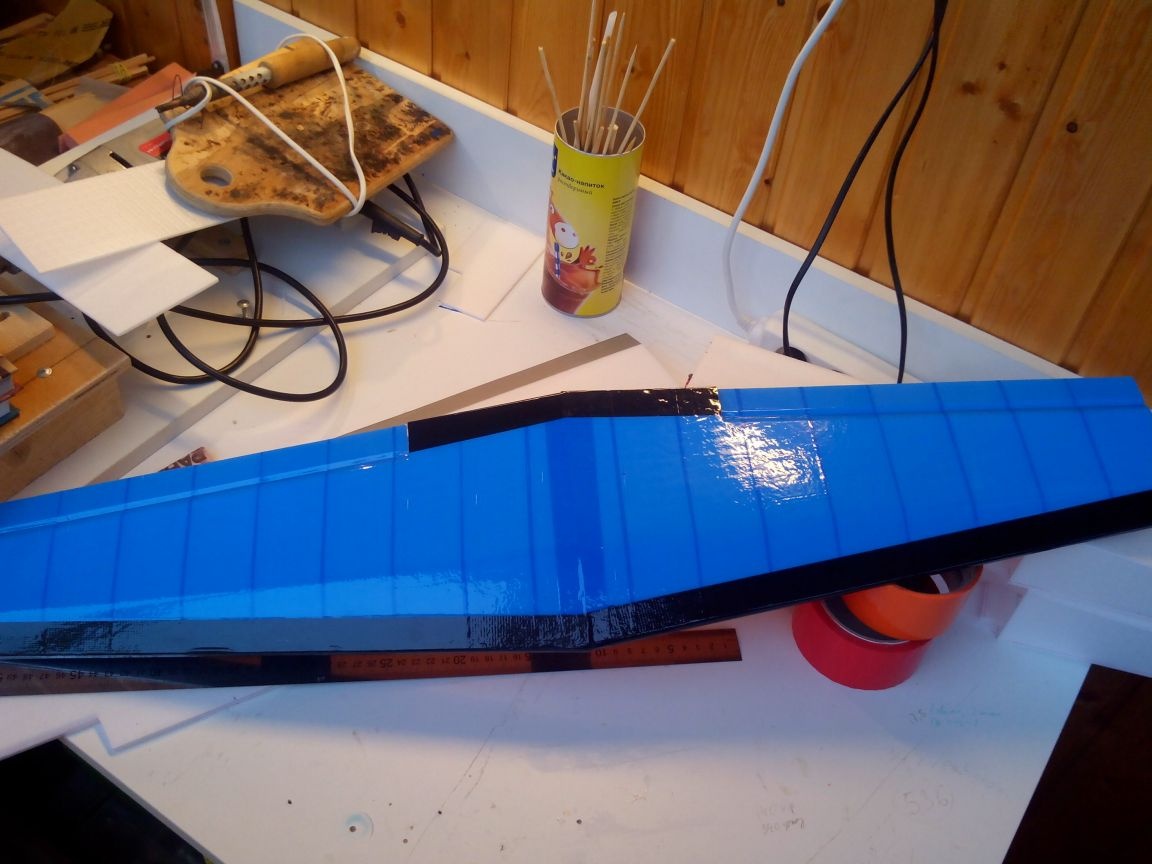
We glue the ends of the wings with glue and glue them, fixing it with tape.
Ailerons (1 layer of the ceiling) are sanded at an angle of 45 degrees.
Aileron loops - adhesive tape that will fit the wing.
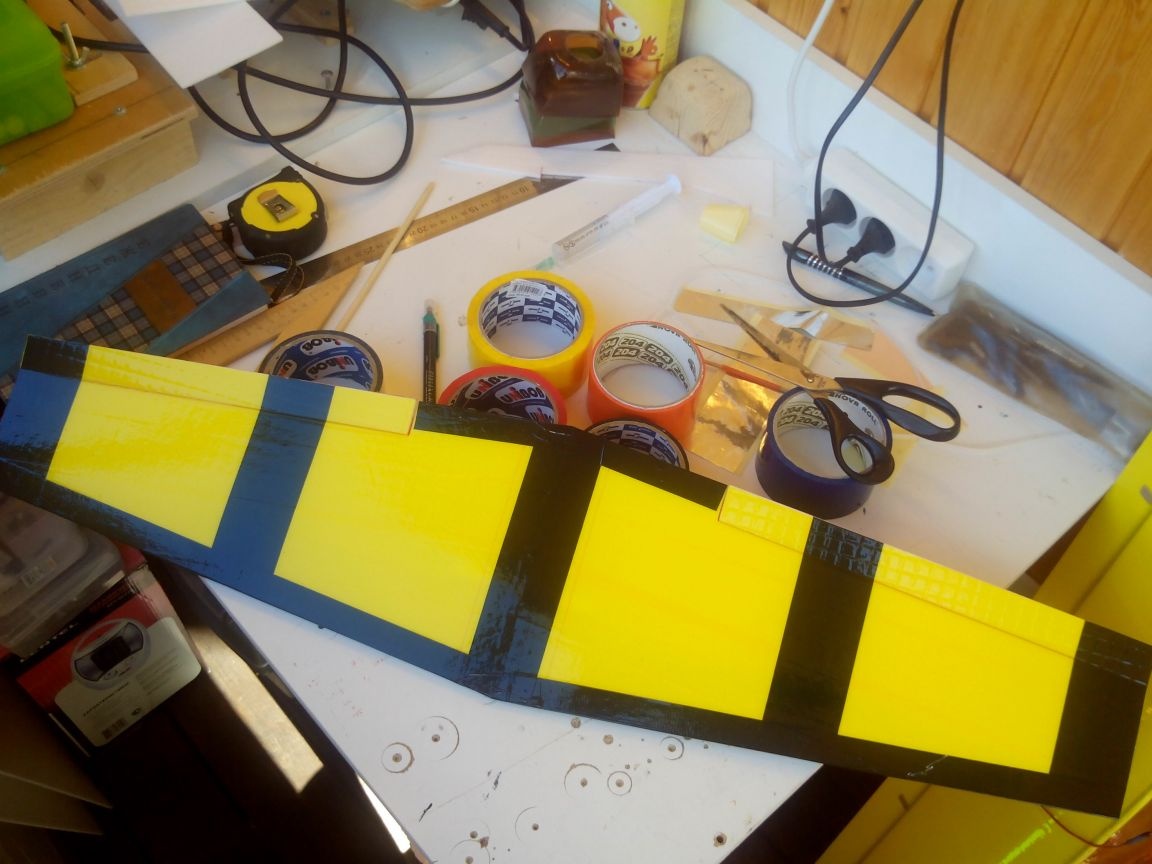
Yes, I took the colors from the fuselage. The color of the top of the fuselage is on the lower plane, and vice versa.
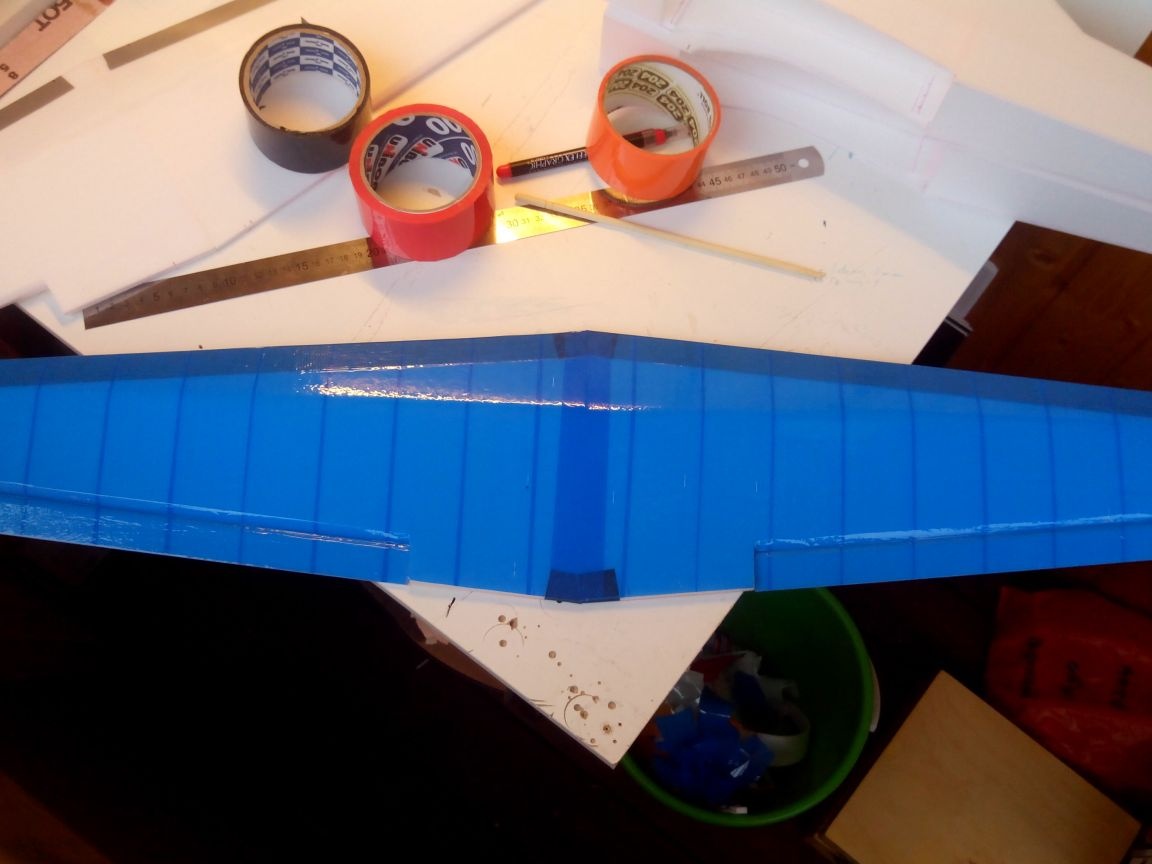
From the bottom we add black stripes to the wing - for good readability of the model in the air.
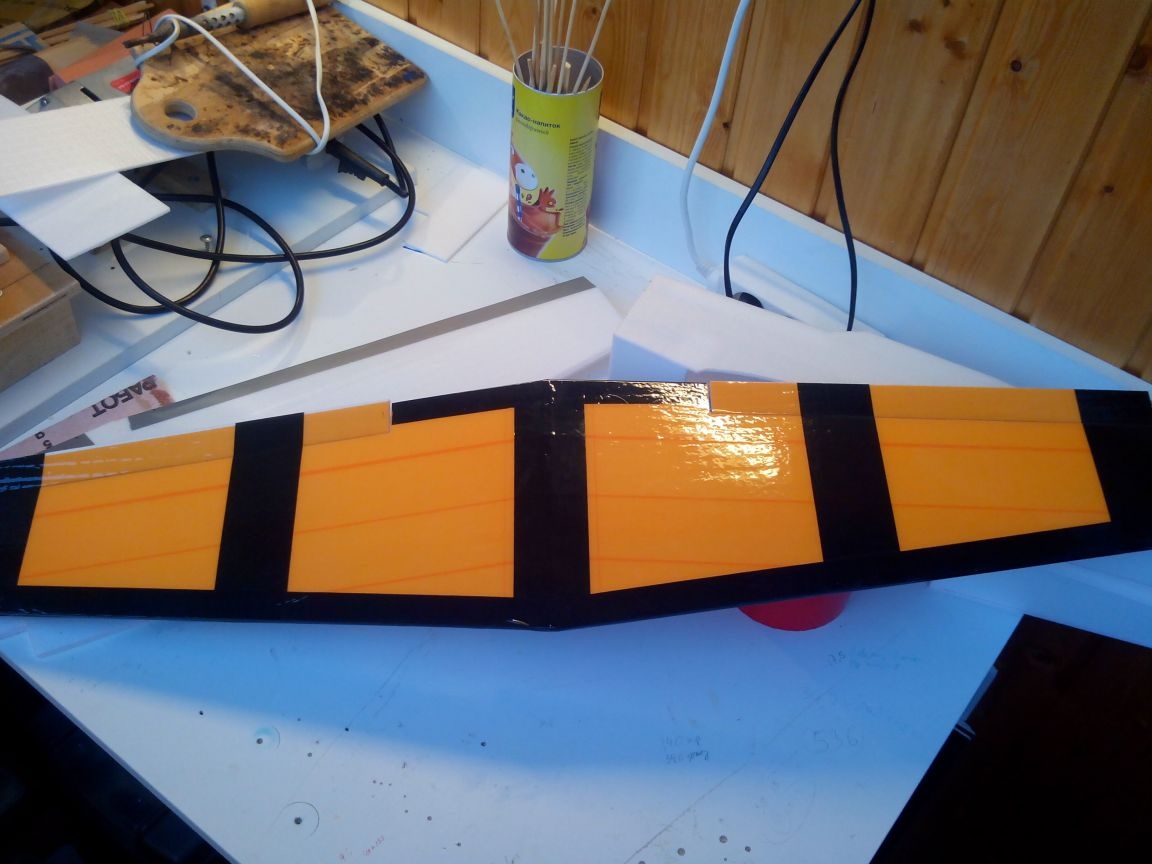
The front edge is decorated with black tape.
The second wing is similar.
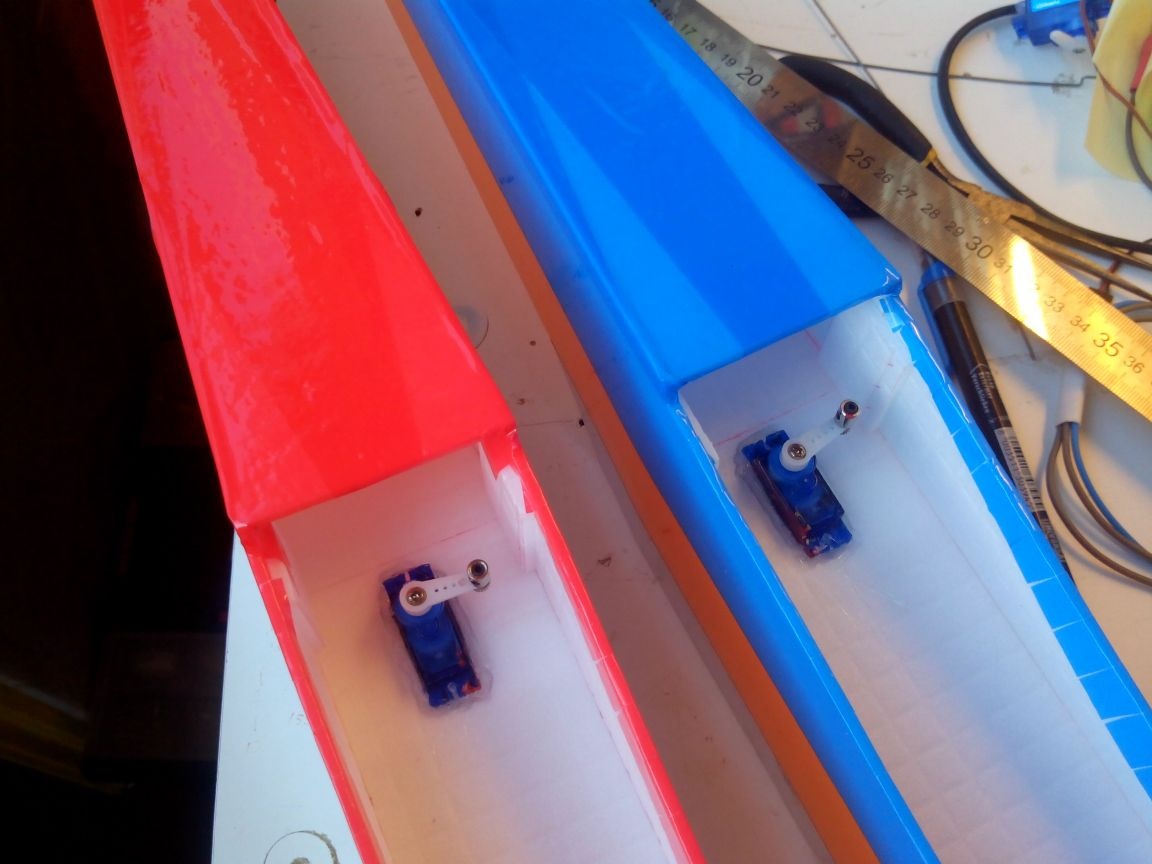
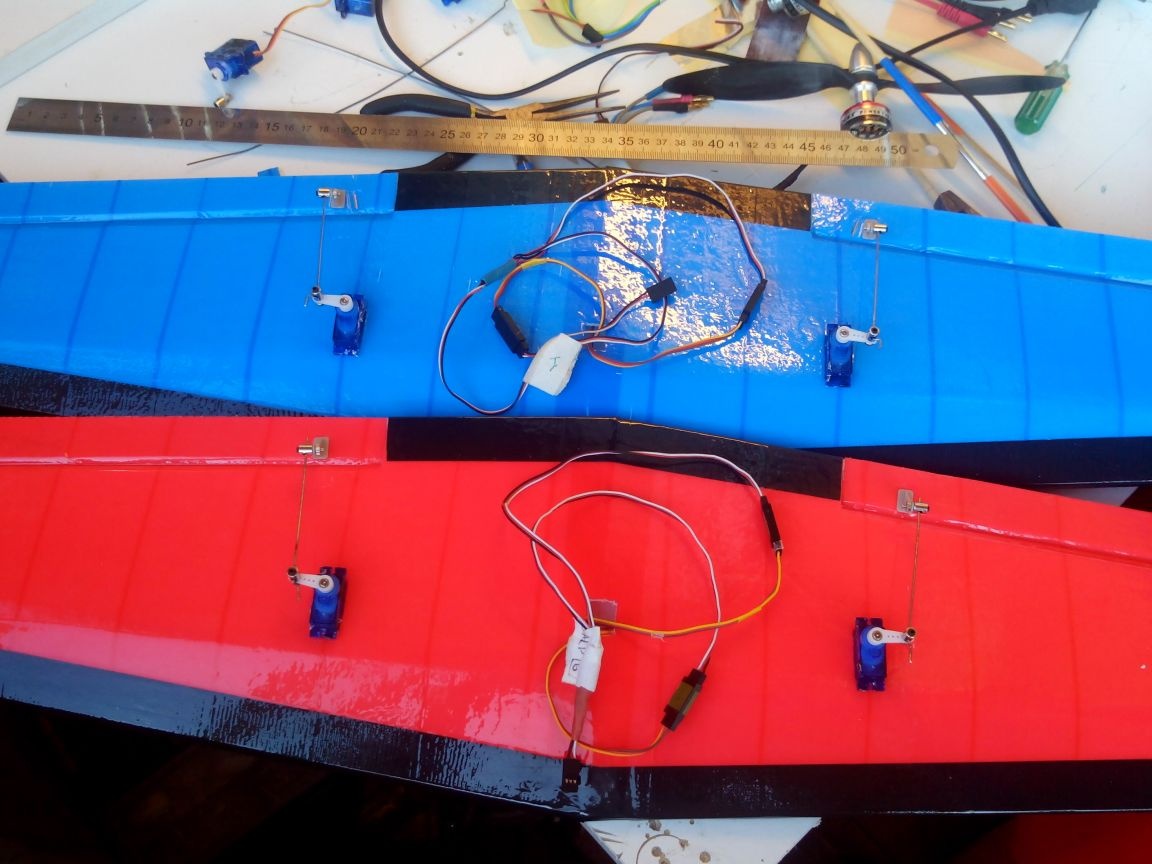
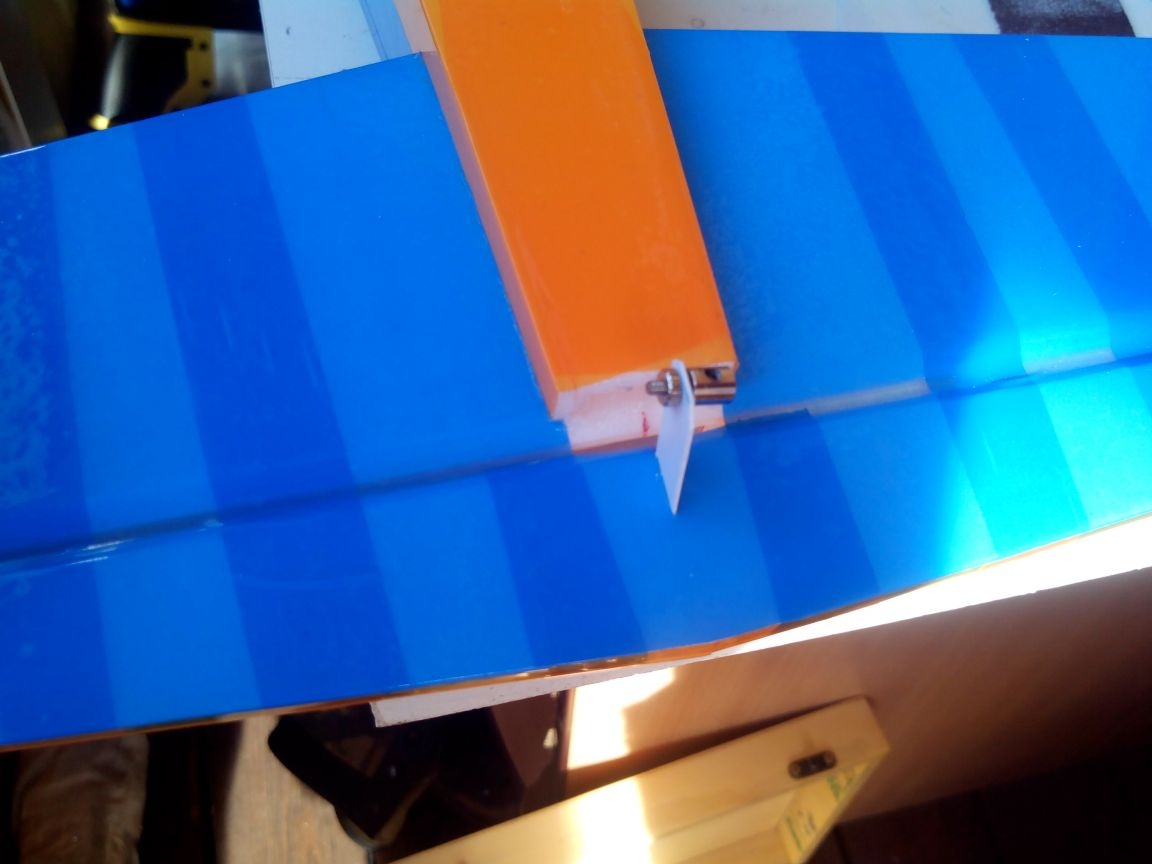
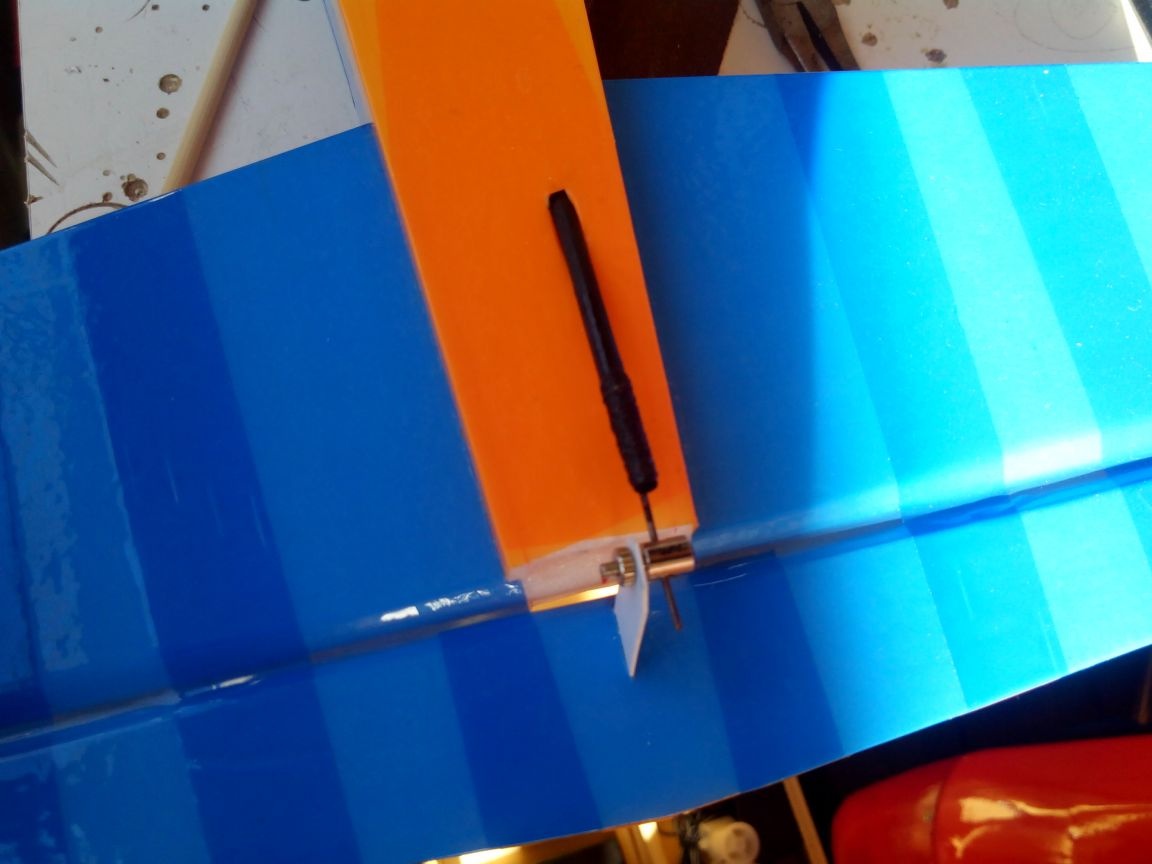
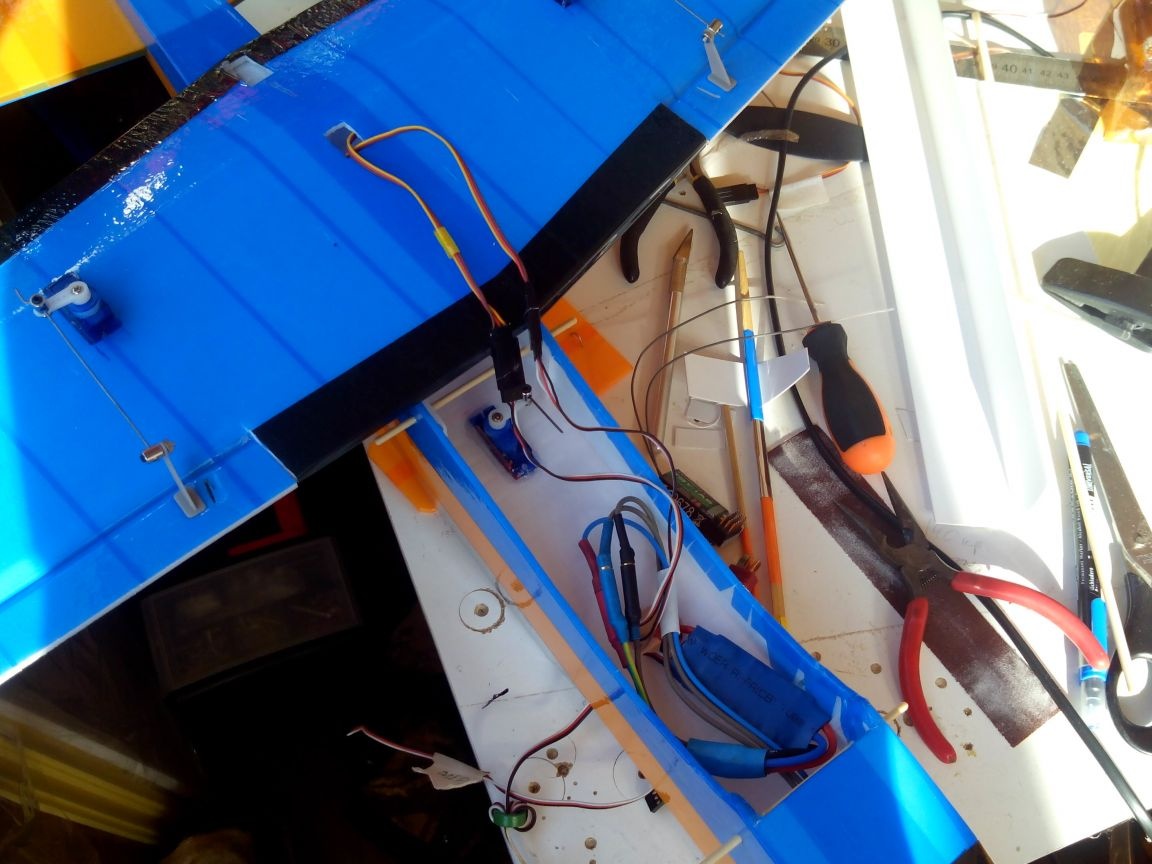
From above we make holes in the wing for servo ailerons and wires.
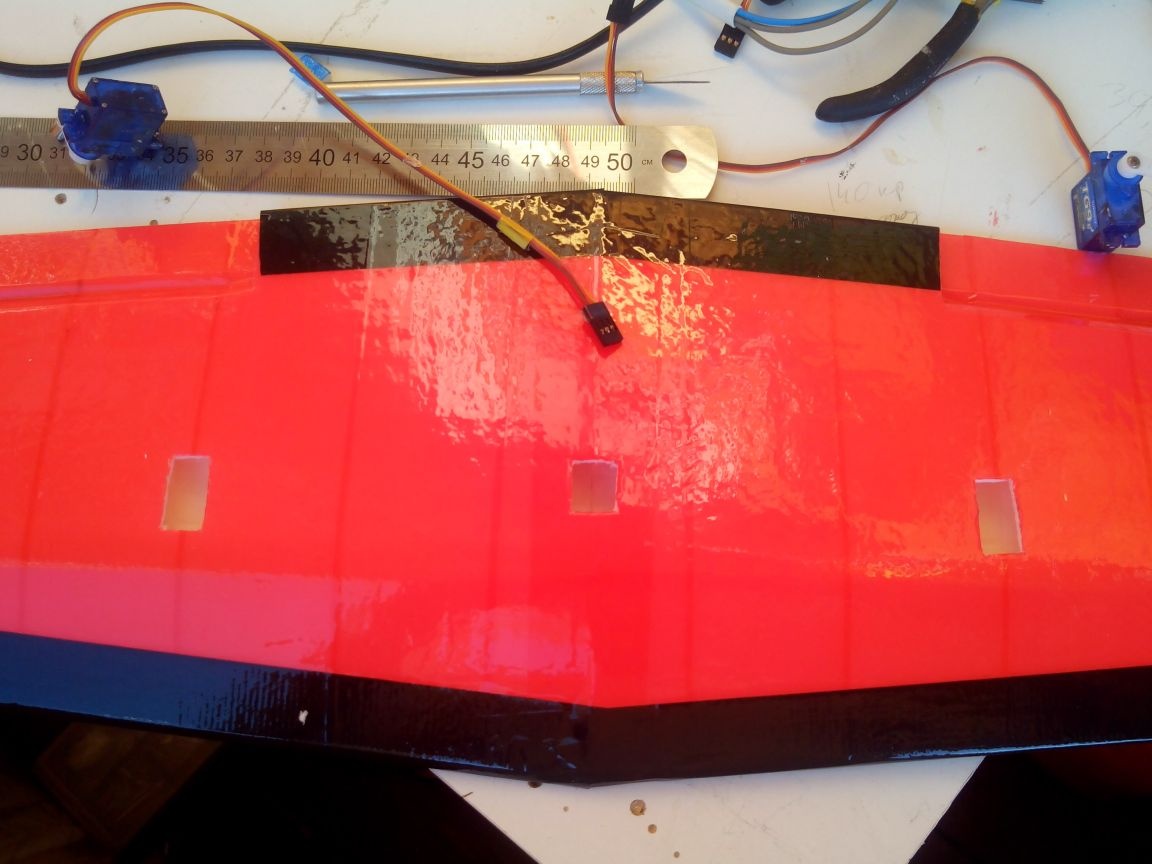
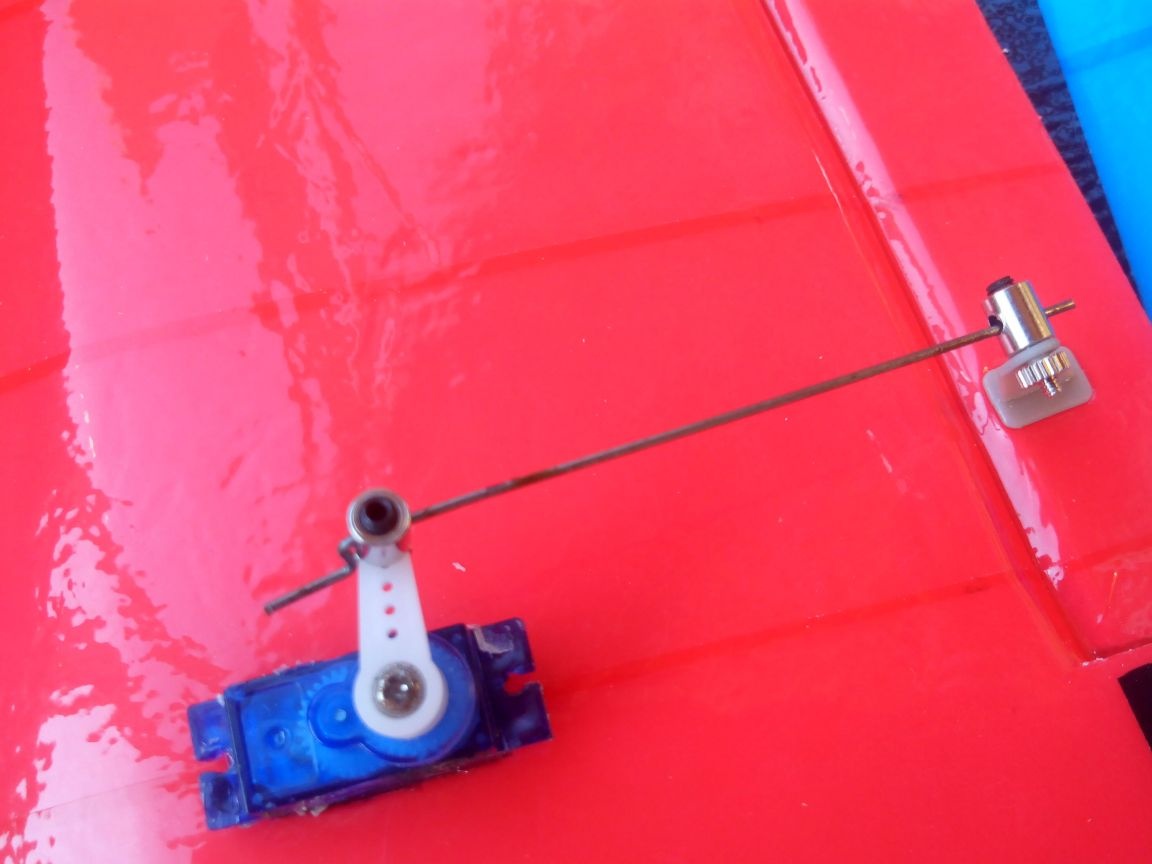
We fix the hogs on ailerons, make traction from steel wire and glue the servos into the wing. Servo wires can be pulled with tweezers
We repeat everything on the second wing and connect the wires to the Y-cable. All wings are ready.
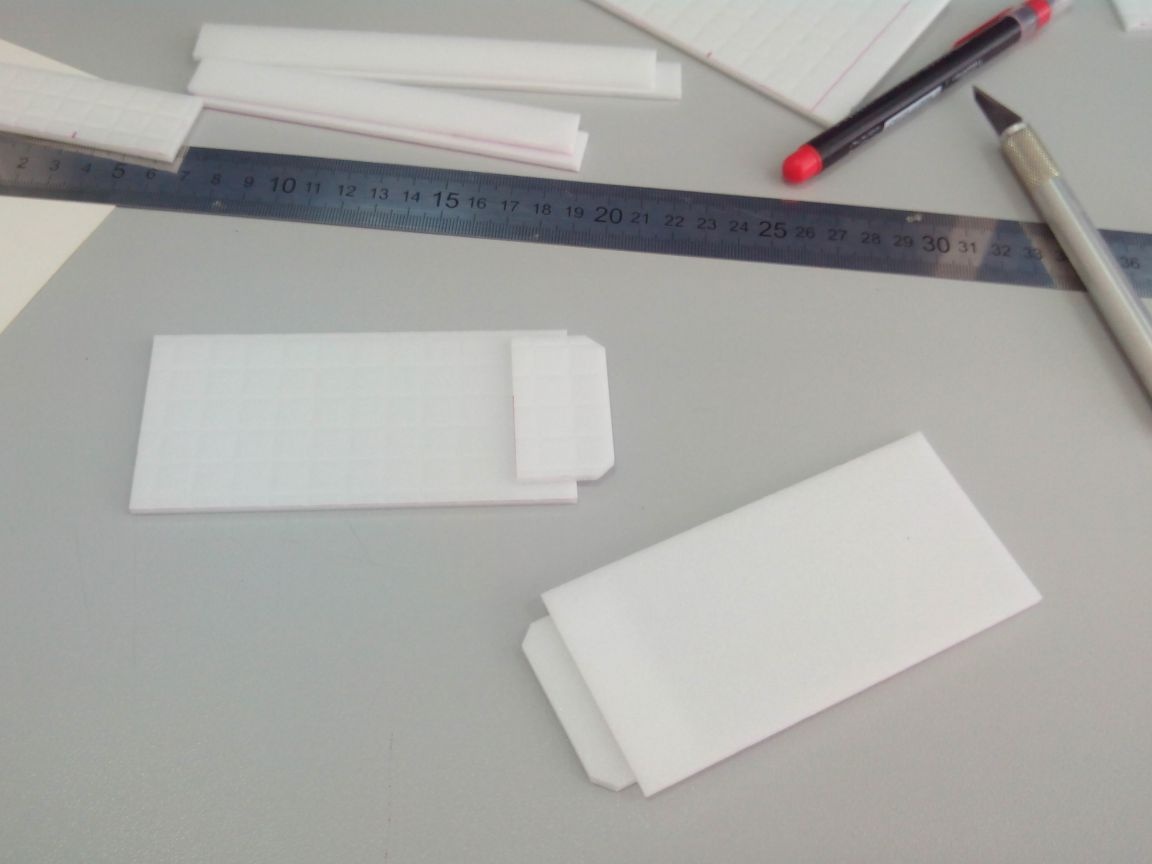
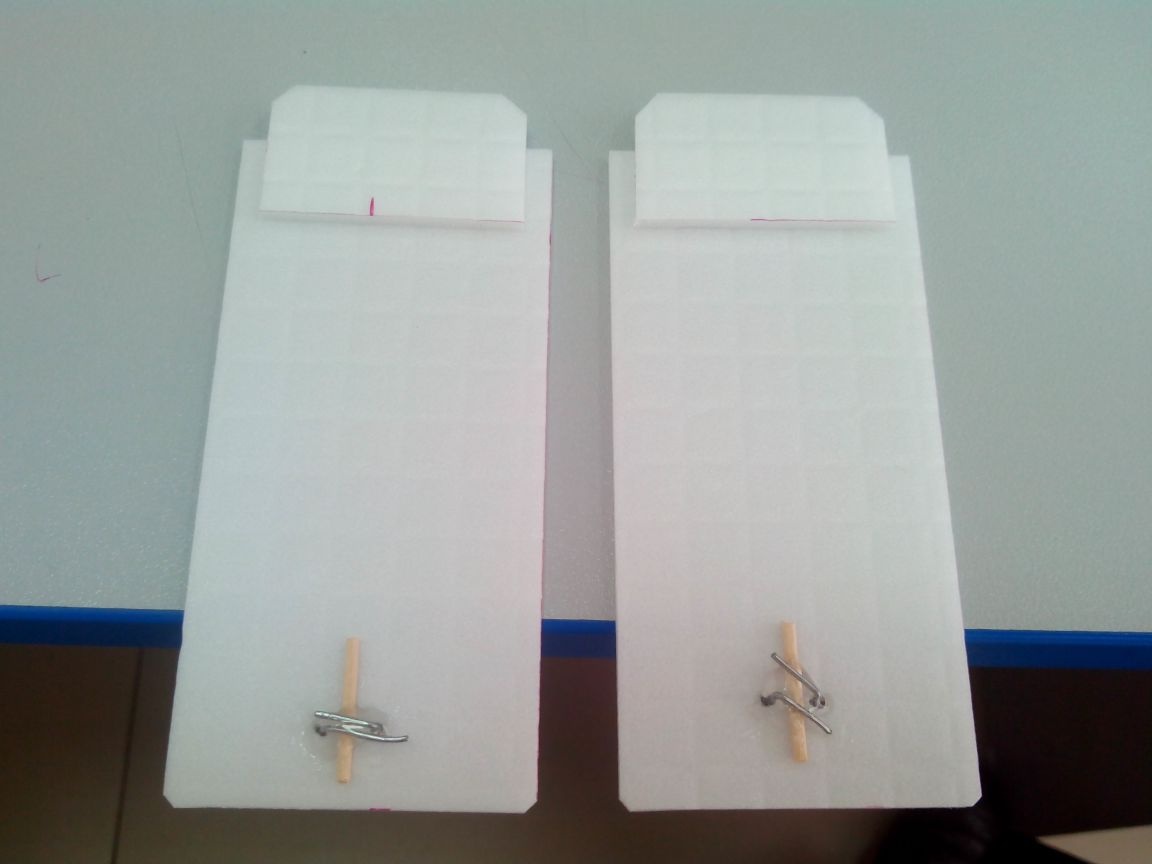
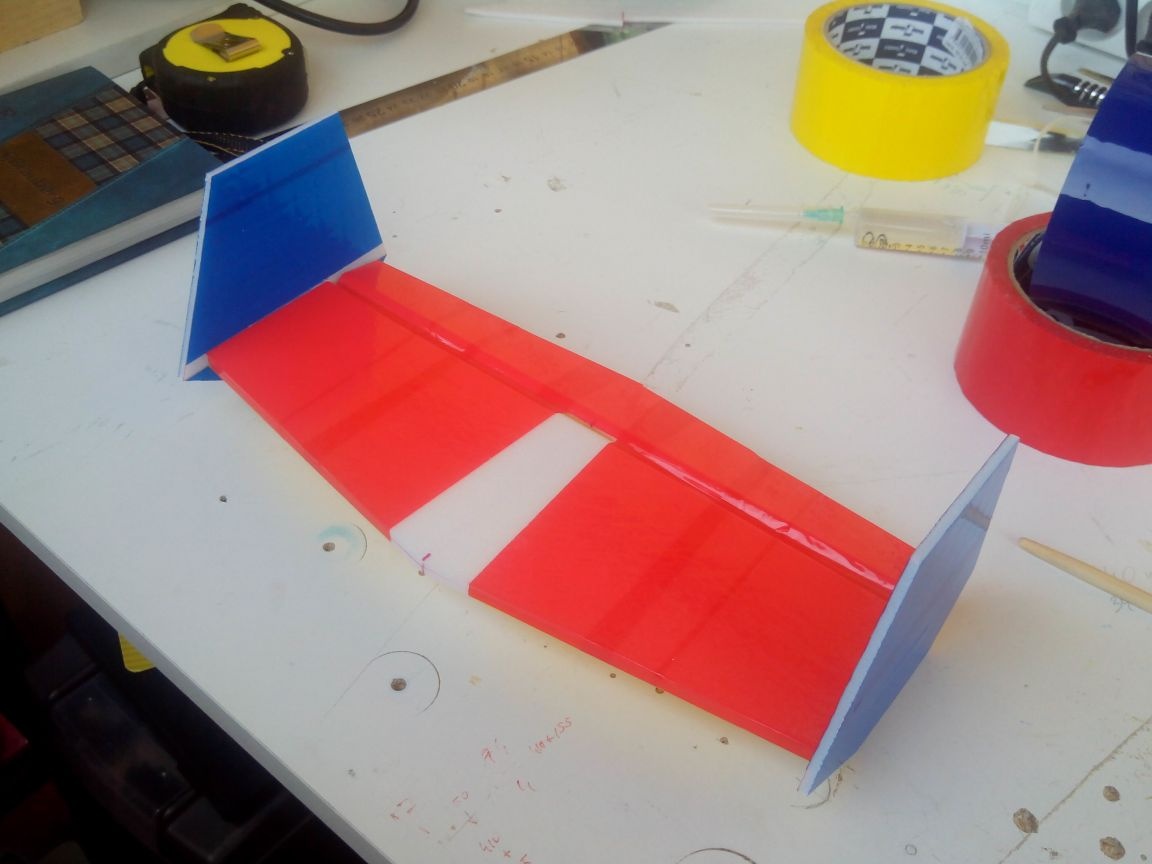
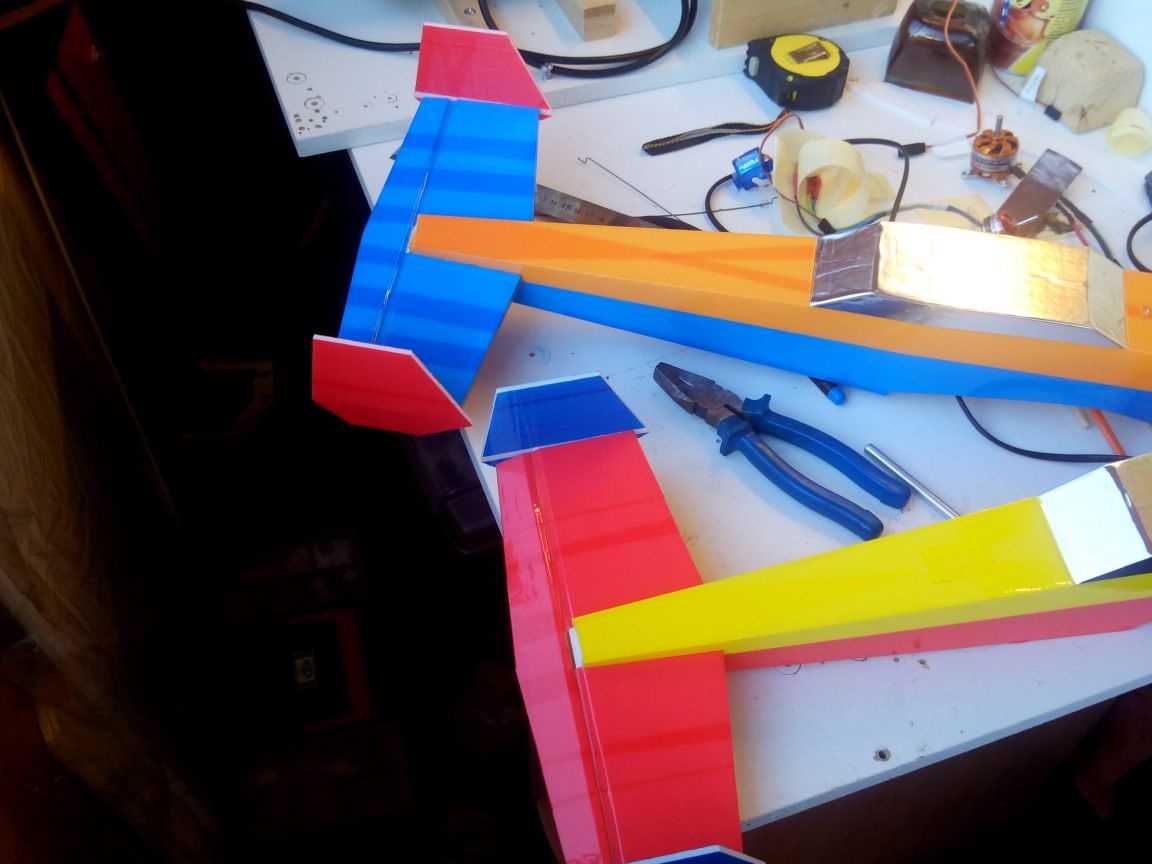
Step 4. Production of tail feathers
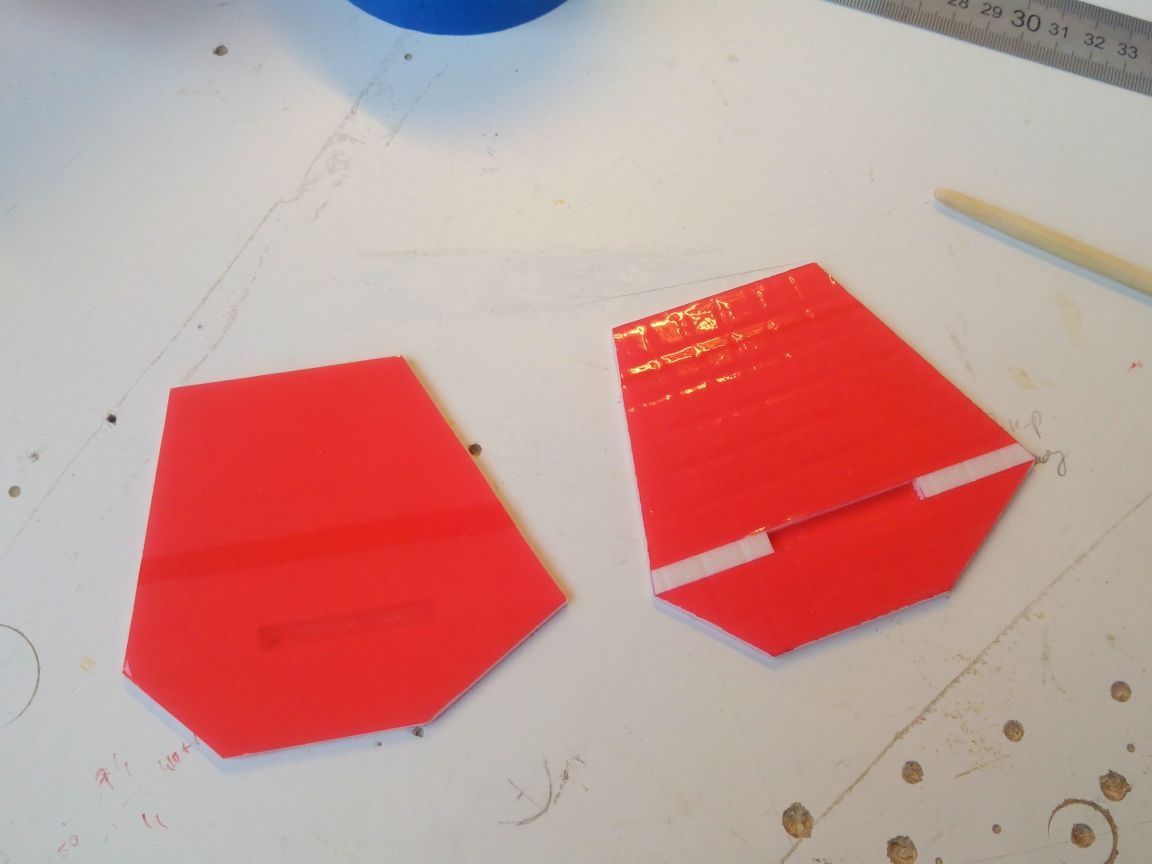
We glue the stabilizer and elevator from the cut out parts and sand it at an angle of 45 degrees. Keels will be in one layer of the ceiling
We glue the stabilizer with tape, making loops for the elevator, similar to ailerons. Colors - like a wing.
Glue the keels on both sides.
Glue the tail parts together.
The tail of the second aircraft.
Glue the tail feathers into the fuselages with ceiling glue.
Boars on the elevator are home-made, from a building corner (purchased ones ended in spite).

In the elevator, we make a gap with a cutter and cut out part of the adhesive tape to stick the boar directly to the ceiling.
We glue the boar on the epoxy so that it "looks" up - so it will cling less to the grass when planting.
We fix the traction lock on the boar.
The rods are made of bamboo, at the ends of which there are pieces of steel wire.
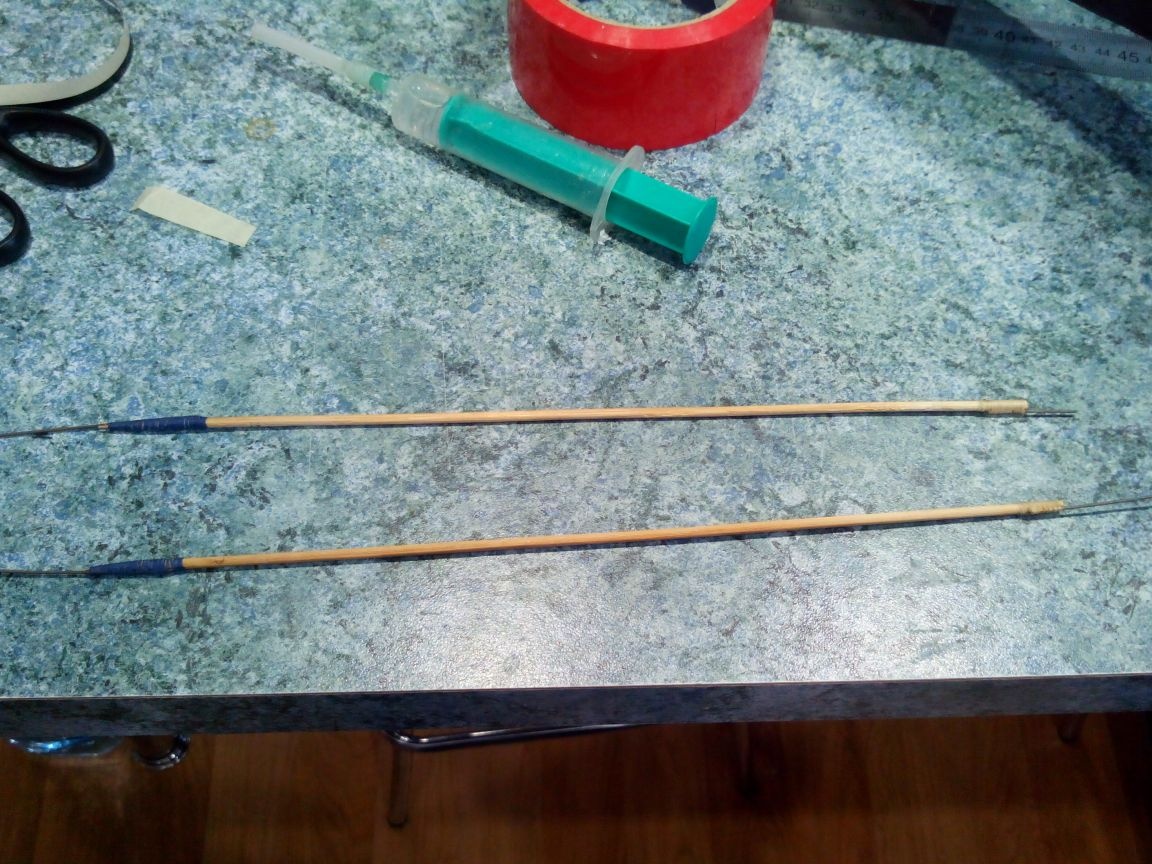
With an awl, we pierce an angle at the top of the fuselage at an angle, “aiming” in the direction of the rocker on the servo drive. Then, with a bamboo skewer, we expand the hole and insert traction into it. We fix it with clamps on a rocking chair and a hog.
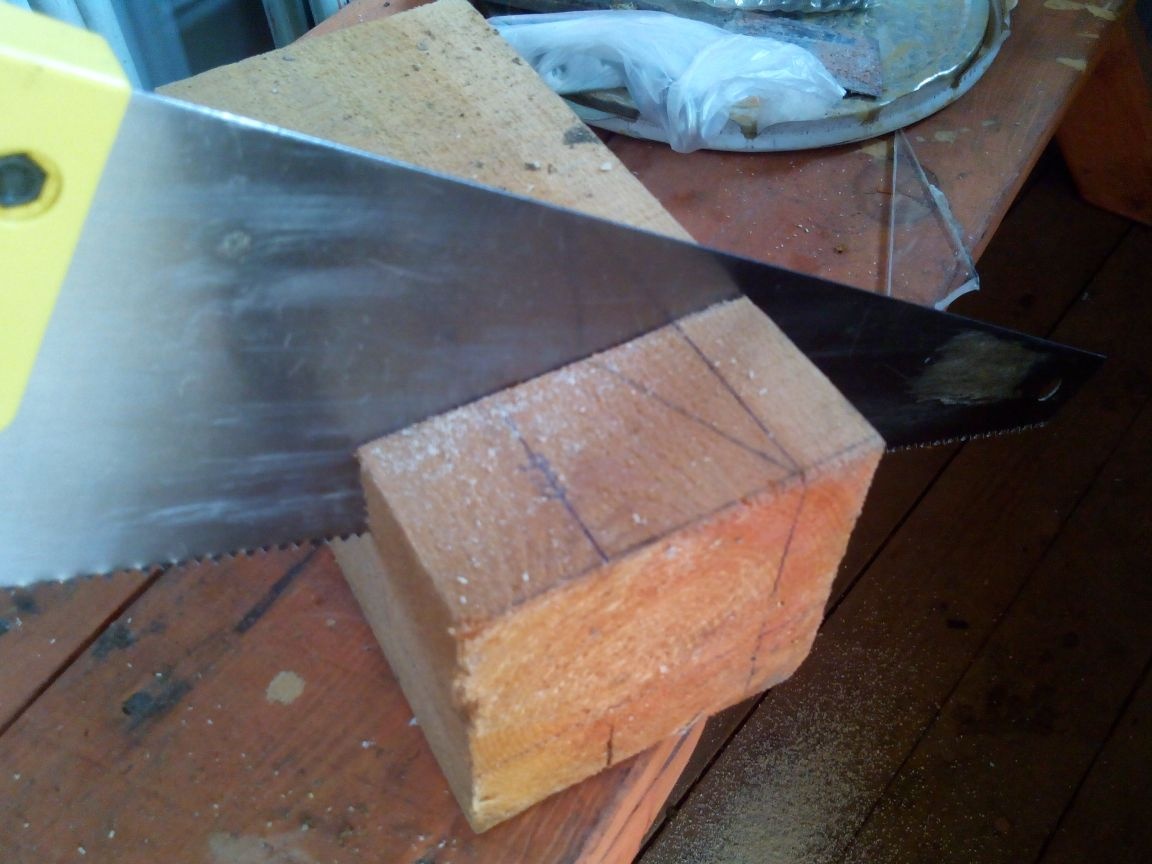
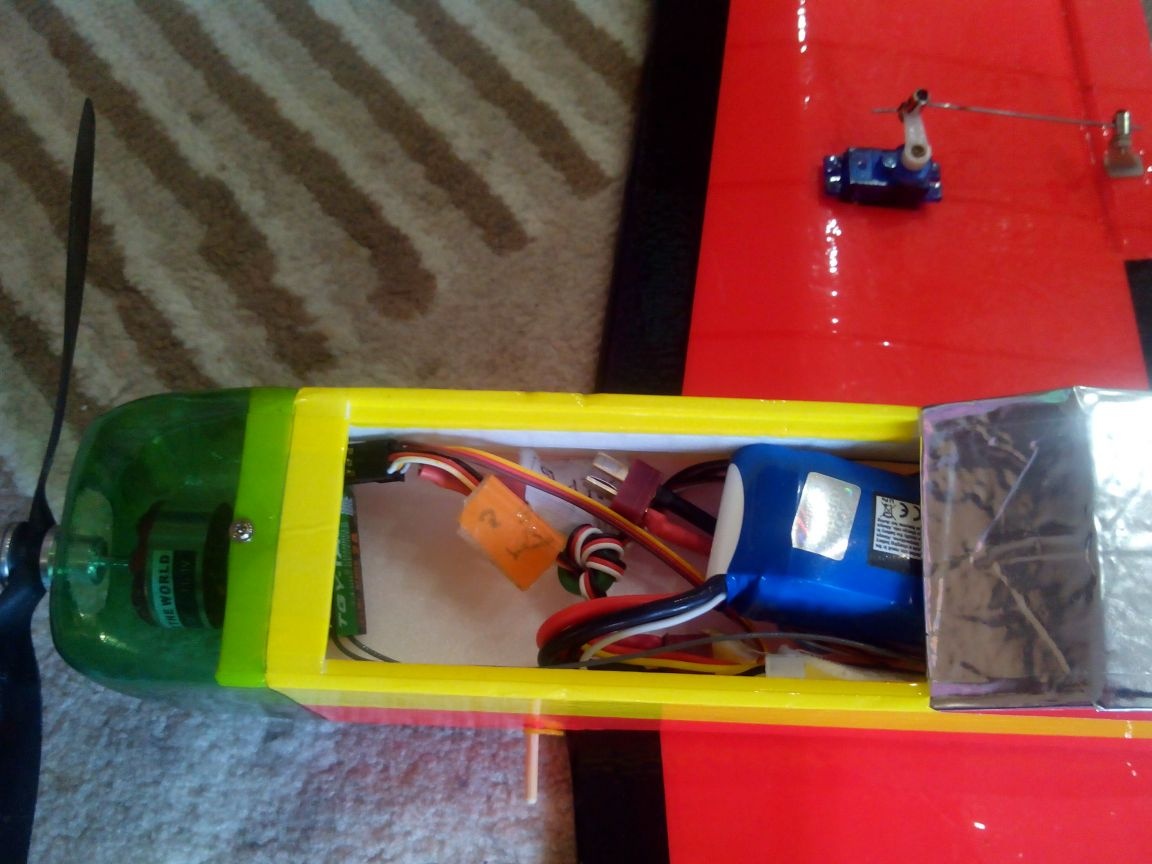
Step 5. Making hoods
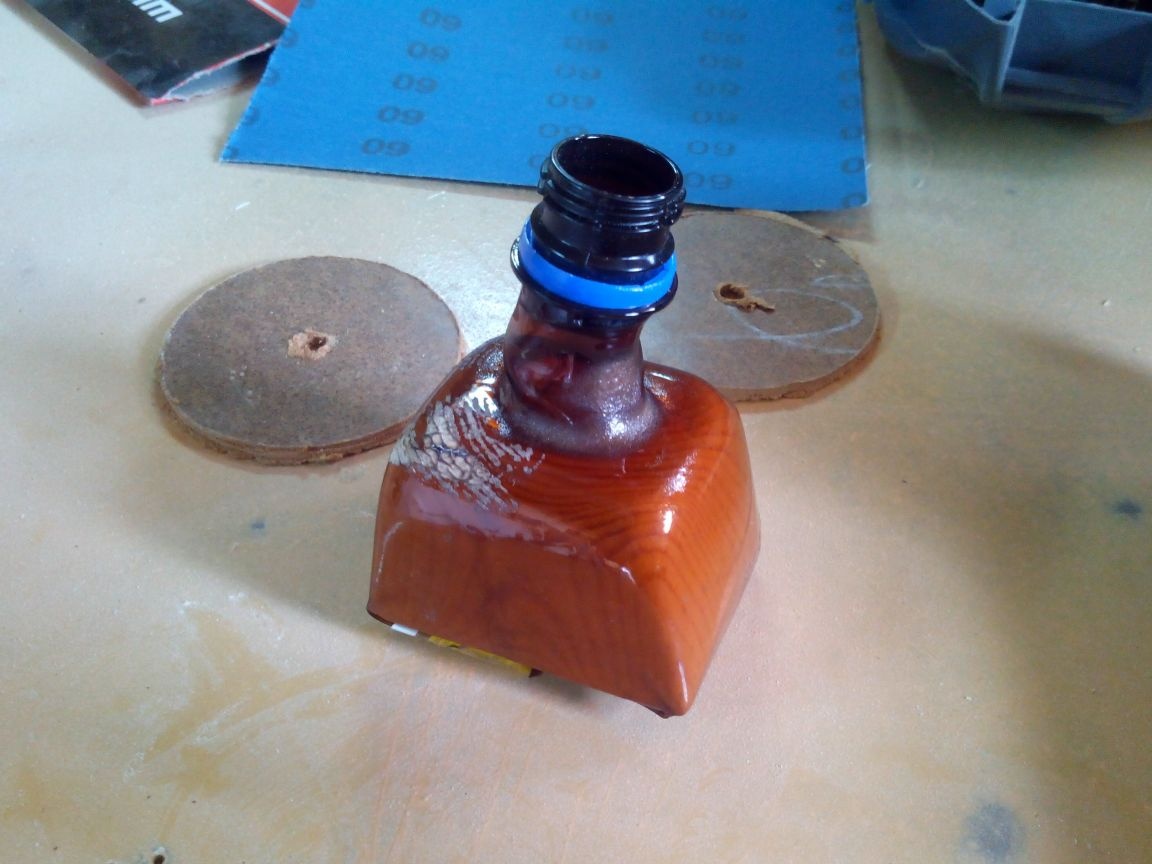
In the absence of the necessary tool or material, you can glue the hood in the form of a truncated pyramid and glue it to the fuselage with tape or glue, but for the sake of strength of the model, a hood from the bottle is recommended.
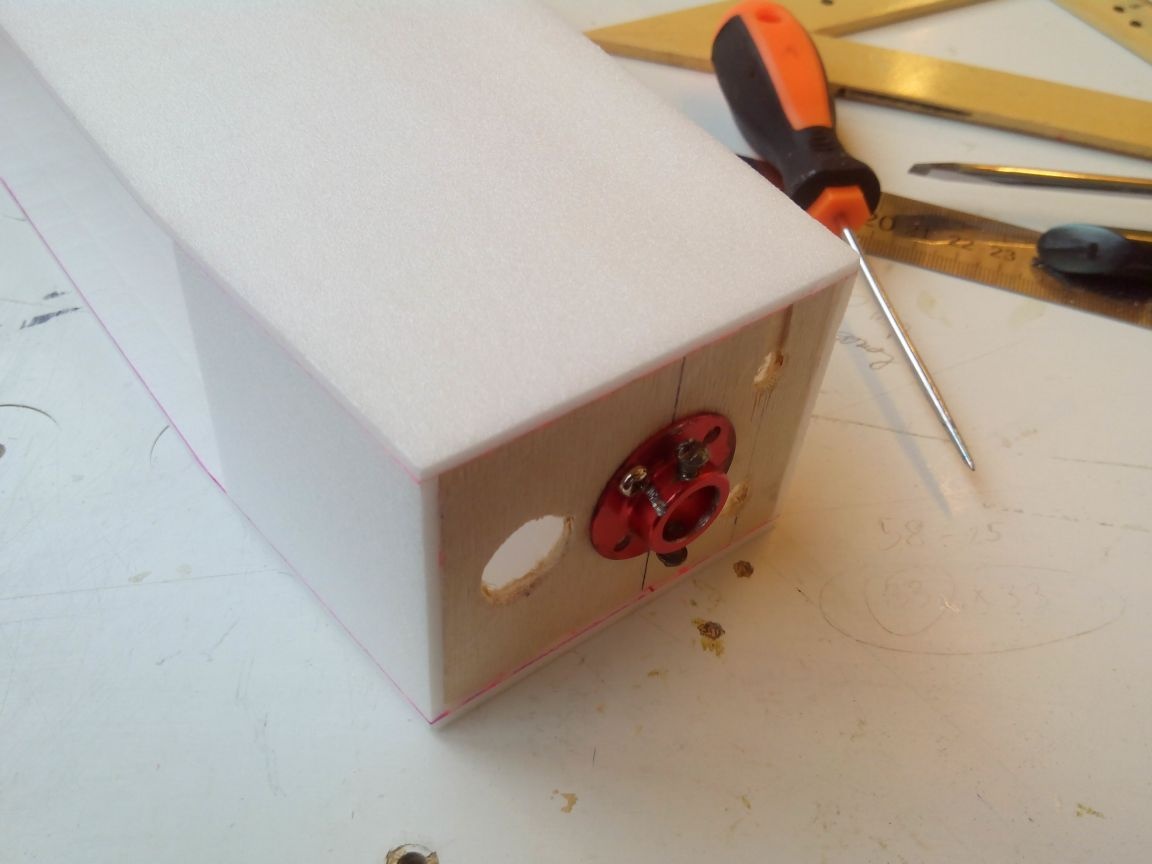
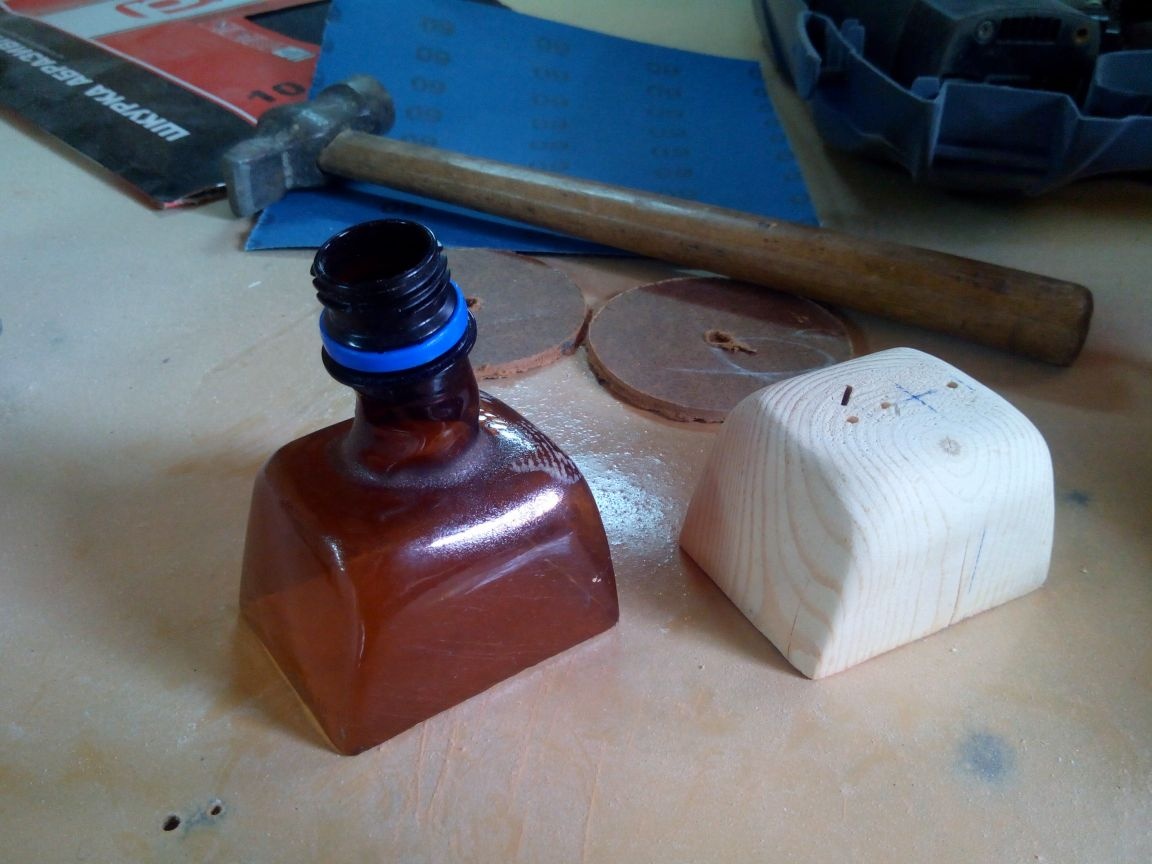
So, we saw off the necessary piece from a wooden bar.
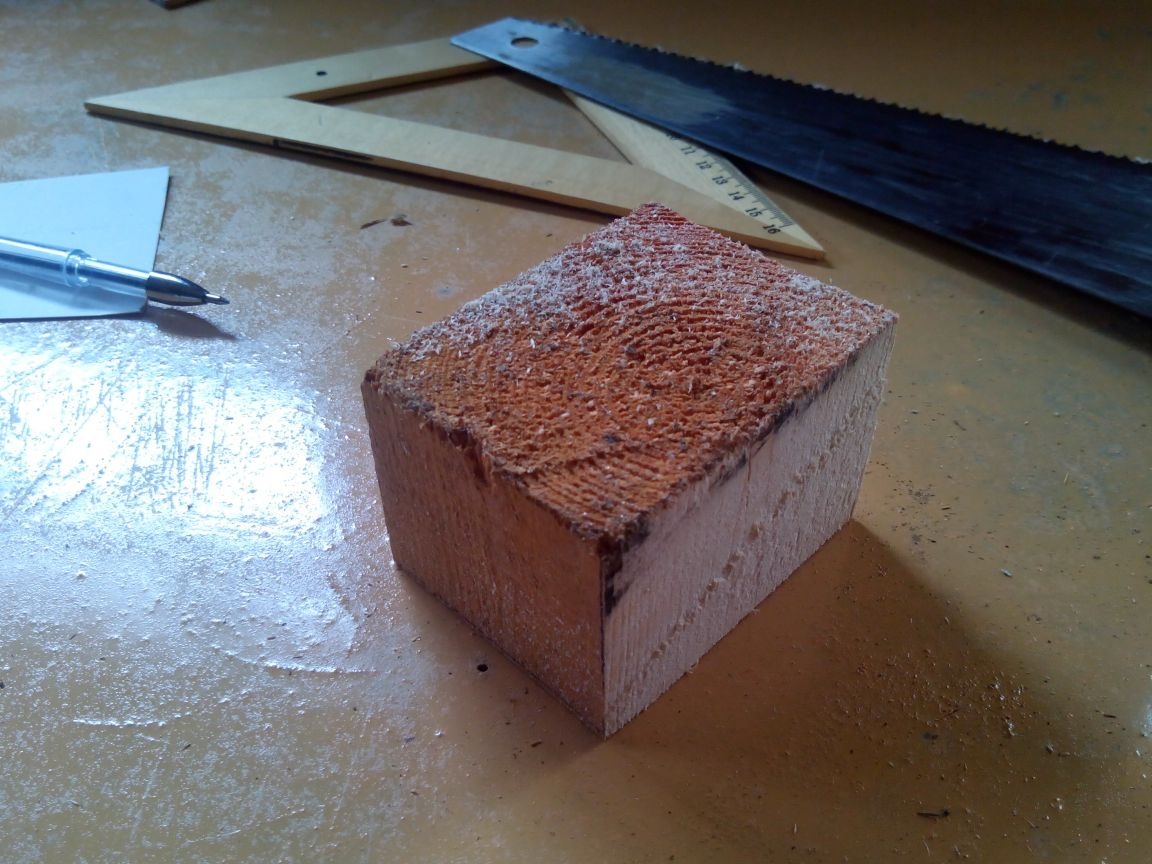
We draw lines on it, along which the excess will be cut off. A cross marks the position of the motor shaft.
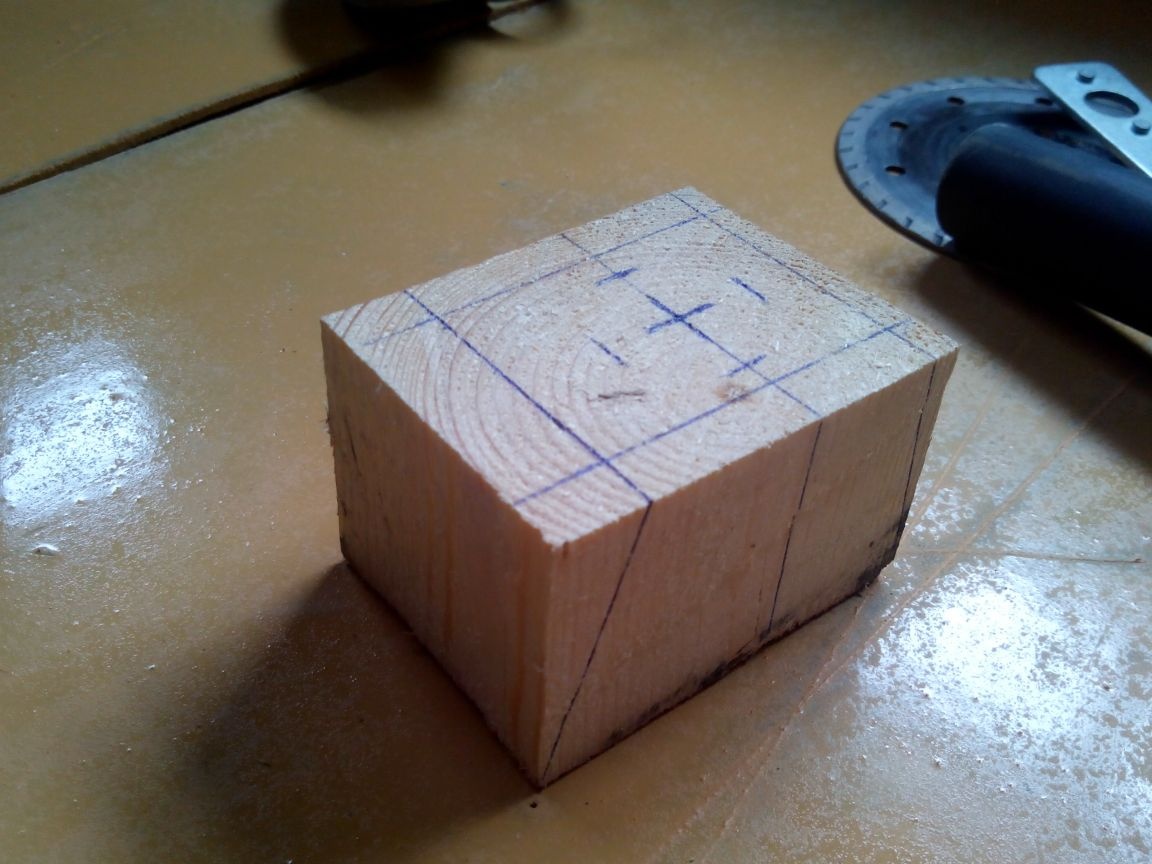
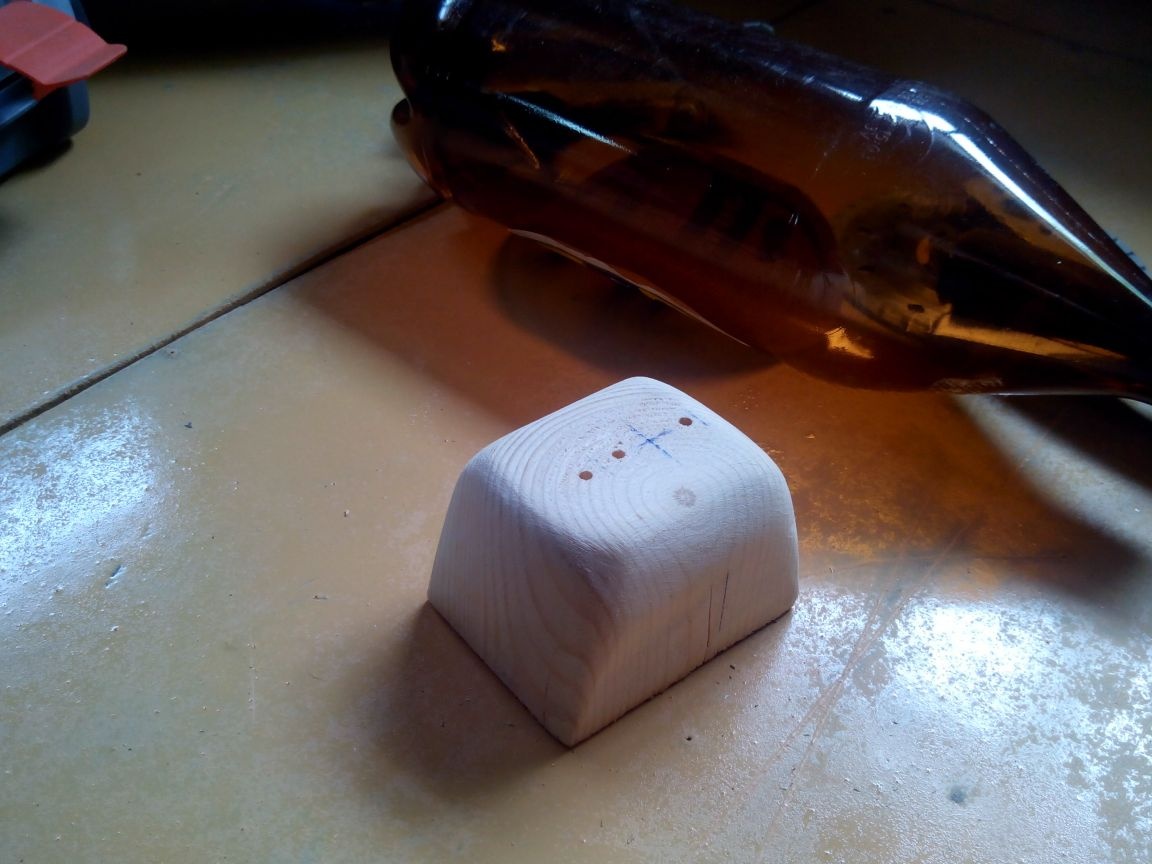
Saw off the excess and grind until a flat surface is obtained.
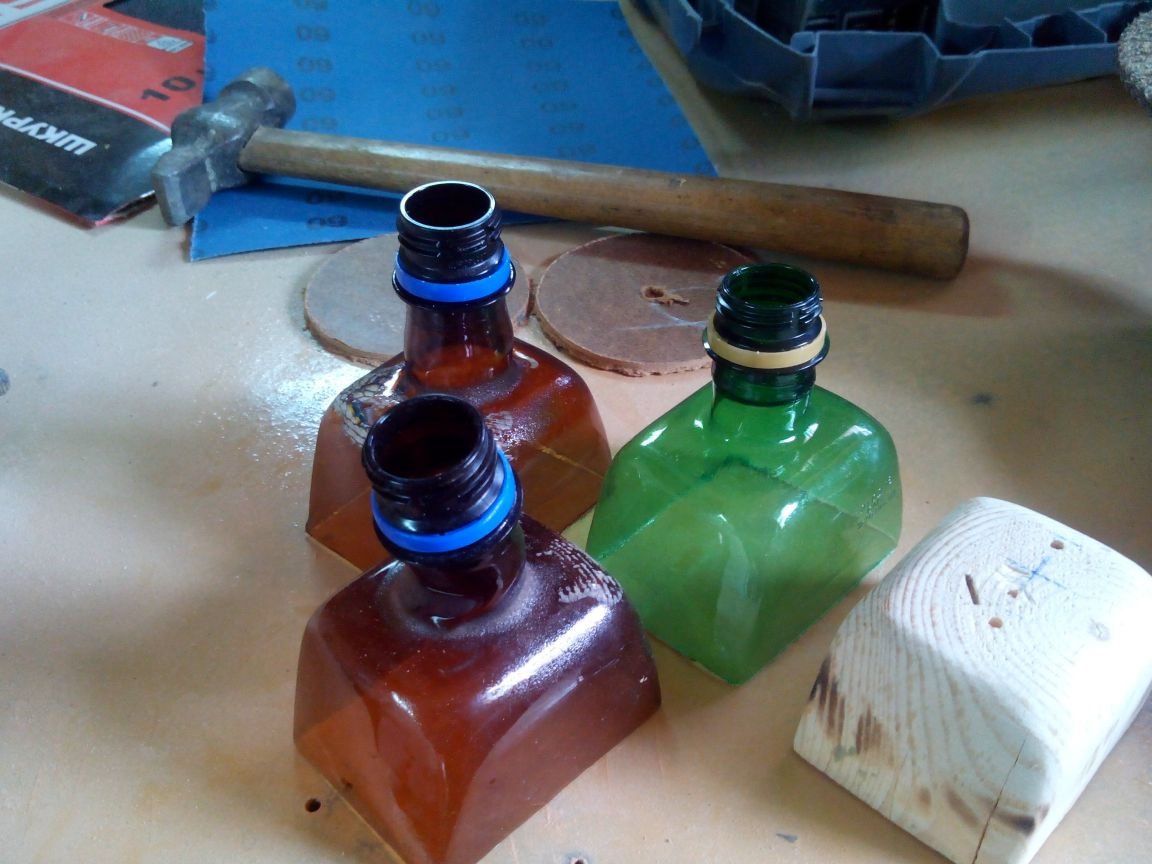
Then insert into a plastic bottle (1.5 liters), bend the edges of the bottle and fix them with screws.


We heat with a burner (it is possible over a gas stove).
Cut off the excess with a knife from the bottom.
Then we cut off the already unnecessary neck and process the edges of the hole (I did everything with a dremel).
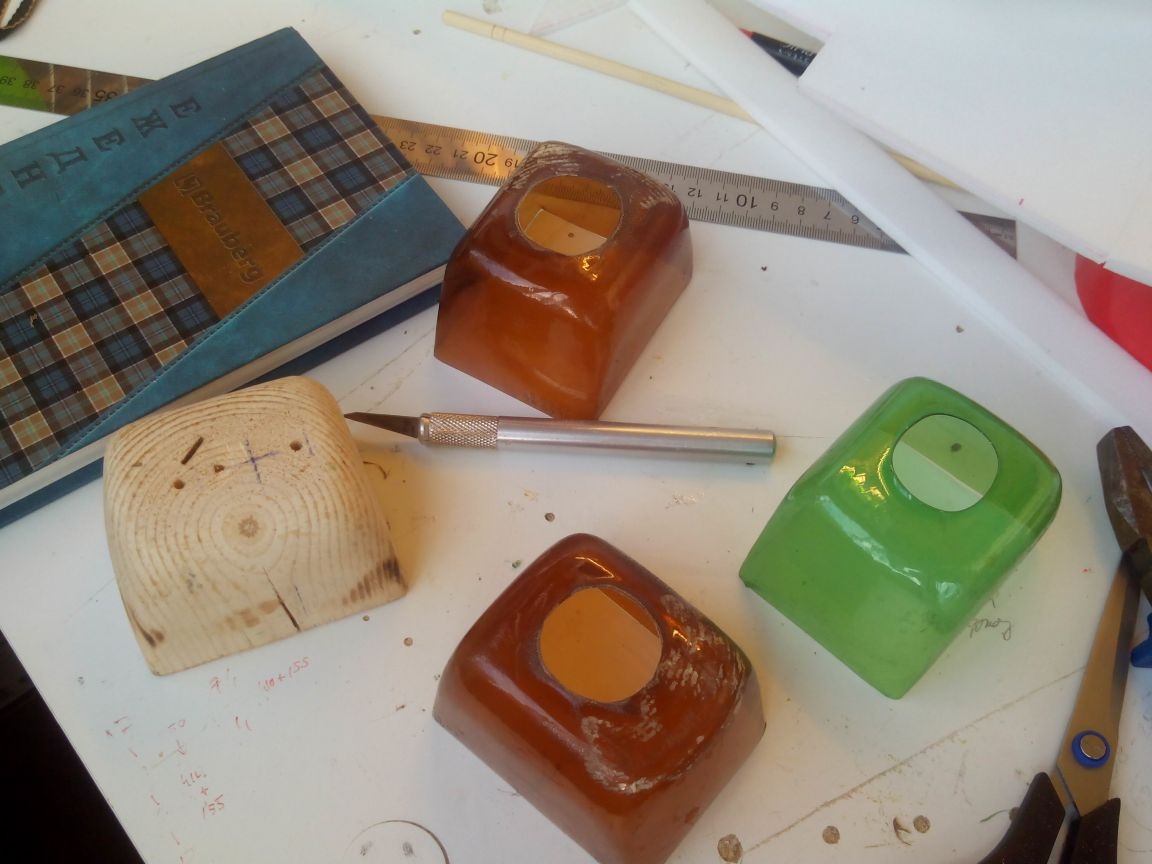
We fix the motor with the adapter on the engine mount (without a screw), try on the hood and mark the border with a marker.

We drill holes from the top and bottom through the hood in the plywood engine mount and fasten the hood with small self-tapping screws (for example, from servos, they are usually included).

Step 6. Final assembly
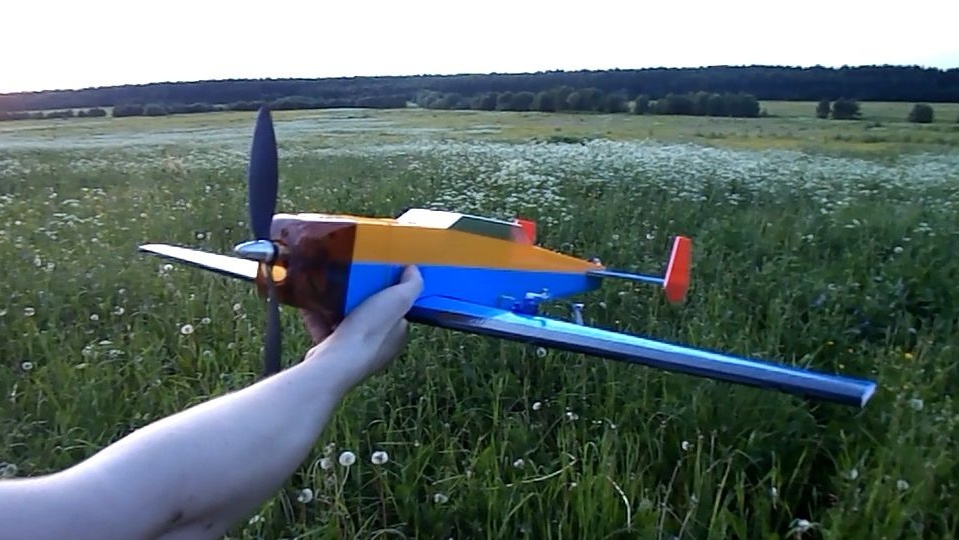
We fasten the screw to the motor shaft.

Inside the fuselage, in the bottom of the shelf, we make a small hole for outputting wires to the receiver and the battery. We connect the regulator to the motor and output the wires to the electronics compartment. Additionally, it does not need to be fixed.
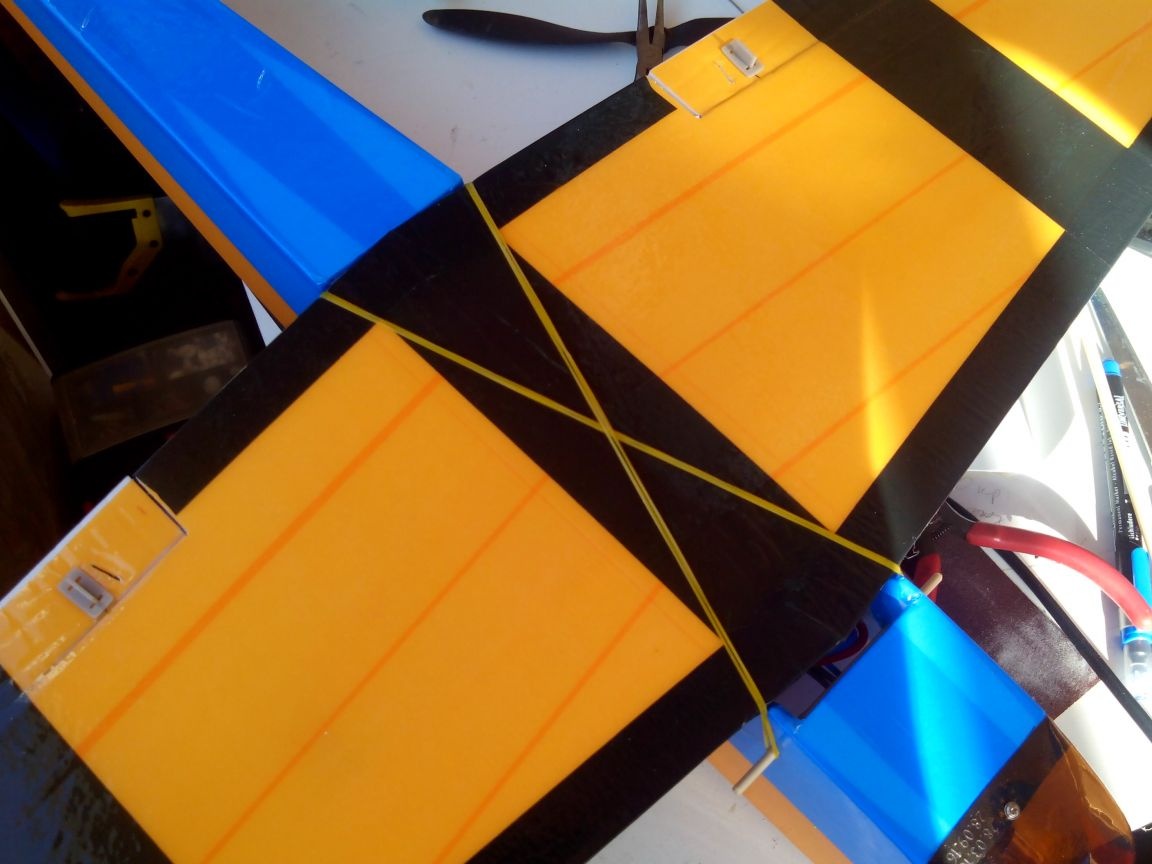
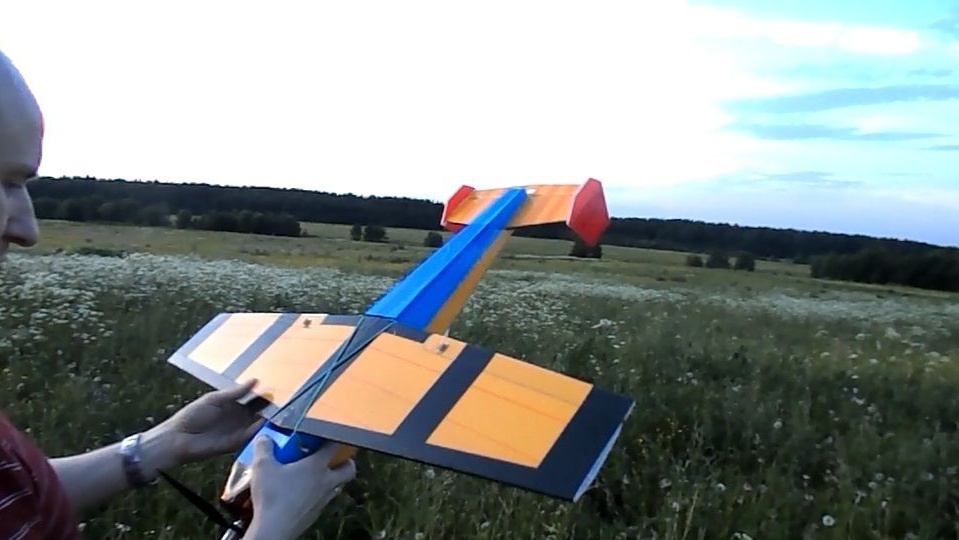
We fix the wing with elastic bands crosswise. As shown, two rubber bands are enough.
The receiver is located in the bow of the compartment, the battery is closer to the center of gravity of the model.
We fix the lid with another rubber band.
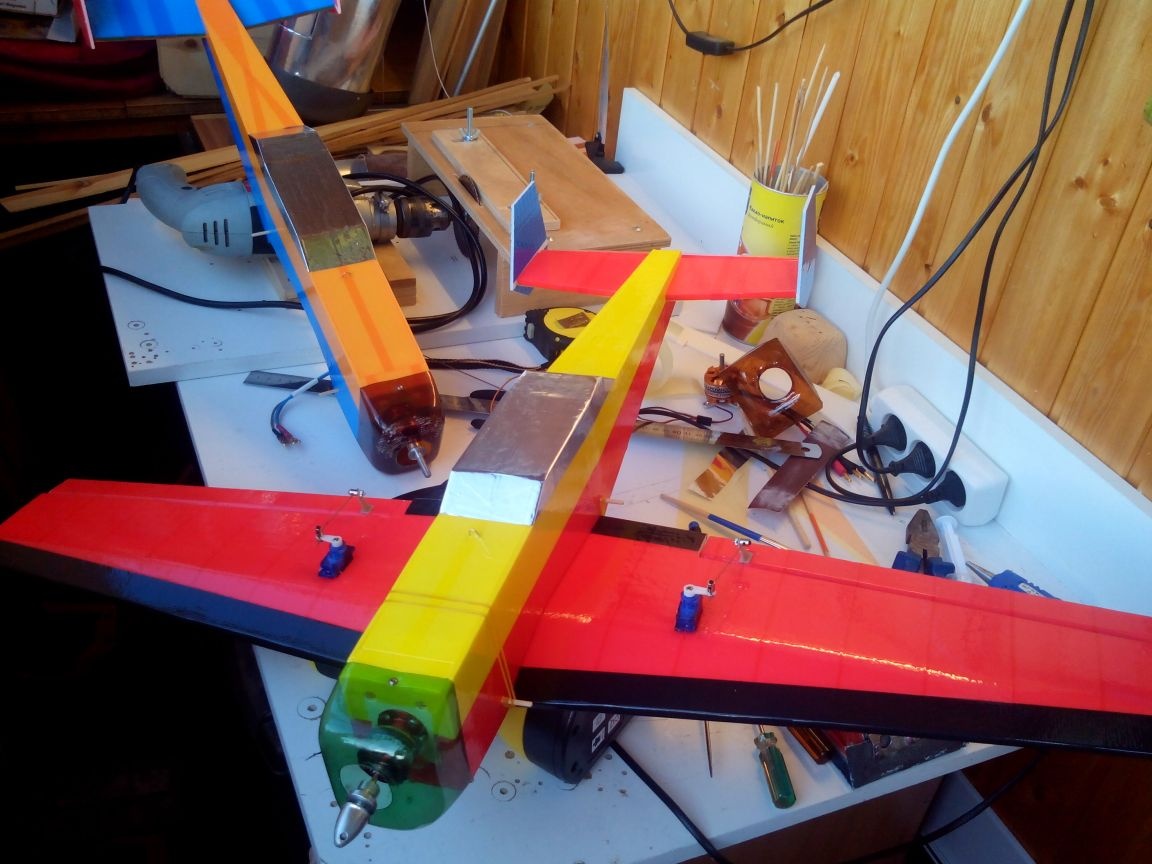
Models are ready to fly.
Last preparations in the field before the flight.
Everything is ready for flight.
TTX models:
Wingspan - 800 mm
Length - 700 mm
Wing weight - 85 grams
Fuselage weight - 150 grams
Flight weight - 375 grams
Video of the first flyby of the model: