Dear visitors of the site, in the presented material you will be shown how to independently make a strong and reliable workbench in the workshop or
garage.
There is no need to do without a workbench in the garage, constantly something needs to be repaired, disassembled, assembled, and where to do it if not on a workbench, the vice is screwed to the countertop and all the necessary tools are always at hand.
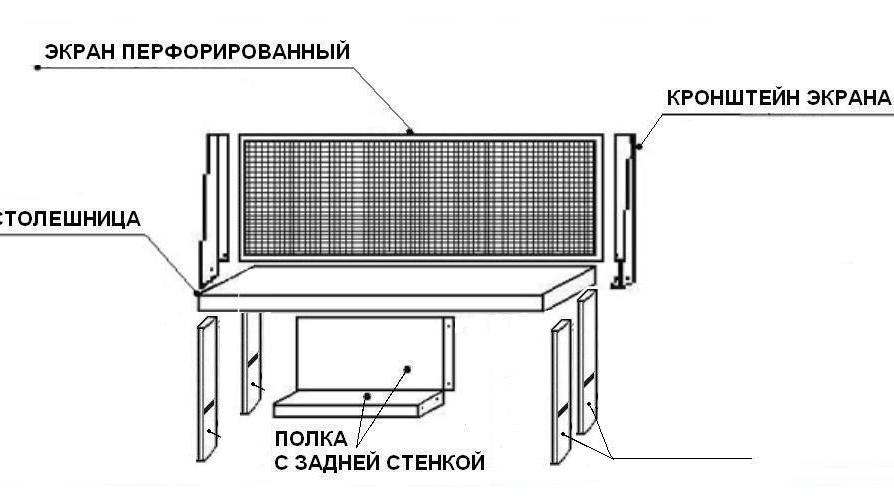
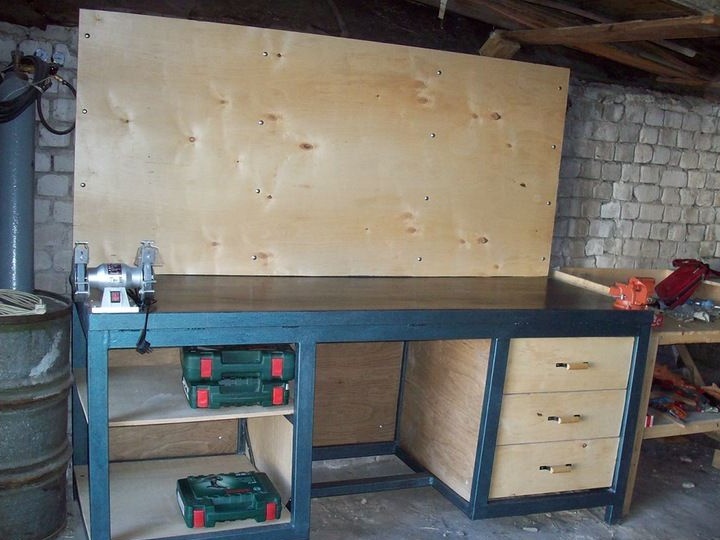
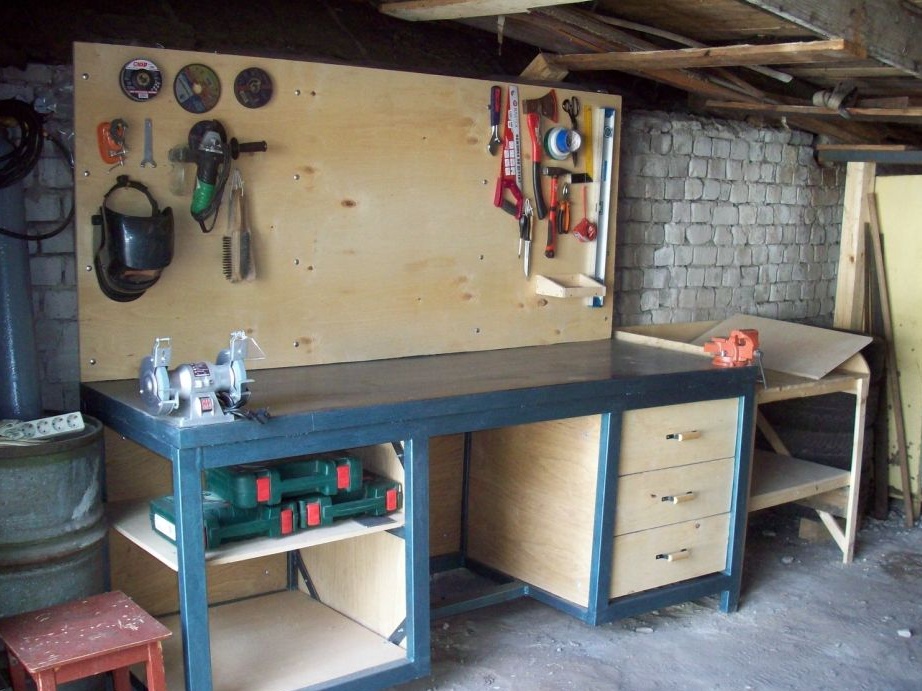
The workbench is designed for locksmithing, has a metal frame from a corner and a professional pipe, as well as convenient drawers for storing small tools, bolts, nuts and other useful trifles, there are also convenient shelves, and the countertop itself must be trimmed with 1.5-2 mm iron thick. In addition to the back of the table, a panel for the tool is attached, which is also very convenient for what you need to hang right in front of you, it is also advisable to put a socket or tee on the panel so that you can connect a power tool.
It is necessary to protect metal surfaces from corrosion, namely cover them with an anti-corrosion compound and paint, so the table will always look neat and will last you for many years.
And so, let's consider what exactly is needed to make a workbench?
Materials1. professional square tube
2. corner 40x40 mm
3. metal sheet 2 mm
4. plywood
5. metal screws
6. paint
7. wood impregnation
8. wood screws
9. anti-corrosion coating
10. metal plate
11. furniture rails for drawers
Instruments1. welding machine
2. Bulgarian (angle grinder)
3. drill
4. roulette
5. hacksaw
6. jigsaw
7. brush
8. hammer
9. screwdriver
10. ruler
11. marker
12. level
13. corner
14. sandpaper
15. grinding machine
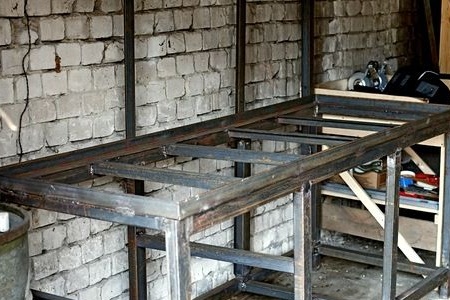
Step-by-step instructions for creating a workbench do it yourself.Assembling and installing this table in a garage or workshop is a serious and responsible business. When manufacturing it, you must first of all know that it must be stable and withstand a load of about 200 kg, check if there are any skews, because it is desirable that the table eventually turns out to be flat. Before starting work, you should study the drawings and diagrams provided by the author.
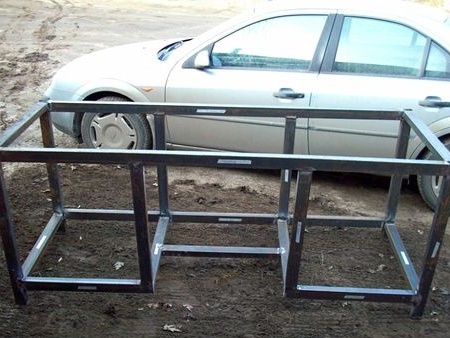
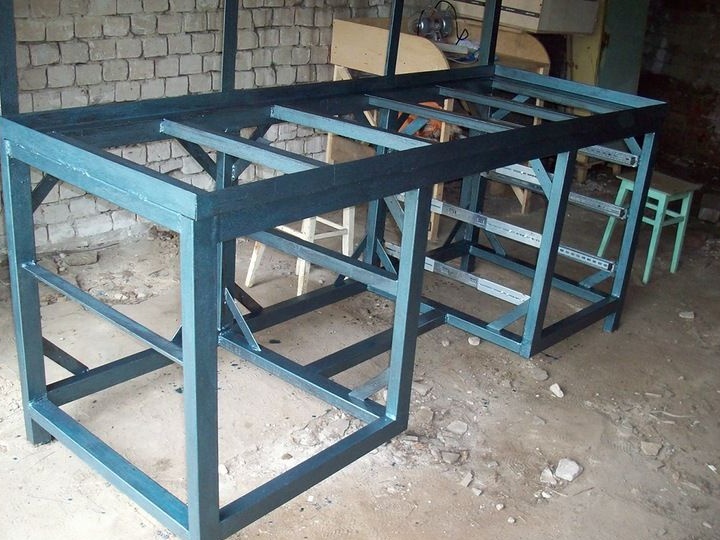
After that, the master from a professional square tube welded the foundation for the future workbench.
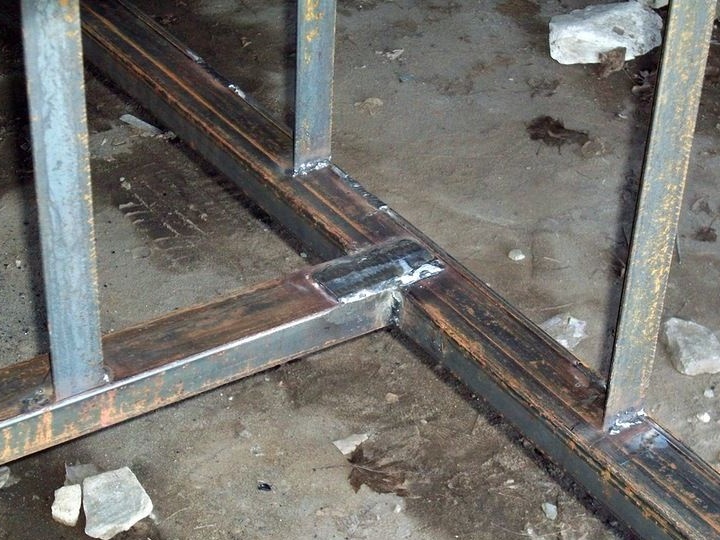
The welding spots were carefully cleaned with a grinder (angle grinder)
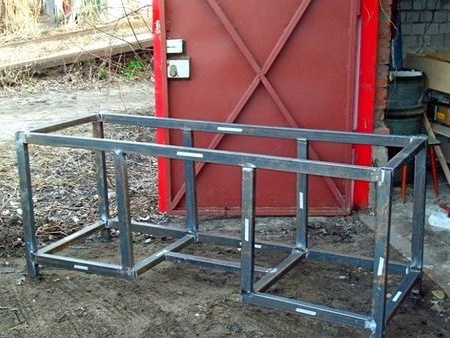
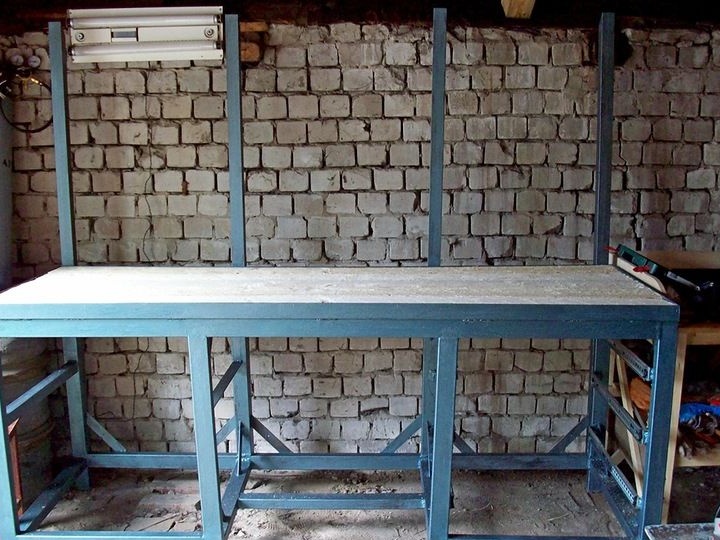
To the back of the table welded metal corners, they will be fixed panel for the tool.
Then the area under the countertop is strengthened, namely, additional pipes are welded.
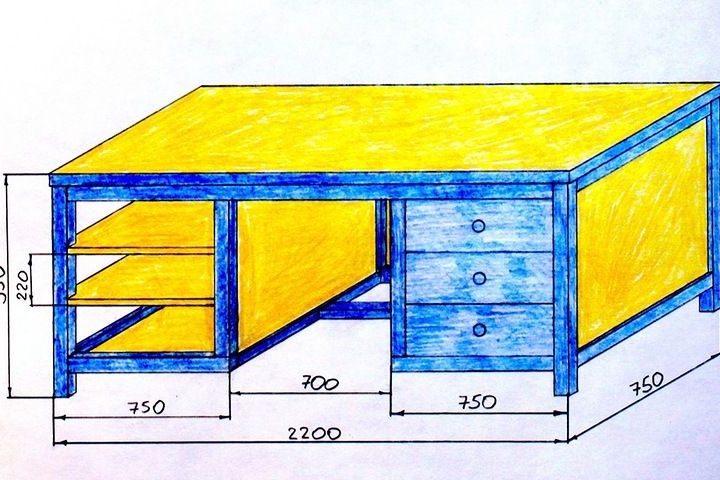
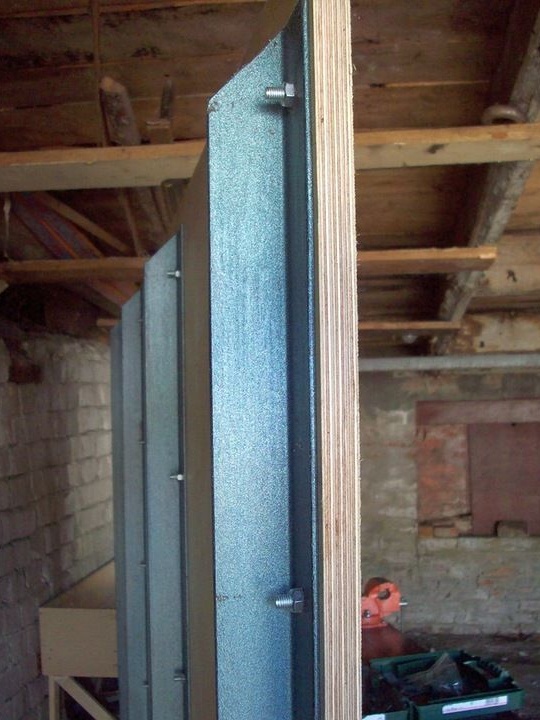
The tabletop itself will be 50 mm from the board and for its placement the author made a frame from the corner.
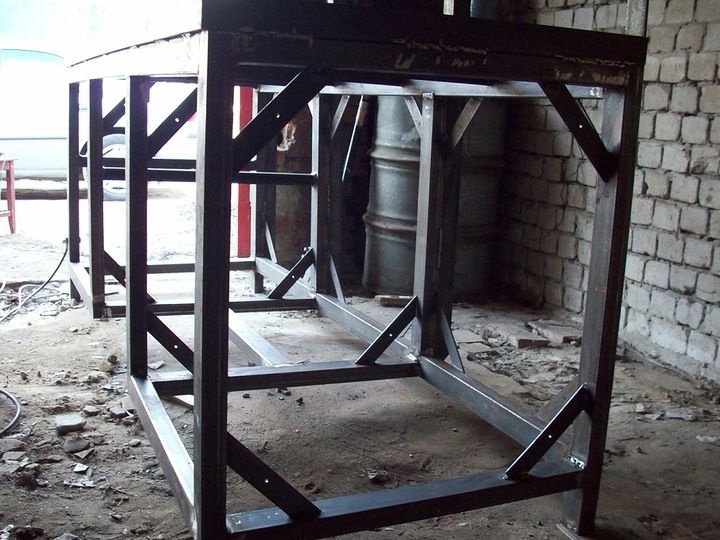
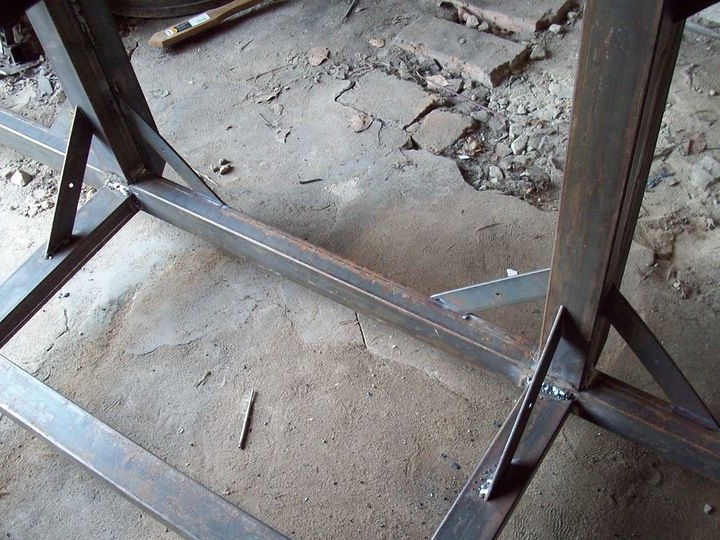
Then all joints must be reinforced with metal plates.
Spacers are welded into the corners.
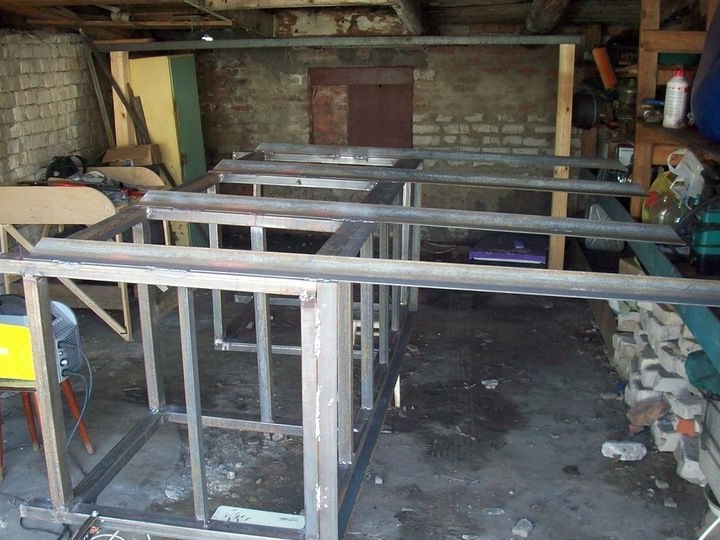
Various loads will act on the workbench: weight, shock, vibration, etc., at the stage of creation, all these points must be taken into account and be safe.
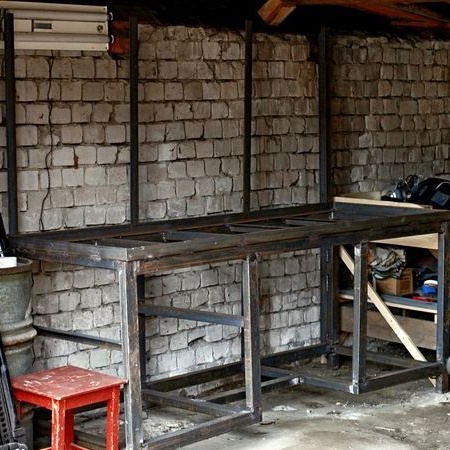
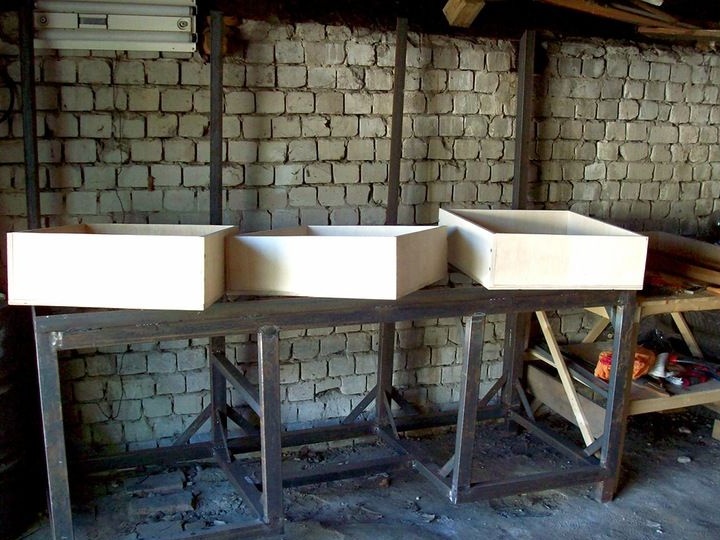
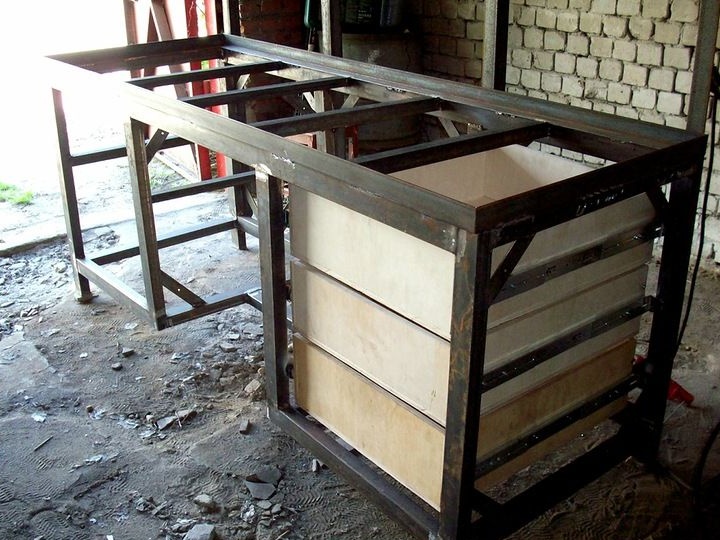
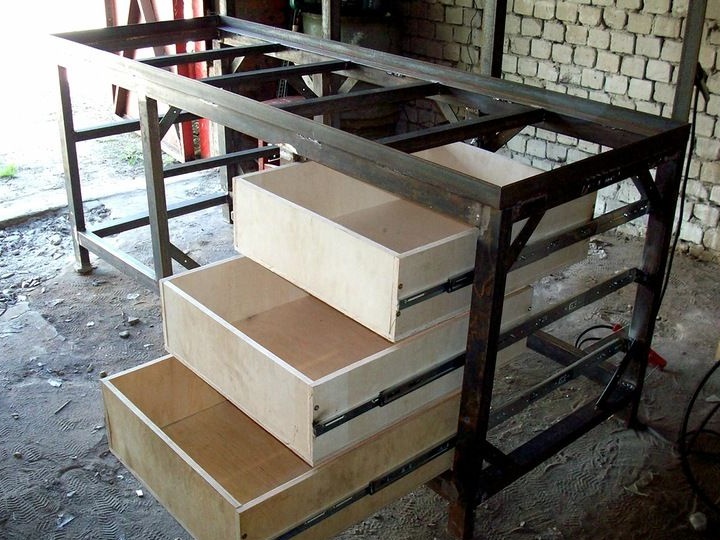
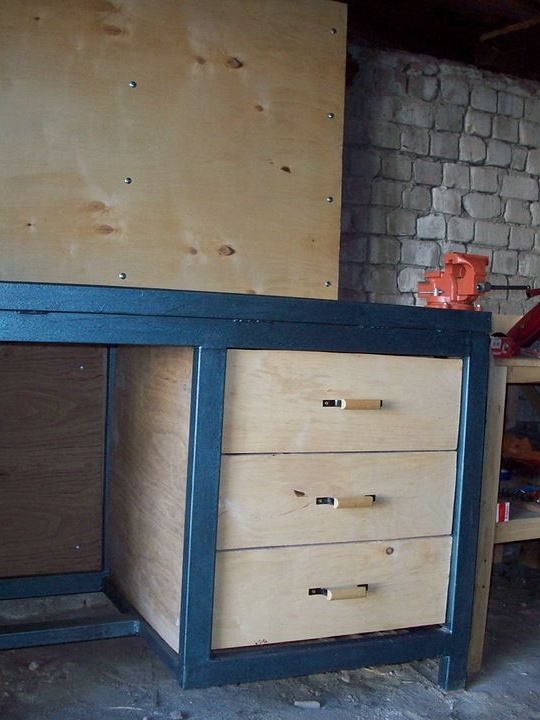
For the convenience of storing small tools, spare parts, bolts and nuts, the master made special boxes of plywood.
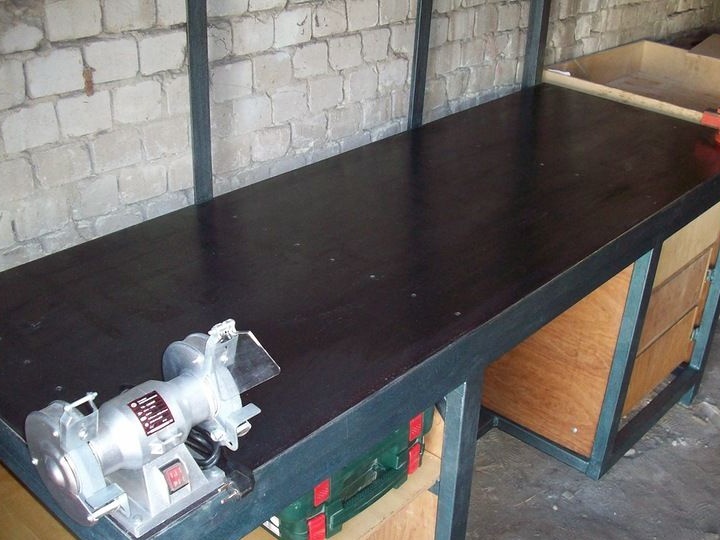
The surface of the workbench is painted.
Furniture rails are screwed onto the drawers on the sides.
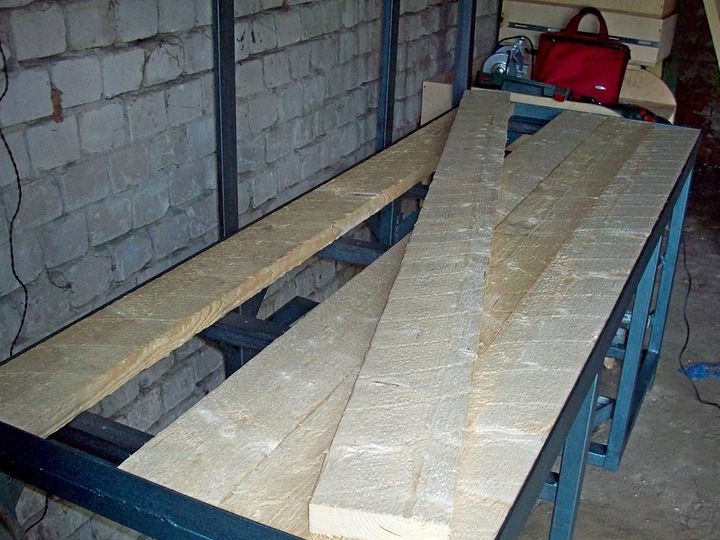
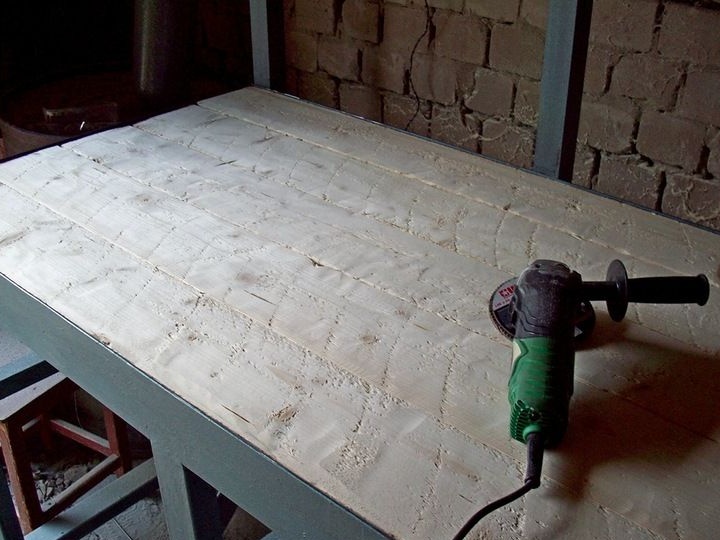
The author makes a countertop of wood, a board of 50 mm, if you do not have a long board, then you can lay short across.
The tree will take on part of the load from shock, vibration and weight.
The resulting surface should be well sanded, the master used a grinder (angle grinder) with a grinding wheel.
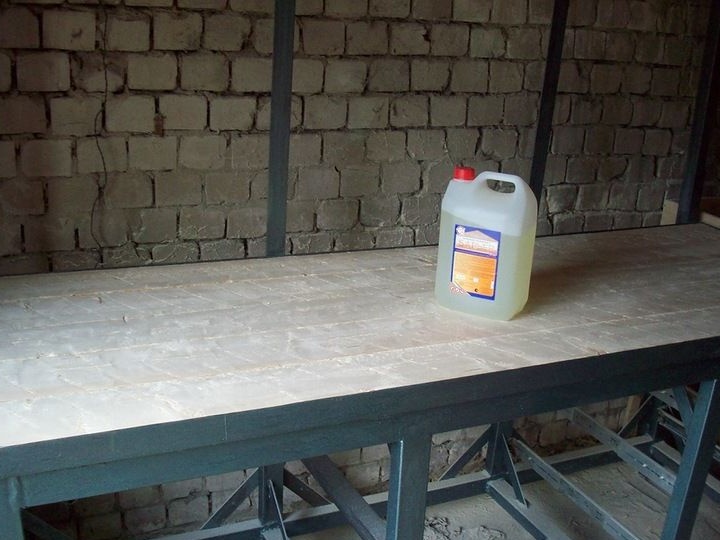
So that the tree lasts a long time and does not rot under the metal, it should be treated with special impregnation for the tree.
The author used here "Barrier"
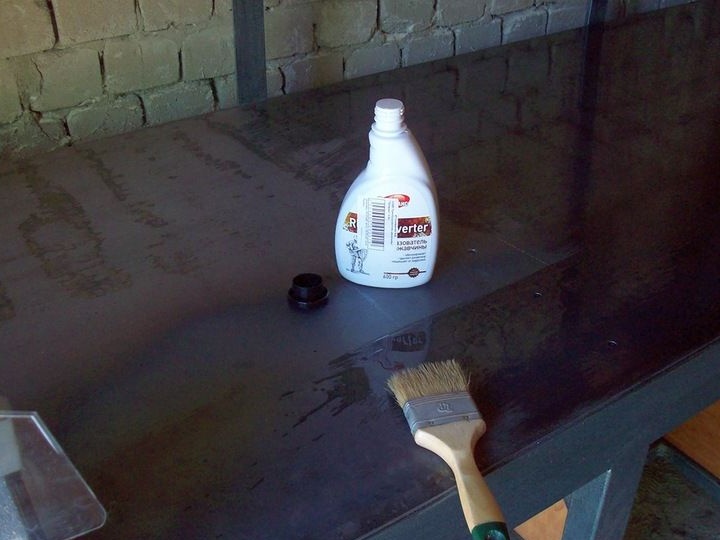
Then, according to the size of the countertop, a metal sheet of 2 mm is cut.
The metal must be treated with an anti-corrosion compound on both sides so that the metal sheet does not rust.
Boxes are installed in the cavity of the table where the master mounted a slide under each box.
Thus, the drawers will conveniently open and close.
A handle is screwed on the front of each drawer for easy opening.
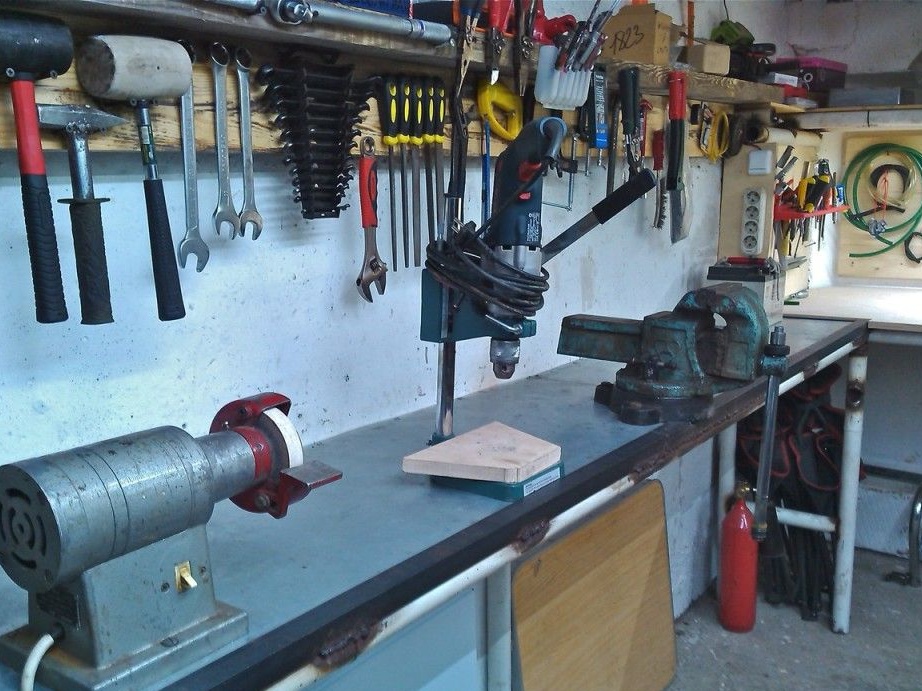
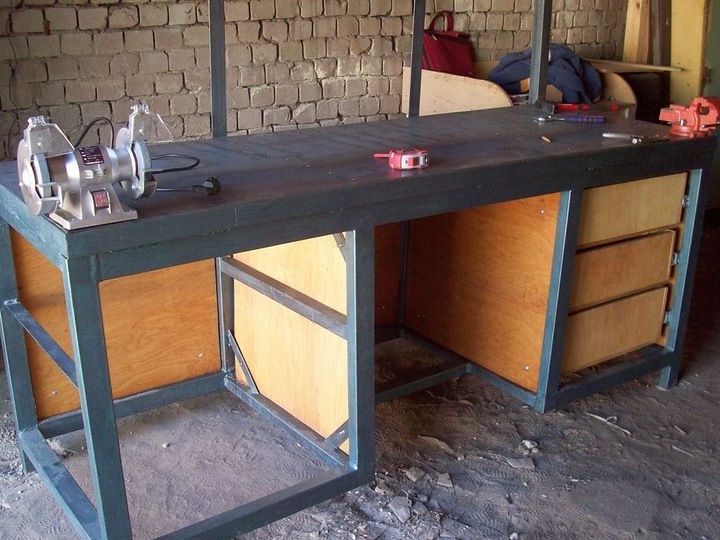
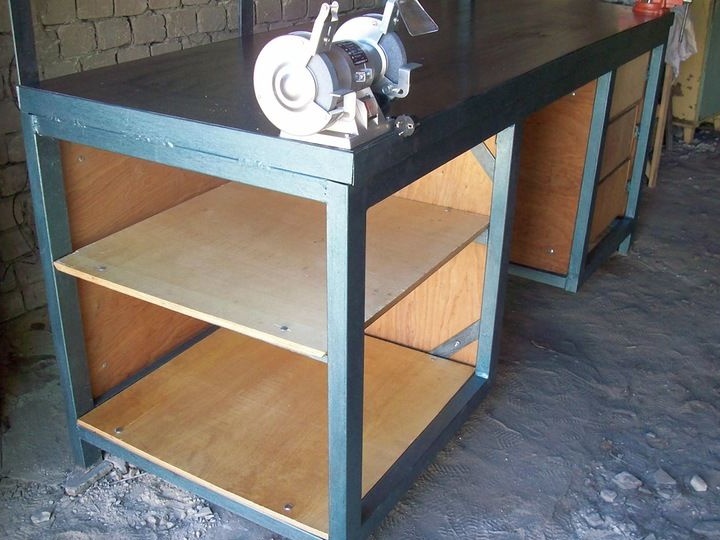
For example, on a finished workbench you can place an emery by screwing it with bolts to the countertop.
Open shelves are made in the lower part, where you can store power tools.
It is very convenient to work when everything is at hand and assembled in one place.
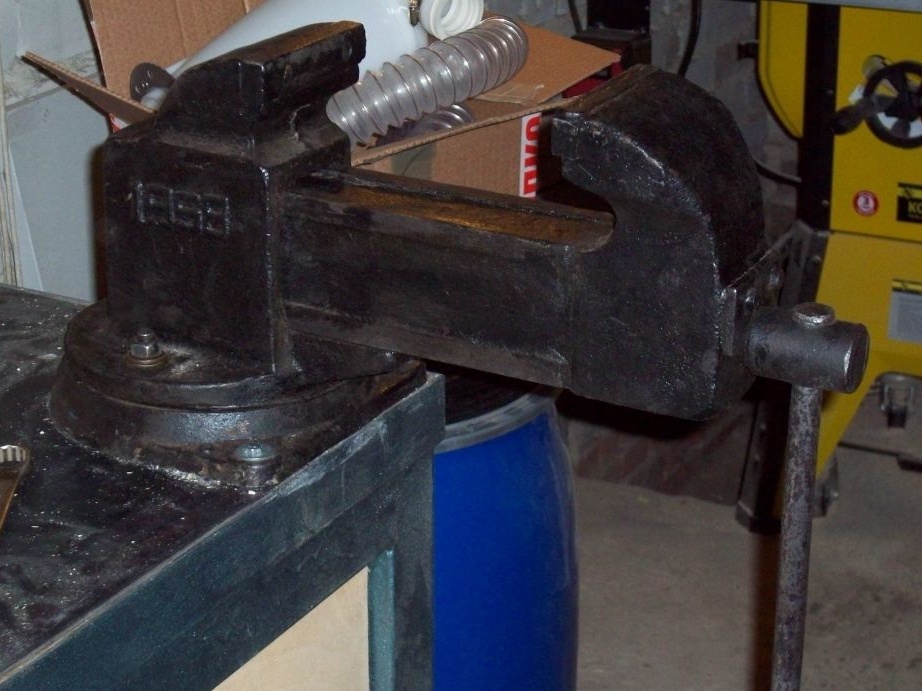
Also on the workbench you can install a vise that is also screwed to the countertop with bolts and tightened with nuts.
After which the author proceeds to create a toolbar, cuts plywood in size and covers it with a protective compound for wood.
Then bolts to the corners and tightens with nuts.
The result was a convenient panel for various tools.
Then you need to screw in screws or make special hooks so that the tools can be easily suspended.
That's actually what happened as a result of the work done.
A workbench in a workshop or garage is simply irreplaceable, and you can make it yourself, which is actually what our author proved with a good example. The master tried to do everything as qualitatively and reliably as possible, because he did it for himself. Many will say a lot of metal is spent, yes it is, but the quality is above all.
As you see, if you want, you can do everything with your own hands, you have an instruction and an example, so we take it and do it. Go for it friends!
This concludes the article. Thank you all for your attention!
Come visit often and do not miss the latest in the world of homemade goods!