The author of this master class kindly shared with us his experience in manufacturing a universal stand with a modern drawer system for drawers.
It will fit perfectly into any interior and will be a good addition to the bedroom headset. According to her example, it is possible to make kitchen cabinets for storing household utensils, and in a larger version, the cabinet can easily replace a wardrobe.
Its design is as simple as possible and perfect for a novice master who is just starting to master the furniture craft.
In addition, the cabinet is made of natural materials - panels of laminated pine and pine boards, which is rare in our time, but working with such material is a real pleasure.
The author left the wood unprocessed. Subsequently, it can be painted, varnished, tinted with stain or decorative oil - a dime a dozen options, and this is a wonderful opportunity for your imagination.
For work you will need the following materials and tools:
1. Materials:
- laminated pine and pine board:
1. two parts 455x700 mm (sides);
2. two parts 400x455 mm (top and base);
3. eight parts 70x400 mm (for boxes);
4. four parts 170x435 mm (front panels of drawers);
5. eight parts 135x450 mm (for the side walls of the boxes);
6. four parts 135x343 mm (the back walls of the boxes from the board 16 mm thick.);
7. four parts 340x430 mm (for the base of the drawers made of 16 mm material.);
- four sets of drawer systems;
- 1800 mm pine stick with a diameter of approximately 25 mm;
- 16 mm screws;
- screws for 40 mm;
- glue for wood;
- sealant that is suitable for working with wood (for example, acrylic);
- varnish for wood (optional);
- composition for staining on a water, alcohol or oil basis (the author used the tone "Antique Oak");
- the cloth.
2. Tools:
- miter saw, jigsaw, or a hacksaw on a tree with a small tooth;
- screwdriver;
- electric drill with a drill on wood;
- a grinder with nozzles with large and small emery paper;
- construction tape measure;
- a pencil;
- square;
- paint brushes.
Step 1: preparing the materials.
In the manufacture of the cabinet, the author combined two materials: a natural pine board with a thickness of 20 millimeters and a panel of laminated pine.
The latter are very convenient in production. of furniture, since individual boards are already glued together in a shield and have a pre-prepared perfectly flat surface. You do not have to do the painstaking work of gluing wood, and fixing large parts to each other will be much easier.
Boards for furniture production, even in domestic conditions home the workshop should be pre-planed so that they have the same thickness.
Grind the planed pine board with a grinder, using a nozzle with fine-grained emery paper for 240 to begin with, and only then with fine-grained 120.
Mark the parts according to our list and cut them using the tool most suitable for you: a miter saw, a jigsaw or an ordinary hacksaw for wood with a small and sharp tooth.
In the process of marking, use a square so that all angles are perfectly smooth and are 90 0FROM.
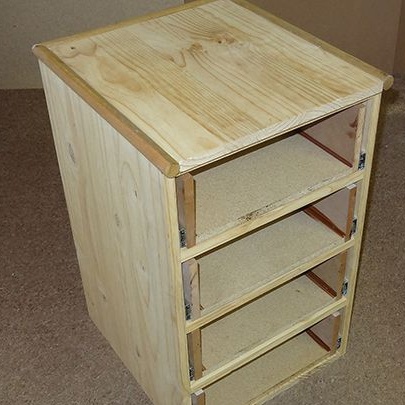
Step 2: Assembling the cabinet.
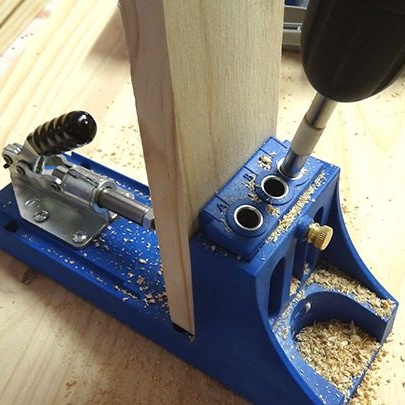
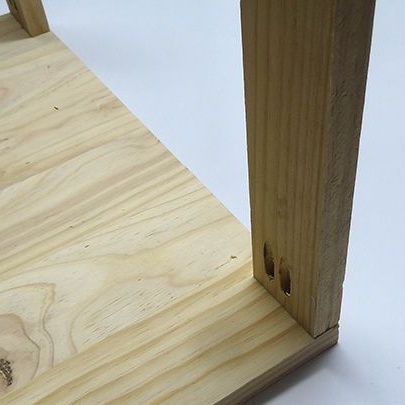
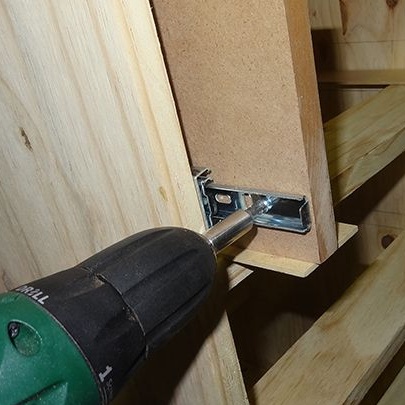
Proceed to the most critical stage - the assembly of the product. In order to prevent the wood from breaking during the screwing in of the screws, it is necessary to drill holes in the fastening points.
At home, an electric drill is most often used for these purposes, but the author recommends purchasing a special machine that makes countersunk holes at the required angle. Such a machine allows you to make furniture without any visible connections. In the photo below you can see how such a machine looks.
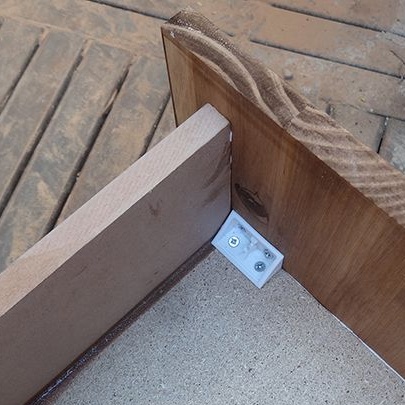
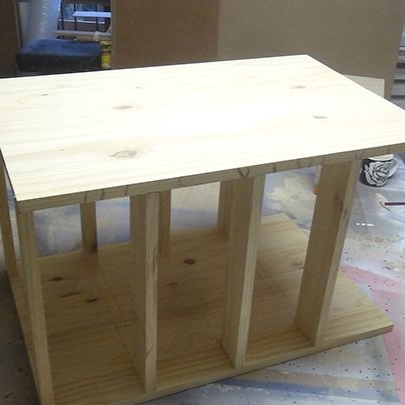
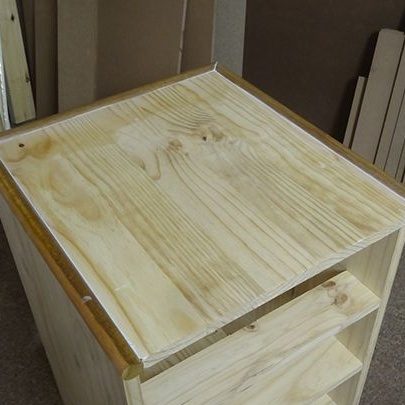
So, mark and make holes in the places of the proposed connections and assemble the frame of the cabinet as shown in the photo.
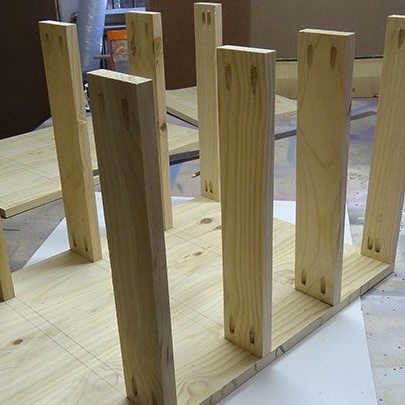
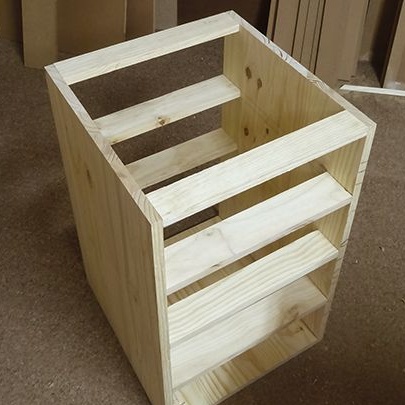
Please note that the opening for each of the drawers must be 150 mm high.
If you use a pine board of a greater or lesser thickness than 20 mm, recount the dimensions of the details of the cabinet.
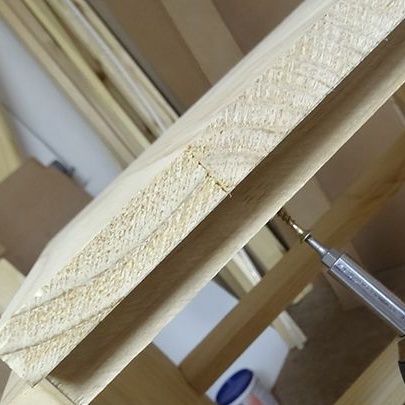
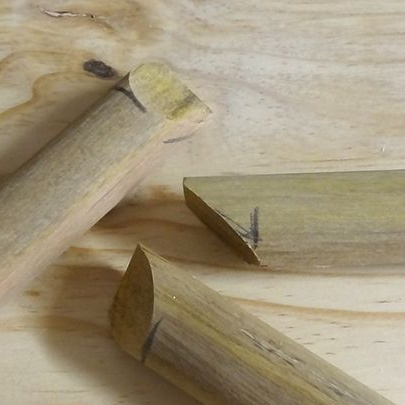
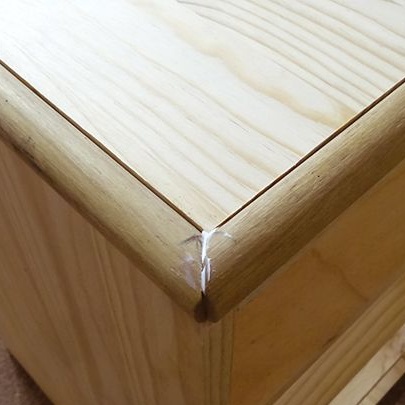
The author, we must give him his due, originally processed the upper edges of the cabinet, using a natural pine stick for this. He could not find a stick with a diameter of 20 mm, so he used a stick with a diameter of 25 mm. It turned out to be a bit too big, but it did not spoil the overall picture.
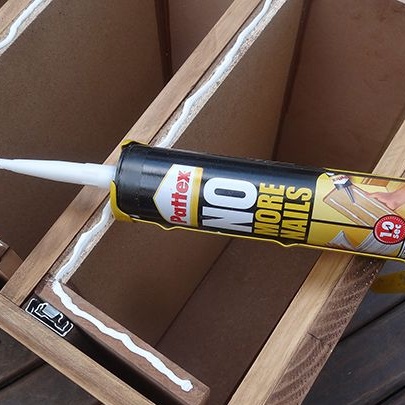
Mark and saw edge sticks at an angle of 45 0C and fasten them in place with glue like “liquid nails”. You can also use wood glue, but the first option will add strength to your product.
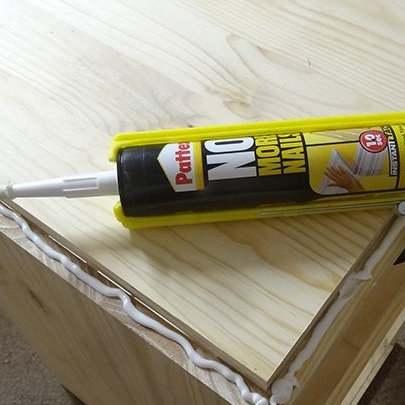
The author will also fill all the cracks and corners with acrylic sealant. It is less susceptible to mechanical damage than the usual putty on wood.
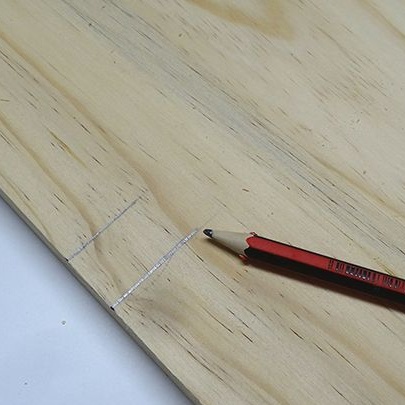
Step 3: mark up the drawers and install the drawer systems.
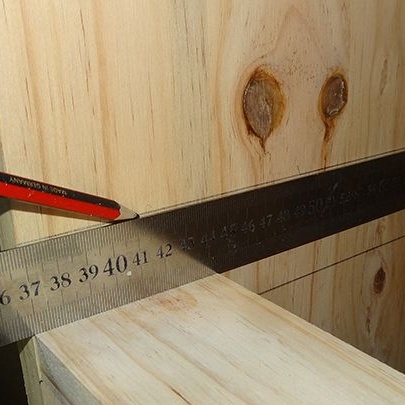
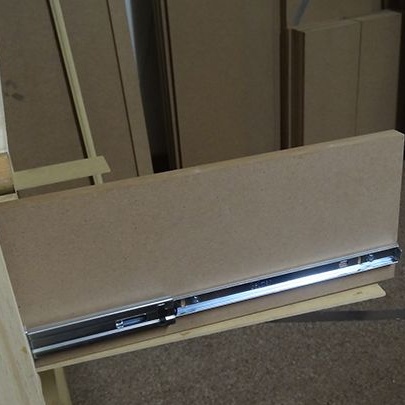
Before starting to install drawers and sliding systems, mark the curbstones. To do this, use a metal ruler according to the example of the author as shown in the photo below. So you get an even perfectly parallel line.
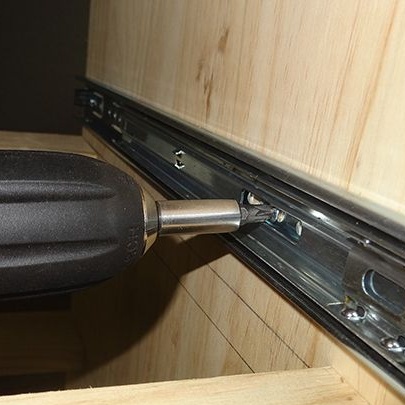
Fasten the retractable systems in a pre-drawn line with screws and a screwdriver. First fix the edges, and then the middle part of the strips.
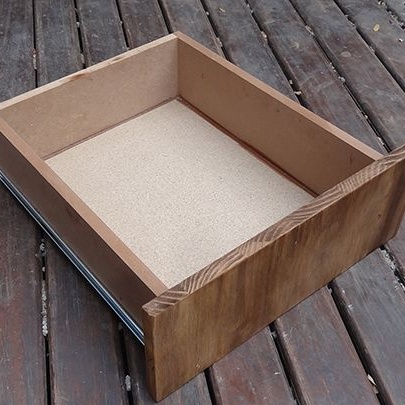
Step 4: making boxes.
The author used 16 mm thick material for the manufacture of boxes simply because he was at hand in sufficient quantity. However, the boxes turned out to be heavy. Therefore, he advises the use of thinner and lighter material such as plywood in places where this is possible.
In this case, you will have to recalculate the dimensions of the parts for the manufacture of boxes, since they are affected by the thickness of the material you use.
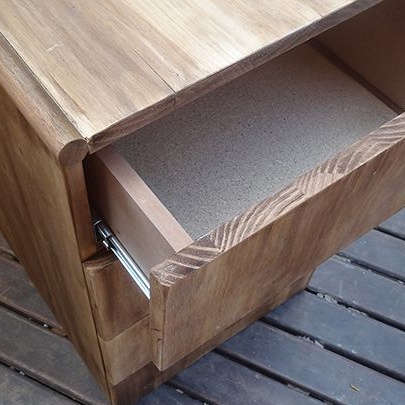
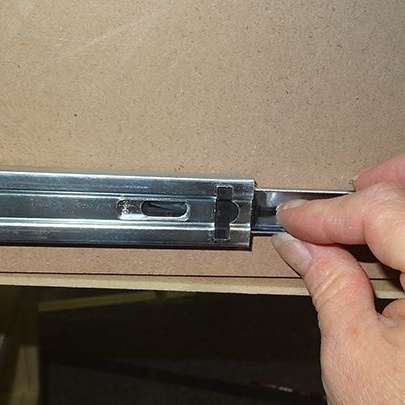
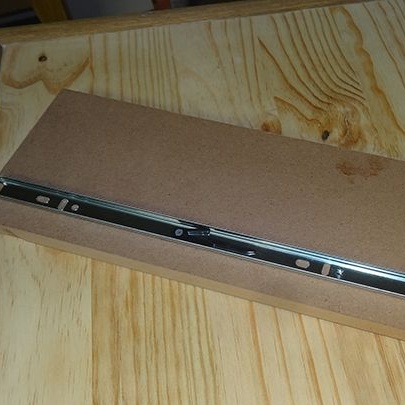
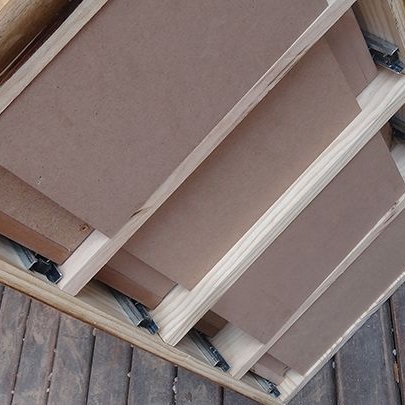
Proceed with the installation of the remaining elements of the sliding systems to the side parts of the drawers. Make it much more convenient until the moment of their final assembly.
The author advises using a thin plywood backing in the process of how you will fix metal fittings. This will allow the drawer to slide freely inside the cabinet (see photo below).
After the fittings are installed, assemble the drawers using the parts from our list. The author missed the cracks at the junction of parts inside the box with sealant.


Step 5: protective and decorative processing of wood and the final touches.
The author advises painting the cabinet before installing the retractable systems. He himself acted differently, and it was not too convenient.
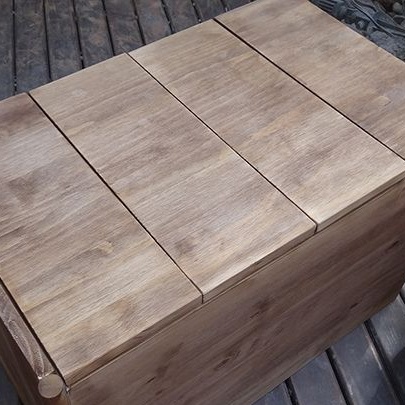
As a protective and decorative coating, he used a stain in the form of an antique oak tone gel.It not only tones the wood, but also protects it from adverse external factors such as moisture, ultraviolet radiation, as well as some chemical influences.
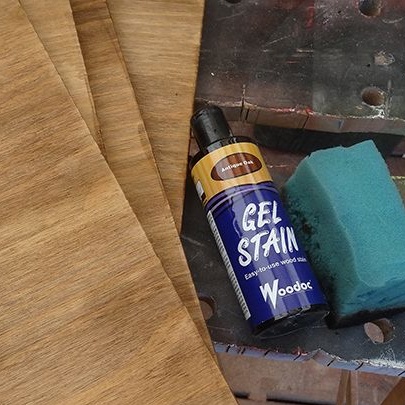
Clean the cabinet from dust and apply the stain with a paint brush or any other convenient way. If the tone is not deep enough and does not correspond to what is indicated on the label, repeat the procedure. Remove stains that have not soaked up using a clean, dry cloth. Wait until the cabinet is completely dry.
At this stage, you can use water-based wood varnish in order to further protect the wood from mechanical damage. It can be applied in several layers, lightly sanding each layer. Thus, each new layer of varnish penetrates and reliably adheres to the previous one.
You can also varnish the inner surface of the drawers. This will make it easy to clean the cabinet as it becomes dirty. This is especially true if you make furniture for the kitchen.
Finally, secure the front of the drawer by turning the cabinet over on its back. To do this, place pieces of non-thick material on the back side under the box to push them out a little.
In order to securely attach the panels to the drawers, glue of the “liquid nails” type mentioned above is quite sufficient.
While the glue is drying, place the glued panels under the press. Clean brick is great for this purpose.
In the photo you can see that all panels are perfectly aligned flush with a gap of several millimeters for the convenience of using drawers.
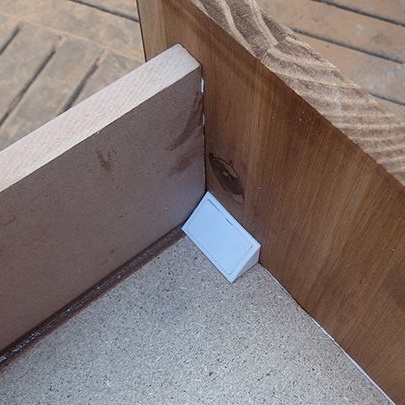
In order to strengthen the design of the boxes, the author also used plastic joints designed for screws. They are closed with a plastic plug and have a very aesthetic appearance.